
Golf is a sport that requires precision and attention to detail. The same can be said for the equipment used in the game, including golf club head covers. These accessories not only protect the valuable clubs from scratches and damage, but they also add a touch of personal style to each golfer’s bag. Hand-knit golf club head covers have become increasingly popular among golf enthusiasts, as they offer a unique and customizable option to showcase their individuality on the course.
Hand knitting is a craft that has been passed down through generations, and it allows for the creation of intricate and beautiful designs. Many knitting enthusiasts have taken up the challenge of creating their own golf club head covers, and they have generously shared their patterns for free. These free knitting patterns for golf club head covers offer a wide range of options, from simple and classic designs to more intricate and whimsical creations.
Whether you are a beginner knitter or an experienced one, these free knitting patterns provide a great opportunity to practice your skills and create a functional and stylish accessory for your golf clubs. From traditional argyle patterns to fun animal-themed designs, there is a pattern out there to suit every golfer’s taste. So why settle for generic head covers when you can create your own unique and hand-knit golf club head covers?
The history of hand knit golf club head covers
Golf club head covers have been used for centuries to protect the heads of golf clubs from damage during transportation and storage. While there are several types of head covers available on the market today, hand knit head covers have a long history and are still popular among golfers.
In the early days of golf, golf club head covers were not widely used. However, as the popularity of the sport grew and more golfers began to participate, the need for protective covers became apparent. Golfers realized that without protection, the heads of their expensive clubs could become scratched, dented, or damaged in other ways.
To address this issue, golfers started using hand knit head covers to provide an extra layer of protection for their clubs. These head covers were often made by the golfers themselves or by skilled craftspeople who specialized in knitting. The hand knit covers were typically made from wool or other warm and durable materials to withstand the rigors of the game.
Over time, hand knit golf club head covers became more than just functional accessories. They also became a way for golfers to express their personal style and add a touch of individuality to their golf bags. Many golfers started customizing their hand knit head covers with unique designs, colors, and patterns. Some even went as far as to have their initials or club logos embroidered onto the covers.
Today, hand knit golf club head covers continue to be popular among golfers of all skill levels. They are not only functional but also add a sense of tradition and craftsmanship to the game. Whether it’s a classic argyle pattern or a whimsical animal design, hand knit head covers are a beloved accessory among golfers who appreciate the artistry and personal touch that they bring to the game.
Reasons to choose hand knit head covers over store-bought options
When it comes to protecting your golf clubs, there are many options available in the market. However, choosing hand knit head covers has its own unique advantages that make them a better choice over store-bought options.
1. Customization: Hand knit head covers can be personalized to match your individual style and preferences. You can choose from a wide range of colors, patterns, and designs to create a unique look for your clubs. This level of customization is often difficult to find in store-bought options, which are typically mass-produced with limited variety.
2. Quality: Hand knitting allows for meticulous attention to detail, resulting in high-quality head covers that are built to last. The craftsmanship and durability of hand knit covers often surpass those of store-bought alternatives, ensuring that your clubs are well-protected for the long term.
3. Softness and protection: Hand knit head covers are typically made from soft and luxurious materials such as merino wool or cashmere. These natural fibers provide an extra layer of cushioning and protection for your golf clubs, reducing the risk of scratches, dings, and other damage that can occur during transportation or storage.
4. Eco-friendly: Choosing hand knit head covers supports sustainable and eco-friendly practices. By purchasing handmade products, you are contributing to the livelihood of independent artisans and reducing the demand for mass-produced, often environmentally harmful, products.
5. Unique and one-of-a-kind: Each hand knit head cover is unique, a testament to the skill and creativity of the artisan who crafted it. By choosing a hand knit cover, you can ensure that your golf clubs stand out from the crowd and reflect your individuality.
Essential materials for hand knitting golf club head covers

Hand knitting golf club head covers requires a few essential materials to achieve the desired results. These materials ensure that the head covers are durable, functional, and aesthetically pleasing. Here are some key materials you will need:
1. Yarn:
The most important material for knitting golf club head covers is the yarn. It is crucial to choose a high-quality yarn that is thick enough to provide adequate protection for the golf clubs. Yarn made from wool or a wool-blend is often preferred as it is warm, durable, and has excellent stitch definition.
2. Knitting Needles:
To knit the head covers, you will need a pair of knitting needles. The size of the needles will depend on the yarn thickness and the desired tension of your stitches. It is recommended to use circular needles with a length that allows you to comfortably work the stitches without stretching or distorting the fabric.
3. Stitch Markers:
Stitch markers are essential for keeping track of stitch patterns and shaping while knitting the head covers. They can be placed on the needles to mark specific points, such as the beginning of a round or the location of a particular stitch pattern. This helps to prevent mistakes and ensures accuracy in the final product.
4. Scissors:
A good pair of scissors is necessary for cutting the yarn and trimming any excess ends. Sharp scissors with pointed tips are ideal for precision cutting and neat finishing, ensuring that the yarn ends are seamlessly incorporated into the knitted fabric.
5. Embellishments:
To add a personalized touch to your golf club head covers, you may want to consider adding embellishments such as buttons, pom-poms, or embroidered designs. These can be attached to the head covers using a yarn needle and thread, further enhancing the appeal and individuality of your creations.
By having these essential materials on hand and using them skillfully, you can create beautiful and functional golf club head covers that showcase your knitting expertise and protect your golf clubs in style.
Beginner-friendly knitting patterns for golf club head covers
If you are new to knitting and looking to create your own golf club head covers, there are several beginner-friendly knitting patterns available that will help you get started. These patterns are designed to be relatively easy to follow, with simple stitches and clear instructions.
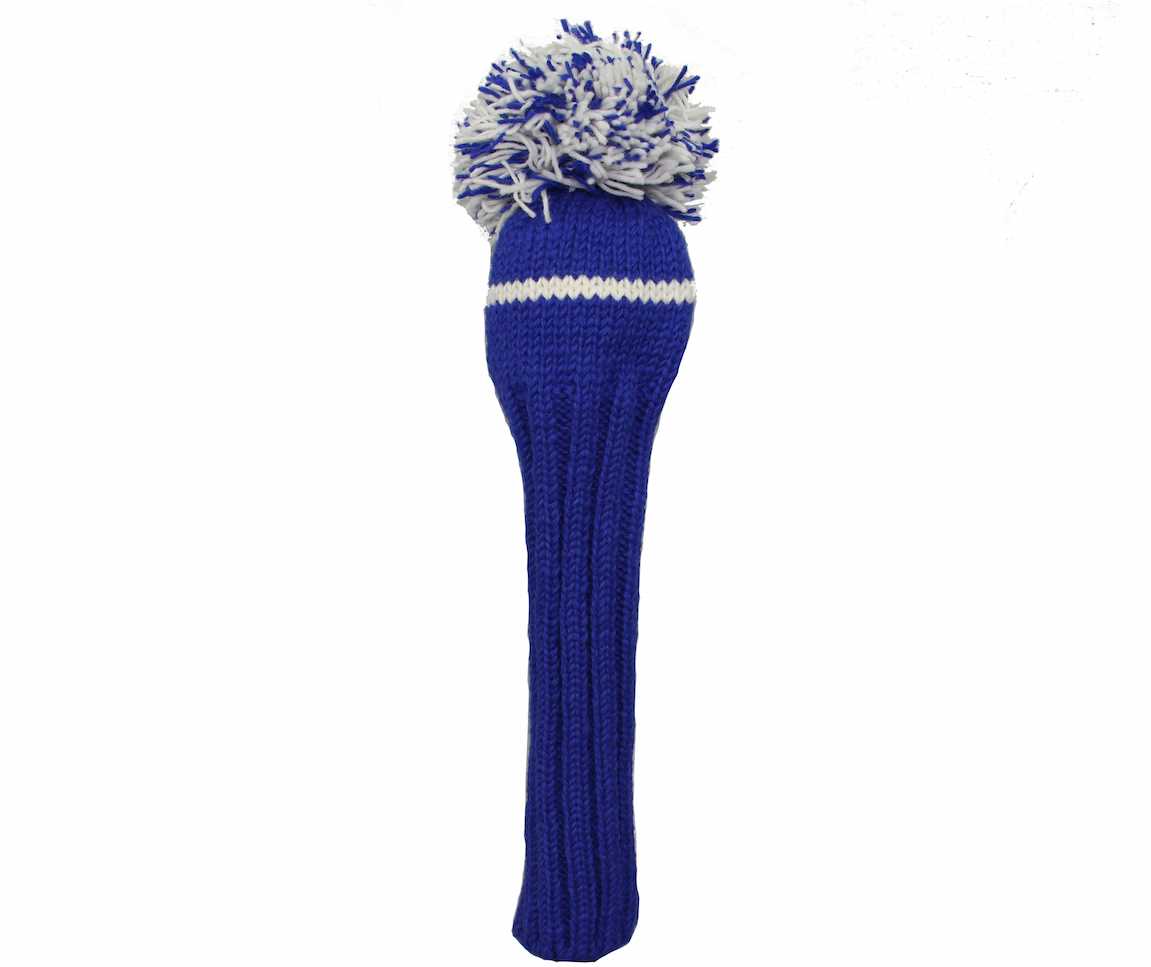
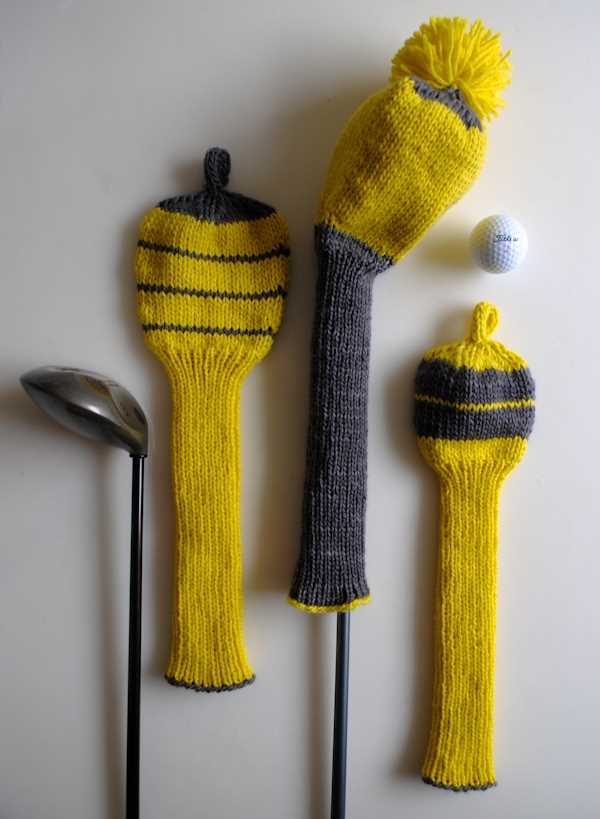
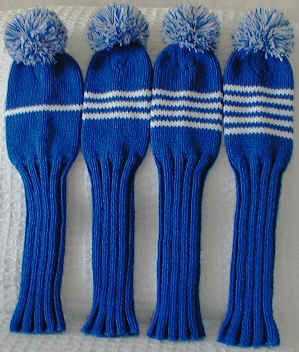
One popular knitting pattern for golf club head covers is the basic ribbed design. This pattern uses a combination of knit and purl stitches to create a stretchy and snug cover for your golf clubs. The ribbed texture also provides added cushioning and protection.
Another beginner-friendly pattern is the striped golf club head cover. This pattern allows you to experiment with different colors and create unique designs for your clubs. By using simple color changes and basic knitting techniques, you can easily create a striped pattern that stands out on the golf course.
If you are looking for something a little more intricate, you can try the cable knit golf club head cover pattern. While cables may seem intimidating, this pattern breaks down the steps into easy-to-follow instructions, making it accessible for beginners. The cable pattern adds a touch of elegance and sophistication to your golf club covers.
No matter which pattern you choose, remember to start with the recommended yarn and needle size. This will help ensure that your golf club head covers fit properly and provide adequate protection for your clubs. Happy knitting!
Intermediate Knitting Patterns for Golf Club Head Covers
For knitters with some experience and looking to tackle a slightly more challenging project, there are a variety of intermediate knitting patterns available for golf club head covers. These patterns typically involve more intricate stitch patterns or additional shaping techniques, allowing knitters to create stylish and personalized covers for their clubs.
One intermediate pattern that is popular among knitters is a cable knit golf club head cover. This pattern combines classic cable stitches with ribbing to create a textured and visually appealing cover. Knitters will need to be comfortable working with cables and following a chart or written instructions to complete this pattern.
- Materials: Worsted weight yarn, size 8 (5 mm) knitting needles, cable needle, stitch markers, tapestry needle
- Instructions:
- Cast on 60 stitches.
- Work in a K2, P2 ribbing pattern for 2 inches.
- Begin cable pattern:
| Round 1: | C2F, K4, C2B, K4 |
|---|---|
| Round 2: | Knit all stitches |
| Round 3: | C2F, K4, C2B, K4 |
| Round 4: | Knit all stitches |
| Round 5: | C2F, K4, C2B, K4 |
Continue working the cable pattern for the desired length, typically around 6 inches. Then, switch to stockinette stitch for the remaining length. Finally, decrease stitches evenly to finish the top of the head cover and bind off. Sew up the seam and add any desired embellishments, such as a pompom or tassel.
Another intermediate pattern worth exploring is a fair isle knit golf club head cover. This pattern incorporates colorwork techniques, allowing knitters to create intricate and eye-catching designs. Knitters will need to be comfortable working with multiple colors and following a color chart or written instructions to complete this pattern.
By choosing an intermediate knitting pattern for golf club head covers, knitters can challenge themselves and create unique and personalized covers for their clubs. Whether it’s a cable knit or fair isle design, these intermediate patterns offer a chance to showcase knitting skills and add a touch of style to the golf course.
Advanced Knitting Patterns for Golf Club Head Covers
For seasoned knitters looking to take their golf club head cover projects to the next level, advanced knitting patterns provide a fun and challenging way to showcase your skills. These patterns offer intricate designs, unique stitch combinations, and additional creative elements that will make your golf club head covers stand out on the course.
One advanced knitting pattern that is sure to impress is the Fair Isle golf club head cover. Inspired by the traditional knitting technique from the Shetland Islands, this pattern incorporates multiple colors and complex geometric patterns. The result is a visually stunning head cover that will surely catch the eyes of your fellow golfers. To create this design, you will need to have experience with colorwork knitting and be comfortable reading complex charts.
Key Features:
- Fair Isle knitting technique
- Multiples colors and intricate geometric patterns
- Requires experience with colorwork and chart-reading
If you’re looking for a challenge that goes beyond traditional knitting techniques, you might consider trying a lace golf club head cover pattern. Lace knitting involves creating intricate patterns using decreases and yarnovers, resulting in a delicate and elegant finished product. This advanced pattern will require patience and precision, as lace knitting can be time-consuming and requires careful attention to detail. The end result, however, will be a head cover that is both functional and beautiful.
Key Features:
- Lace knitting technique
- Intricate patterns created with decreases and yarnovers
- Requires patience and attention to detail
For those looking to push their knitting skills even further, cable golf club head covers offer a complex and visually striking option. Cable knitting involves creating intricate, interwoven patterns using various cable stitches. This advanced technique requires a strong understanding of chart-reading and the ability to work with multiple stitch patterns simultaneously. The end result will be a head cover that showcases your knitting prowess and sets your golf clubs apart from the rest.
Key Features:
- Cable knitting technique
- Intricate interwoven patterns
- Requires chart-reading and working with multiple stitch patterns
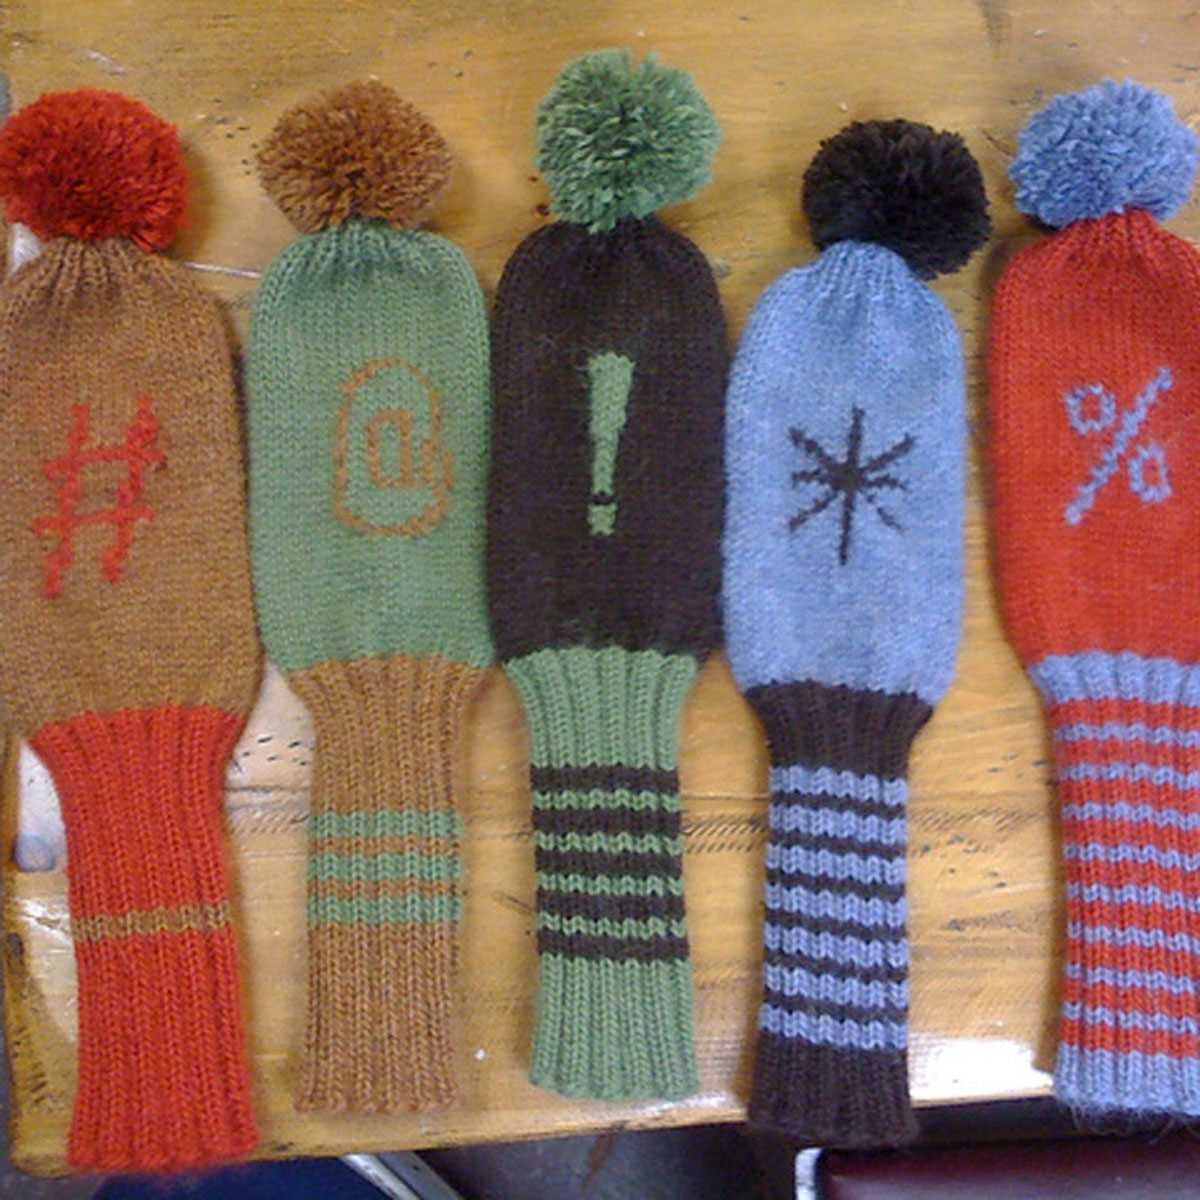
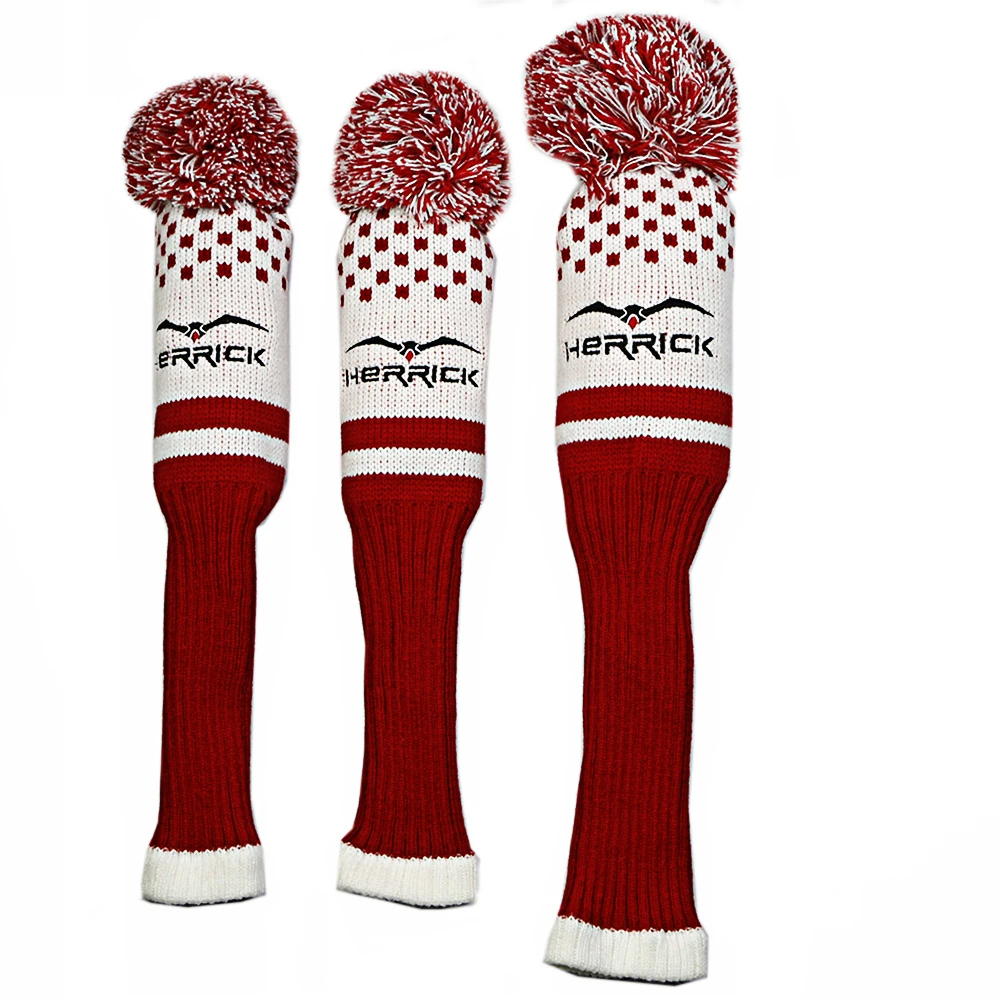
Creative designs and motifs for golf club head covers
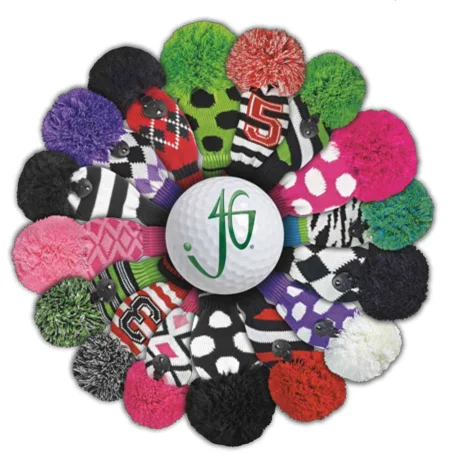
Golf club head covers are not only functional in protecting your clubs from scratches and dents, but they can also be a stylish accessory on the golf course. Hand knitting your own golf club head covers allows you to unleash your creativity and personalize your gear. With a variety of patterns and motifs available, you can create unique designs that reflect your personality and make a statement on the greens.
One creative design idea for golf club head covers is to incorporate different geometric patterns. You can use stripes, chevron patterns, or even simple geometric shapes to add visual interest to your covers. These designs can be achieved by using different stitch patterns or by incorporating contrasting colors. The possibilities are endless, and you can experiment with different combinations to create a one-of-a-kind look.
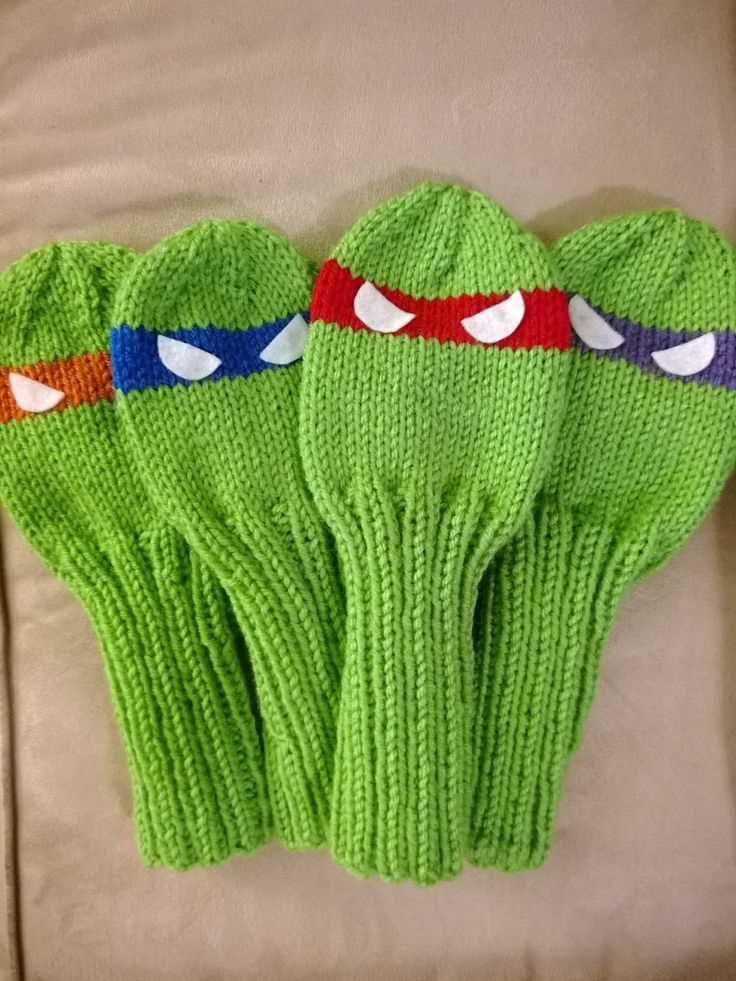
Animal motifs
If you want to add a touch of whimsy to your golf club head covers, why not try incorporating animal motifs? You can knit covers with animal faces or shapes, such as cute little birds, animals, or even your favorite sports mascot. These playful designs will not only protect your clubs but also spark conversations and bring smiles to fellow golfers’ faces.
Sports-themed designs
For those who are passionate about sports, incorporating sports-themed designs into your golf club head covers is a great way to showcase your love for the game. You can knit covers with the logo or colors of your favorite sports teams, or even recreate iconic sports equipment like footballs, basketballs, or baseballs. These designs will not only make your clubs stand out but also show off your team spirit on the golf course.
Nature-inspired patterns
If you’re a nature lover, you can bring the beauty of the outdoors to your golf club head covers by incorporating nature-inspired patterns. Knitting covers with leaves, flowers, or even abstract representations of natural elements can give your gear a unique and eye-catching look. These designs will not only protect your clubs but also remind you of the serenity and beauty of nature while you’re on the course.
With so many creative designs and motifs to choose from, hand knitting your own golf club head covers allows you to personalize your gear and make a statement on the golf course. Whether you prefer geometric patterns, animal motifs, sports-themed designs, or nature-inspired patterns, you can create unique and stylish covers that reflect your personality and showcase your creativity. So, grab your knitting needles and get ready to add a touch of flair to your golf game!
Tips and tricks for achieving a perfect fit
When it comes to hand knitting golf club head covers, achieving a perfect fit is essential. Not only does it ensure the cover stays in place during a game, but it also adds a touch of professionalism and elegance to your golf accessories. Here are some tips and tricks to help you achieve a perfect fit for your hand-knit golf club head covers:
1. Accurate measurements
Start by taking accurate measurements of the golf club head. Measure the length, width, and circumference of the head to ensure your knitting pattern is the perfect size. A well-fitted cover will not only look better but also provide better protection to the club head.
2. Gauge swatch
Knitting a gauge swatch is crucial to ensure your stitches and rows match the pattern’s recommended gauge. By knitting a small swatch and measuring it against the pattern, you can adjust your needle size or tension to achieve the perfect gauge. This will help you create a golf club head cover that fits snugly on the club head.
3. Try it on as you go
To ensure a perfect fit, try the golf club head cover on the club head as you knit. This will allow you to make any necessary adjustments while you’re still working on the project. Trying it on periodically will help you avoid any surprises and ensure a snug fit.
4. Stretchiness
Consider the stretchiness of your yarn when knitting golf club head covers. A yarn with good stretch and recovery will result in a cover that fits well and stays in place during use. If you’re unsure about the stretchiness of your yarn, consider swatching and blocking to test it before knitting the entire cover.
- Take accurate measurements
- Knit a gauge swatch
- Try it on as you go
- Consider the stretchiness of the yarn
By following these tips and tricks, you’ll be able to hand-knit golf club head covers that fit perfectly and add a touch of style to your golf gear.
Personalizing your golf club head covers
When it comes to golf, many players strive to add a personal touch to their game, whether it’s their unique swing or their choice of equipment. One way to personalize your golfing experience is by customizing your golf club head covers. Hand knit free knitting patterns for golf club head covers offer an excellent opportunity to showcase your individual style and personality on the golf course.
1. Choose your design: With hand knit free knitting patterns, you have the freedom to choose from a wide range of designs. Whether you prefer a classic look or something more whimsical, there are patterns available to suit every taste. From simple stripes to intricate cable patterns, the design options are virtually endless. Take the time to browse through different patterns and find one that resonates with your personal style.
2. Select your colors: The color scheme of your golf club head covers can also play a significant role in personalizing your golfing experience. You can choose colors that match your golf bag or go for a contrasting color combination to make a bold statement. Additionally, you can incorporate your favorite team’s colors or showcase your patriotic spirit with red, white, and blue. Whatever colors you choose, make sure they reflect your personality and make you feel confident on the course.
Once you have chosen a design and color scheme, it’s time to put your knitting skills to the test. Download the free knitting pattern and gather the necessary materials. As you knit your golf club head covers, remember to enjoy the process and embrace the opportunity to create something uniquely yours. Once completed, your hand-knit golf club head covers will not only protect your clubs but also serve as a reflection of your personal style and love for the game.
Caring for and maintaining hand knit golf club head covers
Hand knit golf club head covers require a little extra care and maintenance to keep them in top condition. Follow these guidelines to ensure that your hand knit head covers stay clean, protected, and looking great for years to come.
1. Hand washing
To clean your hand knit golf club head covers, it’s best to hand wash them. Fill a basin with lukewarm water and add a mild detergent. Gently agitate the covers in the soapy water, being careful not to stretch or twist them. Rinse thoroughly with clean water and press out any excess moisture. Lay the head covers flat on a towel to dry, reshaping them as needed.
2. Avoid machine washing and drying
Machine washing and drying can cause damage to your hand knit head covers. The agitation and heat can cause them to shrink, stretch, or lose their shape. It’s best to avoid machine washing and drying altogether to preserve the quality and appearance of the covers.
3. Store properly
When not in use, store your hand knit golf club head covers in a cool, dry place. Avoid storing them in direct sunlight, as prolonged exposure to UV rays can fade the colors and weaken the fibers. You can use a cloth or plastic bag to protect the covers from dust and moisture.
4. Rotate the head covers
To prevent excessive wear and tear on your hand knit head covers, it’s a good idea to rotate them regularly. This way, each cover will have a chance to rest and recover, prolonging their lifespan. If you have multiple sets of head covers, you can also rotate them between rounds of golf.
5. Patch any holes or loose threads
If you notice any small holes or loose threads on your hand knit golf club head covers, it’s important to address them promptly. Use a small needle and thread to sew up the holes or reattach any loose threads. This will prevent further damage and ensure that your head covers continue to provide adequate protection for your clubs.
By following these care and maintenance tips, you can enjoy your hand knit golf club head covers for many rounds of golf to come. Keep them clean, protected, and well-maintained, and they will serve you well on the golf course!
Ways to showcase your hand knit golf club head covers
Hand knitting golf club head covers can be a fun and creative way to personalize your golf gear and add a touch of style to your game. Here are some ways you can showcase your hand knit golf club head covers:
1. Mix and match colors: Experiment with different color combinations to create eye-catching designs. You can choose colors that complement each other or go for a bold and contrasting look. Adding pops of color to your golf club head covers can make them stand out on the golf course.
2. Embroider personalized designs: Take your hand knit golf club head covers to the next level by adding custom embroidery. You can embroider your initials, name, or even a small logo on the covers to make them truly unique. This not only adds a personal touch but also makes it easier to identify your clubs on the course.
3. Incorporate unique patterns: Experiment with different stitch patterns to create interesting textures and designs on your golf club head covers. You can try cable knitting, lace knitting, or even colorwork to add visual interest. The unique patterns will make your hand knit covers stand out from the crowd.
4. Add decorative elements: Enhance the appearance of your hand knit golf club head covers by adding decorative elements such as pom-poms, tassels, or buttons. These small additions can give your covers a playful and whimsical look.
5. Create a matching set: If you have multiple golf clubs, consider knitting a set of matching head covers. This will give your golf bag a cohesive and polished look. You can use the same color or pattern for all the covers to create a coordinated set.
6. Take inspiration from your favorite sports team: If you’re a fan of a particular sports team, you can incorporate their colors or logo into your golf club head covers. This is a great way to show off your team spirit while on the course.
With these ideas, you can showcase your hand knit golf club head covers and bring a personal touch to your golf game. Knitting your own covers allows you to express your creativity and stand out on the golf course.
Conclusion
Knitting golf club head covers can be a fun and rewarding hobby. Whether you are a beginner or an experienced knitter, there are plenty of free knitting patterns available for you to try. By creating your own unique head covers, you can add a personal touch to your golf accessories and showcase your creativity.
In addition to the satisfaction of making something with your own hands, knitting head covers can also provide a sense of belonging to a community. There are many online forums and social media groups dedicated to knitting where you can find inspiration, ask for advice, and share your finished projects with like-minded individuals. These communities offer a supportive and encouraging environment, making knitting a social activity that can connect people from all around the world.
Finding Inspiration
If you are looking for inspiration for your next knitting project, there are several resources available. Websites like Ravelry and Pinterest provide a plethora of knitting patterns and ideas for golf club head covers. You can browse through various categories, such as colorwork, cable knitting, or fair isle, to find the style that suits your preferences.
Another great source of inspiration is the knitting community itself. Joining forums and social media groups dedicated to knitting will introduce you to a wide range of talented knitters who are always willing to share their ideas and experiences. By interacting with other knitters, you can learn new techniques, get feedback on your projects, and find inspiration to push your knitting skills to the next level.
- Join knitting forums and social media groups
- Interact with other knitters to learn new techniques and get feedback
- Browse websites like Ravelry and Pinterest for knitting patterns and ideas
- Experiment with different styles, colors, and yarns to create unique head covers
- Don’t be afraid to try new knitting techniques and challenge yourself
By immersing yourself in the knitting community and finding inspiration from various sources, you can take your knitting skills to new heights and create beautiful and functional golf club head covers that will be the envy of your fellow golfers.