
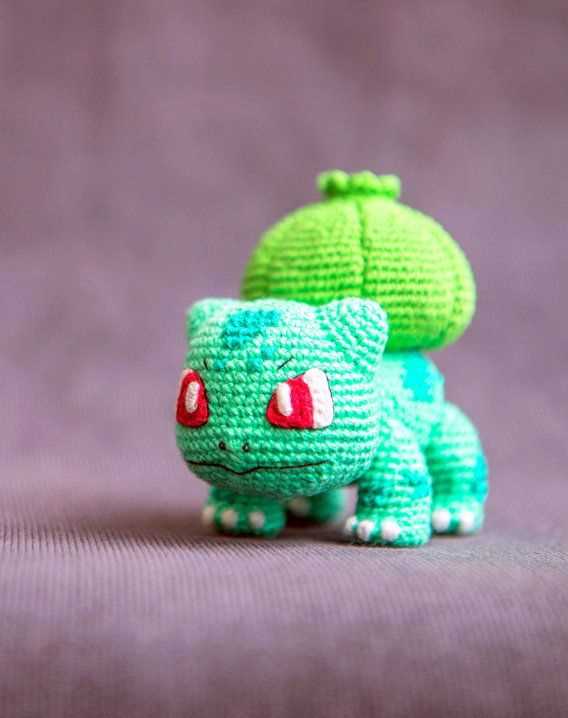
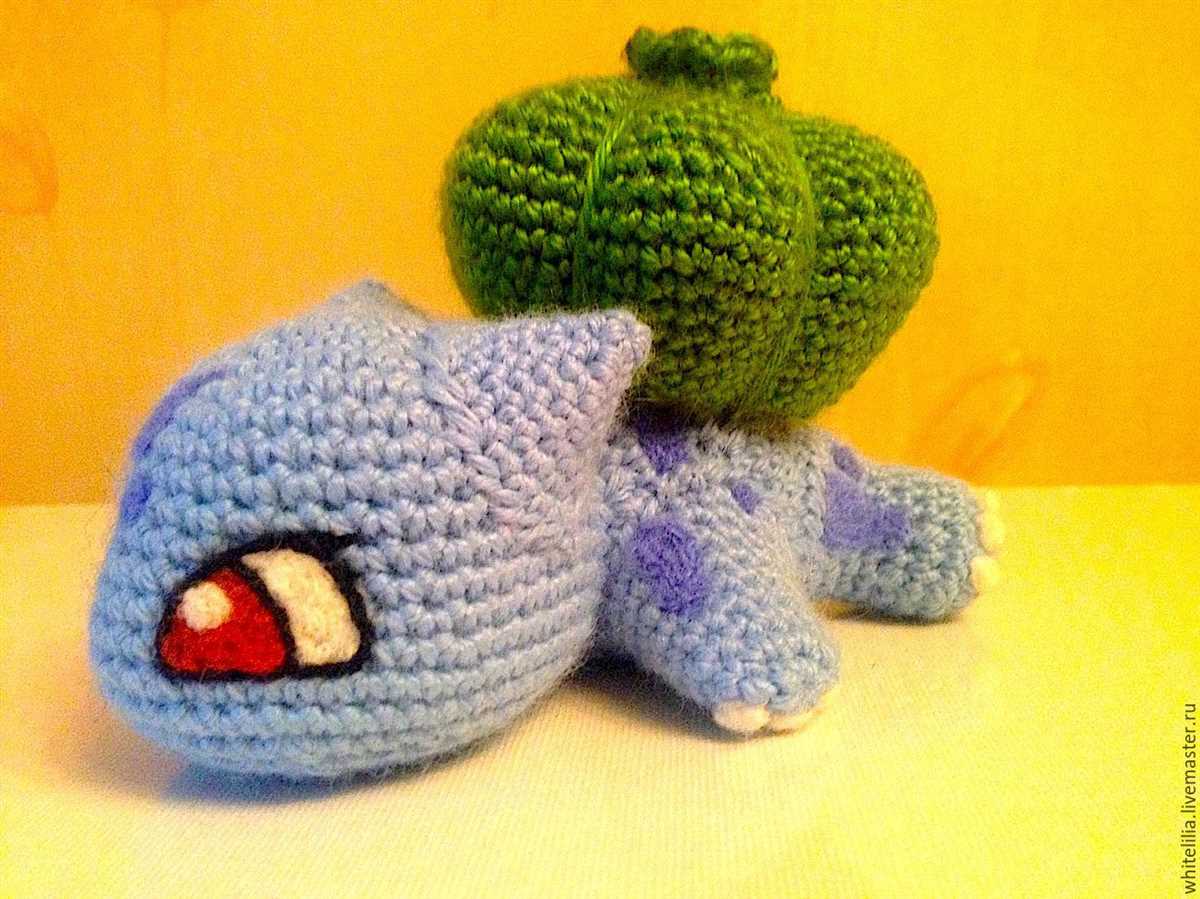
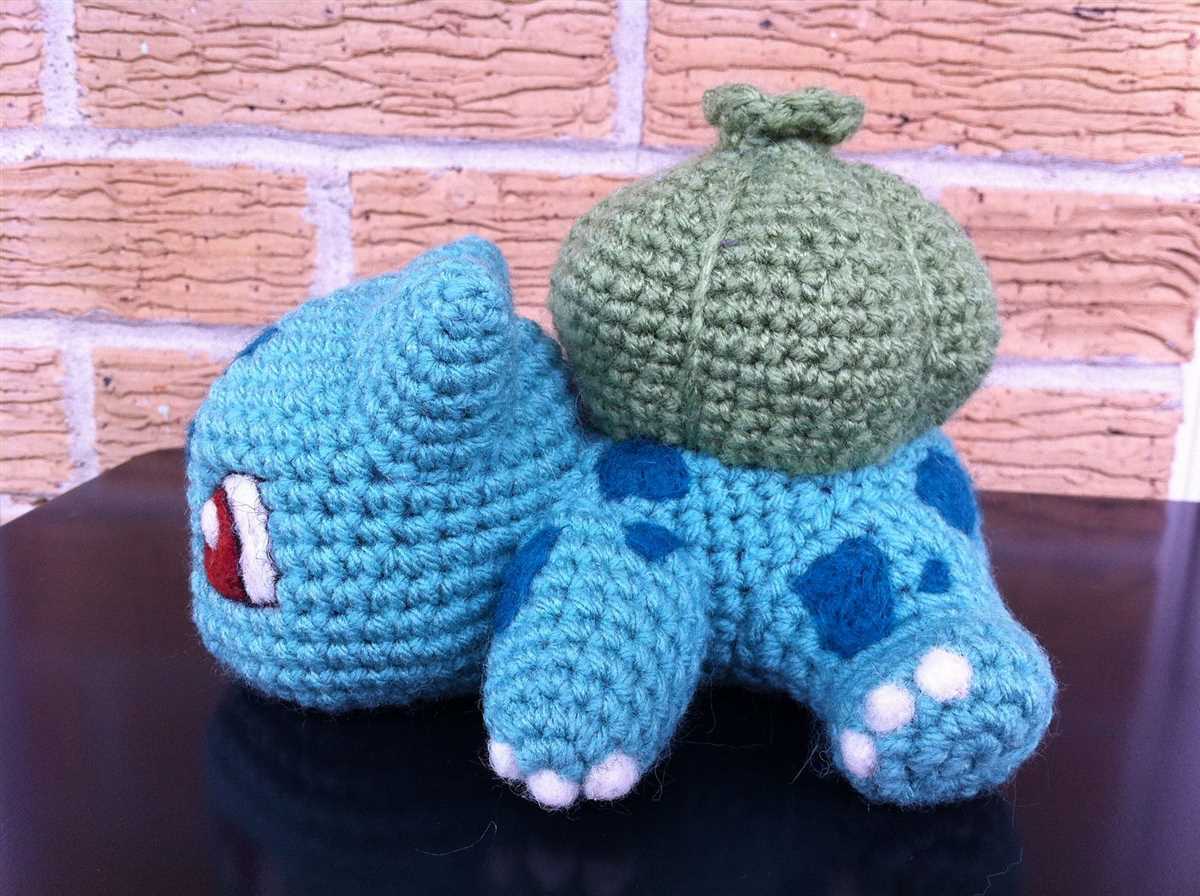
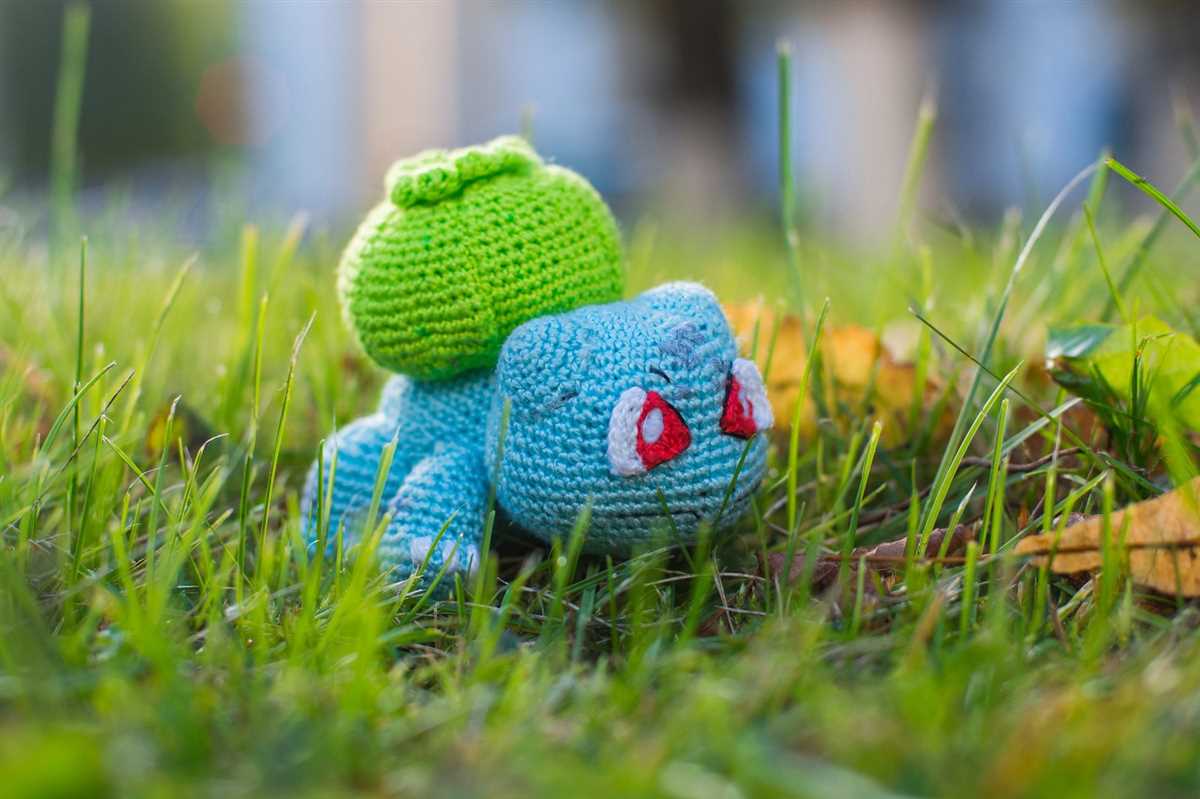
Are you a fan of Pokémon and knitting? If so, you’re in luck! This Bulbasaur knitting pattern is perfect for all the Pokémon trainers and craft enthusiasts out there. Whether you want to make a cute gift for a fellow Pokémon lover or simply want to challenge your knitting skills, this pattern is a must-try!
Knitting your own Bulbasaur toy allows you to create a unique and personalized piece. You can choose your favorite colors and adjust the size to your liking. The end result will be a one-of-a-kind Bulbasaur that you can proudly display on your shelf or give to a friend.
Don’t worry if you’re a beginner knitter. This pattern is suitable for all skill levels, with detailed instructions and step-by-step photos to guide you along the way. Even if you’ve never picked up knitting needles before, you’ll be able to create your very own Bulbasaur in no time!
Bulbasaur Knitting Pattern: Craft Your Own Pokémon Companion
Do you love Pokémon and enjoy knitting? Why not combine your passions by crafting your very own Bulbasaur? With this Bulbasaur knitting pattern, you can create your own adorable Pokémon companion to keep you company on all your knitting adventures.
This knitting pattern is perfect for all skill levels, from beginners to advanced knitters. Whether you’re a seasoned pro or just starting out, you can easily follow the step-by-step instructions to create your own unique Bulbasaur. The pattern includes detailed explanations and helpful tips, making it a breeze to craft your very own Bulbasaur.
To get started, you’ll need some basic knitting supplies, such as knitting needles, yarn, and stuffing. The pattern also recommends using specific yarn colors to replicate Bulbasaur’s iconic look. You can choose to stick with the traditional green and cream colors or get creative and knit a Bulbasaur in your favorite colors.
The pattern guides you through knitting the body, head, arms, legs, and tail separately, before assembling them together to create a complete Bulbasaur. It also includes instructions for adding the signature bulb on Bulbasaur’s back. Whether you prefer knitting in the round or using straight needles, you’ll find instructions for both methods in this pattern.
Once you’ve finished knitting your Bulbasaur, you can personalize it by adding embroidered details, such as eyes, mouth, and any other markings you’d like. You can also get creative and knit accessories for your Bulbasaur, such as a tiny scarf or a mini hat.
Not only will crafting your own Bulbasaur bring you joy and satisfaction, but it also makes for a unique gift for fellow Pokémon fans. Whether you keep it for yourself or gift it to a loved one, your handmade Bulbasaur will surely be cherished and admired.
So, grab your knitting needles and get started on this Bulbasaur knitting pattern. Let your creativity flourish as you bring this beloved Pokémon to life in the form of a cozy knitted companion.
Materials Needed
To create your own Bulbasaur using the knitting pattern, you will need the following materials:
- Yarn: Choose your favorite green yarn for the body and leaf details, and white yarn for the eyes.
- Knitting Needles: Use a pair of size 4mm (US 6) knitting needles for the main body and size 3.5mm (US 4) knitting needles for the leaf details.
- Tapestry Needle: This needle will help you sew the different parts of Bulbasaur together at the end.
- Stuffing: You will need stuffing to fill the body and give Bulbasaur its shape.
- Scissors: A pair of sharp scissors will be necessary to cut the yarn.
- Stitch Markers: These will help you keep track of your stitches and rounds.
- Safety Eyes: If you prefer, you can use safety eyes instead of knitting the eyes with white yarn.
- Embroidery Thread: This will be used for any additional details, such as the mouth or nose, if desired.
These materials should provide you with everything you need to start knitting your very own Bulbasaur. Make sure you have all the materials on hand before you begin, as this will make the knitting process much smoother. Remember to have fun and be creative with your color choices!
Getting Started: Casting On
Before you can start knitting your Bulbasaur, you need to cast on. Casting on is the process of creating the first row of stitches on your knitting needle. This sets the foundation for your project and determines the number of stitches you will have. Here’s how to get started:
Step 1: Choose Your Cast On Method
There are several different cast on methods you can use, but for this Bulbasaur knitting pattern, we recommend using the long-tail cast on method. This method creates a stretchy edge that is perfect for the body of your Bulbasaur. To use this method, you will need to estimate the length of yarn you will need for your cast on stitches and leave a long tail.
Step 2: Make a Slip Knot
To begin the long-tail cast on, make a slip knot at the end of your yarn. This slip knot will serve as the first stitch on your needle. Insert your needle through the loop of the slip knot, and tighten the knot around the needle.
Step 3: Create the First Stitch
Hold your needle with the slip knot in your right hand and the long tail of yarn in your left hand. Insert your right needle into the slip knot loop from front to back, and loop the long tail of yarn over the right needle, creating a new loop. Pull this new loop through the slip knot loop to create your first cast on stitch. Repeat this step until you have cast on the desired number of stitches for your Bulbasaur.
Once you have completed the cast on, you are ready to start knitting your Bulbasaur! Remember to follow the pattern instructions carefully and refer to any additional resources or tutorials if needed. Happy knitting!
Knitting the Body
When knitting the body of your Bulbasaur, you will start by casting on the required number of stitches using the main color yarn. It is important to use a stitch marker to mark the beginning of the round. Once you have cast on the stitches, join the round by knitting the first stitch and slipping the stitch marker onto the needle. This will create a seamless circle.
Next, you will begin knitting in the round using a basic stockinette stitch, which means knitting every stitch in every round. This will create a smooth and even fabric for the body of your Bulbasaur. As you knit, make sure to keep an eye on your stitch count and use additional stitch markers to mark any increases or decreases as indicated in the pattern.
As you continue to knit, you will notice the body of your Bulbasaur taking shape. Remember to periodically stuff the body lightly to maintain its shape and firmness. You can use polyester fiberfill or any other stuffing material that you prefer.
Once you have reached the desired length for the body, you will finish by binding off all the stitches. Cut the yarn, leaving a long tail for sewing. Use a yarn needle to thread the tail of yarn through the remaining stitches and pull tight to close the opening. Secure the yarn by weaving it in and out of the stitches a few times.
Congratulations! You have successfully knitted the body of your Bulbasaur. Now it’s time to move on to the next step and continue knitting the other parts of your adorable Bulbasaur plushie.
Shaping the Head
The Bulbasaur knitting pattern includes detailed instructions on how to shape the head of the adorable Pokemon creature. To create the characteristic shape, you will need to follow a specific pattern of increasing and decreasing stitches. This will give the head its rounded shape and create the cute, bulbous appearance that Bulbasaur is known for.
Start by casting on the required number of stitches for the head. As you work through the pattern, you will gradually increase the number of stitches to shape the head. This is done by knitting into the front and back of certain stitches, effectively doubling the number of stitches in those areas.
Once you have reached the desired width of the head, you will begin decreasing stitches to shape the top. This involves knitting two stitches together, which combines them into one stitch and decreases the total number of stitches. This continues until you have reached the desired height of the head.
Adding the Facial Features
Once you have completed knitting the body and head of your Bulbasaur, it’s time to add the facial features to bring this adorable Pokémon to life. The facial features include the eyes, mouth, and nostrils.
Eyes: To create Bulbasaur’s eyes, you will need black yarn or embroidery thread. Start by threading your needle with the black yarn and insert it into the side of the head where you want to place the eye. Make a small stitch to secure the thread and then create a small circle shape for the eye. Repeat the same process for the other eye, making sure they are symmetrical and aligned.
Mouth: Bulbasaur has a smiling mouth that adds to its cuteness. To make the mouth, you will need red yarn or embroidery thread. Begin by threading your needle with the red yarn and insert it into the center of the head, slightly below the eyes. Make a small stitch to secure the thread and then shape the yarn into a curved smile. Secure the yarn with another small stitch and trim any excess.
Nostrils: To add the nostrils, you will need a small amount of black yarn or embroidery thread. Thread your needle with the black yarn and insert it into the top of the nose area. Make two small stitches to create tiny dots as the nostrils.
Once you have finished adding the facial features, your Bulbasaur knitting project will be complete and ready for display or play. It’s these small details that make your knitting creation truly unique and recognizable. Enjoy your handmade Bulbasaur!
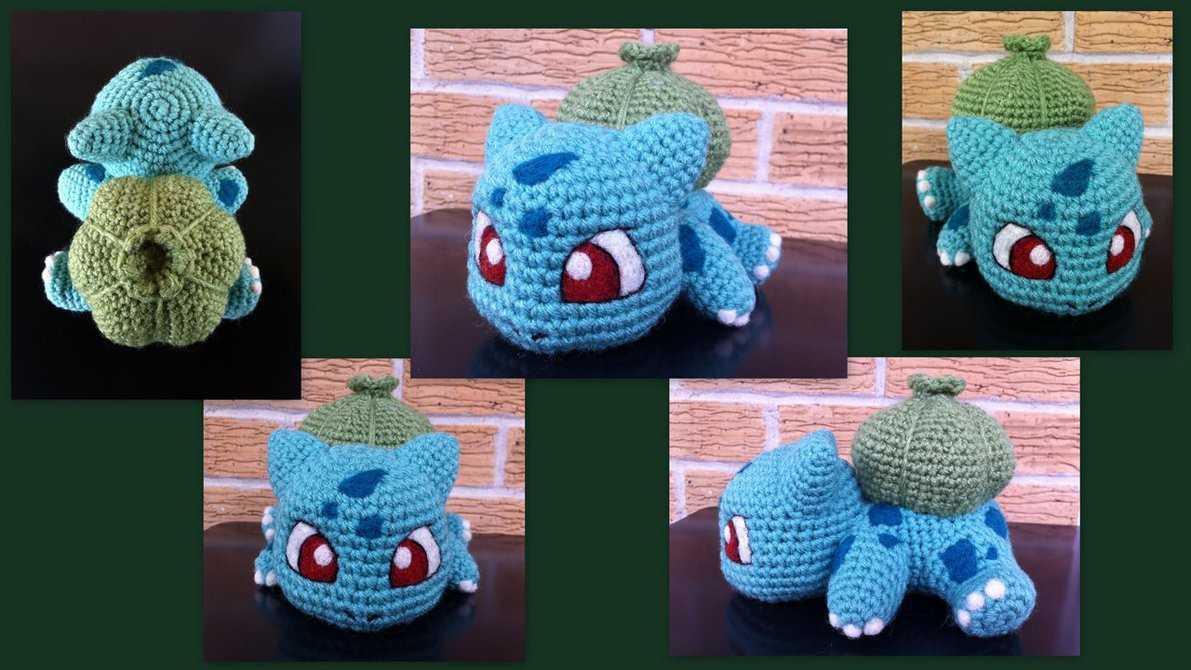
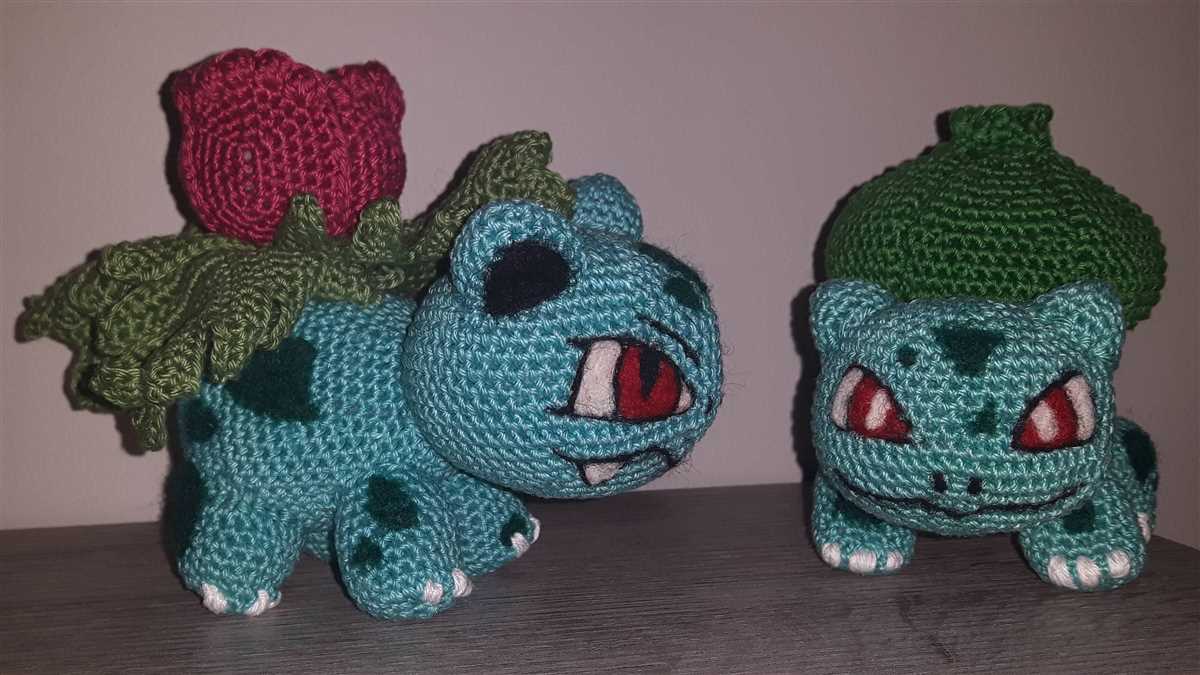
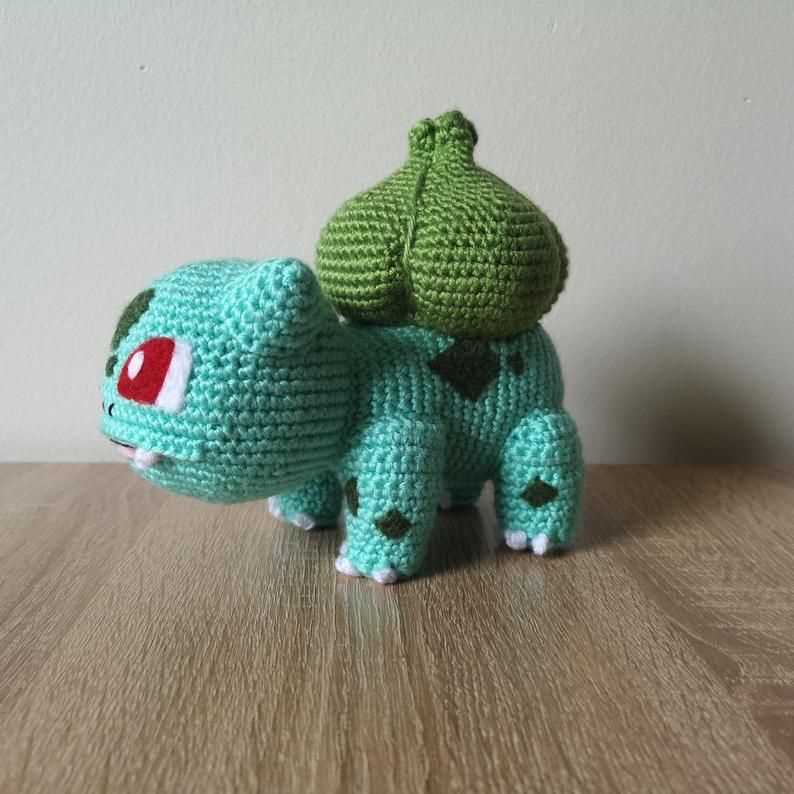
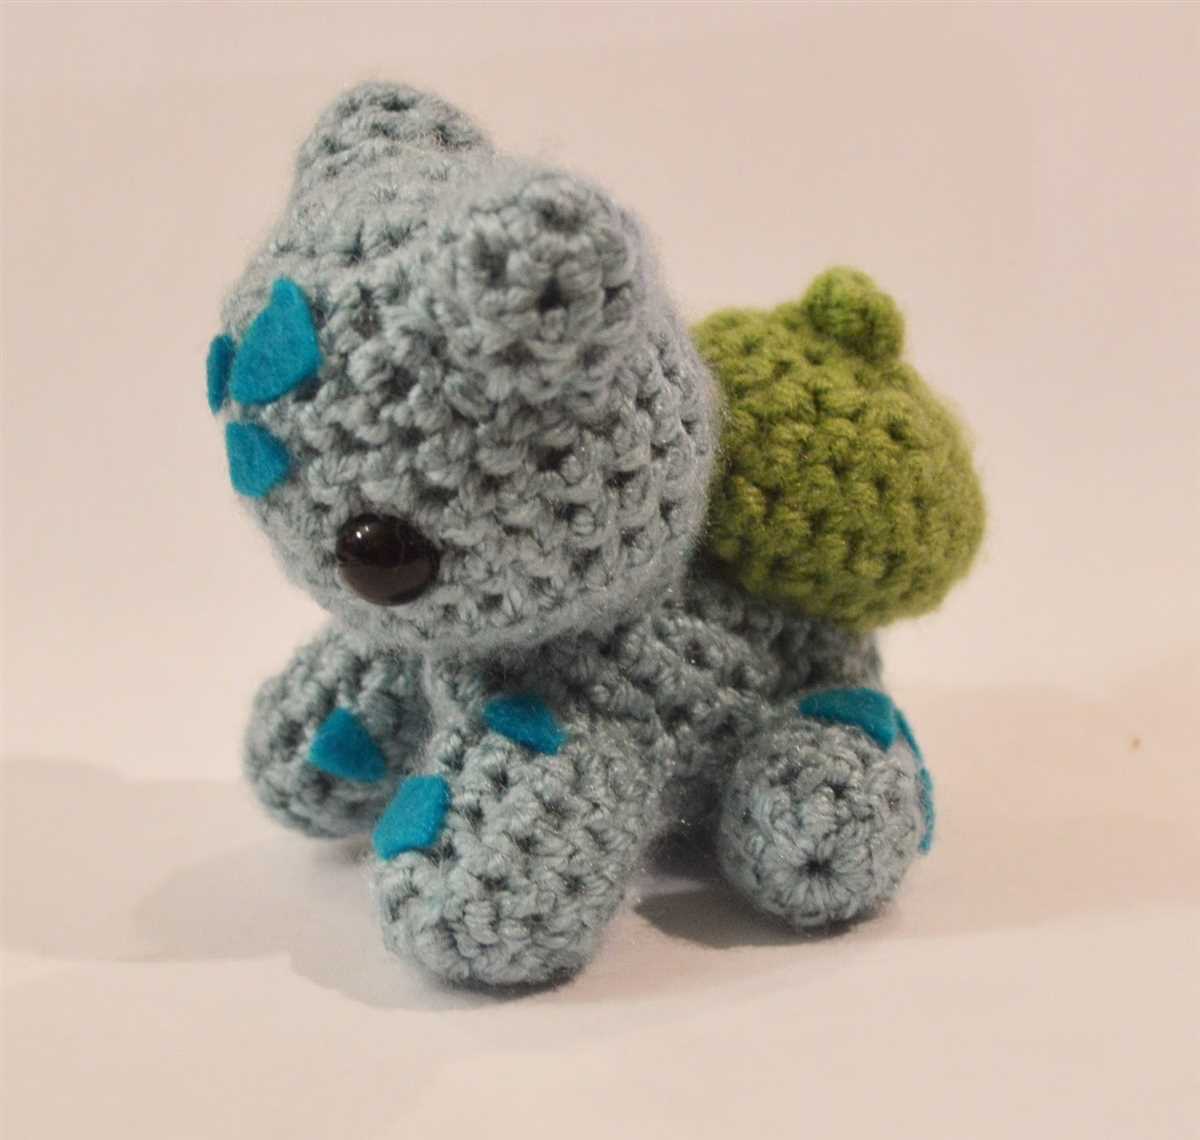
Crafting the Bulb
When it comes to knitting, few patterns are as popular and beloved as the Bulbasaur knitting pattern. The adorable Bulbasaur character from the Pokémon franchise has captured the hearts of fans around the world, and knitting enthusiasts are eager to bring this creature to life with their needles and yarn.
To craft the Bulbasaur, you’ll need to gather the necessary materials and follow the knitting pattern carefully. The pattern typically includes instructions for knitting the body, head, ears, and legs separately, and then sewing them together to create the finished Bulbasaur. Additionally, you may need stuffing, safety eyes, and embroidery thread for details like the face and bulb on Bulbasaur’s back.
Starting with the body, you’ll cast on the required number of stitches and knit in the round to create a seamless, cylindrical shape. Then, you’ll move on to the head, which typically involves shaping with increases and decreases. The ears can be knit separately and attached later, while the legs may require some simple shaping and seaming to achieve the desired shape and length.
If you’re new to knitting or need some guidance, there are many online tutorials and resources available to help you along the way. You can find step-by-step videos, written instructions, and even helpful tips from other crafters who have already tackled the Bulbasaur pattern. Whether you’re a beginner or an experienced knitter, this project is sure to challenge and delight you.
Once you have completed knitting all the separate pieces, it’s time to assemble your Bulbasaur. Using a yarn needle, carefully sew the pieces together, making sure to match up the stitches and maintain the correct proportions. Stuff your Bulbasaur lightly as you go, adding a bit more stuffing to create a plump and huggable finished toy.
Finally, add the finishing touches. Use safety eyes or embroider the eyes onto the face, and use embroidery thread to make the mouth and other details. Attach the ears securely, and don’t forget the bulb on Bulbasaur’s back! With each stitch and seam, you’ll bring the beloved Pokémon character to life in your hands.
Knitting the Legs and Feet
When knitting the legs and feet of your Bulbasaur, it is important to pay attention to the details in order to achieve the desired shape and look. Start by casting on the desired number of stitches for the legs, using the specified yarn and needle size. Knit the legs in the round, using the circular needle, until the desired length is reached. The number of rounds will depend on the size and proportions you want for your Bulbasaur.
Once the legs are complete, it is time to focus on knitting the feet. To do this, begin by picking up stitches along the bottom of each leg. This will create the foundation for the feet. Knit these stitches in the round, using the circular needle, until the desired length is achieved. The number of rounds will depend on how long you want the feet to be. To add more detail, you can use a different color yarn to create the toes, or add additional stitches to create a pointed shape.
Another option for creating the feet is to use a technique called “short row shaping.” This involves knitting a certain number of stitches on one needle, then turning the work before reaching the end of the row. This creates a curved shape and allows you to shape the foot without adding stitches. Repeat this process until the desired shape and size is achieved.
Once the legs and feet are complete, you can continue knitting the body and head of your Bulbasaur, following the pattern instructions. Remember to stuff the legs and feet lightly with stuffing material to give them a plump appearance. With the legs and feet completed, your Bulbasaur will start to take shape and come to life!
- Start by casting on the desired number of stitches for the legs
- Knit the legs in the round until the desired length is reached
- Pick up stitches along the bottom of each leg to create the foundation for the feet
- Knit the stitches in the round until the desired length is achieved
- Consider using a different color yarn or adding additional stitches to create toe details
- Alternatively, use short row shaping to create a curved shape for the feet
- Continue knitting the body and head of your Bulbasaur, following the pattern instructions
- Remember to stuff the legs and feet lightly to give them a plump appearance
Joining the Body and Legs
Once you have finished knitting the body and legs of your Bulbasaur, it’s time to join them together. This process requires some careful sewing to ensure that the finished toy looks neat and professional. Here are the steps to join the body and legs:
1. Pin the pieces together
Start by pinning the body and legs together using sewing pins. Make sure that the right sides of the knitted pieces are facing each other to create a clean seam. Align the edges of the pieces and distribute the pins evenly along the edges to hold them in place.
2. Thread your needle
Thread a tapestry needle with a yarn that matches the color of your Bulbasaur. You may need to use a longer length of yarn to ensure you have enough to sew the entire seam.
3. Sew the pieces together
Using a simple whipstitch or mattress stitch, sew the body and legs together. Start at one end of the seam and work your way down, pulling the yarn tight as you go. Take care to catch both sides of the knitting with your needle to ensure a secure seam.
Tip: If you’re unfamiliar with whipstitch or mattress stitch, there are many online tutorials and videos available that can guide you through the process.
4. Finish the seam
Once you have sewn the entire seam, weave in any loose ends of yarn to secure them. Trim any excess yarn, being careful not to cut too close to the seam, to prevent it from unraveling.
Now that you have successfully joined the body and legs of your Bulbasaur, you’re one step closer to completing your knitted toy. Next, you can move on to the final steps of knitting the head, arms, and other finishing touches.
Finishing Touches: Tail and Other Details
Now that you have completed the main body of your Bulbasaur knitting project, it’s time to add the finishing touches that will bring your creation to life. Paying attention to the small details will ensure that your Bulbasaur looks adorable and accurate to the original design.
One of the most distinctive features of Bulbasaur is its tail. To create the tail, you will need to knit a small tube using a contrast color yarn. A basic pattern for the tail is as follows:
Instructions for knitting the tail:
- Using double-pointed needles, cast on 6 stitches.
- Work in the round using stockinette stitch for approximately 4 inches.
- Bind off your stitches.
- Sew the tail onto the back of the Bulbasaur body, making sure it is centered.
Once the tail is securely attached, you can move on to the other details. Bulbasaur has small ear-like protrusions on the top of its head, so you can create them by making two small triangles out of a contrasting color yarn and sewing them onto the sides of the head.
Lastly, you can use embroidery to add the facial features of Bulbasaur. Use black yarn or thread to embroider the eyes, mouth, and any other desired details onto the face. Take your time and be patient to achieve the desired outcome.
With these finishing touches, your Bulbasaur knitting project is complete! This adorable creature is ready to be displayed or given as a gift to a Pokémon fan. Remember to have fun throughout the knitting process, and don’t be afraid to customize your Bulbasaur with unique colors or accessories that show off your personal style.