
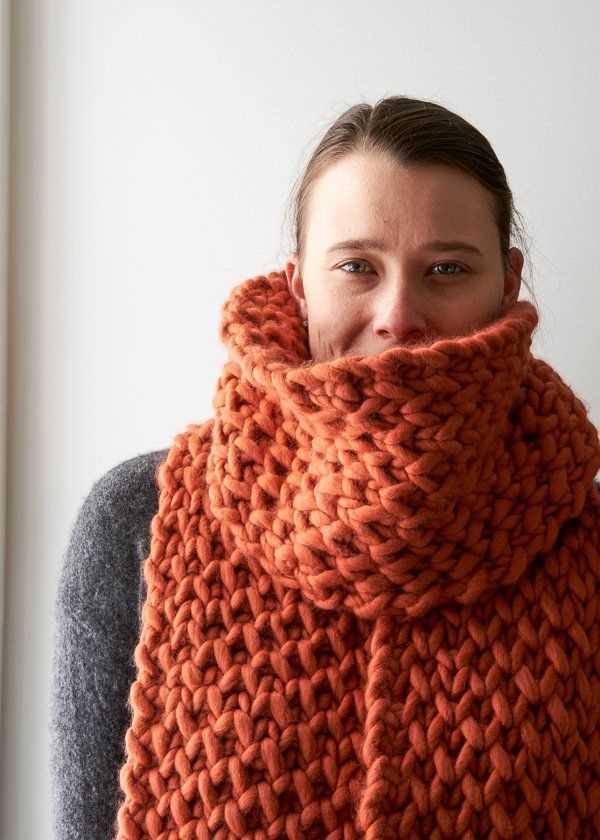
If you’re a beginner knitter or looking for a quick and easy project, knitting a scarf is a great way to start. And if you’re tired of knitting the same old garter stitch scarves, learning the knit purl stitch pattern can open up a whole new world of possibilities. Knit purl scarf patterns can create beautiful textures and designs that will make your scarf stand out!
The knit purl stitch is a fundamental stitch in knitting and is often the first stitch pattern taught to beginners. It’s a versatile stitch that can create a variety of effects, from simple ribbing to more intricate patterns like seed stitch or basketweave. The beauty of the knit purl stitch pattern is that it’s easy to remember and doesn’t require any special skills or techniques.
When knitting a scarf using the knit purl stitch pattern, you can play with different combinations of knits and purls to create unique designs. You can also experiment with yarn weights and colors to customize your scarf and make it truly one-of-a-kind. Whether you prefer a classic and simple design or something more intricate and eye-catching, there are endless possibilities when it comes to knit purl scarf patterns.
Main Types of Knit Purl Scarf Patterns
A knit purl scarf is a classic accessory that can be worn with any outfit and is perfect for keeping warm in the colder months. There are several main types of knit purl scarf patterns that you can try, each offering a unique texture and style.
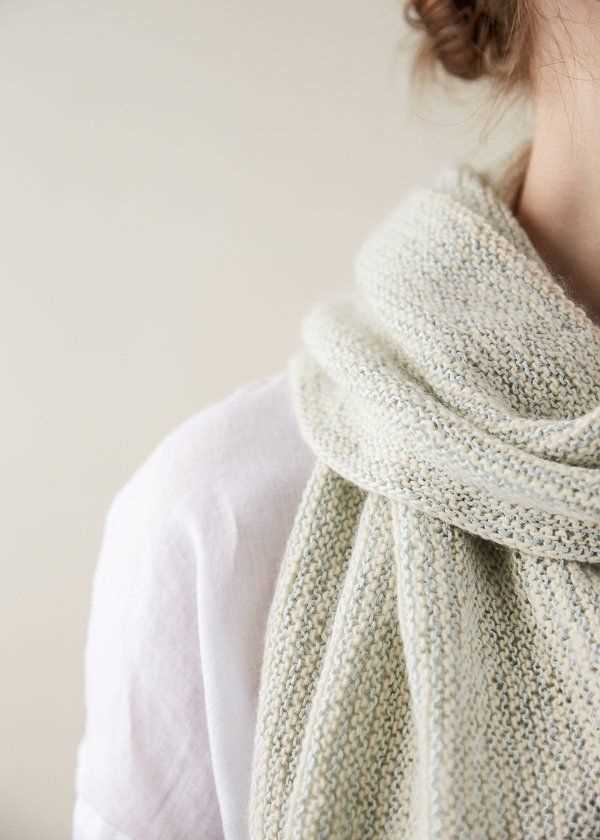
1. Garter Stitch Scarf: The garter stitch is one of the simplest and most basic knitting stitches, making it perfect for beginners. This pattern involves alternating knit and purl stitches on every row, creating a bumpy texture that is both cozy and stylish.
2. Seed Stitch Scarf: The seed stitch pattern is another popular option for knit purl scarves. It involves alternating knit and purl stitches on each row, but with a different arrangement than the garter stitch. The result is a textured pattern that resembles a field of scattered seeds, hence the name.
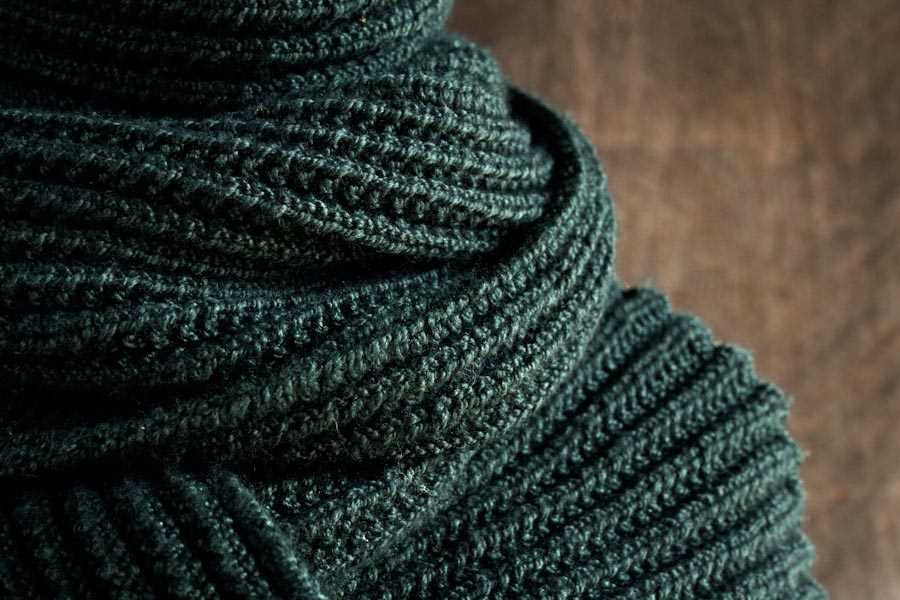
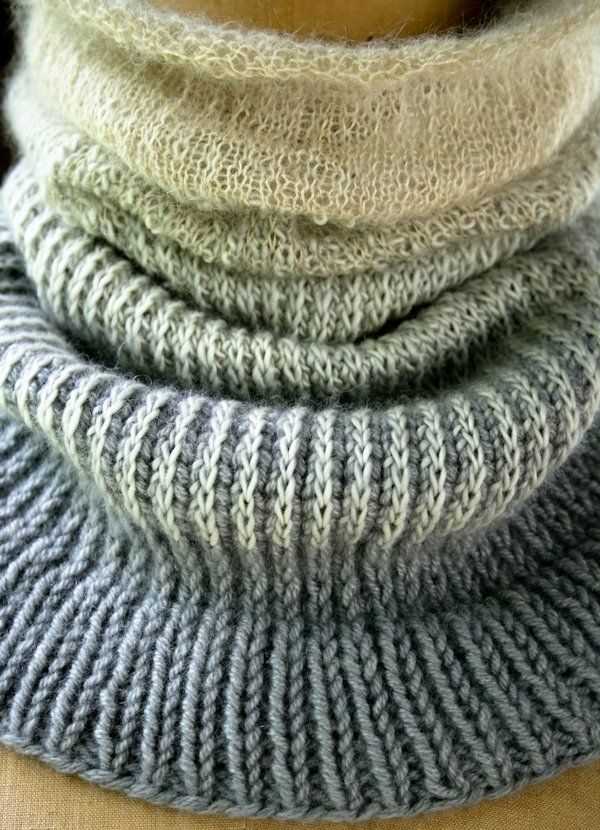
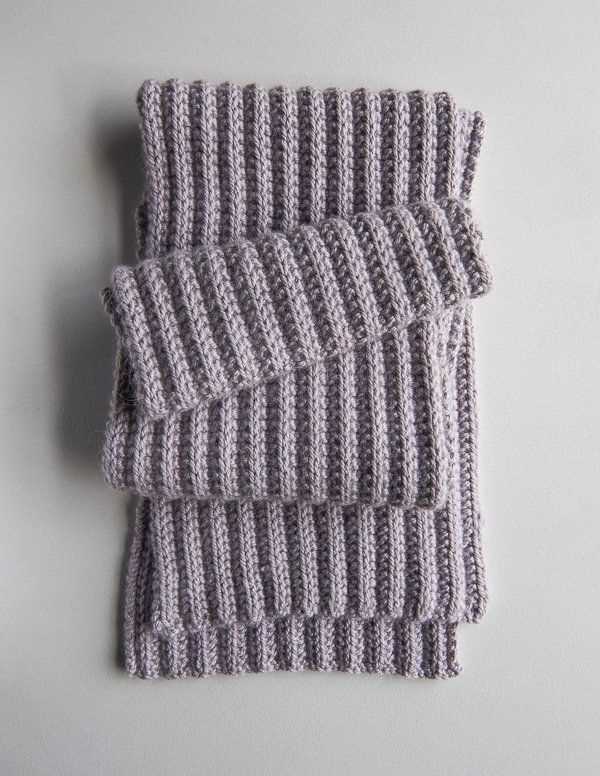
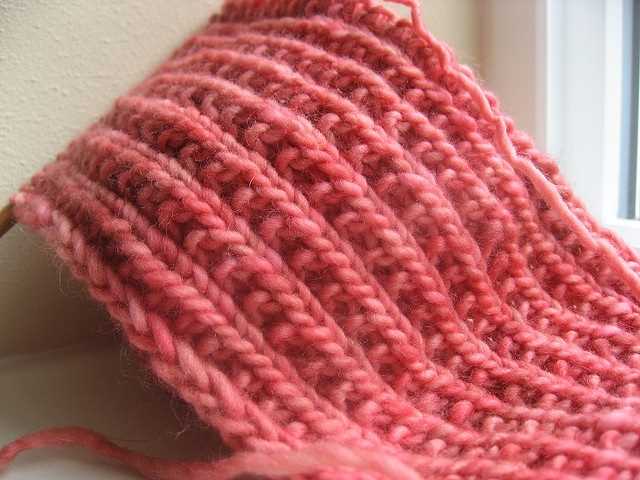
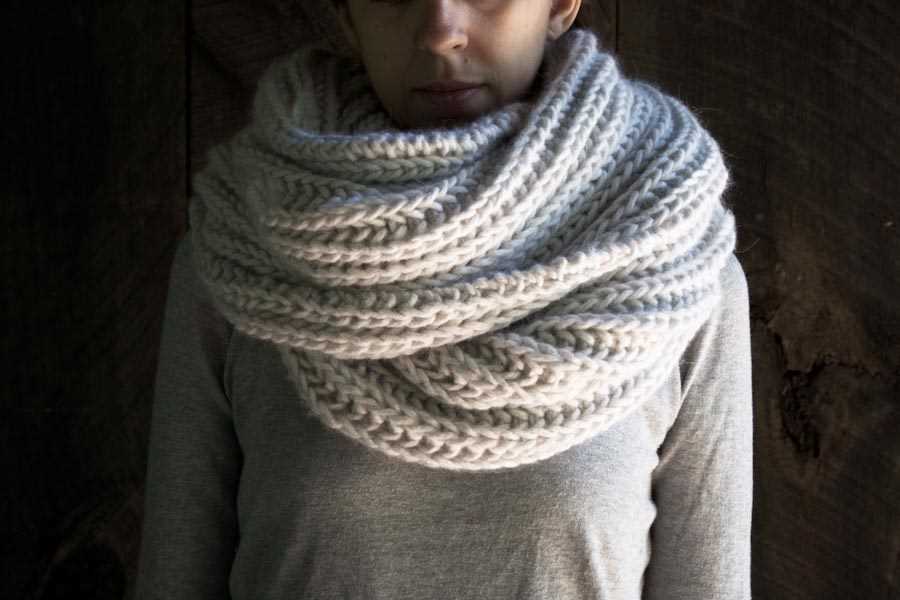
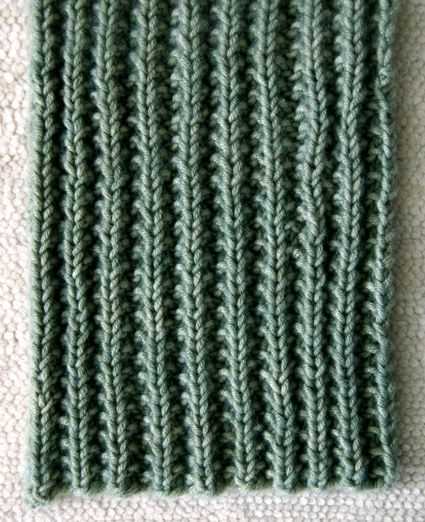
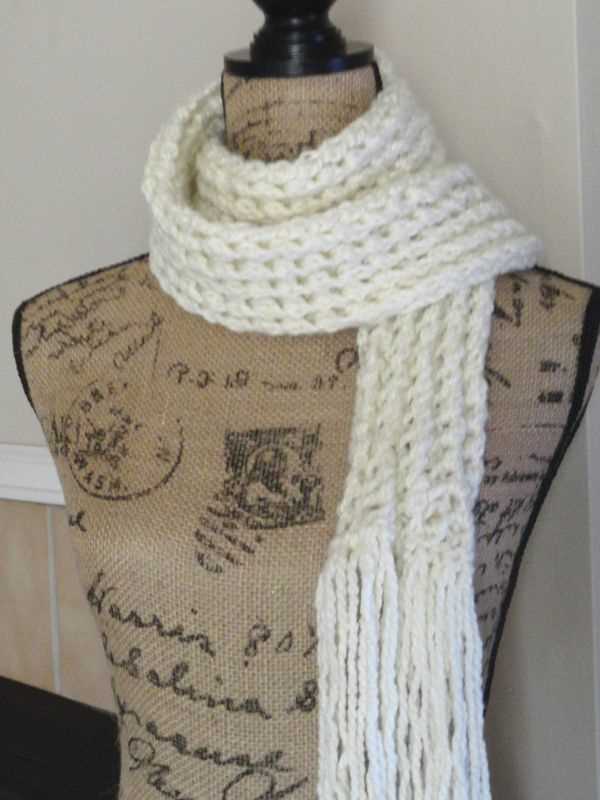
3. Ribbed Scarf: The ribbed pattern is created by alternating knit and purl stitches, but with a specific pattern sequence. This creates a stretchy and structured fabric that is both comfortable and visually appealing. Ribbed scarves are often used for both men’s and women’s accessories.
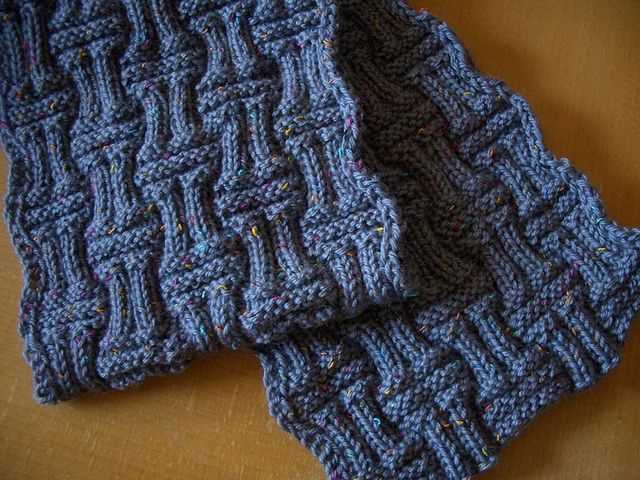
4. Basketweave Scarf: The basketweave pattern is a more advanced option for knit purl scarf patterns. It involves creating panels of knit and purl stitches in a specific pattern, resembling the weave of a basket. This pattern creates a textured and visually interesting scarf that is sure to stand out.
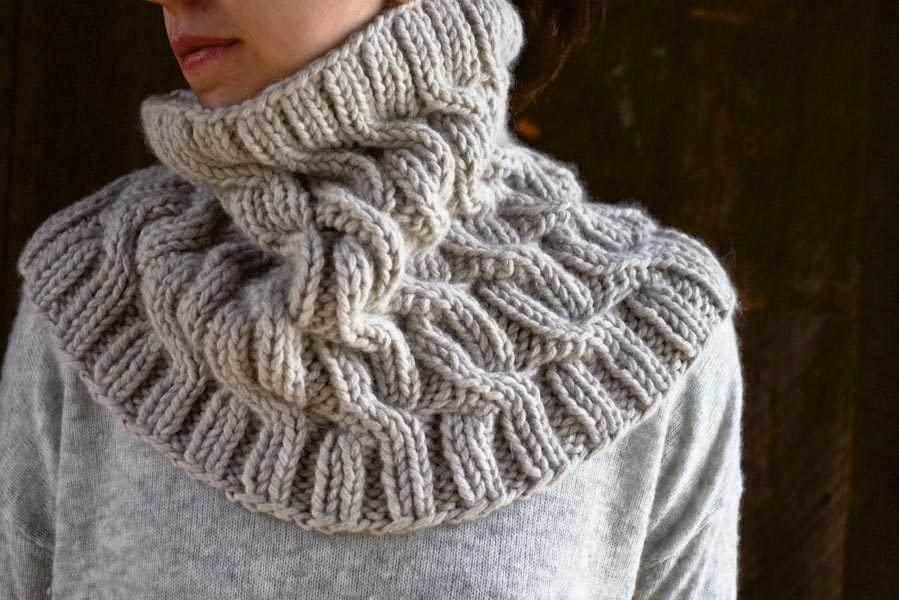
5. Cable Scarf: The cable pattern is another advanced option for knit purl scarf patterns. It involves creating twisting cables by crossing stitches over each other, resulting in a three-dimensional texture. Cable scarves are often seen as more sophisticated and can make a bold statement.
These are just a few examples of the main types of knit purl scarf patterns that you can explore. Whether you’re a beginner or an experienced knitter, there’s a pattern out there for you. So grab your knitting needles, some cozy yarn, and get ready to create a beautiful scarf that you’ll love wearing.
Basic Knit Purl Scarf Pattern
Knit purl scarf patterns are perfect for beginners who want to practice their basic knitting stitches. The knit and purl stitches are the foundation of knitting, and this simple pattern will help you master these techniques while creating a cozy and stylish scarf.
To start this basic knit purl scarf pattern, you will need a pair of knitting needles and a skein of yarn in your desired color. Choose a soft and chunky yarn for extra warmth and texture.
Step 1: Cast on
Begin by making a slipknot and placing it on one of your knitting needles. Slide the knot up towards the end of the needle, leaving a long tail of yarn. Hold the needle with the slipknot in your right hand.
Step 2: Knit row
Now it’s time to start knitting! With your right hand, hold the needle with the slipknot and insert it into the first stitch on the left needle from left to right. Pull the yarn through the stitch, creating a new loop on the right needle. Slip the stitch off the left needle, and you have completed your first knit stitch.
Step 3: Purl row
Switch to the purl stitch for the next row. Insert the right needle into the first stitch on the left needle, this time from right to left. Wrap the yarn counterclockwise around the right needle, and pull it through the stitch to create a new loop. Slip the stitch off the left needle.
Step 4: Repeat
Continue knitting each row with a knit stitch, and purling each row with a purl stitch, until your scarf reaches the desired length. Make sure to always keep the yarn tension consistent, neither too tight nor too loose.
Step 5: Bind off
When you are ready to finish your scarf, bind off the stitches. Knit the first two stitches as usual, then use the left needle to lift the first stitch over the second stitch and off the needle. Knit the next stitch, and repeat the process of lifting stitches over until you have one stitch left. Cut the yarn and pull it through the last stitch to secure it.
With this basic knit purl scarf pattern, you can create a beautiful and cozy scarf that will keep you warm during the colder months. Practice your knit and purl stitches while enjoying the meditative process of knitting, and soon you will be able to experiment with more advanced patterns!
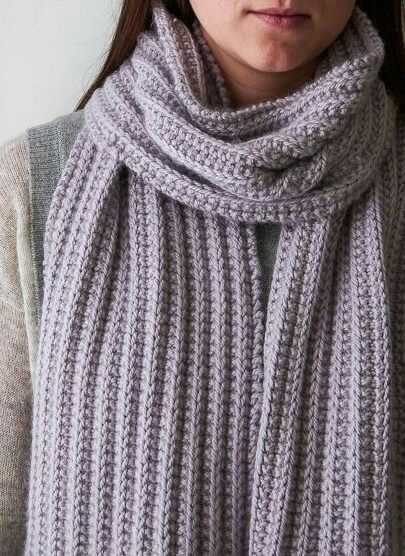
Ribbed Knit Purl Scarf Pattern
If you’re looking for a versatile and classic scarf pattern, the ribbed knit purl scarf is a great choice. The ribbed texture created by alternating knit and purl stitches gives the scarf a stretchy and cozy feel. Whether you’re a beginner or an experienced knitter, this pattern is perfect for you.
To get started, you’ll need a pair of knitting needles and your favorite yarn. Choose a yarn that is soft and warm, such as wool or alpaca, to ensure a comfortable and cozy scarf. You can also experiment with different colors to create a unique and personalized accessory.
Materials:
- Size 8 knitting needles
- Approximately 400 yards of worsted weight yarn
- Tapestry needle for finishing
Instructions:
- Cast on 35 stitches.
- Row 1: *Knit 2, purl 2; repeat from * to the end of the row.
- Row 2: *Purl 2, knit 2; repeat from * to the end of the row.
- Repeat rows 1 and 2 until the scarf measures your desired length.
- Bind off all stitches.
- Weave in any loose ends with a tapestry needle.
The ribbed knit purl scarf pattern is easy to customize to your preferred length and width. If you want a wider scarf, simply cast on more stitches in multiples of 4. For a narrower scarf, cast on fewer stitches.
This classic ribbed scarf is not only stylish but also functional. The ribbed texture traps warmth, making it a perfect accessory for chilly days. Whether you wear it with a coat or as a statement piece, this scarf is sure to keep you cozy and fashionable all winter long.
Cable Knit Purl Scarf Pattern
If you’re looking for a beautiful and intricate knitting project, a cable knit purl scarf pattern is a perfect choice. Cable knitting creates a unique texture that adds interest and visual appeal to any scarf. In this pattern, the combination of knit and purl stitches creates a stunning cable design that will impress anyone who sees it.
To get started on your cable knit purl scarf, you’ll need a few essential materials. Make sure to have a pair of knitting needles, preferably in a size suitable for your chosen yarn. You’ll also need a cable needle or a spare double-pointed needle to hold stitches while you work the cable pattern. Lastly, select a soft and cozy yarn that will keep you warm during those cold winter months.
Once you have your materials ready, it’s time to cast on and start knitting. Begin by casting on the desired number of stitches, keeping in mind that the width of your finished scarf will be determined by the number of stitches you cast on. Then, follow the cable knit purl pattern, alternating between knit and purl stitches as indicated.
As you work on your cable knit purl scarf, you’ll come across the cable pattern sections. These sections will require you to cross stitches over each other to create the cable effect. The pattern will guide you on the specific stitches and direction to use for each cable. Using a cable needle, hold the required number of stitches either in front or in the back of your work, knit or purl the next stitches, and then knit or purl the stitches from the cable needle. This process creates the twists and turns that make cables so charming.
Continue knitting following the cable pattern until your scarf reaches the desired length. Finally, bind off your stitches and weave in any loose ends. You now have a beautiful cable knit purl scarf that you can proudly wear or give as a thoughtful handmade gift.
Lace Knit Purl Scarf Pattern
A lace knit purl scarf pattern is a beautiful way to showcase your knitting skills while creating a delicate and intricate accessory. This pattern combines the classic knit and purl stitches with lace motifs, resulting in a scarf that is both elegant and cozy.
To create a lace knit purl scarf, you will need a pair of knitting needles and lace weight yarn. The pattern typically involves repeating rows of knit and purl stitches, with lace motifs incorporated throughout. You can choose from a variety of lace stitch patterns, such as the feather and fan or the diamond lace stitch, to add visual interest to your scarf.
Begin by casting on the desired number of stitches, usually in multiples of a certain number to maintain the lace pattern. Then, follow the instructions for each row of the pattern, knitting and purling as specified. Pay close attention to any yarn overs or decreases, as these are essential for creating the lace motifs.
A lace knit purl scarf can be a versatile accessory, suitable for both casual and formal occasions. Depending on your color choice and yarn selection, you can create a scarf that complements any outfit or adds a pop of color to an otherwise neutral ensemble. Whether you choose to wear it draped loosely around your neck or wrapped snugly for extra warmth, your lace knit purl scarf will certainly make a statement.
Tips for Choosing Yarn for a Knit Purl Scarf
Choosing the right yarn for your knit purl scarf is essential to achieving the desired look and feel of your finished project. The yarn you select will determine not only the overall texture and drape of the scarf, but also how well the stitches stand out and the scarf maintains its shape. Here are some tips to help you make the best choice for your knit purl scarf:
Consider the Fiber
The type of fiber you choose for your yarn will greatly impact the final result of your scarf. For a more luxurious and soft scarf, consider using natural fibers such as wool, alpaca, or cashmere. These fibers offer warmth and a soft touch against the skin. If you prefer a more lightweight and breathable scarf, cotton or bamboo blends are great options. Synthetic fibers like acrylic or nylon are also popular choices, as they are durable, easy to care for, and come in a wide range of colors.
Check the Weight and Gauge
When selecting yarn for a knit purl scarf, it’s important to consider the weight of the yarn and its corresponding gauge. The weight of the yarn determines the thickness and warmth of the finished scarf. Consider the climate and intended use of the scarf when deciding on the weight. For a chunkier and cozier scarf, opt for a bulky or super bulky weight yarn. If you prefer a more lightweight and airy scarf, choose a fingering or sport weight yarn. Additionally, matching your chosen yarn’s gauge to the recommended gauge in the pattern will ensure that your finished scarf turns out the appropriate size and shape.
Color and Texture
The color and texture of the yarn can greatly enhance the look of your knit purl scarf. Consider the pattern you’ll be using and how the colors and textures of the yarn will interact with the stitch pattern. Solid colors can highlight the intricate details of the knit and purl stitches, while variegated or self-striping yarns can add visual interest and dimension to the scarf. Additionally, experimenting with different textures, such as boucle or mohair, can create a unique and tactile scarf.
Overall, choosing the right yarn for your knit purl scarf is a personal decision that depends on your preferences and the desired outcome of your project. Take the time to consider the fiber, weight, gauge, color, and texture of the yarn before making your selection. With the right yarn, you’ll be well on your way to creating a beautiful and cozy scarf that you’ll cherish for years to come.
Essential Knitting Techniques for Knit Purl Scarf Patterns
Knitting a scarf with a knit purl pattern can be a satisfying and rewarding project for knitters of all skill levels. Whether you are a beginner or an experienced knitter, it is important to have a good understanding of the essential knitting techniques used in knit purl scarf patterns.
Basic Knitting Stitches: The knit and purl stitches are the foundation of most knit purl scarf patterns. The knit stitch creates a smooth V shape on the right side of the fabric, while the purl stitch creates a bump or purl on the right side. It is crucial to learn how to alternate between these two stitches to create the desired pattern in your scarf.
Casting On: Before you can start knitting, you need to cast on your stitches. There are several methods for casting on, but the long-tail cast on is commonly used for knit purl scarf patterns. This method creates a neat and stretchy edge that is ideal for scarves. Practice the technique and make sure to cast on the required number of stitches for your pattern.
- Knitting Techniques:
- Continental Style: In this technique, the yarn is held in the left hand, and the stitches are worked using the right-hand needle. It allows for faster knitting and is often favored by experienced knitters.
- English Style: In this technique, the yarn is held in the right hand, and the stitches are worked using the right-hand needle. It is commonly used by beginners and provides good control over the yarn.
Reading Knitting Patterns: Knit purl scarf patterns are typically written in a combination of abbreviations and instructions. It is important to understand the abbreviations used in the pattern, such as “k” for knit and “p” for purl. Take the time to read through the pattern before starting and make sure you understand the stitch pattern and any special instructions.
Blocking: Once you have finished knitting your scarf, it is important to block it to give it a professional finish. Blocking involves wetting the scarf and then gently shaping and drying it to the desired dimensions. Blocking helps even out the stitches, improve the drape, and give the scarf a polished look.
With these essential knitting techniques in your repertoire, you are ready to tackle knit purl scarf patterns with confidence. Whether you choose a simple alternating knit and purl pattern or a more complex design, these techniques will ensure that you can create a beautiful and cozy scarf.
Cast On and Bind Off
When starting a knitting project, the first step is to cast on. Casting on is the process of creating the first row of stitches on your knitting needle. This is done by creating a loop and then pulling the working yarn through it. The method of casting on can vary depending on the pattern and desired outcome. Some common cast on methods include the long-tail cast on, the knitted cast on, and the cable cast on. The long-tail cast on is often the preferred method as it creates a neat and stretchy edge.
Once you have finished knitting your project, it’s time to bind off. Binding off, or casting off, is the process of securing the stitches and finishing the edge of your knitting. This is done by knitting two stitches, then passing the first stitch over the second stitch and off the needle. Repeat this process until you have only one stitch remaining, then cut the yarn and pull it through the final stitch to secure it. Binding off creates a neat and finished edge and prevents the stitches from unraveling.
Common cast on and bind off methods:
- Long-tail cast on: This is a versatile method that creates a neat and stretchy edge.
- Knitted cast on: This method is quick and easy, but can create a tighter edge.
- Cable cast on: This method creates a firm edge and is often used for buttonholes or other areas that require stability.
Tips for successful casting on and binding off:
- Use a larger needle for casting on: This will create a looser edge and make it easier to knit the first row.
- Ensure an even tension: Consistent tension is important to create a neat and uniform edge.
- Practice and experiment: Different cast on and bind off methods can create different effects, so don’t be afraid to try out different techniques to achieve the desired result.
Knit Stitch
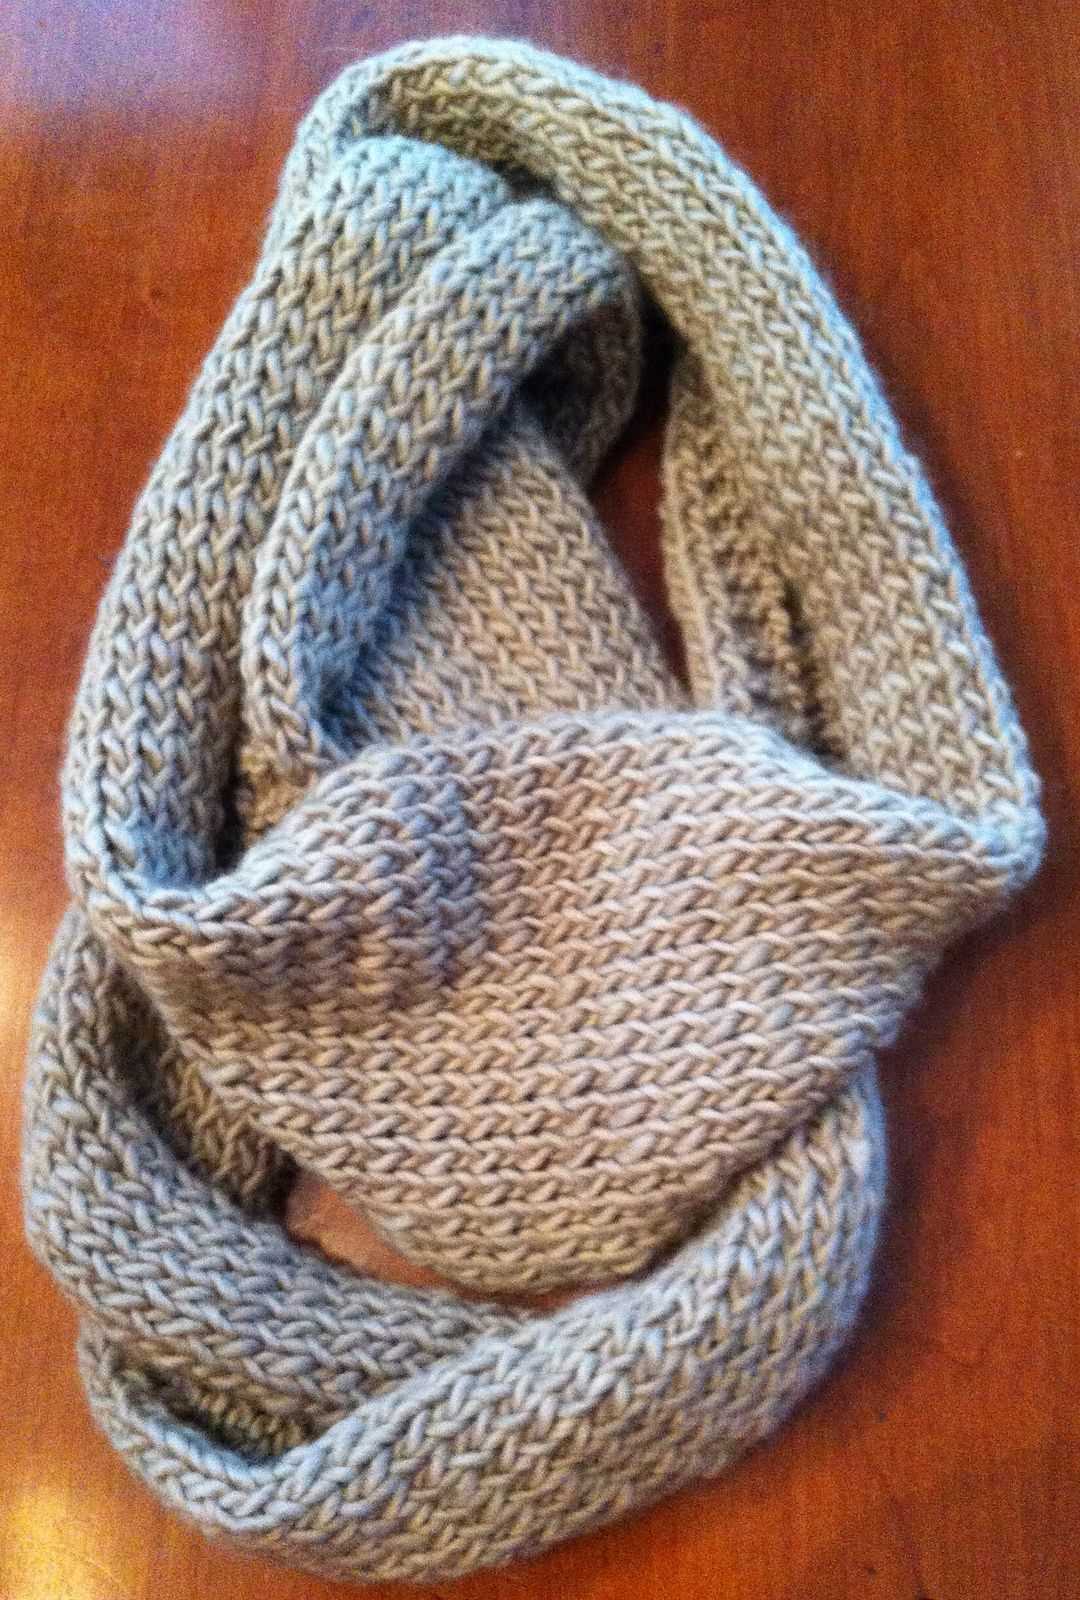
The knit stitch is one of the basic stitches in knitting. It is commonly used in a wide variety of knitting patterns, including scarf patterns. The knit stitch creates a smooth and flat fabric, making it great for scarves that need to drape nicely around the neck. This stitch is also known as the garter stitch, as it is often used to create the garter stitch pattern.
To create the knit stitch, you will need a pair of knitting needles and yarn. Start by holding the knitting needle with the cast-on stitches in your left hand, and the empty knitting needle in your right hand. Insert the right needle into the first stitch from left to right, going under the left needle. Wrap the yarn around the right needle from back to front, and pull it through the stitch. Slip the stitch off the left needle, and you have completed one knit stitch.
The knit stitch is a versatile stitch that can be used to create a variety of textures and patterns. It can be used on its own to create a simple garter stitch scarf, or combined with other stitches to create more intricate patterns. By alternating knit stitches with purl stitches, you can create the stockinette stitch, which is commonly used in many scarf patterns. The knit stitch is also often used as the foundation for more complex stitch patterns, such as cables and lace.
When knitting a scarf using the knit stitch, it is important to keep your tension consistent to ensure an even and professional-looking fabric. Practice makes perfect, so don’t be discouraged if your first few stitches don’t turn out exactly as you want them to. With time and practice, you will become more comfortable with the knit stitch and be able to create beautiful scarves and other knitted items.
Purl Stitch
The purl stitch is a basic knitting stitch that creates a textured pattern on the fabric. It is commonly used alongside the knit stitch to create a variety of patterns, including the classic stockinette stitch. The purl stitch is often abbreviated as “p” in knitting patterns and instructions.
To work the purl stitch, insert the right-hand needle into the front of the loop on the left-hand needle from right to left. Wrap the working yarn counterclockwise around the right-hand needle, then pull it through the loop to create a new stitch. Slip the old stitch off the left-hand needle, and the purl stitch is complete.
Key Points:
- The purl stitch creates a raised bump on the right side of the fabric.
- It is often used to create ribbing, seed stitch, and other textured patterns.
- Purl stitches are worked on the wrong side of the fabric when knitting in the round.
- When working the purl stitch, make sure to keep the tension consistent to avoid loose or tight stitches.
Tips:
- If you accidentally purl a stitch when you’re supposed to knit, or vice versa, you can simply flip the stitch over on the needle to correct it.
- Practice the purl stitch regularly to improve your tension and speed.
- Experiment with different yarns and needle sizes to see how they affect the appearance of the purl stitch.
In conclusion, the purl stitch is an essential skill for knitters. It adds variety and texture to patterns and allows for endless creative possibilities. Whether you’re a beginner or an experienced knitter, mastering the purl stitch will open up a world of knitting opportunities.
Increasing and Decreasing Stitches
When knitting a scarf, it is important to know how to increase and decrease stitches to add shaping and create interesting patterns. There are several techniques that can be used to achieve these effects.
Increasing Stitches
One common way to increase stitches is by using the “yarn over” technique. To do this, simply bring the yarn to the front of the work, then knit the next stitch. This creates a new stitch and a small hole in the fabric. Yarn overs can be used to create decorative eyelets and lace patterns in a scarf.
Another method of increasing stitches is by using the “make one” technique. To make one stitch, insert the needle into the strand of yarn between two stitches, from front to back. Then, knit or purl this strand as if it were a regular stitch. This method creates a new stitch without leaving a hole in the fabric, making it useful for shaping the scarf.
Decreasing Stitches
There are also various ways to decrease stitches in knitting. One common method is the “knit two together” decrease. To do this, insert the needle into the next two stitches as if to knit, then knit them together as one stitch. This decreases the number of stitches by one, creating a slant towards the right.
Another popular decrease method is the “purl two together” decrease. To do this, insert the needle into the next two stitches as if to purl, then purl them together as one stitch. This decreases the number of stitches by one, creating a slant towards the left. These decreases can be used to shape the edges of a scarf or create interesting patterns.
By mastering these techniques for increasing and decreasing stitches, knitters can create beautifully shaped and textured scarves. Whether using yarn overs for lace patterns or knit two together decreases for a clean edge, these techniques add depth and character to any scarf project.
Mistakes to Avoid When Knitting a Purl Scarf
Knitting a purl scarf is a great project for beginner knitters. The repetitive pattern of knit and purl stitches creates a classic and timeless design. However, even experienced knitters can make mistakes. Here are some common mistakes to avoid when knitting a purl scarf:
1. Miscounting Stitches
One of the most common mistakes when knitting a purl scarf is miscounting stitches. It’s important to pay attention to the pattern and count your stitches correctly. Miscounting can lead to uneven rows or the wrong number of stitches, which can affect the overall look of your scarf.
2. Tension Problems
Tension refers to the amount of pressure you apply when knitting. Tension problems can result in uneven stitches, tight or loose areas, or a scarf that is too narrow or too wide. It’s essential to maintain consistent tension throughout your project to ensure a consistent and professional-looking result.
3. Not Using a Stitch Marker
When knitting a purl scarf, it’s helpful to use a stitch marker to mark the beginning of your rounds or pattern repeats. This helps you keep track of your progress and prevents you from losing your place. Forgetting to use a stitch marker can lead to confusion and mistakes in your pattern.
4. Losing Track of Rows

It’s easy to lose track of which row you are on, especially when knitting a large purl scarf. Losing track can result in uneven patterns or mistakes in your design. To avoid this, it’s helpful to use a row counter or keep a tally of your rows.
5. Not Checking Gauge
Gauge refers to the number of stitches and rows per inch in your knitting. It’s important to check your gauge before starting your purl scarf to ensure that your finished project will be the correct size. Skipping this step can result in a scarf that is too short, too long, or doesn’t fit properly.
Conclusion
By avoiding these common mistakes, you can ensure that your purl scarf turns out beautifully. Paying attention to stitch count, maintaining consistent tension, using stitch markers, keeping track of rows, and checking gauge are all important steps in creating a successful knitting project.