
Knitting your own over the knee socks can be a fun and rewarding project. Not only do you get to choose your own yarn and colors, but you also get to customize the fit and style to your own preferences. Whether you’re a beginner or an experienced knitter, this knitting pattern will guide you through the process of creating a cozy pair of over the knee socks.
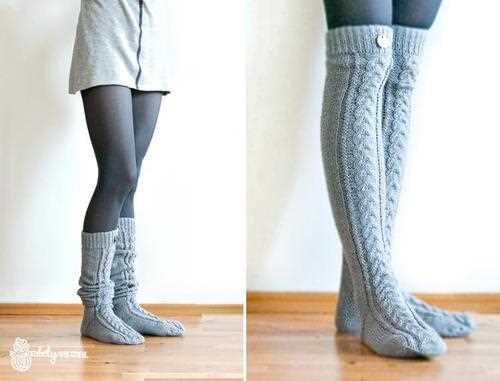
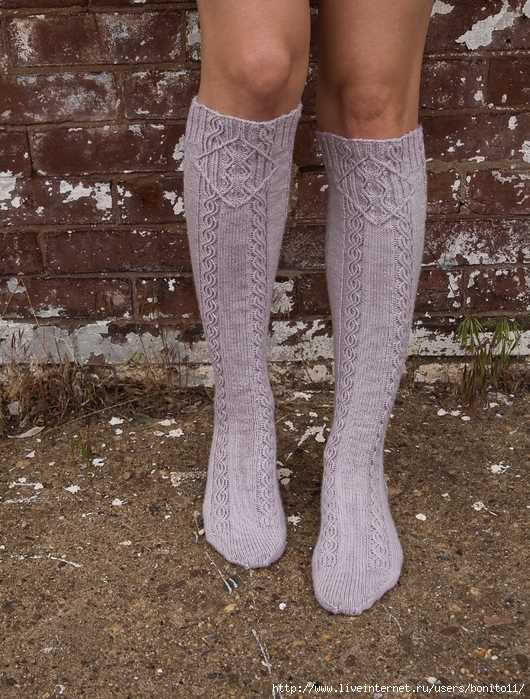
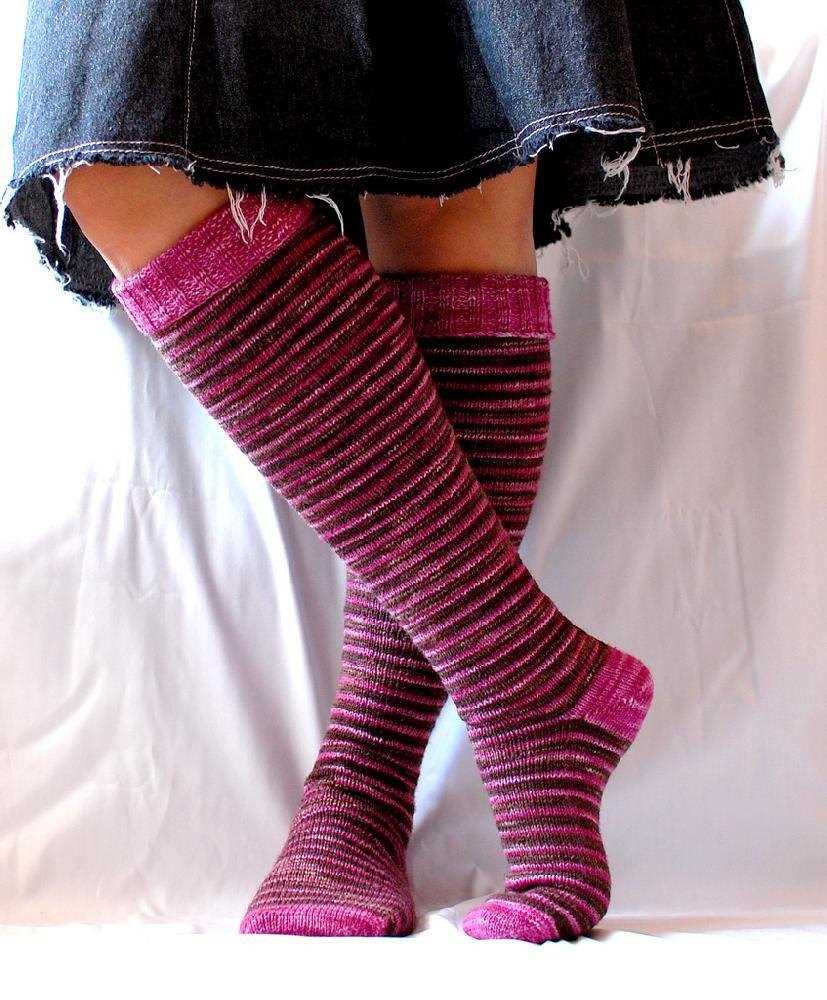
Over the knee socks are a fashionable and versatile accessory that can be worn with skirts, dresses, or even layered over leggings or skinny jeans. They provide warmth and style, making them perfect for colder months or adding a trendy touch to any outfit. With this knitting pattern, you’ll be able to create a pair of socks that fit perfectly and keep you cozy.
The pattern includes clear instructions and step-by-step photos to help you along the way. It covers everything from the cast-on method to the ribbing, shaping the calf, and creating a comfortable toe. You can choose to add additional touches such as cables, lace, or colorwork to make your socks truly unique.
So grab your knitting needles and yarn, and get ready to create your own pair of over the knee socks with this knitting pattern!
Over the Knee Socks Knitting Pattern
If you are a knitting enthusiast looking for a new project, why not try knitting a pair of over the knee socks? These stylish and cozy socks are perfect for keeping warm during the colder months or adding a fashionable touch to any outfit. With the right knitting pattern and a little bit of patience, you can create a pair of socks that are not only comfortable but also personalized to your own style.
When it comes to knitting over the knee socks, the pattern is key. A well-written pattern will guide you through the steps of creating the sock, from casting on to shaping the toe. Look for a pattern that includes detailed instructions, a clear stitch count, and any necessary charts or diagrams. Pay attention to the recommended yarn and needle size, as these will affect the fit and drape of the socks.
To start knitting your over the knee socks, you will need to gather your materials. Choose a soft and warm yarn in your desired color, and make sure you have enough skeins to complete the project. You will also need a pair of knitting needles in the appropriate size, as well as a set of double-pointed needles or a circular needle for the ribbing and shaping. Don’t forget to have a tapestry needle on hand for weaving in the ends.
Once you have your pattern and materials ready, it’s time to get started. Begin by casting on the required number of stitches, following the pattern’s instructions. The ribbing at the top of the sock will help it stay up, so make sure to choose a stretchy cast on method. Work the ribbing for the specified length, and then switch to the main stitch pattern.
Continue knitting the main stitch pattern until you reach the desired length for your socks. Remember to try them on occasionally to ensure a good fit. Once you’ve reached the length, follow the pattern for shaping the toe and completing the sock. Don’t forget to weave in all loose ends and block your socks to give them a finished look.
With a little bit of time and effort, you can create a beautiful pair of over the knee socks that will keep you warm and stylish all winter long. Whether you choose a simple pattern or one with intricate stitch work, knitting your own socks can be a rewarding and enjoyable experience. So grab your yarn and needles, and get ready to knit your way to cozy feet!
Choosing the Right Yarn and Needles
When it comes to knitting over the knee socks, choosing the right yarn and needles is crucial to achieving the desired result. The type of yarn you select will greatly affect the comfort, durability, and overall appearance of the socks. In addition, the size of the needles you use will determine the gauge and fit of the finished product.
First and foremost, it’s important to choose a yarn that is suitable for socks. Sock yarns are typically made from a blend of wool and nylon, which provides both warmth and durability. Look for yarns that have a high twist, as this will help prevent the socks from wearing out too quickly. It’s also a good idea to choose a yarn that has a bit of stretch, as this will ensure a snug and comfortable fit.
When it comes to selecting needles, consider the gauge of the pattern and the size of your yarn. It’s generally recommended to use needles that are slightly smaller than the recommended size for the yarn, as this will help create a tighter fabric that will hold up better over time. However, be mindful that the needles should still be large enough to allow you to comfortably work the stitches.
Overall, taking the time to choose the right yarn and needles for your over the knee socks will greatly enhance the knitting process and ensure that the finished socks are both comfortable and durable. So, don’t be afraid to experiment with different yarns and needle sizes until you find the perfect combination for your project.
Getting Started: Casting On
Before you can start knitting your over the knee socks, you will need to cast on the stitches. Casting on is the process of creating the loops that will form the first row of your knitting project. There are several methods you can use to cast on, but for this pattern, we will be using the long tail cast on method.
To begin, make a slipknot by creating a loop with the yarn and inserting the working end through the loop. Tighten the knot by pulling on both ends of the yarn. Insert the needle into the loop of the slipknot and hold it with your thumb and index finger. With your other hand, grab the working yarn and the tail, making sure the tail is held below the needle.
Step 1: With the yarn in your right hand, bring it behind the needle and towards you, creating a loop on the thumb of your left hand.
Step 2: Slip the needle through the loop on your thumb from back to front, creating a new loop on the needle.
Step 3: Release the loop from your thumb and tighten it slightly by pulling on the working yarn. You should now have two loops on your needle.
Step 4: Repeat steps 1-3, continuing to create new loops on the needle. The number of loops you create will depend on the number of stitches required for your pattern.
Step 5: Once you have cast on all the required stitches, you can remove the slipknot by pulling on the working end of the yarn. Make sure to leave a long enough tail for weaving in later.
Repeat these steps until you have cast on the desired number of stitches for your over the knee socks. Once you have finished casting on, you are ready to move on to the next step in the pattern.
Working the Ribbing
The ribbing is a common stitch pattern used in knitting to create a stretchy and decorative edge. It is often used for cuffs, collars, and hems. In this knitting pattern for over the knee socks, the ribbing is used for the cuff of the socks to provide a snug fit and prevent them from slipping down.
To work the ribbing, you will need to alternate between knit and purl stitches. This creates a raised and recessed pattern that gives the ribbing its stretch and texture. In this pattern, the ribbing is worked in a 2×2 rib, which means you will knit 2 stitches, then purl 2 stitches, and repeat this pattern across the round.
Before starting the ribbing, it is important to ensure that you have cast on the correct number of stitches. The ribbing should be worked over a multiple of 4 stitches to maintain the 2×2 rib pattern. If you need to adjust the size of the socks, make sure to increase or decrease the number of stitches accordingly to maintain the ribbing pattern.
- Step 1: Knit 2 stitches
- Step 2: Purl 2 stitches
- Step 3: Repeat steps 1 and 2 until the end of the round
Continue working the ribbing in this manner for the specified number of rounds as indicated in the knitting pattern. Once you have completed the ribbing, you will then move on to the main body of the over the knee socks.
Knitting the Leg
After completing the ribbing for the cuff of the over the knee sock, it is time to move on to knitting the leg. This is the main part of the sock that will cover your leg from the thigh to just below the knee. The leg is usually knit in the round, using either double-pointed needles or a circular needle depending on your preference.
Before starting the leg, it is important to decide on the desired length. Over the knee socks typically reach just above the knee, but you can adjust the length to your preference. Keep in mind that the leg will stretch when worn, so it is recommended to knit it slightly shorter than the desired length.
To begin, continue knitting in the round using the chosen method. If using double-pointed needles, distribute the stitches evenly across three or four needles. If using a circular needle, simply continue knitting in the round. You can place a stitch marker at the beginning of the round to help keep track of your progress.
As you knit the leg, you can add various patterns or textures to make the socks more visually interesting. Common techniques include simple ribbing, cables, lace, or colorwork. It’s a great opportunity to showcase your knitting skills and create a unique pair of over the knee socks.
Be sure to regularly try on the sock as you go to ensure the fit is correct. Adjustments can be made by adding or removing stitches. Remember that the leg should have a comfortable, but snug fit to stay up. Once the desired length is reached, you can proceed to the next step, which is shaping the calf to provide a better fit.
Shaping the Heel
The heel is an important part of the over the knee socks and it is shaped differently from the rest of the sock. To begin shaping the heel, divide your stitches in half. For example, if you have 60 stitches, you will have 30 stitches on each needle.
Turning the heel
To turn the heel, you will be working short rows. This means that you will not be knitting across the entire row, but instead turning the work and knitting back and forth on a smaller section of stitches. Start by knitting a certain number of stitches, typically half of the total number of stitches on your needle. For example, if you have 30 stitches on your needle, knit 15 stitches.
Once you have knit the first set of stitches, it’s time to start the short rows. To do this, turn your work and purl back the same number of stitches that you just knit. For example, if you knit 15 stitches, purl 15 stitches back. Then, turn your work again and knit one less stitch than you did before. Repeat this process, turning the work and knitting one less stitch each time, until you have knit and purled all the stitches on your needle.
Creating the heel flap
Once you have turned the heel, it’s time to create the heel flap. Knit across the first half of stitches on your needle, then slip the last stitch of the first half purlwise with the yarn in front. This creates a neat edge for picking up stitches later. Then, turn your work and purl across the second half of stitches on your needle, slipping the last stitch of the second half. Continue working back and forth in this manner, knitting and purling across each half of stitches, until your heel flap is the desired length.
Creating the Gusset
The gusset is an important part of over the knee socks, as it provides room for the heel and increases the overall comfort and fit of the sock. To create the gusset, you will need to pick up stitches along the side edge of the heel flap.
Start by turning the sock inside out and placing the circular needle with the instep stitches on hold. With the working yarn, insert the needle into the first stitch along the side of the heel flap and knit it. Continue knitting along the side of the heel flap, picking up and knitting one stitch for every row. This will create a line of picked up stitches along the side of the heel flap.
A gusset shaping will usually involve decreasing stitches to create a tapered effect. This is done by knitting two stitches together at the beginning and end of each gusset section. Follow the instructions provided in the knitting pattern for the specific decreases and continue knitting the gusset until the required number of stitches has been decreased.
Once the gusset has been created, you will continue knitting in the round, following the pattern instructions for the rest of the sock. The gusset adds extra flexibility and room to the sock, ensuring a comfortable fit around the heel and ankle.
Knitting the Foot
Once you have completed the cuff of the over the knee sock, it’s time to move on to knitting the foot. This is the part of the sock that will cover your foot, so it’s important to make sure it fits comfortably.
Before you start knitting the foot, it’s a good idea to measure the length of your foot from the back of the heel to the tip of your longest toe. This will help you determine how long to make the foot of the sock.
To begin, you will continue knitting in the round, using the same stitch pattern as the cuff. You can either continue with the same color yarn or switch to a different color for a contrast.
- Start by knitting one round in the same stitch pattern as the cuff.
- Once you have completed the first round, continue knitting in the round until the foot of the sock is the desired length. Remember to consult your foot measurement to ensure a proper fit.
- If you want to add some extra detail to the foot of the sock, you can incorporate a different stitch pattern, such as a lace or cable pattern. This will add some visual interest to the sock.
- Once the foot is the desired length, you can begin shaping the toe. There are several methods you can use to shape the toe, such as the traditional wedge toe or the rounded toe.
- After you have shaped the toe, you can finish off the sock by binding off all the stitches. Make sure to weave in any loose ends so that the sock is neat and tidy.
Decreasing for the Toe
When you reach the desired length for your over the knee socks, it’s time to start decreasing for the toe. This is done to create a tapered shape and ensure a comfortable fit.
To begin decreasing, you will need to divide the stitches evenly across multiple needles or use the magic loop method if you prefer. This will make it easier to work the decreases on each side of the sock.
Start by knitting two stitches together at the beginning of the first needle. This will decrease one stitch. Then knit across the needle until you have two stitches left. Knit these two stitches together as well. Repeat this process on the second needle.
Continue knitting across each needle, decreasing by two stitches at the beginning and end of every needle until you have reached the desired number of stitches for the toe. This will depend on the size of your foot and the gauge of your knitting.
Once you have decreased to the desired number of stitches, you can then begin shaping the toe by knitting one round without any decreases. Then, on the next round, decrease one stitch before and after each marker, evenly spaced around the sock.
Repeat this decrease round every other round until you have reached the desired number of stitches for the toe. This will create a rounded shape and ensure a comfortable fit for the sock. Lastly, you can use the Kitchener stitch or another preferred method to close the toe and finish your over the knee socks.
Finishing the Toe
Once you have completed knitting the foot portion of your over the knee socks, it’s time to finish off the toe. This is the final step in creating the perfect pair of socks that will keep your legs warm and stylish all winter long.
1. Grafting the toe: To create a seamless finish, you will need to graft the stitches of the toe together. Thread a tapestry needle with a length of yarn and bring it through the first stitch on the front needle as if to purl. Next, bring the needle through the first stitch on the back needle as if to knit. Continue alternating between the front and back needles, always going through the stitches as if to purl on the front needle and knit on the back needle. Pull the yarn tight after each stitch to create a smooth join. Once all the stitches have been grafted, secure the yarn by weaving it through a few stitches on the inside of the sock.
2. Weaving in ends: Trim any excess yarn from the toe and use a tapestry needle to weave in the loose ends. Start by inserting the needle into the knitted fabric near the base of the toe and pulling the yarn through. Then, weave the needle back and forth through the stitches, making sure to go in the direction of the knitting. This will help secure the ends and prevent them from coming undone.
With these final steps complete, your over the knee socks are now ready to wear or gift to someone special. Enjoy the warmth and style they bring to your winter wardrobe!
Adding Detail: Cables or Lace
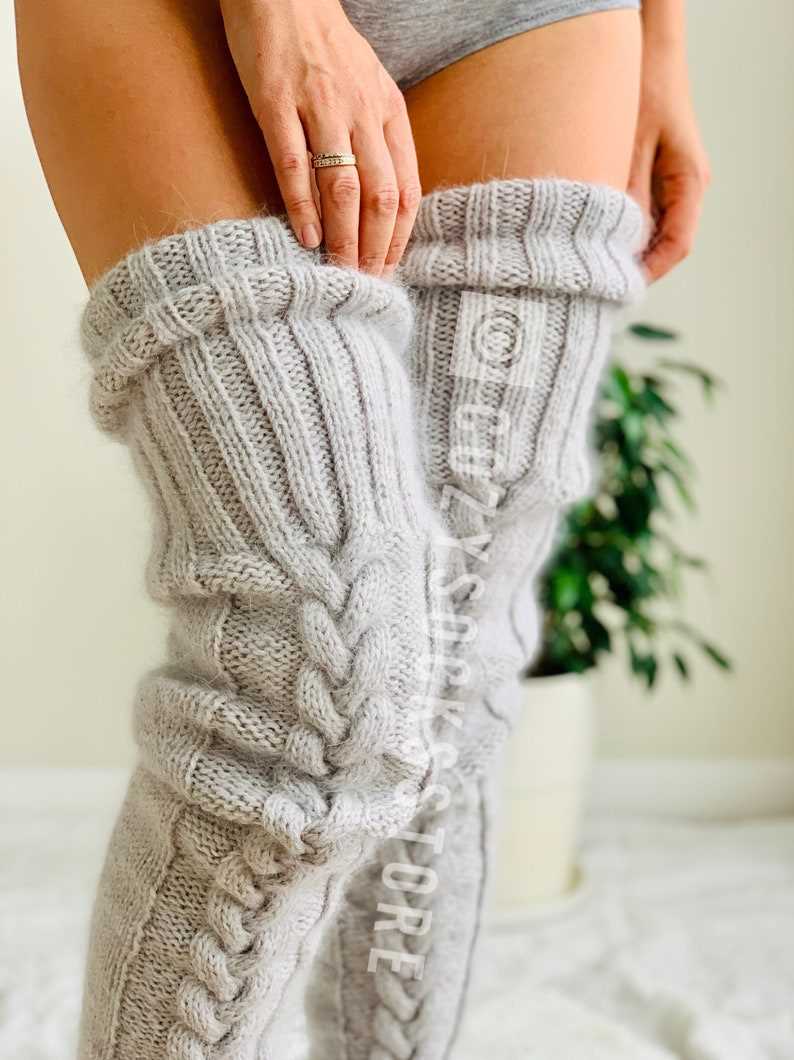
When it comes to knitting over the knee socks, adding a bit of detail can make all the difference in the final look. One popular way to add detail is by incorporating cables or lace into the design. These intricate patterns can elevate a simple pair of socks to a whole new level of sophistication.
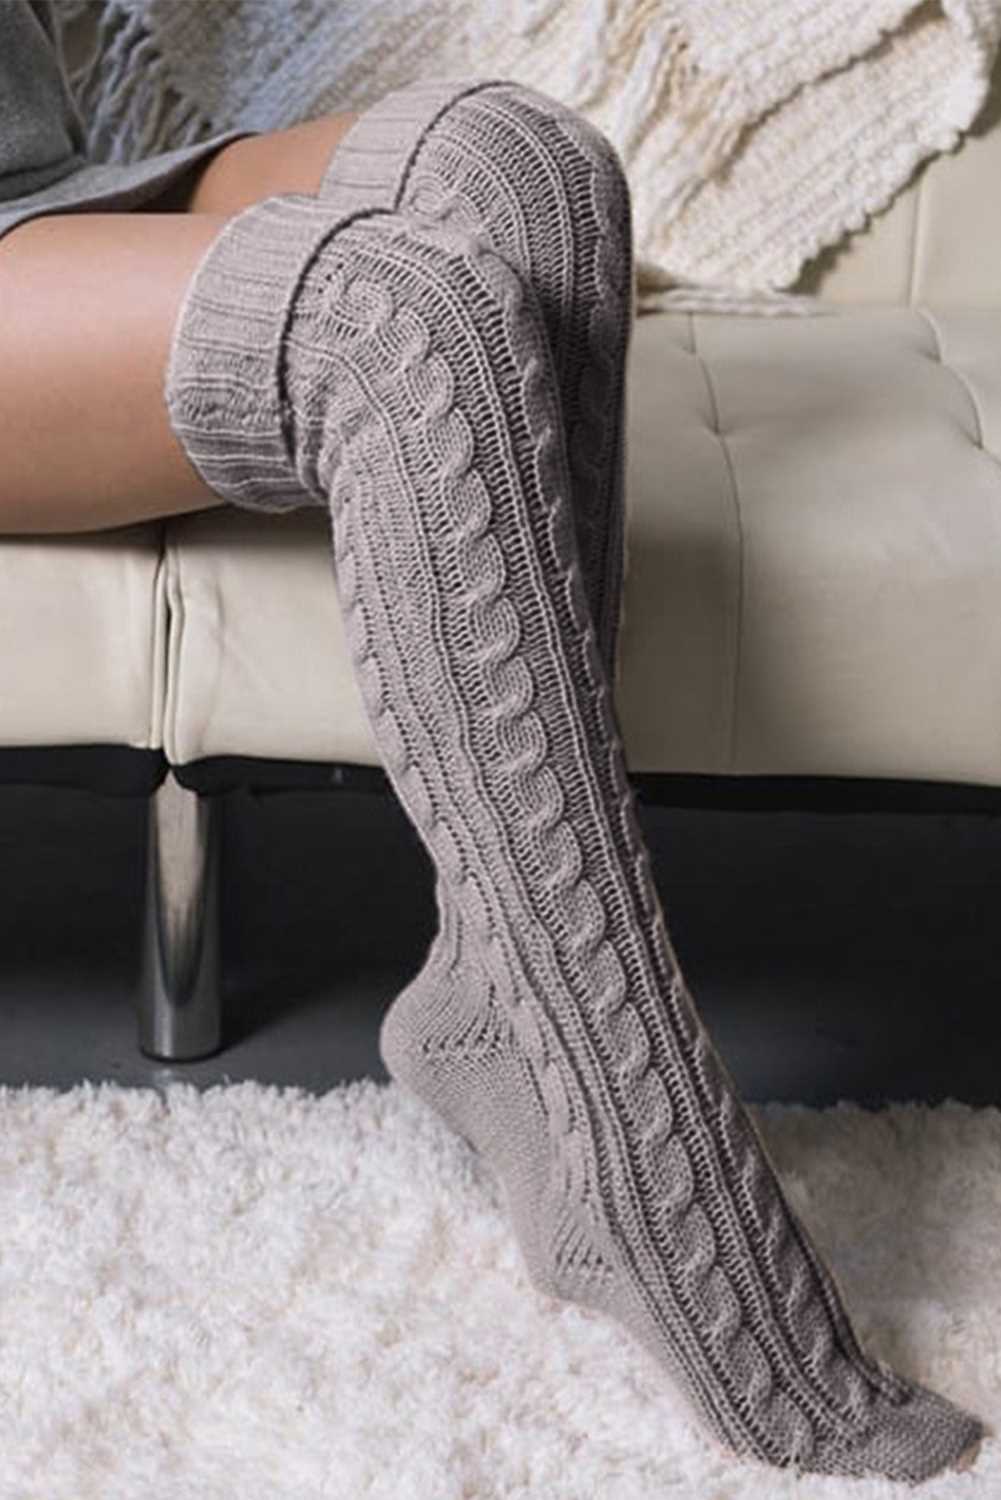
Cables are created by crossing stitches over one another, creating a twist effect in the fabric. They can be relatively simple, with just a few crossed stitches, or more complex, with multiple cable crossings and intricate motifs. Knitting over the knee socks with cable details can create a beautiful, textured look that adds interest and depth to the design.
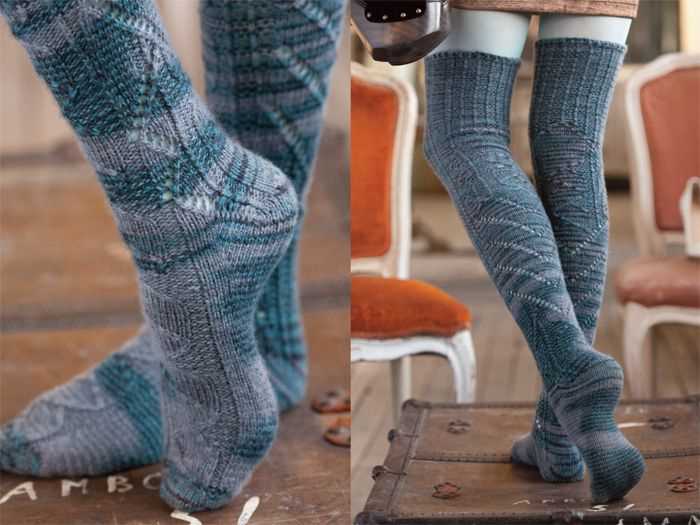
Lace is another stunning option for adding detail to over the knee socks. Knitting lace patterns involves creating holes and intricate designs through a combination of decreases, yarn overs, and other stitches. The delicate nature of lace makes it a perfect choice for adding femininity and elegance to your socks. Whether you choose a simple lace motif or a more intricate pattern, knitting over the knee socks with lace details can create a stunning and eye-catching look.
If you’re new to knitting cables or lace, don’t be intimidated. There are plenty of resources available, including tutorials, patterns, and videos, that can help you learn the techniques and create beautiful designs. You can also experiment with different yarn weights and colors to customize your over the knee socks and make them truly unique.
Incorporating cables or lace into your over the knee sock knitting pattern is a great way to add detail and elevate the design. Whether you choose cables for a textured look or lace for a delicate touch, these intricate patterns can make your socks stand out. Don’t be afraid to experiment and challenge yourself with new techniques to create stunning over the knee socks that you’ll be proud to show off.
Blocking and Finishing the Socks
Once you have finished knitting your over the knee socks, it is important to block them before wearing or gifting them. Blocking helps to even out the stitches and give the socks a more professional and polished look.
Start by filling a basin or sink with lukewarm water. Add a small amount of mild detergent and gently submerge the socks in the water. Let them soak for about 10-15 minutes, making sure they are fully saturated.
After soaking, drain the water and gently squeeze out any excess water from the socks. Avoid wringing or twisting them, as this can stretch or misshape the fabric.
Next, lay a clean towel on a flat surface and place the socks on top of it. Roll up the towel, starting from one end, to soak up more moisture.
Once the socks are partially dry, it is time to shape them. You can use sock blockers, which are specially designed forms that help maintain the shape of the socks, or you can use other household objects, such as rolled-up towels or empty water bottles.
Slide the socks onto the blockers or the chosen objects, making sure the stitches are evenly distributed and the sock is stretched to the desired size.
Leave the socks to dry completely, preferably in a well-ventilated area. This can take anywhere from a few hours to overnight, depending on the thickness of the socks and the humidity of the environment.
Once dry, carefully remove the socks from the blockers or objects. The socks should now be beautifully shaped and ready to wear or gift.
In conclusion, blocking and finishing your over the knee socks is an important step in the knitting process. It helps to improve the overall appearance and fit of the socks, making them look more professional and polished. So don’t skip this step and enjoy your cozy and stylish socks!
Tips for Styling and Wearing Over the Knee Socks
Over the knee socks are a versatile accessory that can add a touch of style to any outfit. Whether you’re looking to achieve a cute and playful look or a more sophisticated and chic vibe, here are some tips on how to style and wear over the knee socks.
1. Pair with skirts or dresses
Over the knee socks look great when paired with skirts or dresses. They can help add an extra layer of warmth during colder months while still maintaining a stylish look. Opt for a shorter hemline to show off the socks, or choose a longer length for a more modest and sophisticated look.
2. Wear with shorts
For a fun and casual look, try wearing over the knee socks with shorts. This combination is perfect for warmer weather and can help create a youthful and playful vibe. Consider choosing socks in a contrasting color to add an interesting pop to your outfit.
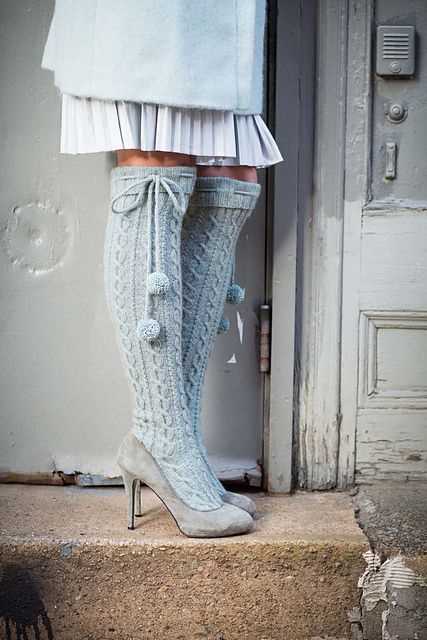
3. Layer with boots
When the weather cools down, layering your over the knee socks with boots can create a stylish and cozy look. Opt for ankle boots or knee-high boots to complement the length of the socks. You can also pair them with over-the-knee boots for a dramatic and trendy ensemble.
4. Mix and match patterns
Over the knee socks come in a variety of patterns and designs. Don’t be afraid to mix and match patterns to create a unique and eye-catching look. For example, pair a floral print dress with striped socks for a playful combination, or choose socks with polka dots to add some whimsy to a plain outfit.
5. Dress up or down
Over the knee socks can be dressed up or down depending on the occasion. Pair them with a blouse and blazer for a more formal look, or wear them with a graphic tee and denim jacket for a casual and laid-back ensemble. The versatility of over the knee socks allows you to experiment and create different looks to suit your personal style.
In conclusion, over the knee socks are a versatile accessory that can elevate your outfit. Whether you choose to pair them with skirts, shorts, or layer them with boots, the possibilities are endless. Have fun experimenting with different patterns and styles to create unique and fashionable looks!