
Knitting socks can be a fun and rewarding project for any knitting enthusiast. Thick socks are especially popular, as they provide extra warmth and comfort during the colder months. Whether you’re new to knitting or a seasoned pro, this thick sock knitting pattern is a great way to create cozy footwear for yourself or as a thoughtful gift.
One of the key advantages of knitting your own socks is the ability to customize the pattern to your preferences. With this thick sock knitting pattern, you can choose your favorite yarn and needle size to achieve the desired thickness. The pattern also allows for easy customization of the length and width of the socks, ensuring a perfect fit for any foot size.
To get started with the thick sock knitting pattern, you’ll need to gather your materials, including a set of double-pointed knitting needles, a thick and soft yarn, stitch markers, a tapestry needle, and a pair of scissors. The pattern itself is simple and easy to follow, making it suitable for knitters of all skill levels. By following the step-by-step instructions and working at your own pace, you’ll be able to create a pair of thick, cozy socks in no time.
Choosing the Right Yarn for Thick Sock Knitting
When it comes to knitting thick socks, choosing the right yarn is essential. The yarn you select will determine the warmth, durability, and comfort of your finished socks. Here are some important factors to consider when selecting yarn for thick sock knitting.
1. Fiber content
The fiber content of the yarn is crucial in determining the warmth and softness of your socks. For thick socks, it is best to choose yarn made from natural fibers such as wool or alpaca. These fibers are excellent insulators and will keep your feet cozy in cold weather. Additionally, natural fibers have moisture-wicking properties, which will help keep your feet dry and comfortable.
2. Ply and weight
The ply and weight of the yarn will affect the thickness and density of the knitted fabric. For thick socks, look for yarn that is labeled as “worsted weight” or “chunky weight.” These yarns have a higher ply count and will create a thicker, warmer fabric. If you prefer lighter socks, you can opt for a DK or sport weight yarn, but keep in mind that they may not provide as much warmth.
3. Durability
Thick socks are often subjected to more wear and tear, so it’s important to choose a yarn that is durable. Look for yarn with a tight twist, as this will make it stronger and less prone to pilling. Additionally, consider yarn that has some synthetic content, such as nylon or acrylic, as these fibers can add strength and durability to your socks.
4. Color and pattern
The color and pattern of the yarn can also play a role in your thick sock knitting project. Darker colors and complex patterns can help hide wear and tear, making your socks look newer for longer. However, keep in mind that intricate patterns may be more challenging to knit with thicker yarn, so choose a pattern that is suitable for the yarn you have selected.
By considering these factors, you can choose the right yarn for your thick sock knitting project. Remember to also read the yarn label for specific care instructions and gauge recommendations to ensure the best results for your knitting endeavors.
Understanding Yarn Weight and Fiber
When it comes to knitting thick socks, it is important to understand the weight and fiber of the yarn you will be using. Yarn weight refers to the thickness or diameter of the yarn, and it can vary greatly depending on the project. Different weights of yarn are suitable for different types of garments and accessories, so choosing the right weight for your thick sock project is essential.
There are several standard yarn weight categories, ranging from super fine to super bulky. For thick socks, it is recommended to use a yarn in the medium to bulky weight range. This will ensure that your socks are warm, cozy, and durable.
Yarn Fiber Options for Thick Socks
When it comes to choosing the fiber for your thick sock yarn, there are several options to consider. Wool is a popular choice for its warmth and durability. It has natural moisture-wicking properties, making it a great option for socks that need to keep your feet dry. Merino wool is a soft and luxurious option, while traditional wool is known for its sturdiness.
Cotton is another option for thick sock yarn, especially for those who are allergic or sensitive to wool. Cotton socks are lightweight and breathable, but they may not provide as much warmth as wool socks. Acrylic is a synthetic option that is often blended with other fibers to add durability and softness. It is also a great choice for those on a budget, as it is generally more affordable than natural fibers.
Ultimately, the choice of yarn weight and fiber for your thick sock knitting project will depend on your personal preferences and the desired characteristics of the finished socks. Experimenting with different yarns and fibers can be a fun way to explore the possibilities and find the perfect combination for your knitting needs.
Recommended Yarns for Thick Sock Knitting
When it comes to knitting thick socks, choosing the right yarn is essential. Thick socks are perfect for those cold winter days, providing warmth and comfort. The yarn you choose should be durable, soft, and have good stitch definition to showcase the intricate patterns.
Wool Yarn: Wool yarn is a popular choice for knitting thick socks. It is known for its warmth and durability, making it an excellent option to keep your feet cozy during the winter months. Look for yarns with a high percentage of wool, such as merino or alpaca, as they offer excellent insulation.
Cashmere Blend: For a touch of luxury, consider knitting thick socks with a cashmere blend yarn. Cashmere adds a softness and warmth to the socks while still providing durability. Look for blends that combine cashmere with other fibers like merino or nylon for added strength.
- Cotton Blend: If you prefer natural fibers, a cotton blend yarn can be a great option for thick socks. Cotton provides breathability and comfort, while a blend with synthetic fibers like nylon or polyester adds durability and elasticity.
- Aran or Worsted Weight Yarn: When choosing a yarn for thick sock knitting, opt for yarns that are categorized as aran or worsted weight. These yarns are thicker and will produce socks that are cozy and warm.
- Sock Yarn with Nylon: Sock yarns with added nylon provide extra durability, which is important for socks that will be subject to constant wear and tear. Nylon adds strength to the yarn and helps socks retain their shape.
When shopping for yarn, consider the pattern you’ll be using for your thick socks and match the recommended gauge. It’s also a good idea to feel the yarn before making a purchase, ensuring it’s soft and pleasant to touch. With the right yarn, you’ll be well on your way to knitting a pair of cozy and thick socks!
Getting Started with Thick Sock Knitting
Knitting thick socks is a wonderful way to keep your feet cozy and warm during the colder months. Whether you’re a beginner or a seasoned knitter, this guide will help you get started with knitting your own thick socks.
Choosing the Right Yarn: When knitting thick socks, it’s important to choose a yarn that is warm and durable. Look for yarns that are made of wool or a wool blend, as these fibers are known for their insulating properties. Additionally, consider choosing a yarn that has a good amount of stretch, as this will make the socks more comfortable to wear.
Needle Size and Gauge: The needle size you choose will depend on the thickness of the yarn and the desired thickness of your socks. Generally, larger needles are used for thicker yarns. It’s a good idea to swatch and check your gauge before starting your socks to ensure that they will fit properly. The gauge will help determine the number of stitches and rows needed for your socks.
Pattern Selection: There are many thick sock knitting patterns available, ranging in difficulty from beginner to advanced. Consider your skill level and the techniques you’re comfortable with when choosing a pattern. It’s also important to consider the fit and construction of the socks, as certain patterns may be better suited for thicker yarns.
Getting Started: Once you’ve chosen your yarn, needles, and pattern, it’s time to cast on and start knitting! Follow the pattern instructions carefully, paying attention to any special stitches or techniques that may be required. As you work through the pattern, be sure to try the sock on occasionally to ensure a proper fit. And don’t forget to enjoy the process of knitting your own cozy, thick socks!
Essential Knitting Tools and Equipment
When starting a knitting project, it is important to have the necessary tools and equipment on hand. These tools not only make the knitting process smoother but also ensure that the end result is of high quality. Here are some essential knitting tools and equipment that every knitter should have:
1. Knitting Needles
A good set of knitting needles is a must-have for any knitter. Knitting needles come in different sizes and materials. The size of the needles determines the size of the stitches, while the material affects the overall feel and durability of the needles. It is important to choose the right size and material based on the project you are working on.
2. Yarn
Yarn is the most important component of any knitting project. It is available in various colors, textures, and thicknesses. The choice of yarn greatly impacts the final appearance and feel of the knitted item. It is important to select the right yarn for your project, considering factors such as fiber content, gauge, and washability.
3. Stitch Markers
Stitch markers are small, circular markers that are used to mark specific stitches or sections in a knitting project. They come in handy when working on complex stitch patterns or when joining pieces together. Stitch markers help in keeping track of where you are in the pattern and ensure that your stitches are accurate.
4. Tapestry Needles
Tapestry needles, also known as yarn needles, are used for weaving in ends and sewing pieces together. They have a large eye that can easily accommodate yarn and a blunt tip that prevents the needle from splitting the yarn fibers. Tapestry needles are essential for finishing touches and giving the knitted item a polished look.
5. Measuring Tape
A measuring tape is an essential tool for knitters. It is used to measure the gauge (number of stitches and rows per inch) and to take important measurements for sizing, such as the length of the sleeves or the circumference of the head for a hat. Accurate measurements are crucial for achieving the correct fit and size of the finished item.
6. Scissors
Having a pair of sharp scissors is essential for cutting yarn and trimming loose ends. It is important to have a dedicated pair of scissors for knitting, as they should be kept clean and sharp for efficient use. Knitting scissors should be small and lightweight for ease of carrying and use.
These are just a few of the essential knitting tools and equipment that every knitter should have. With the right tools and equipment, knitting can be a relaxing and enjoyable hobby that yields beautiful results.
Basic Knitting Techniques for Thick Sock Knitting
When it comes to knitting thick socks, it’s important to use the right techniques to ensure a warm and cozy finished product. Here are some basic knitting techniques that are essential for thick sock knitting:
Casting on:
The first step in knitting thick socks is to cast on your stitches. A common casting on method for thick socks is the long-tail cast on. This method creates a sturdy and stretchy edge, ideal for socks that need to withstand the wear and tear of everyday use. To do the long-tail cast on, measure a long tail of yarn (approximately three times the desired width of your sock) and make a slipknot. Then, using both the tail and working yarn, create the first stitch by placing the needle through the slipknot and making a loop with the working yarn.
Knitting with double-pointed needles:
Thick socks are often knitted using double-pointed needles (DPNs) to accommodate the larger gauge of the yarn and create a denser fabric. When working with DPNs, it’s important to divide the stitches evenly among the needles to prevent laddering or loose stitches. Start by casting on your desired number of stitches onto one DPN, then distribute the stitches evenly onto the other needles. To prevent gaps between the needles, you can use a stitch marker to mark the beginning of the round.
- Knitting in the round: After dividing the stitches onto the DPNs, you will need to join them in the round to knit the sock tube. To join the stitches, simply start knitting with the working yarn from the first stitch on the first needle. Be careful not to twist the stitches when joining, as this can affect the fit and appearance of the finished sock.
- Knit and purl stitches: When knitting thick socks, you will likely use a combination of knit and purl stitches to create different textures and patterns. The knit stitch is the most basic stitch in knitting, while the purl stitch creates a raised bump on the fabric. By mastering these two stitches, you can create a variety of designs and textures in your thick socks.
- Decreasing: To shape the toe or heel of your thick sock, you will need to decrease stitches. The most common method of decreasing is the knit two together (K2tog) stitch, where you knit two stitches together as if they were one. This creates a decrease and reduces the number of stitches on your needles, shaping the sock to fit the foot comfortably.
By using these basic knitting techniques, you’ll be able to confidently create thick socks that are not only warm but also comfortable and durable.
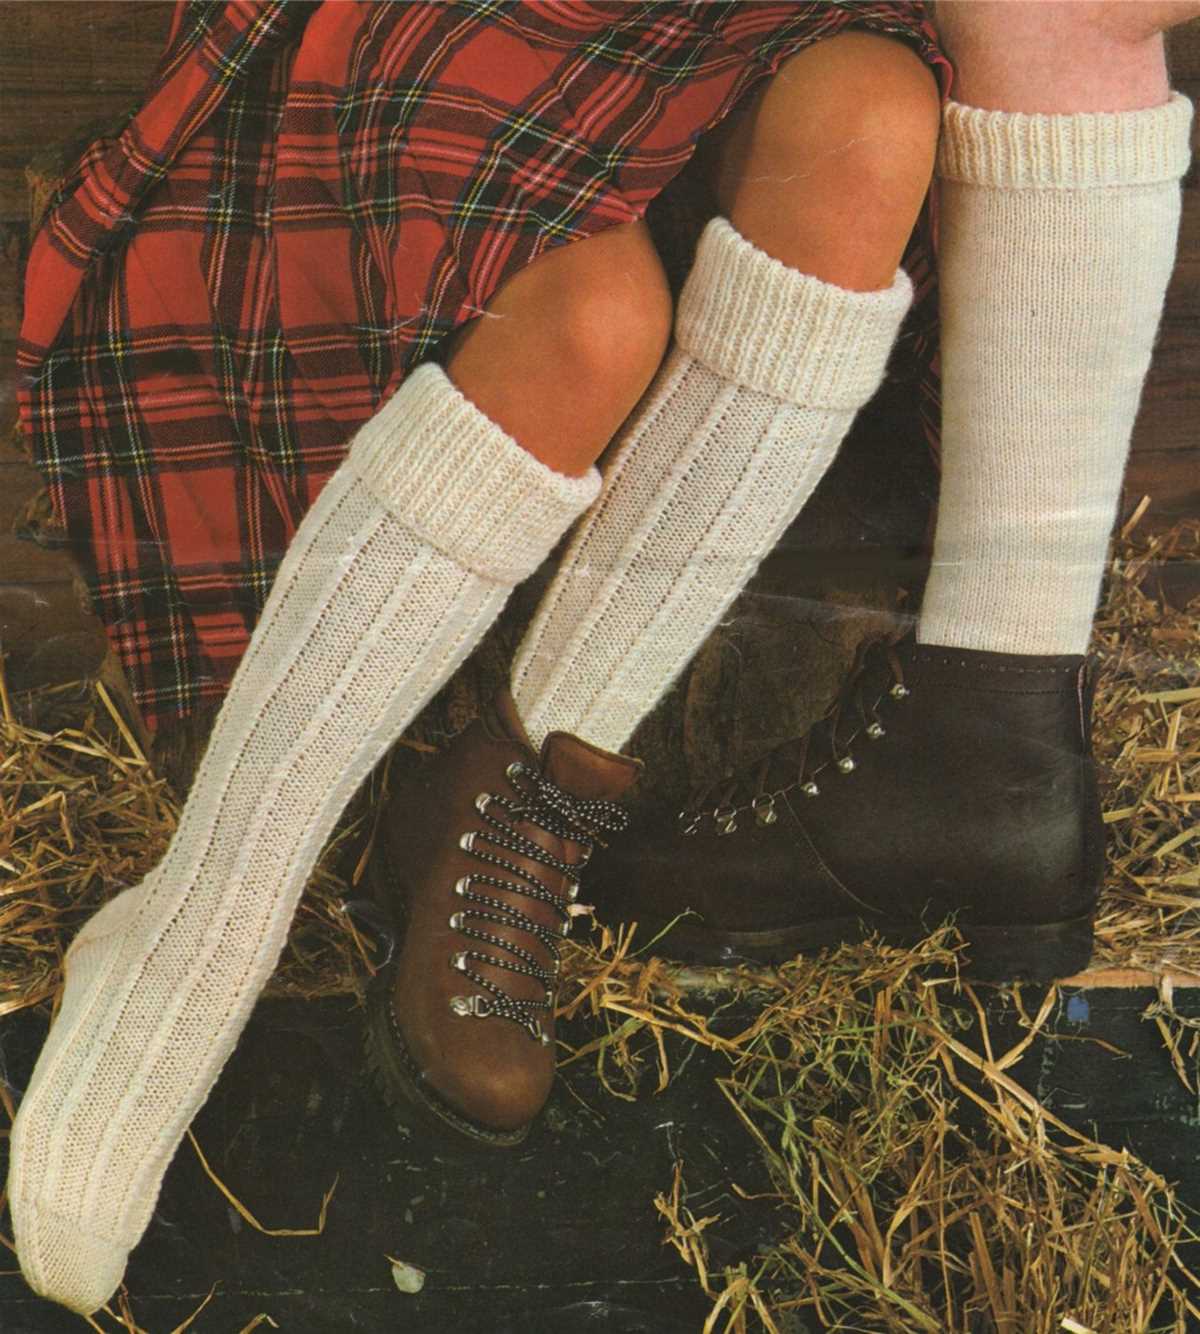
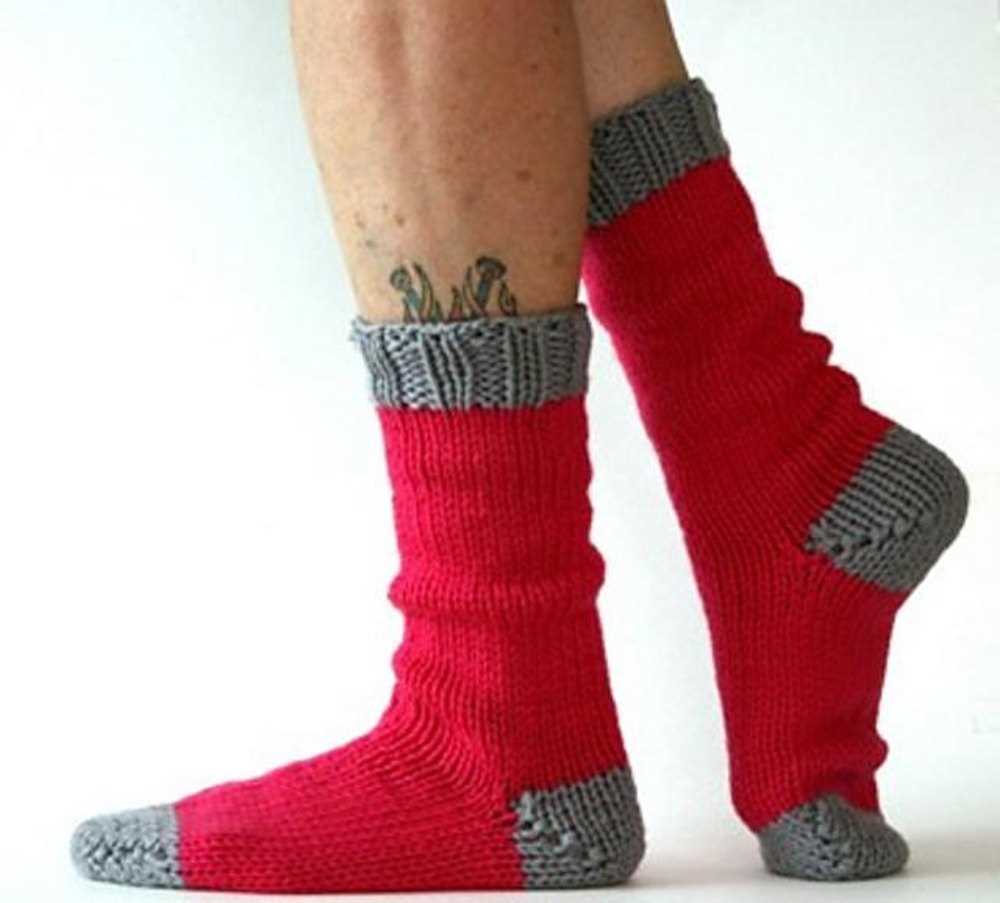
Thick Sock Knitting Pattern: Basic Sock
Knitting thick socks can be a cozy and rewarding project, especially during the cold winter months. With a basic sock knitting pattern, you can create a pair of warm and comfortable socks to keep your feet toasty. Whether you’re a beginner knitter or an experienced one, this pattern is a great way to practice your skills and create a practical item.
Making the Cuff
Start by casting on the desired number of stitches for your sock cuff. You can use double-pointed needles or circular needles, depending on your preference. A ribbed cuff is a popular choice for thick socks, as it provides a snug fit and helps keep the sock in place. You can knit a simple 2×2 rib, alternating between knit and purl stitches, for a stretchy and stylish cuff.
Once you have completed the desired length for the cuff, you can move on to the leg portion of the sock. The leg is knitted in the round, which means you will continue knitting in a circle without turning your work. This technique creates a seamless sock with no seam on the sides.
Knitting the Leg and Heel
To knit the leg, continue working in the desired stitch pattern, whether it’s a simple stockinette stitch or a more complex pattern. The leg can be as long as you prefer, depending on your personal preference and the desired length of your socks.
Once you have reached the desired length for the leg, it’s time to knit the heel. The heel is typically knitted using a heel flap construction, which creates a reinforced and durable section of the sock. This construction involves knitting back and forth on a smaller number of stitches to create a flap that will cover the heel area. After completing the flap, you’ll then work the heel turn to shape the back of the sock. This part may require some experience and attention to detail, but there are many resources available that can guide you through this step.
Finishing the Foot and Toe
After completing the heel, you’ll return to knitting in the round for the foot of the sock. This part is relatively straightforward, as you’ll continue knitting until you’ve reached the desired length for your foot. To ensure a proper fit, you can try the sock on as you go or refer to a foot measurements chart.
Once the foot is complete, it’s time to shape the toe. There are various ways to shape the toe, including a classic rounded toe or a more pointed toe. You can use a technique called toe decreases to gradually decrease the number of stitches and create the desired shape. Just like the heel, toe shaping may require some practice and attention to detail, but it’s worth the effort to achieve a comfortable fit.
After completing the toe shaping, you can cast off your stitches and weave in any loose ends. Give your socks a gentle wash and let them air dry to help them hold their shape and become even cozier. With this basic thick sock knitting pattern, you’ll have a stylish and warm pair of socks to enjoy or gift to someone special.
Understanding the Pattern Instructions
When it comes to knitting thick socks, it’s important to understand the pattern instructions before getting started. Whether you’re an experienced knitter or a beginner, taking the time to read and comprehend the instructions will ensure that you’re on the right track and can create a cozy pair of socks.
1. Gauge: The first thing to check in the pattern instructions is the gauge. This will tell you how many stitches and rows should be created in a specific measurement, usually a 4×4 inch square. It’s essential to match the gauge mentioned in the pattern to ensure that your socks turn out the correct size.
2. Yarn and Needles: The pattern will specify the type of yarn and the size of needles required for the project. Make sure you have the recommended yarn weight and the appropriate needle size to achieve the desired outcome. Using the wrong yarn or needle size can result in socks that are too tight or too loose.
3. Stitch Patterns: The pattern may include various stitch patterns such as ribbing, cables, or colorwork. Take the time to understand each stitch pattern and how they are worked. It’s helpful to practice these stitch patterns before starting the socks, especially if you’re not familiar with them.
4. Sock Construction: The pattern will outline the construction method for the socks, such as cuff-down or toe-up. It’s important to follow the instructions step by step to ensure that you create the correct shape and fit for your socks.
5. Sizing and Measurements: Pay attention to the sizing information provided in the pattern. This will help you determine the appropriate number of stitches and rows to create for your desired size. Additionally, the pattern may provide measurements for various parts of the sock, such as the cuff, leg, heel, and foot. Refer to these measurements to ensure that your socks fit properly.
By taking the time to thoroughly understand the pattern instructions, you can confidently knit a pair of thick socks that are warm, comfortable, and the perfect fit.
Step-by-Step Guide to Knitting a Basic Thick Sock
Knitting thick socks can be a fun and rewarding project for knitters of all skill levels. Whether you’re looking to keep your feet warm during cold winter months or want to gift a cozy pair of socks to a loved one, this step-by-step guide will help you create a basic thick sock.
Materials Needed:
- Thick wool yarn in your desired color
- Knitting needles in size suitable for your yarn
- Tape measure
- Darning needle
- Scissors
Step 1: Gauge and Measurements
Start by knitting a gauge swatch using your chosen yarn and needles. This will help ensure that your socks fit properly. Measure the number of stitches and rows per inch in your swatch to determine the correct number of stitches to cast on for your sock.
Step 2: Cast On
Using the long-tail cast on method, cast on the number of stitches determined from your gauge swatch. Make sure to leave a long tail for later use in closing the toe of the sock.
Step 3: Knit the Leg
Work in your preferred stitch pattern for the leg of the sock. This could be a simple ribbing or any other pattern of your choice. Continue knitting until the desired length is reached, keeping in mind that the sock will be thicker due to the use of thick yarn.
Step 4: Knit the Heel
When the leg is at the desired length, it’s time to shape the heel. Follow a heel flap and gusset construction or use any other preferred method for knitting the heel. This step is crucial for ensuring a comfortable fit.
Step 5: Knit the Foot
Continue knitting the foot of the sock in your chosen stitch pattern. Make sure to try on the sock periodically to check for proper fit. Remember that thick socks will have less stretch than regular socks, so make any necessary adjustments as you go.
Step 6: Toe Decreases
Once the foot is the desired length, it’s time to decrease for the toe. Follow a toe decrease pattern or use any other preferred method to shape the toe. Make sure to leave enough yarn for closing the toe.
Step 7: Bind Off and Finishing
Finally, bind off the remaining stitches and weave in any loose ends. Use the long tail from the cast on to carefully close the toe of the sock. Trim any excess yarn and give your sock a gentle blocking if desired.
Congratulations! You’ve completed your basic thick sock. Make sure to try it on and admire your handiwork. Repeat the process to create a matching pair and enjoy the warmth and comfort of your handmade socks.
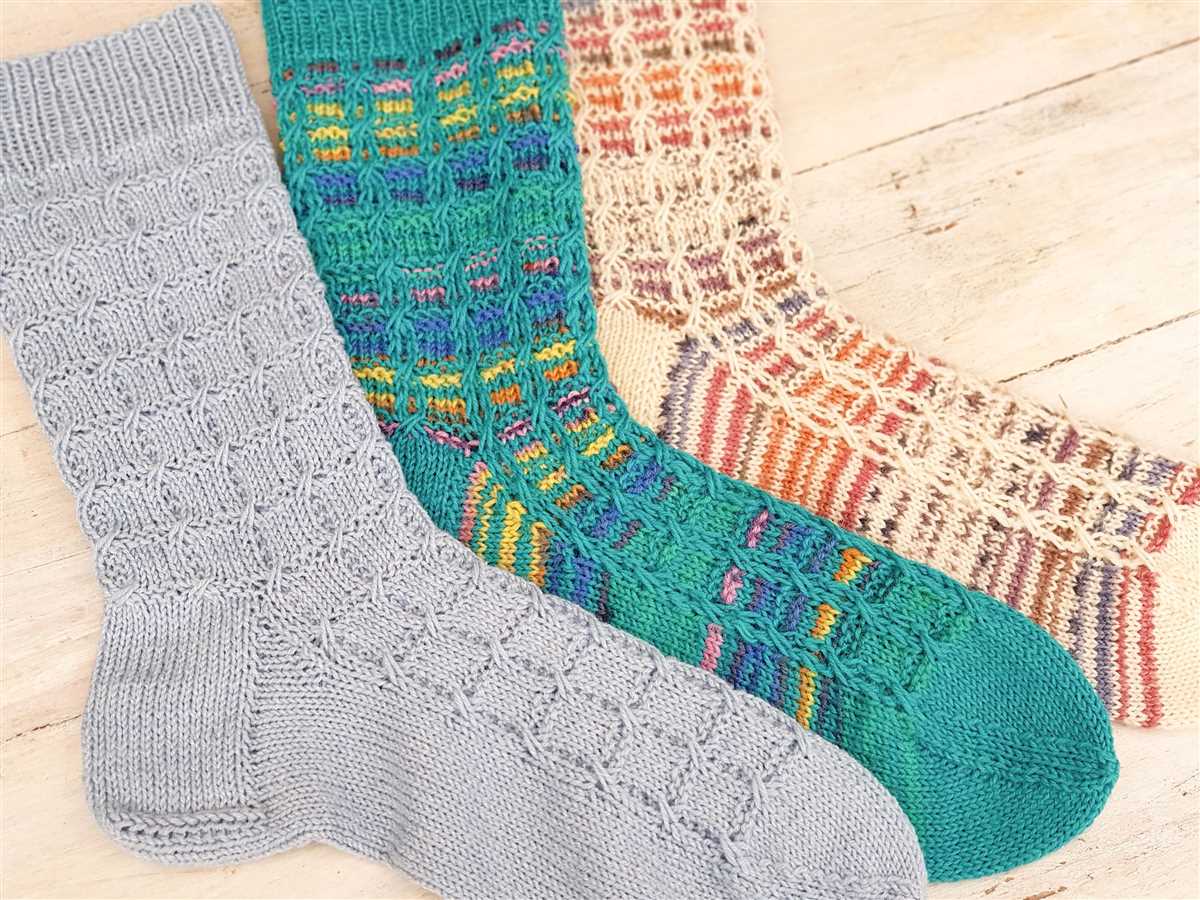
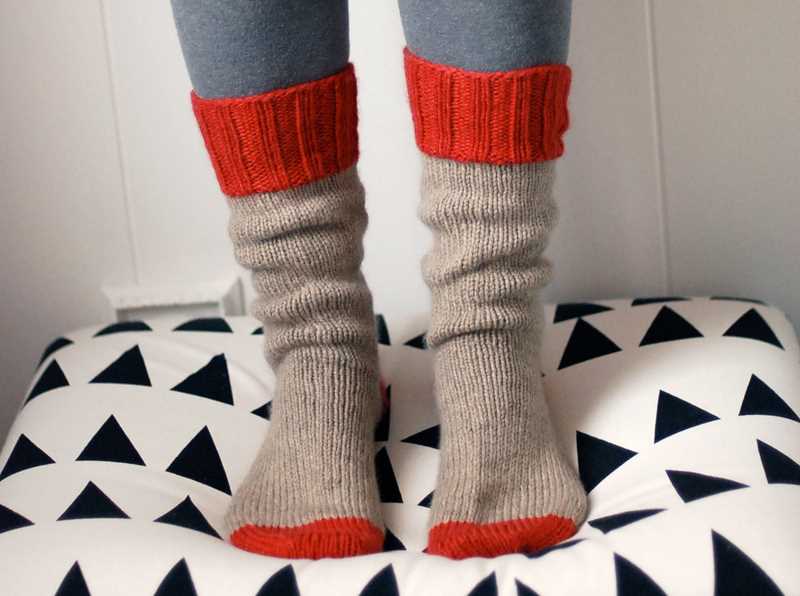
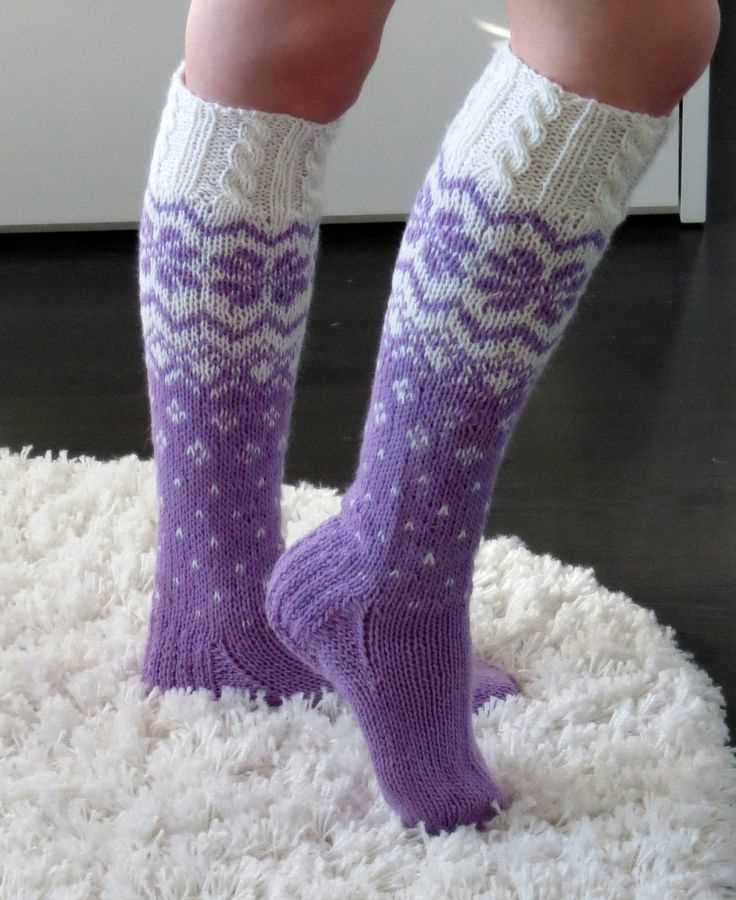
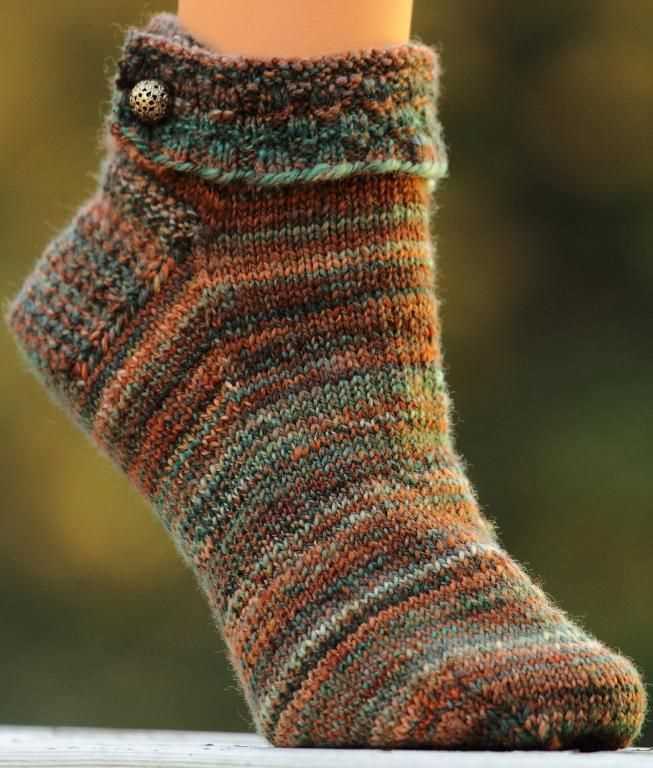
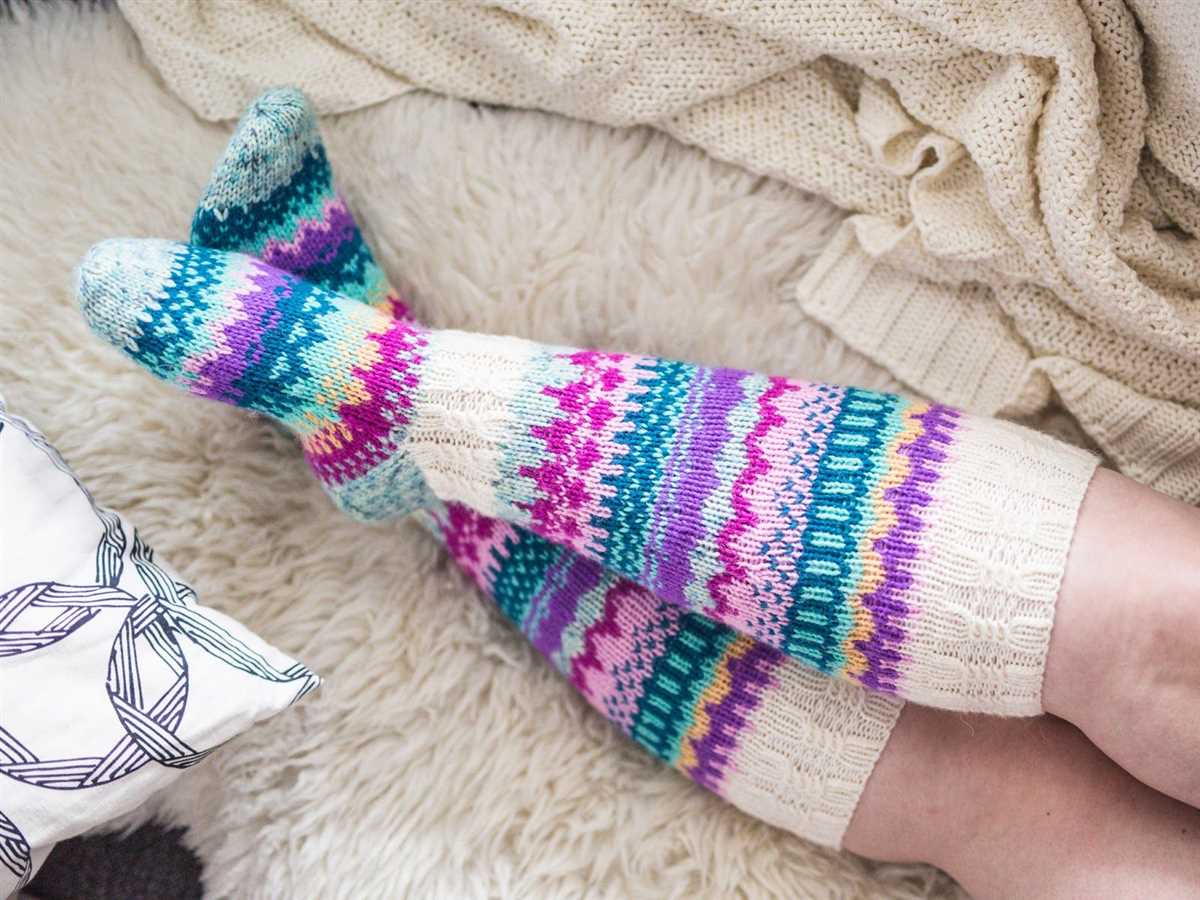
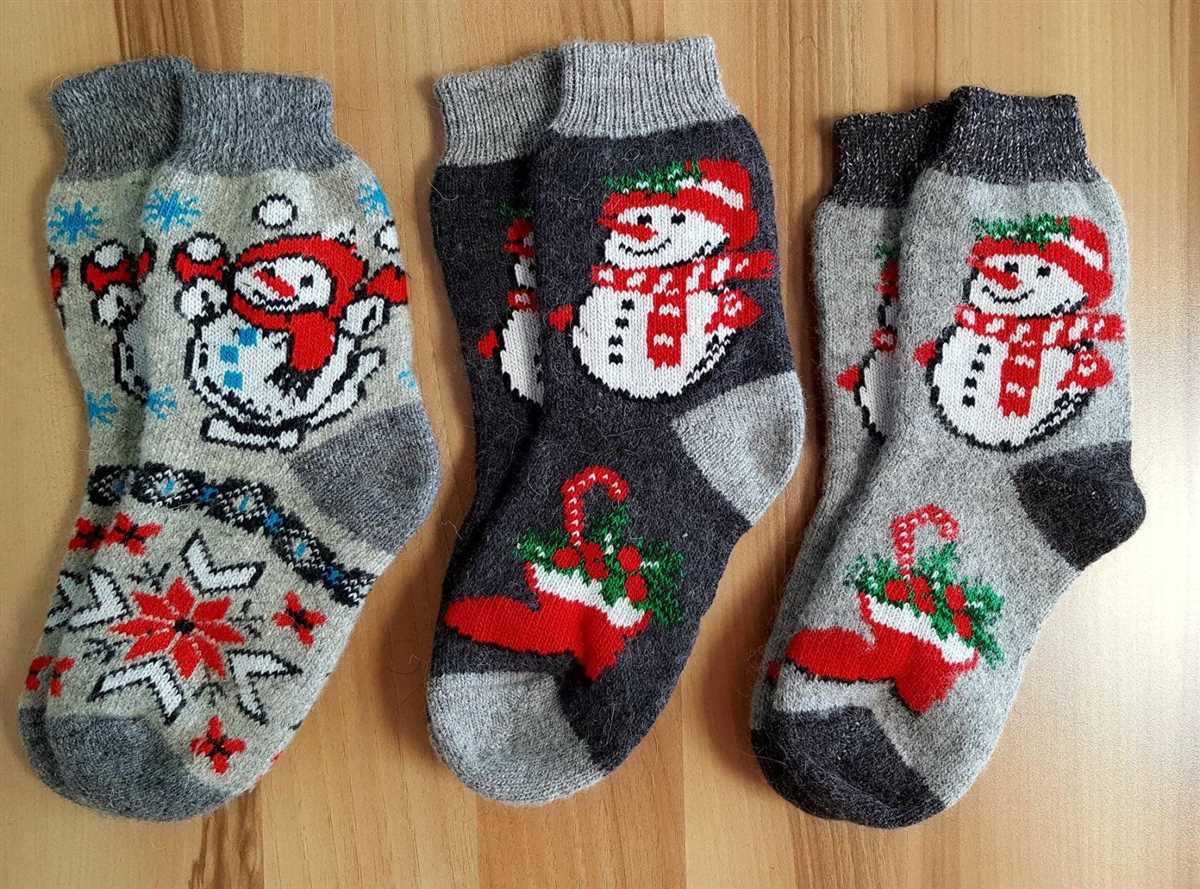
Adding Design Elements to Your Thick Sock
Knitting thick socks not only provides warmth and comfort during the colder months but also allows for creativity with design elements. Adding these design elements to your thick socks can personalize them and make them unique. Whether you are a beginner or an experienced knitter, there are several ways you can enhance your thick socks with interesting patterns and textures.
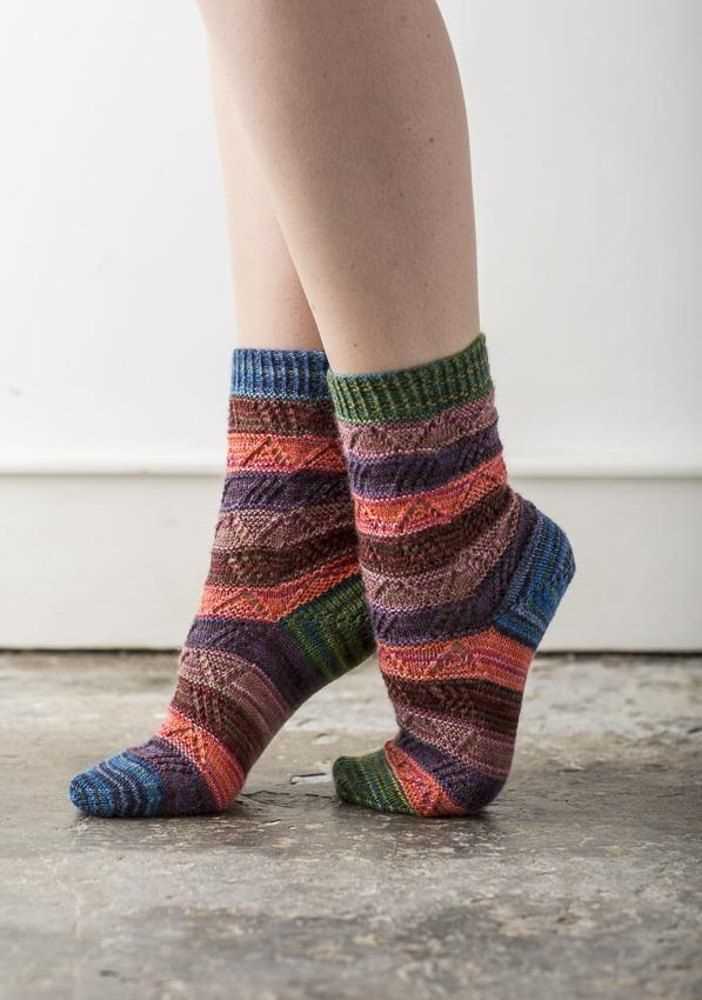
Colorwork
One way to add a design element to your thick socks is through colorwork. This technique involves using different colors of yarn to create patterns or motifs on the fabric. You can experiment with different color combinations and create beautiful geometric designs, stripes, or even intricate Fair Isle patterns. Colorwork can add visual interest to your socks and make them stand out.
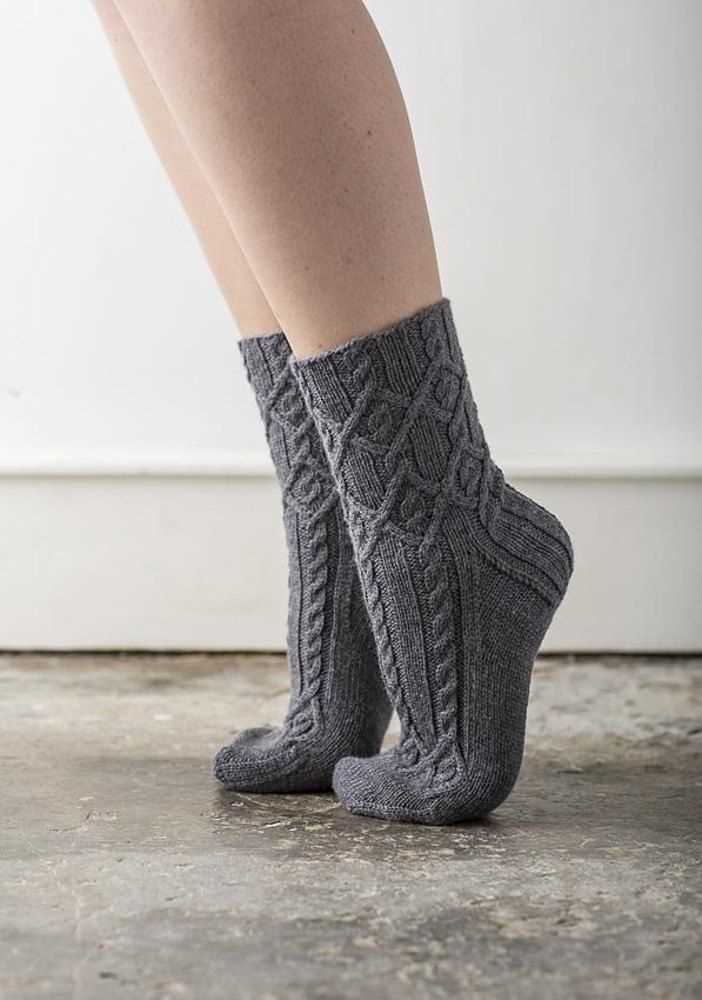
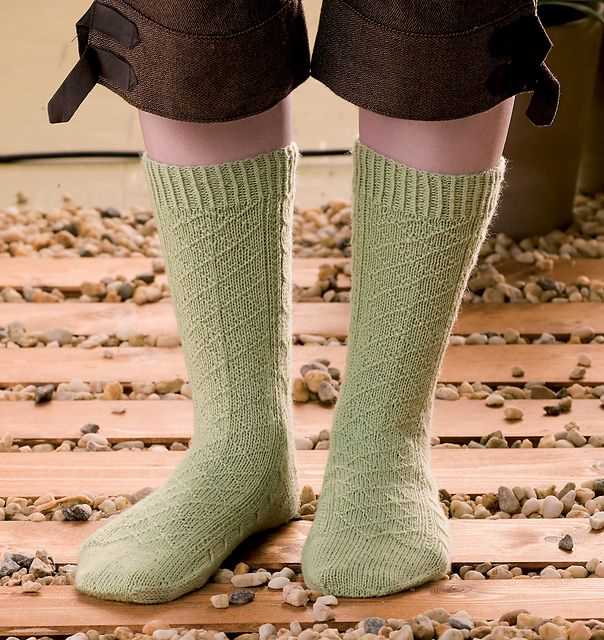
Cables
Cables are another popular design element that can be added to your thick socks. This technique involves crossing stitches over each other to create a twisted or braided effect. You can incorporate cable patterns into different sections of your socks, such as the cuff, leg, or even the foot. Cables add texture and depth to the fabric, making your socks look more intricate and visually appealing.
Lace
If you prefer a more delicate and feminine look, lace patterns can be a great addition to your thick socks. Lace involves creating patterns of holes and eyelets on the fabric, resulting in a lightweight and airy design. You can incorporate lace panels or motifs into the leg or foot of your socks, giving them a touch of elegance and sophistication. Lace patterns also provide breathability, making your socks comfortable to wear in warmer weather.
Stripes and Textures
Stripes and textures are simple yet effective design elements that can transform the appearance of your thick socks. You can alternate different colors or textures of yarn to create stripes or textured patterns on the fabric. For example, you can use a ribbed stitch pattern or a seed stitch pattern to add texture and visual interest. These design elements are versatile and can be combined with other techniques, such as colorwork or cables, to create unique and personalized thick socks.
Incorporating design elements into your thick socks allows you to showcase your knitting skills and create one-of-a-kind pieces. Whether you choose to experiment with colorwork, cables, lace, or stripes and textures, these design elements will add visual interest and make your thick socks truly special.
Incorporating Colorwork in Thick Sock Knitting
When it comes to knitting thick socks, incorporating colorwork can add an extra level of interest and design to your project. Colorwork involves using different colors of yarn to create patterns and motifs within your knitting. It can be a fun and creative way to make your socks unique and visually appealing.
One popular technique for colorwork in socks is stranded knitting, also known as Fair Isle knitting. This technique involves carrying two or more colors of yarn across the back of your work, creating a float on the wrong side of the fabric. The float is then caught every few stitches to prevent it from being too long and getting snagged. This method can add warmth and thickness to your socks, making them perfect for cold weather.
When choosing colors for your colorwork socks, it’s important to consider how they will work together. Selecting colors from the same color family or choosing contrasting colors can create different effects. Using a variegated yarn as one of the colors can also add an interesting element to your design. Experimenting with different color combinations can help you achieve the look you desire.
Another method to incorporate colorwork in thick sock knitting is by using intarsia. This technique involves knitting individual sections of color separately, so there are no floats carried across the back of the work. This method is great for creating larger and more complex designs in your socks. It requires a little more planning and yarn management, but the results can be stunning.
Whether you choose stranded knitting or intarsia, incorporating colorwork in your thick sock knitting can elevate your project to the next level. It allows you to showcase your creativity and make a statement with your socks. So grab your favorite colors and get ready to create a pair of socks that are not only warm and cozy but also visually stunning.
Using Different Stitch Patterns for Thick Sock Knitting
The choice of stitch pattern plays a crucial role in knitting thick socks. Different stitch patterns not only affect the overall look of the socks but also impact their warmth, durability, and stretchiness. By selecting the right stitch pattern, knitters can create cozy and comfortable socks that are perfect for colder climates or for those who need extra insulation.
One popular stitch pattern for thick sock knitting is the cable stitch. Cable stitches create a raised, textured pattern that adds thickness to the fabric. This makes cables an excellent choice for those who want to knit thick and warm socks. Not only do cables look visually appealing, but they also provide additional insulation and can give the socks a luxurious feel. Knitters can experiment with different cable patterns, ranging from simple twists to intricate designs, to add interest and uniqueness to their thick socks.
The Seed Stitch
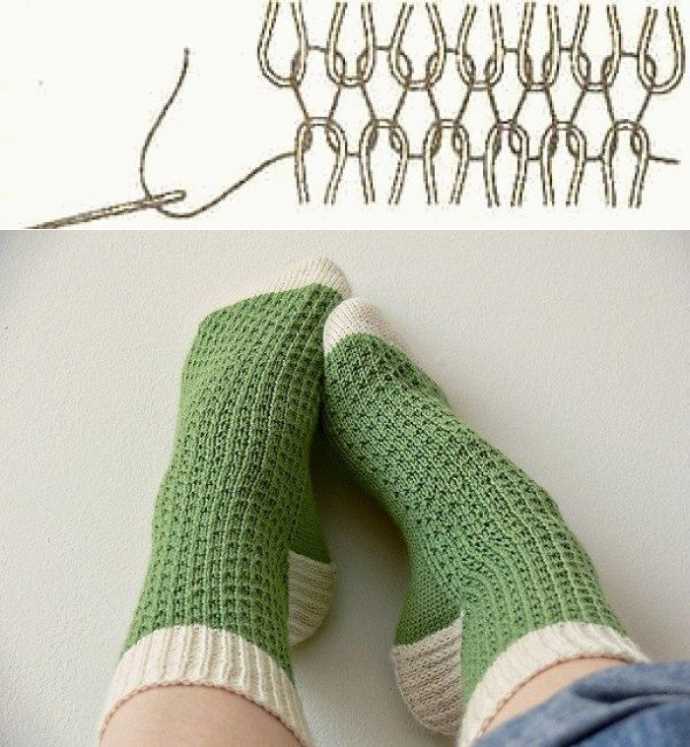
Another stitch pattern that is commonly used for knitting thick socks is the seed stitch. The seed stitch is created by alternating knit and purl stitches in a consistent pattern. This stitch pattern creates a dense and textured fabric that is excellent for chilly weather. The seed stitch gives the socks a rustic and cozy look, making them perfect for lounging around the house during colder months. Additionally, this stitch pattern has the advantage of being reversible, so the socks can be worn inside out without compromising their appearance.
The Rib Stitch
The rib stitch is a versatile stitch pattern that is often used in thick sock knitting. The rib stitch is created by alternating knit and purl stitches in a specific sequence, such as K2, P2. This stitch pattern creates a stretchy fabric that conforms to the shape of the foot, providing a snug and comfortable fit. The rib stitch is known for its excellent elasticity, making it a great choice for individuals with different foot sizes or those who prefer socks with a tight grip. Furthermore, the rib stitch adds texture to the socks, giving them a classic and timeless look.
Tips and Tricks for Perfect Thick Sock Knitting
Knitting thick socks can be a rewarding and cozy project. Whether you’re a beginner or an experienced knitter, these tips and tricks will help you achieve the perfect pair of thick socks.
1. Choose the Right Yarn: When knitting thick socks, it’s important to choose a yarn that is warm, durable, and soft. Look for yarns with a high wool content, as wool has excellent insulation properties. You can also consider blends with alpaca or cashmere for added warmth and luxury.
2. Use Appropriate Needles: To create a dense and cozy fabric, it’s recommended to use smaller needles than you would for regular sock knitting. This will help to make your stitches tighter and prevent any gaps or holes in the fabric. Experiment with different needle sizes to find the right one for your preferred tension.
3. Pay Attention to Gauge: Before starting your thick sock project, make sure to check your gauge. Thick socks tend to have a looser gauge compared to regular socks. Adjust your needle size if necessary to match the recommended gauge in your pattern. This will ensure that your socks fit well and keep your feet warm.
4. Incorporate Texture: Adding texture to your thick socks can make them even cozier. Consider using stitch patterns such as cables or ribbing to create a dense and stretchy fabric. These patterns not only enhance the insulation properties of the socks but also add visual interest.
5. Reinforce High-Wear Areas: Thick socks are often used for outdoor activities and can experience more wear and tear. To make your socks more durable, reinforce high-wear areas such as the toes and heels. You can do this by using a reinforcing stitch or knitting these areas with a double strand of yarn.
6. Experiment with Color: Thick socks are a great canvas for playing with different colors. Consider using self-striping yarn or incorporating contrasting colors to add visual appeal to your socks. Have fun and let your creativity shine!
In summary, knitting thick socks requires attention to yarn choice, needle size, gauge, texture, and reinforcement. By utilizing these tips and tricks, you’ll be able to create the perfect pair of thick socks that will keep your feet cozy and warm during the colder months.