
If you love knitting and want to try your hand at making your own bag, then this knit bag pattern straight needles is perfect for you. The beauty of using straight needles is that you don’t need to worry about the complexity of circular needles or double-pointed needles. With just a pair of straight needles and some yarn, you’ll be able to create a stylish and functional bag that you can use every day.
This pattern is great for beginners who are looking to expand their knitting skills. The simple and straightforward design allows you to focus on mastering the basic techniques while enjoying the process of creating something beautiful. Whether you’re a seasoned knitter or just starting out, this pattern is sure to challenge and inspire you.
This knit bag pattern straight needles features a classic tote bag style with a sturdy handle and a roomy interior. The pattern includes step-by-step instructions and a detailed stitch guide, making it easy for knitters of all levels to follow along. You’ll learn how to cast on, knit, purl, and bind off, as well as how to create various textures and patterns with different stitch techniques.
Knit Bag Pattern Straight Needles: A Beginner’s Guide
Are you a knitting enthusiast looking to create your own stylish and functional bag? Look no further! This beginner’s guide will walk you through the process of knitting a bag using straight needles and provide you with a simple and versatile pattern to get started.
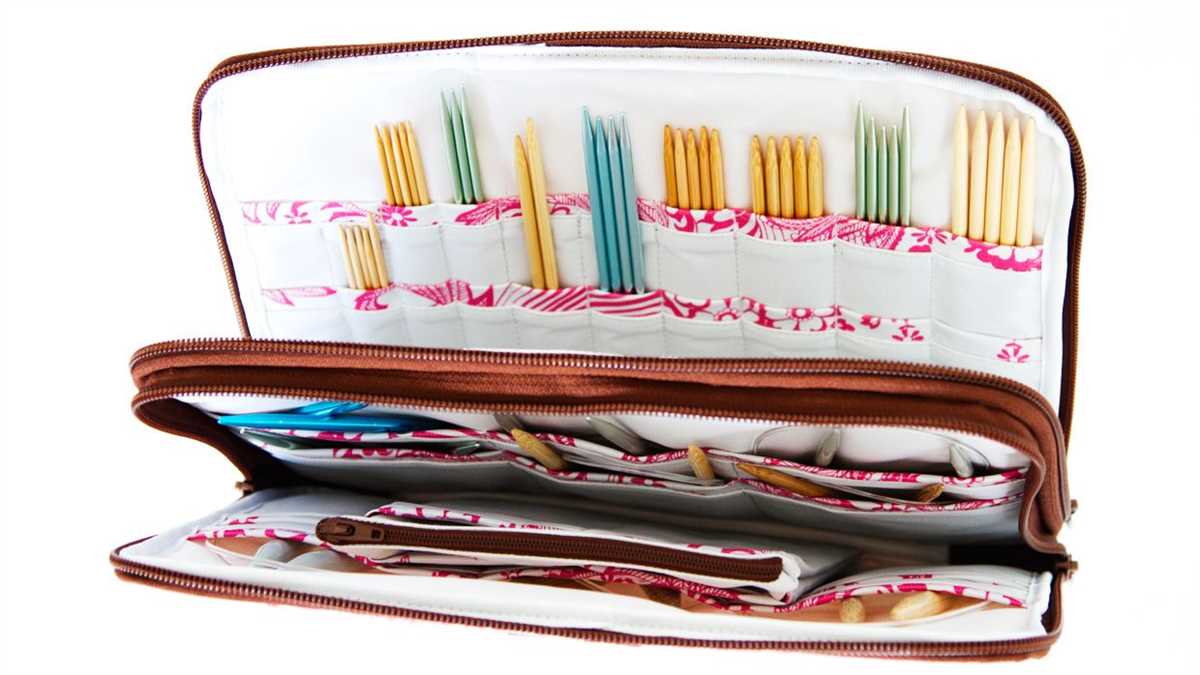
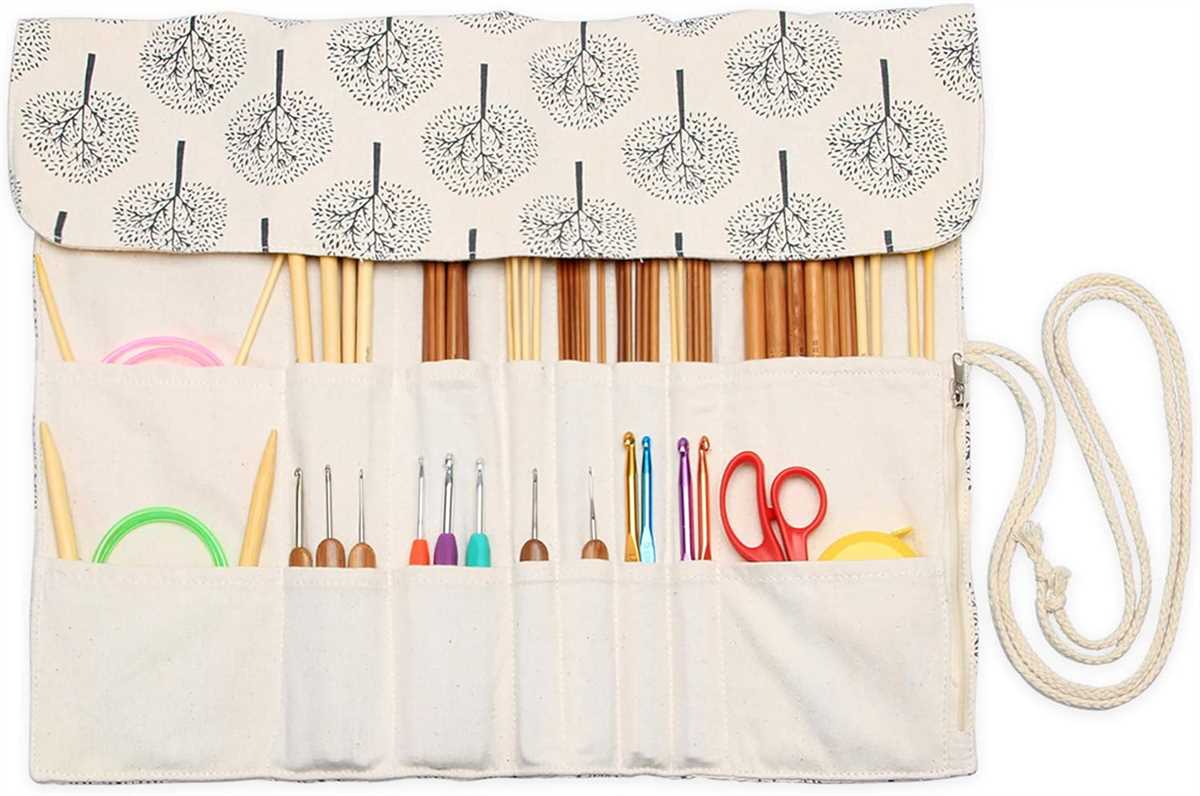
To begin, gather your materials: a pair of straight knitting needles, yarn of your choice, and a tapestry needle for finishing touches. Choose a yarn that is sturdy enough to hold the weight of your bag’s contents, but also soft and comfortable to the touch. You may want to consider using a thicker yarn for added durability.
Pattern:

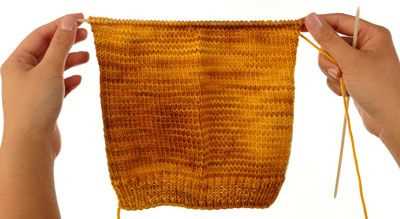
Cast on 70 stitches using your preferred cast-on method. This will serve as the base of your bag. Knit every row until the piece measures approximately 12 inches in length.
Next, it’s time to create the handles of the bag. Knit 10 stitches, bind off the next 20 stitches, and then knit the remaining 10 stitches. This will leave a gap in the middle for your bag’s handles. Continue knitting every row until the piece measures the same length as the base.
Once you have finished knitting, you can begin the finishing touches. Fold the piece in half, wrong sides together, and use the tapestry needle to stitch the sides together. Make sure to secure the handles as you sew along the sides. After sewing the sides, weave in any loose ends and trim excess yarn.
This knit bag pattern using straight needles is a great project for beginners as it allows you to practice basic knitting techniques while creating something functional and stylish. Experiment with different yarn colors and stitch patterns to make your bag uniquely yours. Happy knitting!
How to Start Knitting a Bag Using Straight Needles
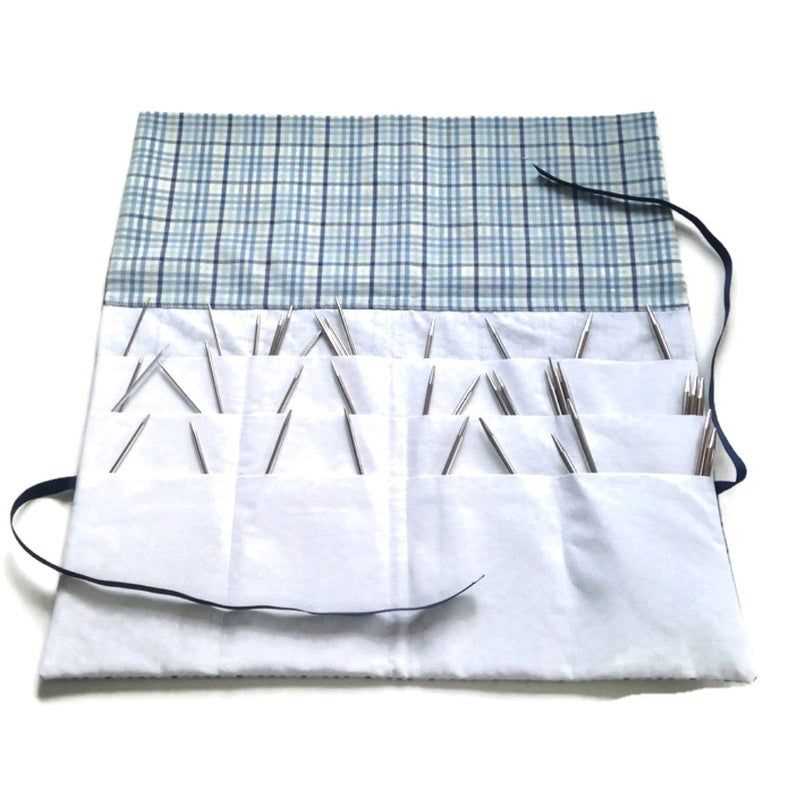
In order to start knitting a bag using straight needles, you will need to gather the necessary materials. This includes a pair of straight knitting needles, a ball of yarn in your desired color, and a yarn needle for finishing touches. Once you have everything you need, you can begin the knitting process.
Step 1: Choose a Bag Pattern
The first step is to choose a bag pattern that can be knit using straight needles. This will ensure that you can follow the pattern easily without the need for circular needles or double-pointed needles. Look for bag patterns that specify the use of straight needles or search for patterns specifically designed for straight needles.
Step 2: Cast On Stitches
The next step is to cast on the required number of stitches onto one of your straight needles. The pattern you chose will specify the exact number of stitches needed. Make sure to leave a long tail of yarn for later use. You can use the long-tail cast-on method or any other cast-on method of your choice.
Step 3: Knit Rows
Once you have cast on the stitches, you can start knitting the rows according to the pattern instructions. Typically, bag patterns will specify a combination of knit and purl stitches to create various patterns and textures. Follow the pattern instructions closely and adjust your needle size if needed to achieve the desired gauge.
Step 4: Shape the Bag
As you continue knitting the rows, the bag will start to take shape. Follow the pattern instructions for any shaping, such as increasing or decreasing stitches to create handles or pockets. Pay attention to any specific instructions for shaping and make sure to count your stitches accurately.
Step 5: Finishing Touches
Once you have completed all the rows and shaped the bag according to the pattern, it’s time for the finishing touches. Bind off your stitches using the desired method and weave in any loose ends using the yarn needle. You can also add any additional embellishments or decorations to personalize your bag.
Step 6: Assemble the Bag
Finally, it’s time to assemble your knitted bag. Fold the knitted piece in half, wrong sides together, and use the yarn needle to sew up the sides. You may also need to sew the bottom seam depending on the bag pattern. Make sure to secure any seams tightly to ensure durability.
By following these steps, you can easily start knitting a bag using straight needles. Remember to choose a pattern suitable for straight needles, cast on the required number of stitches, knit the rows according to the instructions, shape the bag, finish the knitting, and assemble the bag. With practice, you can create beautiful and functional bags using just straight needles.
Choosing the right yarn and needle size for your bag
When creating a knit bag using straight needles, it is important to select the right yarn and needle size to achieve the desired texture and drape. The yarn weight will determine the thickness and density of the bag, while the needle size will determine the stitches’ size and tension.
Firstly, consider the yarn weight suitable for your project. If you prefer a lightweight and delicate bag, opt for a lace or fingering weight yarn. These yarns will create a finer texture with more drape. For a sturdy and durable bag, choose a worsted or bulky weight yarn. These yarns will result in a thicker and more substantial fabric. Think about the bag’s purpose and the items it will carry to determine the appropriate yarn weight.
Next, decide on the needle size based on the yarn weight chosen. For lace or fingering weight yarn, use smaller needle sizes such as US 2-4 (2.75-3.5 mm). This will create tight and intricate stitches suitable for delicate designs. For worsted or bulky weight yarn, use larger needle sizes such as US 9-11 (5.5-8 mm) for a looser and more relaxed fabric. Experiment with different needle sizes to achieve the desired gauge and texture for your bag.
Remember, the yarn and needle size chosen will contribute to the finished look and feel of your knit bag. Take into account the yarn weight and needle size recommendations provided in the pattern you are using as a starting point, but feel free to adjust them according to your personal preferences and desired outcome. Enjoy the process of selecting the perfect yarn and needle size to create a beautiful and functional knit bag!
Basic knitting stitches for your bag pattern
When it comes to knitting a bag pattern using straight needles, there are a few basic stitches that you will need to know. These stitches will help you create a sturdy and functional bag that is both fashionable and practical. Let’s take a look at some of the essential stitches you should be familiar with:
1. Garter stitch
One of the most basic stitches in knitting, the garter stitch is created by knitting every row. This stitch creates a fabric that is textured and reversible, making it perfect for bag patterns. To knit in garter stitch, simply knit every stitch on every row.
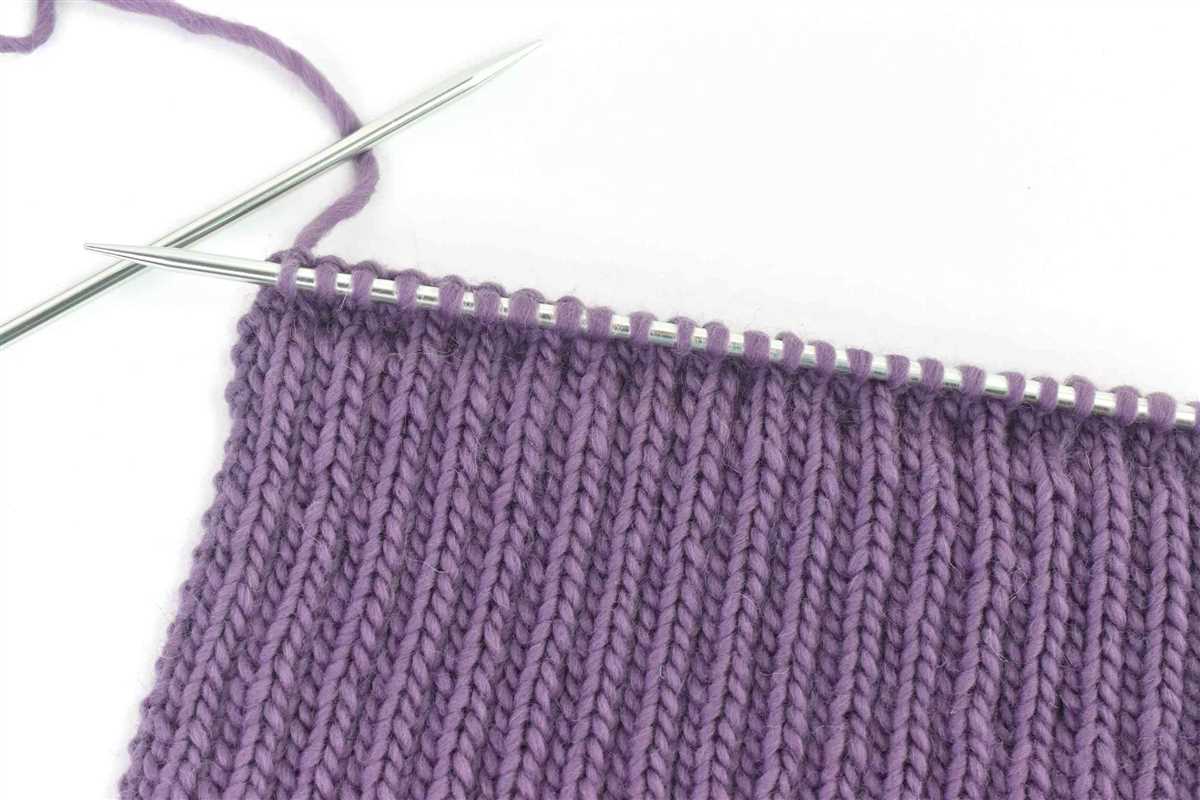
2. Stockinette stitch
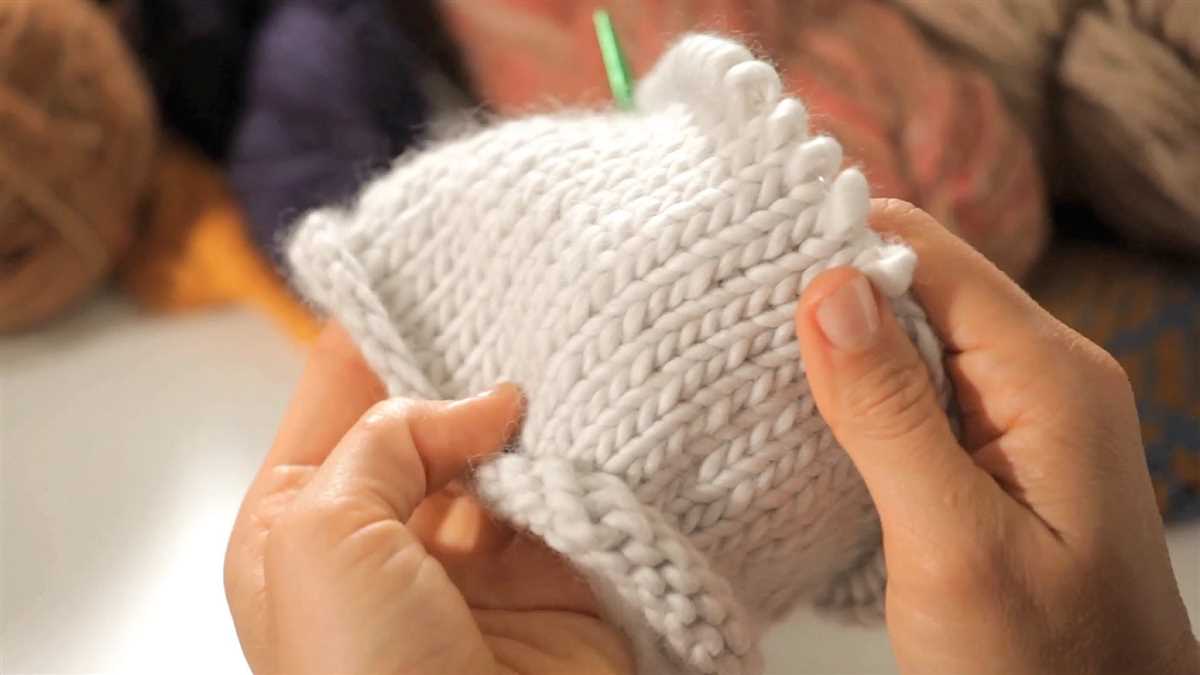
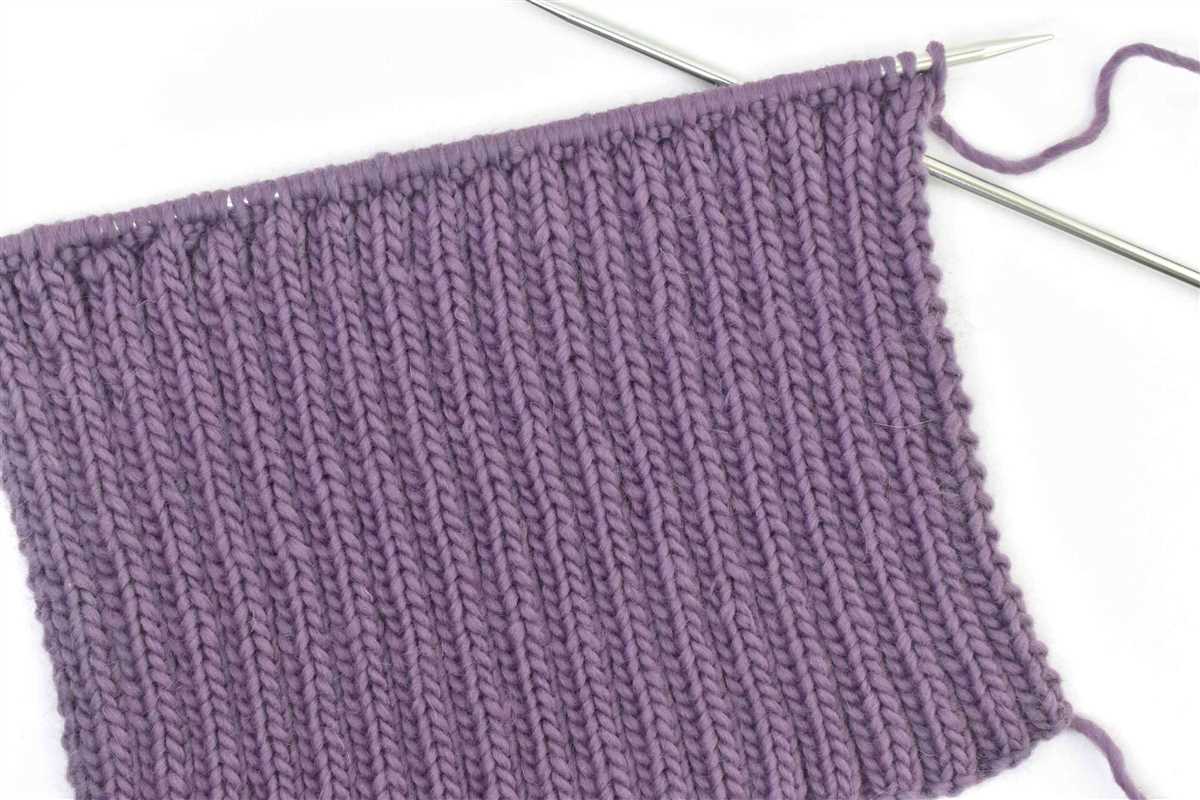
The stockinette stitch is another fundamental stitch in knitting. It is created by knitting one row and purling the next row, and repeating this pattern. The result is a smooth and even fabric with a distinct “V” pattern on one side and a bumpy texture on the other side. You can use the stockinette stitch for the body of your bag to create a sleek and polished look.
3. Rib stitch
The rib stitch is a versatile stitch that adds elasticity and texture to your bag pattern. It is commonly used for cuffs, hems, and borders. To knit in rib stitch, alternate between knitting and purling stitches in a specific pattern, such as knit 2, purl 2. This creates vertical columns of knits and purls, giving your bag a stretchy and visually interesting design.
4. Seed stitch

The seed stitch is a combination of knits and purls that creates a fabric with a rich texture. It is made by alternating between knitting and purling stitches in a specific pattern, such as knit 1, purl 1. This creates a pattern that resembles scattered seeds, hence the name. The seed stitch is great for adding interest and depth to your bag pattern.
By mastering these basic knitting stitches, you’ll be well-equipped to tackle any bag pattern using straight needles. Don’t be afraid to experiment with different stitch combinations to create a unique and personalized bag that showcases your knitting skills!
Tips for avoiding common knitting mistakes
Knitting is a popular craft that allows you to create beautiful and unique items. However, it can also be frustrating, especially if you make common mistakes. Here are some tips to help you avoid these mistakes and enjoy your knitting projects.
1. Check your gauge
One of the most common knitting mistakes is not checking your gauge before starting a project. Gauge refers to the number of stitches and rows per inch in your knitting. This measurement is crucial for ensuring that your finished item will be the correct size. Take the time to knit a gauge swatch and measure it accurately. If your gauge doesn’t match the one specified in the pattern, adjust your needle size accordingly.
2. Count your stitches regularly
Another common mistake is miscounting stitches, which can lead to uneven edges or misshapen items. To avoid this, make it a habit to count your stitches after every few rows or rounds. This will help you catch any mistakes early on and prevent them from snowballing into bigger problems. Using stitch markers can also be helpful in keeping track of your stitch count.
3. Fix mistakes as you go
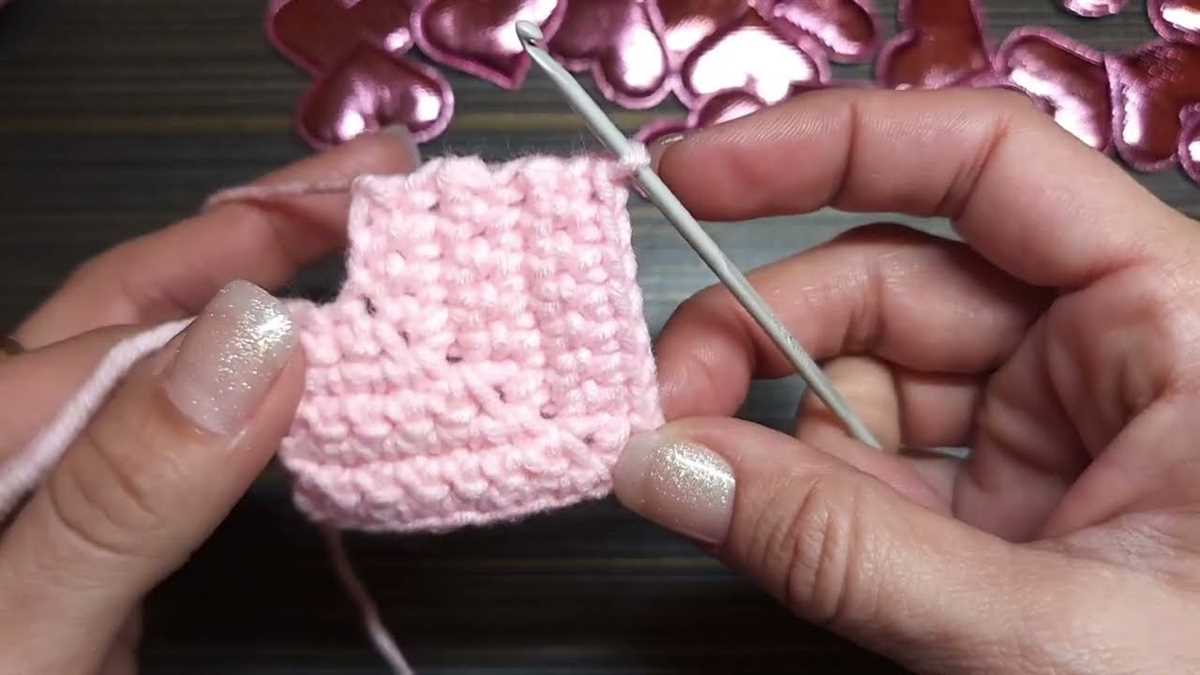
Don’t wait until the end of your project to fix mistakes. It’s much easier to correct them as you go along, especially if they involve dropped stitches or twisted stitches. Invest in a crochet hook or a knitting needle with a small point to pick up dropped stitches and fix them properly. Don’t be afraid to use lifelines, which are thin pieces of waste yarn inserted into a row and can be a lifesaver if you need to rip back.
4. Read the pattern carefully
Before you start a knitting pattern, take the time to read it carefully from beginning to end. Make sure you understand all the instructions and abbreviations used. If something is unclear, don’t hesitate to seek clarification through online resources or asking other knitters for help. Following the pattern correctly will help you avoid mistakes and achieve the desired result.
5. Practice good tension control

Consistent tension is key to producing neat and even stitches. Avoid knitting too tightly or too loosely. If your stitches are too tight, try using larger needles or loosening your grip on the yarn. If your stitches are too loose, try using smaller needles or tightening your grip. Practicing good tension control will help your finished item look more professional and polished.
Conclusion
By following these tips, you can avoid common knitting mistakes and enjoy a smoother knitting experience. Remember to check your gauge, count your stitches, fix mistakes as you go, read the pattern carefully, and practice good tension control. With practice and attention to detail, you’ll be able to create beautiful knitted items that you can be proud of.
Understanding the different types of bag patterns
When it comes to knitting bags, there are various patterns available to suit different needs and preferences. Understanding the different types of bag patterns can help you choose the right one for your project.
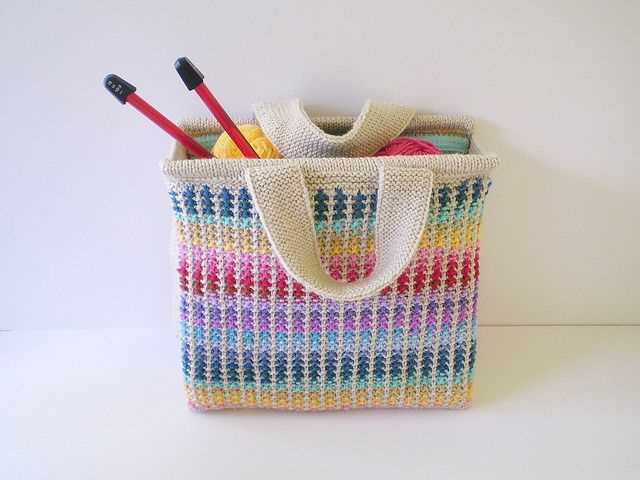
1. Tote bags: Tote bags are a popular choice for everyday use. They are typically large and spacious, with sturdy handles that can support the weight of your belongings. Tote bag patterns often include additional pockets and compartments for better organization.
2. Shoulder bags: Shoulder bags are another common type of bag pattern. These bags are designed to be worn on the shoulder, with longer straps or handles that allow for easy carrying. Shoulder bag patterns can range from small and compact to larger sizes, depending on your needs.
3. Clutch bags: Clutch bags are smaller, handheld bags that are often used for special occasions or evenings out. They are typically more decorative and stylish, with patterns that incorporate intricate stitches or embellishments. Clutch bag patterns often include instructions for adding a closure, such as a zipper or snap button.
4. Crossbody bags: Crossbody bags are designed to be worn across the body, with a longer strap that allows for hands-free carrying. These bags are often smaller and more compact, making them a convenient choice for those on the go. Crossbody bag patterns may include instructions for adjustable straps.
5. Backpacks: Backpacks are versatile bags that are ideal for carrying heavier items or for traveling. Backpack patterns often include more complex constructions, such as multiple compartments and adjustable straps. They can be knit in various sizes, from small backpacks suitable for children to larger ones for adults.
By understanding the different types of bag patterns, you can choose the one that best fits your needs and style. Whether you’re looking for a spacious tote for everyday use or a stylish clutch for a special occasion, there’s a bag pattern out there for everyone.
Adding decorative elements to your knit bag
Creating a beautiful knit bag is a great way to showcase your knitting skills and add a personal touch to your accessory. One way to make your bag stand out is by adding decorative elements. These elements can enhance the overall design and make your bag unique and eye-catching.
1. Embroidery: One popular way to add decorative elements to a knit bag is through embroidery. You can use different colored yarns to create intricate designs on the bag’s surface. This can include floral patterns, geometric shapes, or even personalized monograms. Embroidery adds a touch of elegance and can turn a simple bag into a work of art.
2. Appliques: Another way to add decorative elements is by incorporating appliques. These are small decorative pieces that can be sewn or glued onto the bag’s fabric. Appliques can be made from various materials such as fabric, beads, or buttons. They can come in the form of flowers, animals, or any other design that suits your style. Appliques add texture and dimension to the bag, giving it a unique and playful look.
- 3. Pompoms: Pompoms are a fun and whimsical way to add a decorative touch to your knit bag. You can make pompoms using yarn in different colors and sizes. Attach them to the bag’s surface using a needle and thread. Pompoms add a playful and cheerful vibe to the bag, making it a standout accessory.
- 4. Beads and sequins: If you want to add some sparkle to your knit bag, consider using beads and sequins. These embellishments can be sewn onto the bag’s fabric, creating a shimmering effect. You can opt for a subtle touch of sparkle or go all out with an intricate beaded design. Beads and sequins add a glamorous and sophisticated touch to the bag.
- 5. Lace: Adding a lace trim or panel to your knit bag can instantly give it a delicate and romantic feel. You can knit or crochet the lace using a fine yarn and then attach it to the bag’s edges or create a separate lace panel to sew onto the fabric. Lace adds a touch of femininity and elegance to the bag, making it perfect for special occasions.
Adding decorative elements to your knit bag allows you to express your creativity and create a personalized accessory that reflects your style. Whether you choose to embroider, applique, add pompoms, use beads and sequins, or incorporate lace, these elements will enhance the overall design and make your bag truly unique.
Finishing touches: weaving in ends and blocking your bag
Weaving in ends and blocking your knit bag are the final steps to complete your project and make it look polished and professional. After you have finished knitting your bag, you will have loose ends of yarn that need to be secured and hidden. Weaving in ends is the process of threading the ends of yarn through your stitches to secure them, so they don’t unravel. It is essential to weave in your ends properly to ensure that your bag stays intact and doesn’t come apart.
To weave in ends, take a tapestry needle and thread the loose end of yarn through its eye. Starting from the wrong side of your work, insert the needle under several stitches, following the same path as the direction of the stitches. Make sure to go back and forth a few times to secure the end properly. Then, trim any excess yarn close to the fabric to ensure a clean finish.
After weaving in ends, you may want to consider blocking your bag to give it a more professional look. Blocking is the process of shaping and drying your knitted item to improve its appearance and even out the stitches. It can help remove any uneven tension, smooth out the fabric, and enhance the drape and shape of the bag.
To block your bag, you will need a clean towel or blocking mat, some rustproof pins, and water. Wet your bag with lukewarm water, being careful not to agitate or wring it. Gently squeeze out any excess water and lay the bag flat on the towel or blocking mat. Use the rustproof pins to shape the bag, pulling it gently to achieve the desired dimensions. Allow the bag to dry completely before removing the pins.
By weaving in ends and blocking your knit bag, you can elevate the overall look and finish of your project. These finishing touches can make a significant difference and ensure that your bag looks professional, neat, and ready for use or gifting.
Alternative techniques for joining seams and handles
When it comes to knitting bags with straight needles, there are various techniques you can use to join seams and attach handles. These techniques can add structure and durability to your bag, ensuring that it holds up well over time. Whether you prefer a seamless finish or a more decorative look, there is an alternative technique that can suit your needs.
1. Mattress stitch: This is a popular technique for joining side seams and creating an invisible finish. With mattress stitch, you sew the edges of the knitted pieces together using a tapestry needle, creating a seamless join. It is important to carefully match the stitches on both sides of the seam to ensure a neat and even finish. This technique works well for both straight and curved seams.
2. Whip stitch: If you prefer a more visible seam, whip stitch can be a great option. With whip stitch, you simply sew the edges of the knitted pieces together using a tapestry needle and a contrasting yarn. This technique creates a decorative effect and adds a unique touch to your bag. It is important to make sure that your stitches are tight and even for a polished look.
3. Crochet seam: If you have basic crochet skills, you can use a crochet hook to join seams and attach handles. To create a crochet seam, you insert the hook into the stitches along the edge of the knitted pieces and make crochet stitches to join them together. This technique can add a decorative touch to your bag and is particularly useful for attaching handles.
4. Knitted seams: For a truly seamless finish, you can use the technique of knitting seams. With this method, you use the same yarn and needle to knit the pieces together, creating a continuous fabric. This technique works well for joining side seams and can give your bag a clean and polished look. It is important to keep your tension consistent throughout to ensure an even finish.
5. Garter stitch selvedge: When it comes to attaching handles, using a garter stitch selvedge can provide added strength and stability. To create a garter stitch selvedge, you simply knit the first and last few stitches of each row in garter stitch. This creates a ridge along the edge, which can then be used as a stable point for attaching handles. This technique works especially well for bags with heavier contents.
By exploring these alternative techniques for joining seams and handles, you can elevate the construction of your knit bag. Whether you prefer an invisible finish or a decorative touch, there is a technique that can suit your style and enhance the durability of your bag.
Exploring different knitting pattern variations
Knitting patterns offer a wonderful opportunity for creativity and experimentation. With a basic pattern, you can explore various variations and create unique and personalized designs. Whether you are a beginner or an experienced knitter, trying different pattern variations can add excitement and interest to your knitting projects.
One way to explore different knitting pattern variations is by experimenting with different stitches. Instead of sticking to the traditional stockinette stitch, you can try patterns that incorporate lace, cables, or colorwork. Lace patterns can add a delicate and feminine touch to your knitted items, while cables can create a textured and cozy look. Colorwork patterns, such as Fair Isle or intarsia, allow you to play with different colors and create beautiful designs.
1. Lace patterns
Lace patterns are often associated with delicate and intricate designs. From simple eyelet stitches to more complex lace motifs, there are endless possibilities to explore. Lace patterns can be used to create beautiful shawls, scarves, or even decorative elements on sweaters or cardigans. By varying the size and placement of the lace motifs, you can create different effects and customize your knitted items.
2. Cable patterns
Cables are another popular knitting technique that adds texture and interest to your projects. By crossing stitches over each other, you can create twisted and intertwined cables. The size and complexity of cable patterns can vary, from simple one-over-one cables to more intricate designs with multiple strands. Cable patterns are commonly used in garments like sweaters, hats, and socks, but can also be incorporated into bags or accessories.
3. Colorwork patterns
Colorwork patterns involve using different colors of yarn to create unique designs. Fair Isle and intarsia are two common techniques used in colorwork knitting. Fair Isle involves knitting with two or more colors in a single row, creating a pattern on the right side of the fabric. Intarsia, on the other hand, involves knitting with separate bobbins of yarn to create distinct color blocks. Colorwork patterns can be used in a variety of projects, from sweaters and hats to bags and home decor.
By exploring different knitting pattern variations, you can expand your skills and create one-of-a-kind knitted items. Whether you choose to experiment with lace, cables, or colorwork, the possibilities are endless. Don’t be afraid to try new techniques and see where your creativity takes you!
Popular Knit Bag Design Ideas for Inspiration
Looking for some knitting inspiration for your next bag project? Look no further! We have compiled a list of popular knit bag designs that are sure to inspire your creativity. Whether you prefer a simple and classic design or a more intricate and detailed pattern, there is something for everyone in this collection.
1. Striped Tote Bag: A simple yet stylish design, a striped tote bag is a versatile and functional accessory. You can choose contrasting colors or stick to a monochromatic palette for a more subtle look. Knit it in a durable yarn to ensure it can carry all your essentials with ease.
2. Cable Knit Shoulder Bag: Add some texture to your bag with a cable knit design. This classic pattern never goes out of style and gives your bag a sophisticated and timeless look. Opt for a neutral color like cream or gray to highlight the intricate cable stitch pattern.
3. Colorblock Backpack: For a fun and modern twist, try knitting a colorblock backpack. This design allows you to experiment with different colors and create a bold and eye-catching accessory. Use a sturdy yarn and add adjustable straps for added functionality.
4. Lace Market Bag: If you prefer a more delicate and feminine design, a lace market bag is the perfect choice. Knit in a lacy stitch pattern, this bag is both elegant and practical. It’s ideal for carrying your farmers market finds or as a stylish everyday bag.
5. Geometric Print Clutch: Create a statement accessory with a geometric print clutch. This design is perfect for showcasing your knitting skills with its intricate colorwork pattern. Choose vibrant and contrasting colors to make the geometric shapes pop.
These are just a few ideas to get you started on your knit bag journey. Remember to choose a pattern that matches your skill level and personal style. With so many options available, you’re sure to find the perfect knit bag design to inspire your creativity. Happy knitting!
Final thoughts and next steps
Knitting a bag pattern using straight needles can be a fulfilling and enjoyable project. With the simplicity of straight needles, you can create a stylish and functional bag that showcases your knitting skills. Whether you choose to make a simple tote or a more intricate design, the possibilities are endless.
Throughout this article, we have explored various bag patterns that can be made using straight needles. From basic garter stitch to more intricate cable and lace designs, there is something for everyone. With the step-by-step instructions and helpful tips provided, you can confidently tackle these projects and add some hand-knit bags to your collection.
- Choose a bag pattern that suits your skill level and personal style.
- Gather the necessary materials, including yarn and straight needles.
- Start knitting following the pattern instructions, being mindful of any shaping or stitch variations.
- Take your time and enjoy the process of creating a unique bag.
- Don’t be afraid to experiment with different colors, yarn weights, and stitch patterns to make the design your own.
- Finish off your bag with any desired embellishments or closures.
Remember, knitting is a versatile and creative hobby, and making bags on straight needles is just one of the many possibilities. Once you have mastered these patterns, you might consider branching out to other knitting projects such as hats, scarves, or sweaters. The key is to keep challenging yourself and exploring new techniques.
So, grab your straight needles, choose a bag pattern, and let the knitting adventure begin!
Q&A:
Can I knit a bag using straight needles?
Yes, you can knit a bag using straight needles. There are many patterns available that are specifically designed for knitting bags using straight needles.
Where can I find knit bag patterns for straight needles?
You can find knit bag patterns for straight needles in various places, such as knitting books, magazines, and websites. Online platforms like Ravelry and Pinterest also have a wide selection of free and paid bag patterns that can be knit using straight needles.
Are knit bags made with straight needles as sturdy as those made with circular needles?
Knit bags made with straight needles can be just as sturdy as those made with circular needles, depending on the yarn and stitch patterns used. However, bags made with circular needles may have fewer seams and a more even distribution of weight, which can contribute to their overall sturdiness.
What are the advantages of using straight needles to knit a bag?
Using straight needles to knit a bag offers a few advantages. First, straight needles are widely available and familiar to most knitters. Second, they can be easier to handle and manipulate, especially for beginners. Lastly, knitting with straight needles allows you to work on a smaller section of the bag at a time, making it more portable and convenient for knitting on-the-go.
Can I modify a circular needle bag pattern to use straight needles?
Yes, it is possible to modify a circular needle bag pattern to use straight needles. However, you may need to adjust the stitch count and make other modifications to accommodate the different knitting technique. It is important to carefully review the pattern and consider the differences in construction before making any modifications.
Can I knit a bag using straight needles?
Yes, you can knit a bag using straight needles. While most bag patterns are written for circular needles, it is possible to adapt them to straight needles. You may just need to sew the seams together at the end instead of using a circular needle for seamless knitting.