
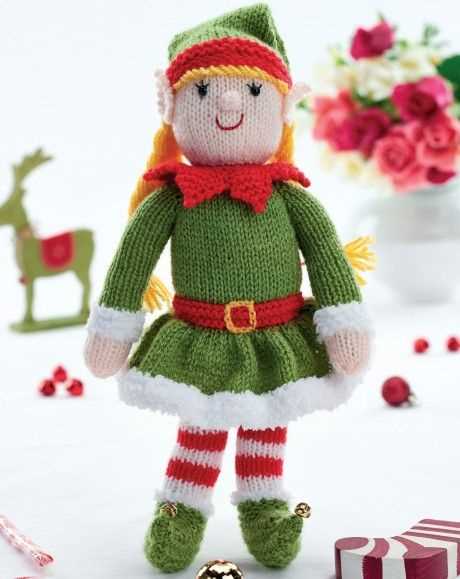
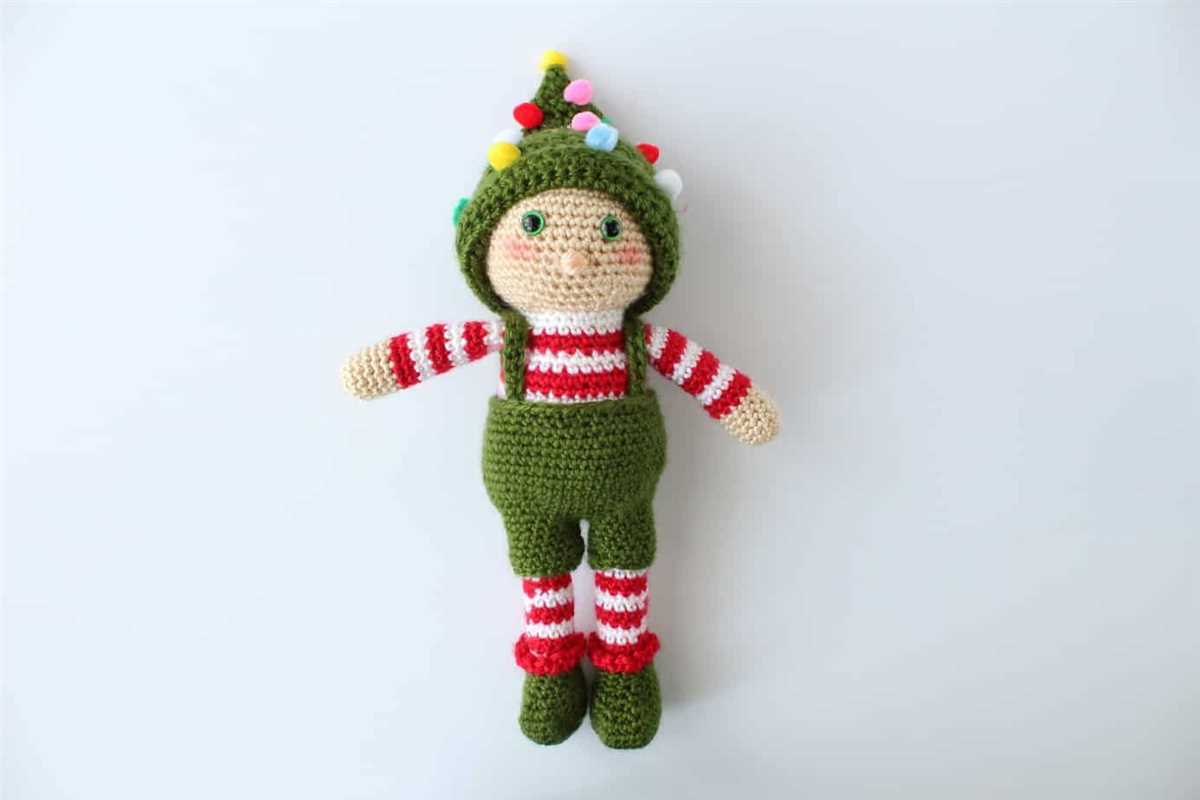
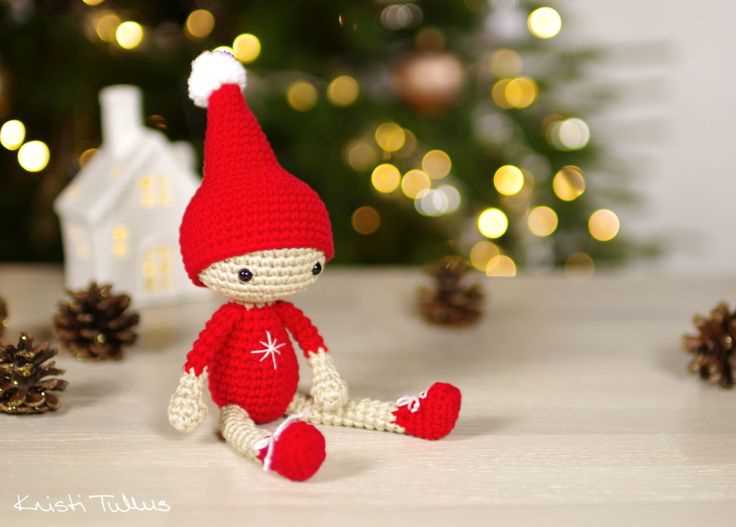
Get into the holiday spirit and create your very own festive decorations with this free knitting pattern for a Christmas elf. These adorable little creatures are a perfect addition to any home during the holiday season. Whether you want to knit them as ornaments for your Christmas tree or as cute little gifts for your loved ones, this pattern will guide you through the process step by step.
The beauty of this knitting pattern is that it is suitable for both beginner and experienced knitters. Even if you’re new to knitting, you can easily follow the clear instructions and create your own holiday magic. The pattern includes detailed explanations of all the stitches used, as well as a list of materials needed.
With this free knitting pattern, you can let your creativity shine and customize your Christmas elves to your liking. You can choose different colors of yarn to create elves with different outfits, or add your own special touches such as buttons or ribbons. The possibilities are endless, and the result will be a charming and unique Christmas decoration that you can cherish for years to come.
Materials Needed:
1. Yarn: You will need green, red, and white yarn for this knitting project. It is recommended to use a medium weight yarn (worsted or aran) for the body and a light weight yarn (fingering or sport) for the details.
2. Knitting needles: You will need a set of double-pointed knitting needles in size US 5 (3.75mm) for the body and size US 2 (2.75mm) for the details. Alternatively, you can use circular needles if you prefer magic loop or two circulars method.
3. Stitch markers: It is helpful to have stitch markers to keep track of your rounds and to mark specific stitches for the details.
4. Yarn needle: A yarn needle with a large eye is essential for weaving in ends and sewing any parts together.
5. Fiberfill stuffing: You will need fiberfill stuffing to stuff the body, arms, and legs of the xmas elf.
6. Scissors: A pair of scissors is necessary for cutting the yarn and trimming any excess.
7. Embroidery floss: You will need embroidery floss in various colors to embroider the facial features and other details on the xmas elf.
8. Optional accessories: If desired, you can also gather additional materials such as small bells, ribbon, or buttons to embellish the elf.
With these materials ready, you are now prepared to start knitting your very own xmas elf. Enjoy the process and have fun creating your festive holiday decoration!
Elf Body
The body of the Christmas elf is an essential part of the overall design. It provides the foundation for the rest of the elf’s attire, ensuring a sturdy and well-formed figure. To create the body, you will need to follow a specific knitting pattern that includes the necessary techniques and measurements.
Pattern: Start by casting on the required number of stitches, usually around 40-50, depending on the desired size of the elf. Knit in the round using circular needles, as this will allow you to seamlessly join the body later on.
Materials:
- Knitting needles (appropriate size for the yarn)
- Yarn (choose a festive color such as red, green, or white)
- Circular knitting needles
- Stitch markers
- Tapestry needle
Consider using a soft and stretchy yarn that will give the elf a plush and huggable feel. Once you have completed knitting the required number of rounds, you can start shaping the body by decreasing stitches in a regular pattern. This will give the elf a tapered shape, narrowing towards the top.
Note: A helpful tip is to stuff the body as you go along to ensure even distribution and eliminate any lumpy or uneven sections. This can be done using polyester filling or other suitable stuffing materials.
Remember to leave an opening at the bottom of the body for stuffing and later attaching the legs. Once the body is complete, it can be embellished with additional details such as a belt or bows to give it a festive touch.
Legs
In knitting a Christmas elf, the legs play a vital role in creating the unique character of the little creature. The legs are typically knitted separately and then attached to the body. This allows for greater flexibility in positioning and styling the legs.
When it comes to the pattern for the legs, there are various options to consider. One popular choice is to use a simple stockinette stitch to create a smooth and even texture. Another option is to incorporate different stitch patterns or colorwork to add visual interest to the legs.
Materials:
- Knitting needles (appropriate size for yarn weight)
- Yarn in desired colors
- Tapestry needle
- Scissors
Instructions:
- Cast on the desired number of stitches for the leg. This will depend on the size of your elf and the thickness of your yarn.
- Work in the chosen stitch pattern until the leg reaches the desired length. This can vary depending on the proportions of your elf.
- Bind off the stitches and cut the yarn, leaving a tail for sewing.
- Repeat the above steps to create the second leg.
- Attach the legs to the body of the elf using the tapestry needle and the yarn tail. Make sure to position the legs evenly and securely.
With these instructions, you can easily create adorable legs for your Christmas elf. Feel free to customize the pattern and experiment with different stitch patterns and color combinations to make your elf truly unique!
Arms
When knitting an xmas elf, the arms are an important element to bring the toy to life. The arms can be knit separately and then sewn onto the body, or they can be knit as part of the body by picking up stitches along the sides.
Option 1: Knitting separate arms
For this option, you will need to cast on stitches and knit a rectangular piece for each arm. The number of stitches will depend on how long you want the arms to be. Once the pieces are knit, you can fold them in half and sew the edges together, leaving a small opening for stuffing. After stuffing the arms, you can sew them onto the body using a whip stitch.
Option 2: Knitting arms as part of the body
If you prefer to knit the arms as part of the body, you can start by knitting the body up to the point where the arms should be attached. Then, you can pick up stitches along the sides of the body using the same color yarn. Knit a few rows in a smaller size needle to create the hands, and then continue knitting in the larger size needle for the length of the arms. Once the arms are the desired length, you can cast off the stitches and repeat the process on the other side of the body. Make sure to stuff the arms lightly before closing them off.
To add more details to the arms, you can use different colors for the hands or even knit small fingers by working with multiple stitches on the smaller needles. You can also embroider or sew on small buttons or beads for added decoration.
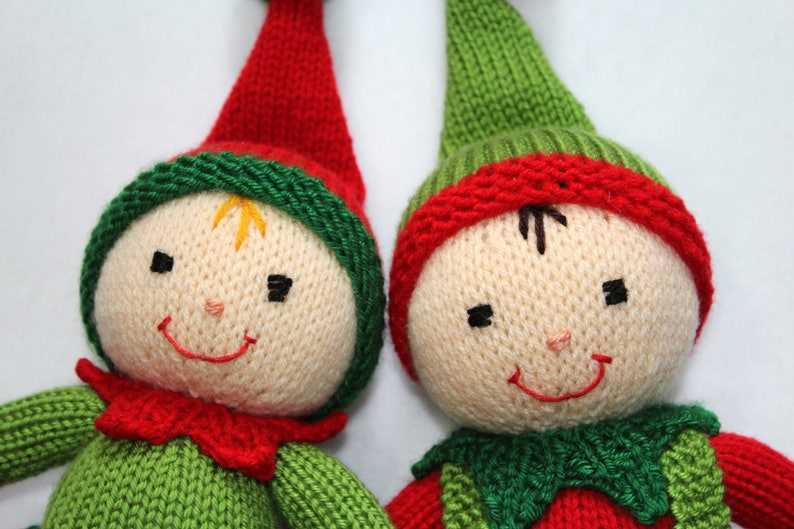
Head
The head is an essential part of knitting an Xmas elf. It is where you start creating the character’s face, and it sets the tone for the rest of the pattern. When knitting the head, it’s important to pay attention to the details to ensure that the elf will have a jolly and festive appearance.
To start knitting the head, cast on the required number of stitches using the specified yarn and needle size. It’s recommended to use a lighter color yarn for the head to create a contrast with the rest of the body. Once the stitches are cast on, begin working in rounds, knitting every stitch until the desired length is reached.
As you knit the head, keep in mind that it should be slightly larger than the body to give it a whimsical and exaggerated look. To achieve this, you can gradually increase the number of stitches in each round. This will create a subtle tapering effect and give the head a more rounded shape.
When the head is complete, you can start adding the facial features. This is where you can get creative and give your Xmas elf a unique personality. Use embroidery techniques to stitch on the eyes, nose, and mouth. You can also add rosy cheeks by lightly brushing on some blush or using blush-colored yarn to embroider the cheeks.
- Start by stitching or embroidering the eyes. You can use black or colored yarn for a playful touch.
- Add a small nose using a different color yarn or felt.
- Finally, create the mouth using embroidery thread or yarn.
Remember, the head is the focal point of the Xmas elf, so take your time and enjoy the process of creating a cheerful and festive face. Once the head is complete, you can continue knitting the rest of the elf’s body, arms, legs, and hat, following the pattern instructions.
The Hat – A Must-Have Accessory for Your Xmas Elf
When it comes to dressing up your Xmas elf, the hat is an absolute must-have accessory. Not only does it add a touch of festive flair to their outfit, but it also helps to complete the overall elf look. Whether you’re making an elf costume for yourself or for someone special, don’t forget to include a cute and cozy hat!
Choosing the Right Hat
When choosing a hat for your Xmas elf, there are a few key things to consider. First and foremost, it’s important to select a hat that is the right size for your elf’s head. You don’t want it to be too tight or too loose, as it may not stay in place properly. Additionally, you’ll want to choose a hat that matches the overall color scheme and style of your elf’s outfit. Whether you opt for a classic red and green hat or something more whimsical, make sure it complements the rest of the ensemble.
Making Your Own Elf Hat
If you’re feeling crafty, why not make your own elf hat? There are plenty of free knitting patterns available online that can guide you through the process, even if you’re a beginner. With just a few basic knitting stitches, you can create a personalized elf hat that perfectly fits your Xmas elf. If you prefer sewing, you can also find patterns for elf hats that can be made using felt or other fabric materials. Get creative and have fun with the design, adding embellishments like bells or pom-poms for an extra festive touch.
Accessorizing the Hat
To make your Xmas elf hat even more special, consider adding some unique accessories. This could include a miniature Santa hat perched on top, a small sprig of holly or mistletoe, or even a tiny candy cane tucked into the brim. These little touches can take your elf’s hat from cute to absolutely enchanting. Remember, it’s all in the details!
Face
The face is an essential part of the Christmas elf knitting pattern. Adding facial features to your knitted elf will give it personality and bring it to life. There are several ways to create the face, depending on your preference and skill level.
Embroidered Face: One option is to embroider the facial features onto the elf’s head using a tapestry needle and yarn. Start by creating the eyes with small stitches, using a contrasting color yarn. You can make them simple dots or more detailed shapes. Then, embroider the nose and mouth using the same technique. The advantage of this method is that it allows you to customize the expression and style of your elf’s face.
Buttons
Another popular option for the elf’s face is to use buttons. Choose buttons in different sizes and colors to create the eyes and nose of the elf. Sew the buttons onto the elf’s face securely, using a needle and thread that matches the color of the yarn. You can arrange the buttons to create different expressions and play around with their positioning until you’re happy with the result. Make sure to secure the buttons tightly to avoid them coming off during play or handling.
Yarn Embellishments
If you prefer a more minimalist or child-friendly approach, you can use yarn embellishments to create the face of your knitted elf. Cut small pieces of yarn in different colors to represent the eyes, nose, and mouth. Attach them to the elf’s face by sewing them onto the knitted fabric with a needle and thread. This method allows for a softer and safer facial feature, as there are no small pieces that could come off and pose a choking hazard.
Whichever method you choose, take your time to carefully create the face of your knitted elf. It’s the detail that will make your creation truly unique and special. Experiment with different expressions and styles to give your elf its own personality. Have fun and let your creativity shine!
Hair
When making an xmas elf, one of the most important details is the hair. The hair of the elf adds personality and character to the finished product. There are various options for creating the hair for your elf.
Yarn is a popular choice for creating hair. You can use yarn in different colors to match the desired look of your elf. For a more natural look, you can use yarn that matches the color of human hair, such as brown or blonde. You can either sew or glue the yarn onto the head of the elf.
Sewn Yarn Hair
One option is to sew the yarn onto the elf’s head. Start by cutting multiple strands of yarn to the desired length for the hair. Then, using a needle and thread, sew the strands of yarn onto the head, starting from the back and working towards the front. Make sure to secure the ends of the yarn with knots to prevent them from unraveling.
Glued Yarn Hair
If you prefer a quicker method, you can also use glue to attach the yarn to the elf’s head. Start by cutting the yarn into small pieces. Apply a small amount of glue to the head of the elf, and then press the ends of the yarn onto the glue. Repeat this process until the desired amount of hair is achieved.
Another option for creating the hair for your xmas elf is to use felt. Felt can be cut into different shapes and sizes to create various hairstyles. You can glue the felt pieces onto the head of the elf, or sew them on for added durability.
Remember, the hair of the elf is an important element in bringing your xmas elf to life. Get creative and have fun experimenting with different materials and styles to make your elf unique!
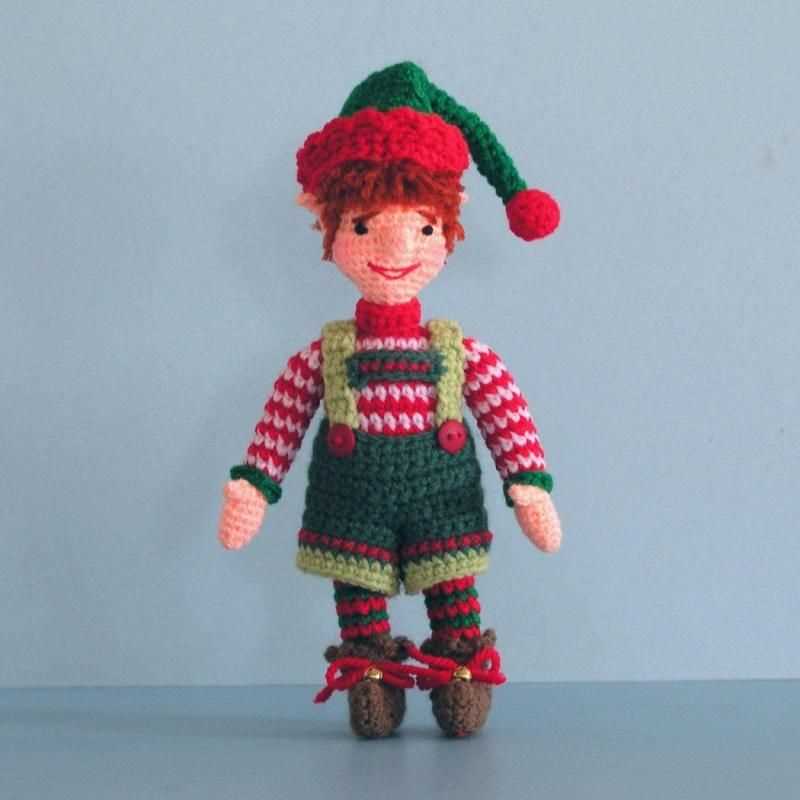
Clothes
In the world of fashion, clothes play a vital role in expressing one’s personality and style. Whether it’s a cozy winter sweater or a trendy summer dress, the right outfit can make a lasting impression. People of all ages and backgrounds enjoy wearing clothes that not only fit well but also reflect their individuality.
When it comes to knitting, clothes are a popular choice for many crafters. Hand-knitted garments offer a unique charm and can be customized to suit personal preferences. From hats and scarves to cardigans and socks, there are endless possibilities for creating beautiful and functional items. Knitting allows for experimentation with different yarns, colors, and stitch patterns, resulting in truly one-of-a-kind pieces.
Knitting Patterns
For those looking to add a touch of holiday cheer to their wardrobe, a knitted elf sweater is the perfect choice. This festive garment features a playful design with vibrant colors and whimsical details. The pattern typically includes instructions for creating the body, sleeves, and collar, as well as any decorative elements such as stripes or buttons.
Another popular option is a knitted hat. Whether it’s a chunky beanie or a slouchy beret, a knitted hat can add both warmth and style to an outfit. Knitting patterns often provide instructions for different sizes and variations, allowing crafters to personalize their creations. With the right yarn and stitch pattern, a knitted hat can become a unique accessory that stands out from the crowd.
Benefits of Hand-Knitted Clothes
One of the main benefits of hand-knitted clothes is their quality and durability. Unlike mass-produced garments, knitted items are made with care and attention to detail. The craftsmanship and time invested in creating each piece ensure that it will last for years to come.
Additionally, hand-knitted clothes offer a level of customization and individuality that is hard to find in store-bought items. Crafters can choose the yarn, color, and stitch pattern that best suits their tastes and preferences. This ability to create a truly unique piece of clothing is both empowering and satisfying.
- Cozy winter sweaters
- Trendy summer dresses
- Hats and scarves
- Cardigans and socks
- Knitted elf sweaters
- Chunky beanies
- Slouchy berets
Assembly
Once you have finished knitting all the required parts of your xmas elf, it’s time to assemble them. Follow these steps to bring your elf to life:
1. Attach the head: Start by sewing the head to the body. Match the center back of the head with the center back of the body. Use a blunt needle and the same yarn used for knitting to stitch them together. Make sure the stitch is secure and tight, leaving no gaps.
2. Add the arms: Position the arms on either side of the body, just below the head. Sew them onto the body, ensuring they are evenly centered. Use the same stitching technique as for the head to attach the arms securely.
3. Attach the legs: Place the legs at the bottom of the body, slightly apart. Sew them onto the body, making sure they are centered and secure. Use the same stitching technique as for the head and arms.
4. Sew on the hat: Take the knitted hat and place it onto the head of the elf. Adjust the position for a desired look. Use the same yarn and needle to sew the hat onto the head, ensuring it stays in place.
5. Embellish: Finally, it’s time to add some festive touches to your xmas elf. Use colored yarn or embroidery floss to create eyes, a nose, and a mouth on the face. You can also add buttons, bows, or other decorations to the elf’s outfit. Get creative and personalize your elf as much as you like!
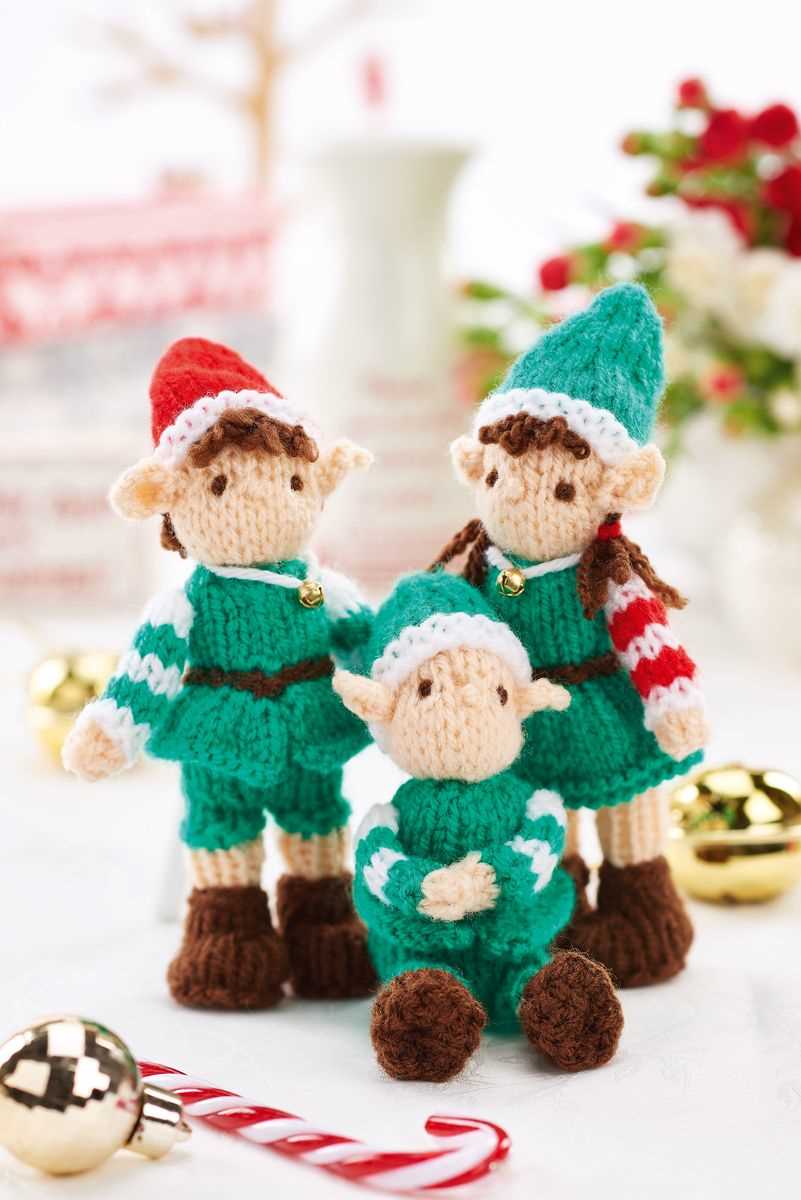
Once you have finished assembling and embellishing your xmas elf, it’s ready to spread holiday cheer. Display it on a shelf, give it as a gift, or use it as a festive decoration in your home. Enjoy this adorable knitted creation throughout the holiday season!
Finishing Touches
Now that you have completed knitting your adorable Christmas elf, it’s time to add some finishing touches to bring your creation to life. Here are a few ideas to make your elf extra special:
- Add a Hat: Give your elf a festive touch by knitting or crocheting a small hat using contrasting colors. You can add a pompom or a braided tassel for extra flair.
- Embroider the Face: Use embroidery floss to stitch on the details of your elf’s face. Add eyes, a nose, and a smiling mouth to give your creation a lively expression.
- Attach Bells: Sew small jingle bells onto the tips of your elf’s hat or shoes. Every time your elf moves, it will create a delightful sound that adds to the Christmas cheer.
- Add a Scarf or Shawl: Knit or crochet a tiny scarf or shawl to drape around your elf’s neck. Choose a color that complements the elf’s outfit and adds an extra layer of coziness.
- Decorate with Buttons: Sew on buttons as embellishments to your elf’s outfit. Play around with different shapes, sizes, and colors to create unique patterns and designs.
Remember to have fun and let your creativity shine while adding these finishing touches. Your Christmas elf will be a delightful addition to your holiday decorations or a heartwarming gift for loved ones.
Happy knitting!