
If you are new to knitting and looking for some festive projects to get started on, look no further! Christmas is the perfect time to dive into the world of knitting and create beautiful handmade gifts and decorations. With the right patterns and a little practice, you can easily create cozy hats, scarves, and ornaments that will impress your loved ones and add a personal touch to your holiday celebrations.
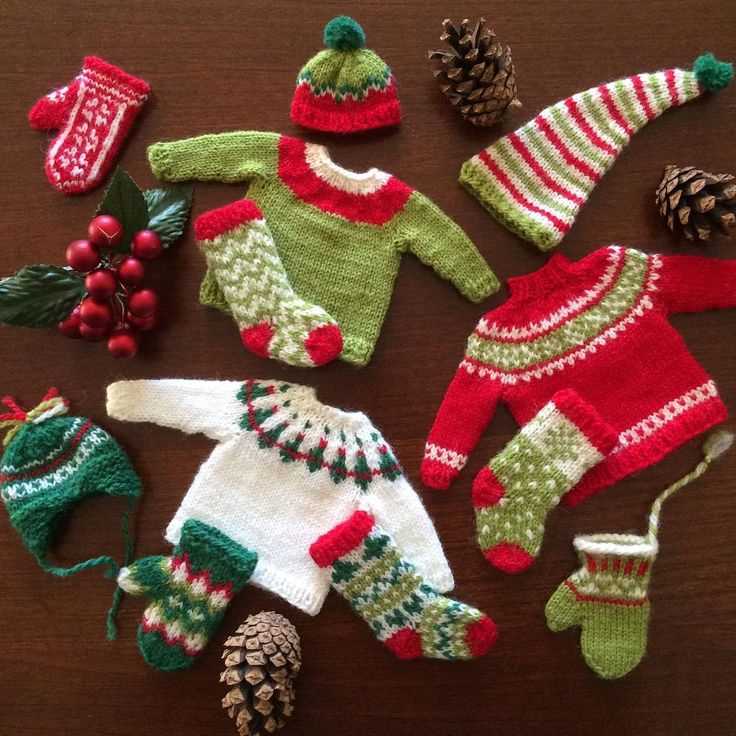
Knitting is a versatile craft that allows you to create unique and customizable items. Whether you are interested in making a classic Santa hat, a cozy pair of mittens, or a cute Christmas stocking, there are plenty of beginner-friendly patterns available. You don’t need advanced skills to create beautiful knits – all you need is a basic knowledge of knitting stitches and the willingness to learn.
In this article, we have rounded up some free Christmas knitting patterns that are perfect for beginners. These patterns are straightforward and come with detailed instructions and helpful tips to guide you through the process. From simple scarves and headbands to adorable ornaments and gift bags, there is something for everyone to enjoy. So grab your knitting needles, choose your favorite pattern, and get ready to spread some holiday cheer through your stitches!
Free Christmas Knitting Patterns for Beginners
Christmas is the perfect time to get creative and crafty, and what better way to do that than with knitting? Whether you’re a beginner or an experienced knitter, there are plenty of free Christmas knitting patterns available online to help you create beautiful and festive decorations, gifts, and accessories.
If you’re new to knitting, starting with simple patterns is a great way to learn the basics and build your skills. There are many Christmas-themed patterns that are perfect for beginners, such as knitted ornaments, stockings, and scarves. With a few basic stitches and techniques, you can create personalized gifts for your loved ones or add a touch of handmade charm to your own holiday decor.
One popular free knitting pattern for beginners is a simple knitted ornament. These ornaments are quick and easy to make, and you can customize them with different colors and stitches. Another great beginner project is a knitted Christmas stocking. You can choose from a variety of patterns, from classic designs to more modern and unique styles. Knitting a stocking can be a fun and rewarding project, and it’s a great way to add a personal touch to your holiday decorations.
If you’re interested in knitting accessories, there are also plenty of beginner-friendly patterns available. You can knit cozy hats, scarves, and mittens for yourself or as thoughtful gifts for your friends and family. These patterns often use simple stitches and techniques, making them perfect for beginners who want to practice their knitting skills while creating something useful and stylish.
With so many free Christmas knitting patterns available, there’s no excuse not to get started on your holiday knitting projects. Whether you’re a beginner or an experienced knitter, there’s something for everyone. So grab your needles, choose a pattern, and get knitting!
Snowflake Hat
The Snowflake Hat is an adorable pattern perfect for beginners looking to knit their first Christmas project. With its simple design and easy-to-follow instructions, this hat is a great introduction to knitting in the round.
You’ll need a set of double-pointed needles, size 8, as well as worsted weight yarn in two contrasting colors. The main color will be used for the majority of the hat, while the contrast color will be used to create the snowflake design.
To start, cast on 80 stitches with the main color yarn. Join in the round and place a stitch marker to mark the beginning of the round. Begin knitting in a rib stitch pattern (knit 2 stitches, purl 2 stitches) for 2 inches.
Next, switch to the contrast color yarn and knit every stitch for 2 inches. Then, switch back to the main color and continue knitting every stitch until the hat measures approximately 6 inches from the cast-on edge.
Now it’s time to add the snowflake design! Follow the chart below to create the snowflake pattern using the contrast color yarn. Each square on the chart represents one stitch, and you’ll be working the design over the next 20 stitches.
| Row 1: | knit to end |
| Row 2: | purl to end |
| Row 3: | knit to end |
| Row 4: | purl to end |
Repeat these 4 rows of the chart until the snowflake design is complete. Once finished, continue knitting in the main color until the hat measures approximately 8 inches from the cast-on edge.
Finally, decrease the stitches to close the top of the hat. Knit 8 stitches, then knit 2 stitches together. Repeat this decrease pattern until there are only 10 stitches left. Cut the yarn, leaving a long tail, and thread it through the remaining stitches. Pull tight to close the top of the hat and secure the ends.
Your Snowflake Hat is now complete and ready to be worn during the festive season! This pattern is a great way to practice basic knitting techniques while creating a beautiful and functional accessory for the holidays.
Reindeer Scarf
The Reindeer Scarf is a perfect project for beginners who want to practice their knitting skills. This cute and cozy scarf features a pattern of reindeer, making it a great accessory for the holiday season.
To knit the Reindeer Scarf, you will need basic knitting supplies such as yarn, knitting needles, and a tapestry needle. Choose a soft and warm yarn in your preferred color to create a comfortable scarf. You can also opt for a yarn with a hint of sparkle or a festive color to add a touch of holiday cheer.
To start knitting the scarf, cast on the desired number of stitches according to your preferred width. You can follow a basic garter stitch pattern or choose a ribbed or seed stitch for added texture. Once you have the desired length, it’s time to add the reindeer pattern.
The reindeer pattern can be created using simple knit and purl stitches. You can find free reindeer chart patterns online or create your own by working with the stitches on your knitting needles. Knit each stitch to form the reindeer shape, and switch to purl stitches for the background. The reindeer can be placed evenly along the scarf or arranged in a specific pattern.
After completing the reindeer pattern, continue knitting in your chosen stitch pattern until you reach your desired scarf length. Finally, bind off the stitches and weave in any loose ends. Your Reindeer Scarf is now ready to be worn or gifted to someone special.
With its adorable reindeer pattern, the Reindeer Scarf is sure to bring a festive touch to your winter wardrobe. Whether you’re a beginner knitter or an experienced crafter, this scarf is a fun and rewarding project that will keep you warm and stylish throughout the holiday season.
Santa Claus Sweater
The Santa Claus Sweater is a festive and fun knitting project perfect for beginners. This adorable sweater features a classic Santa Claus design, complete with a jolly face, white beard, and iconic red and white colors.
Knitting this sweater is a great way to get into the holiday spirit and show off your knitting skills. The pattern is simple and easy to follow, making it ideal for beginners who want to create something special for Christmas.
To make your very own Santa Claus Sweater, you will need basic knitting skills and some materials. You can find free knitting patterns for Santa Claus Sweaters online, which provide step-by-step instructions and a list of materials needed.
Once you have your materials ready, you can start knitting your Santa Claus Sweater. The pattern typically involves knitting in the round, creating a seamless and comfortable fit.
The finished sweater will make you feel like Santa Claus himself, spreading joy and cheer wherever you go. It’s a perfect gift for loved ones or a festive addition to your own holiday wardrobe.
- Materials needed for Santa Claus Sweater:
- Red and white yarn
- Knitting needles
- Tape measure
- Scissors
- Yarn needle
With a little time and effort, you can create a beautiful and cozy Santa Claus Sweater that will be the highlight of your Christmas celebrations.
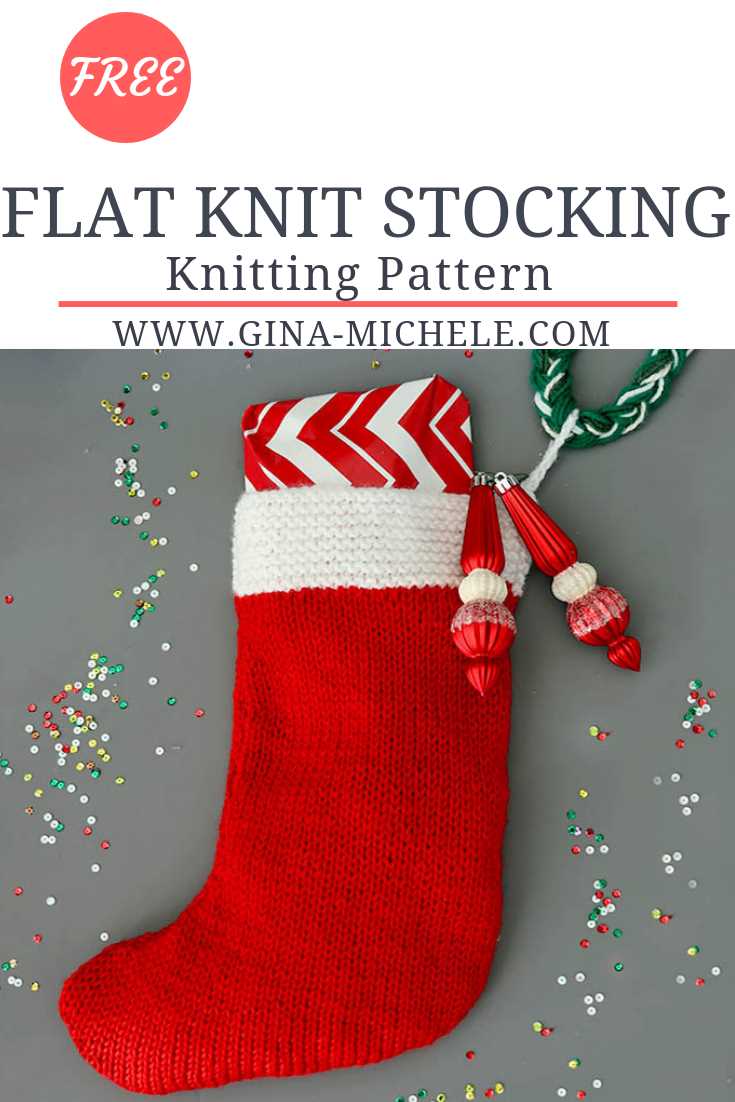
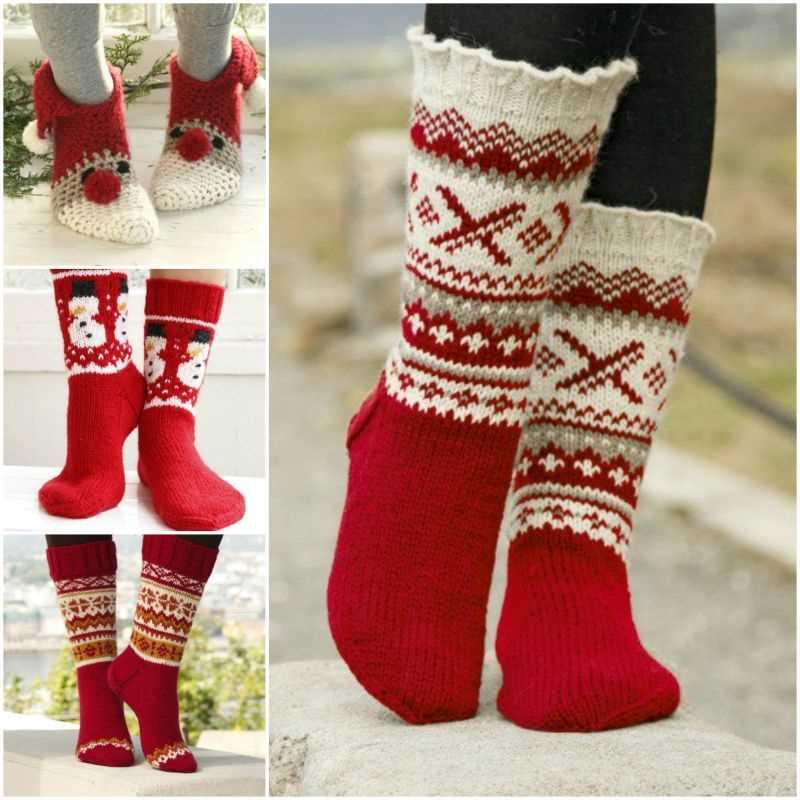
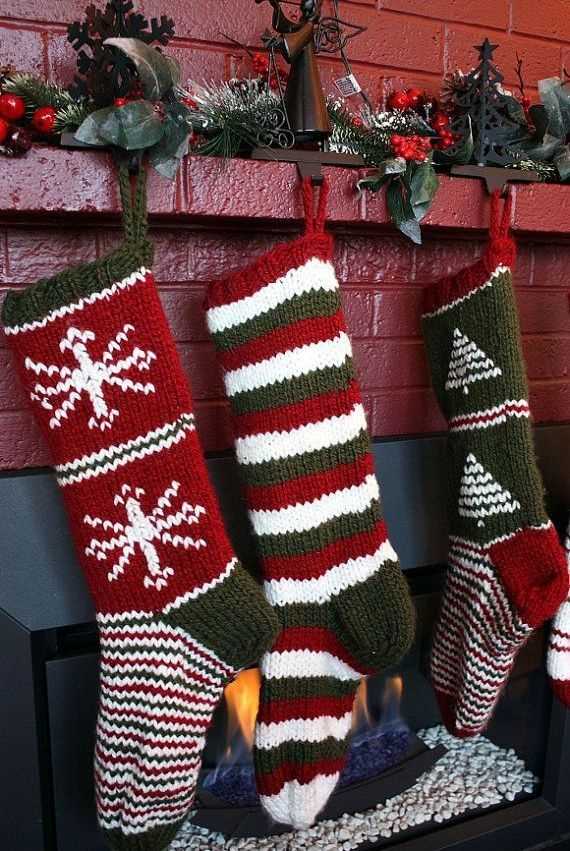
Christmas Stocking

A Christmas stocking is a traditional decoration that is often hung by the fireplace or on a mantel during the holiday season. It is usually made of fabric and is shaped like a large sock, with an opening at the top for filling with gifts and treats. The stocking is believed to have originated from the story of St. Nicholas, who is said to have thrown bags of gold coins through the window of a poor man’s house, which landed in the stockings that were hanging by the fireplace to dry.
Knitting a Christmas stocking is a fun and festive project for beginners. There are many free knitting patterns available online that provide step-by-step instructions for creating a personalized stocking. Some patterns feature traditional designs, while others incorporate modern and unique elements. Beginners can choose a pattern that matches their skill level and customize it with their favorite colors and embellishments.
When knitting a Christmas stocking, it is important to select the right yarn and needle size to achieve the desired size and texture. Acrylic or wool blend yarns are popular choices for stockings as they are durable and provide good stitch definition. Circular or double-pointed needles are typically used for knitting in the round, which is the most common method for creating a stocking. It is also important to pay attention to tension and gauge to ensure that the stocking turns out the right size.
- To begin knitting a Christmas stocking, cast on the required number of stitches and join in the round.
- Follow the pattern instructions for knitting the body of the stocking, which may include different stitch patterns, color changes, and shaping.
- Once the body is complete, finish the stocking with a ribbed cuff and a loop for hanging.
- After knitting, the stocking can be further personalized by adding embroidery, beads, or pompoms.
Knitting a Christmas stocking is a rewarding project that allows beginners to practice their knitting skills while creating a meaningful decoration for the holiday season. Whether it is hung by the fireplace or used as a festive gift wrap, a handmade stocking adds a personal touch to the Christmas celebrations.
Snowman Coasters
If you’re a beginner knitter looking for a fun and festive project to try this Christmas, why not give snowman coasters a go? These adorable coasters are perfect for adding a festive touch to your home decor or for giving as a thoughtful handmade gift.
To create your snowman coasters, you’ll need some basic knitting skills and a few supplies. You’ll need white yarn for the snowman’s body, as well as small amounts of yarn in various colors for the snowman’s hat, scarf, and facial features. You’ll also need knitting needles in a size appropriate for your chosen yarn.
To start your snowman coaster, cast on a small number of stitches to create a circle that will serve as the snowman’s body. Knit in the round for a few rows to create the base, then switch to the white yarn and continue knitting until the coaster is the desired size.
Once you have completed the main body of the coaster, it’s time to add the snowman’s features. Using the colored yarn, create a small hat and scarf, then sew or embroider them onto the coaster. Next, add the snowman’s face using embroidery thread or yarn in contrasting colors. You can choose to give your snowman a classic carrot nose, coal eyes and mouth, or get creative and add your own personal touch.
Once you’ve finished knitting and embellishing your snowman coasters, make sure to block them to give them a polished finish. This involves gently wetting the coaster and shaping it into the desired shape, then allowing it to dry fully before using or gifting.
These snowman coasters are the perfect way to add a touch of Christmas charm to your home. Plus, they’re a great way to practice your knitting skills and create something both useful and decorative. So why not grab your knitting needles and give these adorable snowman coasters a try?
Holiday Wreath Ornament
Looking for a festive and beginner-friendly knitting project for the holiday season? Try making a Holiday Wreath Ornament! This adorable ornament is perfect for adding a touch of holiday cheer to your Christmas tree or for gifting to loved ones.
To create this ornament, you will need some basic knitting skills and a few simple supplies. Start by gathering a small amount of green yarn, preferably in a festive shade like pine or evergreen. You will also need some thin wire or pipe cleaners, a small amount of red yarn or ribbon for the bow, and a pair of knitting needles in a size appropriate for your chosen yarn.
Begin by casting on a small number of stitches to create the wreath base. You can use any cast-on method you prefer, such as the long-tail cast on or the knitted cast on. Once you have cast on, work in stockinette stitch for a few rows to create the circular shape of the wreath. Remember to knit the right side rows and purl the wrong side rows.
Once you have completed the desired number of rows for your wreath, it’s time to add the bow. Cut a length of red yarn or ribbon and tie it into a small bow shape. Thread a yarn needle with the same red yarn or ribbon and sew the bow securely onto the wreath.
To make the wreath look even more festive, consider adding some decorative accents. You can use small beads or sequins to simulate ornaments or tiny pompoms for a touch of texture. Simply sew them onto the wreath wherever you like to create a personalized and unique ornament.
Once all the decorative elements are in place, it’s time to finish off your Holiday Wreath Ornament. Cut a length of wire or use a pipe cleaner to create a hanger for the ornament. Thread it through the top of the wreath and twist the ends together to secure it in place. Trim any excess wire or pipe cleaner.
Now your Holiday Wreath Ornament is ready to adorn your Christmas tree or to be given as a heartfelt homemade gift. Have fun experimenting with different colors and embellishments to create a variety of personalized ornaments. Happy knitting!
Elf Hat
Looking for a fun and festive knitting project for the holiday season? Look no further than an elf hat! Whether you’re a beginner or an experienced knitter, making an elf hat is a great way to add some holiday cheer to your wardrobe and create a unique accessory that will stand out at any Christmas party.
To get started, you’ll need some basic knitting supplies, including a set of double-pointed needles, worsted weight yarn in festive colors like red, green, and white, and a tapestry needle for finishing. There are plenty of free patterns available online that cater to all skill levels, so you’ll be able to find one that suits your needs.
Once you have your supplies and pattern, the first step is to cast on the required number of stitches. The pattern will specify how many stitches to cast on, typically around 80-100 stitches. If you’re new to knitting, casting on is the process of creating the foundation row of stitches on your needle.
Next, you’ll begin knitting in the round using the double-pointed needles. This means that instead of knitting back and forth like you would with straight needles, you’ll be working in a continuous loop. The pattern will guide you through the specific stitches and techniques needed to create the elf hat, such as ribbing for the brim and shaping for the pointy top.
Once you’ve completed the main part of the hat, it’s time to add some festive embellishments. You can knit or crochet a pom-pom to attach to the top, or use buttons, ribbons, or bells to decorate the brim. Get creative and have fun with it!
When you’re finished knitting, bind off your stitches and weave in any loose ends using the tapestry needle. Try on your elf hat and admire your handiwork. You’re now ready to spread some holiday cheer with your festive and adorable accessory. Happy knitting!
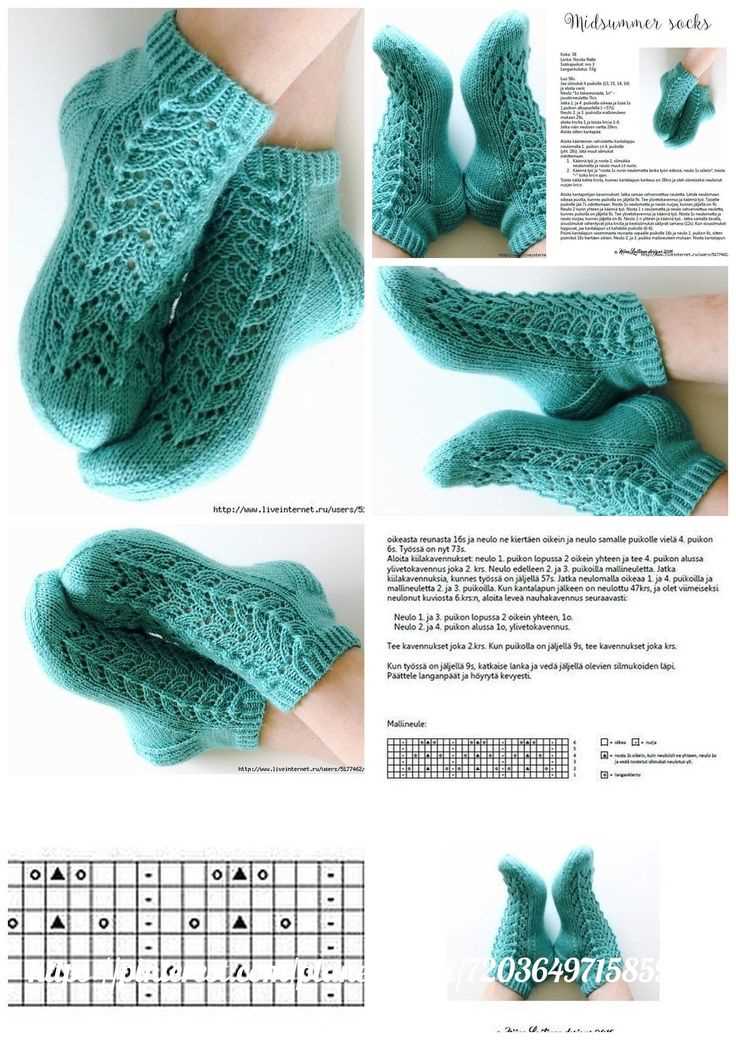
Candy Cane Socks

Are you looking for a fun and festive knitting project for the holiday season? Look no further than Candy Cane Socks! These adorable socks are perfect for beginners who want to try their hand at knitting socks. With their vibrant red and white stripes, they are reminiscent of the iconic candy canes that are a staple of Christmas decorations.
To get started on your Candy Cane Socks, you will need to gather the necessary materials. You will need a set of double-pointed knitting needles in size 3.5mm, as well as two different colors of yarn – one red and one white. You can choose any brand or type of yarn that you prefer, as long as it is suitable for knitting socks.
Once you have your materials ready, you can begin knitting your Candy Cane Socks. The pattern for these socks is simple and easy to follow, making it perfect for beginners. You will start by casting on the desired number of stitches and dividing them evenly among your double-pointed needles. From there, you will work in the round, alternating between red and white yarn to create the candy cane stripes.
As you continue knitting, you will see the candy cane pattern emerge. The vibrant red and white stripes will add a festive touch to any outfit, making these socks the perfect accessory for the holiday season. Don’t be afraid to experiment with different color combinations or even add some embellishments, such as bows or pom-poms, to make them even more unique.
Whether you want to make a pair of Candy Cane Socks for yourself or as a gift for a loved one, you will find that this project is both enjoyable and rewarding. Not only will you have a cozy pair of festive socks to wear during the holiday season, but you will also have the satisfaction of knowing that you created them yourself. So grab your knitting needles and get started on your Candy Cane Socks today!
Christmas Tree Dishcloth
The Christmas Tree Dishcloth is a festive and practical knitting project for beginners. This pattern is perfect for those who are new to knitting and want to create something fun and seasonal. The dishcloth features a charming Christmas tree design that will add a touch of holiday cheer to your kitchen.
To make the Christmas Tree Dishcloth, you will need basic knitting skills such as casting on, knitting, purling, and binding off. The pattern uses simple stitches to create the tree shape, making it an ideal project for beginners to practice their knitting techniques.
The pattern starts with casting on a certain number of stitches, then follows a series of knitting and purling rows to create the tree shape. The tree is formed by increasing and decreasing stitches in a specific pattern. This creates a textured tree design that stands out on the dishcloth.
The Christmas Tree Dishcloth can be knitted using any color of yarn you prefer. Traditional green yarn is a popular choice for this pattern, but you can also experiment with different shades to match your personal style or holiday decorations. The dishcloth can be finished off with a simple binding off technique to secure the stitches.
Once completed, the Christmas Tree Dishcloth can be used in your kitchen for everyday tasks such as washing dishes or wiping countertops. It also makes a great handmade gift for friends and family during the holiday season. Whether you keep it for yourself or give it as a gift, the Christmas Tree Dishcloth is a delightful and practical knitting project for beginners.
Gingerbread Man Slippers
If you’re looking for a festive and fun project to try this Christmas, why not make a pair of gingerbread man slippers? These adorable slippers are perfect for beginners and make a great gift for family and friends. With their cute design and cozy warmth, they are sure to be a hit with everyone!
To make your own gingerbread man slippers, you will need basic knitting skills and some simple materials. The pattern typically calls for worsted weight yarn in brown and white, as well as knitting needles in a size suitable for the yarn. You’ll also need some stuffing and a tapestry needle for sewing the pieces together.
Instructions:
- Start by knitting the sole of the slipper in brown yarn. This is usually done in garter stitch, which is simply knitting every row. The size of the sole will depend on the size of the slipper you want to make, so be sure to measure your foot or the foot of the person you are making the slippers for.
- Next, knit the top part of the slipper in brown yarn. This is usually done in stockinette stitch, which is knitting one row and purling the next. The size of this piece will depend on the size of the sole.
- Once both the sole and top are completed, you can start working on the gingerbread man design. This is typically done using intarsia or stranded knitting techniques, which involve knitting with two colors at the same time. Follow the pattern instructions to create the gingerbread man’s face, body, and limbs in white yarn on the brown background.
- After finishing the main body of the slipper, you can add any additional details, such as eyes, buttons, or icing decorations, using yarn or embroidery thread.
- Finally, stuff the slipper with some soft, squishy material like polyester fiberfill, and sew the top and sole together using a tapestry needle. Make sure to leave an opening for your foot to slide in.
Once you have completed the first slipper, you can repeat the process to make a second one. And there you have it – a pair of adorable gingerbread man slippers that are sure to bring a smile to anyone’s face! Whether you keep them for yourself or give them as a gift, these slippers are a festive and fun way to celebrate the holiday season.
Angel Doll
If you are a beginner knitter looking for a charming and easy Christmas project, the Angel Doll is the perfect choice. This adorable doll will make a beautiful addition to your holiday decorations or a lovely gift for a friend or family member.
To make the Angel Doll, you will need basic knitting skills and some common supplies. The pattern uses simple stitches like knit, purl, and decrease, making it suitable for beginners. You will also need yarn in white or cream colors, knitting needles, stuffing, and a tapestry needle for sewing.
Materials:
- White or cream-colored yarn
- Knitting needles (size 8 or as required by the pattern)
- Stuffing
- Tapestry needle
Instructions:
- Start by knitting the head of the doll. Follow the pattern instructions for casting on and knitting in the round. You will need to use increase and decrease stitches to shape the head and create the face.
- Next, move on to the body and wings. The body is usually knitted in one piece, while the wings may require separate panels that are later sewn onto the body. Again, follow the pattern instructions for each piece.
- Once you have finished knitting all the pieces, it’s time to assemble the doll. Use the tapestry needle to sew the head onto the body and attach the wings. Stuff the doll firmly with stuffing, making sure to shape it nicely.
- Finally, add the finishing touches to your Angel Doll. You can use yarn or felt to create the hair and a small piece of fabric or ribbon for a dress. Embroider the face and add any additional decorations, such as a halo or a wand.
The Angel Doll is a delightful project that will bring joy to both the knitter and the recipient. Whether you display it in your home or give it as a gift, this charming doll will be a treasured Christmas decoration for years to come.
Conclusion
Create a cozy and festive atmosphere in your home this Christmas by knitting a beautiful Nativity Scene Blanket. With its intricate and detailed design, this blanket will be sure to impress your guests and become a cherished heirloom for years to come. Whether you are a beginner or an experienced knitter, there are plenty of free patterns available online that will guide you through the process.
By using basic knitting stitches and techniques, you can create a stunning piece that captures the essence of the Nativity scene. Choose from a variety of patterns that feature Mary, Joseph, baby Jesus, the shepherds, the Three Wise Men, and even the animals present in the stable. You can customize the colors and sizes of your blanket to suit your preferences and knitting skills.
Knitting a Nativity Scene Blanket is not only a fun and rewarding project, but it also allows you to celebrate the true meaning of Christmas. Display your finished blanket on your couch or hang it on a wall, and let it serve as a reminder of the miracle of Jesus’ birth.
So gather your knitting needles and yarn, and embark on this journey to create a beautiful Nativity Scene Blanket. With your own handmade creation, you’ll be able to add a personal touch to your holiday decorations and share the joy of Christmas with your loved ones. Happy knitting!