
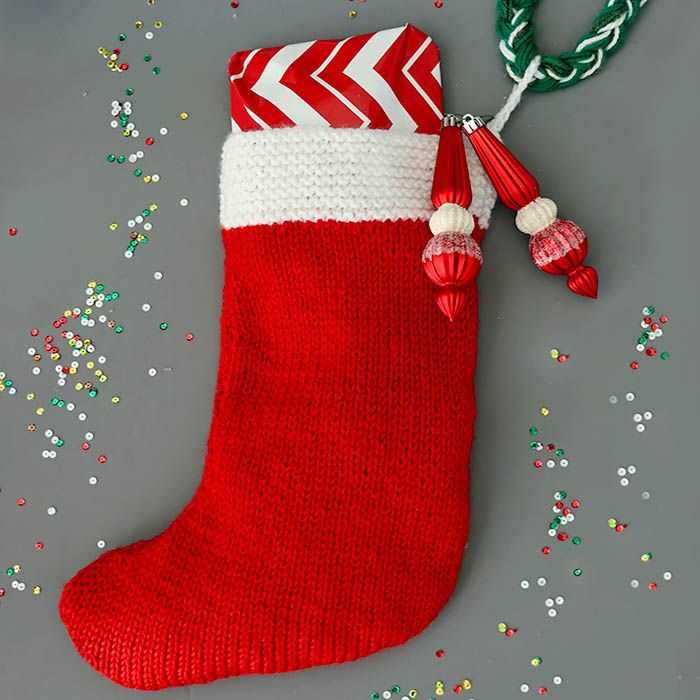
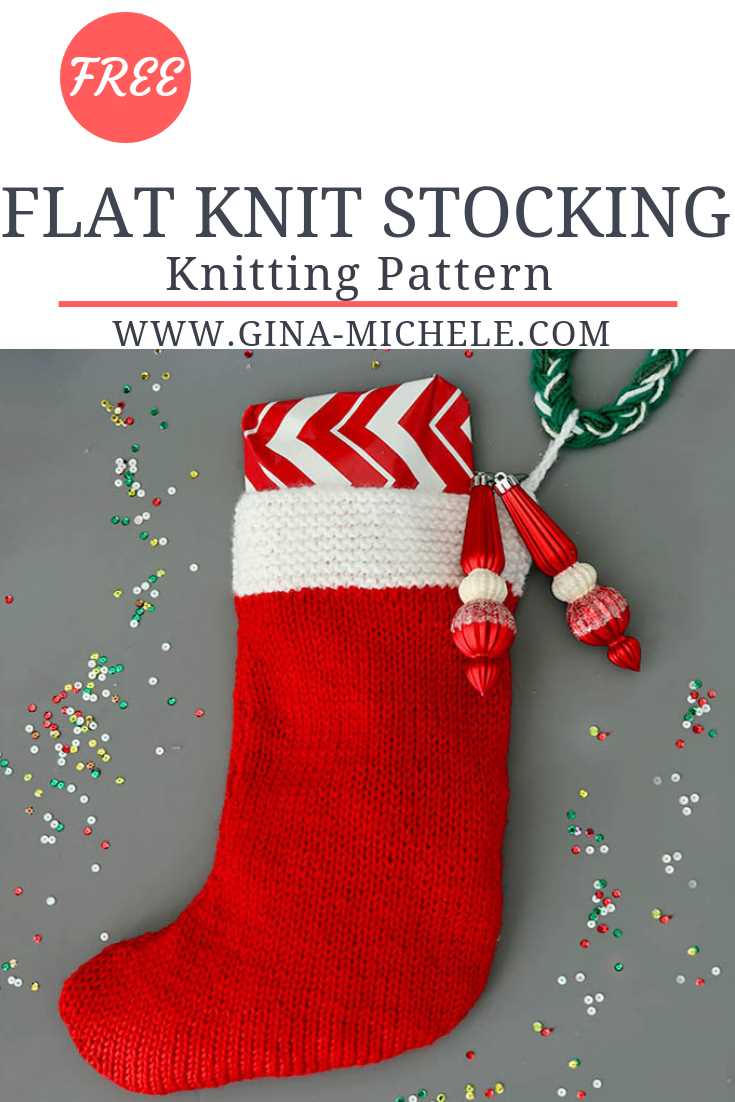
If you are looking for a fun and festive knitting project for the holiday season, look no further than a flat knit Christmas stocking! These charming stockings are perfect for adding a personal touch to your holiday décor. Whether you are a beginner knitter or an experienced pro, this pattern is easy to follow and customizable to suit your own style.
The flat knit Christmas stocking pattern features a classic design with a ribbed cuff, a simple body, and a rounded toe. The pattern uses basic knitting techniques such as knit and purl stitches, as well as decreases and increases to create the shaping. The stocking is worked flat on straight knitting needles, making it ideal for knitters who prefer not to work in the round.
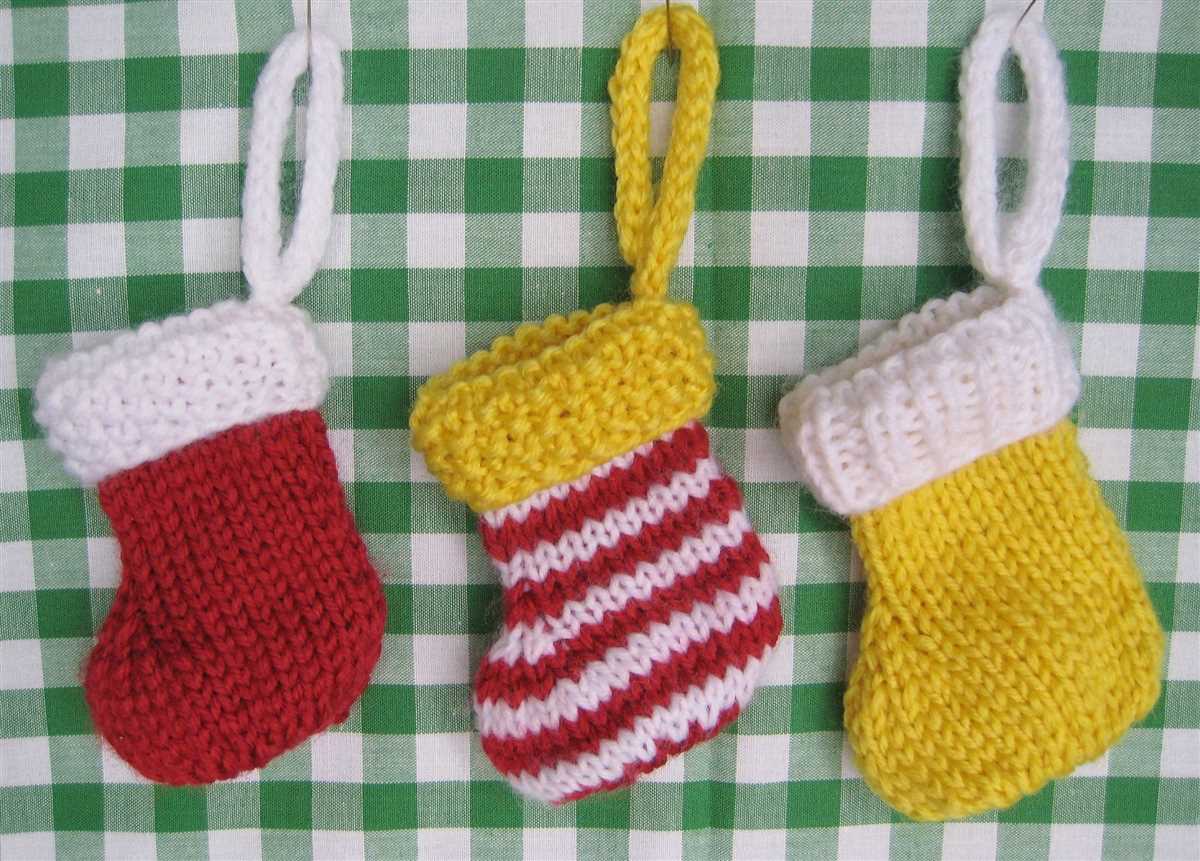
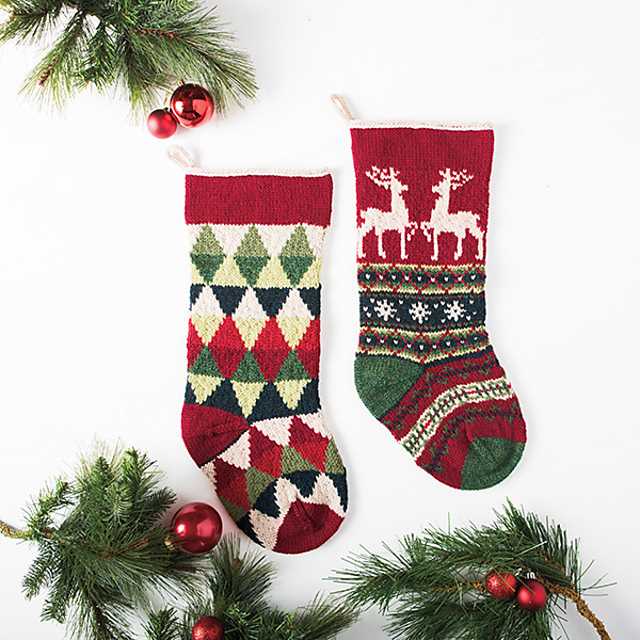
One of the great things about this pattern is that it can be easily customized to match your holiday decorations. You can choose traditional Christmas colors like red, green, and white, or go for a more eclectic color scheme with pastels or metallics. You can also add your own personal touch by embroidering names or initials on the cuff, or by adding pom-poms, beads, or other embellishments.
So why not grab your knitting needles and get started on your very own flat knit Christmas stocking? This pattern is a great way to relax and unwind during the holiday season, and the finished stocking will become a cherished family heirloom for years to come.
Flat Knit Christmas Stocking Pattern
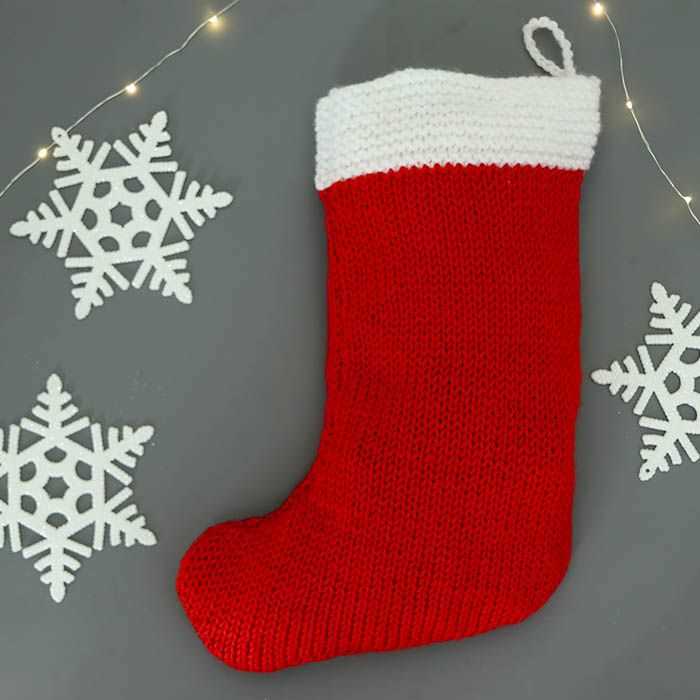
Are you looking for a simple and easy Christmas stocking pattern to knit? Look no further! This flat knit Christmas stocking pattern is perfect for knitters of all skill levels.
Made with basic knit and purl stitches, this pattern creates a classic design that will add a festive touch to your holiday decor. The stocking is worked flat in one piece and then seamed at the back, allowing you to customize the size and color as desired.
To get started, you will need basic knitting supplies including yarn, knitting needles, and a tapestry needle. Choose a yarn that is soft and cozy, and select holiday-themed colors such as red, green, or white. You can also add embellishments like pom poms or ribbons to make the stocking even more special.
Materials:
- Worsted weight yarn in desired colors
- US size 8 (5 mm) knitting needles
- Tapestry needle
- Scissors
Instructions:
- Cast on the desired number of stitches to achieve the desired width of the stocking.
- Follow the pattern for the main body of the stocking, knitting and purling as directed.
- Continue knitting until the stocking is the desired length.
- Bind off all stitches and cut the yarn, leaving a long tail for seaming.
- Using a tapestry needle, sew the back seam of the stocking together.
- To finish, add any desired embellishments such as pom poms or ribbons.
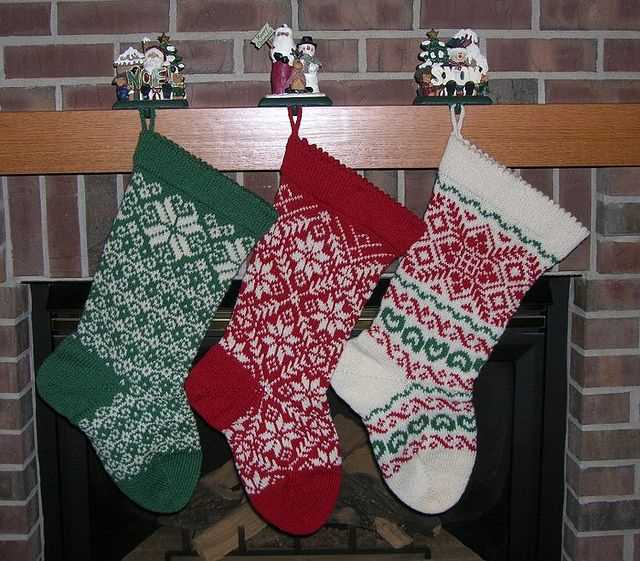
With this flat knit Christmas stocking pattern, you can create personalized and handmade stockings for your family and loved ones. Hang them by the fireplace or on the mantle and fill them with small gifts and treats to truly embrace the spirit of the holiday season. Happy knitting!
Choosing the Right Yarn and Needles
When it comes to knitting a flat knit Christmas stocking, choosing the right yarn and needles is essential for achieving the desired outcome. The type of yarn and the size of the needles will determine the overall look and feel of the stocking, as well as its durability and comfort.
Yarn Selection: In order to create a sturdy yet soft stocking, it is important to select a yarn that is strong enough to withstand wear and tear, while also being comfortable against the skin. Wool and acrylic blends are popular choices for stocking knitting, as they provide both durability and softness. Consider the color and texture of the yarn, as well as any decorative elements you may want to add to your stocking, such as sequins or beads.
Needle Size: The size of the needles you choose will determine the overall size and shape of your stocking. For a flat knit stocking, it is recommended to use needles that are slightly larger than the recommended size for the yarn you have chosen. This will create a looser knit, allowing the stocking to stretch and hold its shape when filled with gifts. However, it is important to note that using needles that are too large may result in a sloppy or holey fabric, so it is best to experiment with a swatch before committing to a needle size.
By carefully considering the yarn and needles you use for your flat knit Christmas stocking, you can ensure that the final product is not only beautiful, but also durable and comfortable. Take the time to explore different yarn options and swatch with different needle sizes to find the perfect combination for your stocking project, and enjoy the process of creating a one-of-a-kind holiday decoration.
Casting On
Before you can start knitting your flat knit Christmas stocking, you need to cast on. Casting on is the process of creating the first row of stitches on your knitting needle. The foundation row created by casting on sets the stage for all the subsequent rows you will knit.
There are several methods for casting on, but one common and easy method is the long-tail cast on. To do this, you will need a long tail of yarn that is approximately three times the width of the item you are knitting. Hold the tail of the yarn in your left hand and the working yarn in your right hand.
To start the long-tail cast on, make a slipknot by creating a loop with the yarn and pulling the tail through. Place the slipknot onto the knitting needle and tighten it slightly. Hold the knitting needles in your right hand, with the slipknot on the left needle.
Insert the right needle into the slipknot from left to right, under the left needle. Bring the working yarn to the front of the slipknot and wrap it around the right needle from left to right. With your right hand, pull the working yarn through the slipknot, creating a new stitch on the right needle.
Continue this process, inserting the right needle under the left needle from left to right, wrapping the working yarn around the right needle, and pulling it through the slipknot to create new stitches. Keep casting on until you have the desired number of stitches for your flat knit Christmas stocking pattern.
Once you have successfully cast on all the required stitches, you are ready to start knitting the body of the stocking. Remember to keep your tension even and consistent as you work, and refer to your pattern for any specific instructions on stitch patterns or shaping.
Knitting the Cuff
When it comes to knitting a flat knit Christmas stocking, one of the first steps is knitting the cuff. The cuff is the top part of the stocking that sits at the opening. It is typically knitted in a ribbed pattern to provide stretch and ensure a snug fit around the leg.
To begin knitting the cuff, you will cast on a certain number of stitches, depending on the size of the stocking. The cuff can be as short or as long as you like, but a common length is around 2 inches. You can use a simple 1×1 rib pattern, where you alternate between knitting one stitch and purling one stitch, or you can try a different rib pattern for added texture.
Key phrase: To begin knitting the cuff, cast on a certain number of stitches, depending on the size of the stocking.
Key phrase: The cuff can be as short or as long as you like, but a common length is around 2 inches.
Once you have completed the desired length for the cuff, you can bind off the stitches. This will create a finished edge and prevent the cuff from unraveling. You can use a basic bind off method, such as the traditional bind off or the stretchy bind off, to ensure a neat and secure edge.
Key phrase: Once you have completed the desired length for the cuff, bind off the stitches to create a finished edge.
After knitting the cuff, you can continue on to the body of the stocking, where you will create the main section and shape the toe. But the cuff is an important starting point, as it sets the tone for the rest of the stocking and provides a comfortable fit around the leg. Choose a yarn color and rib pattern that complements your overall design, and enjoy the process of creating a beautiful and personalized flat knit Christmas stocking!
Key phrase: The cuff is an important starting point, as it sets the tone for the rest of the stocking and provides a comfortable fit around the leg.
Creating the Leg and Heel
The next step in creating the flat knit Christmas stocking is to work on the leg and heel. This part of the pattern will add depth and structure to the stocking, making it more comfortable to wear and visually appealing.
To start, continue working in the chosen stitch pattern for the leg of the stocking. This could be a simple stockinette stitch, a ribbed pattern, or any other design that fits the desired aesthetic. Work the stitches in the round, being careful to maintain tension and evenness throughout.
Once the desired length for the leg is reached, it’s time to shape the heel. To do this, switch to working the heel stitches on half of the total number of needles. This can be achieved by dividing the stitches evenly onto two needles or by using double-pointed needles.
To shape the heel, begin by working a series of decreases. This will create a triangular shape that fits snugly against the back of the foot. The specific decrease pattern will depend on the chosen stitch pattern, but common methods include k2tog (knit two stitches together) or ssk (slip, slip, knit). Continue working the decreases until the desired width for the heel is achieved.
Once the decreases are complete, work back and forth on the heel stitches in rows to create a flat surface. This is typically done using a heel flap technique, where the stitches are worked in a specific stitch pattern (such as stockinette or a textured pattern) for a set number of rows.
After the heel flap is complete, it’s time to shape the heel turn. This is done by working short rows, which means turning the work without completing a full row. Short rows create the curve of the heel and help to create a more comfortable fit. Again, the specific technique will depend on the chosen stitch pattern, but common methods include wrap and turn or German short rows.
Once the heel turn is complete, the stitches are usually picked up along the sides of the heel flap to continue working in the round for the foot of the stocking. This allows for a seamless transition and ensures that the stocking maintains its shape and structure.
Shaping the Toe

In order to shape the toe of your flat knit Christmas stocking, you will need to use a combination of decreases. These decreases will gradually decrease the number of stitches and create a tapered shape.
To begin shaping the toe, you will typically start working decreases at both sides of the stocking. This can be done by working a decrease, such as a knit two together (k2tog) or slip slip knit (ssk), at the beginning and end of a row. These decreases will be repeated every other row or as specified in the pattern.
As you continue to work the decreases, you will notice the toe section gradually becoming narrower and tapered. This is the desired shape for the toe of the stocking. It is important to follow the pattern instructions carefully and make sure to count your stitches to ensure that the decreases are evenly spaced and symmetrical.
Once you have completed the shaping of the toe, you will typically have a small number of stitches remaining. These stitches can then be gathered or bound off to close the toe of the stocking. This can be done by using a tapestry needle to thread the yarn through the remaining stitches and pulling tight to secure.
Adding Embellishments
Once you have completed knitting the main body of your flat knit Christmas stocking, it’s time to add some embellishments to make it even more festive and personalized. There are various options available depending on your preference and skill level.
Embroidery: Embroidery is a popular choice for adding decorative elements to knitted stockings. You can use different stitches and colors of yarn to create patterns, images, or even personalization. Common designs include snowflakes, holly leaves, or names of family members.
Buttons and beads: Adding buttons or beads can make your Christmas stocking visually appealing. You can sew beads or buttons onto the body of the stocking to create patterns or even spell out words. Make sure to choose buttons and beads that are not too heavy and won’t weigh down the stocking.
Ribbons and bows: Adding ribbons and bows is a simple yet effective way to embellish your stocking. You can sew ribbons around the top opening of the stocking or create bows and attach them at various points. Satin or velvet ribbons in festive colors like red, green, or gold work well for this purpose.
Pom-poms and tassels: Pom-poms and tassels can add a playful touch to your Christmas stocking. You can make pom-poms using yarn of different colors and attach them to the corners or along the sides of the stocking. Tassels can be made using yarn or embroidery floss and attached to the stocking as well.
Sequins and glitter: For those who love a little extra sparkle, sequins and glitter can be used to add a festive touch to your stocking. You can sew sequins onto the body of the stocking in patterns or sprinkle glitter over areas where you want the stocking to shine.
Personalized tags: If you want to add a personal touch to your stocking, consider attaching personalized tags. These can be made using cardstock or fabric and can include the names of family members or special messages. Attach the tags to the cuff or the body of the stocking using ribbon or thread.
There are endless possibilities when it comes to embellishing knitted Christmas stockings. Let your creativity guide you and have fun adding unique touches to make your stocking truly one-of-a-kind.
Finishing Off

After you have completed knitting your flat knit Christmas stocking, it’s time to finish off the project. Here are the steps to follow:
Weave in the loose ends: Start by weaving in any loose ends of yarn from where you changed colors or joined new balls of yarn. Take a tapestry needle and thread the loose ends through a few stitches on the inside of the stocking. Trim off any excess yarn once the ends are secure.
Block the stocking: Blocking is an optional step, but it can help to improve the finished look of your stocking. Fill a sink or basin with lukewarm water and add a small amount of wool wash or mild detergent. Immerse the stocking in the water and gently squeeze to remove any air pockets. Allow the stocking to soak for about 10 minutes, then remove and gently squeeze out any excess water. Lay the stocking flat on a towel and reshape it to the desired dimensions. Allow the stocking to dry completely before proceeding.
Add the finishing touches: Once the stocking is dry, you can add any additional decorations or embellishments. This could include sewing on buttons, attaching pompoms or tassels, or even embroidering names or designs onto the fabric. Use a fabric glue or needle and thread to secure the decorations in place.
Prepare the stocking for hanging: To hang the stocking, you will need to attach a loop or ribbon. Fold a piece of ribbon in half and sew the ends together to form a loop. Alternatively, you can knit a small i-cord and attach it to the inside of the stocking. Make sure the loop is securely attached to the top edge of the stocking.
Once you have completed all these steps, your flat knit Christmas stocking will be ready to hang and fill with goodies for the holiday season.
Personalization Ideas
When it comes to creating a flat knit Christmas stocking, personalization is key. Adding a personal touch to a stocking can make it even more special and meaningful. Here are some personalization ideas to consider:
1. Monogram: One classic way to personalize a stocking is by adding a monogram. Embroider or knit the recipient’s initials onto the stocking for a timeless and elegant touch. You can use a contrasting color thread or yarn to make the monogram stand out.
2. Name Embroidery: Another option is to embroider the name of the recipient onto the stocking. This can be done in a variety of fonts and colors to suit their personal style. Whether you choose a traditional script or a fun and funky font, the name embroidery adds a personal touch to the stocking.
3. Family Photos: For a truly unique and sentimental touch, consider adding a small pocket to the stocking where a family photo can be inserted. This way, the stocking not only represents a person but also the memories and love shared within the family.
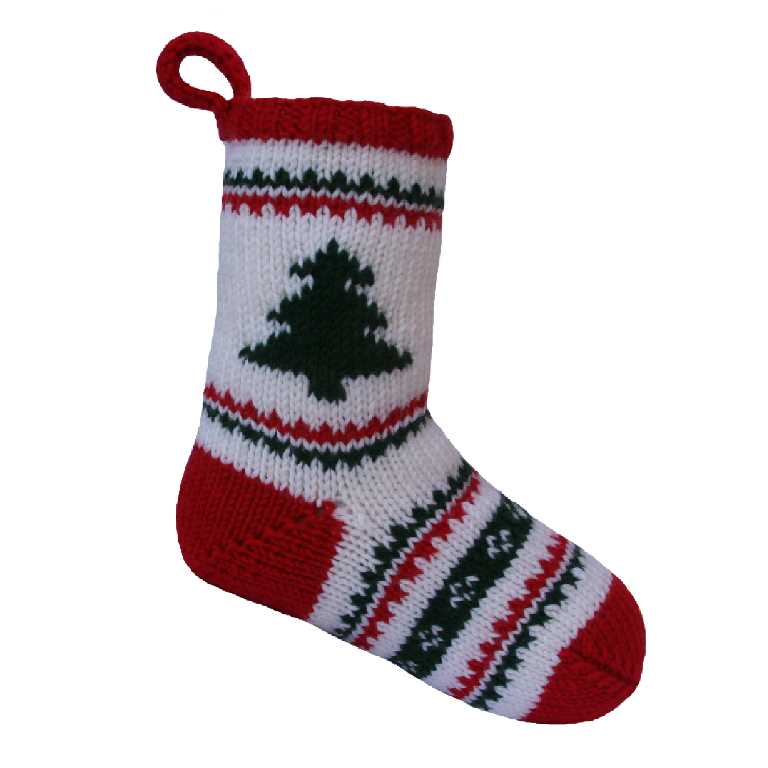
4. Festive Appliques: One fun way to personalize a stocking is by adding festive appliques. You can knit or sew on small holiday-themed shapes, such as snowflakes, gingerbread men, or Christmas trees. This adds visual interest and a playful element to the stocking.
5. Embroidered Messages: Lastly, consider adding an embroidered message to the stocking. This can be a heartfelt sentiment, a favorite quote, or a simple “Merry Christmas.” The personalized message adds an extra layer of meaning to the stocking and shows the recipient how much they are loved.
Overall, personalization is an important part of creating a flat knit Christmas stocking. Whether you choose to add a monogram, name embroidery, family photos, festive appliques, or embroidered messages, the personalized stocking is sure to be treasured for years to come.
Caring for Your Knitted Stocking
After spending hours knitting a beautiful flat-knit Christmas stocking, it’s important to take proper care of it to ensure its longevity and to keep it looking its best for years to come. Here are some tips for caring for your knitted stocking:
1. Hand-wash your stocking: Knitted items are delicate and can easily stretch or lose their shape in the washing machine. Instead, hand-wash your stocking using mild detergent and lukewarm water. Gently agitate the water to clean the stocking, and then rinse it thoroughly. Avoid wringing or twisting the stocking, as this can cause it to stretch or deform.
2. Dry flat: After washing, lay your stocking flat on a clean towel or drying rack to dry. Avoid hanging it up to dry, as this can cause it to stretch and lose its shape. If you need to speed up the drying process, you can gently roll the stocking in a towel to remove excess water before laying it flat to dry.
3. Avoid direct heat and sunlight: Direct heat, such as from a heater or a clothes dryer, and prolonged exposure to sunlight can cause the colors in your stocking to fade or the yarn to become brittle. It’s best to store your stocking in a cool, dry place away from direct sunlight to maintain its vibrant colors.
4. Store properly: When not in use, store your knitted stocking in a breathable bag or container to protect it from dust, moths, or other pests. Avoid storing it in plastic bags, as these can trap moisture and lead to mildew or mold growth. Adding a sachet of lavender or cedar chips to the storage container can also help to deter pests.
5. Mend any damage promptly: If you notice any loose threads or small holes in your stocking, fix them as soon as possible to prevent further damage. You can use a darning needle and matching thread or yarn to mend the stocking. Replacing any worn-out hanging loops or embellishments will also help to maintain the overall integrity of the stocking.
By following these care instructions, you can ensure that your knitted stocking will bring joy and cheer to your holiday celebrations for many years to come.