
If you’re looking for a fun and fashionable accessory to keep you warm during the colder months, a knitted headband is the perfect choice. Whether you’re a beginner or an experienced knitter, this free pattern is easy to follow and allows you to create a stylish headband in no time.
With this pattern, you’ll be able to create a cozy and comfortable headband that will not only keep your ears warm, but also add a touch of style to any outfit. The pattern uses basic knitting stitches and can be easily customized to fit your desired size and style. Whether you prefer a simple ribbed design or a more intricate cable pattern, the possibilities are endless.
Not only is knitting a great way to relax and unwind, but it also allows you to create personalized and unique items that reflect your own personal style. By choosing your favorite yarn and color, you can easily customize your headband to match your winter wardrobe or make a statement with a bold and vibrant hue.
So grab your knitting needles and get ready to create a fashionable and functional accessory with this knitted headband free pattern. Whether you’re making it for yourself or as a gift for a loved one, this headband is sure to become a winter wardrobe staple.
Knitted Head Band Free Pattern
Are you looking for a stylish and warm accessory to keep your head cozy during the colder months? Look no further than this knitted headband free pattern. With just a few skeins of yarn and some basic knitting skills, you can create a beautiful headband that will not only keep your ears warm but also add a touch of style to any outfit.
This knitted headband pattern is perfect for beginners and experienced knitters alike. It features a simple yet elegant design that can be customized to fit your personal style. The pattern includes instructions for both a narrow and wide headband, so you can choose the width that suits you best. You can also easily adjust the length of the headband to ensure a perfect fit.
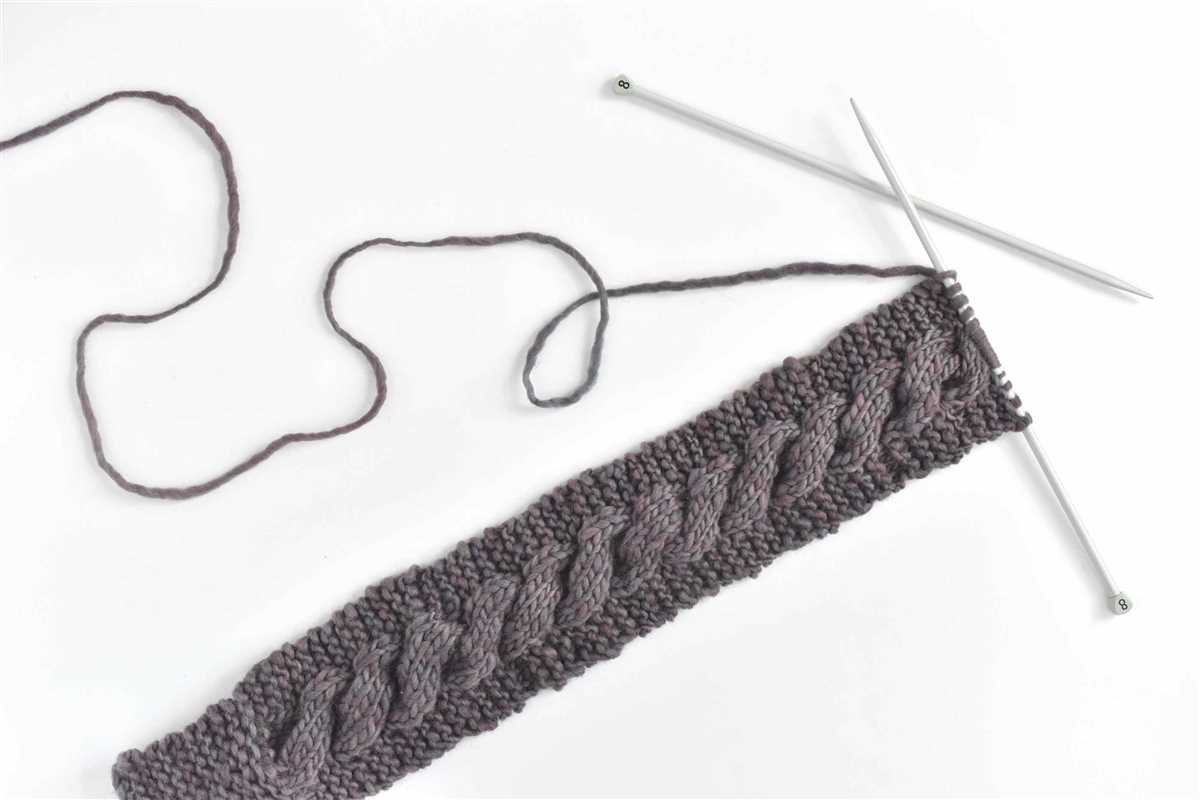
To create this knitted headband, you will need a size 8 knitting needle and worsted weight yarn. You can choose any color you like to match your wardrobe or opt for a neutral shade that will go with everything. The pattern uses a basic rib stitch, which gives the headband a nice stretch and ensures a snug fit.
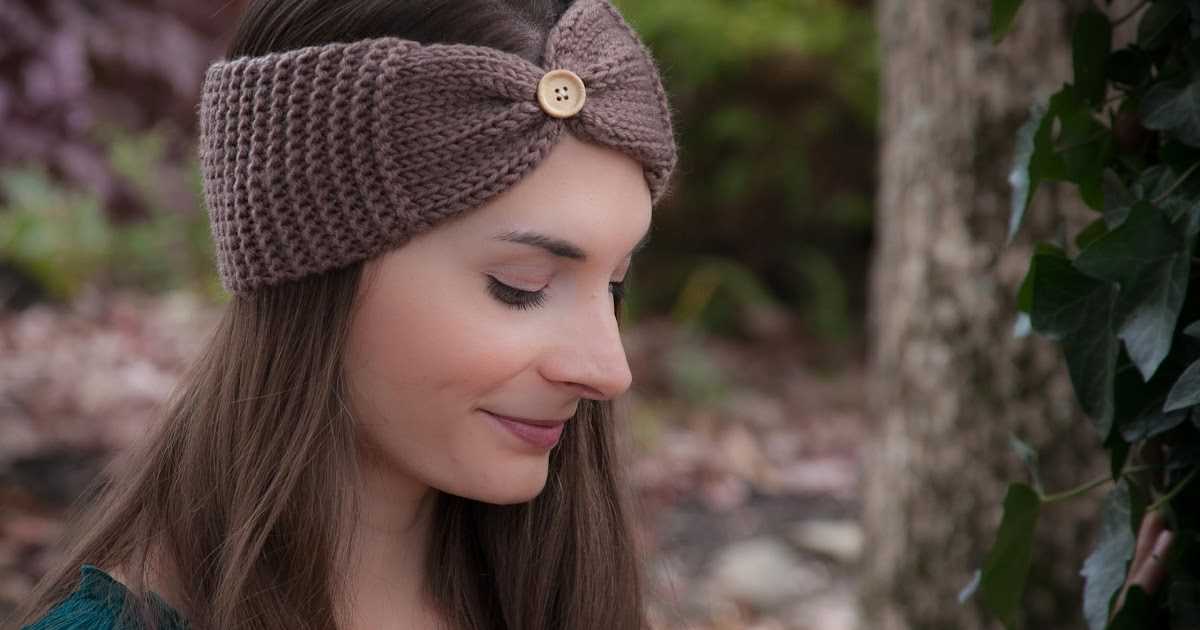
Once you have completed the headband, you can add any additional embellishments you like, such as buttons, bows, or flowers. These can be sewn onto the headband or attached with a small safety pin, allowing you to easily change up the look whenever you want.
Whether you’re a seasoned knitter or just starting out, this knitted headband free pattern is a fun and rewarding project that will keep you warm and stylish all winter long.
What is a knitted head band?
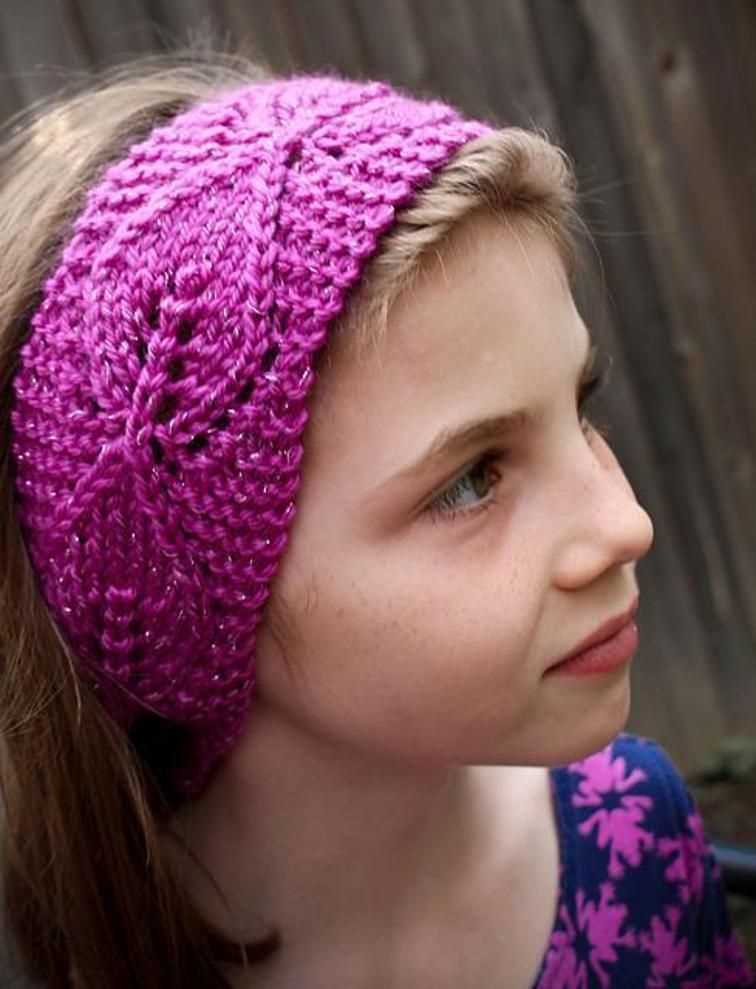
A knitted head band is a fashionable accessory that can keep your ears warm while adding style to your outfit. It is typically made from soft yarn and features a stretchy band that fits snugly around the head. Head bands are a popular choice for those who want to keep their hair out of their face while still looking stylish.
Knitted head bands come in a variety of designs and patterns, allowing you to express your personal style. Whether you prefer a simple, solid-colored band or a more intricate design with cables or lace, there are plenty of options to choose from. Some head bands may also have embellishments, such as buttons or bows, for added flair.
The best part about knitted head bands is that they are versatile and can be worn in multiple ways. You can position the band over your forehead for a retro-inspired look, or wear it lower on your head to keep your ears warm on chilly days. Some head bands even come with an elastic or adjustable closure, allowing you to adjust the fit to your preference.
Not only are knitted head bands fashionable, but they are also functional. The soft yarn used in their construction provides warmth and comfort, making them ideal for colder weather. They are a great accessory for outdoor activities such as hiking, skiing, or simply running errands on colder days.
Overall, a knitted head band is a versatile accessory that combines fashion and function. Whether you want to add a touch of style to your outfit or keep your ears warm during the winter months, a knitted head band is a great choice.
Materials needed for knitting a head band
When it comes to knitting a head band, you will need a few key materials to get started. Here is a list of the essential items you will need:
- Yarn: Choose a soft and cozy yarn that is suitable for the desired thickness and texture of the head band. There are various types of yarn available, such as acrylic, wool, or cotton, so choose the one that best fits your preferences and needs.
- Knitting needles: Select the right size of knitting needles according to the thickness of your chosen yarn. The recommended needle size is usually stated on the yarn label or in the knitting pattern instructions.
- Tape measure: This tool will help you accurately measure the length of your head band and ensure that it fits comfortably.
- Scissors: You will need a pair of sharp scissors to cut the yarn and any excess threads.
- Darning needle: A darning needle, also known as a yarn needle, is necessary for stitching and weaving in loose ends of yarn to finish off your head band neatly.
With these materials at hand, you’ll be ready to start knitting your own beautiful and cozy head band. Remember to also have your knitting pattern and any additional embellishments or buttons you may want to add to your head band.
Choosing the right yarn for your head band
When it comes to knitting a head band, choosing the right yarn is essential to ensure the best results. The yarn you select will determine the look, feel, and durability of your head band. Take into consideration the following factors when choosing the perfect yarn for your project.
Fiber content:
Consider the fiber content of the yarn. When it comes to head bands, you’ll want to choose a yarn that is soft and comfortable to wear against the skin. Natural fibers like merino wool, cotton, or alpaca can be good choices for head bands as they are breathable and gentle on the skin.
Weight:
The weight of the yarn will also impact the final product. A lightweight, fine yarn will create a more delicate and elegant head band, while a heavier yarn will result in a thicker and warmer head band. Consider the desired look and functionality of your head band when choosing the appropriate weight of yarn.
Color and pattern:
The color and pattern of the yarn will play a role in the overall design of your head band. Solid, neutral colors can create a classic and versatile head band that can be paired with any outfit. Alternatively, vibrant colors or bold patterns can add a unique and eye-catching touch to your head band.
Texture:
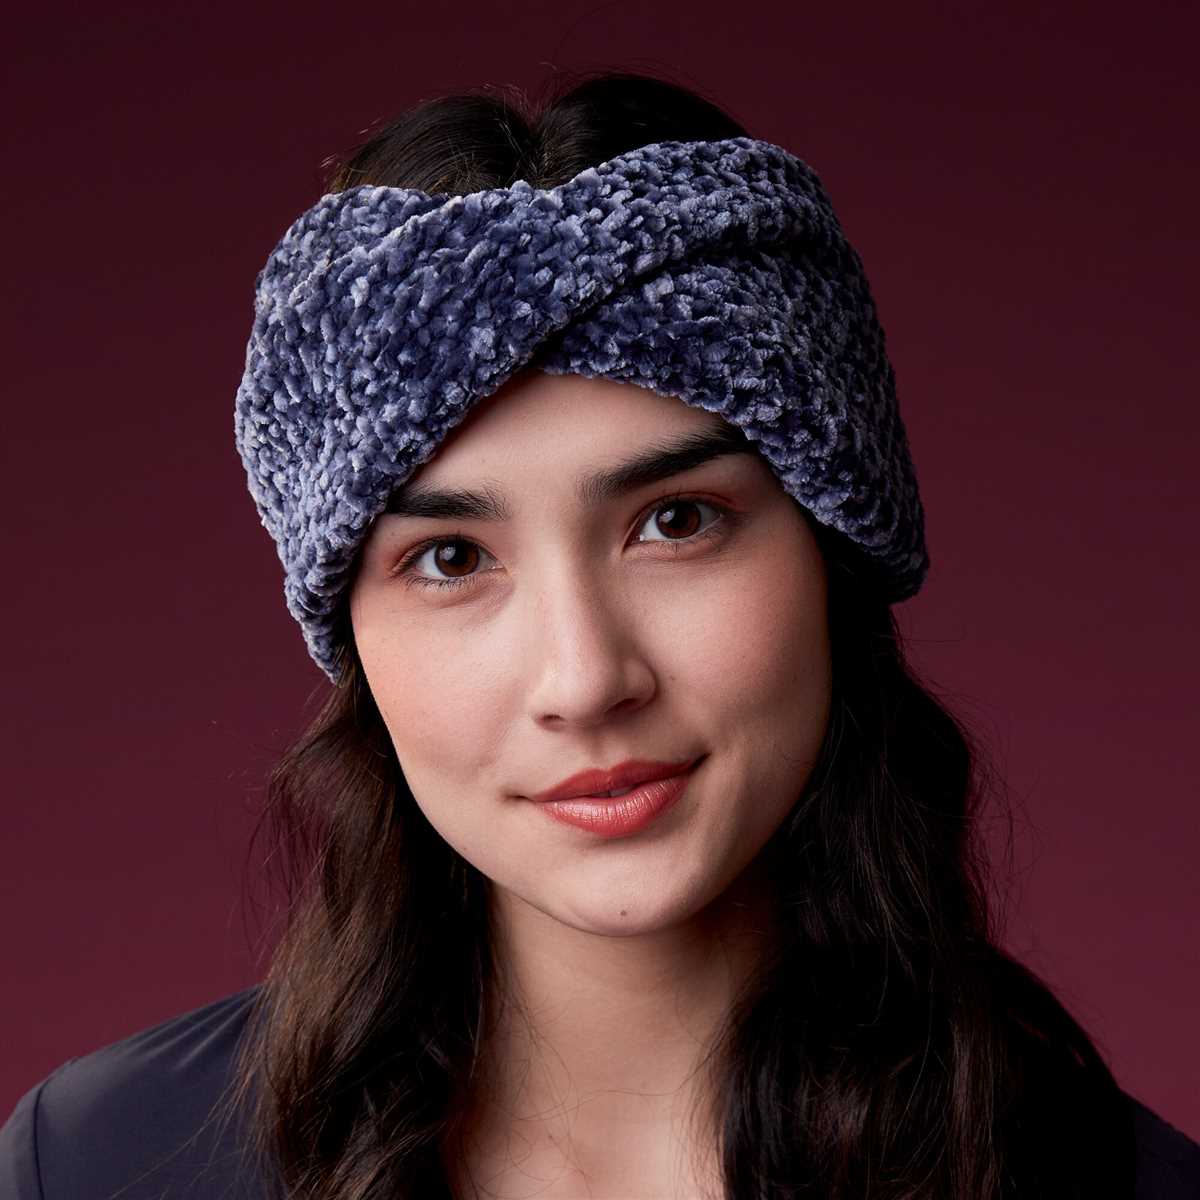
Texture can add interest and dimension to your head band. Consider yarns with different textures, such as boucle, chenille, or ribbon, to create a visually appealing head band. However, keep in mind that highly textured yarns may not be as comfortable to wear for extended periods of time.
By carefully considering fiber content, weight, color and pattern, and texture, you can choose the perfect yarn for your head band project. Experiment with different yarns to achieve the desired look and feel, and enjoy the process of creating a beautiful and functional accessory.
How to choose the suitable knitting needles
Choosing the right knitting needles is essential for creating beautiful and well-fitting knitted accessories. The type and size of needles you choose can greatly affect the outcome of your knitting project. Here are some factors to consider when selecting knitting needles:
Material

Knitting needles are made from a variety of materials, including metal, wood, bamboo, and plastic. Each material has its own unique qualities that can impact your knitting experience. Metal needles, such as aluminum or stainless steel, are durable and slide easily through stitches. Wood and bamboo needles provide a warm and natural feel, making them ideal for those who prefer a more traditional approach. Plastic needles can be a good choice for beginners due to their affordability and lightweight nature. Consider your personal preference and knitting style when choosing the material of your knitting needles.
Size
Knitting needles come in different sizes, measured in millimeters or US sizes. The size of the needles you choose should correspond to the yarn weight and gauge recommended for your knitting project. Thicker yarns require larger needles, while finer yarns call for smaller needles. It’s important to match the recommended needle size to achieve the desired stitch tension and ensure that your finished project turns out the right size. Check the label or pattern instructions for the recommended needle size for your project.
Length
The length of your knitting needles can also impact your knitting experience. Shorter needles are suitable for smaller projects and can help you knit in tighter spaces without stretching your stitches. Longer needles are ideal for larger projects, as they can hold more stitches and provide better control. Consider the size and type of project you are working on when choosing the length of your knitting needles.
Comfort
Lastly, consider your own comfort when selecting knitting needles. Some knitters may prefer lightweight and ergonomic needles that reduce strain on the wrists and hands, while others may prefer the weight and feel of heavier needles. It’s important to find knitting needles that feel comfortable to hold and work with for long periods of time. You may want to try different types and sizes of needles to find the ones that suit you best.
By considering the material, size, length, and comfort of knitting needles, you can choose the suitable ones for your knitting projects. Experiment with different options to find the needles that enhance your knitting experience and help you create beautiful and well-fitting knitted accessories.
Getting started with knitting
Knitting is a beautiful and rewarding craft that allows you to create warm, cozy garments and accessories with just a few simple tools. Whether you’re a beginner or an experienced knitter, it’s always helpful to review the basics and get acquainted with the essential techniques.
Tools and materials:
Before you start knitting, you’ll need a few basic tools and materials. These include knitting needles, which come in different sizes and materials; yarn, which can be made from various fibers and comes in different weights; and a pair of scissors. You may also want to have a tape measure, stitch markers, and a yarn needle handy.
Casting on:
The first step in knitting is casting on, which is a way of creating the first row of stitches on your needles. There are different methods for casting on, but one of the most common is the long-tail cast on. This method creates a stretchy and even edge. To cast on, you’ll need to estimate the amount of yarn you’ll need and leave a long tail. Then, using both needles, you’ll create a loop and transfer it onto one of the needles. Repeat this process until you have the desired number of stitches.
Knit stitch:
The knit stitch is the building block of knitting and forms the basis of many patterns. To knit, insert the right needle into the first stitch on the left needle, from front to back. Then, bring the yarn over the right needle, towards the back. With the right needle, pull the yarn through the stitch, creating a new loop on the right needle. Slip the old stitch off the left needle. Repeat this process for each stitch until the row is complete.
Purl stitch:
The purl stitch is the reverse of the knit stitch and creates a bumpy texture on the fabric. To purl, insert the right needle into the first stitch on the left needle, from back to front. Then, bring the yarn in front of the right needle. With the right needle, pull the yarn through the stitch, creating a new loop on the right needle. Slip the old stitch off the left needle. Repeat this process for each stitch until the row is complete.
Increasing and decreasing stitches:
Once you have mastered the basic knit and purl stitches, you can start exploring different stitch patterns and techniques. One important skill to learn is increasing and decreasing stitches, which allows you to shape your knitting. There are various methods for increasing and decreasing, such as yarn overs, knit two together, and slip slip knit. These techniques can be used to add or remove stitches in your work, creating shaping and decorative effects.
Finishing:
When you have completed your knitting project, it’s time to finish it off. This usually involves binding off, which is a way of securing the stitches and creating a neat edge. To bind off, knit the first two stitches. Then, insert the left needle into the first stitch on the right needle, lift it over the second stitch, and off the right needle. Repeat this process until there is only one stitch left on the right needle. Cut the yarn, leaving a long tail, and pull it through the last stitch to fasten off.
With these basics in mind, you’re now ready to start your knitting journey. Remember to practice regularly, be patient with yourself, and have fun exploring the endless possibilities of knitting!
Basic knitting stitches for a headband
When it comes to knitting a headband, there are several basic stitches that you’ll need to know. These stitches will help you create different patterns and textures for your headband, allowing you to customize it to your liking.
Garter stitch: The garter stitch is one of the simplest knitting stitches and is commonly used for headbands. It is created by knitting every row, resulting in a fabric that has a ridged texture. This stitch is easy to learn and perfect for beginners.
Stockinette stitch: The stockinette stitch is another popular option for headbands. It is created by knitting one row and purling the next, resulting in a smooth and flat fabric. This stitch is great for creating a sleek and polished look.
Rib stitch: The rib stitch is often used for the band part of a headband, as it creates a stretchy and elastic fabric. It is achieved by alternating knit and purl stitches in a repeating pattern. The most common rib stitch pattern is the 1×1 rib, where one knit stitch is followed by one purl stitch.
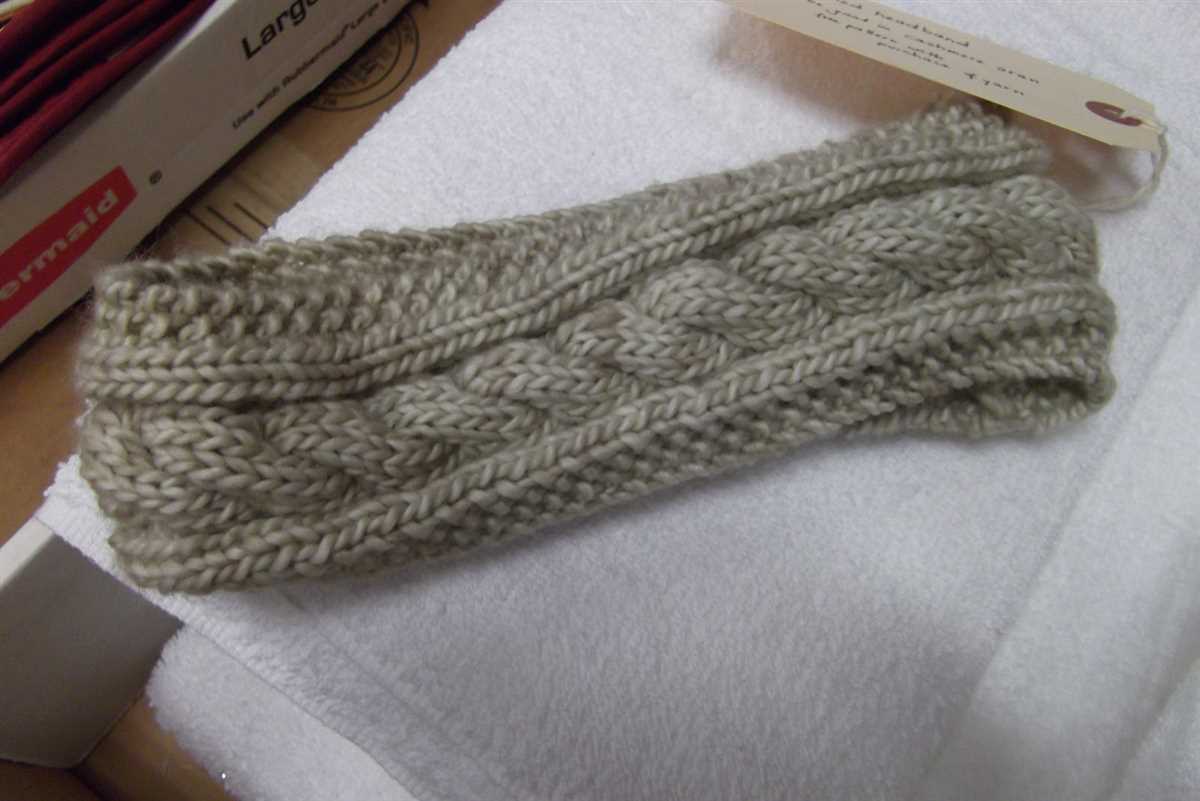
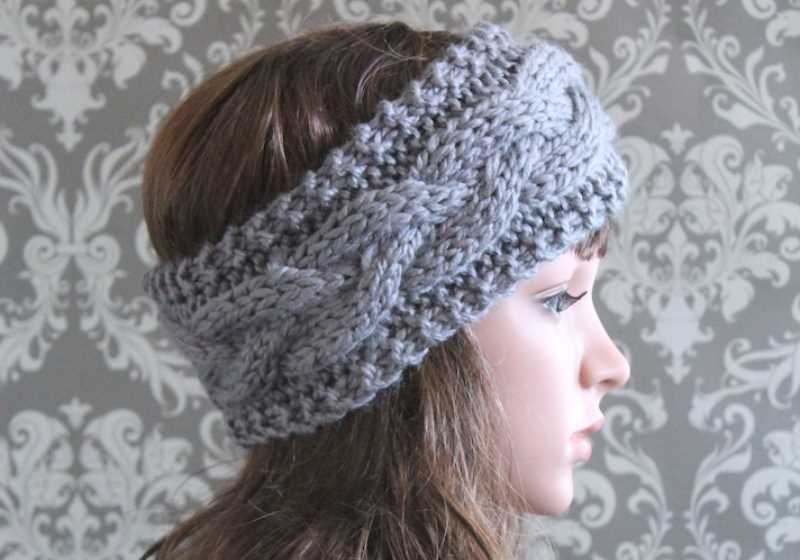
Cable stitch: For those who want to add some texture and interest to their headband, the cable stitch is a great option. This stitch involves crossing a set of stitches over each other, creating a twist effect. Cable stitches can be simple or intricate, depending on the pattern you choose.
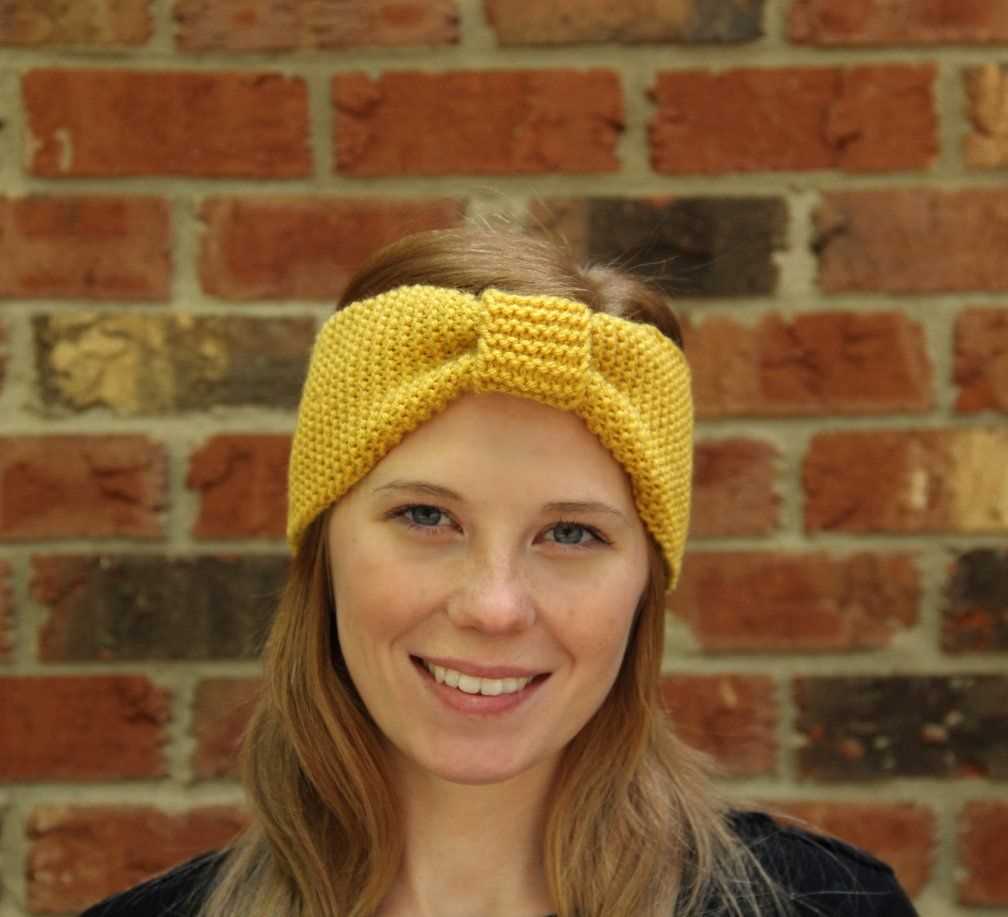
Seed stitch: The seed stitch is a versatile stitch that creates a textured fabric with a bumpy surface. It is achieved by alternating knit and purl stitches in a specific pattern. This stitch works well for adding dimension and visual interest to a headband.
By mastering these basic knitting stitches, you’ll have the skills to create a wide variety of headbands. You can experiment with different stitch combinations and patterns to create unique and stylish accessories.
Knitting the Head Band Pattern
Knitting a head band is a fun and practical project that can be completed quickly. With this free pattern, you can create a stylish and cozy head band that will keep you warm during the winter months. Whether you’re a beginner or an experienced knitter, this pattern is easy to follow and can be customized to your desired size and style.
To start knitting the head band pattern, gather the necessary materials. You will need a medium weight yarn and knitting needles in the appropriate size for your chosen yarn. You may also want to have a tape measure and stitch markers on hand.
Begin by casting on the desired number of stitches, which will depend on the width of the head band you want to create. The pattern typically calls for a multiple of 4 stitches to achieve the desired ribbed effect. Once you have cast on, join the ends of the stitches to form a circle, being careful not to twist the stitches.
Next, you will start the ribbing pattern, which consists of knit and purl stitches. The pattern will specify the number of rows and the order of the stitches for each row. It is important to pay attention to the pattern and make sure to follow it accurately to achieve the desired result. You may find it helpful to use stitch markers to keep track of the different sections of the pattern.
Once you have completed the ribbing pattern, you will finish the head band by binding off the stitches. Cut the yarn, leaving a long tail, and use a tapestry needle to weave in any loose ends. You can then sew the two ends of the head band together, making sure to align the stitches for a seamless finish.
Once you have finished knitting the head band, you can embellish it with buttons, bows, or other decorative elements if desired. The head band can be worn as a stylish accessory or as a practical way to keep your ears warm during the colder months. Experiment with different yarn colors and patterns to create head bands that match your style and wardrobe.
In conclusion, knitting a head band using a free pattern is a great way to practice your knitting skills while creating a useful and stylish accessory. With a few basic techniques and some patience, you can knit a head band that will keep you warm and fashionable all winter long.
Finishing and adding details to your headband
Once you have completed knitting your headband, there are a few finishing touches you can add to make it even more unique and stylish. These details can elevate your headband from a simple accessory to a fashion statement.
1. Embellishments: You can add small embellishments to your headband to give it a personal touch. Sew on buttons, beads, or small crochet flowers to add some flair. You can also attach decorative ribbons or bows to enhance the overall look.
2. Contrast threading: If you’re feeling adventurous, you can add some contrast threading to your headband. Use a different color yarn and a tapestry needle to weave it through the stitches, creating an interesting pattern or design. This can add a pop of color and make your headband stand out.
3. Braided detail: Another way to add interest to your headband is by incorporating a braid. Take three strands of yarn in contrasting colors and braid them together. Sew the braided strand onto the headband, either as a decorative element or as a way to adjust the size for a better fit.
4. Lining: To make your headband more comfortable to wear, consider adding a lining. Cut a strip of fabric slightly smaller than the width of your headband and sew it onto the back. This will provide a soft and smooth surface against your skin and prevent any itching or discomfort.
5. Tag or label: If you want to give your headband a professional touch, add a small fabric or leather tag with your name or logo sewn onto it. You can attach it to the side or back of the headband, making it look like a designer piece.
By adding these finishing details, you can transform your knitted headband into a unique and stylish accessory that showcases your creativity and personal style.
Blocking your knitted head band
Blocking is an essential step in finishing your knitted head band. It helps to shape and enhance the stitch definition of your project, giving it a professional and polished look. Blocking also helps to even out any uneven tension in your knitting and allows the fibers of the yarn to relax and settle into their final shape.
To block your knitted head band, you will need a clean surface, some rustproof pins, and a spray bottle filled with water. Start by soaking your head band in lukewarm water for about 20 minutes. Gently squeeze out the excess water, being careful not to wring or twist the fabric. Lay the head band on a clean towel and roll it up to remove more moisture.
Next, lay your head band on a blocking mat or an ironing board. Pin the edges of the head band down, using rustproof pins, to ensure that the edges lay flat and straight. If your head band has any lace or decorative stitches, use more pins to shape and define the pattern.
Once your head band is pinned down, lightly mist it with water from the spray bottle. This will help the fibers relax and settle into place. Let the head band dry completely, which may take anywhere from a few hours to overnight, depending on the humidity and thickness of the yarn.
After your head band is completely dry, carefully remove the pins. Your knitted head band should now be beautifully shaped and ready to wear. Blocking not only enhances the appearance of your head band, but it also helps it to retain its shape over time. Remember to follow the specific blocking instructions for your yarn and pattern, as different fibers and stitch patterns may require different blocking techniques.
Adding a lining to your head band
Making a knitted head band is a great way to keep your ears warm during the colder months. However, if you want an extra layer of warmth and comfort, adding a lining to your head band can be a wonderful option. A lining can also help prevent your head band from stretching out over time and provide a more polished finish to your project.
To add a lining to your knitted head band, you will need a soft fabric that is comfortable against your skin. Consider using a fleece or jersey fabric for the lining as they are warm and cozy. Measure the width and length of your head band to determine the size of the lining needed.
Once you have your lining fabric, cut it to the same width and length as your head band. Place the right sides of the lining and head band together, aligning the edges. Pin or baste the lining and head band together, making sure to leave a small opening for turning. Then, stitch along the edges, either by hand or with a sewing machine, leaving the small opening untouched.
After stitching, carefully turn the head band right side out through the opening. Use a pencil or knitting needle to push the corners out for a clean finish. Then, stitch the opening closed either by hand or with a sewing machine. Trim any excess fabric if necessary.
With the lining added, your knitted head band will not only be warm and cozy but also have a professional touch. You can now enjoy the added comfort and durability of your lined head band during those chilly winter days.
Troubleshooting Common Knitting Problems
Knitting is a relaxing and enjoyable hobby, but sometimes problems can arise that can be frustrating. Here are some common knitting problems and tips for solving them:
Dropped Stitches

One of the most common knitting problems is dropping a stitch. This can happen when your needle slips out of a stitch, causing it to unravel. To fix a dropped stitch, use a crochet hook or the tip of your knitting needle to carefully pick up the dropped stitch and put it back on the needle in the correct orientation. Take your time when fixing dropped stitches to ensure they are properly secured.
Uneven Tension
Another common knitting problem is having uneven tension, where some stitches are tighter or looser than others. This can result in an uneven fabric or a misshapen finished project. To fix uneven tension, try to be conscious of your knitting technique and make sure you are consistently pulling the yarn with the same amount of tension. You can also try adjusting the size of your knitting needles to achieve a more even tension.
Twisted Stitches
Twisted stitches can also be a common problem, especially for beginners. Twisted stitches occur when the orientation of the stitch on the needle is incorrect, resulting in a twisted appearance. To fix twisted stitches, carefully slip the stitch off the needle and reinsert it in the correct orientation. Pay close attention to the twist of the stitch to ensure it is properly corrected.
Uneven Rows or Columns
It’s not uncommon for knitters to notice uneven rows or columns in their work, especially when working with intricate patterns or colorwork. This can be caused by unintentionally skipping or adding stitches or by pulling the yarn too tightly in certain areas. To fix uneven rows or columns, carefully count your stitches and make sure you are following the pattern correctly. If necessary, you can also try blocking your finished project to even out any inconsistencies.
- Remember to take your time and be patient when troubleshooting knitting problems.
- If you’re unsure how to fix a specific issue, don’t hesitate to ask for help from a more experienced knitter or consult a knitting resource such as a book or online tutorial.
Wearing and styling your knitted head band
Now that you have finished knitting your head band, it’s time to wear it and show off your stylish creation. Here are a few tips and ideas on how to wear and style your knitted head band:
1. Basic Wear
The simplest way to wear your knitted head band is by placing it over your head and pulling it down towards your forehead. Make sure it covers your ears and keeps them warm. This classic style is perfect for chilly weather and can be paired with any outfit.
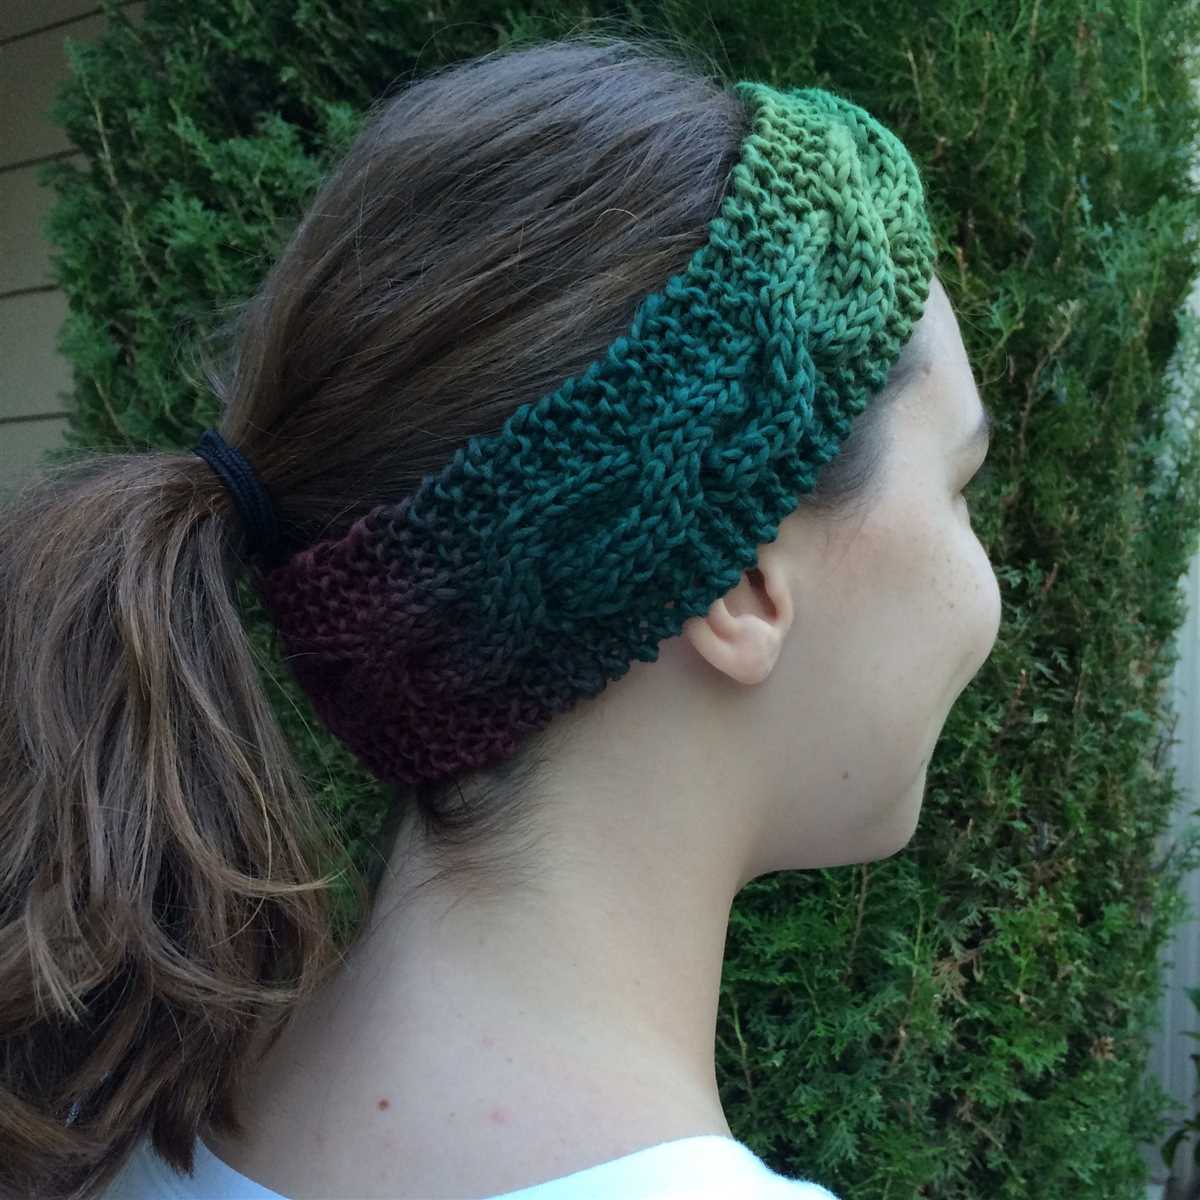
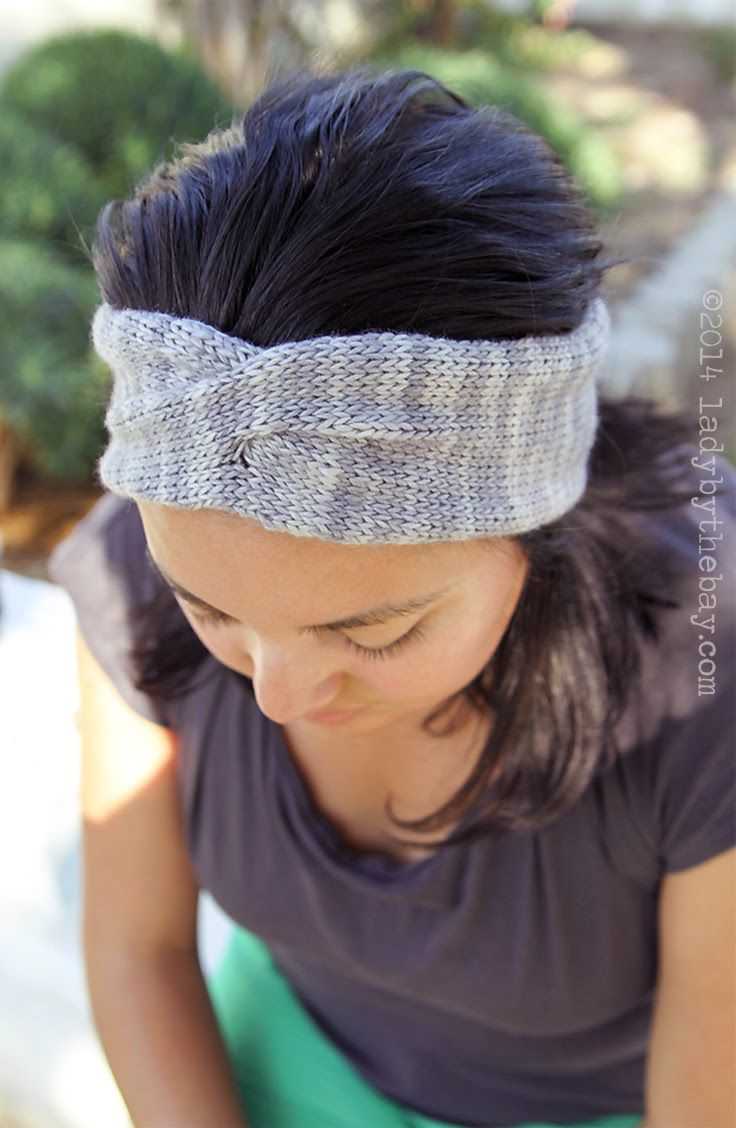
2. Bohemian Twist
If you want to add a bohemian touch to your look, try twisting your knitted head band before placing it on your head. This will create a unique and stylish twist effect. You can position the twist towards the front or to the side, depending on your preference.
3. Headband with a Bun
For a chic and effortless look, wear your knitted head band with a bun. Start by tying your hair in a bun at the back or top of your head, then place the head band over your head to secure the bun in place. This style works great for both casual and formal occasions.
4. Underneath a Hat
To add an extra layer of warmth and style, wear your knitted head band underneath a hat. Choose a hat that complements the color and texture of your head band. This combination will not only keep you cozy, but also elevate your winter outfit.
5. Accessorize with Pins or Brooches
Add a touch of sparkle or flair to your knitted head band by accessorizing it with pins or brooches. You can attach them to the front or side of the head band to create a focal point and make a statement. Choose pins or brooches that match your personal style and the occasion.
With these tips and ideas, you are ready to rock your knitted head band in style. Whether you prefer a basic or more unique look, your head band will not only keep you warm but also showcase your creativity and fashion sense.
Q&A:
Where can I find a free pattern for a knitted headband?
You can find free patterns for knitted headbands on various websites and blogs. Some popular sources include Ravelry, LoveKnitting, and Pinterest. You can also try searching for specific patterns on search engines like Google.
What materials do I need to knit a headband?
To knit a headband, you will typically need yarn, knitting needles, and a tapestry needle or crochet hook for finishing. The specific materials you need will depend on the pattern you choose. Some patterns may also require additional accessories like buttons or elastic.
Are knitted headbands suitable for beginners?
Yes, knitted headbands can be a great project for beginners. They are usually smaller in size and require less time and yarn compared to larger items like sweaters or blankets. There are also many simple and beginner-friendly patterns available, making it easier for beginners to follow along and learn new knitting techniques.
Can I adapt a knitted headband pattern to a different size?
Yes, you can adapt a knitted headband pattern to a different size by adjusting the number of stitches and rows you knit. You can use a gauge swatch to determine the number of stitches per inch, and then calculate the number of stitches needed for your desired size. Keep in mind that adjusting the size may also require modifying the pattern’s instructions for shaping or finishing.
Can I sell headbands made from a free pattern?
The answer to this question depends on the specific terms and conditions set by the pattern designer. Some free patterns may allow you to sell finished items, while others may have restrictions or require permission from the designer. It’s always best to check the pattern’s terms or contact the designer directly to clarify whether selling is permitted.
Where can I find a free pattern for a knitted headband?
You can find a free pattern for a knitted headband on various websites and platforms such as Ravelry, Knitting patterns galore, and Pinterest. These websites offer a wide variety of patterns for knitted headbands, and some even have filters for specific styles or difficulty levels.