
A cowl neck warmer is a stylish and cozy accessory that can keep you warm and fashionable during the colder months. Whether you’re a beginner or an experienced knitter, this pattern is perfect for you. With just a few simple stitches and some soft yarn, you can create a beautiful and functional accessory in no time.
To start, you’ll need to gather your materials. You’ll need a pair of knitting needles, size 8 or 9, depending on your desired gauge. You’ll also need approximately 200-250 yards of bulky weight yarn, preferably one that is soft and warm, like alpaca or merino wool. Finally, you’ll need a yarn needle for weaving in ends.
Once you have your materials, you can begin the pattern. Cast on 100 stitches onto your knitting needles. If you want a narrower neck warmer, you can cast on fewer stitches, and if you want a wider one, you can cast on more stitches. Make sure your cast on is not too tight, as you’ll need to be able to comfortably fit the cowl over your head.
Materials
Before you start knitting the cowl neck warmer, make sure you have all the necessary materials. Here is a list of items you will need:
- Yarn: Choose a soft and warm yarn that is suitable for winter accessories. You will need about 200-250 grams of yarn, depending on the size of the cowl.
- Knitting needles: Use circular knitting needles in a size that is appropriate for the yarn you have chosen. A size between US 7 and US 9 (4.5mm-5.5mm) should work well.
- Tape measure: You will need a tape measure to check the gauge and measure the length of the cowl.
- Stitch markers: These are helpful for marking the beginning of rounds or specific stitches in the pattern.
- Yarn needle: A yarn needle is essential for weaving in the loose ends of yarn and finishing the cowl.
- Scissors: Keep a pair of scissors handy for cutting the yarn.
- Pattern: Download or print out the pattern for the cowl neck warmer. You can find free patterns online or purchase a pattern from a knitting store.
Once you have gathered all these materials, you will be ready to start knitting your cowl neck warmer. Double-check the pattern to ensure you have the correct yarn weight and needle size. It’s always a good idea to make a gauge swatch before beginning the project, especially if you are using a different yarn or needle size than recommended in the pattern. Now you are all set to begin knitting!
Choosing the right yarn
When it comes to knitting a cowl neck warmer, choosing the right yarn is essential. The right yarn can make all the difference in ensuring that your cowl neck warmer is cozy, warm, and comfortable to wear. There are several factors to consider when selecting yarn for your project.
Fiber content: The fiber content of the yarn will determine the warmth, softness, and drape of your cowl neck warmer. For a soft and luxurious feel, consider using yarn made from natural fibers such as merino wool, alpaca, or cashmere. If you prefer a more durable and easy-care option, acrylic or acrylic blend yarns may be a better choice.
Weight: The weight of the yarn will determine the thickness and heaviness of your cowl neck warmer. For a lightweight and breathable option, choose a fingering or sport weight yarn. If you prefer a chunkier and warmer cowl, opt for a worsted or bulky weight yarn.
Gauge: Pay attention to the recommended gauge for the pattern you are using. The gauge determines how many stitches and rows are needed to achieve the desired size and fit of your cowl neck warmer. Be sure to choose a yarn that matches the recommended gauge to ensure a well-fitting finished project.
Color and texture: The color and texture of the yarn can add personality and style to your cowl neck warmer. Consider whether you want a solid color or a variegated yarn, as well as any texture or pattern you may want to incorporate. Experiment with different color combinations and yarns to create a truly unique and eye-catching cowl neck warmer.
Getting started
Before you begin knitting your cowl neck warmer, make sure you have all the necessary materials. You will need a set of knitting needles, preferably circular ones, and a skein of yarn in your chosen color. You may also want to have a stitch marker and a yarn needle on hand for finishing touches.
Once you have gathered your materials, it’s time to cast on your stitches. The pattern for the cowl neck warmer will specify how many stitches you need to cast on, so refer to it before starting. To cast on, simply hold the knitting needle in your dominant hand and create a slipknot with the yarn. Slide the slipknot onto the needle and tighten it, leaving a short tail.
- Step 1: Hold the needle with the slipknot in your right hand and insert the needle into the slipknot from front to back.
- Step 2: With your left hand, bring the yarn over the top of the needle, creating a loop.
- Step 3: Pull the loop through the slipknot, creating a new stitch.
- Step 4: Slide the new stitch onto the left needle.
- Step 5: Repeat steps 1-4 until you have cast on the required number of stitches.
Once you have cast on your stitches, you are ready to begin knitting the cowl neck warmer. The pattern will guide you through the specific stitches and techniques to use, so be sure to follow it carefully. As you progress, you may find it helpful to use a stitch marker to mark the beginning of each round.
Knitting the body of the cowl
Once you have cast on the desired number of stitches, you are ready to begin knitting the body of the cowl. Follow the pattern instructions for the stitch pattern and continue knitting in rounds until the body reaches the desired length. Remember to always knit in the round, as this will create a seamless and continuous fabric for the cowl.
When knitting the body, it is important to keep track of your stitch count and pattern. You may find it helpful to use stitch markers to mark the beginning and end of the round, as well as any pattern repeats. This will help you stay on track and ensure that your stitch pattern is consistent throughout the cowl.
As you continue knitting the body, you may notice that the fabric begins to curl or roll up on itself. This is normal and can be easily fixed during the finishing process. To prevent excessive curling, you can block the cowl by gently wetting it and laying it flat to dry. This will help to relax the yarn and smooth out the fabric.
Once you have reached the desired length for the body of the cowl, you can move on to the next section of the pattern, such as the ribbed edging or the cowl closure. Make sure to follow the pattern instructions carefully to achieve the desired finished look for your cowl.
Adding the neck shaping
Once you have completed the body of the cowl neck warmer, it’s time to add the shaping for the neck. This will allow the cowl to sit comfortably around the neck and provide a snug fit.
To begin the neck shaping, you will need to decide how many stitches you want to decrease. This will depend on the size of the cowl and the desired neck opening. You can make a provisional cast on at the center front of the cowl and work a few rows in stockinette stitch. Then, with a contrasting color yarn, work a few rows in a ribbing pattern.
Next, you will work the decreasing rows. You can use a variety of decrease methods, such as k2tog (knit two stitches together) or ssk (slip, slip, knit). The important thing is to evenly distribute the decreases around the neck opening so that the shaping is symmetrical.
Continue working the decreasing rows until you have reached the desired neck opening size. You can try the cowl on as you go to ensure a good fit. Once you have finished the neck shaping, you can bind off the stitches and weave in any loose ends.
Finishing touches
Once you have completed knitting your cowl neck warmer, it’s time to add the finishing touches to make it truly special. These final steps will give your project that polished and professional look.
Weaving in ends: Start by weaving in any loose yarn ends from your cast on and cast off edges. Use a tapestry needle to thread the yarn through the neighboring stitches, making sure it is secure and won’t unravel.
Blocking: Blocking is an important step to shape and even out your cowl neck warmer. Soak it in lukewarm water with a gentle detergent for about 15 minutes, then gently squeeze out the excess water. Lay it flat on a clean towel, making sure to smooth out any wrinkles or kinks. Use rust-proof pins to secure the edges and corners in place, allowing the cowl neck warmer to dry completely.
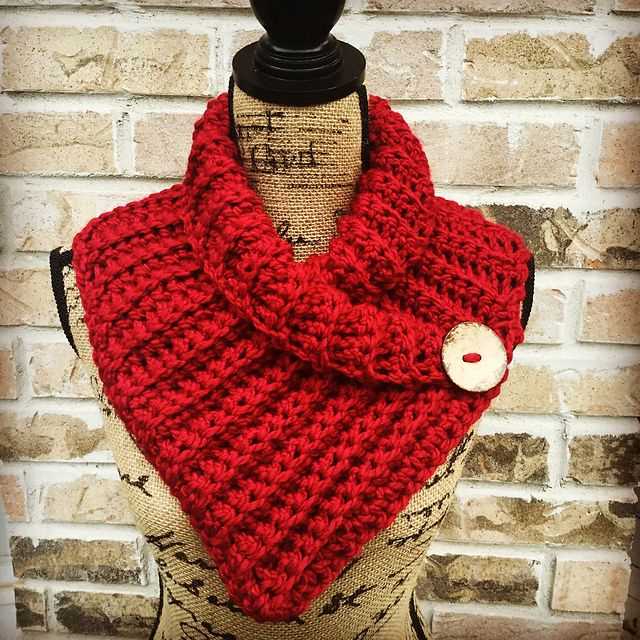
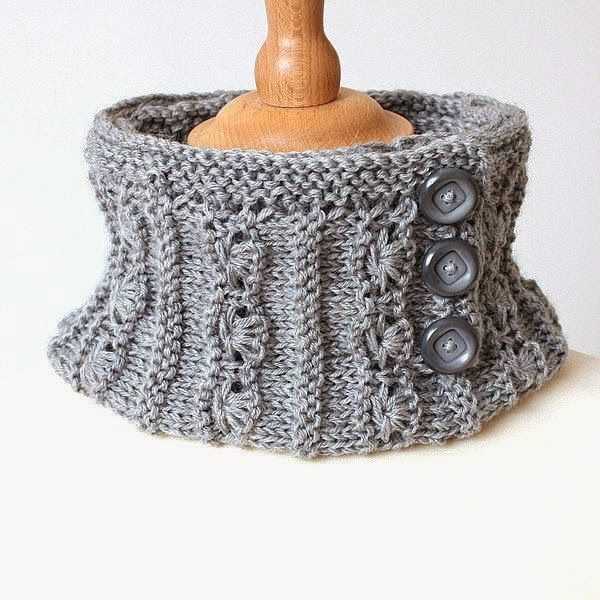
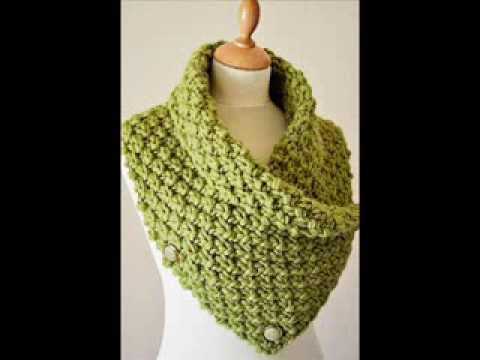
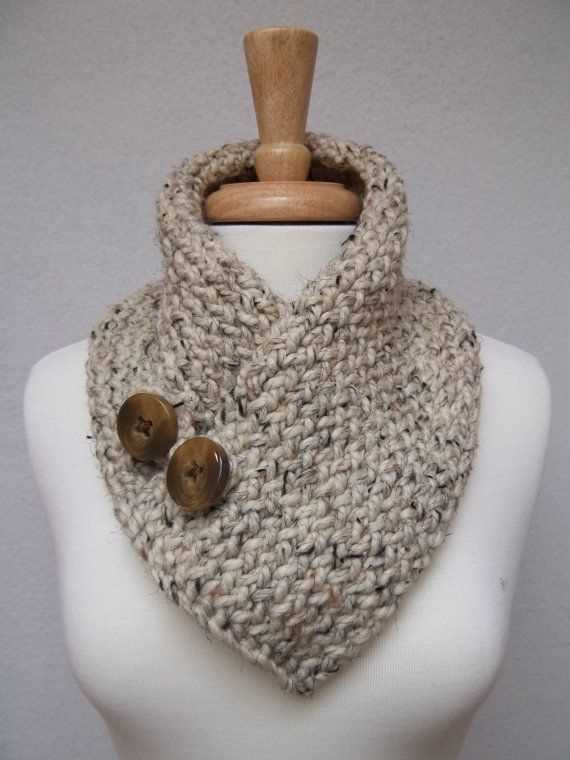
Adding a decorative twist: You can personalize your cowl neck warmer by adding a decorative twist. This can be achieved by attaching a small fabric flower, a knitted bow, or a cute button. Simply sew or attach your chosen embellishment to the side or front of the cowl neck warmer, making sure it is secure and won’t easily come off.
Care instructions: Lastly, don’t forget to include care instructions for your cowl neck warmer. This can be as simple as recommending hand washing and air drying to prevent any unwanted stretching or shrinking. You can write or print out the care instructions and attach it to the cowl neck warmer using a small safety pin or ribbon.
With these finishing touches, your knitted cowl neck warmer will be ready to keep you warm and stylish during the colder months, or make a thoughtful handmade gift for a loved one.
Blocking the cowl
After completing the knitting of your cowl neck warmer, the next step is to block it. Blocking is an important process that helps in giving your knitted project a finished and polished look. It involves shaping and sizing the knitted fabric by wetting it and letting it dry in the desired shape.
Before blocking, you should check the care instructions for the yarn used in your cowl neck warmer. Some yarns may require different blocking techniques or have specific temperature and moisture requirements. It is important to follow these instructions to avoid damaging the yarn or altering the texture of your cowl neck warmer.
To begin the blocking process, you need to wet your cowl neck warmer. Fill a basin or sink with lukewarm water and add a few drops of mild soap or specialized wool wash. Gently immerse the cowl in the water, making sure it is fully submerged. Allow the cowl to soak for about 10-15 minutes.
After soaking, carefully remove the cowl from the water and squeeze out excess water without wringing or twisting. Lay the cowl on a clean towel and gently roll it up to absorb more water. Once excess water has been removed, transfer the cowl to a blocking mat or an old towel that you don’t mind getting wet.
Now it’s time to shape your cowl neck warmer. You can use T-pins or blocking wires to secure the edges and corners of the cowl in place. Stretch and shape the fabric to the desired measurements, making sure it is evenly distributed. Pay special attention to the cowl’s neckline and any stitch patterns or cables, ensuring they are well defined.
Allow the cowl to air dry in a well-ventilated area, away from direct sunlight or heat sources. Depending on the humidity and thickness of the fabric, it may take a day or more for the cowl to completely dry. Once dry, remove the T-pins or blocking wires and admire your beautifully blocked cowl neck warmer.
Styling options
Now that you have learned how to make a knitted cowl neck warmer using the pattern provided, it’s time to explore different ways to style your new accessory. Whether you’re dressing up for a fancy event or keeping it casual, there are plenty of options to choose from.
Here are some ideas to inspire your creativity:
1. Classic Look
Pair your knitted cowl neck warmer with a tailored coat, jeans, and ankle boots for a timeless and sophisticated look. Opt for neutral colors like gray or black to keep it versatile and easy to match with your existing wardrobe.
2. Bohemian Vibes
Add a touch of bohemian flair to your outfit by pairing your cowl neck warmer with a flowy maxi dress, suede boots, and some statement jewelry. Choose a cowl neck warmer with a vibrant or patterned design to create a striking contrast against a solid-colored dress.
3. Sporty Chic
For a more relaxed and sporty look, wear your knitted cowl neck warmer with a cozy sweater, leggings, and sneakers. This outfit is perfect for running errands or heading to the gym, allowing you to stay warm and stylish at the same time.
4. Layered Style
Create a layered look by wearing your cowl neck warmer over a turtleneck sweater or under a cardigan. This adds an extra dimension to your outfit and allows you to show off the textured pattern of the cowl neck warmer. Experiment with different color combinations to create a visually appealing ensemble.
With these styling options in mind, you can now confidently wear your knitted cowl neck warmer in various settings and occasions. Enjoy the warmth and comfort it provides while showcasing your personal style!