
When it comes to knitting scarves, the options are endless. One of the classic and versatile patterns that you can try is the seed stitch. The seed stitch creates a beautiful textured pattern that is perfect for scarves, as it is reversible and has a nice drape. Whether you are a beginner or an experienced knitter, the seed stitch is a great pattern to add to your collection.
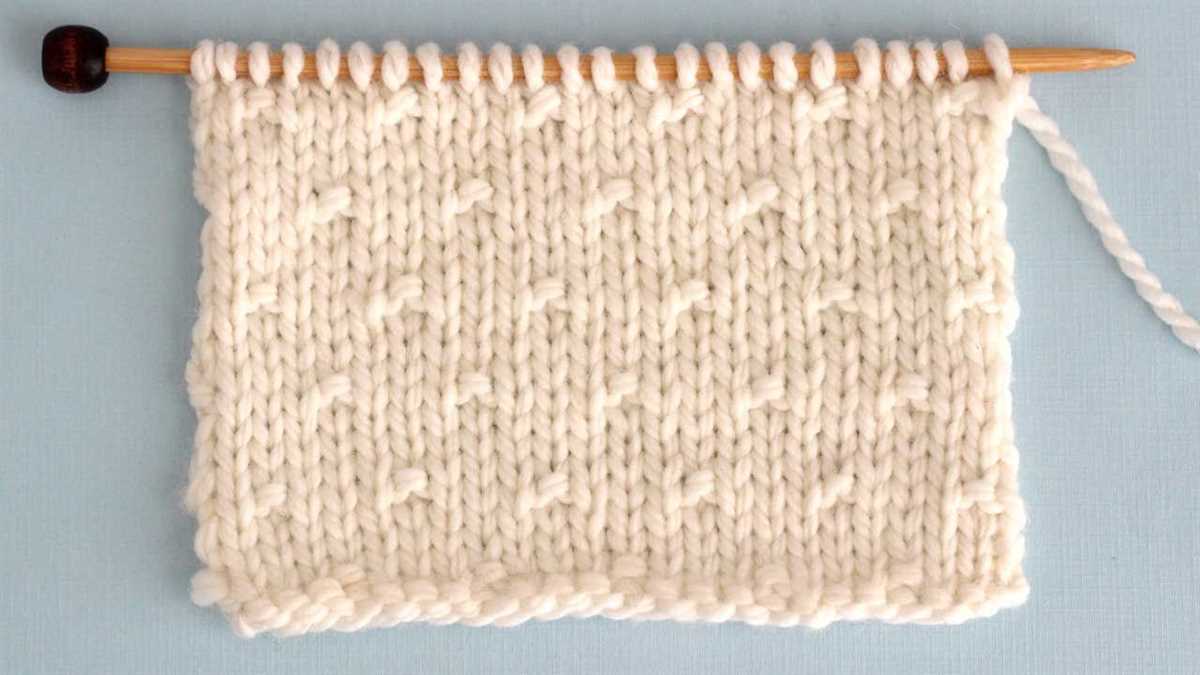
The seed stitch is a simple and easy stitch pattern that is created by alternating knit and purl stitches. This creates a raised “seed” effect that gives the fabric a rich and textured look. The pattern is created by knitting one stitch and purling the next, and then repeating this pattern across the row. On the next row, you simply knit the purl stitches and purl the knit stitches to create the same texture on the other side of the fabric.
One of the great things about the seed stitch is that it works well with any yarn and any needle size. You can use a chunky yarn and bigger needles to create a cozy and warm scarf, or you can use a lighter weight yarn and smaller needles for a more delicate and lightweight scarf. The choice is yours!
If you’re looking for some inspiration, there are many seed stitch scarf patterns available online. You can find patterns that use different color combinations, stitch variations, and even different widths and lengths. Whether you prefer a simple and classic seed stitch scarf or something more intricate, there is a pattern out there that will suit your style and skill level.
Why You Should Choose Seed Stitch for Your Next Knitting Project

When it comes to knitting, there are hundreds of different stitch patterns to choose from. Each stitch pattern creates a unique texture and design, and it can be overwhelming to decide which one to use for your next project. One stitch pattern that definitely deserves your attention is the seed stitch. Here are a few reasons why you should consider using seed stitch for your next knitting project.
Versatility
One of the great things about seed stitch is its versatility. This stitch pattern can be used for a wide variety of projects, from scarves and hats to blankets and sweaters. Whether you’re a beginner or an experienced knitter, seed stitch is a great choice because it’s simple to learn and looks beautiful in any project.
Texture
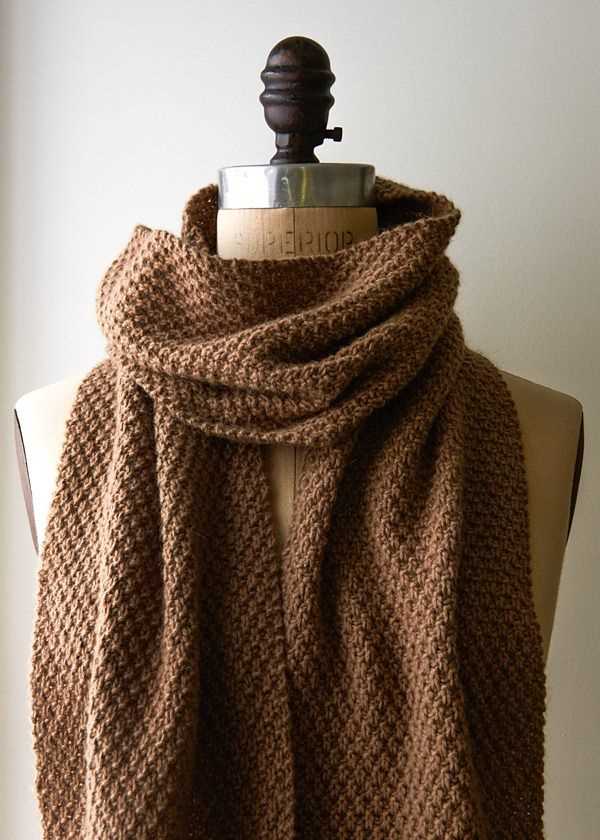
The seed stitch creates a gorgeous and unique texture that adds depth and interest to your knitting. It consists of alternating knit and purl stitches, creating a bumpy surface that is both visually appealing and tactile. The texture of the seed stitch makes it perfect for scarves and other accessories, as it adds warmth and dimension to your finished piece.
Reversible
Unlike some other stitch patterns, seed stitch is reversible. This means that both sides of your knitting will look the same, making it perfect for projects where both sides will be visible, such as scarves or blankets. This also means that you don’t have to worry about the “wrong” side of your knitting showing when you wear or use your finished project.
Beginner-Friendly
If you’re new to knitting or looking for a stitch pattern that’s easy to learn, seed stitch is a great choice. It only requires basic knit and purl stitches, making it accessible for beginners. The repetitive nature of the seed stitch also makes it a great pattern for practicing your tension and getting into a knitting rhythm.
In conclusion, seed stitch is a versatile, textured, reversible, and beginner-friendly stitch pattern that should definitely be considered for your next knitting project. Whether you’re knitting a scarf, sweater, or blanket, seed stitch will add a beautiful and unique touch to your finished piece.
Understanding the Basics of Seed Stitch
Seed stitch is a simple yet versatile knitting stitch pattern that is often used to create a textured fabric. It gets its name from the way the stitches resemble scattered seeds in a field. This stitch pattern is achieved by alternating knit and purl stitches within the same row and between rows. The result is a fabric with a bumpy texture that lies flat and doesn’t curl at the edges.
To create the seed stitch, you will need to have a basic understanding of knitting and be familiar with knit and purl stitches. The seed stitch can be worked with any number of stitches, but it’s commonly done with an odd number of stitches to achieve a balanced pattern.
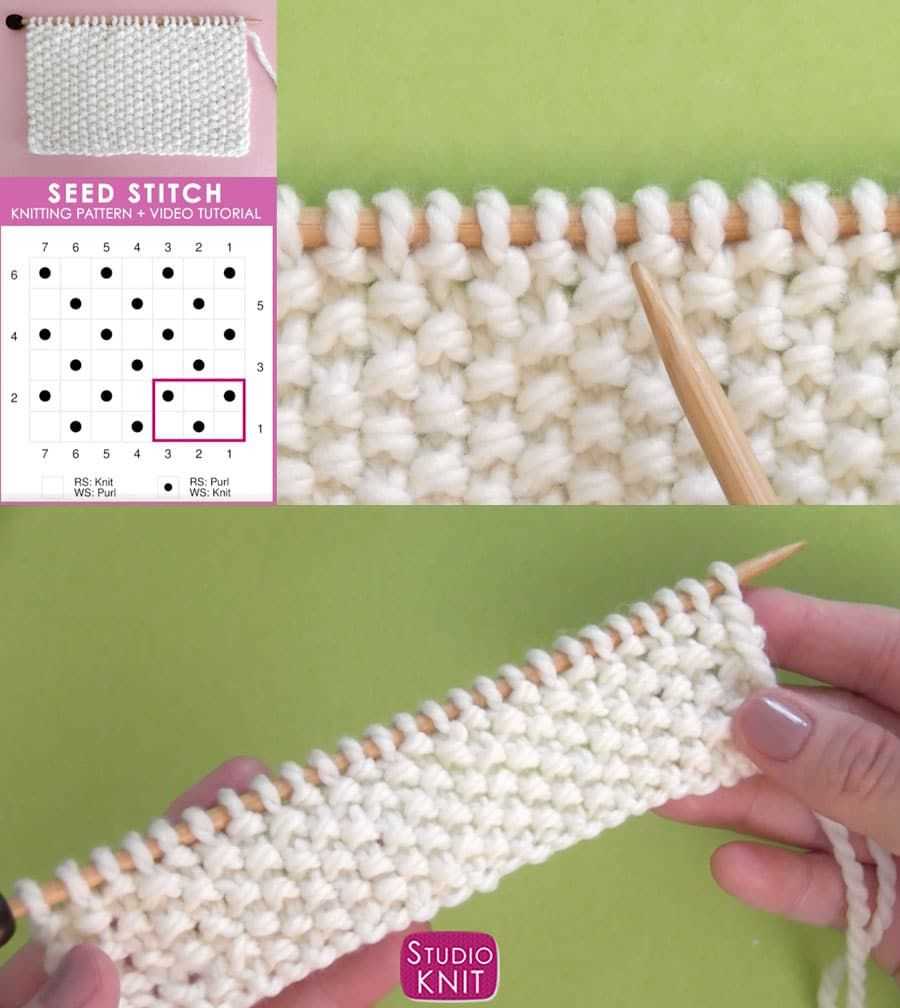
To work the seed stitch, you start by knitting the first stitch, then purling the next stitch. Repeat this pattern across the row. On the next row, you will purl the first stitch and then knit the next stitch. Repeat this pattern across the row. By alternating knit and purl stitches between rows, you create the seed stitch pattern.
The seed stitch is often used to create scarves, as it produces a fabric that is reversible and has a nice drape. It can also be used for other projects like blankets, hats, and even sweaters. When working with the seed stitch, it’s important to keep in mind that it requires a bit more attention and concentration than other basic stitch patterns. However, once you get the hang of it, it can be quite enjoyable to knit.
If you are looking for a simple yet elegant knitting project, consider trying out a seed stitch scarf. There are many seed stitch scarf knitting patterns available, ranging from basic designs to more intricate patterns that incorporate different colors or stitch combinations. Whether you are a beginner or an experienced knitter, the seed stitch is a great technique to add to your repertoire. Its versatility and simplicity make it a popular choice for creating beautiful and cozy accessories.
What is Seed Stitch?
Seed stitch is a commonly used knitting stitch pattern that creates a textured fabric with a raised, seed-like appearance. It is created by alternating knit and purl stitches within a row and across rows. The result is a fabric that looks like scattered seeds, hence the name “seed stitch”.
To knit seed stitch, you will need a multiple of 2 stitches. In each row, you alternate between knitting and purling across the row. In the following rows, you will knit the purl stitches and purl the knit stitches. This alternating pattern creates the characteristic texture of seed stitch.
The seed stitch is often used in knitting projects where you want to add some visual interest or texture to the fabric. It is great for creating scarves, hats, blankets, and other accessories. The texture of seed stitch also makes it a popular choice for knitting patterns that feature colorwork, as it helps to create a contrast between the different colors.
Seed stitch is a versatile stitch pattern that can be used in various ways to create different effects. For example, you can knit a seed stitch pattern using a single color of yarn for a classic look, or you can use multiple colors to create stripes or other patterns. The texture of seed stitch also makes it a great choice for knitting patterns with cables or lace stitches.
If you’re new to knitting, seed stitch is a great stitch pattern to practice, as it is relatively simple and easy to memorize. Once you get the hang of it, you can experiment with different variations and combinations to create your own unique designs. Whether you’re a beginner knitter or an experienced one, seed stitch is a versatile and timeless stitch pattern that can add a touch of elegance to your knitting projects.
How to Knit Seed Stitch
Seed stitch is a popular knitting pattern that creates a textured fabric. It is characterized by alternating knit and purl stitches in a pattern that resembles a field of seeds. The seed stitch is perfect for creating scarves, blankets, and other projects that require a flexible and warm fabric.
To knit the seed stitch, you will need a pair of knitting needles and yarn of your choice. Start by casting on an odd number of stitches, as the seed stitch pattern requires an odd number of stitches to work properly.
Step 1: Setting up the first row
Begin by knitting the first stitch. Then, purl the next stitch. Continue this pattern of knitting and purling across the entire row until you reach the last stitch. Knit the last stitch.
Step 2: Continuing the seed stitch pattern
For the second row, start by purling the first stitch. Then, knit the next stitch. Repeat this pattern of purling and knitting across the row until you reach the last stitch. Purl the last stitch.
Repeat these two rows, alternating between knitting and purling, until your desired length is reached. Remember to always start with a knit stitch on odd-numbered rows and a purl stitch on even-numbered rows to maintain the seed stitch pattern.
The beauty of the seed stitch is that it is reversible, meaning both sides of the fabric will look the same. This makes it a great option for scarves or other projects where both sides will be visible. It also creates a dense fabric that provides warmth and durability.
Now that you know how to knit the seed stitch, you can explore various projects using this versatile pattern. Whether you want to make a cozy scarf or a textured blanket, the seed stitch will add an elegant touch to your knitting projects. Happy knitting!
Seed Stitch vs. Other Knitting Stitches
The seed stitch is a popular knitting stitch pattern that is commonly used in various projects, including scarves. It is loved for its simplicity and its ability to create a textured and reversible fabric. However, there are many other knitting stitches that offer different looks and textures. Let’s take a closer look at seed stitch and compare it to some other popular knitting stitches.
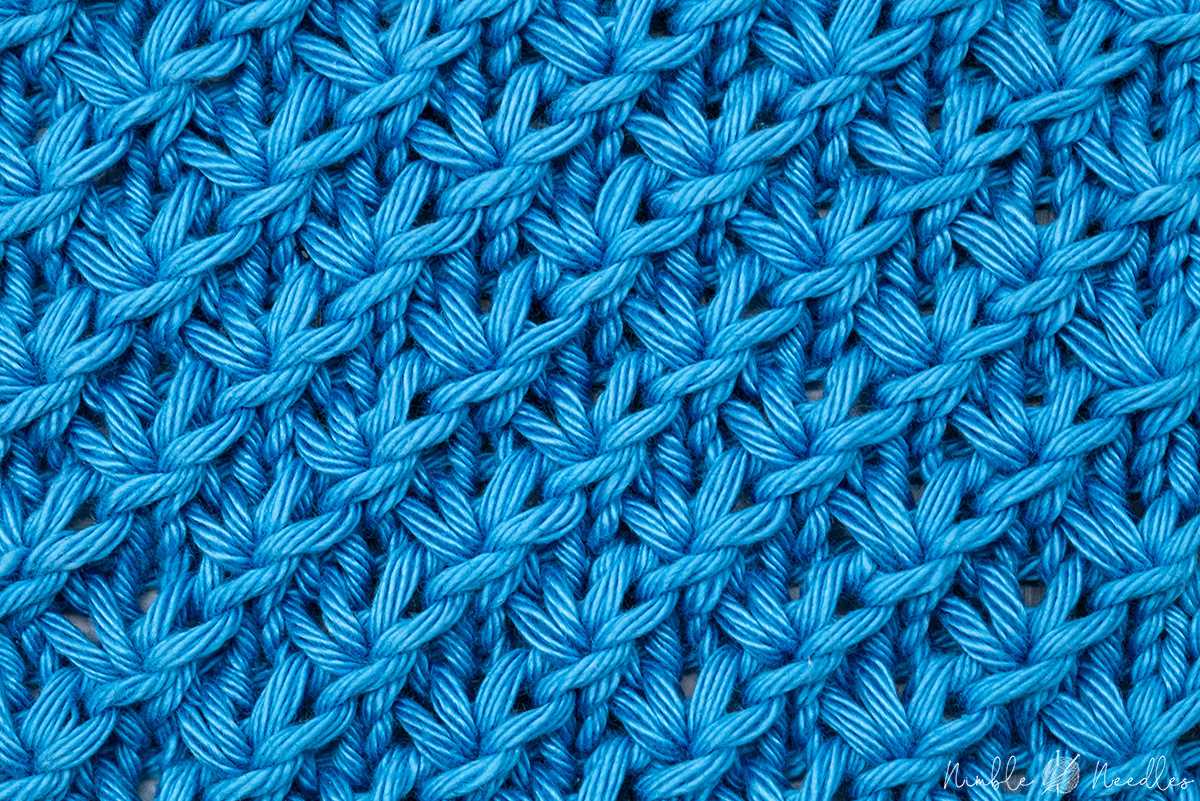
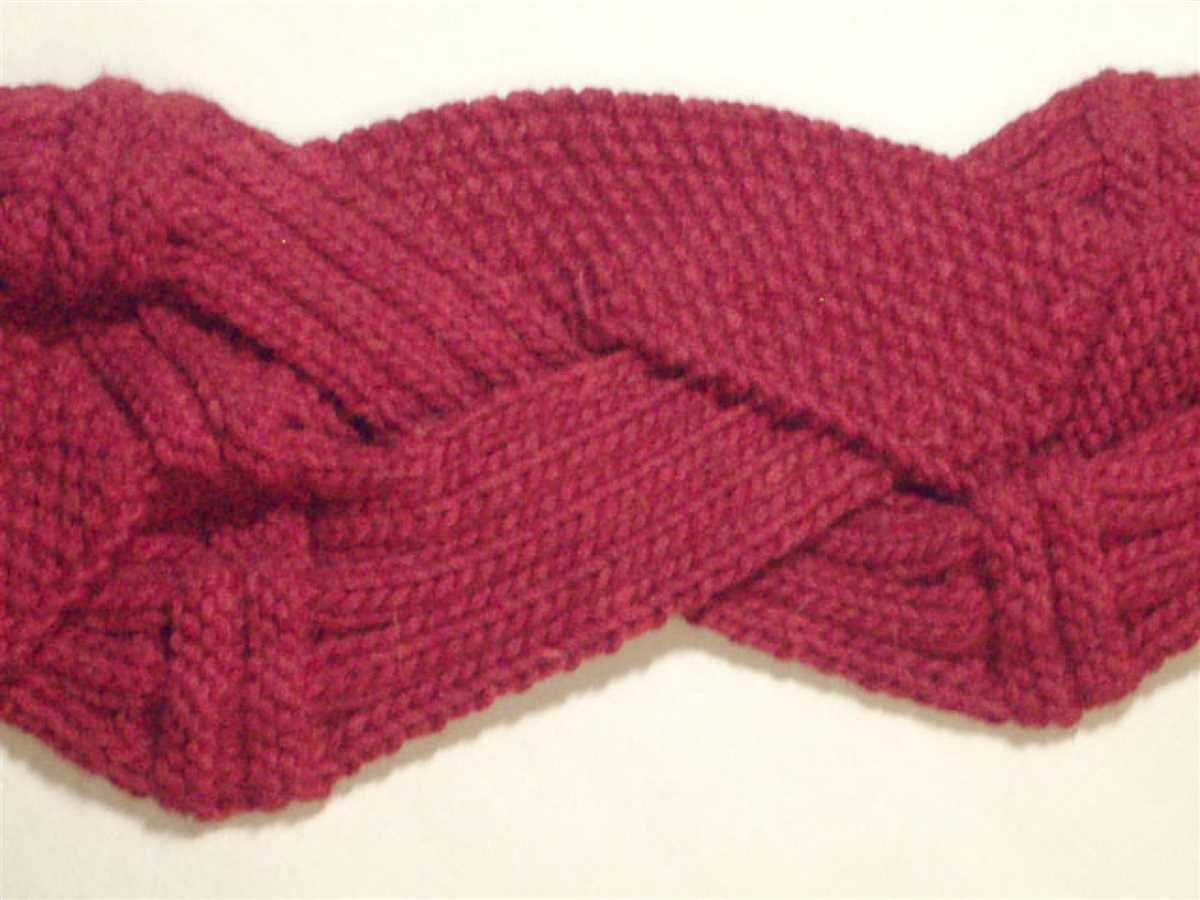
Seed Stitch: The seed stitch is created by alternating knit and purl stitches in a regular pattern. This creates a fabric with small, raised bumps or “seeds” on both sides. The resulting fabric is reversible and has a nice drape. It is often used for scarves, blankets, and other cozy accessories.
Garter Stitch:
The garter stitch is another simple and versatile knitting stitch pattern. It is created by knitting every row (or purling every row if working in the round), resulting in a fabric with ridges on both sides. The garter stitch is great for beginner knitters and works well for scarves, blankets, and dishcloths.
Stockinette Stitch:
The stockinette stitch is a popular knitting stitch that creates a smooth and flat fabric. It is created by knitting one row and purling the next row, alternating between the two. The right side of the fabric has smooth “V” stitches, while the wrong side has purl bumps. The stockinette stitch is commonly used for sweaters, socks, and other garments.
Rib Stitch:
The rib stitch is a versatile knitting stitch pattern that is often used for cuffs, collars, and hems. It creates a fabric with vertical columns of knit and purl stitches, which results in a stretchy and textured pattern. Common rib variations include 1×1 (alternating knit and purl stitches), 2×2 (alternating two knit stitches with two purl stitches), and 3×1 (alternating three knit stitches with one purl stitch).
In conclusion, while the seed stitch is a popular choice for scarves and other projects, there are many other knitting stitches to explore. Each stitch pattern offers a unique look and texture, allowing knitters to create a wide range of beautiful designs.
Simple Seed Stitch Scarf Pattern for Beginners
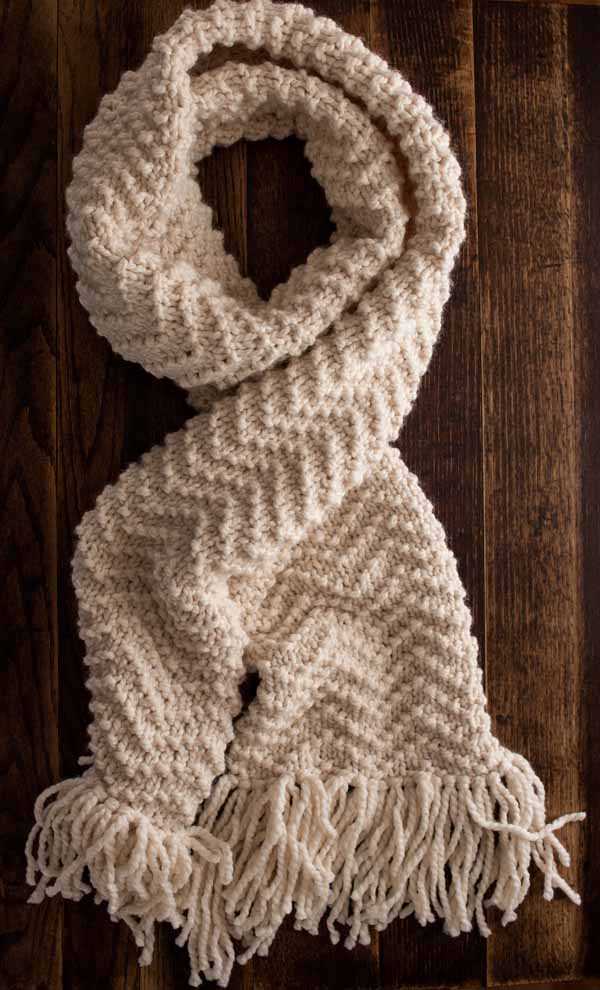
Are you new to knitting and looking for an easy project to start with? A seed stitch scarf is a perfect choice for beginners. The seed stitch is a simple, yet beautiful, knitting stitch that creates a textured pattern that looks great on scarves. With this pattern, you can practice your knitting skills and create a cozy accessory to keep you warm during the colder months.
To make this seed stitch scarf, you’ll need some basic knitting supplies, including a pair of knitting needles and a skein of yarn. Choose a soft and bulky yarn for extra warmth and a larger needle size to create a loose, drapey fabric. The seed stitch pattern requires you to alternate between knitting and purling stitches, making it a great way to practice these essential knitting techniques.
Here’s a simple seed stitch scarf pattern for beginners:
- Cast on an even number of stitches.
- Row 1: Knit 1, purl 1. Repeat this pattern to the end of the row.
- Row 2: Purl 1, knit 1. Repeat this pattern to the end of the row.
- Repeat rows 1 and 2 until the scarf reaches your desired length.
- Bind off all stitches.
Once you’ve completed the pattern, you can add some personal touches to your scarf. Consider adding fringe to the ends or experimenting with different colors or yarn types. The seed stitch pattern is versatile and can be easily customized to suit your preferences.
Remember, practice makes perfect, so don’t be discouraged if your first few rows don’t turn out exactly as you imagined. With some patience and persistence, you’ll quickly get the hang of the seed stitch pattern and be able to create beautiful scarves and other knitted accessories. So grab your knitting needles and yarn, and start knitting your very own seed stitch scarf today!
Materials Needed
To start knitting a seed stitch scarf, you will need the following materials:
- Yarn: Choose a yarn that is suitable for scarves. You can use a variety of yarn weights, depending on the desired thickness of your scarf. Worsted weight yarn is commonly used for scarves.
- Knitting Needles: Select knitting needles that are appropriate for the yarn weight you have chosen. The recommended needle size is usually stated on the yarn label. For a worsted weight yarn, you will typically need US size 8 (5mm) knitting needles.
- Tapestry Needle: This needle is used for weaving in loose ends and finishing touches on your scarf.
- Scissors: You will need scissors to cut the yarn at the end of your project.
- Stitch Marker: A stitch marker can be helpful for keeping track of stitch patterns or marking specific sections of your scarf.
It is important to gather all the necessary materials before starting your project to ensure a smooth knitting experience. Make sure you have enough yarn to complete your desired scarf length, and check that your knitting needles are in good condition without any bends or damage.
Step-by-Step Instructions
Knitting a seed stitch scarf is a great project for beginners. It’s a simple and versatile stitch pattern that creates a textured fabric. Here are step-by-step instructions on how to knit a seed stitch scarf.
Materials:
- Yarn of your choice (worsted weight works well for scarves)
- Knitting needles (size recommended on yarn label)
- Tapestry needle
Step 1: Cast on stitches
Start by making a slipknot and placing it on your knitting needle. Then, cast on the desired number of stitches for your scarf. If you want a narrower scarf, cast on fewer stitches, and for a wider one, cast on more stitches. The seed stitch pattern requires an odd number of stitches.
Step 2: Knit the first row
For the seed stitch pattern, you’ll be alternating knit and purl stitches. On the first row, knit every stitch across. Make sure to maintain a consistent tension throughout the row.
Step 3: Purl the second row
On the second row, purl every stitch across. This creates the characteristic seed stitch pattern, as it alternates between knits and purls. Again, keep the tension consistent.
Step 4: Repeat rows 2 and 3
Continue alternating between knitting and purling every row until your scarf reaches the desired length. Remember to knit the odd rows and purl the even rows. The more rows you knit, the more pronounced the seed stitch texture will be.
Step 5: Bind off
Once you have reached the desired length, it’s time to bind off your stitches. Knit the first two stitches, then use your left-hand needle to lift the first stitch over the second stitch and off the needle. Knit the next stitch and repeat the process until you have one stitch left. Cut the yarn, leaving a tail, and pull it through the final stitch to secure it.
You’ve now completed your seed stitch scarf! Weave in any loose ends with a tapestry needle, and your scarf is ready to wear or gift to someone special.
Tips for Success
Knitting a seed stitch scarf can be a rewarding and enjoyable project. To help you achieve success, here are some tips to keep in mind:
Selecting the Right Yarn
Choose a yarn that is suitable for the seed stitch pattern. Yarn with good stitch definition and a smooth texture will showcase the seed stitch pattern beautifully. Consider the weight of the yarn as well, as it will affect the drape and thickness of your scarf.
Using the Correct Needle Size
Make sure to use the appropriate needle size for your chosen yarn. This will ensure that your stitches are evenly spaced and the fabric has the desired tension. Test your tension by knitting a small swatch before starting your scarf.
Paying Attention to Gauge
Gauge is essential in knitting, as it determines the size of your finished project. Take the time to check your gauge and adjust your needle size if necessary. This will help you achieve the desired dimensions for your seed stitch scarf.
Keeping an Even Tension
Consistency in tension is key when knitting the seed stitch pattern. Pay attention to how tightly or loosely you knit each stitch to maintain an even tension throughout. If your tension varies, the texture of your scarf may appear uneven.
Blocking Your Scarf
After completing your seed stitch scarf, blocking can help enhance the stitch definition and even out any irregularities. Follow the recommended blocking method for your yarn to achieve the best results. Blocking can also help the scarf relax and drape beautifully.
By keeping these tips in mind, you’ll be on your way to knitting a stunning seed stitch scarf that you’ll be proud to wear or gift to someone special.
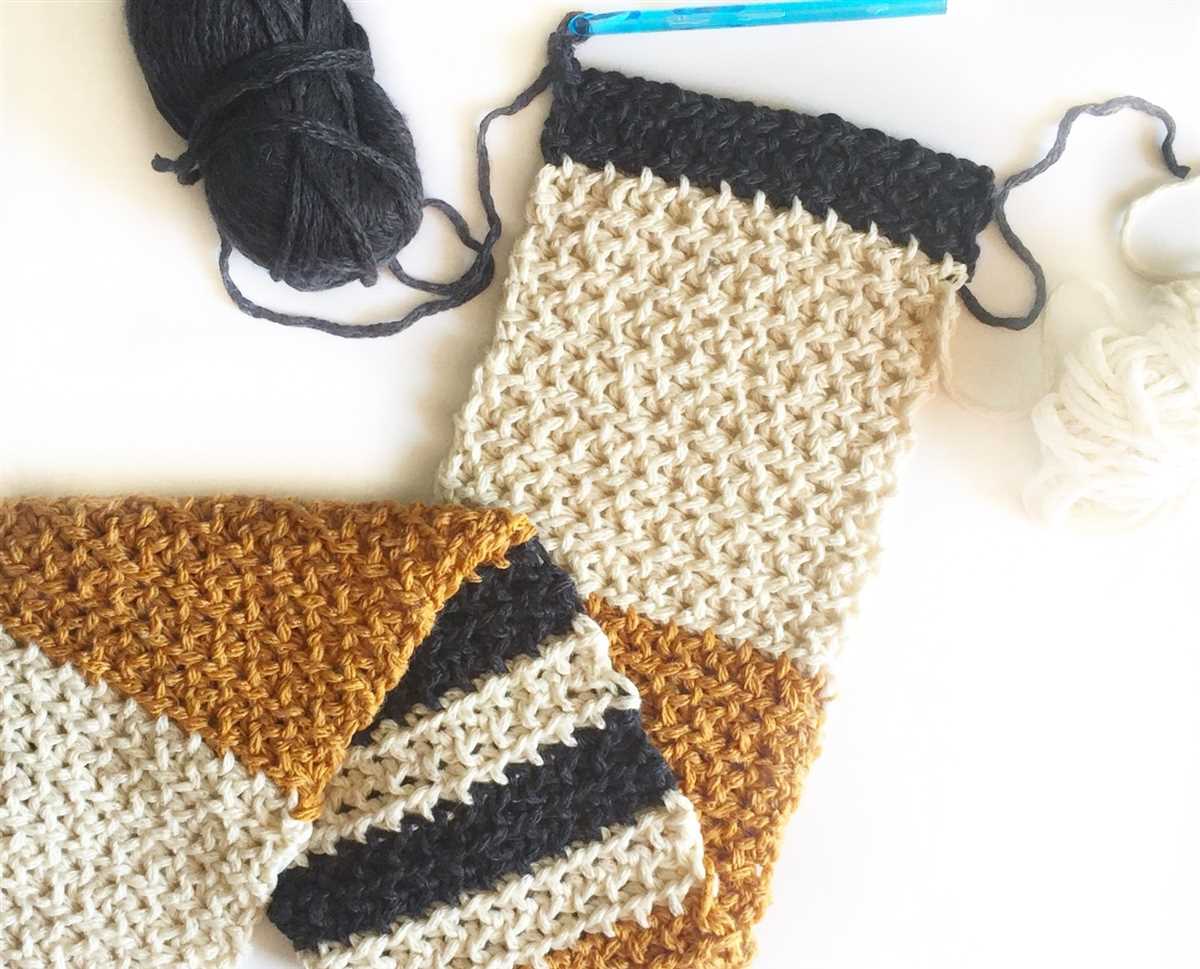
Intermediate Seed Stitch Scarf Pattern with Colorwork
For experienced knitters looking for a new challenge, this intermediate seed stitch scarf pattern with colorwork is the perfect project to take your skills to the next level. This pattern combines the classic texture of seed stitch with the added visual interest of colorwork, resulting in a sophisticated and eye-catching accessory.
To begin this pattern, you will need two colors of yarn in contrasting shades. The seed stitch technique is achieved by alternating between knit and purl stitches, creating a bumpy and textured fabric. The addition of colorwork involves introducing the second color of yarn and working it in specific rows or sections to create intricate patterns or designs.
Materials needed:
- Yarn in two contrasting colors
- US size 8 knitting needles
- Tapestry needle
Instructions:
- Cast on an even number of stitches with your main color yarn.
- Work seed stitch for the desired width of your scarf, alternating between knit and purl stitches.
- When you are ready to introduce the second color, simply start knitting with it instead of the main color, following the pattern or design you have chosen.
- Continue alternating between the two colors, working the seed stitch pattern and incorporating the colorwork as desired.
- Once you have reached the desired length for your scarf, bind off and weave in any loose ends.
This intermediate seed stitch scarf pattern with colorwork offers endless possibilities for creativity and personalization. Whether you choose to create a simple striped design or experiment with more intricate motifs, this pattern is sure to result in a beautiful and unique scarf that you can be proud of.
Color Selection and Yarn Choices
When it comes to knitting a seed stitch scarf, one of the most exciting parts is choosing the colors and yarn for your project. The color selection can greatly enhance the overall look of the scarf and showcase your personal style.
Yarn choices: There are various types of yarn that work well for seed stitch patterns, including wool, cotton, and acrylic. Wool yarn is known for its warmth and durability, making it an excellent choice for winter scarves. Cotton yarn is lightweight and breathable, making it ideal for scarves that will be worn in warmer weather. Acrylic yarn is budget-friendly and comes in a wide range of colors, perfect for experimenting with different color combinations.
Color selection:
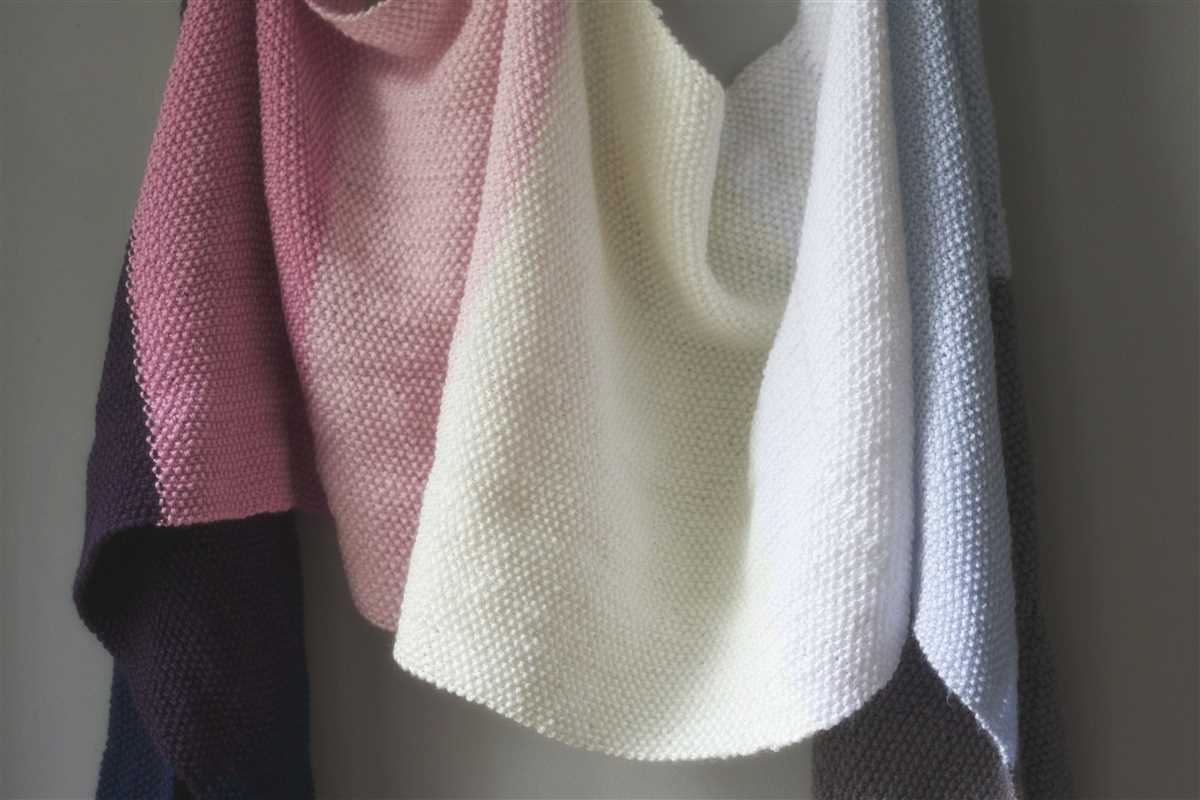
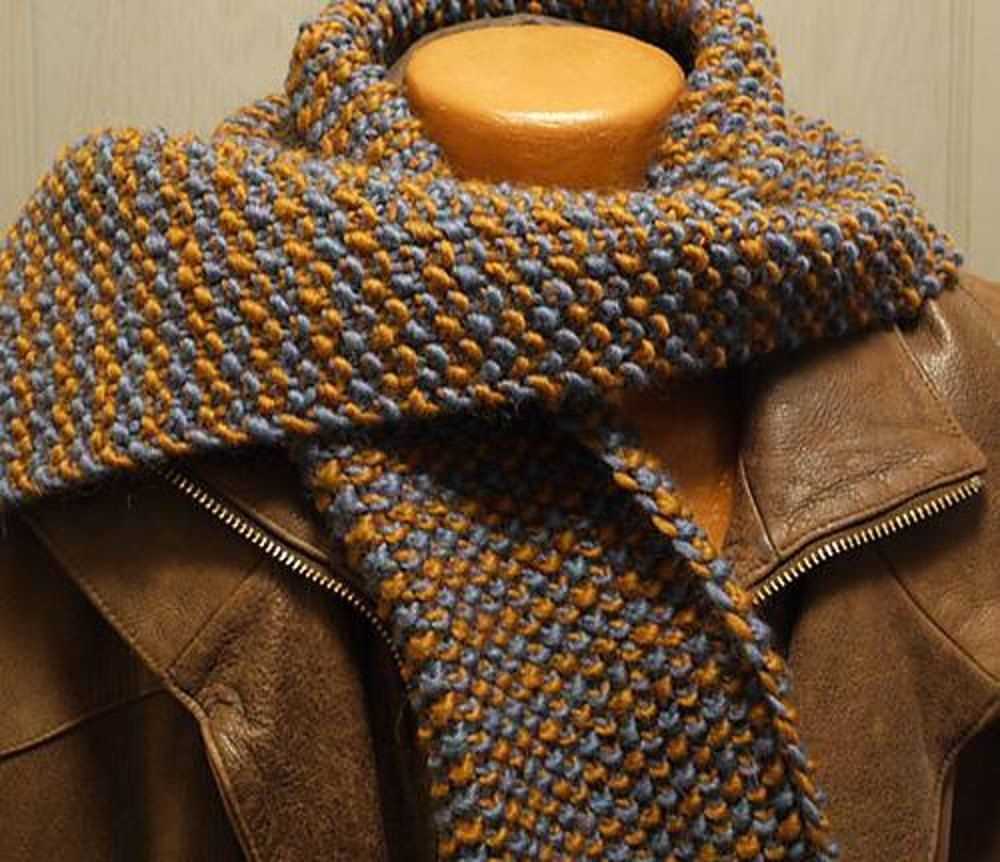
When it comes to choosing colors for your seed stitch scarf, there are a few things to consider. Firstly, think about the season and the overall look you want to achieve. For a classic and timeless look, neutral and earthy tones such as beige, gray, or olive green can work well. If you want to make a bold statement, vibrant and contrasting colors such as red and teal can add a pop of color to your outfit.
- Neutral and earthy tones
- Vibrant and contrasting colors
- Monochromatic color scheme
- Ombre or gradient effect
Another option is to create a monochromatic color scheme using different shades of the same color. This can create a subtle and harmonious effect. If you want to add more visual interest, you can also experiment with an ombre or gradient effect by using yarn in different shades of a single color.
Overall, the color selection and yarn choices for your seed stitch scarf should reflect your personal style and the look you want to achieve. Whether you opt for classic neutrals, bold and vibrant colors, or a unique color scheme, the possibilities are endless. Have fun exploring different color combinations and let your creativity shine through your knitting project!
Pattern Instructions
Below are the detailed instructions for knitting a seed stitch scarf.
Materials:
- Size 8 (5mm) knitting needles
- Approximately 300 yards of worsted weight yarn
- Tapestry needle
- Scissors
Gauge:
20 stitches and 24 rows = 4 inches in seed stitch
Instructions:
- Cast on 30 stitches.
- Row 1: *Knit 1, purl 1; repeat from * across the row.
- Row 2: *Purl 1, knit 1; repeat from * across the row.
- Repeat rows 1 and 2 until the scarf measures desired length, ending with row 1.
- Bind off all stitches.
- Weave in any loose ends using a tapestry needle.
- Trim off excess yarn.
Once you have completed the scarf, you can block it to enhance the stitch definition and drape. Simply wet the scarf, gently squeeze out the excess water, and lay it flat to dry. You can also steam block it by hovering a steamer over the scarf without touching it directly.
Finishing Touches
Once you have finished knitting your seed stitch scarf, it’s time to add the finishing touches to make it complete. Here are some ideas to consider:
- Blocking: Before wearing or gifting your scarf, you may want to block it to give it a more even and professional look. To do this, soak your scarf in cool water, gently squeeze out the excess water, and then lay it flat to dry. You can shape it to your desired dimensions using pins or blocking mats.
- Adding Fringe: For a fun and decorative touch, you can add fringe to the ends of your scarf. Cut several pieces of yarn to your desired length, fold them in half, and use a crochet hook or your knitting needle to pull them through the edge stitches of your scarf. Once all the fringe is attached, trim it to an even length if necessary.
- Embellishments: If you want to further personalize your scarf, you can add embellishments such as buttons, beads, or embroidery. Sew on buttons along the edges or incorporate beads into the stitch pattern. You can also use embroidery thread to add small designs or initials to your scarf.
Remember, the finishing touches are what make your seed stitch scarf unique to you. Have fun experimenting with different options and make it truly your own!