
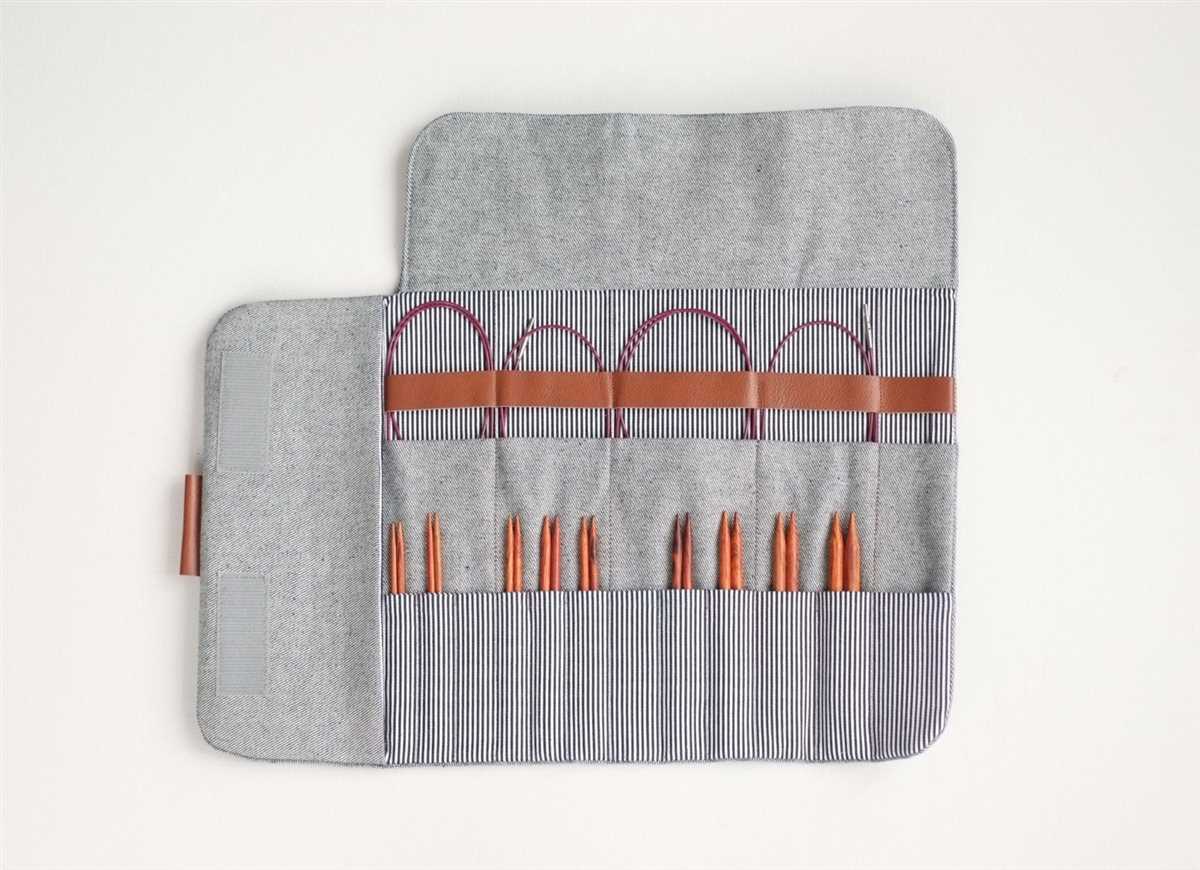
If you’re a knitter, you know how important it is to keep your tools organized. Circular knitting needles, with their long cables and various sizes, can easily become tangled or lost. That’s why having a dedicated case for them is essential. In this article, we will share a free pattern for a circular knitting needle case that you can easily make yourself.
The circular knitting needle case pattern we’re providing is not only functional but also stylish. It features multiple pockets and sections to hold all your circular needles neatly in one place. The case will also help protect your needles from getting damaged or lost, making it a must-have accessory for any knitting enthusiast.
With our free pattern, you can customize the size of the case to fit your needs. Whether you have a small collection of circular needles or a large one, you can easily adapt the pattern to accommodate them all. Additionally, you can choose your favorite fabric and add your own personal touches to make the case truly unique.
Materials needed
Before you start making your circular knitting needle case, make sure you have all the necessary materials on hand. Here is a list of what you will need:
- Fabric: Choose a durable fabric that will hold up well to frequent use. You will need enough fabric to make the main body of the case, as well as any additional pockets or compartments you want to include.
- Lining fabric: This will be used to line the inside of the case, giving it a finished and professional appearance.
- Padding: If you want to add extra protection to your knitting needles, consider using some padding material such as foam or quilt batting.
- Thread: Choose a thread color that matches or complements your fabric choice.
- Elastic: Elastic bands can be used to secure your knitting needles in place. Make sure to choose a width that will comfortably fit your needles.
- Button or snap: If you want to keep your circular knitting needle case securely closed, you may need a button or snap fastener.
- Scissors and pins: Essential tools for cutting and holding fabric in place.
Once you have gathered all the materials, you will be ready to start creating your own circular knitting needle case. It’s important to have everything ready before you begin so that you can work efficiently and enjoy the process of making your own customized needle case.
Choosing the Right Yarn
When it comes to circular knitting projects, choosing the right yarn is crucial to the success of your finished project. The type of yarn you choose can impact the drape, stitch definition, and overall feel of your knitted item. Here are some factors to consider when selecting the perfect yarn for your circular knitting project.
Fiber Content
The first thing to consider when choosing yarn is the fiber content. Different fibers have different properties, so it’s important to choose a yarn that suits the specific needs of your project. For example, wool is a popular choice for many knitting projects because it is warm, durable, and has great stitch definition. On the other hand, if you’re knitting something for someone with allergies, you may want to opt for a hypoallergenic yarn like cotton or bamboo. Consider the desired qualities of your finished item and choose a fiber that will help you achieve that.
Weight
The weight of the yarn is another important factor to consider. Different weights of yarn are better suited for different types of projects. For instance, lace weight yarn is perfect for delicate shawls and intricate patterns, while bulky weight yarn is great for cozy hats and blankets. Make sure to check the pattern guidelines for the recommended yarn weight and adjust accordingly if needed. In general, it’s best to use a yarn that matches the weight recommended in the pattern to ensure proper gauge and fit.
Color and Texture
Lastly, consider the color and texture of the yarn. The color of the yarn can greatly affect the appearance of your finished project, so choose a color that complements your own personal style and preferences. Additionally, consider the texture of the yarn and how it will impact the overall look and feel of your knitting. Some yarns have a smooth, polished texture, while others have a more rustic, nubby feel. Experiment with different textures to find the one that works best for your project.
When it comes to circular knitting, choosing the right yarn is key to creating a beautiful and successful project. Consider the fiber content, weight, color, and texture of the yarn to ensure that it suits the specific needs of your project and reflects your own personal style. With the perfect yarn, your circular knitting projects are sure to turn out stunning every time.
Selecting the Appropriate Needles
When it comes to circular knitting, selecting the right needles is crucial for a successful and comfortable knitting experience. There are several factors to consider when choosing the appropriate needles, including the project you are working on, the type of yarn you are using, and your personal knitting preferences.
1. Project Type: The type of project you are working on will determine the length of the needle you need. Longer needles are ideal for larger projects, such as sweaters or blankets, as they allow for more stitches to be comfortably held on the needle. Shorter needles, on the other hand, are better suited for smaller projects like socks or hats.
2. Yarn Type: The type of yarn you are using should also be taken into consideration when selecting needles. Thicker yarns, such as chunky or bulky weight, require larger needle sizes to create a balanced and even fabric. Finer yarns, such as lace or fingering weight, work best with smaller needle sizes for a more delicate and intricate result.
Note: It is always a good idea to check the yarn label or pattern instructions for recommended needle sizes.
3. Knitting Style: Your personal knitting style and preferences can also influence your choice of needles. If you tend to knit tightly, you may want to consider using larger needles to achieve the desired gauge. Conversely, if you knit loosely, using smaller needles can help you achieve a more even tension.
By considering these factors and selecting the appropriate needles, you can ensure a successful and enjoyable knitting experience. Remember to experiment with different needle materials, such as bamboo, metal, or plastic, to find the ones that work best for you and your knitting style.
Preparation and cutting of fabric
Before starting any sewing project, it’s important to properly prepare and cut the fabric. This step is crucial in ensuring that your finished product turns out well and fits correctly. Here are some key points to keep in mind when preparing and cutting fabric:
1. Washing and ironing:
Before cutting your fabric, it’s essential to prewash and iron it. This helps to remove any dirt, chemicals, or odors that may be present in the fabric. Prewashing also allows the fabric to shrink if it is prone to shrinking, preventing any distortion or fitting issues later on. Ironing the fabric smooths out any wrinkles, making it easier to work with and ensuring accurate cutting.
2. Choosing the right layout:
When cutting your fabric, it’s important to consider the pattern layout and the fabric’s grainline. The grainline refers to the direction in which the threads run in the fabric and is usually indicated on the pattern. Aligning the pattern pieces with the grainline ensures that the fabric will drape and hang correctly when the garment is finished. Additionally, matching patterns or prints at seams is crucial for a visually pleasing result.
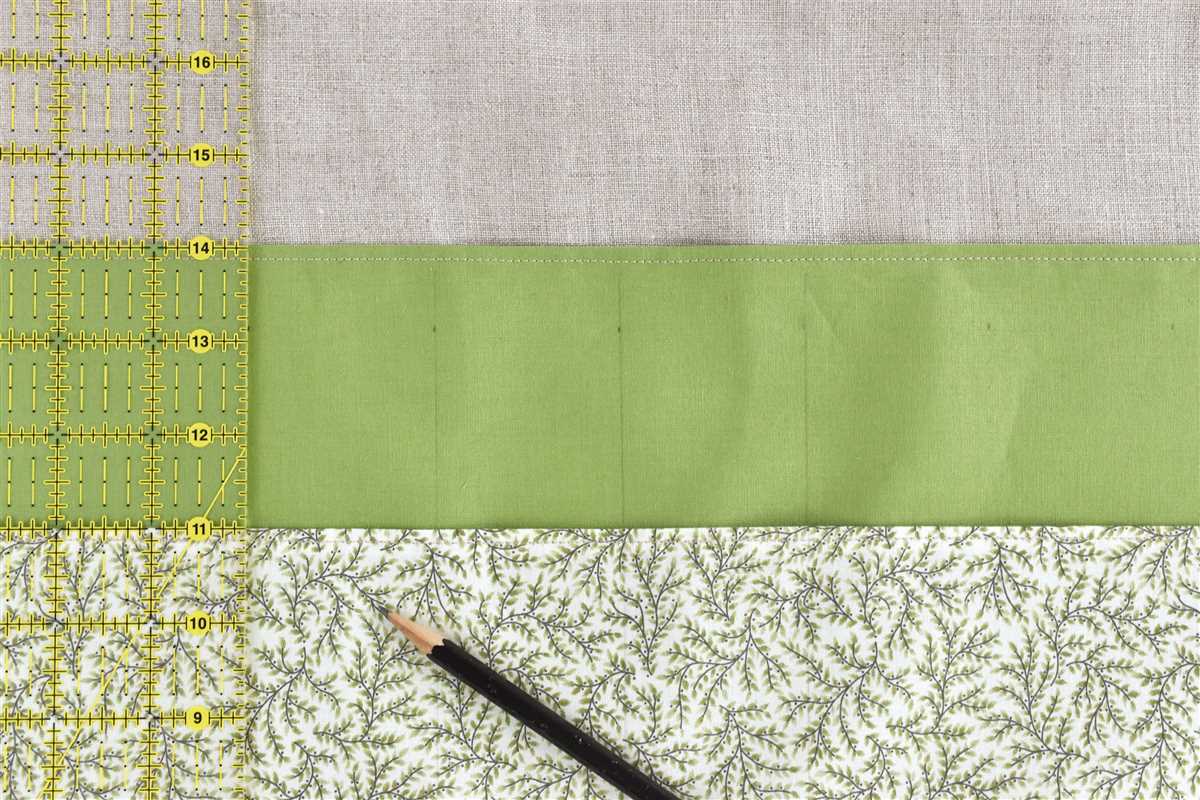
3. Measuring and marking:
Accurate measuring and marking of the fabric is essential to ensure precision in cutting. Use a measuring tape or ruler to measure and mark the required dimensions of each pattern piece. Double-check your measurements before cutting to avoid any mistakes. You can use tailor’s chalk or fabric markers to mark the cutting lines on the fabric, ensuring that they are clearly visible and won’t smudge or fade away as you work.
4. Cutting techniques:
There are different cutting techniques you can use depending on the fabric type and your personal preference. Some common techniques include using fabric scissors, a rotary cutter, or a cutting mat. When cutting, always follow the cutting lines precisely to maintain accuracy and match the pattern pieces correctly. Take your time and cut slowly to avoid any accidents or mistakes that could ruin your fabric.
By following these preparation and cutting guidelines, you can ensure that your fabric is ready for sewing and that your finished project will turn out beautifully.
Sewing the main part of the case
Once you have gathered all the necessary materials and measurements, you can start sewing the main part of the circular knitting needle case.
Step 1: Cut your fabric according to the measurements you have taken. Make sure to leave a small seam allowance on all sides.
Step 2: Take two pieces of the cut fabric and place them right sides together. Pin the edges to hold them in place.
Step 3: Using a sewing machine or needle and thread, sew along the pinned edges, leaving a small opening at the top to turn the fabric right side out.
Step 4: Trim any excess fabric and clip the corners to reduce bulk when the case is turned right side out.
Step 5: Turn the fabric right side out through the opening. Use a pressing tool to push out the corners and edges for a neat finish.
Step 6: Sew the opening closed using a ladder stitch or slip stitch to make it as invisible as possible.
Step 7: Press the main part of the case with an iron to remove any wrinkles and give it a finished look.
Congratulations! You have completed sewing the main part of your circular knitting needle case. Now you can move on to adding the pockets and finishing touches.
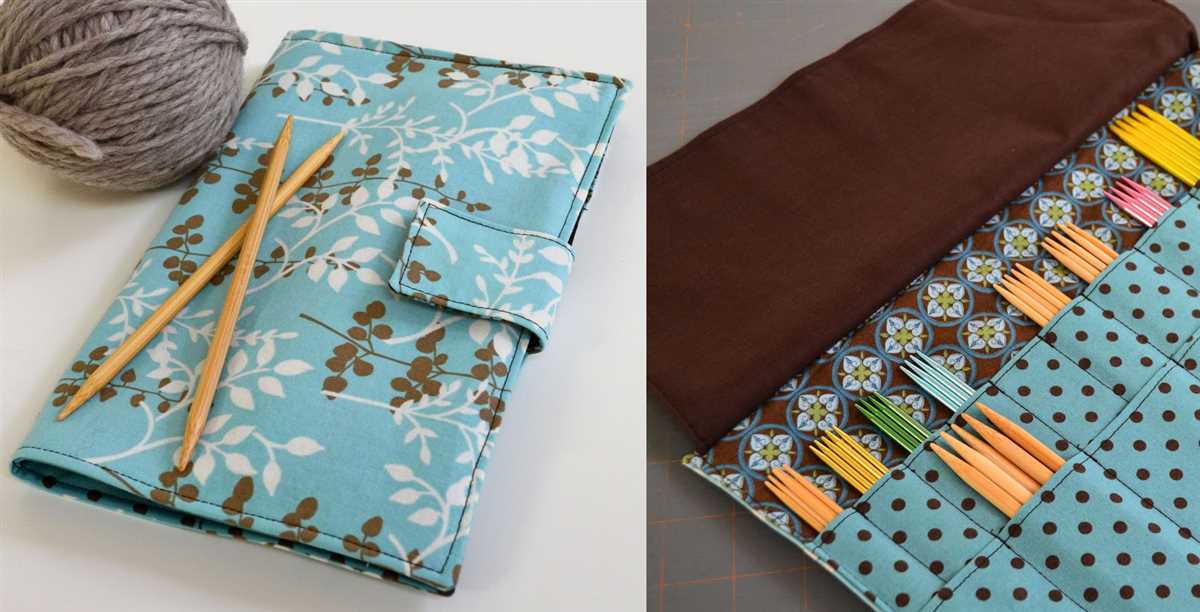
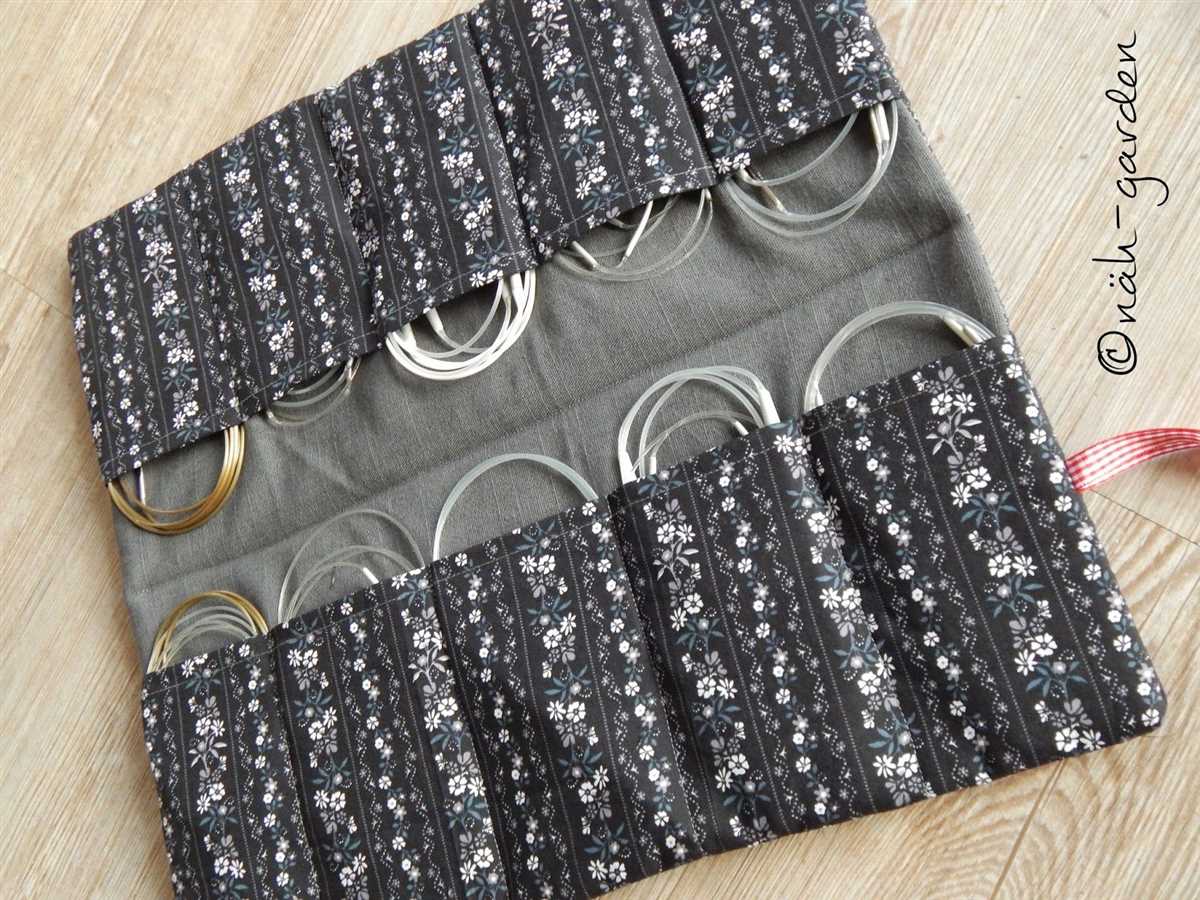
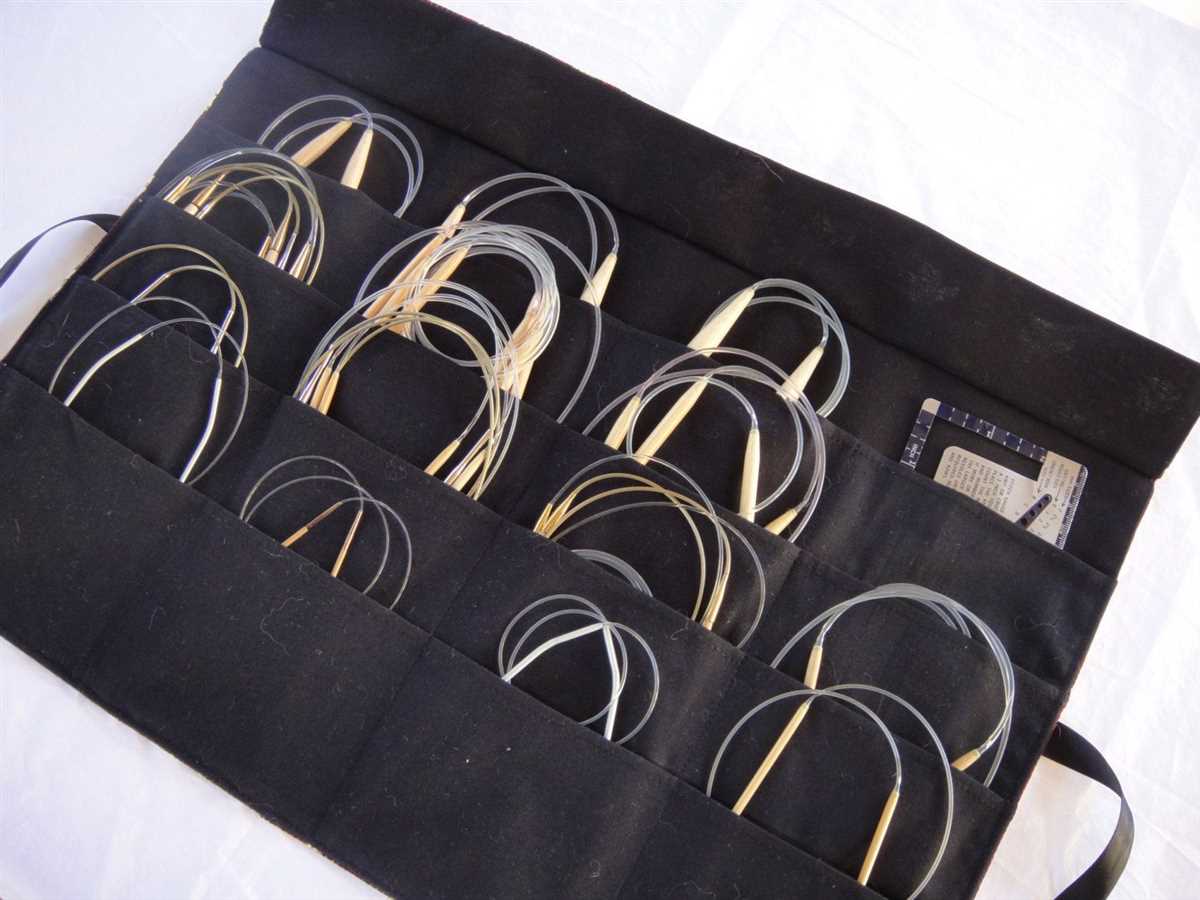
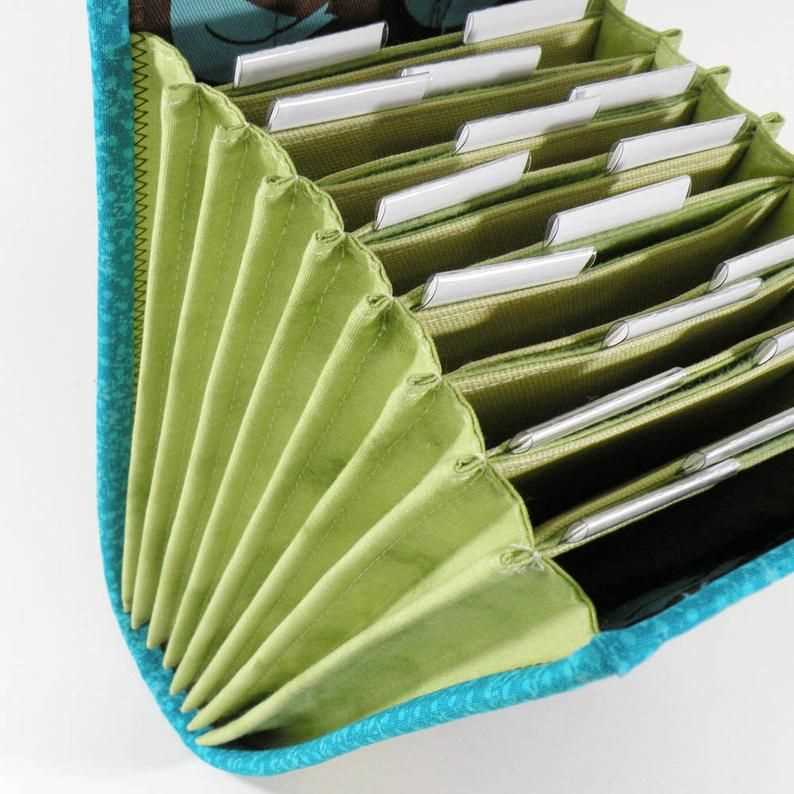
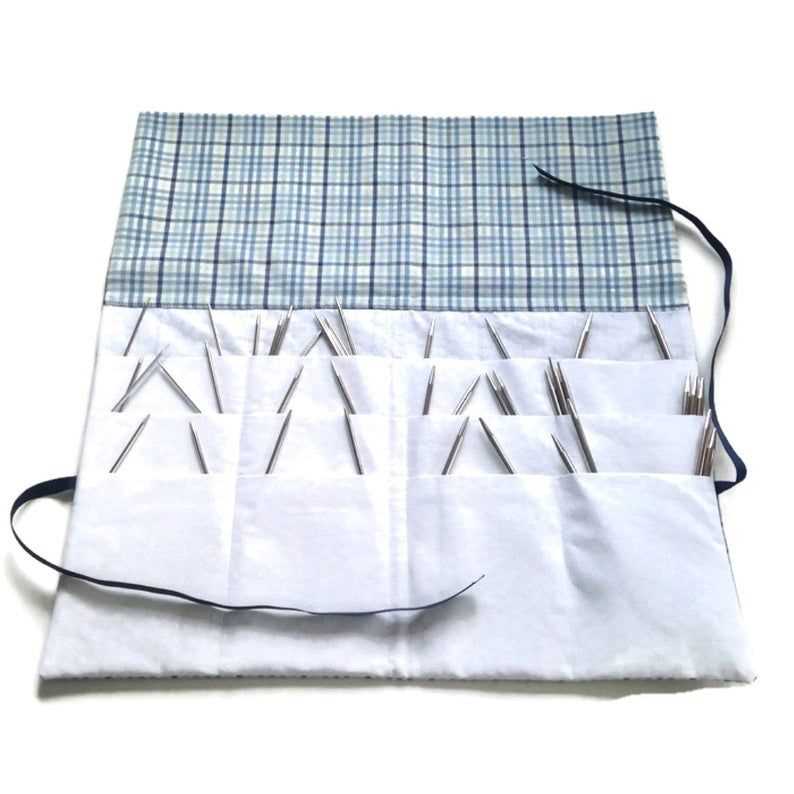
Adding pockets for circular needles
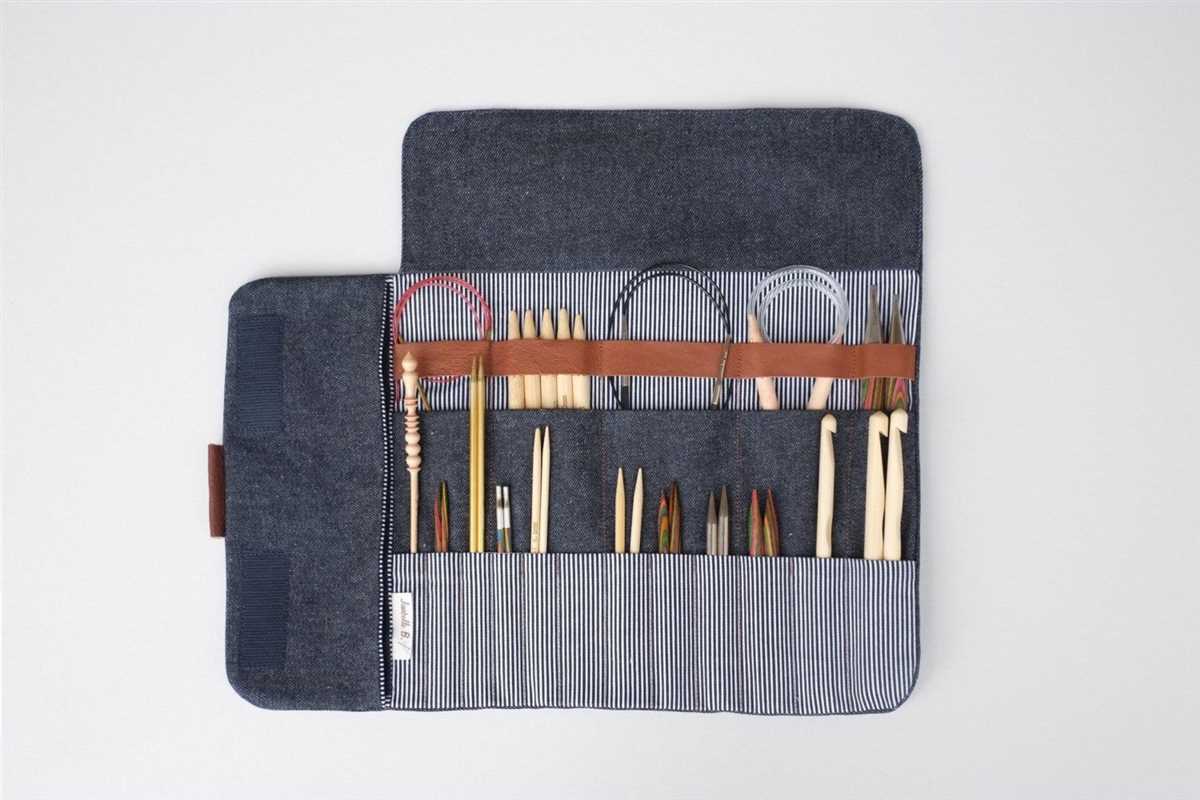
If you are a knitter who enjoys working with circular needles, having a designated space to store and organize them can be very helpful. One way to achieve this is by adding pockets to your knitting needle case specifically designed to hold circular needles.
To create these pockets, you will need a fabric that is sturdy enough to hold the weight of the needles but flexible enough to allow easy access. Consider using a cotton or linen fabric for this purpose. Measure out the size of the pockets based on the length and diameter of your circular needles. You can create individual pockets for each needle size or group them together based on similar sizes.
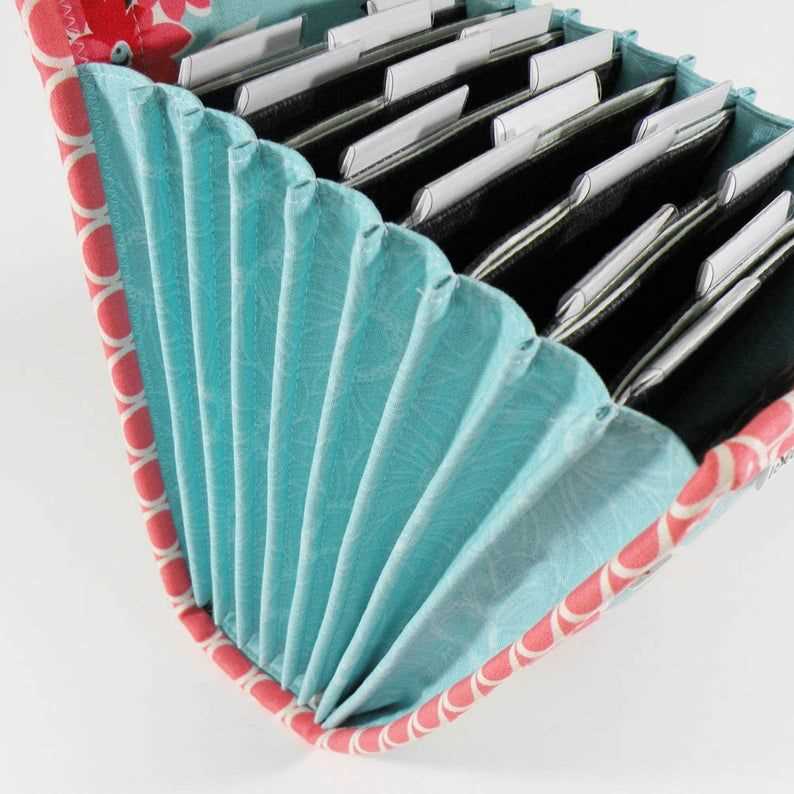
Steps to add pockets for circular needles:
- Cut out rectangular pieces of fabric that are double the width of your circular needles and 1 inch longer than the length of the needles.
- Fold each rectangular piece in half lengthwise and sew along the long edge to create a pocket.
- Attach the pockets to your knitting needle case by sewing them onto the inside fabric. You can sew them directly onto the case or create a flap that folds over to secure the pockets.
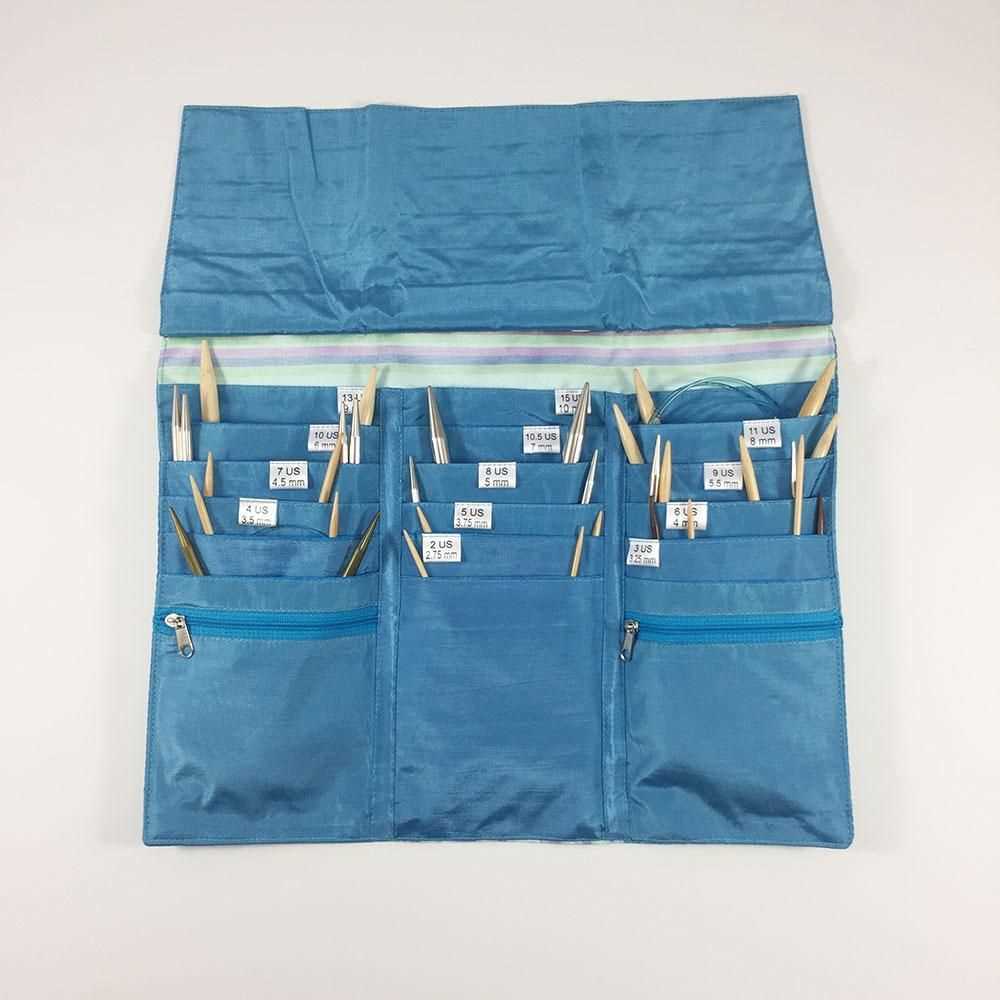
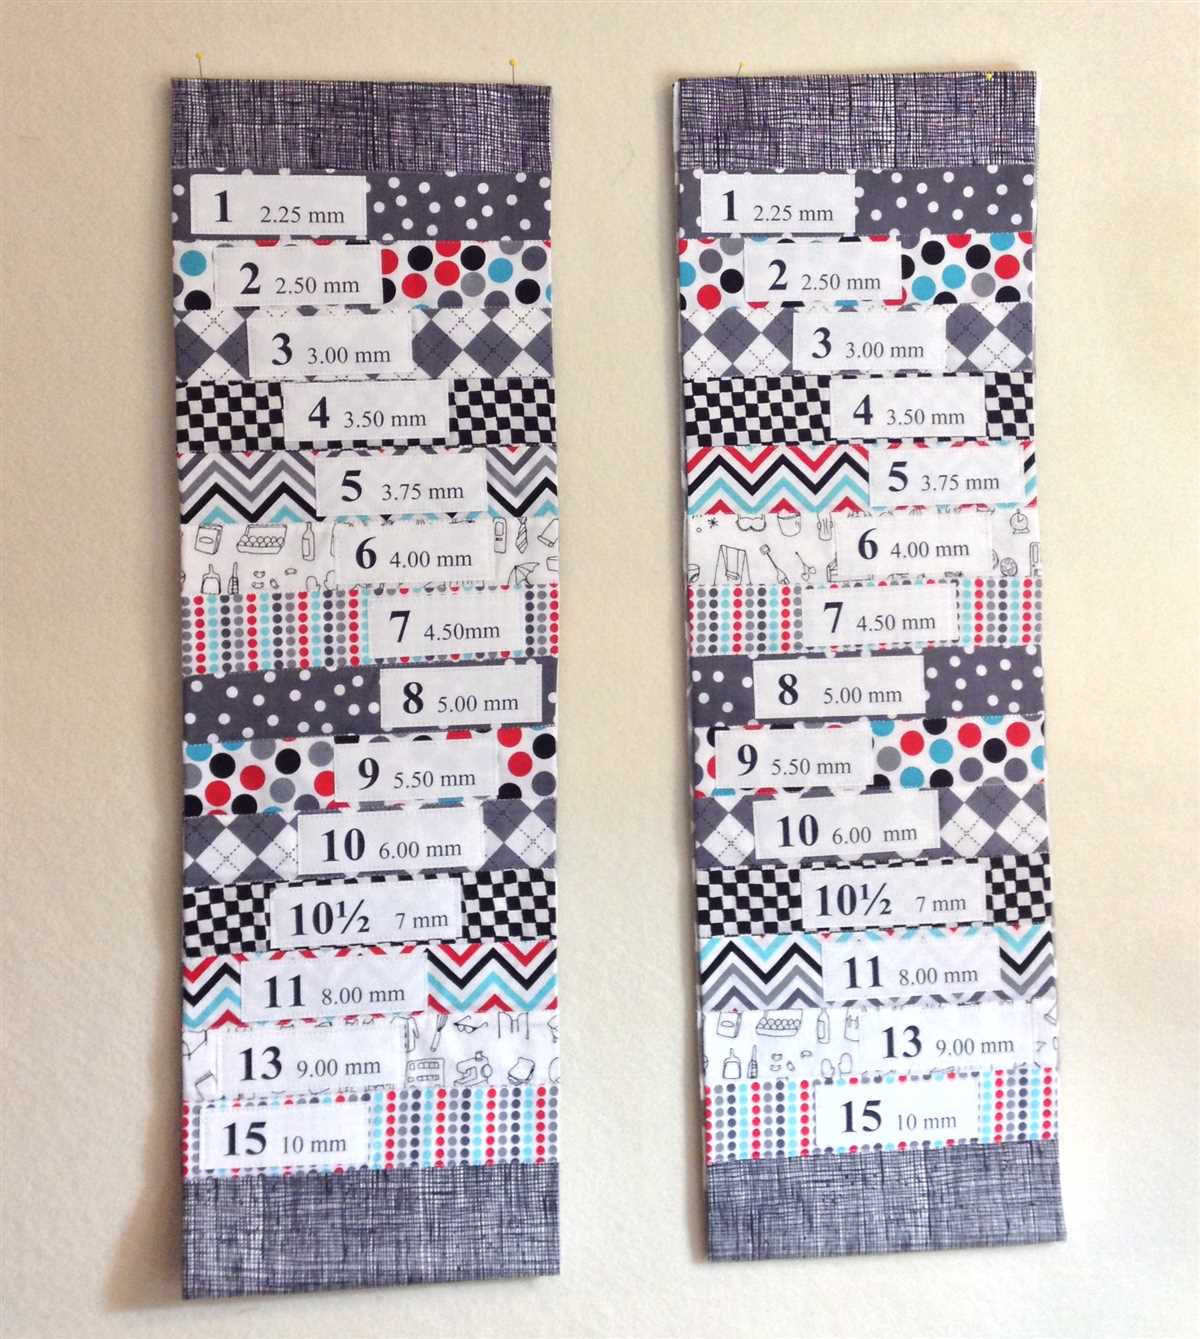
- If desired, add labels or tags to each pocket indicating the size or type of circular needles it holds.
This method allows you to easily see and access your circular needles while keeping them organized and protected. It also helps prevent tangling and keeps your needles in one place, making it easier to find the size you need for your next project. By customizing your knitting needle case with pockets for circular needles, you can create a functional and convenient storage solution that meets your specific knitting needs.
Attaching a closure mechanism
When making a circular knitting needle case, it’s important to include a closure mechanism to keep your needles secure and prevent them from falling out. There are several options for attaching a closure mechanism, each with its own advantages and disadvantages.
One popular option is to sew a button and loop closure onto the case. This involves attaching a button to one side of the case and creating a loop on the opposite side to fasten the button. This type of closure is simple and easy to use, making it a good choice for beginners. However, it may not provide the most secure closure and can be prone to coming undone if not fastened tightly.
For a more secure closure, you could consider using a zipper. Sewing a zipper onto the case allows you to completely close it, keeping your knitting needles safe and secure inside. However, sewing in a zipper can be more challenging and time-consuming than attaching a button closure. Make sure to measure the length of your case accurately and choose a zipper that fits properly to ensure a smooth and secure closure.
Another option is to use hook and loop fasteners, such as Velcro, to create a closure. This type of closure is easy to use and provides a secure hold. Simply attach one side of the fastener to one side of the case and the other side to the opposite side, ensuring they line up when closed. However, hook and loop fasteners can wear out over time and may need to be replaced.
Ultimately, the choice of closure mechanism for your circular knitting needle case will depend on your personal preference and the level of security you desire. Consider the pros and cons of each option and choose the one that best suits your needs. Whichever closure mechanism you choose, make sure to attach it securely to ensure your knitting needles remain safe and protected.
Adding a handle for easy carrying
If you’re someone who loves to take their circular knitting needles on the go, adding a handle to your needle case can make it even more convenient to carry. A handle can provide a comfortable grip and make it easier to transport your needles from one place to another.
There are several ways to add a handle to your needle case. One option is to sew a fabric or leather strap onto the case, creating a loop that you can hold onto. This can be done by measuring the desired length of the handle and sewing the ends securely to the case. Make sure to use strong and durable materials that can withstand regular use.
Another option is to attach a metal or plastic handle onto the case. These handles can be found at craft or sewing stores and come in various shapes and sizes. They often have pre-drilled holes or slots that make it easy to attach them to the case using screws or other fasteners. This provides a sturdier handle that can withstand heavier loads.
Regardless of the method you choose, it’s important to ensure that the handle is securely attached to the needle case. Test it out by lifting and holding the case to make sure it feels comfortable and stable in your hand. Adding a handle to your circular knitting needle case can make it more functional and convenient, allowing you to easily take your needles wherever you go.
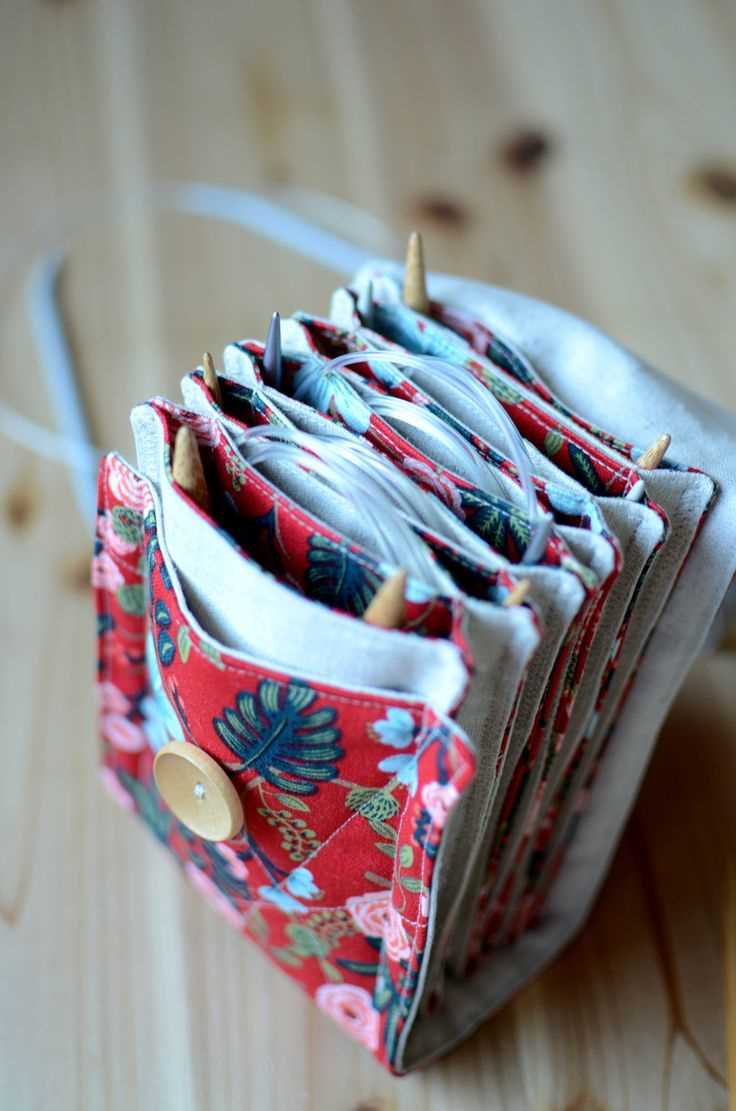
Embellishments and Personalization Options
When it comes to creating a circular knitting needle case, there are many ways to add embellishments and personalize the design. This allows you to make a case that not only keeps your needles safe and organized but also reflects your own unique style and preferences.
One popular option for embellishing a needle case is to use different types of fabric or materials for the exterior. You can choose a fabric with a bold pattern or vibrant color to make a statement, or opt for a more subtle and elegant look with a solid-colored fabric or even faux leather. Adding lace or trim along the edges can also give the case a touch of femininity or vintage charm.
If you want to take personalization to the next level, consider adding embroidery or appliqué to the exterior of the case. You can stitch your name or initials, a favorite quote or saying, or even a small image or design that holds special meaning to you. This not only adds a personal touch but also makes it easy to identify your case among others.
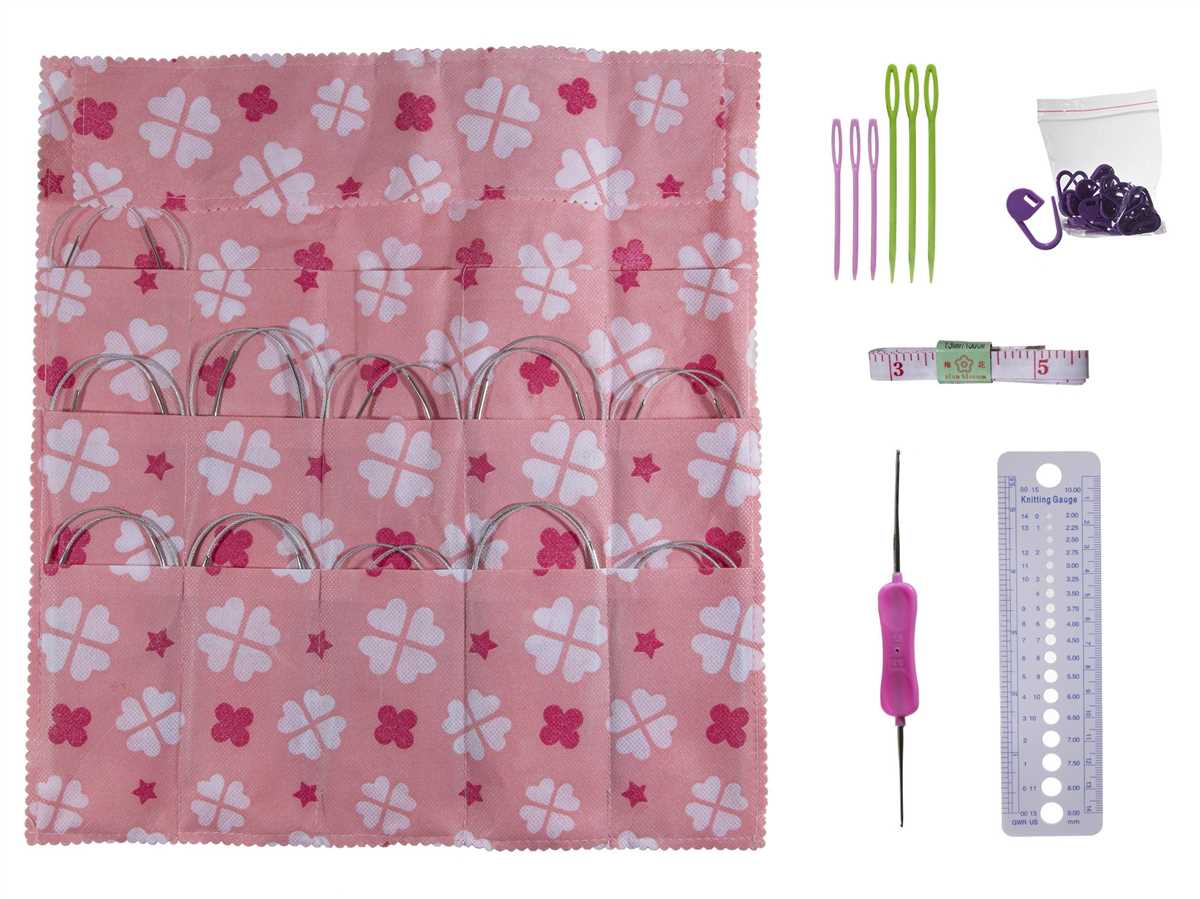
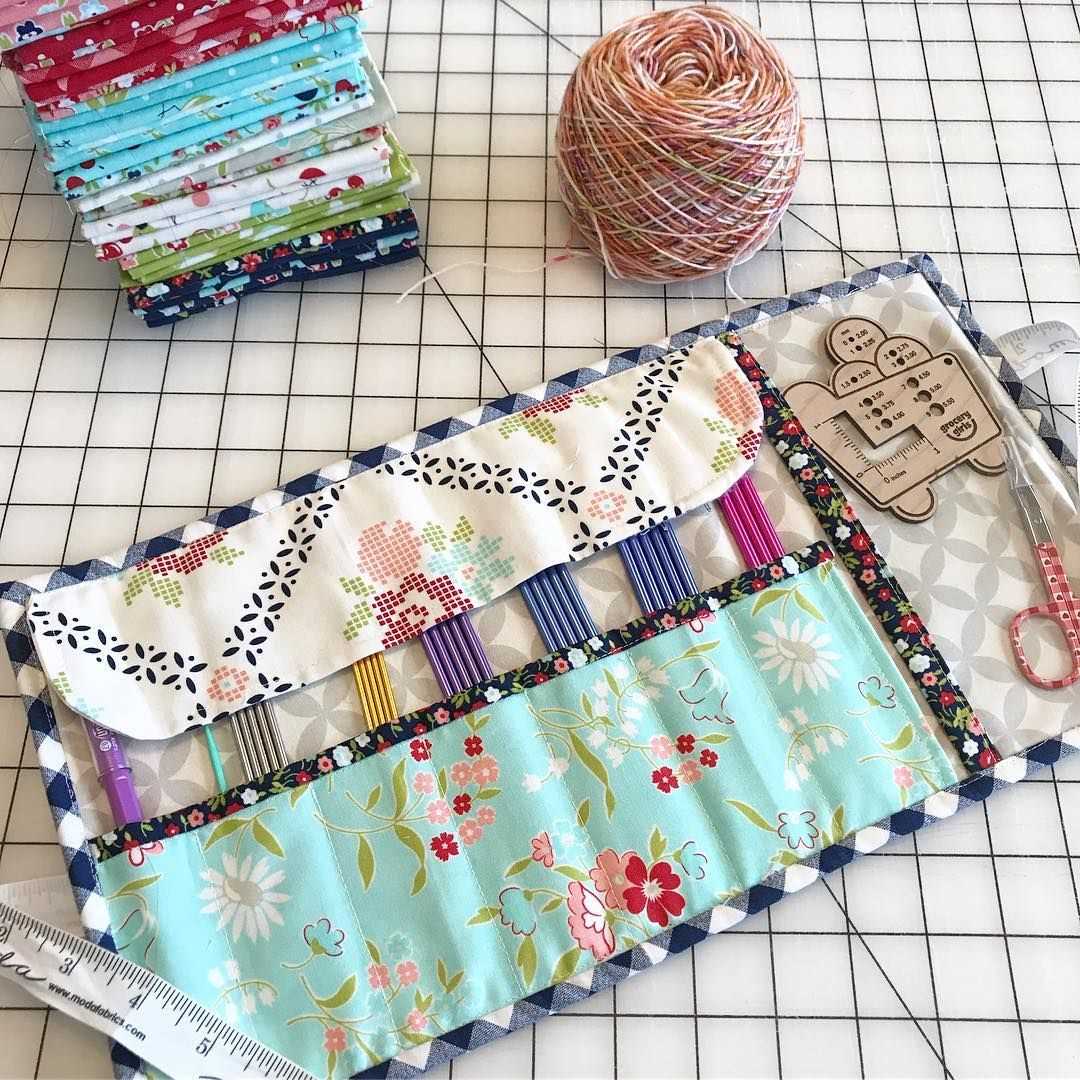
Inside the case, you can add pockets or compartments to hold additional knitting accessories such as stitch markers, scissors, or a tape measure. These can be sewn directly onto the fabric or made as separate removable pouches to provide flexibility in organizing your tools. You can also incorporate elastic loops or straps to secure the individual needles and prevent them from getting tangled.
Another option for personalization is to include a small label or tag on the case. This can be made from fabric or leather and can be customized with your name, a favorite quote, or a fun knitting-related saying. It adds a nice finishing touch and gives your case a professional look.
When it comes to embellishments and personalization options for circular knitting needle cases, the possibilities are endless. Get creative and let your imagination run wild to create a case that not only protects your precious needles but also showcases your own unique style and personality.
Final touches and finishing the case
After knitting the circular knitting needle case, it’s time to add the final touches and finish it off. This includes making sure all loose ends are woven in and securing any buttons or closures that were added during the knitting process.
One important step in finishing the case is blocking it. This helps to straighten out any uneven stitches and give the case a more polished look. To block the case, simply wet it with water and lay it flat on a towel. Gently stretch and shape the case as desired, making sure to measure it to ensure it’s the correct size. Allow it to dry completely before proceeding.
Once the case is dry and blocked, it’s time to add any additional embellishments, such as buttons or decorative stitches. If buttons were added earlier in the knitting process, make sure they are securely fastened by sewing them on with a needle and thread.
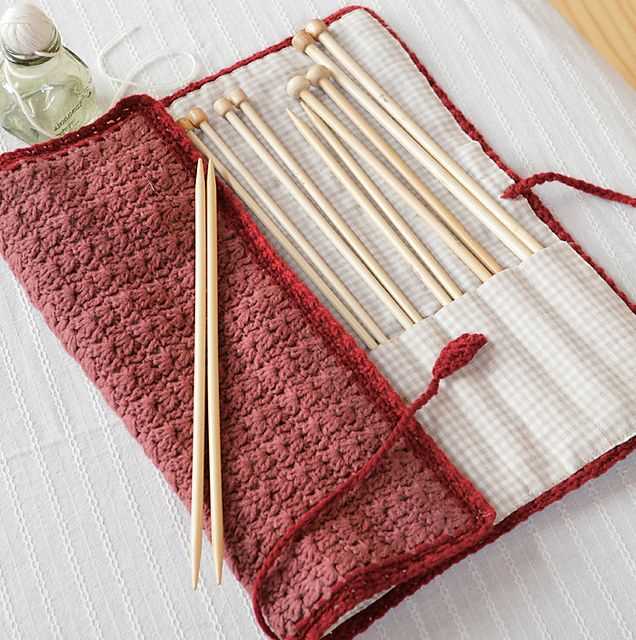
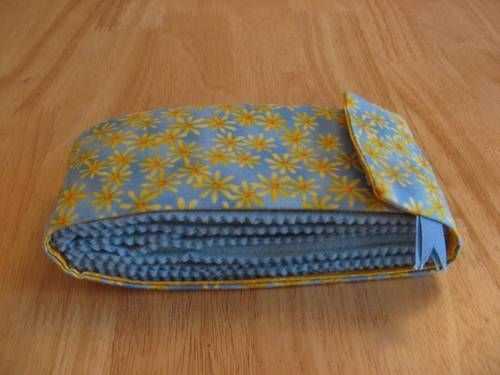
Finally, fold the case in half lengthwise and use a whipstitch or a slip stitch to sew up the sides. This will create a pocket for your circular knitting needles to slide into. If desired, you can also sew a small strip of fabric or ribbon along the top edge of the case to create a tie closure.
With the final touches complete, your circular knitting needle case is ready to be used! It’s the perfect way to keep your knitting needles organized and easily accessible, whether you’re knitting at home or on the go.
Tips and tricks for using the case
When using a circular knitting needle case, there are a few tips and tricks that can make your knitting experience even better. Here are some suggestions to help you get the most out of your case:
1. Keep your needles organized
One of the main purposes of a circular knitting needle case is to keep your needles organized and easily accessible. Make sure to use the pockets or compartments provided to store your needles according to their size and length. This will prevent them from getting tangled or lost and make it easier to find the needle you need for your project.
2. Label your needles
If you have multiple sets of circular knitting needles, it can be helpful to label them to easily identify their size and length. You can use small tags or labels to indicate the size or simply use a different color thread for each size. This will make it quick and easy to find the right needle for your project without having to measure them each time.
3. Store your accessories
In addition to your circular knitting needles, your case may have compartments or pockets for storing accessories such as stitch markers, tapestry needles, or cable needles. Take advantage of these storage options to keep all your knitting essentials in one place. This will save you time and effort searching for these small items when you need them.
4. Keep it clean
To ensure the longevity of your circular knitting needle case, it’s important to keep it clean. Regularly remove any dust or lint that may have collected inside the case, and wipe down the exterior with a damp cloth if needed. If your case is washable, follow the care instructions provided to keep it looking and functioning its best.
- By following these tips and tricks, you can make the most out of your circular knitting needle case and ensure that your needles and accessories are always organized and easily accessible. Happy knitting!
Resources for additional patterns and inspiration
If you’re looking for more patterns and inspiration for circular knitting needle cases, here are some resources you can check out:
1. Online knitting communities and forums:
- Ravelry – This popular online knitting community has thousands of patterns and a dedicated section for circular knitting needle cases. You can browse through user-generated projects and find inspiration for your own case.
- Knitting Paradise – This forum is a great place to connect with fellow knitters and exchange ideas. You can find pattern recommendations and ask for help or advice.
2. Knitting magazines and books:
- Vogue Knitting – This well-known knitting magazine often includes patterns for various accessories, including needle cases. You can subscribe to their online or print edition to get access to their pattern database.
- The Knitter’s Handbook – This comprehensive guidebook covers various knitting techniques and includes patterns for different types of cases, including circular needle cases. It’s a great resource for both beginners and experienced knitters.
3. Craft and knitting websites:
- AllFreeCrochet – While this website predominantly focuses on crochet patterns, they also have a section dedicated to knitting. You can find a variety of patterns for knitting needle cases, including circular ones.
- LoveKnitting – This website offers a wide range of knitting patterns and supplies. They have a section specifically for circular needle case patterns, and you can also find yarn and other knitting accessories on their site.
With these resources, you’ll have plenty of options for finding patterns and inspiration for your circular knitting needle case. Whether you prefer online communities, magazines, books, or websites, there’s something for everyone. Happy knitting!