
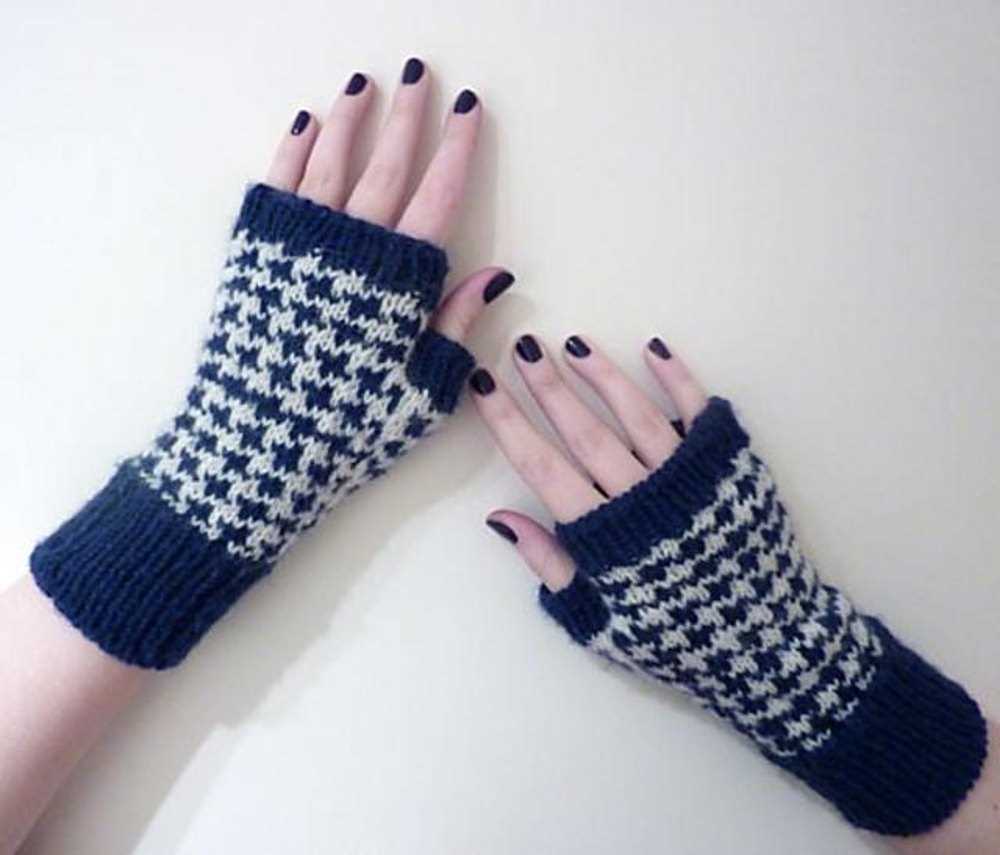
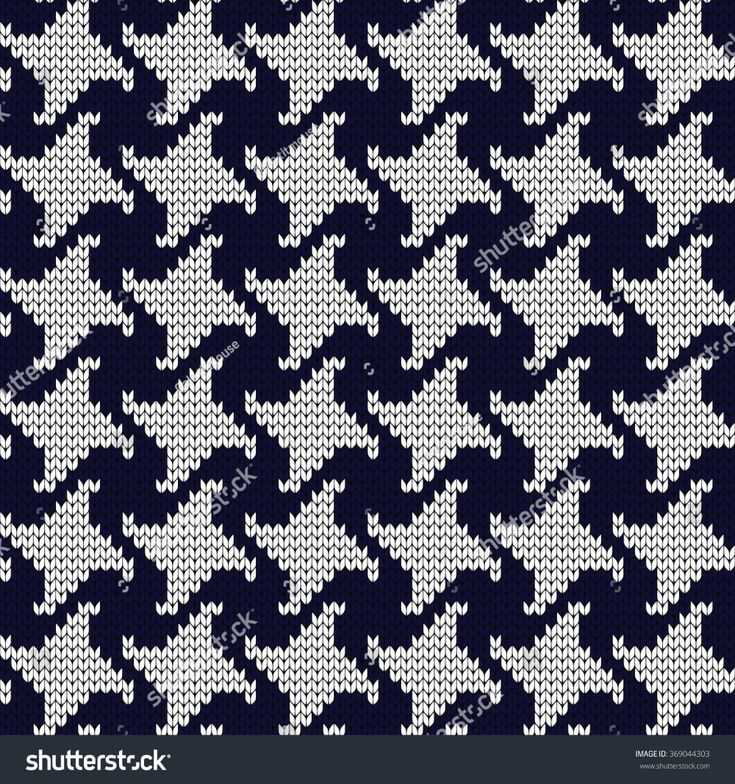
Are you looking for a classic and timeless knitting pattern? Look no further than the houndstooth knit pattern! Houndstooth, also known as dogstooth, is a pattern that originated in Scotland and is characterized by checkered squares of two different colors. It is a popular choice for both clothing and home decor items, as it adds a touch of elegance and sophistication to any project.
With this free houndstooth knit pattern, you can create beautiful and stylish garments, such as sweaters, scarves, and hats, for yourself or as gifts for your loved ones. The pattern is suitable for both beginner and experienced knitters, as it only requires basic knitting stitches, such as knit and purl, and the technique of changing colors.
Knitting this houndstooth pattern is not only enjoyable, but it also allows you to experiment with different color combinations to create your own unique designs. Whether you prefer a classic black and white houndstooth or you want to add a pop of color to your project, the possibilities are endless. So gather your needles, choose your favorite yarn, and give this free houndstooth knit pattern a try!
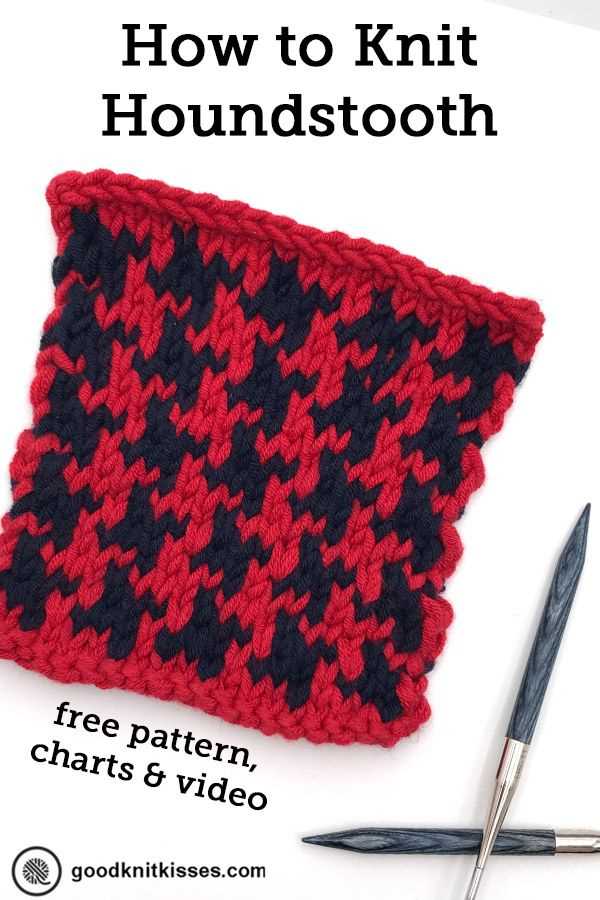
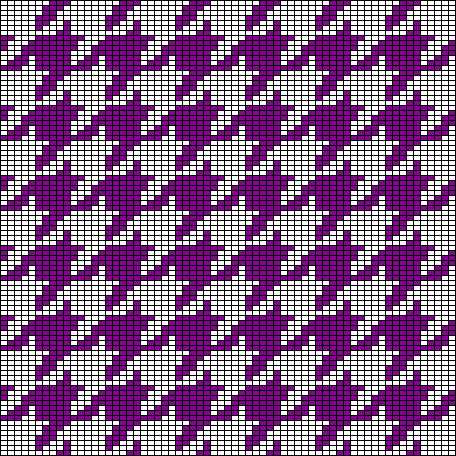
Free Houndstooth Knit Pattern
Looking to add a touch of classic elegance to your knitting projects? Look no further than the houndstooth pattern. This iconic two-color pattern, featuring a series of small checks or jagged lines, is a timeless choice for any knitter. With its bold graphic look, it can add interest and sophistication to everything from scarves and sweaters to blankets and accessories.
Fortunately, there are plenty of free houndstooth knit patterns available online, making it easy for knitters of all skill levels to try their hand at this classic pattern. Whether you prefer to knit in the round or flat, there are patterns available for both options. You can also find patterns for a variety of projects, such as hats, mittens, and even socks.
How to Knit the Houndstooth Pattern
To knit the houndstooth pattern, you will need two colors of yarn and knitting needles. The pattern typically alternates between the two colors, creating a checkerboard effect. The size of the checks can vary depending on the number of stitches and rows you choose to knit.
There are several different techniques for knitting the houndstooth pattern, including stranded colorwork and slip stitch knitting. Stranded colorwork involves carrying both yarn colors across the back of the work, while slip stitch knitting involves slipping stitches to create the appearance of color changes.
- Start by casting on the desired number of stitches in one of the colors.
- Follow the pattern instructions for the houndstooth pattern, which will specify the number of stitches and rows to knit in each color.
- Remember to take care of the yarn floats at the back of your work to prevent them from becoming too loose or too tight. This will help ensure a neat and even fabric.
- Once you have completed the pattern, bind off the stitches and weave in any loose ends.
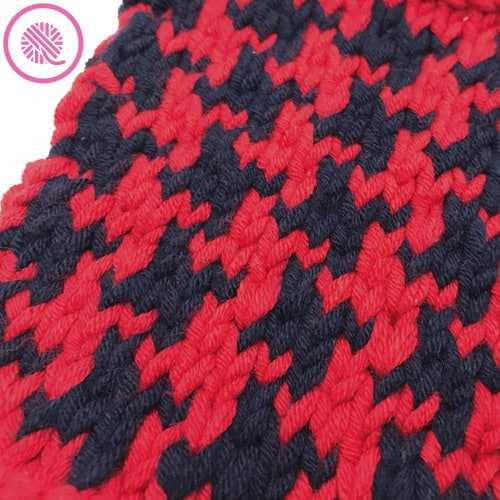
Don’t be afraid to experiment with different color combinations and yarn weights to make the houndstooth pattern your own. Whether you choose a traditional black and white color scheme or opt for more vibrant hues, the houndstooth pattern is sure to become a favorite in your knitting repertoire.
Selecting the Right Yarn and Needles

When it comes to knitting a houndstooth pattern, selecting the right yarn and needles is crucial to achieving the desired results. The yarn you choose will determine the overall appearance and feel of your knitted fabric, while the needles will determine the tension and gauge of your stitches.
Yarn: For a houndstooth knit pattern, it is best to choose a yarn that has good stitch definition and is not too fuzzy. This will help highlight the distinctive houndstooth design and ensure that the pattern stands out. A yarn with a blend of wool and acrylic or nylon can be a good choice, as it provides warmth, durability, and stitch definition.
Needles: The size of your needles will depend on the weight of the yarn you choose and the desired gauge of your project. Generally, for a houndstooth pattern, it is recommended to use needles that are slightly smaller than what is recommended on the yarn label. This will help create a denser fabric that accentuates the pattern. However, it is important to always check your gauge and make adjustments accordingly.
Additionally, the type of needles you choose can also impact your knitting experience. Straight needles, circular needles, or double-pointed needles can all be used depending on your preferences and the size of your project. Circular needles are often favored for larger projects as they distribute the weight of the project more evenly, while double-pointed needles are commonly used for knitting in the round.
Overall, selecting the right yarn and needles for your houndstooth knit pattern is essential for achieving the desired texture, appearance, and stitch definition. Be sure to consider the characteristics of the yarn and the appropriate needle size to create the perfect fabric for showcasing the distinctive houndstooth design.
Understanding the Houndstooth Knit Pattern
Houndstooth: A Classic Design
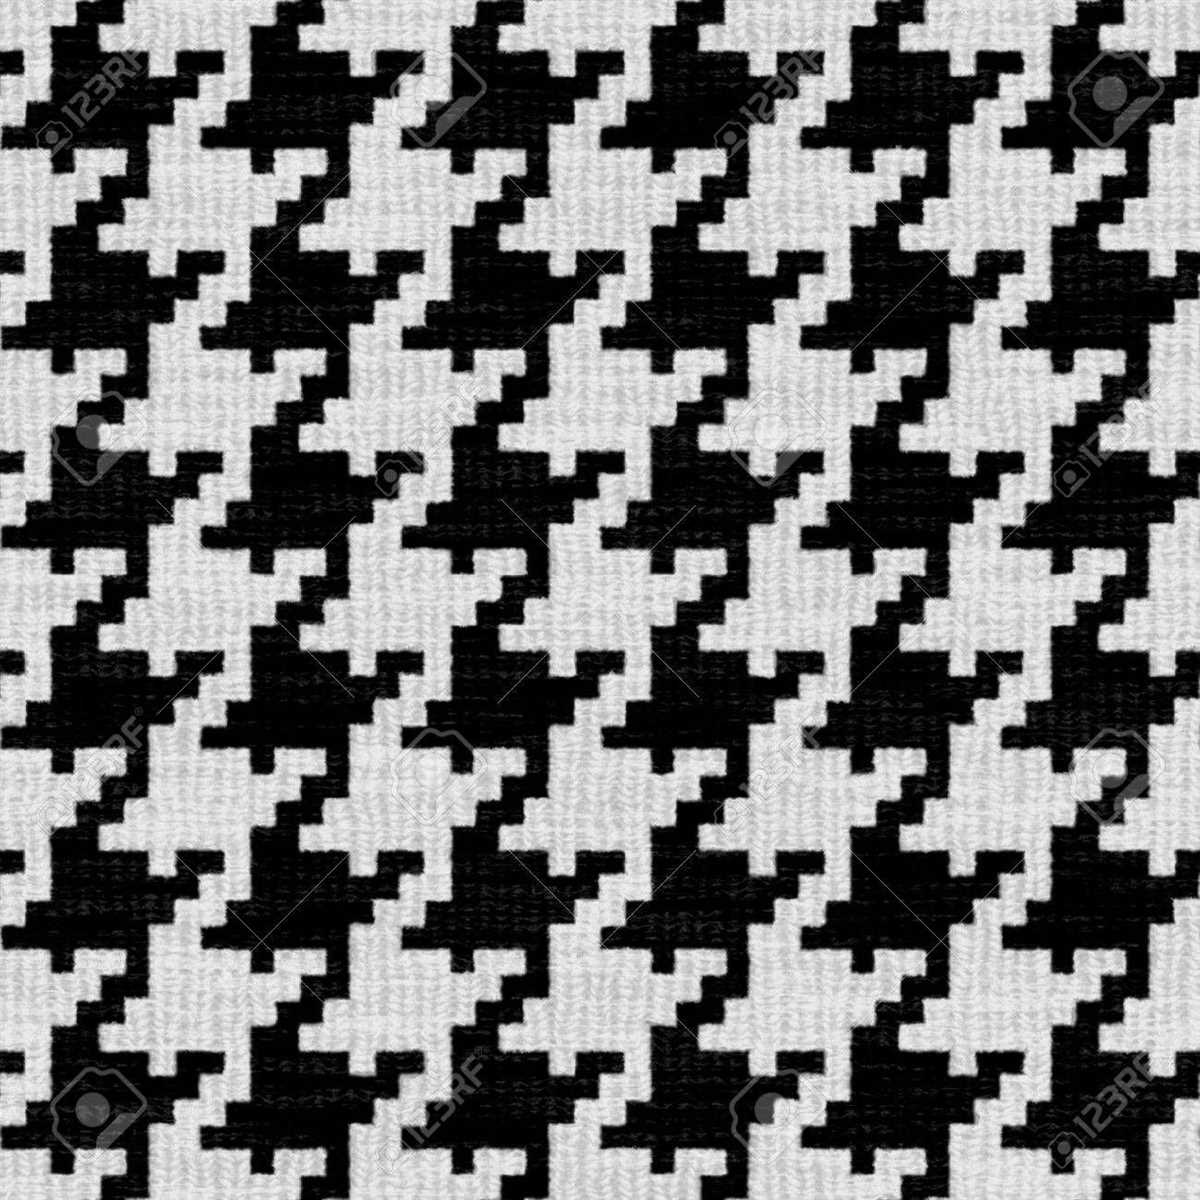
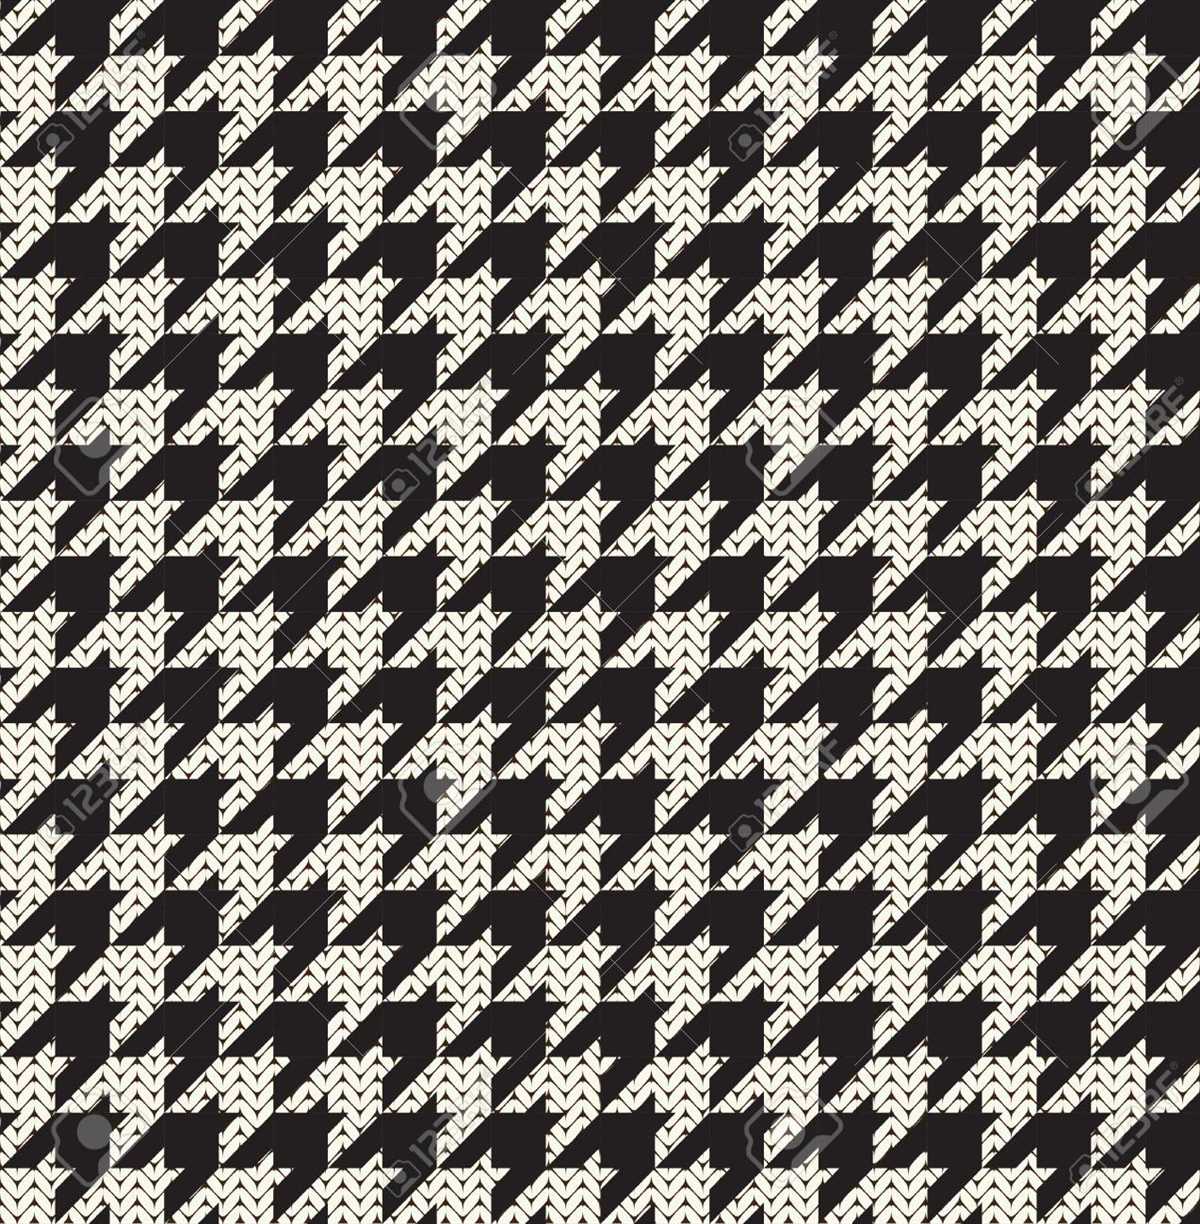
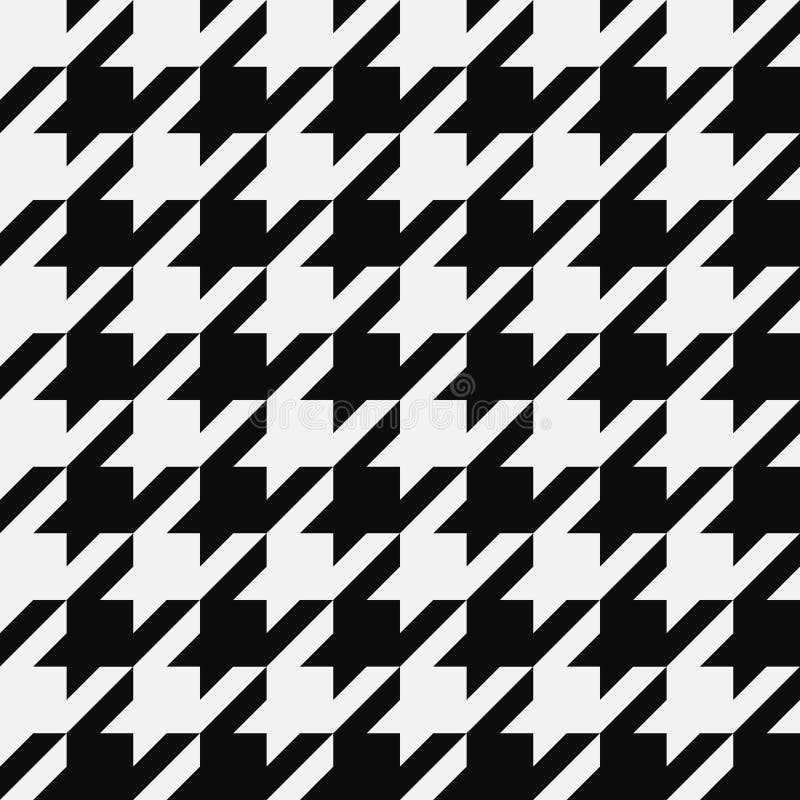
The houndstooth knit pattern is a classic design that has been popular for many years. It is characterized by its distinctive checkered pattern, which consists of small, evenly spaced squares or rectangles. The pattern is usually created using two contrasting colors, with one color forming the background and the other color forming the overlapping checks. This creates a visually striking design that is both timeless and elegant.
Originally, houndstooth patterns were woven into fabrics such as wool and tweed. However, with the rise in popularity of knitting, the houndstooth pattern has also made its way into the world of knitwear. Knitting allows for greater flexibility in terms of color choices and yarn types, giving knitters the opportunity to create unique houndstooth designs in various weights and textures.
Creating the Houndstooth Pattern
To create the houndstooth pattern in knitwear, knitters use a combination of knit and purl stitches. The basic houndstooth pattern consists of blocks of four stitches, with two stitches of each color. The first row is typically a setup row, where the alternating colors are established. From there, the pattern is repeated over multiple rows to create the checkered effect.
Knitters can experiment with different color combinations and yarn weights to achieve different effects with the houndstooth pattern. For a bold and graphic look, high contrast colors such as black and white are commonly used. However, softer color combinations can also be used to create a more subtle and sophisticated houndstooth design. Additionally, using different yarn weights can result in a tighter or looser pattern, giving knitters even more options for creating unique houndstooth knits.
- Understanding the Houndstooth Knit Pattern
- Creating the Houndstooth Pattern
Casting On and Setting up the Pattern
Before you start knitting the houndstooth pattern, you’ll need to cast on the desired number of stitches. The number of stitches you cast on will depend on the width of the knit item you’re making and the gauge of your yarn. Make sure to use the appropriate size of knitting needles for your yarn to achieve the correct gauge.
To cast on, you can use any method you prefer, such as the long-tail cast on or the knitted cast on. Once you have cast on the required number of stitches, you’re ready to begin setting up the houndstooth pattern.
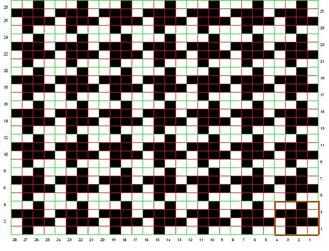
Setting up the houndstooth pattern involves creating the foundation rows that will establish the colorwork design. The houndstooth pattern typically consists of alternating blocks of two colors, often black and white. Depending on the size of your project, you may have different color combinations or more colors in your pattern.
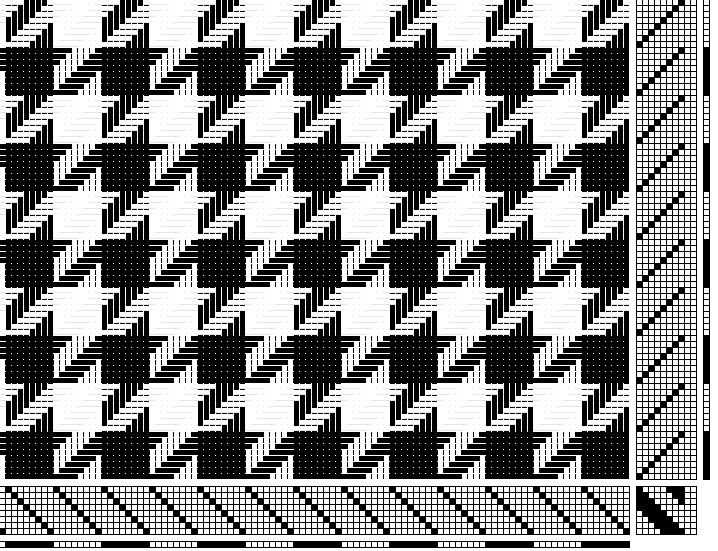
When setting up the houndstooth pattern, you’ll need to follow a specific sequence of stitches and colors. You might start with a few rows of the main color, then introduce the contrasting color, and continue alternating between the two colors for the houndstooth design. A common setup pattern for houndstooth is a series of knit and purl stitches arranged in a diagonal grid-like pattern.
As you work the setup rows, make sure to keep an eye on your tension and gauge to ensure consistent colorwork and an even fabric. It’s also important to remember to carry the yarn not in use loosely on the back of your work to prevent puckering or tight stitches.
Once the setup rows are complete, you’re ready to continue knitting the houndstooth pattern according to the established colorwork chart. Following the chart, you’ll knit or purl the stitches in the appropriate color as indicated. Pay attention to any special instructions for increases or decreases within the pattern to maintain the integrity of the houndstooth design.
Knitting the Base Rows
In order to create the houndstooth pattern, it is important to start with the base rows. These rows will serve as the foundation for the rest of the knit pattern. To begin, gather your materials, including your houndstooth knitting pattern, knitting needles, and yarn in your desired colors.
Step 1: Cast on
The first step in knitting the base rows is to cast on the required number of stitches. The number of stitches will depend on the size of your project and the houndstooth pattern you are using. Make sure to refer to the pattern for the correct number of stitches to cast on.
Step 2: Knit the first row
Once you have cast on the required number of stitches, it’s time to start knitting the base rows. The first row is usually knitted in a simple stitch, such as the knit stitch. Follow the pattern instructions to determine which stitch to use for the first row.
Step 3: Continue knitting the base rows
After knitting the first row, continue to knit the remaining base rows according to the pattern instructions. Each row may require a different combination of knit and purl stitches to create the houndstooth pattern. Pay close attention to the pattern chart or written instructions to ensure you are following the correct stitch pattern.
Step 4: Repeat the base rows
Depending on the size of your project, you may need to repeat the base rows multiple times to achieve the desired length. Make sure to refer to the pattern for the recommended number of repeats. As you repeat the base rows, you will start to see the houndstooth pattern take shape.
By following these steps, you will be able to successfully knit the base rows of your houndstooth pattern. Once the base rows are complete, you can move on to the next steps in the pattern, such as creating the houndstooth design using color changes and different stitch combinations.
Creating the Houndstooth Check
A houndstooth check is a classic pattern in textile design that adds a touch of sophistication to any garment or accessory. The pattern consists of small, alternating blocks of two colors, typically black and white, in a grid-like formation. This creates an illusion of texture and dimension, giving the fabric a rich and visually appealing look.
To create the houndstooth check pattern, designers typically start with a basic knit or woven fabric in two contrasting colors. The pattern is then achieved by manipulating the yarn or thread in a specific way. Traditionally, this is done by weaving or knitting the fabric in a twill pattern, where the yarns are interlaced over and under each other in a diagonal formation.
In knitting, the houndstooth check can be created through a combination of knit and purl stitches. By alternating between knitting with one color and purling with the other, the pattern emerges row by row. This requires careful attention to detail and precise stitch placement to achieve the desired effect.
Another method for creating the houndstooth check in knitting is through the use of stranded colorwork. This technique involves carrying both colors of yarn across the back of the work and knitting with one color at a time, creating a float of yarn on the wrong side of the fabric. By following a specific chart or pattern, the knitter can create the houndstooth check by strategically placing the color changes.
The houndstooth check pattern can be incorporated into a wide range of knit items, including sweaters, scarves, hats, and even blankets. It adds a timeless and elegant touch to any design, making it a popular choice among both traditional and modern knitters. Whether created through intricate stitchwork or stranded colorwork, the houndstooth check is sure to impress with its classic appeal.
Working with Multiple Colors
When it comes to knitting with multiple colors, there are several techniques and tips that can help you create stunning and intricate designs. One popular method is Fair Isle knitting, which involves knitting with two or more colors in a row to create beautiful patterns. This technique requires carrying the unused yarn along the back of the work, and it’s important to ensure that the tension remains consistent throughout to avoid puckering or loose stitches.
Another technique commonly used when working with multiple colors is intarsia knitting. This method involves knitting blocks of color separately and then joining them together as you go. Unlike Fair Isle knitting, intarsia knitting requires separate bobbins or balls of yarn for each color change. It’s important to twist the yarns at color changes to avoid holes and to carry the yarn loosely along the edge to prevent tightness.
Fair Isle Knitting
In Fair Isle knitting, it’s recommended to choose colors that contrast well with each other to create bold and defined patterns. The key to successful Fair Isle knitting is to not carry the unused yarn too tightly, as this can cause the fabric to pucker. It’s also important to keep an eye on the tension to ensure that both colors are worked evenly. Using smaller needles can help achieve a tighter tension.
- Choose contrasting colors
- Do not carry the unused yarn too tightly
- Keep an eye on tension
- Use smaller needles for a tighter tension
Intarsia Knitting
When working with intarsia knitting, it’s important to have a separate bobbin or ball of yarn for each colored section. This helps keep the colors clean and prevents them from tangling. It’s also crucial to twist the yarns at color changes to avoid holes in the fabric. When knitting with multiple colors, it’s helpful to use a yarn holder or bobbins to keep the unused yarns organized and untangled.
- Use separate bobbins or balls of yarn
- Twist the yarns at color changes
- Use a yarn holder or bobbins to keep the yarns organized
Adding Depth with Different Stitches
When it comes to knitting, the choice of stitches can make a big difference in the final look and feel of your project. By using different stitch patterns, you can add depth and texture to your knitting, making it more visually interesting and unique.
One stitch pattern that is particularly effective in adding depth is the houndstooth stitch. The houndstooth stitch is a classic pattern that creates a two-tone, checkered look. By alternating between two colors or shades of yarn, you can create a dynamic effect that adds depth and dimension to your knit fabric.
The houndstooth stitch is just one example of how different stitches can be used to add depth to your knitting. Other stitches, such as cables, bobbles, and lace patterns, can also create interesting textures and patterns that bring your knitting to life.
For example, cables involve crossing stitches over each other, creating a twisted effect that adds depth and definition to your fabric. Bobbles, on the other hand, are small, raised stitches that create a bumpy texture, adding visual interest and dimension to your knitting.
Lace patterns, with their intricate and delicate designs, can create a sense of depth by allowing light to shine through the openwork. This creates a beautiful and airy fabric that adds a touch of elegance to any project.
- Experimenting with different stitch patterns can be a fun and creative way to elevate your knitting.
- By choosing stitches that complement your yarn and project, you can add depth and visual interest to your knitting.
- Whether you’re knitting a sweater, scarf, or even a blanket, don’t be afraid to try new stitches and techniques to create a unique and textured fabric.
- Remember, the beauty of knitting lies in its versatility and the endless possibilities it offers for creating beautiful and personalized pieces.
Adding a Border or Edging
Adding a border or edging to your houndstooth knit pattern can give it a finishing touch and make it stand out even more. There are several different options you can consider when deciding on a border or edging for your project.
If you want to keep it simple, a basic garter stitch border can be a great choice. This involves knitting every row for a few rows to create a flat, ribbed edge. This will add a clean and classic finish to your houndstooth knit pattern.
If you want to add a bit more flair, you can consider an eyelet border. This involves creating small holes along the edge of your knitting by knitting two stitches together and then yarn over, repeating this pattern across the row. This will create a delicate lace-like effect that can be a beautiful addition to your houndstooth pattern.
Another option is to add a contrasting color border. You can choose a color that complements or contrasts with your houndstooth pattern to really make it pop. You can either knit the border directly onto your project or pick up stitches along the edge and then work the border separately. This will create a bold and striking edge that will draw attention to your houndstooth pattern.
Blocking and Finishing the Houndstooth Knit
Blocking and finishing are important steps in the knitting process, especially when it comes to intricate patterns like houndstooth. Blocking helps to even out the stitches and give the knit fabric a more professional and polished look. It also helps to relax the fibers and stretch the fabric to its intended shape and size.
To block the houndstooth knit, you will need a flat surface, blocking mats or towels, rustproof pins, and a spray bottle filled with water. Start by placing the knit fabric on the blocking mat or towel, making sure it is flat and smooth. Use the rustproof pins to secure the edges and corners of the fabric, gently stretching it as necessary to achieve the desired shape and size.
Once the fabric is pinned in place, lightly mist it with water using the spray bottle. Be careful not to soak the fabric, as excessive moisture can distort the stitches. Allow the knit fabric to dry completely before removing the pins. This process may take several hours or even overnight.
After the houndstooth knit fabric is dry, carefully remove the pins. Take a moment to admire your handiwork and the beautiful houndstooth pattern that emerges. Now it’s time to finish the edges. You can choose to add a simple garter or ribbed border, or even a decorative picot edge. This finishing touch will not only add visual interest to the knit but also help to prevent the edges from curling.
Once the edges are finished, your houndstooth knit is complete! It’s now ready to be incorporated into any project you have in mind, whether it’s a scarf, hat, or even a sweater. The blocking and finishing steps may take some additional time and effort, but the end result is well worth it when you see the final product.
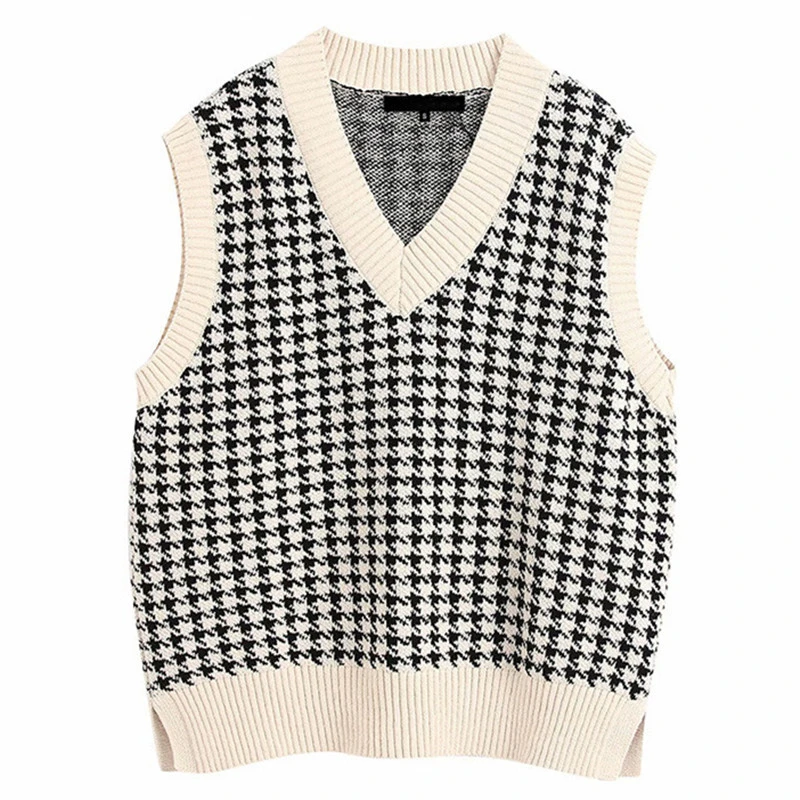
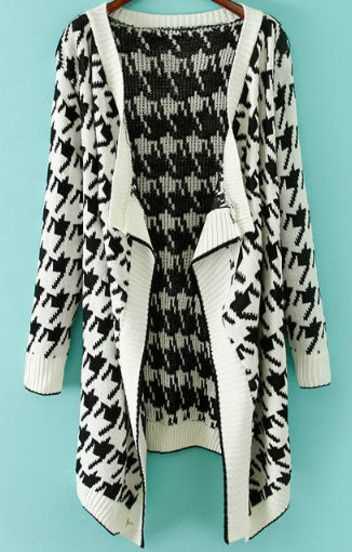
Using the Houndstooth Pattern in Different Projects
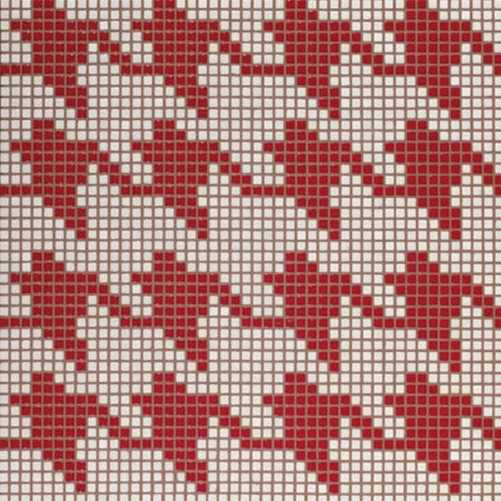
The houndstooth pattern, with its distinctive checkered design, is a classic and timeless pattern that has been used in various projects over the years. From fashion to interior design, this versatile pattern adds a touch of elegance and sophistication to any project.
One popular use of the houndstooth pattern is in fashion. It can be seen on clothing items such as jackets, skirts, and pants. The bold and visually striking pattern adds interest and texture to any outfit, making it a popular choice among fashion enthusiasts. Whether used as the main fabric or as an accent, the houndstooth pattern brings a chic and stylish element to any ensemble.
In interior design, the houndstooth pattern can be used in various ways to create a visually appealing space. It can be incorporated into upholstery fabrics for chairs and sofas, adding a touch of sophistication to the room. The houndstooth pattern can also be used as a wallpaper, creating a statement wall that instantly draws attention. Additionally, it can be used in accessories such as throw pillows and blankets, further enhancing the overall look and feel of the room.
The versatility of the houndstooth pattern extends beyond fashion and interior design. It can also be used in graphic design and branding. The bold and geometric nature of the pattern makes it an eye-catching choice for logos and promotional materials. The houndstooth pattern can add a sense of professionalism and elegance to a brand’s visual identity, making it instantly recognizable and memorable.
In conclusion, the houndstooth pattern is a versatile and visually appealing design that can be used in a variety of projects. Whether it’s in fashion, interior design, or graphic design, this classic pattern adds a touch of elegance and sophistication. So, whether you’re looking to update your wardrobe, revamp your home, or create a memorable brand, consider incorporating the houndstooth pattern into your next project.
Troubleshooting Common Houndstooth Knit Issues
Knitting houndstooth patterns can be a fun and rewarding experience. However, like any other knitting project, it’s not uncommon to encounter some issues along the way. Here are some troubleshooting tips for common houndstooth knit issues:
Tangled Yarn
If you find that your yarn is becoming tangled while knitting, try using a yarn holder or swift to keep it organized and untangled. Additionally, make sure to work with a yarn that has good ply and doesn’t split easily. If you’re still having issues, you can try winding your yarn into a center-pull ball before starting your project.
Inconsistent Gauge

Getting the correct gauge is crucial for achieving the desired size and fit of your houndstooth pattern. If you find that your gauge is inconsistent, make sure you’re using the recommended needle size and yarn weight. Also, take the time to check your tension and adjust it as needed. Swatching before starting your project can help you identify any gauge issues and make necessary adjustments.
Mistakes in the Houndstooth Pattern

It’s not uncommon to make mistakes in complex houndstooth patterns, especially if you’re new to colorwork. To fix mistakes, carefully unravel the stitches back to the error and correct it, either by re-knitting the stitches or using a crochet hook to pick up the correct stitches. It’s important to pay attention to the colorwork pattern and count your stitches to ensure accuracy.
Uneven Tension in Colorwork
Creating even tension in colorwork can be challenging, especially when switching between different colors. To help achieve an even tension, make sure to keep your floats (the strands of yarn that span between stitches) neither too tight nor too loose. Practice maintaining consistent tension by starting with simple, small colorwork projects before attempting more complex houndstooth patterns.
Not Enough Contrast
Houndstooth patterns are known for their bold contrast, so if your pattern doesn’t have enough contrast, the design may not stand out as desired. To avoid this issue, choose colors that have a significant difference in lightness or darkness. It’s also helpful to hold your colorwork swatch at a distance to see if the pattern is still distinct from a distance.
By keeping these troubleshooting tips in mind, you’ll be able to overcome common issues that may arise when knitting houndstooth patterns. Remember, practice makes perfect, so don’t be discouraged if you encounter challenges along the way. With patience and perseverance, you’ll soon be creating beautiful houndstooth knits with confidence.