
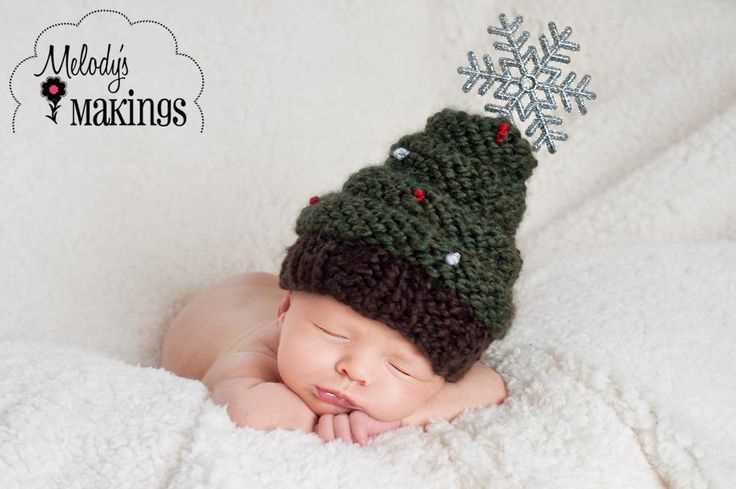
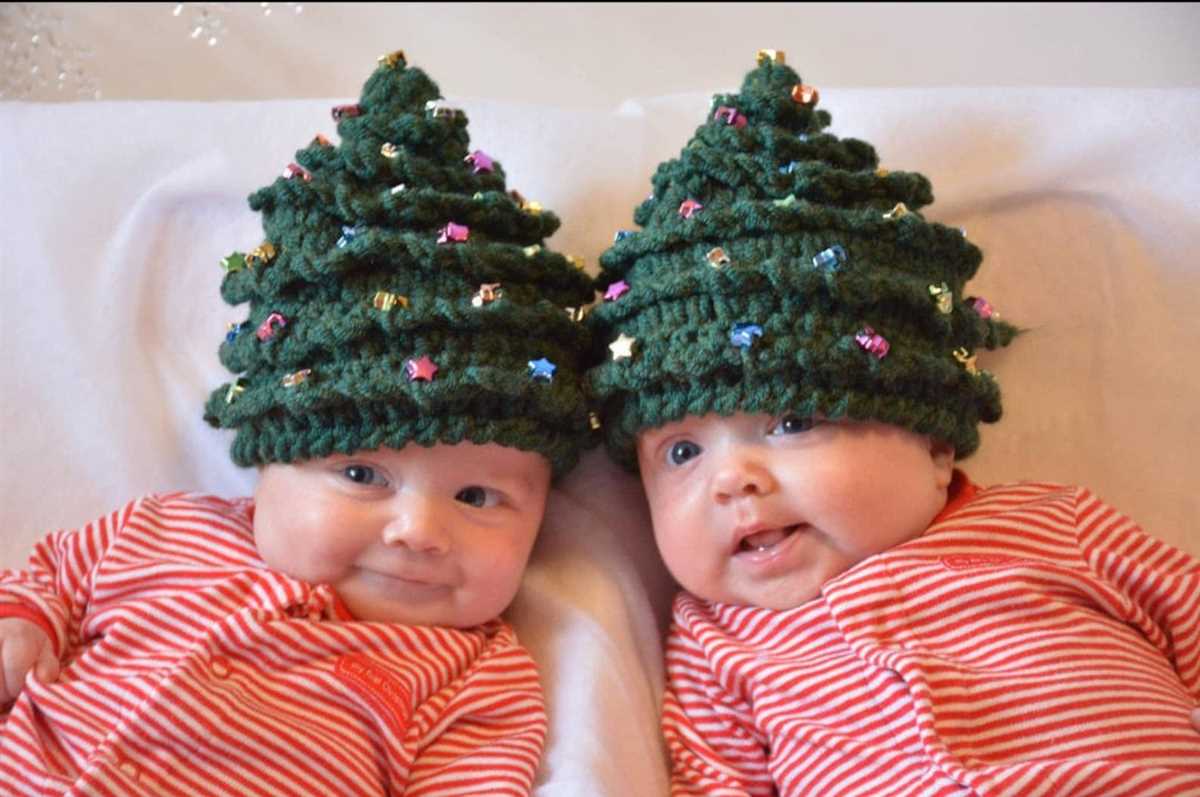
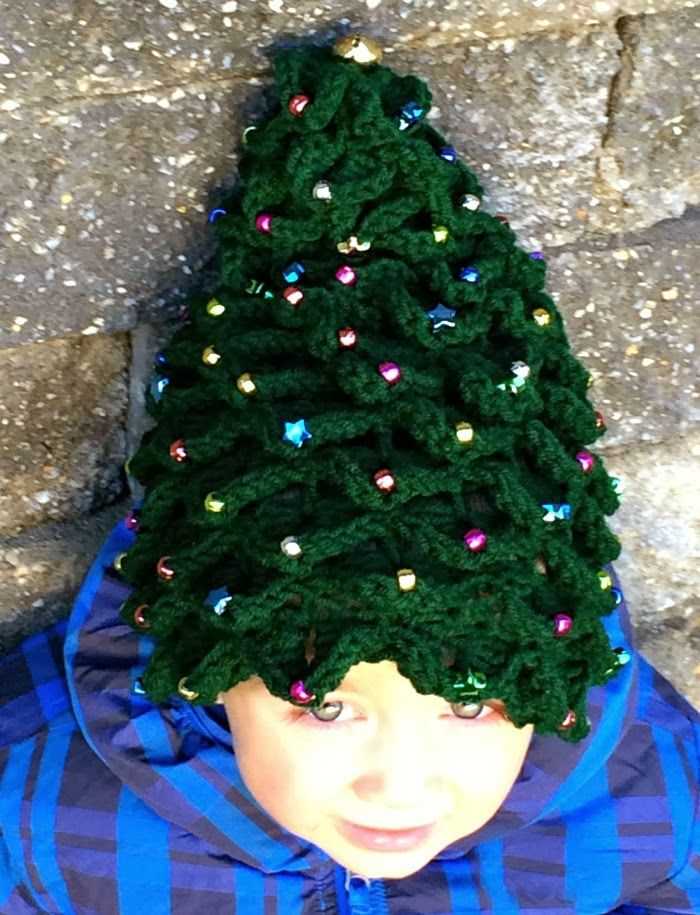
Christmas is a time of joy and celebration, and what better way to show your holiday spirit than by wearing a festive hat? This knitting pattern for a Christmas tree hat is perfect for spreading some cheer and adding a touch of whimsy to your winter wardrobe.
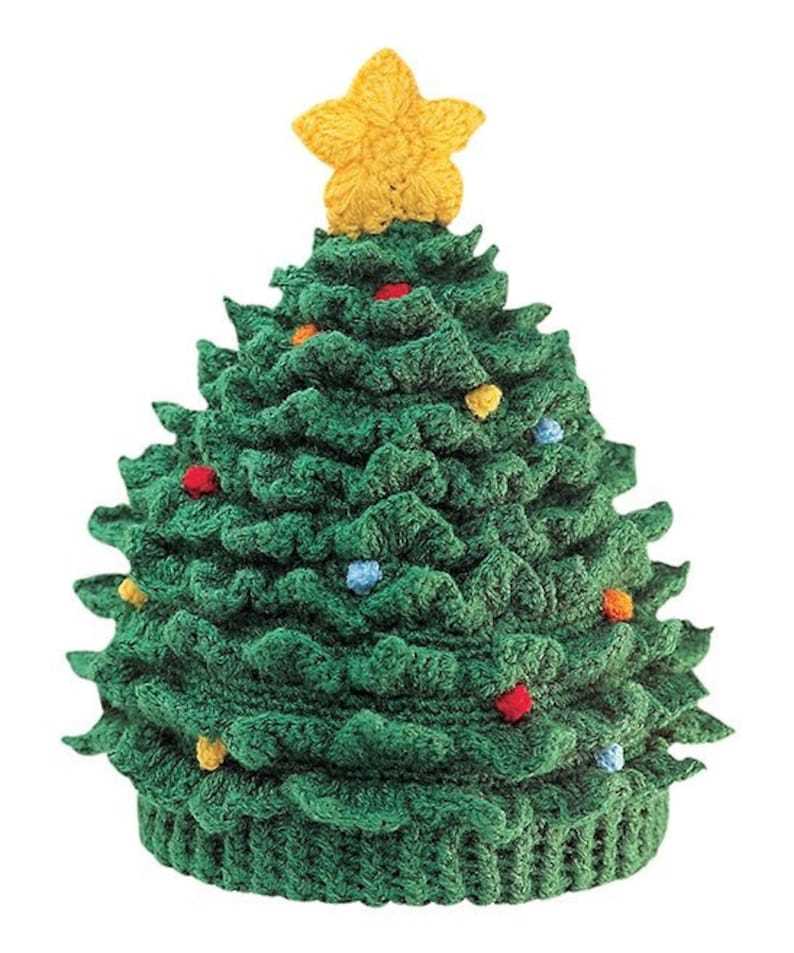
Made with soft yarn in green and adorned with colorful baubles and a golden star on top, this hat is a fun and unique accessory for holiday parties, family gatherings, or even just a stroll in the park. Whether you’re a beginner knitter or an experienced one, this pattern is easy to follow and will result in a hat that is sure to turn heads and bring smiles wherever you go.
With step-by-step instructions and helpful tips, this knitting pattern is suitable for all skill levels. Even if you’re new to knitting, you’ll be able to create a beautiful Christmas tree hat that is sure to become a beloved piece in your festive wardrobe. So gather your knitting needles and get ready to create a one-of-a-kind holiday accessory that will make you the envy of all your friends!
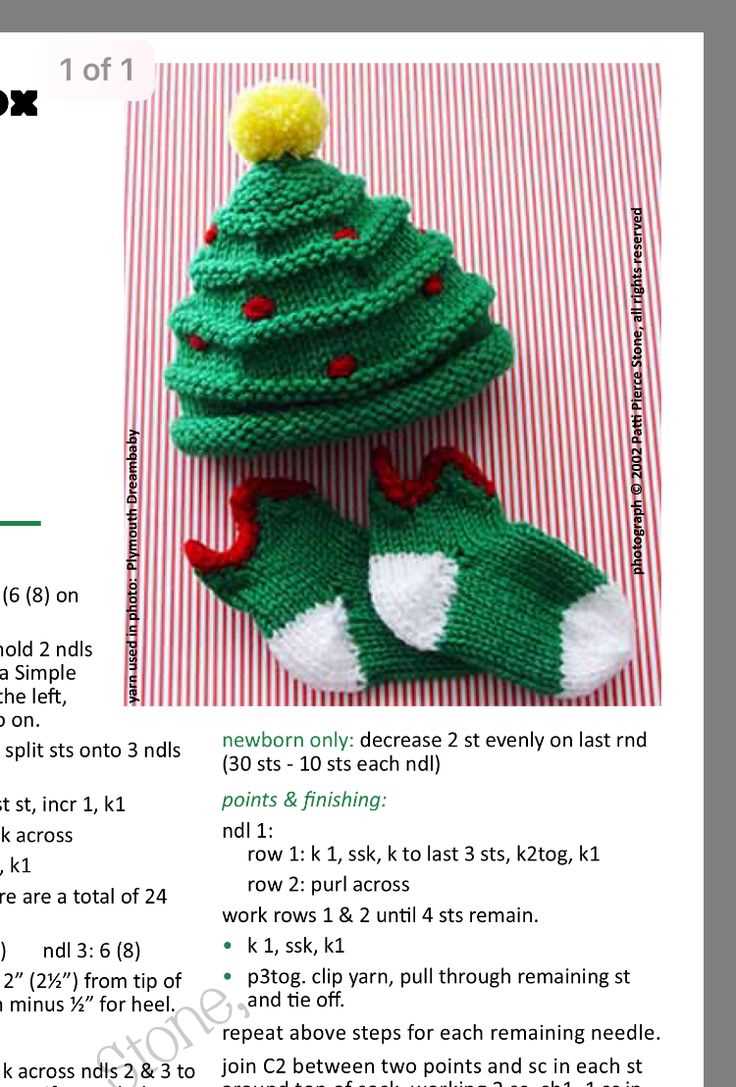
Knitting Pattern for Christmas Tree Hat
Get into the festive spirit with a fun and cozy Christmas tree hat! This knitting pattern is the perfect project for the holiday season, and it’s sure to bring smiles to faces of all ages. Whether you’re wearing it to a holiday party or giving it as a gift, this hat is a great way to spread some holiday cheer.
To knit this Christmas tree hat, you’ll need the following supplies:
- Size 8 knitting needles
- Worsted weight yarn in green and assorted colors for the decorations
- Yarn needle
- Scissors
Instructions:
- Using the green yarn, cast on 80 stitches.
- Knit in a rib stitch (knit 1, purl 1) for the first 4 rows.
- Switch to stocking stitch (knit 1 row, purl 1 row) and continue for 10 rows.
- Next, start decrease rows. *Knit 6 stitches, knit 2 together* – repeat from * to * until the end of the row.
- Continue knitting in stocking stitch for 4 rows.
- Decrease again: *Knit 5 stitches, knit 2 together* – repeat from * to * until the end of the row.
- Continue knitting in stocking stitch for 4 rows.
- Decrease once more: *Knit 4 stitches, knit 2 together* – repeat from * to * until the end of the row.
- Knit 1 row in stocking stitch.
- Finally, decrease one last time: *Knit 3 stitches, knit 2 together* – repeat from * to * until the end of the row.
- Cut the yarn, leaving a long tail. Thread the tail through the remaining stitches and pull tight to close the top of the hat.
To decorate your Christmas tree hat, use the assorted colored yarn to sew on small pom-poms, miniature ornaments, or even some battery-powered fairy lights. Get creative and make it your own!
| Size | Head Circumference |
|---|---|
| Child | 19 inches |
| Teen/Adult | 21 inches |
Remember to adjust the number of stitches and rows accordingly if you’re making the hat for a different head size. Now you’re ready to grab your knitting needles and get started on this festive knitting project. Happy knitting!
Materials Needed for Knitting
When it comes to knitting, having the right materials is essential to creating beautiful and successful projects. Whether you’re a beginner or an experienced knitter, there are a few key items you’ll need to have on hand. Here’s a list of materials you’ll need for your knitting projects:
- Yarn: Yarn is the main material you’ll be working with in knitting. Choose a yarn that is suitable for your project and desired outcome. There are many different types of yarn available, including wool, acrylic, cotton, and alpaca.
- Knitting Needles: Knitting needles are used to create the stitches in your knitting. They come in a variety of sizes and materials, such as bamboo, metal, and plastic. The size of your needles will depend on the weight of your yarn and the pattern you’re following.
- Scissors: A good pair of scissors is essential for cutting yarn and trimming loose ends. Choose a pair of sharp, small scissors that are comfortable to hold.
- Tapestry Needle: A tapestry needle is used to weave in loose ends and sew pieces of your project together. It’s a small, blunt needle with a large eye that makes it easy to thread with yarn.
- Stitch Markers: Stitch markers are used to mark specific stitches or sections in your knitting. They can be helpful in keeping track of your progress and following a pattern.
- Measuring Tape: A measuring tape is useful for checking your gauge and measuring the size of your project. It’s important to match the gauge specified in your pattern to ensure the correct fit.
- Row Counter: A row counter is a handy tool for keeping track of your rows in a pattern. It can help you stay organized and avoid mistakes.
Having these materials on hand will ensure that you’re well-equipped to tackle any knitting project. With the right yarn, needles, and accessories, you’ll be able to create beautiful and unique knitted items.
Choosing the Right Yarn and Needles
When knitting a Christmas tree hat, choosing the right yarn and needles is crucial to achieving the desired result. The yarn you select will determine the overall look and feel of the hat, while the needles will affect the size and tension of your stitches. Here are some important factors to consider when making your yarn and needle choices.
Yarn Weight:
One of the first things to consider is the weight of the yarn. For a Christmas tree hat, you’ll want to choose a medium weight yarn (often referred to as worsted or aran weight) to ensure that the hat has enough structure and holds its shape. This weight also allows for a balance between warmth and comfort.
Yarn Type:
Another factor to consider is the type of yarn. Acrylic yarn is a popular choice for Christmas tree hats because it is durable, easy to care for, and comes in a wide range of colors. If you prefer a more natural option, you can also use wool or a wool blend for added warmth. Consider the intended recipient of the hat when selecting the yarn type and choose one that suits their preferences and needs.
Needle Size:
The needle size you choose will determine the gauge and size of your stitches. For a Christmas tree hat, you’ll want to use a needle size that creates a dense fabric to ensure that the hat retains its shape. The recommended needle size for worsted weight yarn is usually around US size 8 or 9 (5.0-5.5mm), but make sure to swatch and adjust your needle size if needed to obtain the desired tension.
Needle Type:
When it comes to needle type, there are several options to choose from, including straight needles, circular needles, and double-pointed needles (DPNs). Straight needles are great for beginners and smaller projects, while circular needles and DPNs are useful for knitting in the round. Consider your knitting preference and the construction of the hat pattern when selecting the needle type.
By carefully considering the yarn weight, yarn type, needle size, and needle type, you can ensure that your Christmas tree hat turns out just as you envisioned. Remember to always check the pattern recommendations and make any necessary adjustments to achieve the desired fit and look.
Getting Started: Casting On Stitches
Before you can begin knitting your Christmas tree hat, you will need to cast on stitches. Casting on is the process of creating the first row of stitches on your knitting needle. This is the foundation of your project, so it’s important to get it right.
There are several different methods of casting on stitches, but for this Christmas tree hat pattern, we will be using the long-tail cast on method. This method creates a neat and elastic edge, perfect for knitting hats.
To start, you will need to estimate how much yarn you will need for the long-tail cast on. This can be done by wrapping the yarn around the needle multiple times, usually about 1 inch of yarn for each stitch you plan to cast on. Make sure to leave a long enough tail, as this will be used to create the first row of stitches.
Once you have your estimated yarn length, make a slipknot by creating a loop with the tail end of the yarn. Insert your needle into the loop and tighten it by pulling on the tail. Hold the needle with the slipknot in your right hand, and the tail hanging down.
Now, using your left hand, bring the working yarn (the end attached to the yarn ball) over your thumb and hold it with your other fingers. Insert your needle under the working yarn, going from front to back, and then over the top of the yarn, going from back to front. This creates a loop on your needle. Continue this process for each stitch you want to cast on, making sure to keep the yarn tension consistent.
Once you have cast on all the required stitches, you can start knitting the first row of your Christmas tree hat. Follow the pattern instructions for the specific stitches and techniques needed for your project. Happy knitting!
Knitting the Ribbing Section
In the knitting pattern for the Christmas tree hat, the ribbing section adds a nice texture and helps the hat to stay in place on your head. The ribbing is worked in a 2×2 rib stitch pattern, which means knitting two stitches and then purling two stitches in a repeating pattern.
To start the ribbing section, you will need to cast on the required number of stitches, which will depend on the size of the hat you are making. Make sure you have a circular knitting needle and a set of double-pointed needles if necessary.
Step 1: Begin by casting on the required number of stitches using the long-tail cast-on method. This method provides a nice, stretchy edge for the ribbing section.
Step 2: Once you have cast on your stitches, join the round by knitting the first stitch. This will create a seamless edge for your hat.
Step 3: Now you can start working the ribbing stitch pattern. Knit two stitches, then purl two stitches, and continue this pattern until you reach the end of the round.
Step 4: Continue knitting in the 2×2 rib stitch pattern for the required number of rounds, as specified in the knitting pattern. This will create the ribbed texture for the hat.
Remember to keep your tension even as you work the ribbing section to ensure a consistent and stretchy fabric. Once you have completed the ribbing section, you can move on to the next part of the knitting pattern.
- Knit two stitches, purl two stitches, repeat.
- Continue in pattern for required number of rounds.
Creating the Body of the Hat
Now that you have completed the brim of the Christmas tree hat, it is time to move on to creating the body of the hat. This section will guide you through the steps to knit the main part of the hat, which will resemble the shape of a Christmas tree.
Step 1: Begin by casting on the required number of stitches, according to the size of the hat you are making. You can refer to the pattern for specific instructions on the number of stitches to cast on.
Step 2: Once you have cast on the stitches, you will start working in the round. This means that you will continue knitting in a continuous spiral, without turning your work. Make sure to place a stitch marker to indicate the beginning of the round.
Step 3: Knit each round in the designated stitch pattern, following the instructions provided in the pattern. As you progress, you will see the body of the hat taking shape, resembling the tapering shape of a Christmas tree.
Step 4: Continue knitting the specified number of rounds, until the body of the hat reaches the desired height. This will depend on personal preference and the length of the hat specified in the pattern.
Step 5: Once you have reached the desired height, it’s time to start decreasing the stitches to close the top of the hat. Follow the pattern’s instructions on the specific decrease technique to use.
Step 6: Continue decreasing the stitches until you have a small opening left. Cut the yarn, leaving a long tail, and thread it through the remaining stitches using a yarn needle. Pull tight to secure the top of the hat.
Shaping the Hat: Decreasing Stitches
Once you have completed the desired length of the Christmas tree hat, it’s time to start shaping the crown by decreasing stitches.
Sometimes, knitting patterns will specify the number of stitches you need to decrease on each round, while others may provide a general guideline for decreasing evenly.
To decrease stitches, you can use various techniques such as knit two stitches together (k2tog), slip slip knit (ssk), or purl two stitches together (p2tog). These techniques help to bring the stitches closer together, creating a tapered effect towards the top of the hat.
It’s important to follow the pattern’s instructions for decreasing stitches carefully to ensure an even and symmetrical crown. This will help the hat maintain its shape and fit properly.
Some patterns may also incorporate a decrease round followed by a round of knitting without decreases to create a textured or patterned effect. This adds interest to the design and can make the hat look more intricate and unique.
As you continue to decrease stitches, you may find it helpful to switch to double-pointed needles or a magic loop method to accommodate the decreasing number of stitches. This will make it easier to work in the round and maintain the shape of the hat.
Finally, once you have decreased the stitches to a small enough number, you will usually finish the crown by gathering the remaining stitches together and securing them tightly. This completes the shaping of the hat and creates a neat and finished look.
With these techniques, you can confidently shape the crown of your Christmas tree hat and create a festive accessory that will be a hit during the holiday season. So grab your needles and get ready to decrease those stitches!
Adding Tree Branches: Creating the Zigzag Pattern
Once you have completed knitting the main body of the Christmas tree hat, it’s time to add the tree branches to create the zigzag pattern. This step will give your hat a festive and authentic tree-like appearance. Follow these instructions carefully to achieve the desired effect.
Step 1: Identify the Starting Point
To begin, identify the starting point for adding the tree branches. This is usually at the top of the hat, where the pointy tip is located. Mark this point with a stitch marker or a contrasting yarn to make it easier to follow the pattern.
Step 2: Work with Multiple Yarn Colors
The zigzag pattern is created by alternating colors between the main hat color and the tree branch color. Choose a yarn color that closely resembles the color of a Christmas tree branch, such as a dark green or brown. You will be working with both colors throughout this step.
Step 3: Knitting the Zigzag Pattern
Start by knitting one stitch in the main hat color from the starting point. Then, switch to the tree branch color and knit two stitches. Continue this pattern of one stitch in the main color, followed by two stitches in the branch color, until you reach the desired width for your tree branches.
- Remember to keep track of the number of stitches in each color to maintain the zigzag pattern.
- For a more pronounced zigzag effect, you can increase the number of stitches in the branch color to three or four.
Step 4: Securing the Tree Branches
To make the tree branches more secure, you can gently twist the yarns together at the back of your work every few rows. This will prevent the branches from flopping around and ensure a neater finish.
Continue knitting in the zigzag pattern until you reach the desired length for your tree branches. Once you’re satisfied with the height and appearance, you can proceed to bind off and finish the hat according to your preferred method. Your Christmas tree hat is now ready to be worn and admired during the festive season!
Adding Decorations: Knitting Ornaments
Once you have completed knitting your Christmas tree hat, it’s time to add some decorations to make it even more festive. Knitting ornaments is a fun and creative way to personalize your hat and make it truly unique.
Here are some ideas for knitting ornaments to embellish your Christmas tree hat:
- Bells: Knit small bells using metallic yarn or thread and attach them to the tips of the tree branches on the hat. The jingling sound will add a playful and joyful element to your hat.
- Stars: Knit mini stars in different colors and sizes using sparkly yarn. Sew or glue them onto the hat, scattered among the tree branches, to create a twinkling effect.
- Baubles: Knit small round baubles in various colors and textures. Attach them to the hat using thread or yarn, placing them strategically to mimic the look of hanging ornaments on a Christmas tree.
- Miniature Gifts: Knit tiny gift box shapes in different colors. Attach them to the hat, either at the top of the tree or scattered among the branches, to give the illusion of presents nestled within.
- Bow: Knit a large bow in a contrasting color and attach it at the base of the hat, where the tree trunk would be. This will add a charming touch and create a focal point for your hat.
Remember, the options for knitting ornaments are endless. You can get creative with different shapes, sizes, and colors to match your personal style and preference. Have fun experimenting with different designs and let your imagination run wild!
Finishing Touches: Bind Off and Weaving in Ends
Once you have completed knitting your Christmas tree hat, it’s time to add the finishing touches. The first step is to bind off the stitches. To do this, knit the first two stitches as usual, then insert the left-hand needle into the first stitch and pull it over the second stitch, dropping it off the needle. Continue this process until you have bound off all the stitches on your knitting needle.
After binding off, you will have a row of live stitches on your knitting needle. Use a yarn needle to weave in these ends to secure them. Start by threading the yarn through the needle, then insert the needle into the first stitch and pull the yarn through. Repeat this process for each stitch until you have woven in all the ends.
To ensure that the ends are securely woven in, weave the yarn in different directions, such as weaving vertically and horizontally. This will help prevent the ends from coming undone. Once you have woven in all the ends, trim any excess yarn, making sure to leave a small tail for added security.
By binding off and weaving in the ends, you are giving your Christmas tree hat a polished and professional finish. This will not only make your hat look neat and tidy but also help prevent any unraveling or loose ends. Follow these steps and give your hat the final touch it deserves.
Blocking and Shaping the Hat
Once you have finished knitting the Christmas tree hat, it is time to block and shape it to give it a more polished and professional look. Blocking helps to even out the stitches and make the hat maintain its shape.
1. Wet Blocking: Start by filling a sink or basin with lukewarm water. Gently submerge the hat in the water, making sure it is completely saturated. Let it soak for about 10-15 minutes.
2. Reshape: After soaking, carefully remove the hat from the water and gently squeeze out excess water. Lay a clean towel on a flat surface and place the hat on top. Shape the hat by gently stretching and pressing it into the desired shape. Pay extra attention to the tree details to make sure they are well-defined.
3. Pinning: Use rustproof T-pins or blocking wires to secure the hat in place. Start by pinning the brim and work your way up to the top. Make sure the stitches are aligned and the brim is even. Use more pins or wires on the tree details if needed.
4. Dry: Allow the hat to air dry completely. Avoid direct sunlight or heat sources as this can cause the fibers to shrink or warp. Once dry, remove the pins or wires and gently pat the hat to fluff up the stitches.
Following these steps will help you achieve a beautifully shaped Christmas tree hat that is ready to be worn or gifted. Enjoy showing off your festive creation!
Optional: Personalizing the Hat with Embroidery or Appliques
If you want to make your Christmas tree hat even more unique and personalized, you can consider adding embroidery or appliques. This can be a great way to add extra flair and creativity to your hat, making it a one-of-a-kind masterpiece.
Embroidery allows you to add intricate designs, patterns, or even names to your hat. You can use different colored threads to create stunning effects and make your hat stand out. Consider using embroidery techniques such as satin stitch, cross stitch, or French knots to add detail and texture.
Appliques, on the other hand, involve adding fabric or other decorative materials to your hat. You can cut out festive shapes such as stars, snowflakes, or reindeer from felt, fabric, or even sequin materials, and sew them onto the hat. This can give your hat a playful and whimsical touch.
When personalizing your hat with embroidery or appliques, it’s important to plan the design beforehand. You can sketch out your ideas on paper and experiment with different placement options. Once you have a design in mind, secure the hat on an embroidery hoop or use pins to keep it stable while you work. Remember to use sharp embroidery needles and appropriate thread to achieve the desired effect.
Overall, personalizing your Christmas tree hat with embroidery or appliques is a fun and creative way to make it truly your own. Whether you choose to add a simple monogram or go all out with intricate designs, embroidery and appliques can take your hat to the next level. So let your imagination run wild and create a festive accessory that will bring joy and holiday cheer to everyone around you!