
If you’re a yoga enthusiast, you know that having a sturdy grip on your mat is essential for maintaining balance and getting the most out of your practice. That’s where yoga socks come in! These innovative socks have non-slip soles that provide traction, allowing you to hold your poses with confidence. Plus, they keep your feet warm and protected, making them perfect for chilly studio floors.
Why buy expensive yoga socks when you can easily make your own? In this article, we’ll share a yoga sock knitting pattern that you can follow to create your very own stylish and functional yoga socks. Whether you’re a beginner or an experienced knitter, this pattern is suitable for all skill levels and can be customized to your liking.
Knitting your own yoga socks not only allows you to express your personal style but also gives you the freedom to choose the type of yarn and colors that suit your preferences. With this pattern, you can make socks that fit perfectly and provide the right amount of grip for your specific needs. So gather your knitting needles, pick out some soft and stretchy yarn, and get ready to create your own pair of yoga socks!
Materials needed for knitting yoga socks
Knitting your own yoga socks can be a rewarding and creative project. To get started, you will need a few key materials. Here are the essentials:
- Yarn: Choose a soft and durable yarn that is suitable for wearing against the skin. Look for yarns that have good stretch and recovery to ensure a comfortable fit. Some popular options for yoga socks include cotton or bamboo blends, as they are breathable and moisture-wicking.
- Knitting Needles: Depending on your preferences, you can use double-pointed needles or circular needles with a small circumference. Choose a needle size that will result in the desired gauge for your yarn.
- Tapestry Needle: This needle will be used for weaving in ends and finishing touches on your yoga socks.
- Stitch Markers: Stitch markers are helpful for keeping track of increases, decreases, or any other important stitch placements in the pattern.
- Scissors: A pair of sharp scissors will be useful for cutting yarn and trimming any excess.
- Tape Measure: To ensure accurate sizing, having a tape measure on hand is essential for measuring your foot circumference and length.
With these materials, you’ll be well-equipped to start knitting your own cozy and stylish yoga socks. Remember to check the pattern instructions for any additional materials that may be required, such as buttons or embellishments.
Step-by-step guide to knitting yoga socks
Knitting yoga socks is a fun and rewarding project for both beginners and experienced knitters. These socks are designed to keep your feet warm while still allowing you to have traction and grip on the yoga mat. By following these step-by-step instructions, you’ll be able to create your own cozy and functional pair of yoga socks.
Materials needed:
- Size 4 (3.5 mm) double-pointed knitting needles
- Yarn (sport or light worsted weight)
- Tapestry needle
- Stitch markers
- Scissors
Step 1: Cast on stitches
Using the long-tail cast on method, cast on 44 stitches onto your size 4 double-pointed knitting needles. Divide the stitches evenly onto three needles, with 16 stitches on the first and second needles, and 12 stitches on the third needle. Place a stitch marker to mark the beginning of the round.
Step 2: Knit the ribbed cuff
Knit in a K2, P2 rib pattern for the first inch of the sock. This will create a stretchy cuff that will keep the sock securely in place on your leg. Repeat the K2, P2 pattern until you reach the desired length for the cuff.
Step 3: Work the heel
Next, you’ll work the heel of the sock using the short row method. Follow the specific instructions for the pattern you’re using, as this step may vary. Short rows involve turning the work before completing the entire row, creating a rounded shape for the heel.
Step 4: Knit the foot
Once the heel is complete, continue knitting in the round to create the foot of the sock. Knit until the foot measures the desired length from the back of the heel to the tip of the toe. You can try the sock on as you go to ensure a good fit.
Step 5: Shape the toe
To shape the toe, you’ll decrease stitches gradually to create a tapered point. Again, follow the specific instructions for the pattern you’re using, as this step may vary. Typically, you’ll continue decreasing until there are just a few stitches remaining, then use the tapestry needle to weave the yarn through the remaining stitches and secure tightly.
Step 6: Finishing touches
After binding off the last stitch, weave in any loose ends and trim the yarn. Try on the completed sock to ensure it fits comfortably. If desired, you can add non-slip grips to the bottom of the sock using fabric paint or fabric glue.
Now you have your very own hand-knit yoga socks! They are perfect for keeping your feet warm and cozy during your yoga practice, while still allowing you to maintain grip and balance on the mat. Enjoy your new socks and happy knitting!
Choosing the Right Yarn for Yoga Socks
When it comes to knitting yoga socks, choosing the right yarn is essential. Yoga socks are designed to provide comfort, grip, and support during yoga practice, so it’s important to select a yarn that will meet these requirements.
1. Grip: One of the key features of yoga socks is the grip they provide. Look for a yarn that has a good amount of friction, such as a cotton blend or a yarn with a textured surface. This will help prevent slipping and sliding during yoga poses.
2. Comfort: Yoga socks should be comfortable to wear, so opt for a yarn that feels soft against the skin. Natural fibers like cotton, bamboo, or silk are great choices as they are breathable and gentle on the feet.
3. Stretch and Support: The yarn should have enough stretch to ensure a snug fit without being too tight. A blend of fibers that includes elastic or spandex can provide the necessary stretch and support for yoga socks.
4. Durability: Yoga socks are likely to be worn and washed frequently, so choose a yarn that is durable and easy to care for. Look for yarns that are machine washable and have good resistance to wear and tear.
By considering these factors, you can select the perfect yarn for your yoga socks that will not only provide comfort and support but also enhance your yoga practice.
Different Types of Stitches for Yoga Socks
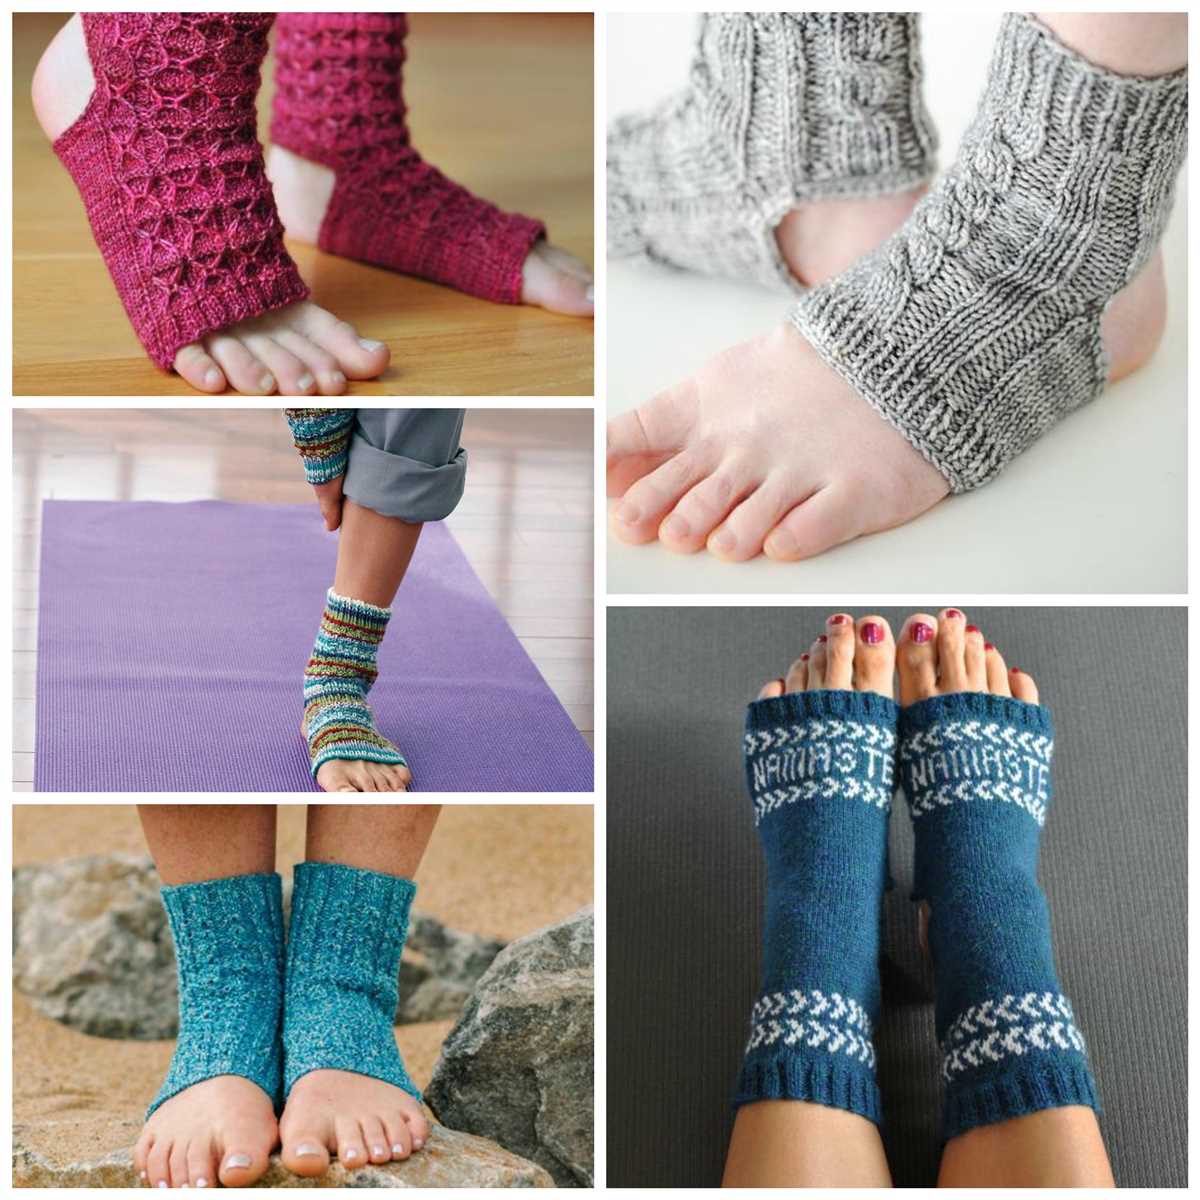
When it comes to knitting yoga socks, there are several different types of stitches that you can use to give your socks both style and function. Each stitch has its own unique characteristics, so it’s important to choose the one that best suits your needs.
Rib Stitch
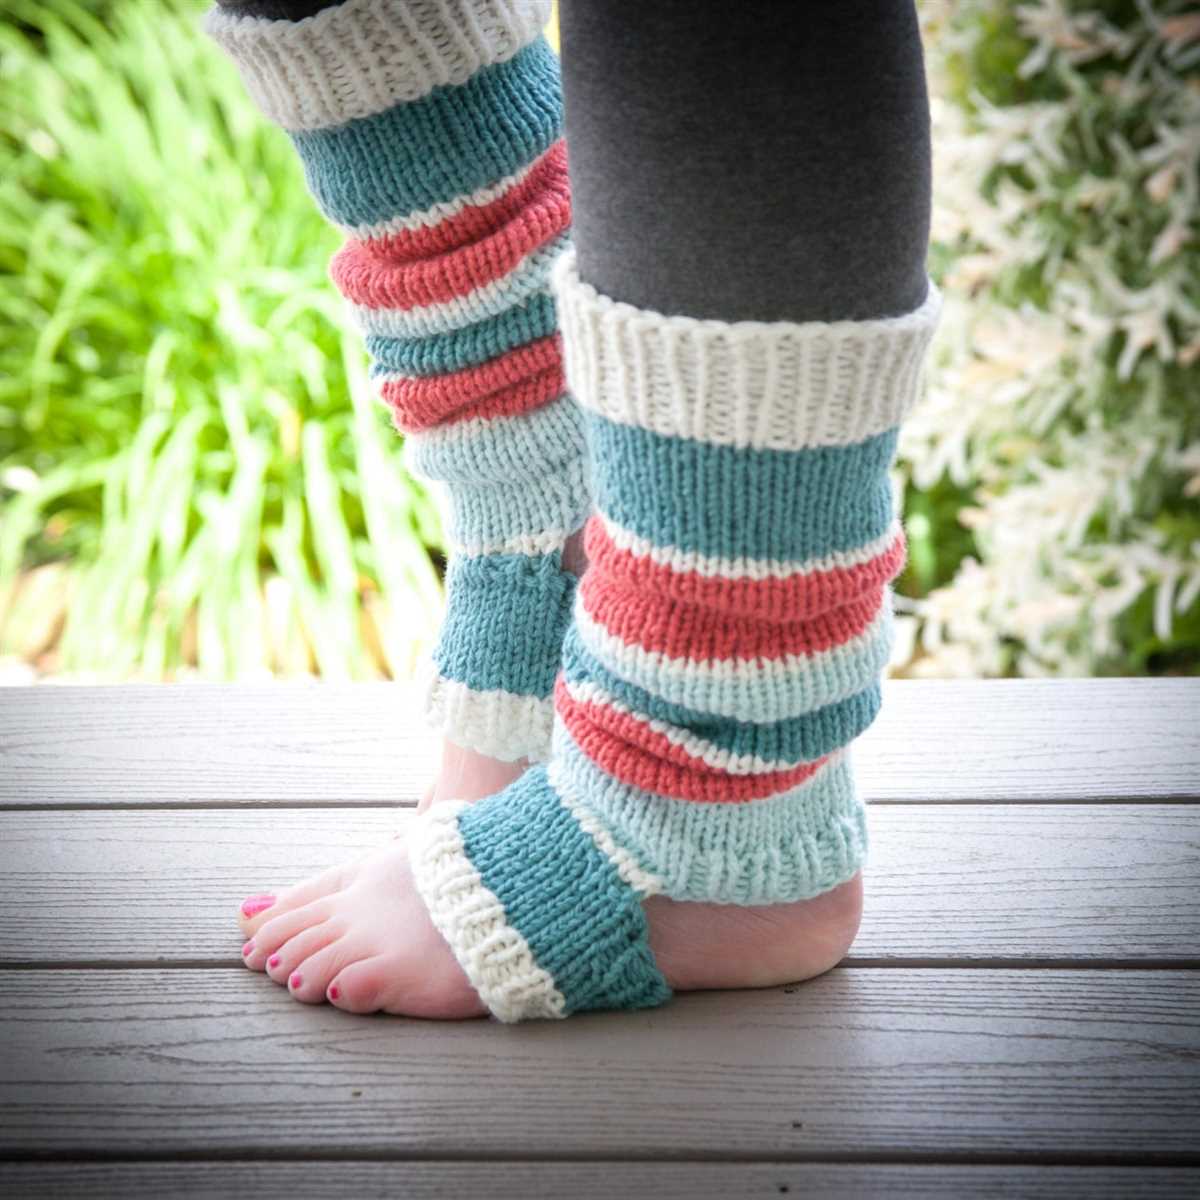
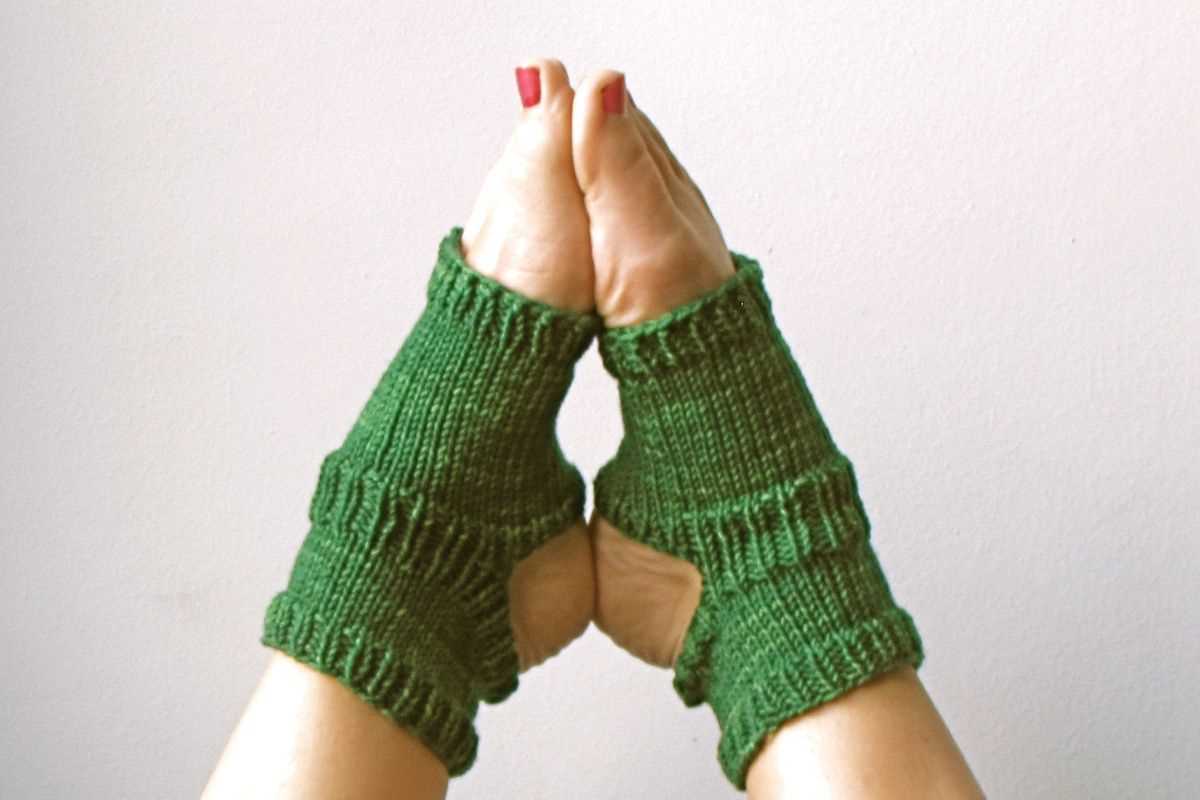
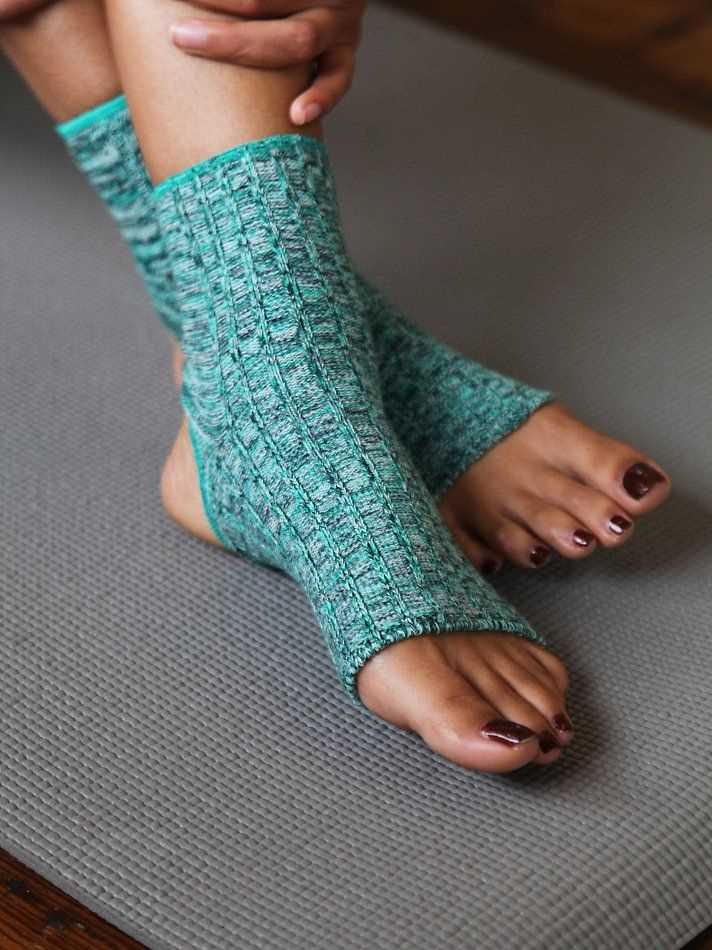
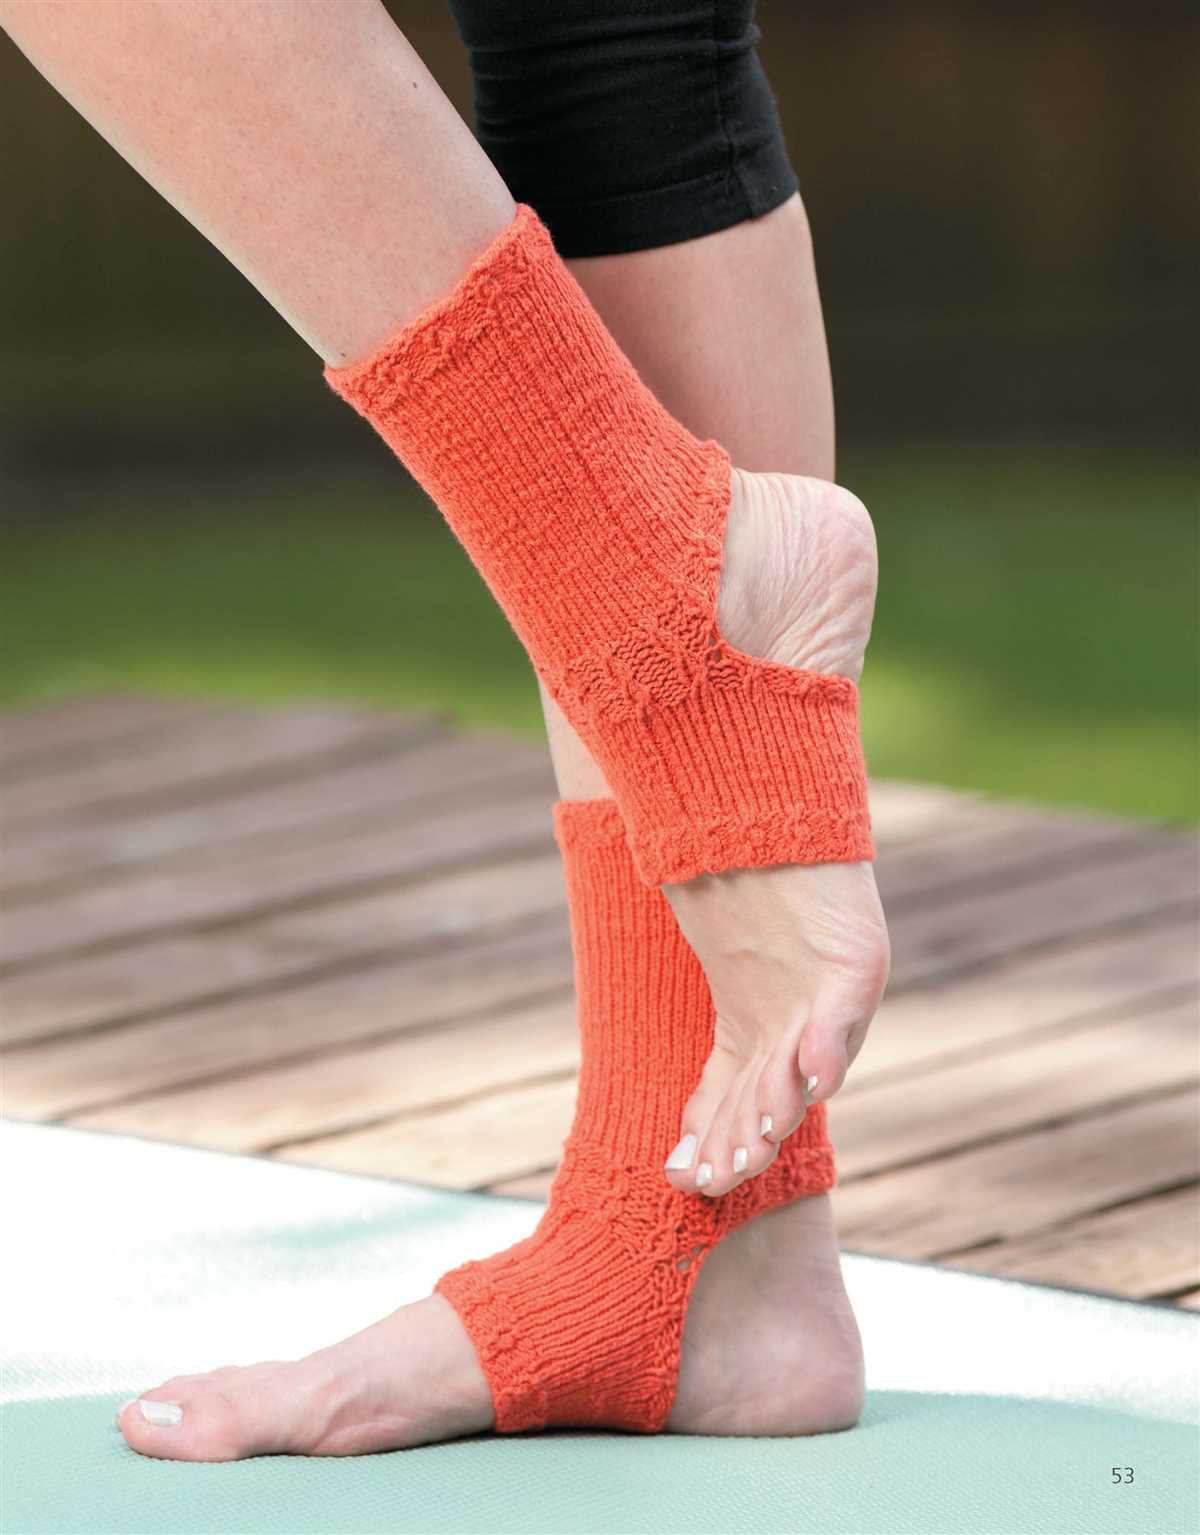
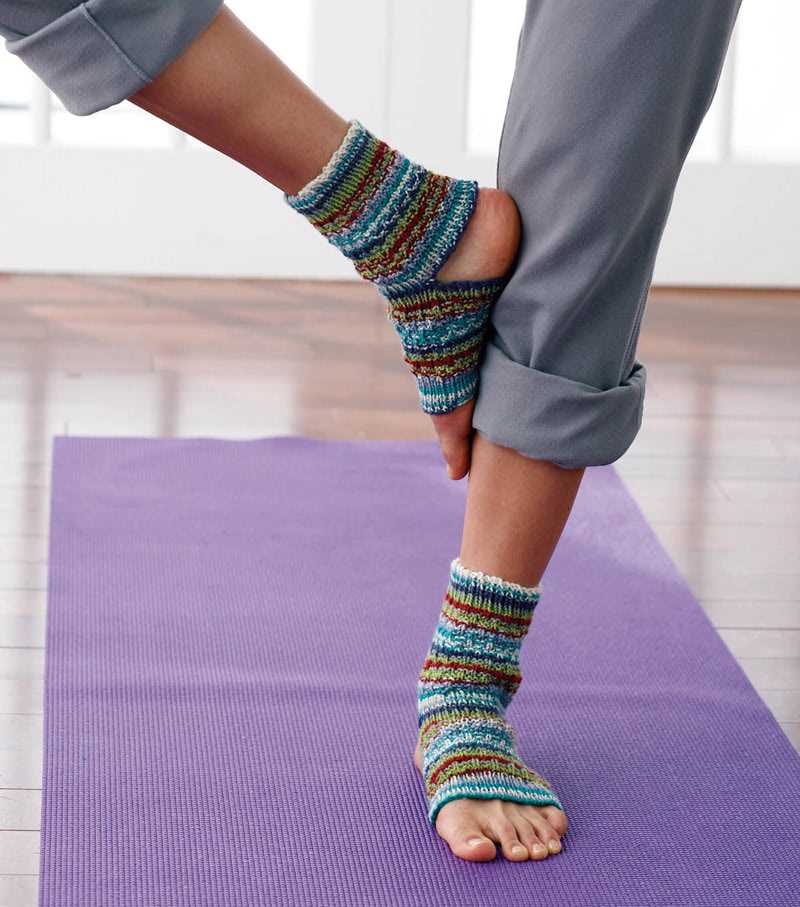
The rib stitch is a common choice for yoga socks because it creates a stretchy and form-fitting fabric. This stitch pattern is often used for the cuffs of the socks to help keep them in place during yoga practice. The rib stitch is created by alternating knit and purl stitches in a specific pattern, such as 2×2 or 1×1.
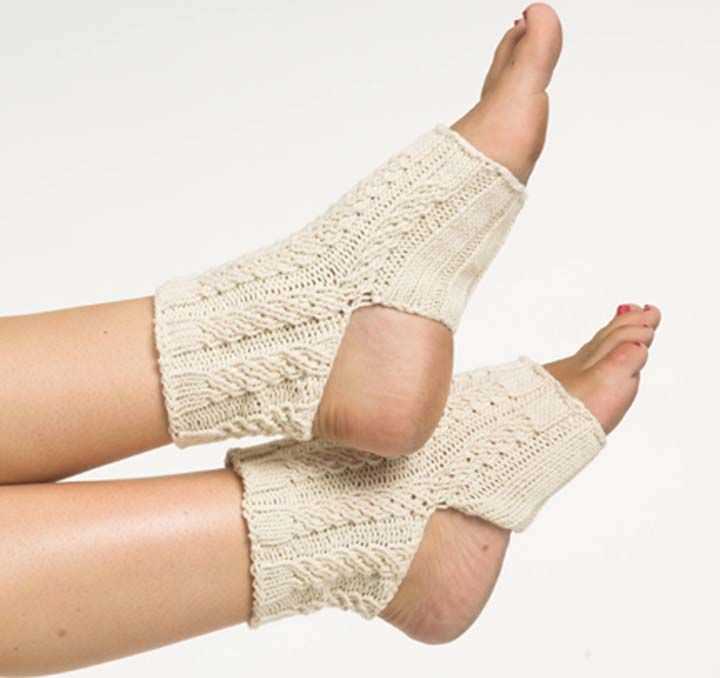
Cable Stitch
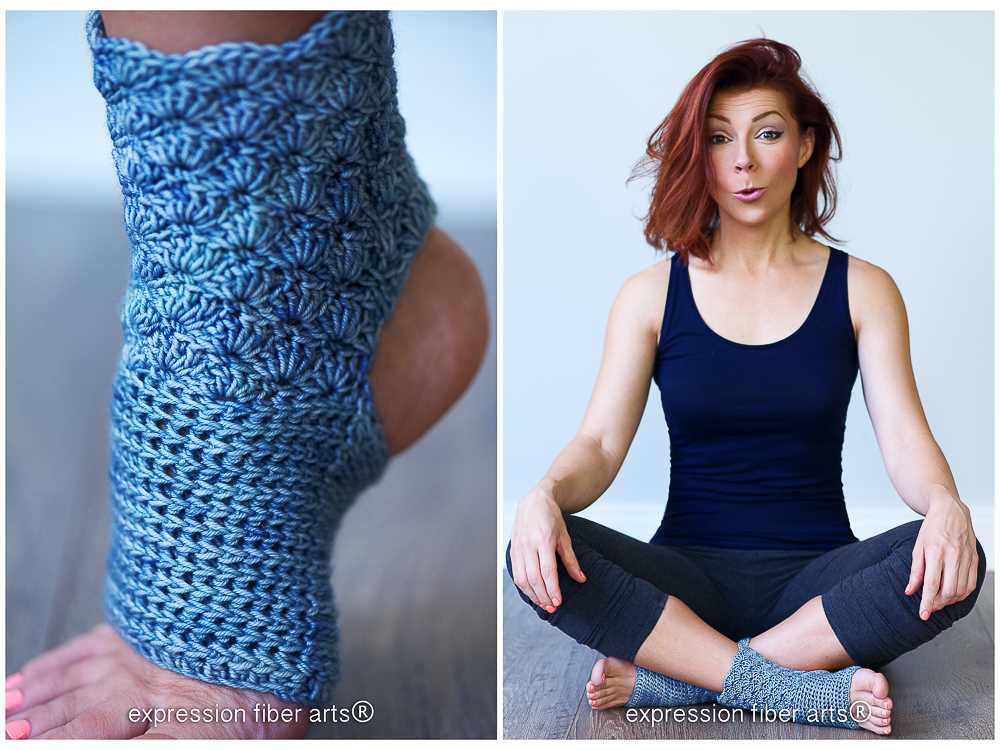
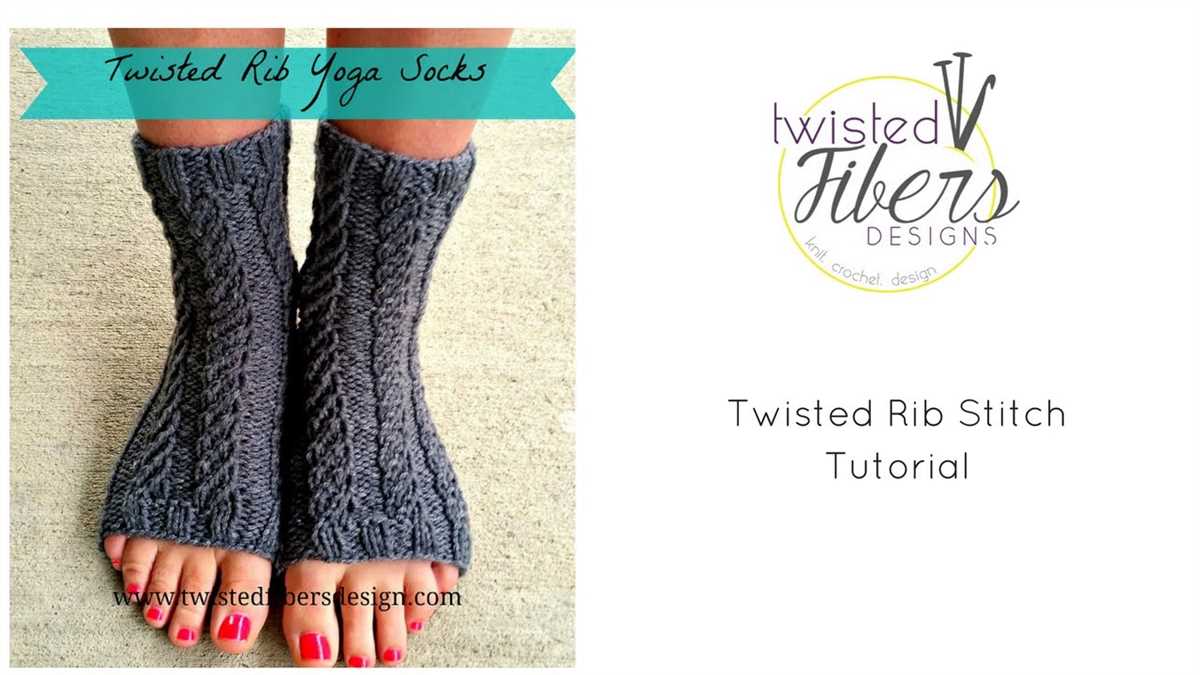
If you want to add a touch of elegance to your yoga socks, then the cable stitch is a great option. This stitch creates a pattern that resembles twisted ropes or cables, giving your socks a beautiful texture. Cable stitches require crossing stitches over each other to create the cable effect, and there are various cable patterns you can choose from.
Seed Stitch
The seed stitch is a simple yet versatile stitch that can add texture to your yoga socks. It is created by alternating knit and purl stitches within the same row, creating a pattern of tiny bumps or seeds. This stitch is great for beginners and can be used for the entire sock or just specific sections for added interest.
Lace Stitch
If you prefer a more delicate and airy look for your yoga socks, a lace stitch may be the way to go. Lace stitches create intricate patterns with holes in the fabric, giving the socks a feminine and lightweight feel. There are numerous lace stitch patterns to choose from, ranging from simple eyelets to more complex designs.
Intarsia Stitch
For those who want to get creative and add color or designs to their yoga socks, the intarsia stitch is a great option. This technique allows you to knit blocks of color or intricate motifs into your socks. The intarsia stitch involves using multiple balls of yarn and twisting them at color changes to create a clean and seamless look.
By choosing the right stitch for your yoga socks, you can not only create a visually appealing design but also ensure that they are comfortable and functional during your practice.
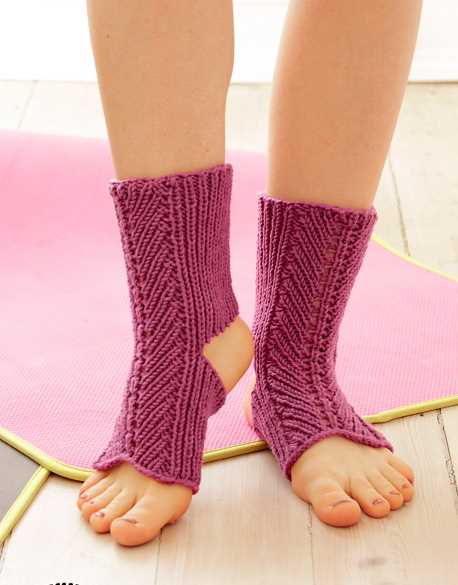
Creating a ribbed cuff for yoga socks
When knitting yoga socks, a ribbed cuff not only adds a stylish touch but also helps the sock stay in place during various yoga poses. The ribbed pattern creates elasticity, allowing the sock to stretch and conform to the shape of the foot while also providing a secure fit.
To create a ribbed cuff for yoga socks, start by casting on the desired number of stitches using a stretchy cast-on method such as the long-tail cast-on. This will help ensure that the cuff has enough elasticity to comfortably fit around the ankle.
Once the stitches are cast on, begin working in a rib stitch pattern. The most commonly used rib stitch pattern for yoga socks is the 2×2 rib, which alternates between two knit stitches and two purl stitches. This creates raised vertical columns of knit stitches separated by purl stitches, resulting in a textured and stretchy fabric.
To maintain the rib stitch pattern, continue working the knit and purl stitches in the established pattern for the desired length of the cuff. It is recommended to work the ribbed cuff for at least a few inches to ensure it comfortably hugs the ankle and provides enough stretch.
To finish the ribbed cuff, bind off the stitches in pattern. This means binding off knit stitches as knit stitches and purl stitches as purl stitches to maintain the continuity of the rib pattern. This will ensure a neat and tidy edge for the cuff.
Overall, creating a ribbed cuff for yoga socks is an essential step in knitting these functional and stylish accessories. The ribbed pattern provides both elasticity and a secure fit, making yoga socks comfortable to wear throughout a yoga practice.
Adding grip to the bottom of yoga socks
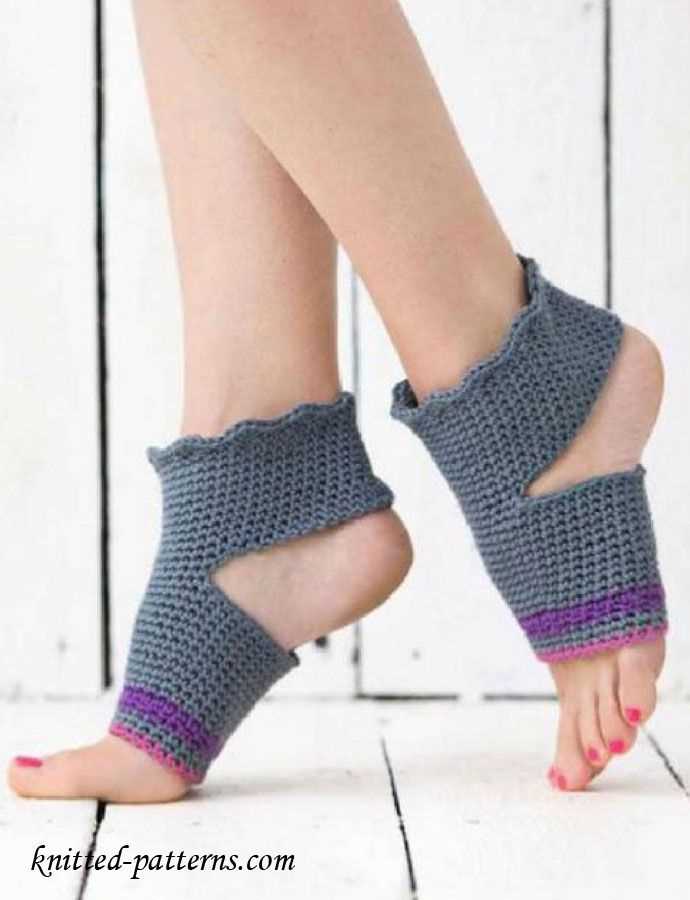
Yoga socks are a popular accessory for practitioners of yoga and Pilates, as they provide extra grip and stability during poses and exercises. To enhance the functionality of yoga socks, it is possible to add grip to the bottom of the socks.
Grip can be added to yoga socks through various methods:
- Silicone dots: One common method is to attach silicone dots or patterns to the bottom of the yoga socks. These dots provide a non-slip surface, allowing the wearer to maintain balance and stability during yoga or Pilates routines.
- Rubberized coating: Another option is to apply a rubberized coating to the sole of the socks. This coating creates a textured surface that increases friction and prevents slipping on smooth surfaces.
- Knit-in patterns: Some knitting patterns for yoga socks incorporate special stitches or patterns on the sole to create a textured surface. These patterns can provide natural grip without the need for additional materials.
Adding grip to the bottom of yoga socks not only enhances their functionality but also extends their lifespan. The increased traction prevents excessive wear and tear on the socks, making them more durable and long-lasting. Additionally, it gives practitioners the confidence to perform challenging poses without the fear of slipping.
When choosing a method to add grip to yoga socks, it is important to consider the type of surface they will be used on. Silicone dots or rubberized coatings may be more suitable for hardwood floors or smooth surfaces, while knit-in patterns can work well on carpeted or softer surfaces. Ultimately, finding the right grip method for yoga socks can greatly enhance the practice and overall experience for yoga and Pilates enthusiasts.
How to shape the heel of yoga socks
The heel of yoga socks is an important part of the pattern as it provides support and comfort during yoga practice. To shape the heel, you will need to follow a few steps to ensure that it fits snugly and stays in place.
Step 1: Begin by knitting the desired number of stitches for the sole of the sock. This will depend on the size and gauge of your yarn.
Step 2: Once you reach the heel portion of the sock, you will need to start shaping it. This can be done using short rows to create a curve that will fit around the back of your foot.
- Step 3: Knit to the desired point where you want the heel to begin. This is typically around half of the total stitches on the needle.
- Step 4: Turn your work and knit back in the opposite direction, leaving several stitches unworked. The number of unworked stitches will depend on the size and design of your sock.
- Step 5: Repeat this process, knitting a few more stitches than the previous row each time, until you have reached the desired width for the heel. This will create a triangular shape.
- Step 6: Once you have shaped the heel, you can continue knitting the rest of the sock according to your pattern.
By following these steps, you will be able to shape the heel of your yoga socks to provide the support and comfort you need during your yoga practice. Remember to adjust the number of stitches and rows based on the size and gauge of your yarn, as well as your individual foot measurements. Happy knitting!
Tips for knitting with circular needles
Knitting with circular needles can be a fun and versatile way to create projects, but it may seem intimidating if you’re new to this method. Here are some tips to help you get started and make the most of your circular knitting experience:
Choose the right needles
- When selecting circular needles, pay attention to the length of the cable. Longer cables are ideal for larger projects such as sweaters, while shorter cables are more suitable for smaller items like hats or socks.
- Ensure that the needles are smooth and have a good join with the cable. This will prevent your yarn from catching or snagging as you knit.
- Consider the material of the needles. Metal or wooden needles are popular choices, each offering different benefits. Metal needles are slick and great for faster knitting, while wooden needles provide a warmer feel and are often more comfortable to hold.
Joining in the round
- When starting a project in the round, make sure your cast-on stitches are not twisted. Connect the last stitch to the first stitch, ensuring they are positioned correctly on the needle, and use a stitch marker to mark the beginning of the round.
- Use a flexible stitch marker that won’t get in the way as you knit. This will help you keep track of your rounds and prevent any confusion.
Managing your stitches
- As you knit with circular needles, it’s important to always keep the stitches on the cable side of the needle. This will prevent any unnecessary twisting or tangling of your work.
- Avoid pulling too tightly on the yarn when transitioning between the needle tips and the cable. Keeping a consistent tension will help your stitches flow smoothly.
With these tips in mind, you’ll be well-equipped to confidently knit with circular needles and create beautiful projects. Practice and experimentation will further enhance your skills, so don’t be afraid to dive in and enjoy the process!
Finishing touches for your yoga socks
Now that you have finished knitting your yoga socks, it’s time to add some finishing touches to make them even more comfortable and stylish. Here are a few ideas to consider:
Add non-slip soles
To ensure stability and prevent slipping on your yoga mat, consider adding non-slip soles to the bottom of your yoga socks. You can purchase silicone or rubber grip soles and attach them securely with a strong adhesive.
Embroider a design
Personalize your yoga socks by adding an embroidered design. This can be a simple pattern or your favorite yoga symbol. Use contrasting thread colors to make the design pop and choose a stitch that complements the overall look of your socks.
Add ribbons or straps
If you prefer a more secure fit, you can consider adding ribbons or straps to your yoga socks. Simply sew them onto the sides of the socks to create adjustable ties. This will help prevent the socks from slipping or sliding during your yoga practice.
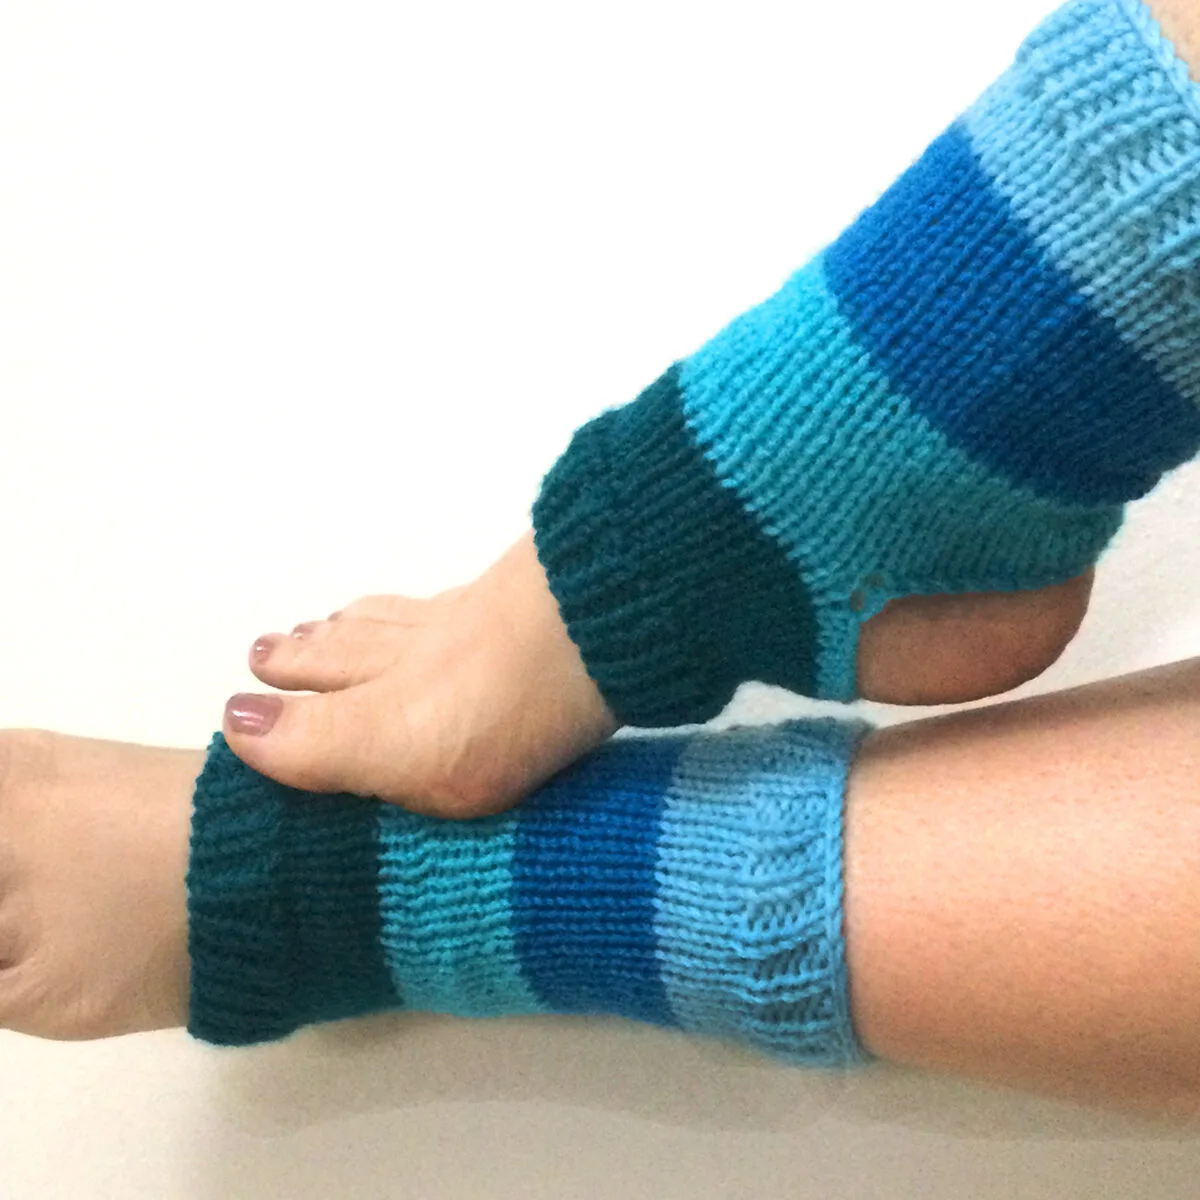
Experiment with color blocking
If you love playing with different colors, consider incorporating color blocking into your yoga socks. Use contrasting yarns to create bold and eye-catching sections, or opt for a more subtle look with complementary shades. This technique can add an extra touch of style to your yoga socks.
Remember, the finishing touches you add to your yoga socks are a great way to personalize them and make them unique to you. Get creative and have fun exploring different options to enhance the function and aesthetic of your yoga socks. Happy knitting and yoga practice!
Q&A:
What are yoga socks?
Yoga socks are special socks designed to be worn during yoga practice. They have open toes and non-slip soles to provide traction and stability while practicing yoga poses.
What are the benefits of using yoga socks?
Yoga socks offer several benefits, including improved grip and stability during yoga practice. They also help to keep the feet warm and provide a barrier between the feet and the yoga mat to maintain hygiene.
Can I knit my own yoga socks?
Yes, you can definitely knit your own yoga socks. There are plenty of knitting patterns available online that provide instructions on how to make yoga socks with non-slip soles and open toes.
Do I need special yarn for knitting yoga socks?
While there are specific types of yarn recommended for knitting yoga socks, such as cotton or bamboo blends that provide breathability and stretch, you can use any yarn that you prefer as long as it meets the required gauge for the pattern.
Where can I find yoga sock knitting patterns?
You can find yoga sock knitting patterns on various knitting websites, online marketplaces, or in knitting pattern books. Some websites and blogs also offer free knitting patterns for yoga socks.
What materials do I need for knitting yoga socks?
You will need a set of double-pointed knitting needles, a yarn of your choice, and a tapestry needle for weaving in ends.