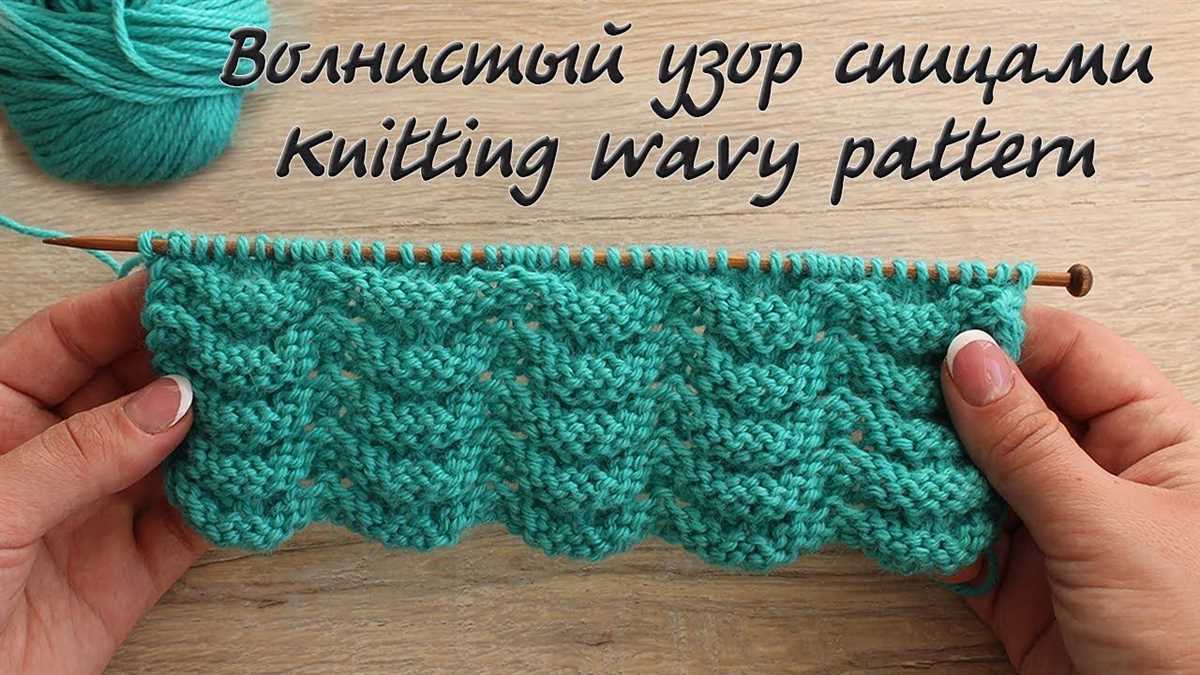
Knitting is not only a great way to create your own handmade items but also a popular form of relaxation and mindfulness. With so many different knitting techniques and patterns to choose from, it can be overwhelming to decide which one to try next. If you’re looking for a pattern that is visually stunning and relatively easy to master, the wavy knitting pattern might be just what you’re looking for.
The wavy knitting pattern creates a beautiful and intricate design that resembles gentle waves. This pattern is achieved by alternating between basic knitting stitches such as knit and purl, creating a ripple effect that gives the appearance of waves in a calm sea. The wavy pattern can be used to create a wide variety of knitting projects, including scarves, blankets, and even sweaters.
One of the great things about the wavy knitting pattern is that it is versatile and can be easily customized. By simply changing the number of stitches or the size of your knitting needles, you can create a completely different look and feel. Whether you prefer a delicate wavy pattern for a lightweight summer shawl or a bold, chunky design for a cozy winter blanket, the possibilities are endless.
If you’re new to knitting and feeling a bit intimidated, don’t worry! The wavy knitting pattern is actually quite beginner-friendly. With just a few basic knitting skills, you’ll be able to create this beautiful pattern in no time. And as you gain more experience, you can experiment with different color combinations and yarn weights to take your wavy knitting projects to the next level.
What is a Wavy Knitting Pattern?
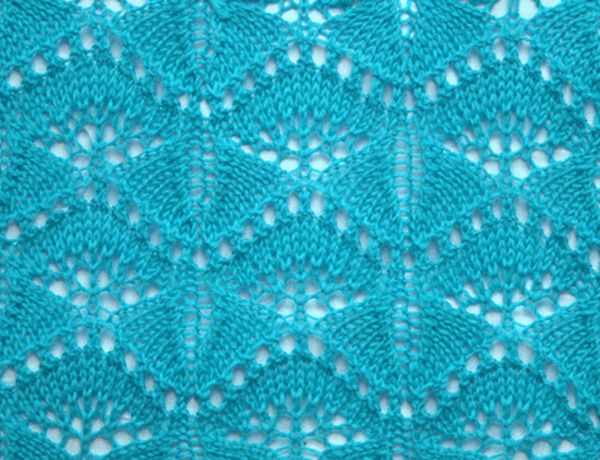
A wavy knitting pattern is a popular technique used in knitting to create a beautiful and textured design. This pattern involves creating rows of stitches that alternate between raised and lowered sections, resembling gentle waves. The result is a visually appealing fabric that adds interest and dimension to any knitted project.
To create a wavy knitting pattern, knitters typically use a combination of knit and purl stitches in a specific sequence. This sequence can be as simple as repeating a few rows of knitting stitches or more complex, involving intricate stitch patterns and motifs. The key is to maintain consistency in the pattern to achieve the desired wavy effect.
Some common wavy knitting patterns include:
- Garter Wave Stitch: This pattern is created by alternating garter stitches with sections of dropped stitches, resulting in a rippling wave effect.
- Ribbed Wave Stitch: This pattern combines alternating rib stitches with sections of dropped stitches, creating a textured wave-like design.
- Zigzag Wave Stitch: In this pattern, knitters create zigzagging waves using a combination of knit and purl stitches, resulting in a visually striking design.
Wavy knitting patterns can be used in a variety of knitting projects, including scarves, shawls, sweaters, and blankets. They add interest and dimension to the fabric and can enhance the overall look of the finished piece. Knitters often choose wavy patterns to create unique and eye-catching designs that stand out.
Whether you’re a beginner or an experienced knitter, experimenting with wavy knitting patterns can be a fun and rewarding way to expand your knitting skills and create beautiful handmade items. With endless possibilities for customization and creativity, wavy knitting patterns offer a versatile and stylish option for any knitting project.
Understanding the Basics of Wavy Knitting Patterns
Wavy knitting patterns are a popular choice for knitters who want to add some texture and visual interest to their projects. These patterns create beautiful wavy lines that give a sense of movement to the finished piece. To understand how to create wavy knitting patterns, it’s important to grasp the basics of shaping and stitch manipulation.
Shaping: The key to creating wavy knitting patterns lies in shaping the stitches. This can be done by increasing or decreasing the number of stitches in each row or round. By strategically placing these shaping elements, you can create the undulating waves that define the pattern. It’s important to keep track of your stitch count and carefully follow the pattern instructions to achieve the desired effect.
Another technique used in wavy knitting patterns is stitch manipulation. This involves working stitches in a way that creates the wave-like appearance. One common method is using yarn overs and decreases. The yarn over creates an extra loop on the needle, while the decrease stitches, such as knit two together or slip-slip-knit, help to offset the additional stitches. By repeating these combinations, you can create the wavy texture throughout the piece.
- Choosing the right yarn: When working on wavy knitting patterns, it’s important to select a yarn that will highlight the texture and stitches. Yarns with good stitch definition, such as those with a smooth texture or a high twist, are ideal for showcasing the wavy pattern. Variegated yarns can also add an extra dimension to the waves, creating a visually striking effect.
- Adding color: Wavy knitting patterns can be enhanced by incorporating color into the design. Whether it’s using different shades of the same color or contrasting colors, adding color can accentuate the waves and make the pattern more eye-catching. Stripes or color blocks can be incorporated into the design to further emphasize the undulating lines.
Overall, understanding the basics of shaping, stitch manipulation, and yarn selection is crucial when working on wavy knitting patterns. With the right techniques and materials, you can create stunning pieces that showcase the beauty of these wave-inspired designs. So grab your needles and yarn, and start creating your own wavy knitting masterpiece!
Choosing the Right Yarn for Your Wavy Knitting Project
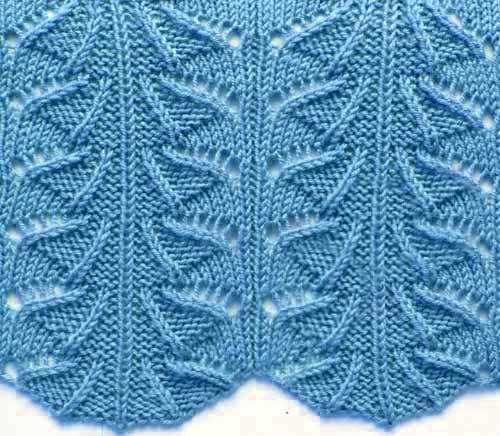
When starting a wavy knitting project, one of the most important decisions you’ll need to make is choosing the right yarn. The yarn you select can have a significant impact on the final look and feel of your project, as well as its overall durability and care requirements. Here are some key factors to consider when choosing the yarn for your wavy knitting project:
Fiber Content:
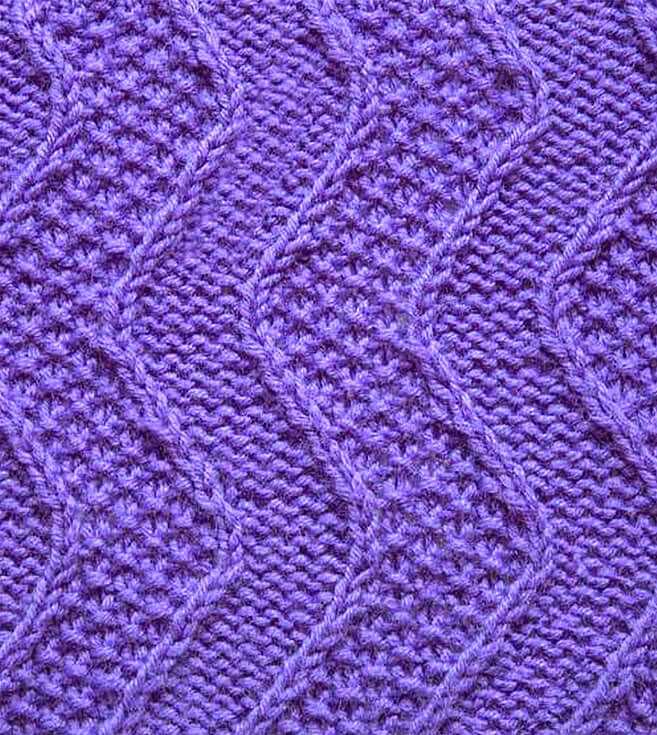
The fiber content of the yarn is crucial in determining the characteristics of your finished project. For a wavy knit design, you’ll want a yarn with good stitch definition, elasticity, and drape. Natural fibers like merino wool, alpaca, and silk are popular choices for wavy knitting because they offer a combination of softness and drape. However, if you prefer a more structured look, you may opt for a yarn blend that includes synthetic fibers such as nylon or acrylic.
Weight and Thickness:
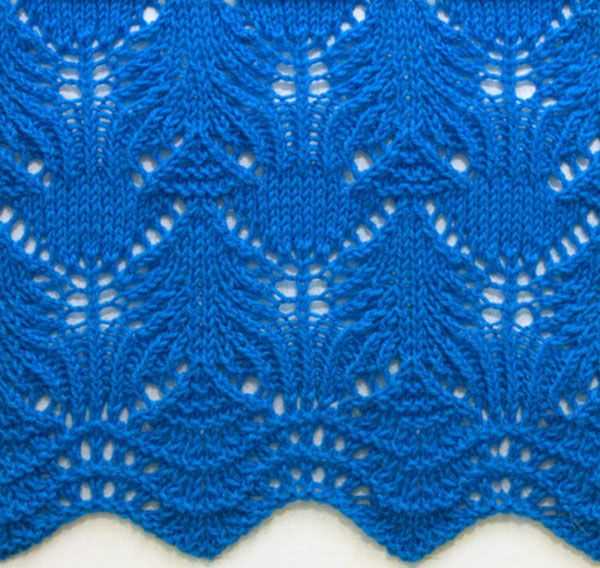
The weight and thickness of the yarn will determine the final size and drape of your wavy knitting project. Bulkier yarns will create larger and more dramatic waves, while lighter weight yarns will result in smaller and more delicate waves. Consider the intended use of your project and the desired effect when choosing the yarn weight. Additionally, pay attention to the recommended gauge for your pattern to ensure the yarn you choose is compatible.
Color and Texture:
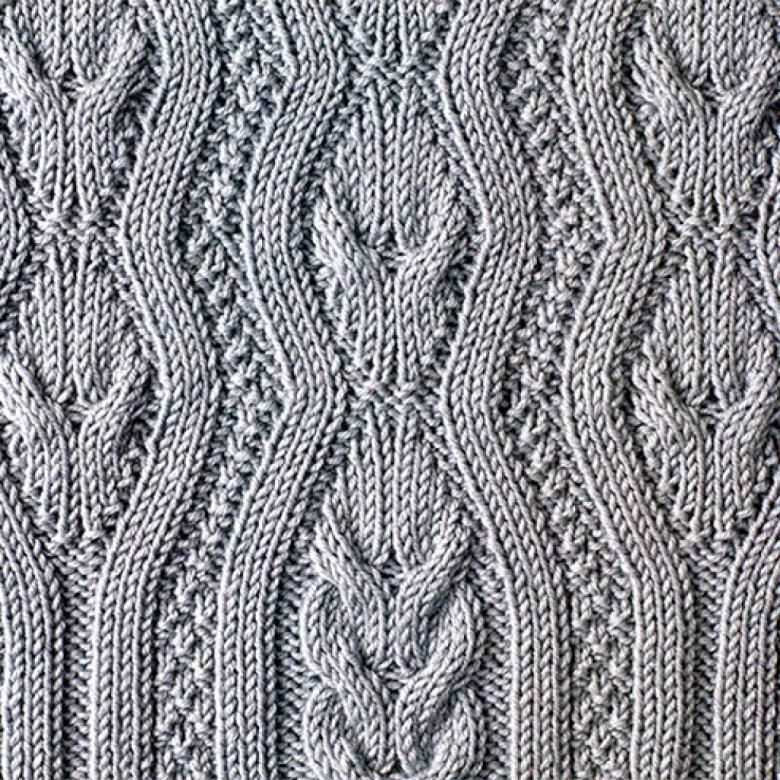
The color and texture of the yarn can enhance the visual impact of the wavy knitting pattern. Variegated yarns with subtle color changes or self-striping yarns can create an exciting visual effect, highlighting the waves in your project. Alternatively, you may choose a solid-colored yarn to showcase the texture and stitch pattern of your waves. Experimenting with different colorways and textures can add depth and interest to your wavy knitting project.
Ultimately, the right yarn choice for your wavy knitting project depends on your personal preferences and the desired outcome. Take the time to consider the fiber content, weight, thickness, color, and texture of the yarn to ensure your project turns out exactly as envisioned.
Getting Started with a Wavy Knitting Pattern
If you are looking to add some texture and movement to your knitting projects, a wavy knitting pattern is a great choice. This pattern creates a beautiful ripple effect that adds visual interest to any garment or accessory. Whether you are a beginner or an experienced knitter, you can easily master this pattern and create stunning pieces.
To get started with a wavy knitting pattern, you will need some basic supplies. First and foremost, you will need yarn in the color and weight of your choice. This pattern works well with both solid and variegated yarns, so feel free to experiment with different options. You will also need knitting needles that are appropriate for your chosen yarn. Check the label on your yarn for a recommended needle size.
Once you have your supplies ready, it’s time to cast on. Start by making a slipknot and placing it on one of your knitting needles. Then, insert your other knitting needle into the slipknot and tighten it. This will be your first stitch. Repeat this process until you have the desired number of stitches for your project.
Next, you will begin working the wavy knitting pattern. The pattern typically involves a combination of knit and purl stitches to create the ripple effect. Follow the specific instructions for your chosen pattern, which will outline the stitch sequence and any additional techniques required. It’s always a good idea to practice the pattern on a small swatch before starting your actual project to ensure you understand the pattern and like the way it looks.
As you work the wavy knitting pattern, you will start to see the ripple effect emerge. This pattern is a great way to add dimension and texture to scarves, blankets, and even sweaters. It can be a bit repetitive, but the end result is well worth it.
In conclusion, a wavy knitting pattern is a fun and versatile design that can elevate your knitting projects. With some basic supplies and a little practice, you can master this pattern and create stunning pieces that are sure to impress. So go ahead, give it a try and see how this pattern can take your knitting to the next level!
Tips and Tricks for Creating Beautiful Waves in Your Knitting
Are you looking to add an extra touch of elegance and texture to your knitting projects? Waves are a fantastic way to create beautiful patterns and add a dynamic element to your work. Whether you’re a beginner or an experienced knitter, here are some tips and tricks to help you create stunning waves in your knitting.
1. Choose the Right Yarn
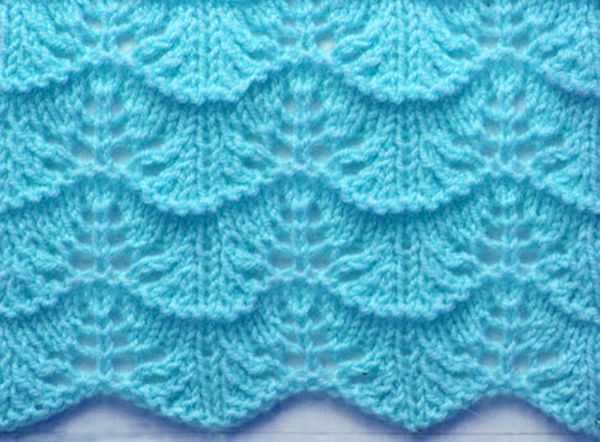
The type of yarn you choose can greatly affect the outcome of your wave pattern. Opt for yarns that have good stitch definition, such as a smooth or plied yarn. These yarns will make the wave pattern more pronounced and visually appealing. Additionally, consider using yarns with contrasting colors to make the waves stand out even more.
2. Use Stitch Patterns
There are several stitch patterns that can help you achieve beautiful waves in your knitting. Some popular ones include the ripple stitch, wave stitch, and chevron stitch. Experiment with different patterns and find one that suits your project and knitting style. Make sure to practice the pattern before working on your final piece to ensure you’re comfortable with the technique.
3. Maintain Consistent Tension
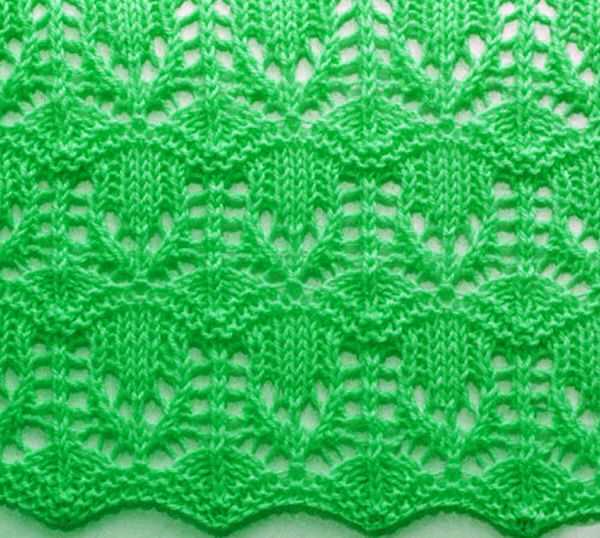
Consistent tension is crucial when creating waves in knitting. If your tension is too loose or too tight, it can distort the wave pattern and make it less defined. Pay attention to your tension as you knit and adjust as necessary. Using stitch markers can also help you keep track of your tension and ensure consistency throughout your project.
4. Block Your Finished Piece
Blocking is an essential step in knitting to enhance the overall appearance of your finished project. When working with wave patterns, blocking can help define the waves and make them more pronounced. Follow the instructions on your yarn label for blocking, or consider wet blocking for maximum effect. Blocking will also help even out your stitches and give your knitting a professional finish.
With these tips and tricks, you’ll be able to create beautiful waves in your knitting projects. Enjoy the process of experimenting with different yarns and stitch patterns, and don’t be afraid to get creative with your designs. Happy knitting!
Exploring Different Stitch Patterns for Wavy Knitting
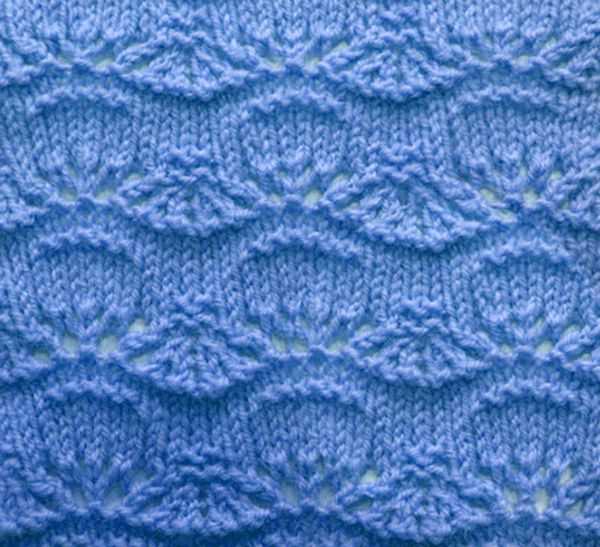
In the world of knitting, there are countless stitch patterns to experiment with. From simple and repetitive designs to intricate and complex ones, each stitch pattern offers a unique texture and appearance to the finished project. One particular type of stitch pattern that has gained popularity in recent years is the wavy knitting pattern. This pattern brings an element of movement and fluidity to the fabric, creating a visually interesting effect.
When it comes to creating wavy knitting patterns, there are several different stitch patterns to choose from. One popular option is the wave stitch, which creates smooth undulating curves that resemble ocean waves. This stitch pattern usually involves increases and decreases to create the shape of the waves, and it can be adapted to suit a variety of projects such as scarves, blankets, or even sweaters.
The Wavy Rib Stitch
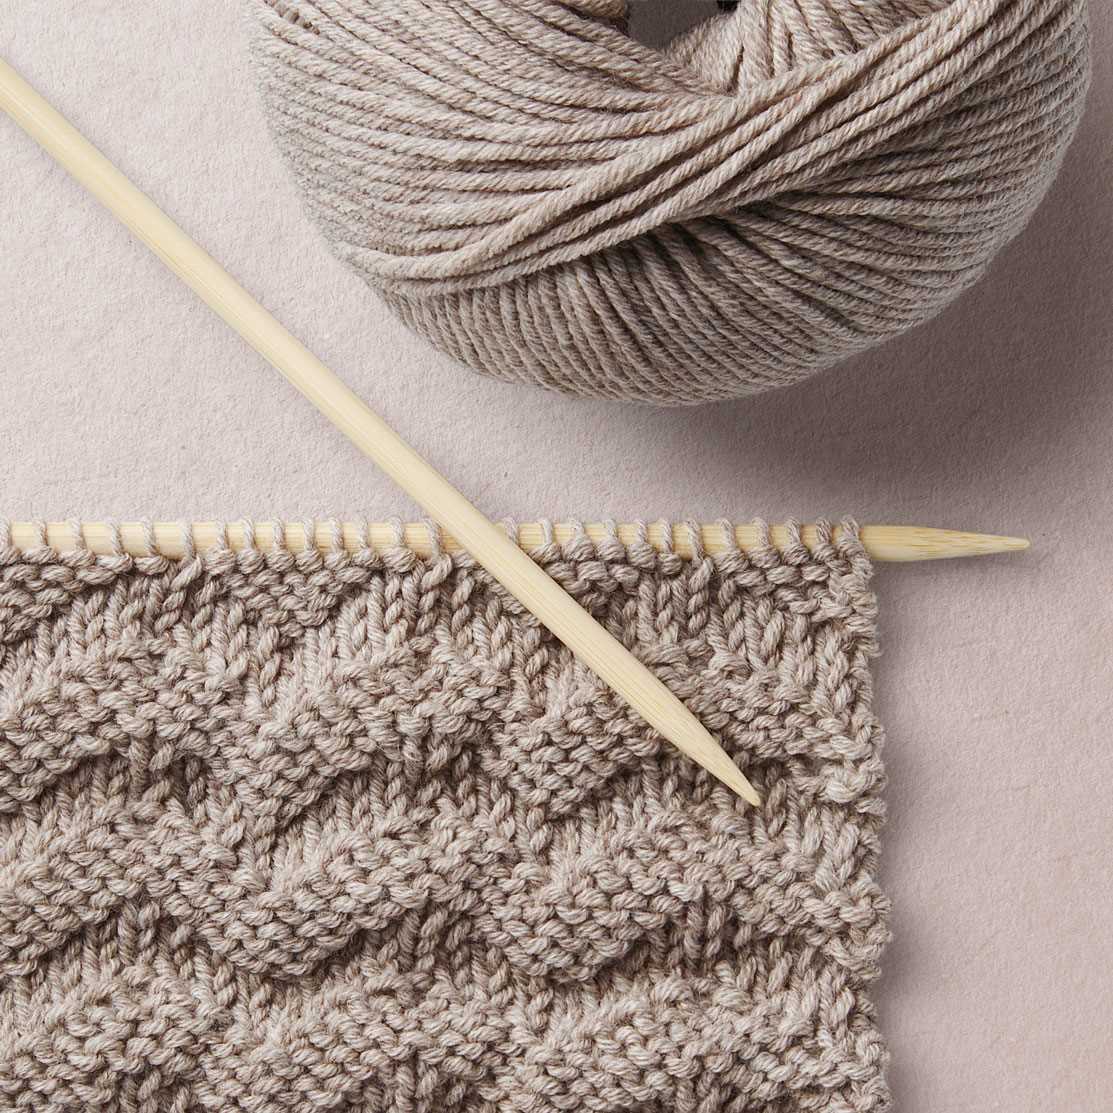
Another versatile stitch pattern for wavy knitting is the wavy rib stitch. This pattern combines ribbing with a wave-like pattern, resulting in a beautifully textured fabric. The alternating columns of knit and purl stitches create the ribbing effect, while the increases and decreases create the wavy appearance. The wavy rib stitch is perfect for adding interest to cuffs, collars, or borders of garments.
The Zigzag Lace Stitch
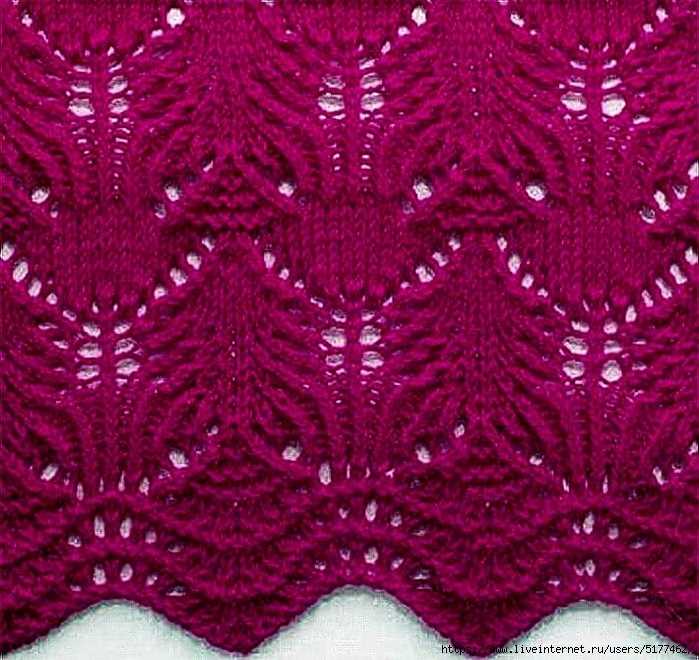
If you’re looking for a more delicate and lacy wavy pattern, the zigzag lace stitch is an excellent choice. This stitch pattern features eyelets and decreases that create a zigzag pattern reminiscent of a meandering river. The openwork created by the lace adds an airy and feminine touch to any project. The zigzag lace stitch works well for lightweight garments, shawls, or even decorative table runners.
In conclusion, exploring different stitch patterns for wavy knitting opens up a world of creative possibilities. Whether you prefer the smooth curves of the wave stitch, the textured look of the wavy rib stitch, or the delicate elegance of the zigzag lace stitch, there are endless options to experiment with. So grab your knitting needles and start exploring the world of wavy knitting!
Modifying a Wavy Knitting Pattern to Fit Your Needs
If you have come across a wavy knitting pattern that you would like to try but it doesn’t quite meet your specific needs, don’t worry! Knitting patterns are versatile and can be easily modified to fit your preferences. Whether you want to adjust the size, the stitch pattern, or the color scheme, here are some tips to help you customize a wavy knitting pattern.
1. Adjusting the Size
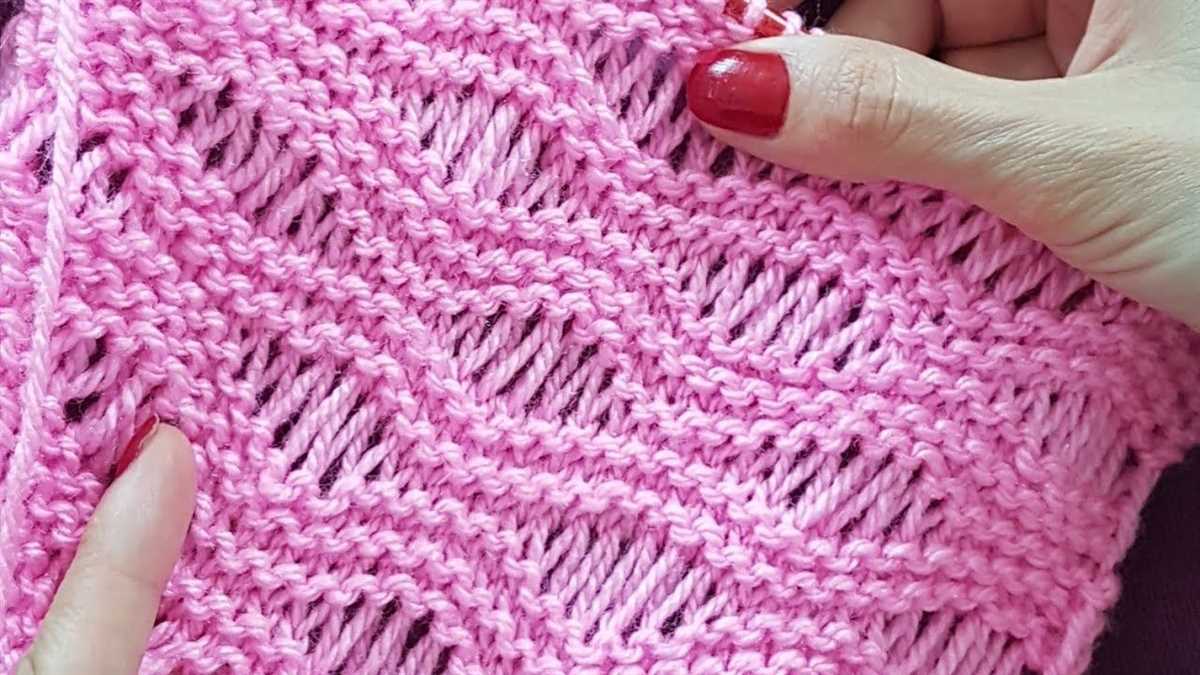
If the wavy knitting pattern you’ve found doesn’t match the size you want to knit, you can easily modify it to fit. Start by determining the gauge of the original pattern and compare it to your desired gauge. If the gauges don’t match, you will need to adjust the number of stitches and rows accordingly. You may need to add or remove stitches to make the pattern wider or narrower, and you can add or subtract rows to make it longer or shorter.
Pro tip: Keep in mind that modifying the size of a pattern will affect the overall look of the waves. Adding stitches or rows may make the waves appear less pronounced, while removing stitches or rows may exaggerate the wavy effect.
2. Changing the Stitch Pattern
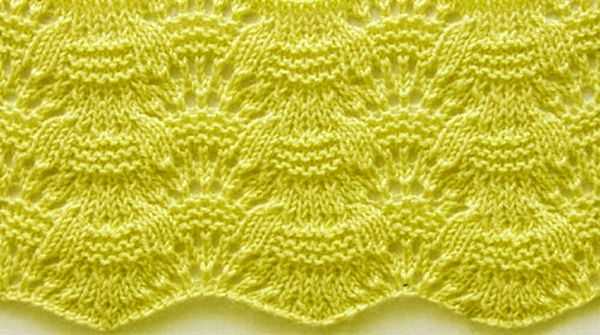
If you like the wavy shape but prefer a different stitch pattern, you can easily swap it out. Look for other stitch patterns that create a similar undulating effect, such as chevron or ripple stitches. Alternatively, you can experiment with different lace or cable patterns to create your own unique wavy design.
Pro tip: When choosing a new stitch pattern, make sure it has the same number of stitches as the original pattern to ensure a proper fit. You may also need to adjust the number of rows to maintain the overall shape of the waves.
3. Playing with Colors
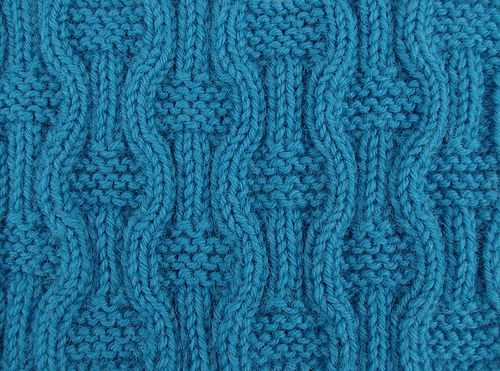
In addition to modifying the size and stitch pattern, you can also personalize a wavy knitting pattern by playing with colors. Instead of sticking to a single color, consider using multiple colors to create a striped or gradient effect. You can alternate colors for each wave or use a gradient yarn to achieve a seamless color transition.
Pro tip: Experiment with different color combinations to find the perfect color scheme that suits your taste. You can also use different shades of the same color to create a subtle variation.
In conclusion, don’t be afraid to modify a wavy knitting pattern to fit your needs. With a few adjustments to the size, stitch pattern, and color scheme, you can create a unique and personalized project that showcases your knitting skills and reflects your individual style.
Creating Colorful Waves in Your Knitting with Variegated Yarn
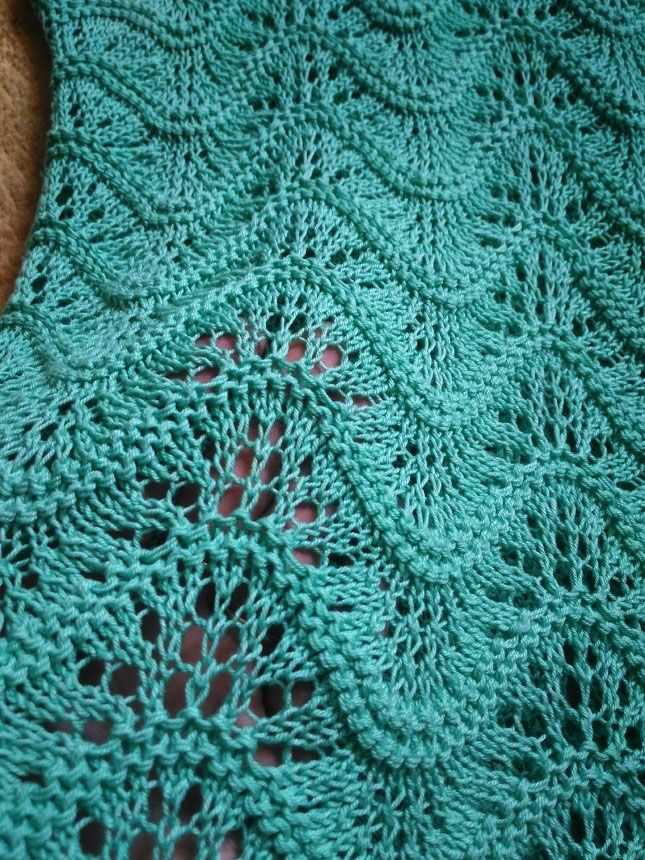
If you want to add a vibrant and dynamic touch to your knitting projects, using variegated yarn can be a great choice. Variegated yarn is known for its multi-colored and multi-patterned appearance, creating a beautiful effect when knitted up. One of the popular patterns that you can achieve with variegated yarn is the wavy knitting pattern.
The wavy knitting pattern is perfect for showcasing the unique color changes in variegated yarn. It creates a wave-like pattern that adds movement and visual interest to your knitted fabric. To achieve this pattern, you can use a simple stitch like garter stitch or stockinette stitch, depending on your preference.
Here’s how you can create the wavy knitting pattern:
- Choose a variegated yarn with vibrant colors that you love. The more color variations, the more dramatic your waves will appear.
- Decide on the stitch pattern you want to use. Garter stitch is great for beginners, while stockinette stitch gives a smoother finish.
- Cast on the desired number of stitches, making sure it’s a multiple of the wave pattern repeat.
- Knit the first row using your chosen stitch pattern.
- On the next row, start creating the waves by changing colors. You can do this by either using the different colors in the variegated yarn or by adding in another solid color.
- Continue knitting in your chosen stitch pattern, alternating the colors to create the wave effect.
- Once you reach the desired length, finish off your knitting with a few rows in your main color to create a clean edge.
- Bind off and enjoy your colorful, wavy knitting project!
With variegated yarn and the wavy knitting pattern, you can create mesmerizing waves of color in your knitting. Whether you’re making a scarf, a blanket, or a sweater, this pattern will add an exciting and eye-catching element to your project. Experiment with different variegated yarns and stitch patterns to create unique and beautiful waves that reflect your personal style.
Adding Texture to Your Wavy Knitting with Cable Stitches
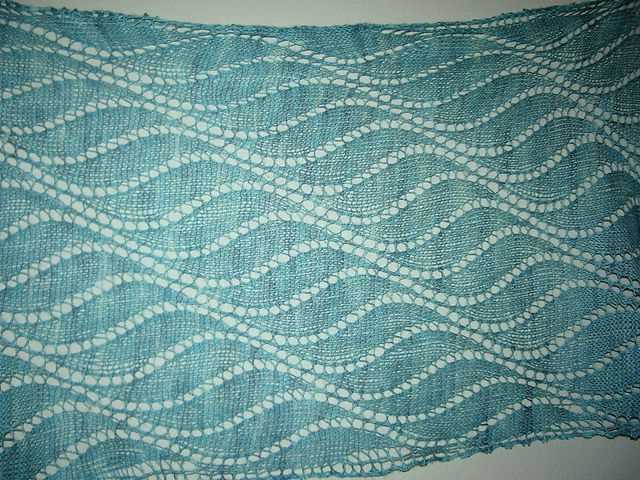
Wavy knitting patterns can add a beautiful and unique touch to your projects, but if you want to take it to the next level, you can incorporate cable stitches to add even more texture and interest. Cable stitches are created by crossing stitches over each other, creating a raised and twisted effect. By incorporating cable stitches into your wavy knitting pattern, you can create a stunning visual and tactile experience.
There are several ways you can incorporate cable stitches into your wavy knitting pattern. One option is to replace one or more of the waves with a cable pattern. For example, you can knit a few waves in a wavy pattern, and then switch to a cable stitch for the next few waves. This alternating pattern can create a visually striking effect and make your project stand out.
If you want to keep the wavy pattern consistent throughout your project, you can still incorporate cable stitches by knitting them within the waves themselves. This can be done by working the cable stitch within the stitches that make up the wave, or by separating the cable stitch from the wave using plain knit or purl stitches. This way, you can maintain the flow of the wavy pattern while adding texture and dimension.
When choosing cable stitches to incorporate into your wavy knitting pattern, consider the size and complexity of the cables. Larger, more intricate cable stitches may require more space and attention, so it’s important to take this into account when planning your project. Additionally, experimenting with different cable stitch patterns can add even more variety and interest to your wavy knitting.
In conclusion, by adding cable stitches to your wavy knitting pattern, you can elevate the texture and visual appeal of your project. Whether you choose to replace waves with cable stitches or incorporate them within the waves, the combination of these two techniques can create stunning results. So, give it a try and let your creativity flow!
Finishing and Blocking Your Wavy Knitting Project
Once you have completed your wavy knitting project, it is important to properly finish and block it to ensure that it retains its shape and looks its best. Here are some steps you can follow to achieve a professional finish.
1. Weave in all loose ends: Take the time to carefully weave in all the loose ends of yarn from your project. This will not only give your project a polished look, but it will also ensure that the ends do not come undone over time.
2. Wet blocking: Wet blocking is a method of shaping and stretching your knitting project using water. Fill a sink or basin with lukewarm water and then gently lower your project into the water, making sure it is fully submerged. Allow your project to soak for about 10-15 minutes.
3. Remove excess water: Once your project has soaked, carefully lift it out of the water and gently squeeze out the excess water. Do not wring or twist your project, as this can distort the stitches.
4. Lay flat to dry: Lay your project on a clean, dry towel and gently reshape it to its desired dimensions. Smooth out any wrinkles or uneven edges. Leave your project to dry completely, which may take up to 24 hours, depending on the yarn and the size of your project.
5. Optional: Steam blocking: If your project requires additional shaping or if you want to speed up the drying process, you can use a steam iron on a low setting. Hold the iron above your project and allow the steam to penetrate the fibers. Be careful not to touch the iron directly to the project, as it can cause damage or melting.
- Tips:
- Always follow the care instructions for your yarn when wet blocking or steaming.
- Use blocking wires or pins to help achieve straight edges or desired shapes.
- If you are unsure about blocking a specific type of yarn or stitch pattern, it’s always a good idea to do a swatch or consult a knitting expert.
By following these steps, you can ensure that your wavy knitting project looks its best and retains its shape for years to come.
Inspiring Wavy Knitting Projects and Patterns to Try
Wavy knitting patterns are a versatile and eye-catching way to add texture and interest to your knitting projects. Whether you’re a beginner or an experienced knitter, there are numerous patterns and projects available that incorporate wavy stitches. Here are some inspiring ideas to get you started.
1. Wavy Scarf: A wavy scarf is a classic and simple project that can be customized to your liking. You can choose bold, contrasting colors to make the waves stand out, or opt for a more subtle look with tonal shades. This accessory will not only keep you warm but also add a touch of style to your outfit.
2. Wavy Blanket: If you’re looking for a larger project, a wavy blanket is a great option. Whether you prefer a cozy lapghan or a full-sized throw, a wavy pattern will add visual interest to your blanket. Choose soft and warm yarn to create a snuggly and inviting texture.
3. Wavy Hat: A wavy hat is a fun and unique way to showcase your knitting skills. The wavy pattern can be incorporated into the brim, body, or crown of the hat, allowing for endless possibilities. Try experimenting with different yarn weights and stitch combinations to create your own personalized design.
4. Wavy Baby Blanket: If you’re looking to create a special gift for a little one, a wavy baby blanket is a perfect choice. The wavy pattern adds a playful touch to a baby’s nursery, and the soft texture will keep them warm and cozy. Consider using pastel colors or gender-neutral shades to enhance the sweetness of this project.
5. Wavy Shawl: A wavy shawl is an elegant and versatile accessory that can be worn year-round. Whether you choose a lightweight yarn for a breezy summer shawl or a cozy yarn for a winter wrap, the wavy pattern will add visual interest and sophistication to your outfit.
If you’re looking to try something new and add a touch of excitement to your knitting projects, wavy knitting patterns are a fantastic option. The projects mentioned above are just a few ideas to get you started, but the possibilities are endless. So grab your knitting needles, choose your favorite wavy pattern, and start creating amazing pieces that showcase your knitting skills and creativity.