
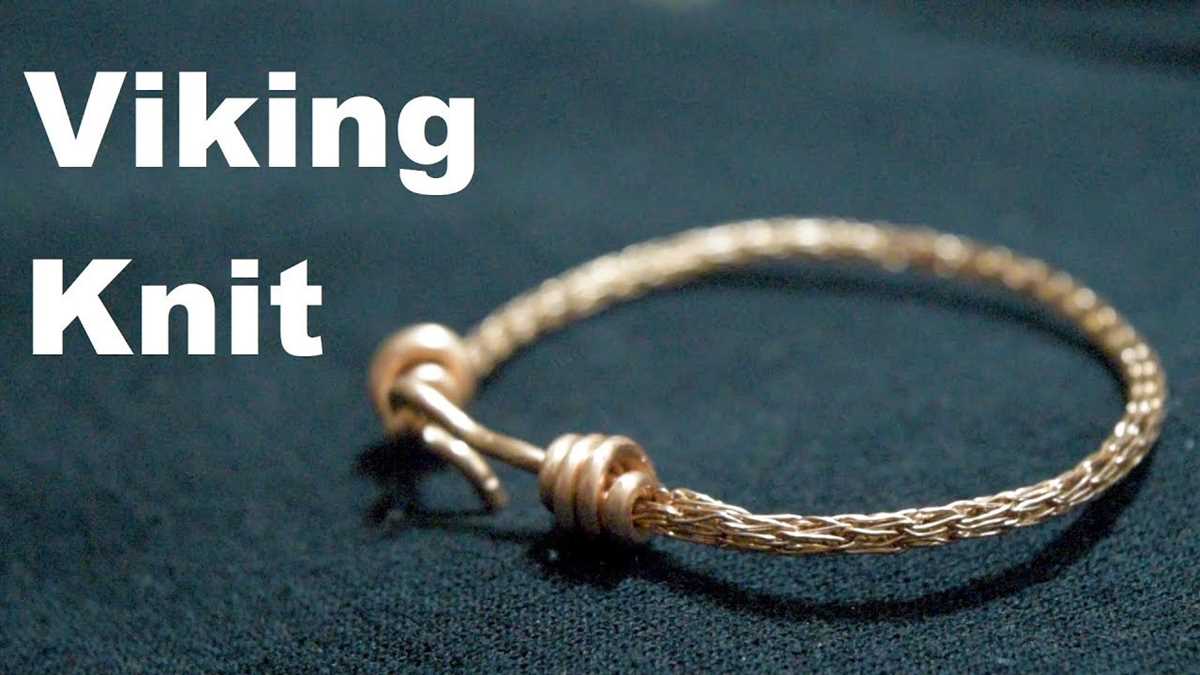
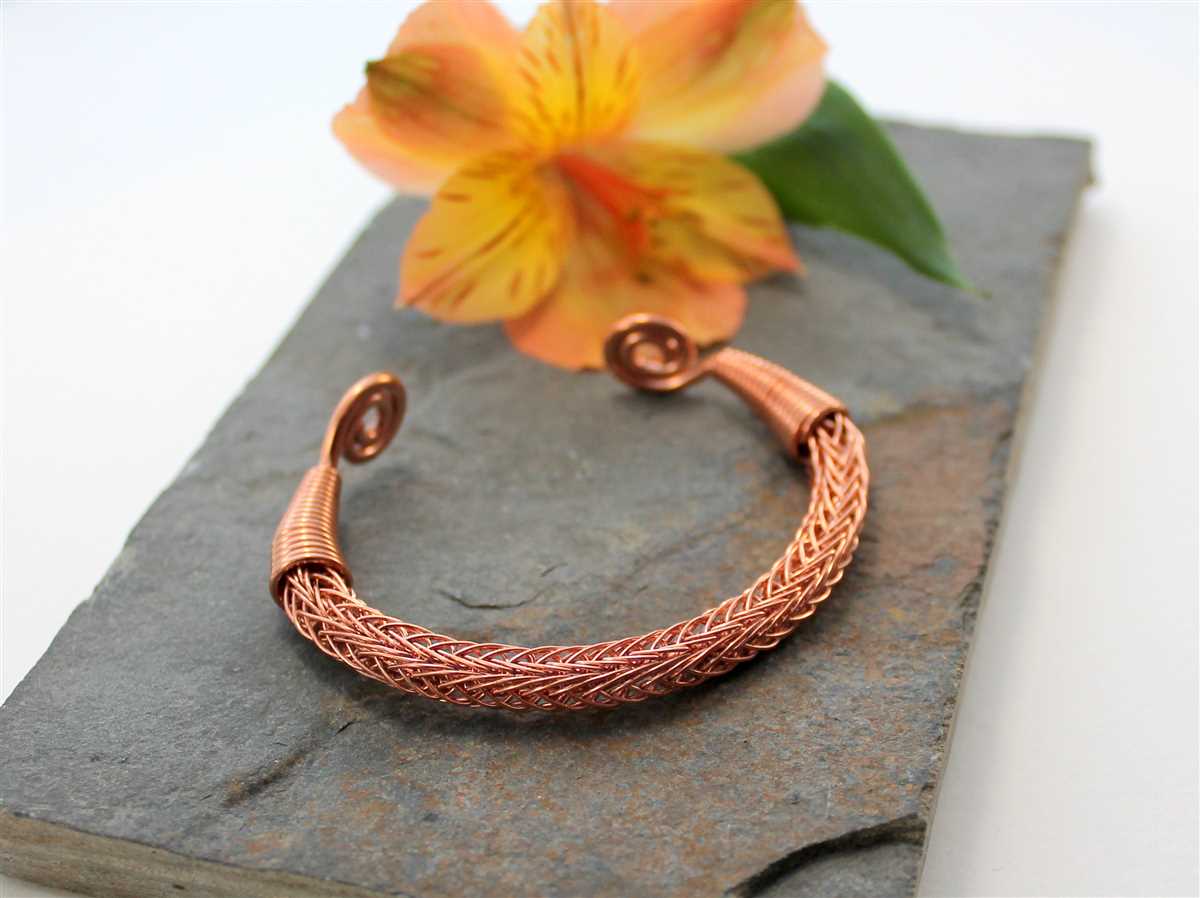
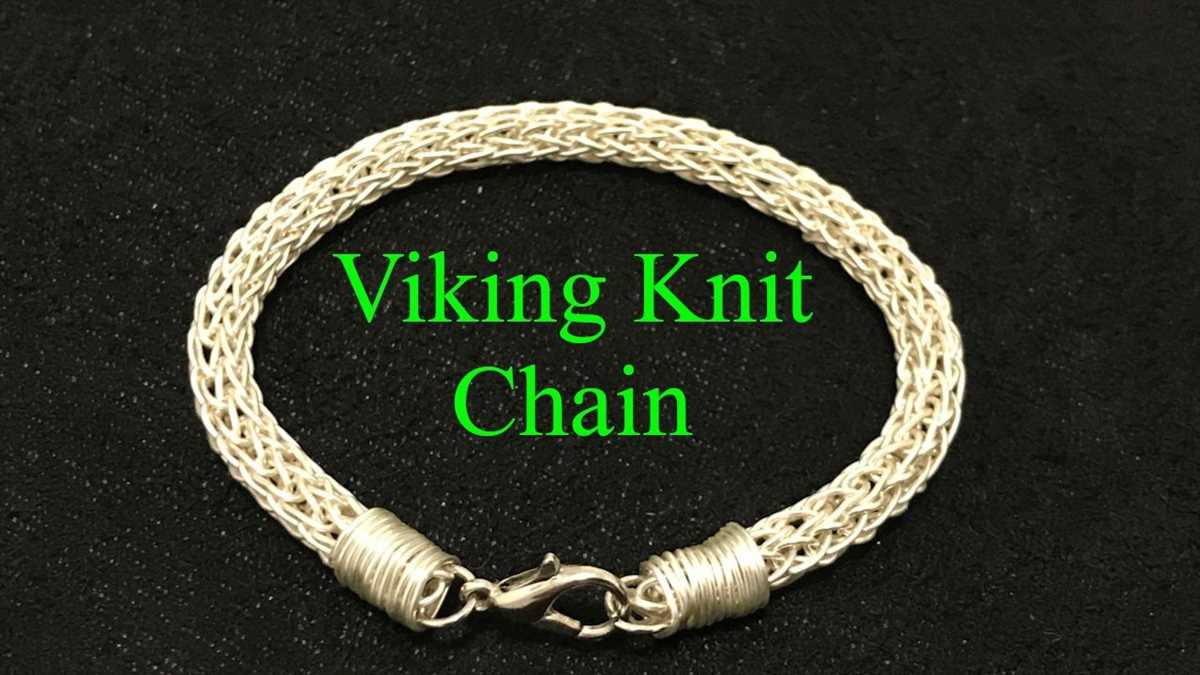
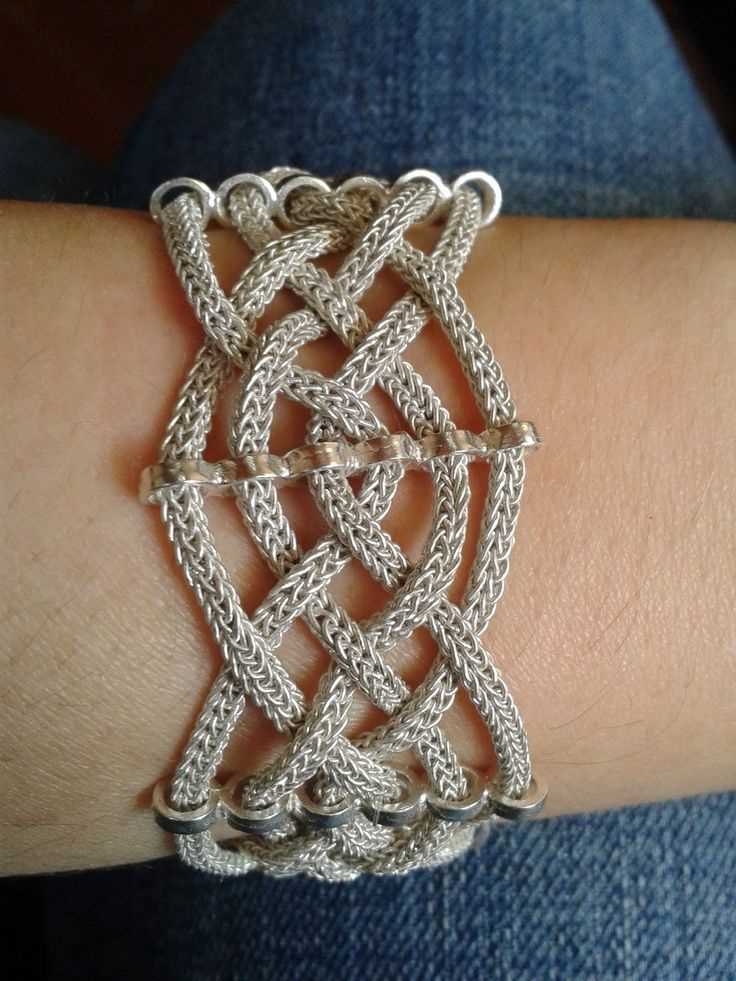
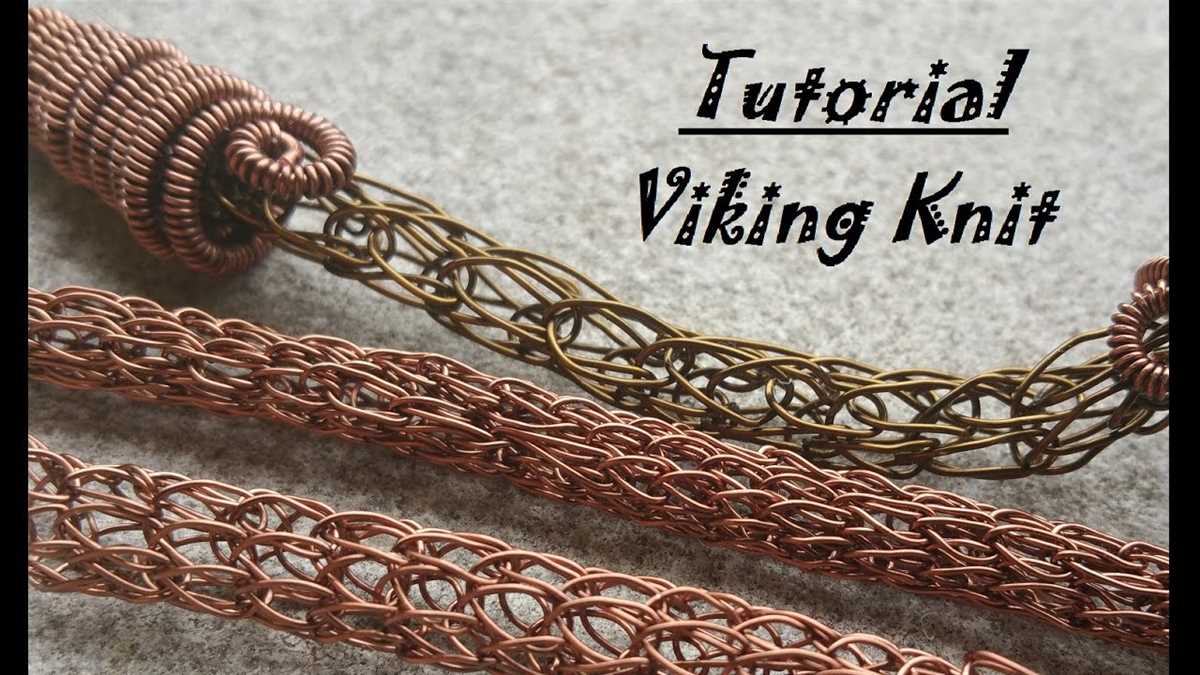
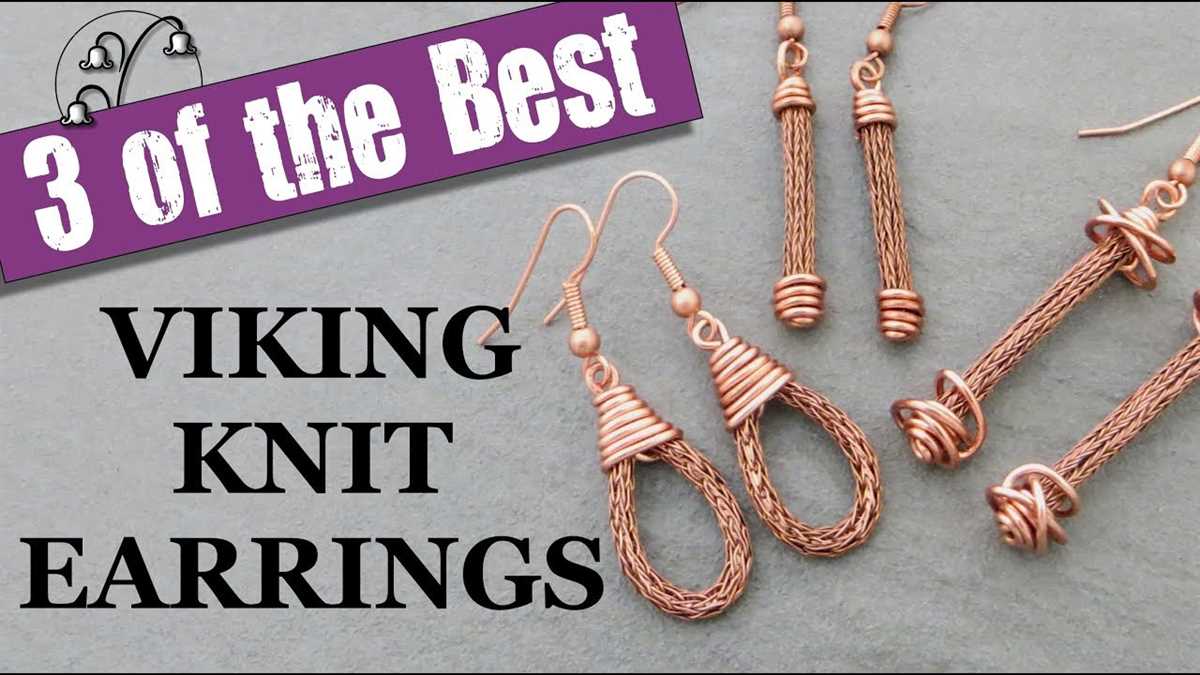
If you’re looking for a unique and beautiful piece of jewelry to add to your collection, a Viking knit bracelet is a perfect choice. Viking knit is an ancient wire-weaving technique that dates back to the Viking era. It creates a flexible and delicate chain that can be shaped into stunning bracelets.
While the technique may seem complicated, creating a Viking knit bracelet is easier than you might think. This article will guide you through the process step-by-step, providing you with a pattern to follow along with. Whether you’re a jewelry-making enthusiast or a beginner, this project is a great way to learn a new skill and create a one-of-a-kind piece.
Before you begin, gather your materials. You’ll need a spool of wire, preferably in a 24-gauge or 26-gauge thickness, a wire cutter, a dowel or mandrel, and a pair of pliers. Once you have everything ready, follow the instructions below to start creating your Viking knit bracelet.
Viking Knit Bracelet Pattern
If you’re looking for a unique and intricate bracelet pattern to add to your collection, the Viking knit bracelet pattern is a perfect choice. This ancient technique of weaving metal wire creates a stunning and durable piece of jewelry that is sure to impress.
The Viking knit bracelet pattern involves creating a chain-like weave using a knitting needle and wire. It’s a relatively simple and straightforward process that can be easily mastered with a bit of practice. The end result is a bracelet that has a beautiful texture and can be customized with beads or charms.
To begin the Viking knit bracelet pattern, you will need a knitting needle, a spool of wire, and any additional beads or charms you want to incorporate into the design. Start by threading the wire through the eye of the knitting needle and leaving a short tail. Then, wrap the wire around the needle, creating a loop. Continue wrapping the wire around the needle, pulling it through the loop each time to create additional loops.
Once you have created the desired length of knitting, carefully slide the loops off the needle and onto a bracelet mandrel or your wrist to shape the bracelet. You can also add beads or charms to the loops as you go to create a more personalized design. Finally, secure the ends of the wire together and add a clasp of your choice to complete the bracelet.
Materials Needed:
- Knitting needle
- Wire spool
- Beads or charms (optional)
- Bracelet mandrel or wrist for shaping
- Clasp
Step-by-Step Instructions:
- Thread the wire through the eye of the knitting needle, leaving a short tail.
- Wrap the wire around the needle, creating a loop.
- Continue wrapping the wire around the needle, pulling it through the loop each time to create additional loops.
- Once you have created the desired length of knitting, carefully slide the loops off the needle and onto a bracelet mandrel or your wrist to shape the bracelet.
- Add beads or charms to the loops as desired.
- Secure the ends of the wire together and add a clasp.
Follow these simple steps and you’ll have a beautiful Viking knit bracelet that is sure to be a showstopper. Whether you’re making it for yourself or as a gift, this pattern is a great way to showcase your creativity and love for jewelry-making.
Materials Needed
In order to create a Viking knit bracelet, you will need a few key materials. These include:
- Wire: Select a wire that is suitable for Viking knit, such as round or square wire in a gauge that matches your desired bracelet size. Copper wire is commonly used, but you can also choose sterling silver, gold, or other metals.
- Drawplate: This tool is crucial for shaping and sizing the wire. A drawplate typically has a series of holes in various sizes, allowing you to progressively reduce the diameter of the wire as you pull it through.
- Wire cutters: You will need a good pair of wire cutters to trim the wire to the desired length before you begin weaving.
- Round nose pliers: These pliers are essential for shaping the ends of the wire into loops that will connect the bracelet’s clasp.
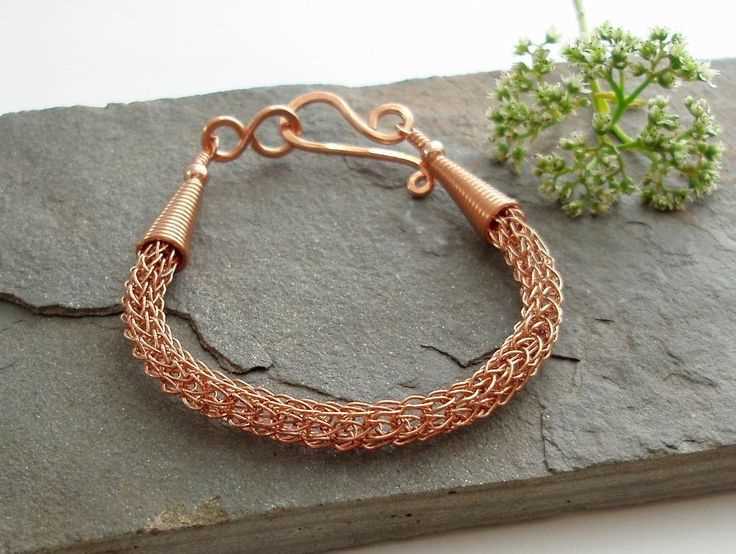
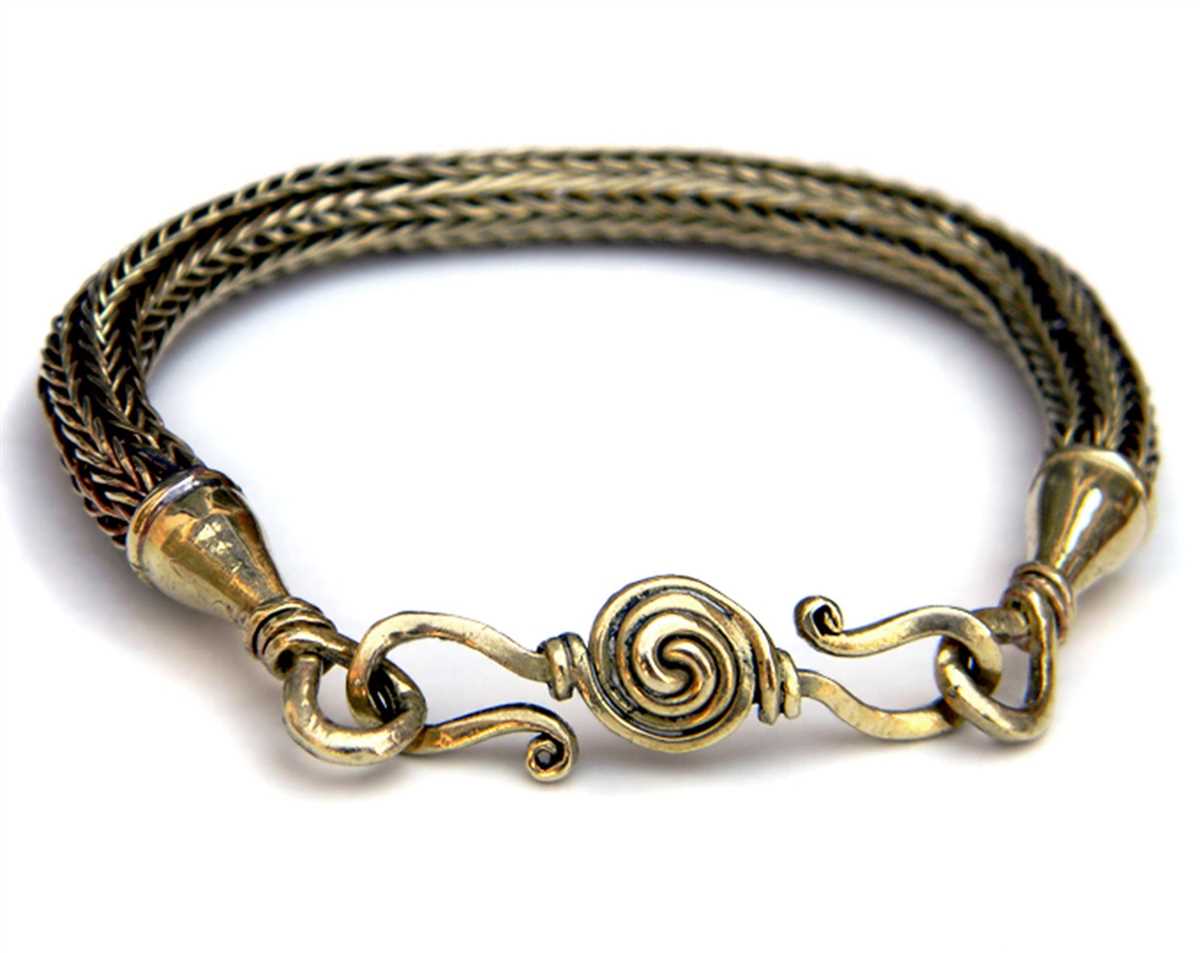
- Clasp: Choose a suitable clasp for your bracelet, such as a lobster clasp or a toggle clasp. Make sure it is sturdy and secure.
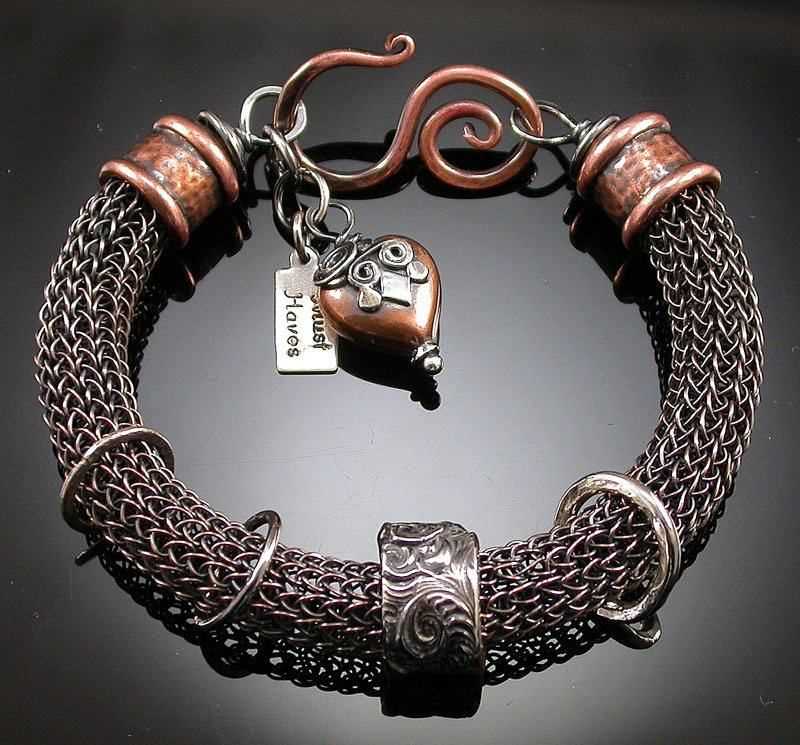
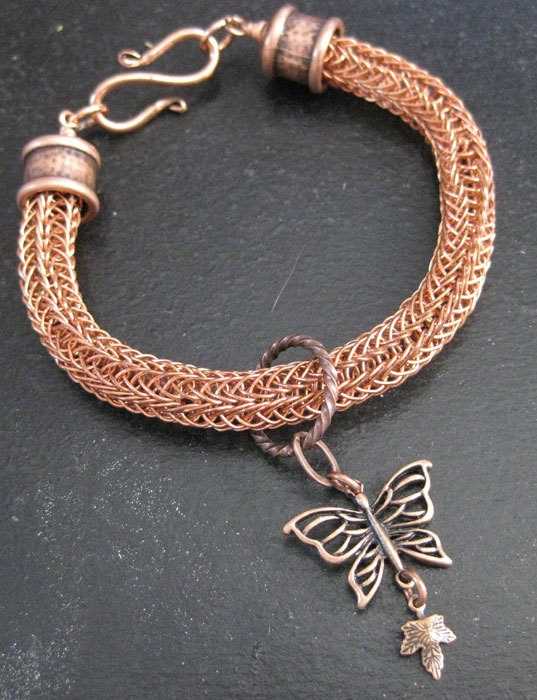
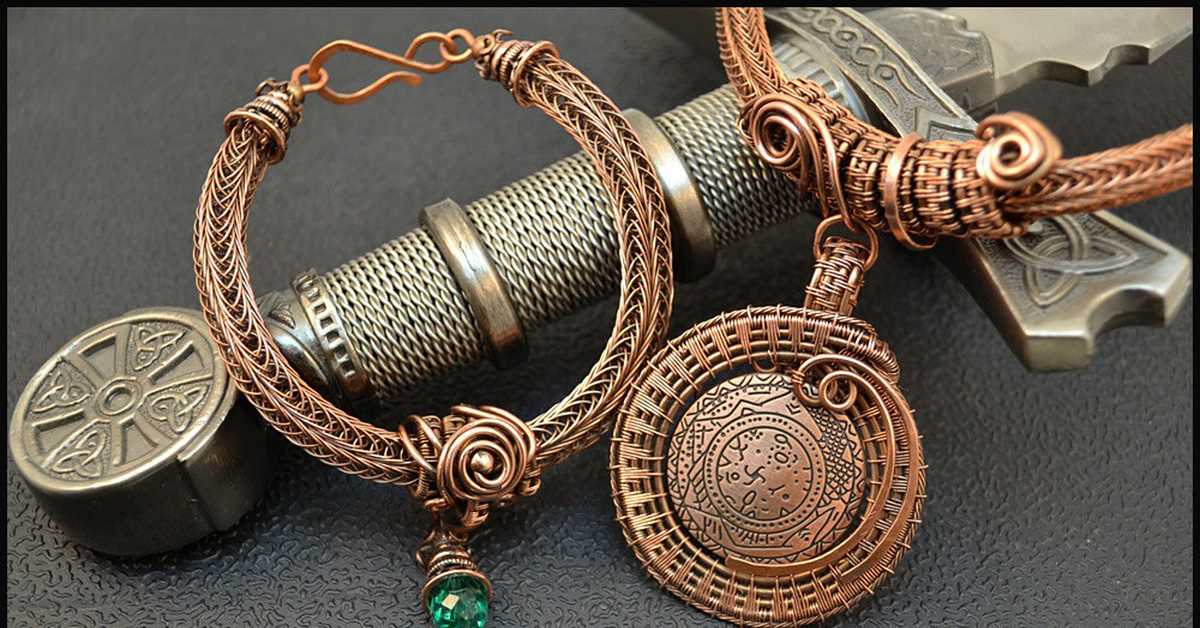
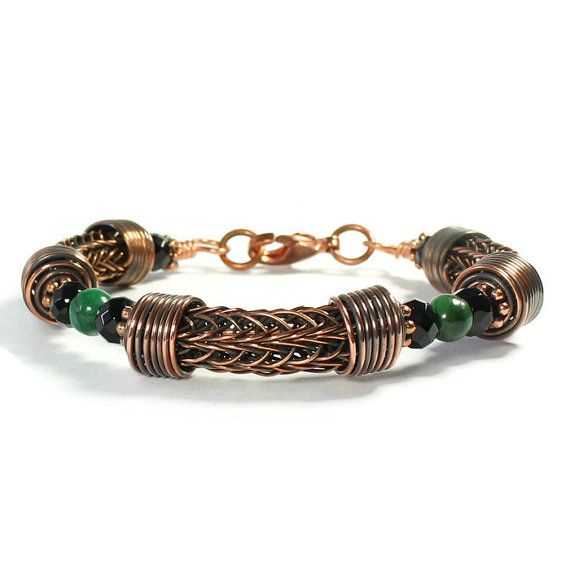
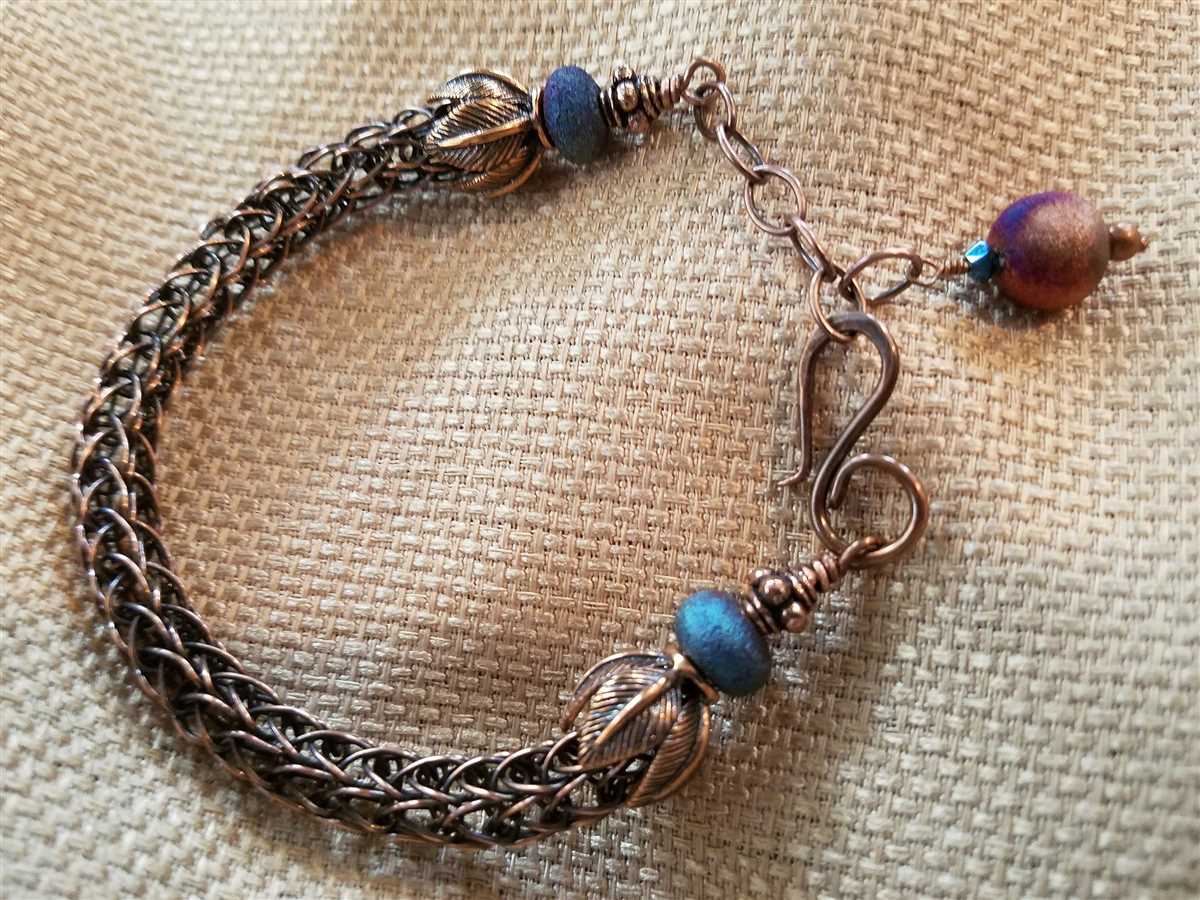
- Optional embellishments: If desired, you can add beads, charms, or other decorative elements to your Viking knit bracelet. These can be inserted into the woven wire during the process or added afterwards using jump rings.
By gathering these materials, you will have everything you need to create a beautiful and intricate Viking knit bracelet. Make sure to choose high-quality materials for the best results, as they will contribute to the overall durability and aesthetic of your finished piece.
Step 1: Making the base
Before we can start creating a Viking knit bracelet, we first need to make the base. The base is essentially a long piece of wire that will serve as the foundation for the bracelet.
To make the base, you will need a spool of wire, preferably in a gauge of your choice. Start by cutting a length of wire that is about three times the desired length of your finished bracelet. For example, if you want a 7-inch bracelet, you will need a wire that is approximately 21 inches long.
Once you have cut the wire to the desired length, you can begin the process of creating the Viking knit base. Hold one end of the wire firmly and attach it to a secure surface, such as a table or clamp. This will help keep the wire in place and prevent it from unraveling as you work.
Next, grab the other end of the wire with a pair of needle-nose pliers. Gently begin pulling the wire through the jaws of the pliers to create a loop. This loop will be the first stitch of your Viking knit base. Repeat this process several more times to create a series of loops or stitches along the length of the wire.
Continue pulling the wire through the pliers to create additional loops until you have reached the end of the wire. Once you have completed this step, you will have a base that resembles a chain made up of interlocking loops. This base will serve as the foundation for the intricate Viking knit design of the bracelet.
Step 2: Creating the loops
Once you have your wire chain ready from step 1, it’s time to create the loops that will make up the Viking knit bracelet. These loops will be woven together to form a beautiful, intricate pattern. Follow the steps below to create the loops:
1. Prepare your knitting tool
Start by placing a knitting tool, such as a dowel or a knitting needle, horizontally across the top of your wire chain. Make sure it is positioned securely and evenly.
2. Twist the wire around the knitting tool
Take the end of your wire chain and start twisting it around the knitting tool in a clockwise direction. Make sure to keep the wire taut as you twist it, and try to maintain an even tension throughout.
3. Continue twisting until desired length
Continue twisting the wire around the knitting tool until you reach the desired length of the loops. This will ultimately determine the size of your Viking knit bracelet. Keep in mind that the loops may shrink slightly once the bracelet is finished, so it’s a good idea to make them slightly longer than you need.
4. Remove the knitting tool

Once you have finished creating the loops, carefully remove the knitting tool from the wire. The loops should now be securely formed and ready for the next step in the Viking knit bracelet pattern.
Step 3: Adding Beads
Once you have completed the basic Viking knit pattern, you can add beads to give your bracelet an extra touch of elegance. Adding beads to a Viking knit requires a few additional steps, but the result is a stunning piece of jewelry that is sure to turn heads.
To add beads, you will need a selection of beads in your desired size and color. You will also need a beading needle and thread that matches the color of your wire. Begin by threading your beading needle with the thread, and then string the beads onto the thread in the desired pattern.
Step 1: Slide the first bead onto the wire before pulling it through the knitted chain. Make sure the bead is positioned at the desired location, usually between two loops of the Viking knit.
Step 2: Continue to pull the wire and bead through the loops, making sure to keep the tension even. Repeat this process for the remaining beads, making sure they are evenly spaced along the length of the bracelet.
Step 3: Once you have added all the beads, continue to knit using the same technique as before. Make sure to keep the tension consistent throughout the bracelet so that the beads sit evenly and securely in place.
Step 4: After finishing your Viking knit with the beads, remember to secure the end of the wire by weaving it back through the knitted loops. This will ensure that your bracelet is secure and won’t unravel.
By adding beads to your Viking knit bracelet, you can create a unique and personalized piece of jewelry that showcases your creativity and style. Don’t be afraid to experiment with different bead sizes, colors, and patterns to create a truly one-of-a-kind design.
Step 4: Finishing the bracelet
After completing the Viking knit pattern for your bracelet, it is time to finish it off with the necessary closures and embellishments. Here are the steps to achieve a polished and professional-looking bracelet:
1. Add a clasp: Choose a clasp that complements your bracelet design and attach it to the ends of your knitted wire. You can use jump rings or jewelry findings to secure the clasp in place. Make sure the clasp is securely fastened to ensure the longevity of your bracelet.
2. Trim excess wire: Use wire cutters to remove any excess wire at the end of your bracelet. Be careful not to accidentally cut the wrong wire, and leave a small tail to tuck in neatly for a clean finish. Make sure the trimmed wire is not sharp or poking out to avoid any discomfort while wearing the bracelet.
3. Add embellishments: If desired, you can further personalize your Viking knit bracelet by adding embellishments such as beads, charms, or pendants. Thread these onto the knitted wire before attaching the clasp, ensuring they are secure and won’t easily detach. This step allows you to add your own unique touch to the bracelet and make it truly one-of-a-kind.
4. Secure loose ends: Use a pair of round nose pliers to bend the ends of the knitted wire inwards, creating a small loop. This will prevent the wire from unraveling or catching on clothing. Gently squeeze the loop closed to ensure it is secure. You can also add a small dot of jewelry glue to the loop for extra reinforcement.
By following these steps, you will be able to complete your Viking knit bracelet with a professional finish. Remember to take your time and work with precision to achieve the best results. Once finished, your bracelet will be ready to wear or gift to someone special.
Tips and Tricks for Viking Knit Bracelet Pattern
When it comes to creating a beautiful Viking knit bracelet, there are some tips and tricks that can help you achieve the best results. Here are a few ideas to keep in mind as you work on your project:
1. Choose the right wire:
When selecting wire for your Viking knit bracelet, it’s important to choose a wire that is flexible yet strong. Copper wire is a popular choice due to its malleability, but you can also experiment with other metals like silver or gold-filled wire. Be sure to choose a wire that is not too thick or too thin for your desired design.
2. Start with a firm foundation:
Before you begin weaving your bracelet, it’s important to create a firm foundation to work on. This can be accomplished by making a few initial rows of simple knitting or by attaching a wire chain to a clasp. This foundation will provide stability and structure to your bracelet, making it easier to weave the intricate Viking knit pattern.
3. Use a mandrel or dowel:
A mandrel or dowel can be a useful tool for creating the cylindrical shape of a Viking knit bracelet. Before starting your project, wrap your wire around the mandrel or dowel to create a basic shape. This will make it easier to weave the wire in and out during the knitting process. Alternatively, you can use a thick knitting needle or even a pen as a makeshift mandrel.
4. Keep your tension consistent:
One of the keys to creating a neat and uniform Viking knit bracelet is to maintain consistent tension throughout the weaving process. If your tension is too loose, the pattern will become distorted and the bracelet may lose its shape. If your tension is too tight, the bracelet may become stiff and difficult to wear. Practice finding a tension that allows the wire to move smoothly but still holds its shape.
5. Finishing touches:
Once you have completed the weaving process, it’s time to add the finishing touches to your Viking knit bracelet. This can include attaching a clasp, adding decorative beads or charms, or even oxidizing the wire for an aged look. Experiment with different techniques and materials to personalize your bracelet and make it truly unique.
With these tips and tricks in mind, you’ll be well-equipped to create a stunning Viking knit bracelet that showcases your skills and creativity. Remember to practice and experiment to find the techniques that work best for you, and don’t be afraid to make your own adaptations to the traditional pattern.
Variations
The Viking knit bracelet pattern is a versatile technique that can be modified to create a variety of different looks. By experimenting with different materials and designs, you can personalize your bracelet and make it truly unique.
Materials
The basic Viking knit bracelet pattern calls for wire, but you can also use other materials such as leather cords, ribbons, or even fabric strips. These alternative materials can create a completely different texture and look for your bracelet. For example, using leather cords can give your bracelet a rustic and earthy feel, while fabric strips can add a touch of color and playfulness.
Designs
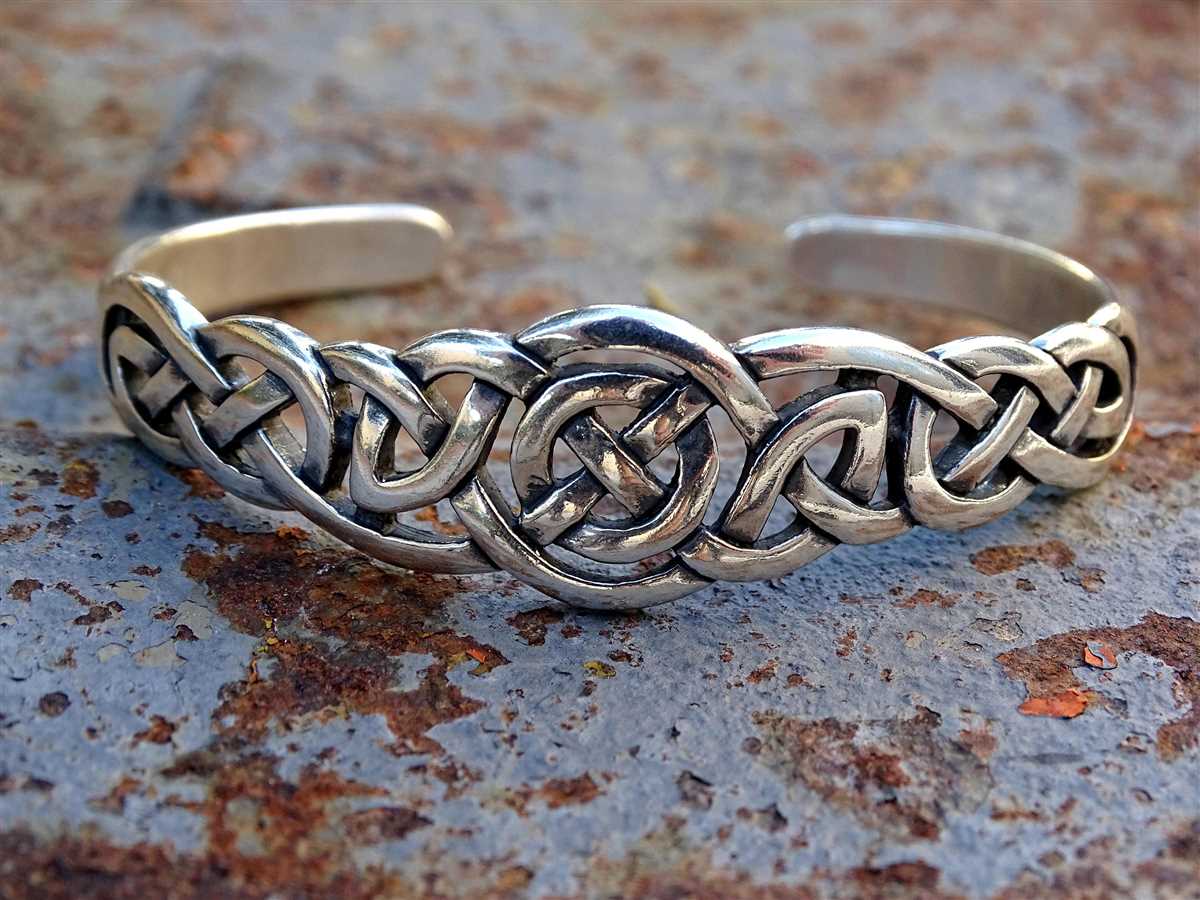
The Viking knit bracelet pattern can be adapted to create various designs. You can experiment with different knit patterns, such as adding beads or charms into the weave or alternating different colors of wire. You can also create different widths and lengths for your bracelet by adjusting the number of loops and rows in the knit. Some popular design variations include braided twists, Celtic knots, and geometric patterns.
Finishing touches
Once you have completed the Viking knit bracelet pattern, you can add some finishing touches to enhance the overall look of your bracelet. You can attach a clasp, toggle, or lobster claw closure to secure the bracelet on your wrist. You can also add decorative elements such as metal charms, gemstone beads, or pendants to create a focal point on your bracelet. These finishing touches can make your bracelet even more eye-catching and personalized.
- Experiment with different materials such as leather cords or fabric strips.
- Try different knit patterns, such as adding beads or charms.
- Create unique designs by adjusting the width and length of the bracelet.
- Add finishing touches like clasps, charms, or pendants to enhance the overall look.
- Personalize your bracelet and make it truly unique.
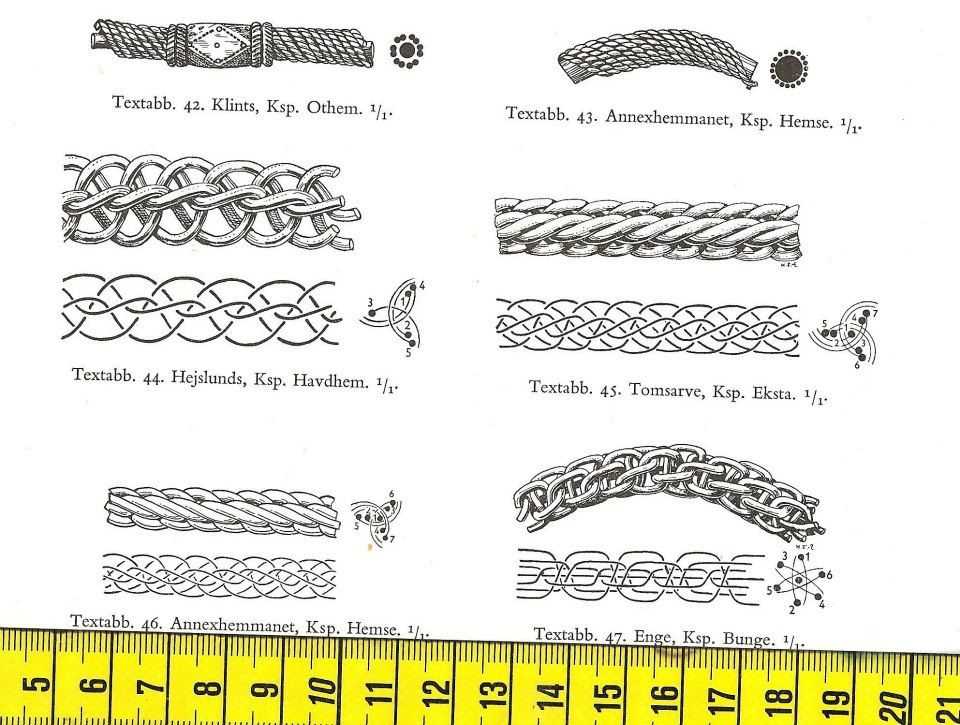
The History of Viking Knit
Viking knit, also known as trichinopoly or Viking chain, is a traditional wire weaving technique that dates back to the Viking era. It is believed to have originated in ancient Scandinavia, where Norse craftsmen used it to create intricate chains and jewelry. The skill and craftsmanship required to accomplish this technique made it highly valued, and Viking knit jewelry became a symbol of status and wealth.
The process of Viking knit involves weaving together fine wire to create a tubular chain. This technique was used to make bracelets, necklaces, and other pieces of adornment. The wire used in Viking knit was typically made of silver or gold, but copper and bronze were also used. The result is a flexible and durable chain with a distinctive texture and appearance.
One of the fascinating aspects of Viking knit is how it has stood the test of time. The technique was passed down through generations of Nordic craftsmen, preserving the traditional method and ensuring its continuity. Even though the Vikings themselves may not have called it “Viking knit,” the technique has come to be associated with their cultural heritage.
Today, Viking knit has found a place in modern jewelry making. Artists and craftsmen continue to use this ancient technique to create unique and beautiful designs. The process of creating Viking knit jewelry involves patience, skill, and attention to detail, making it a cherished art form that celebrates both the history and the craftsmanship of the Vikings.
Whether you are interested in creating your own Viking knit jewelry or simply appreciate the beauty of this ancient technique, exploring the history and intricacies of Viking knit can deepen your understanding and appreciation of this timeless art form.
Inspiration and Ideas
If you’re looking for inspiration for your Viking knit bracelet pattern, there are plenty of sources to explore. From ancient Viking designs to modern interpretations, there are endless possibilities to create a unique and stylish bracelet.
One source of inspiration is the rich history and culture of the Vikings themselves. Researching Viking artifacts, such as brooches, rings, and other jewelry, can provide ideas for patterns and motifs. Look for intricate designs, geometric shapes, and symbols that resonate with you. Incorporating these elements into your Viking knit bracelet can create a meaningful piece that pays homage to Viking heritage.
Color combinations
Another way to find inspiration is through color combinations. The Vikings were known for their love of vibrant hues, so don’t be afraid to experiment with bold and contrasting colors in your bracelet design. Consider using gemstones or beads in colors such as deep reds, rich blues, and vibrant greens to add a pop of color to your Viking knit bracelet.
Materials can also inspire your bracelet design. Explore different types of metals, such as copper, brass, or silver, to give your bracelet a unique look. You can also incorporate leather or other natural materials into your design to add texture and depth.
Personal touches
Finally, don’t forget to add your own personal touches to your Viking knit bracelet pattern. Whether it’s incorporating initials, birthstones, or other meaningful symbols, adding these elements can make your bracelet even more special. Consider designing a custom clasp or incorporating a charm that holds personal significance.
When it comes to Viking knit bracelets, the possibilities are endless. By exploring different sources of inspiration and adding your own creative twists, you can create a beautiful and unique bracelet that reflects your style and personality.
Resources and recommended tools
Now that you are familiar with the Viking knit bracelet pattern, here are some resources and recommended tools to help you get started on your own Viking knit bracelet projects:
Resources:
- Online tutorials: There are many online tutorials available that provide step-by-step instructions on how to create Viking knit bracelets. These tutorials often include videos and images to guide you through the process.
- Books and guides: There are also several books and guides dedicated to Viking knit jewelry making. These resources provide in-depth information on different techniques, patterns, and designs.
- Online communities: Join online communities, forums, and social media groups dedicated to Viking knit jewelry making. These communities are a great source of inspiration, advice, and support from fellow enthusiasts.
Recommended tools:
- Wire cutters: Use wire cutters to cut the wire for your Viking knit bracelet. Ensure that you have a good quality pair that can easily cut through the wire without leaving sharp edges.
- Round nose pliers: Round nose pliers are essential for shaping and bending the wire during the Viking knit process. Look for pliers with a comfortable grip and smooth jaws.
- Drawplate: A drawplate is a tool used to make the Viking knit wire smoother and more even. It helps create a polished look for your bracelet. Choose a drawplate with different hole sizes for various thicknesses.
- Awl or knitting needle: An awl or knitting needle is used to pull the wire through the drawplate holes. Make sure it has a sharp tip for easier threading.
Remember, practice makes perfect, so don’t be discouraged if your first attempts at Viking knit bracelets are not perfect. Keep experimenting with different wire types, colors, and patterns to create unique and beautiful designs. Enjoy the process and have fun with your Viking knit jewelry making journey!
Q&A:
What is a Viking knit bracelet pattern?
A Viking knit bracelet pattern is a method used to create a beautiful and intricate bracelet using a specific weaving technique. It involves weaving wire together in a series of loops and stitches to create a unique and durable bracelet.
How do I make a Viking knit bracelet?
To make a Viking knit bracelet, you will need a Viking knit tool, a mandrel, and wire. First, create a base chain by securing the end of the wire to the mandrel and wrapping the wire around it in a spiral. Then, use the Viking knit tool to pull the wire through each loop of the base chain, creating a woven tube. Repeat this process until you have the desired length, and attach a clasp to finish the bracelet.
What materials do I need to make a Viking knit bracelet?
To make a Viking knit bracelet, you will need wire, a mandrel, a Viking knit tool, and a clasp. The wire can be copper, silver, gold, or any other metal you prefer. The mandrel is usually a rod or dowel that is used as the base for creating the woven tube. The Viking knit tool is a special drawplate-like tool that helps pull the wire through the loops. The clasp can be a lobster clasp, a toggle clasp, or any other type of closure you like.
Where can I find Viking knit bracelet patterns?
You can find Viking knit bracelet patterns online through various crafting websites, blogs, and tutorials. There are also books and magazines dedicated to jewelry-making that may include Viking knit bracelet patterns. Additionally, you can join online forums and communities of jewelry makers to get inspiration and share patterns with other enthusiasts.