
Unicorns have captured the imaginations of people around the world for centuries. The mystical creatures with their beautiful horns and magical abilities have become a symbol of fantasy and wonder. And now, you can bring a touch of unicorn magic into your own life with a unicorn hat knitting pattern!
Knitting is a wonderful hobby that allows you to create beautiful and unique items from scratch. And what could be more special than knitting your very own unicorn hat? Whether you’re knitting for yourself or a loved one, this pattern is sure to bring a smile to your face.
This unicorn hat knitting pattern is suitable for knitters of all skill levels, from beginners to advanced. It uses basic knitting stitches, such as knit and purl, and requires minimal shaping. With a few simple techniques, you’ll be able to create a charming unicorn hat that will make you feel like a magical creature yourself!
How to Knit a Unicorn Hat: A Complete Knitting Pattern
Knitting a unicorn hat is a fun and creative way to add a touch of magic to your winter wardrobe. With this complete knitting pattern, you can create a whimsical and cozy hat that is perfect for both children and adults.
Materials needed:
- Size 8 (5mm) knitting needles
- Worsted weight yarn in white, pink, and any other desired colors
- Tapestry needle
- Pom pom maker
- Stitch markers
- Scissors
Instructions:
- Start by casting on 80 stitches with the white yarn.
- Knit 2 rows in a rib stitch pattern (knit 1, purl 1).
- Switch to the pink yarn and knit 4 rows in stockinette stitch (knit one row, purl one row).
- Next, begin the unicorn pattern. Use the chart provided to knit the unicorn design, using the intarsia technique to switch between colors.
- Continue knitting in stockinette stitch with the unicorn design until the hat measures approximately 8 inches from the cast on edge.
- Decrease rows:
– Row 1: *Knit 6, knit 2 together* (repeat across the row)
– Row 2: Knit all stitches
– Row 3: *Knit 5, knit 2 together* (repeat across the row)
– Row 4: Knit all stitches
– Row 5: *Knit 4, knit 2 together* (repeat across the row)
– Row 6: Knit all stitches
– Continue decreasing in this pattern until there are 10 stitches remaining.
- Break yarn and thread it through the remaining stitches. Pull tight to close the top of the hat.
- Weave in any loose ends with a tapestry needle.
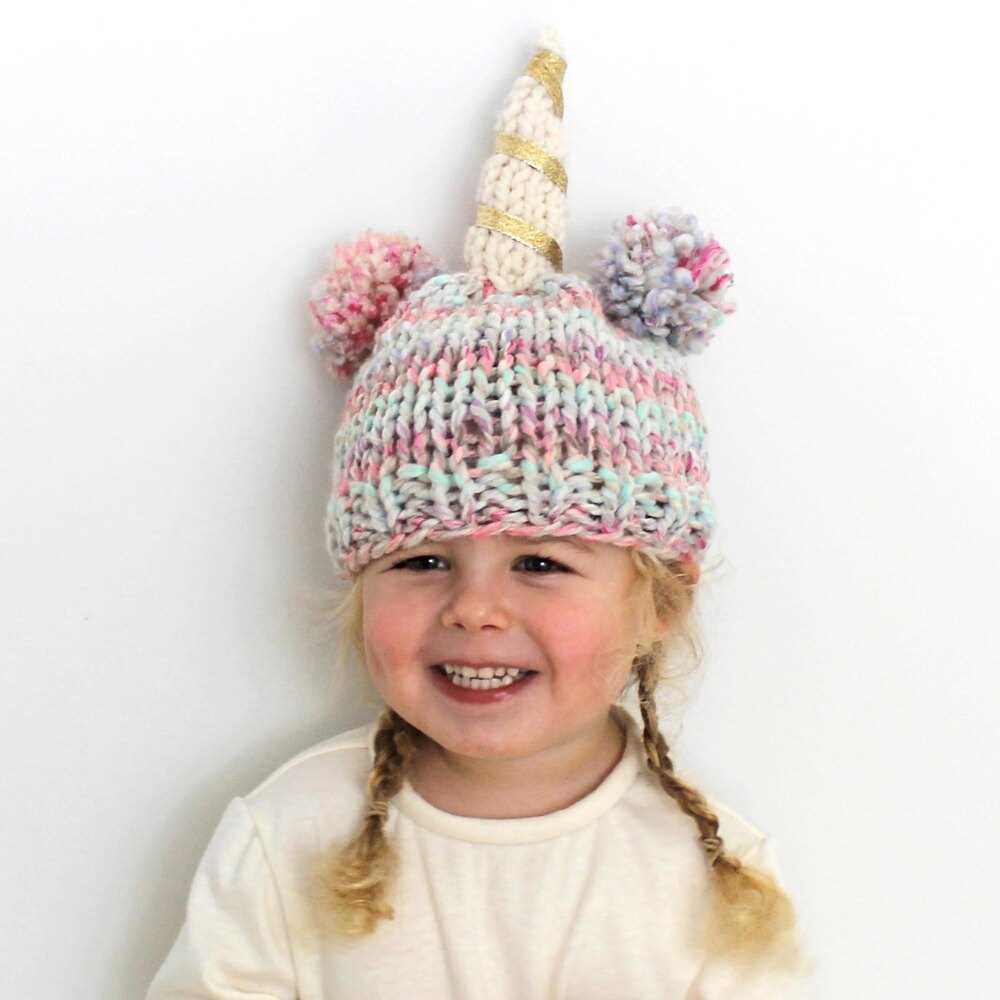
- Use a pom pom maker to create a pom pom in the desired colors.
- Attach the pom pom to the top of the hat using a tapestry needle.
Once you’ve finished knitting and attaching the pom pom, your unicorn hat is ready to wear! This pattern allows for customization, so feel free to experiment with different colors and designs to make it truly unique. Whether you’re knitting for yourself or a loved one, this unicorn hat is sure to bring a touch of magic and warmth to any winter outfit.
Materials Needed for Knitting a Unicorn Hat
When knitting a unicorn hat, it is important to gather all the necessary materials beforehand. Here is a list of items you will need:
- Yarn: Choose a soft and durable yarn in the colors of your choice. Opt for pastel shades for a whimsical unicorn look.
- Knitting Needles: Use the appropriate size of knitting needles according to the yarn weight specified in the pattern. Double-pointed needles may be required for certain sections.
- Tapestry Needle: This needle will be used for weaving in loose ends and stitching the hat together.
- Stitch Markers: These small rings or clips will help you keep track of your stitches and pattern repeats.
- Scissors: A pair of sharp scissors is essential for cutting the yarn and trimming any excess.
- Tape Measure: Use a tape measure to ensure the correct sizing of the hat. This will help you achieve the desired fit.
- Pom-pom Maker: If you want to add a fluffy pom-pom to the top of your unicorn hat, a pom-pom maker will make the process much easier.
- Optional Embellishments: To make your unicorn hat even more magical, consider adding embellishments such as sequins, beads, or felt flowers. These can be sewn or glued onto the finished hat.
With these materials in hand, you will be well-equipped to begin knitting your very own unicorn hat. Follow the pattern instructions carefully, and don’t forget to let your creativity shine through in your color choices and added details!
Choosing the Right Yarn for Your Unicorn Hat
When it comes to knitting a unicorn hat, choosing the right yarn is crucial. The yarn you select will determine the overall look and feel of your hat, as well as its durability and comfort. Here are some factors to consider when picking the perfect yarn for your unicorn hat:
1. Fiber Content
The fiber content of the yarn is an important consideration, as it affects both the warmth and the feel of the hat. For a cozy and soft hat, opt for yarns made from natural fibers like wool or alpaca. These fibers have excellent insulating properties and are known for their softness. If you prefer a lightweight and breathable hat, choose yarns made from plant-based fibers like cotton or bamboo. These fibers are perfect for warmer climates and sensitive skin.
2. Weight and Gauge
The weight of the yarn you choose will determine the thickness of the hat and the gauge you need to achieve. Unicorn hats can be knitted with a variety of yarn weights, from lightweight fingering yarn to chunky bulky yarn. Consider the pattern you are using and the desired finished look to determine the appropriate yarn weight. Make sure to match your gauge to ensure a proper fit.
3. Color and Texture
Unicorn hats are known for their vibrant and whimsical appearance, so don’t be afraid to play with color and texture when selecting yarn. Opt for yarns with variegated or self-striping colors to create a mesmerizing effect. You can also choose yarns with metallic or sparkly threads for added magic. Consider the texture of the yarn as well, as it can add depth and interest to your hat.
By carefully considering these factors, you can choose the perfect yarn for your unicorn hat and create a truly magical and whimsical accessory.
Getting Started: Casting On
Casting on is the first step in any knitting project and it sets the foundation for your work. It creates the stitches that you will be working with throughout the pattern. To start knitting a unicorn hat, you will need to cast on the desired number of stitches, as indicated in the pattern.
There are several methods you can use to cast on, but for this unicorn hat knitting pattern, we recommend using the long tail cast on method. This method gives a neat and stretchy edge, which is perfect for hats.
To cast on using the long tail method:
- Hold the yarn in your right hand and create a slipknot by making a loop with the yarn, leaving a long tail. Place the loop on your left-hand needle.
- Insert the right-hand needle into the slipknot from left to right, going under the left-hand needle and pulling the yarn through the loop. This creates the first cast-on stitch.
- Continue casting on by repeating step 2, inserting the right-hand needle into the loop on the left-hand needle and pulling the yarn through to create a new stitch. Make sure to keep the stitches loose enough so that they can easily slide along the needle.
- Repeat step 3 until you have cast on the required number of stitches for your unicorn hat.
Once you have completed the cast on, you are ready to start knitting the unicorn hat pattern. Make sure to follow the instructions carefully and refer to the pattern for any specific techniques or stitches required.
Knitting the Brim of the Unicorn Hat
When knitting the brim of the unicorn hat, there are a few key steps to follow to ensure a perfect fit and a professional finish. First, it is important to choose the right yarn and needle size to achieve the desired gauge. This will ensure that the brim is not too loose or too tight.
Once you have selected the yarn and needle size, it is time to cast on the required number of stitches. The brim of the unicorn hat is typically knitted in a rib stitch pattern to provide a stretchy and snug fit. To do this, you will need to alternate between knitting and purling stitches in a specific sequence.
The rib stitch pattern for the brim can be knitted in a variety of ways, such as k1, p1 or k2, p2. This will create the ribbing effect that is commonly seen on the brims of hats. It is important to maintain the correct stitch sequence throughout the entire brim to ensure consistency and a neat appearance.
As you knit the brim, be sure to periodically check your gauge to ensure that you are on track. This can be done by measuring a small section of your knitting and comparing it to the recommended gauge in the pattern. Adjust your tension if necessary to achieve the correct gauge.
Once the desired length of the brim has been reached, it is time to bind off. This can be done using a standard bind off method, such as the knit-two-together bind off or the sewn bind off. The bind off should be firm but not too tight, allowing the brim to stretch comfortably around the wearer’s head.
With the brim complete, you are now ready to move on to the main body of the unicorn hat. Follow the pattern instructions for shaping and adding the unicorn details, and soon you will have a magical hat that is sure to delight all who see it!
Creating the Unicorn Pattern: Knitting the Body

Once you have gathered all the necessary materials, you are ready to start knitting the body of your unicorn hat. The body of the hat will be a basic beanie shape, with a few modifications to add the unicorn’s unique features.
To begin, cast on the required number of stitches for your desired hat size. You can use a circular or double-pointed needles, depending on your preference. Knit in the round for the desired length of the hat body, making sure to check the gauge to ensure a proper fit.
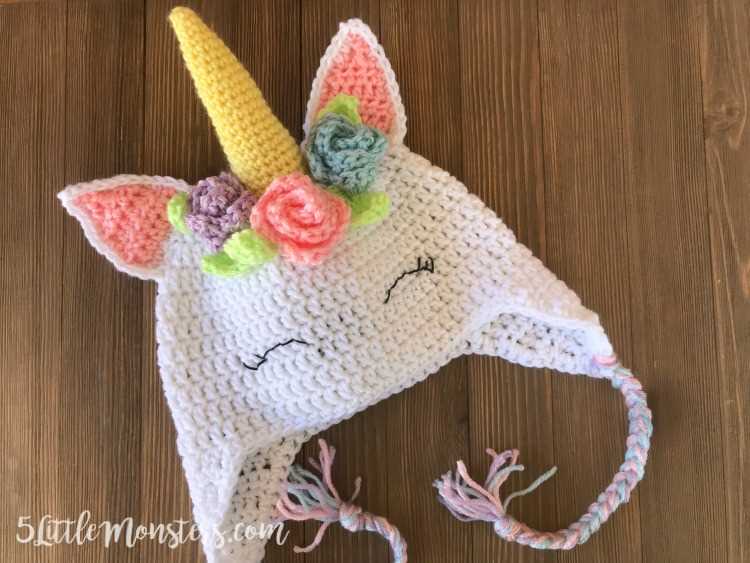
Next, it’s time to add the unicorn’s ears. Knit two small triangles separately, using the same yarn and needle size as the hat body. Once the triangles are complete, sew them onto the hat body, positioning them at the sides of the hat and slightly towards the top.
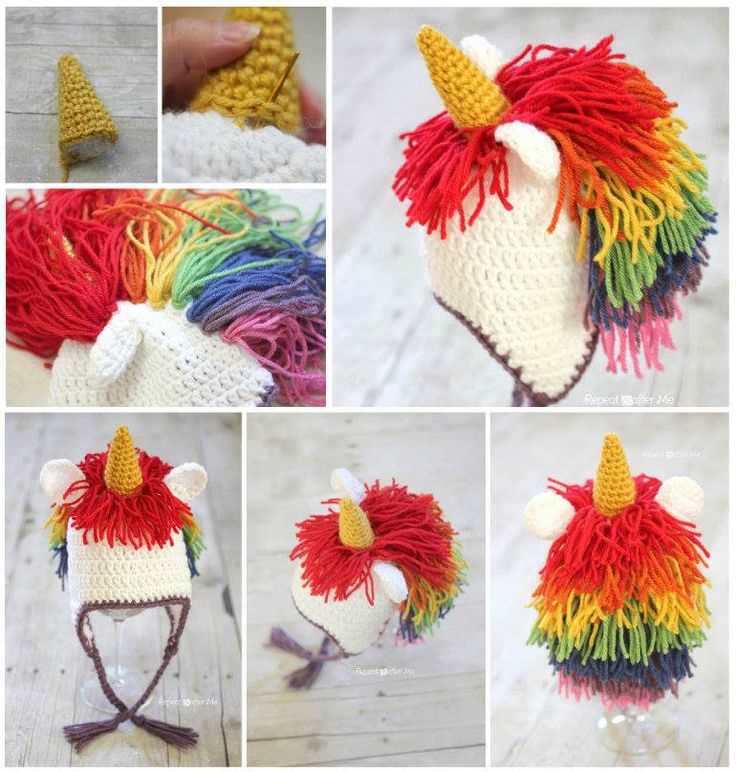
Now comes the fun part – creating the unicorn’s horn! To make the horn, start by knitting a small tube shape. You can achieve this by casting on a small number of stitches and knitting in the round until the desired length is reached. To give the horn a pointed shape, decrease stitches gradually towards the top. Once the tube is complete, stuff it lightly with fiberfill and sew it onto the top center of the hat, between the ears.
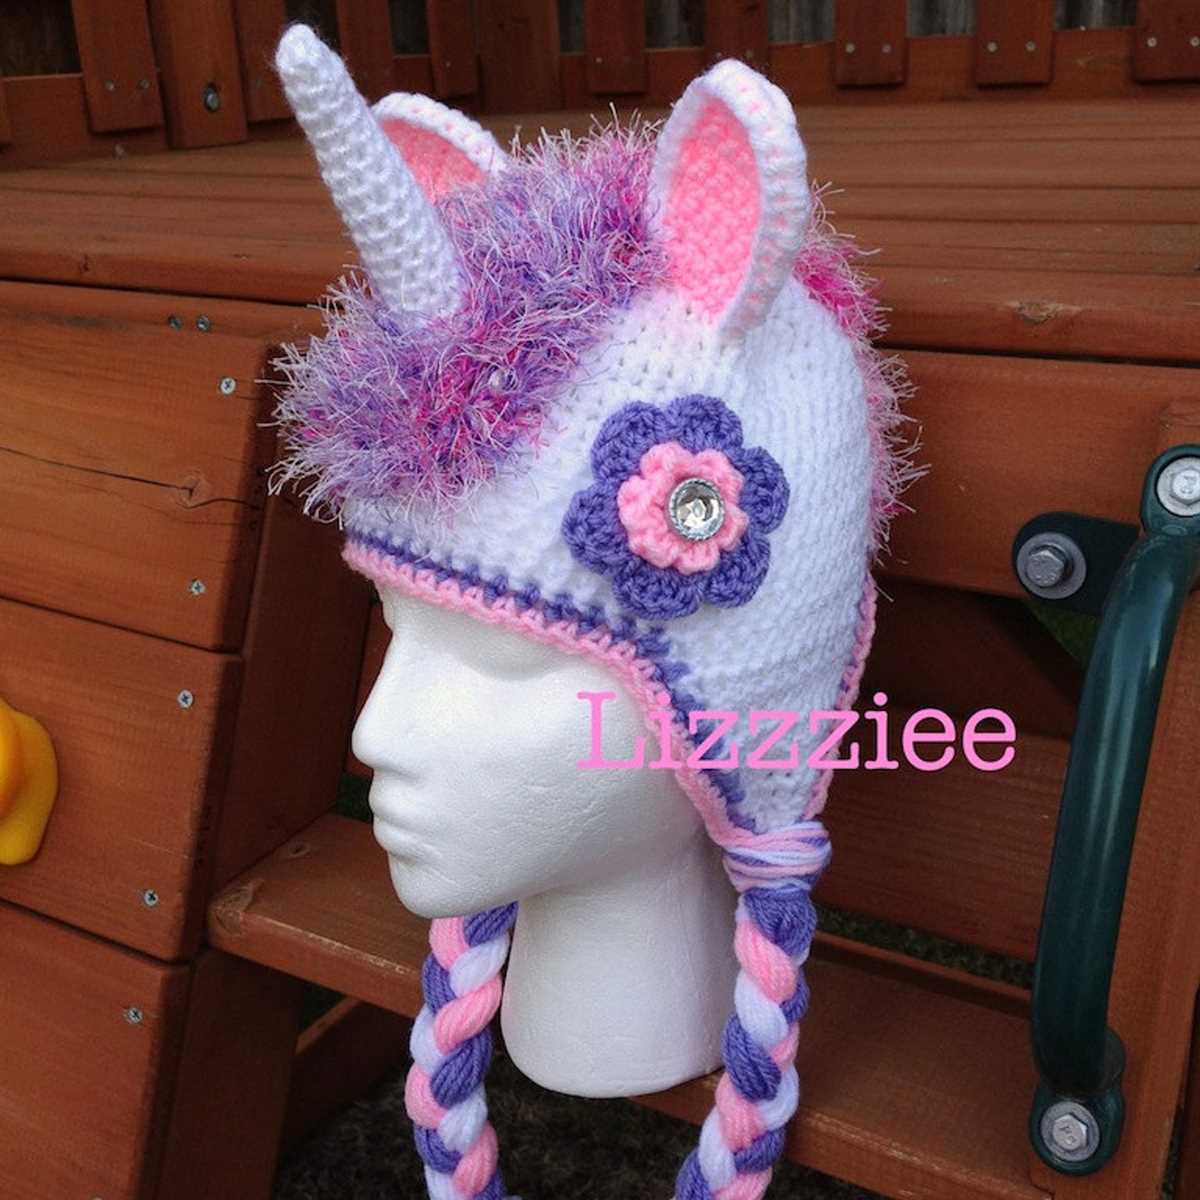
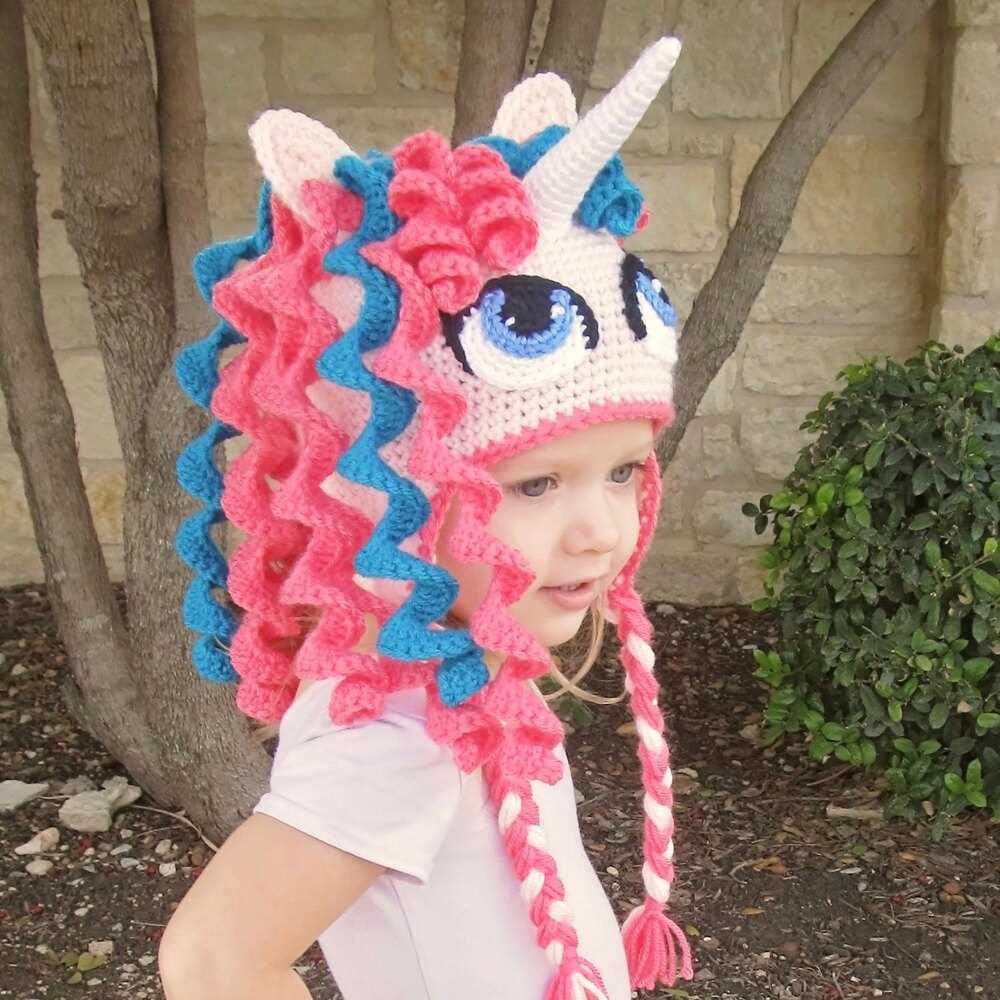
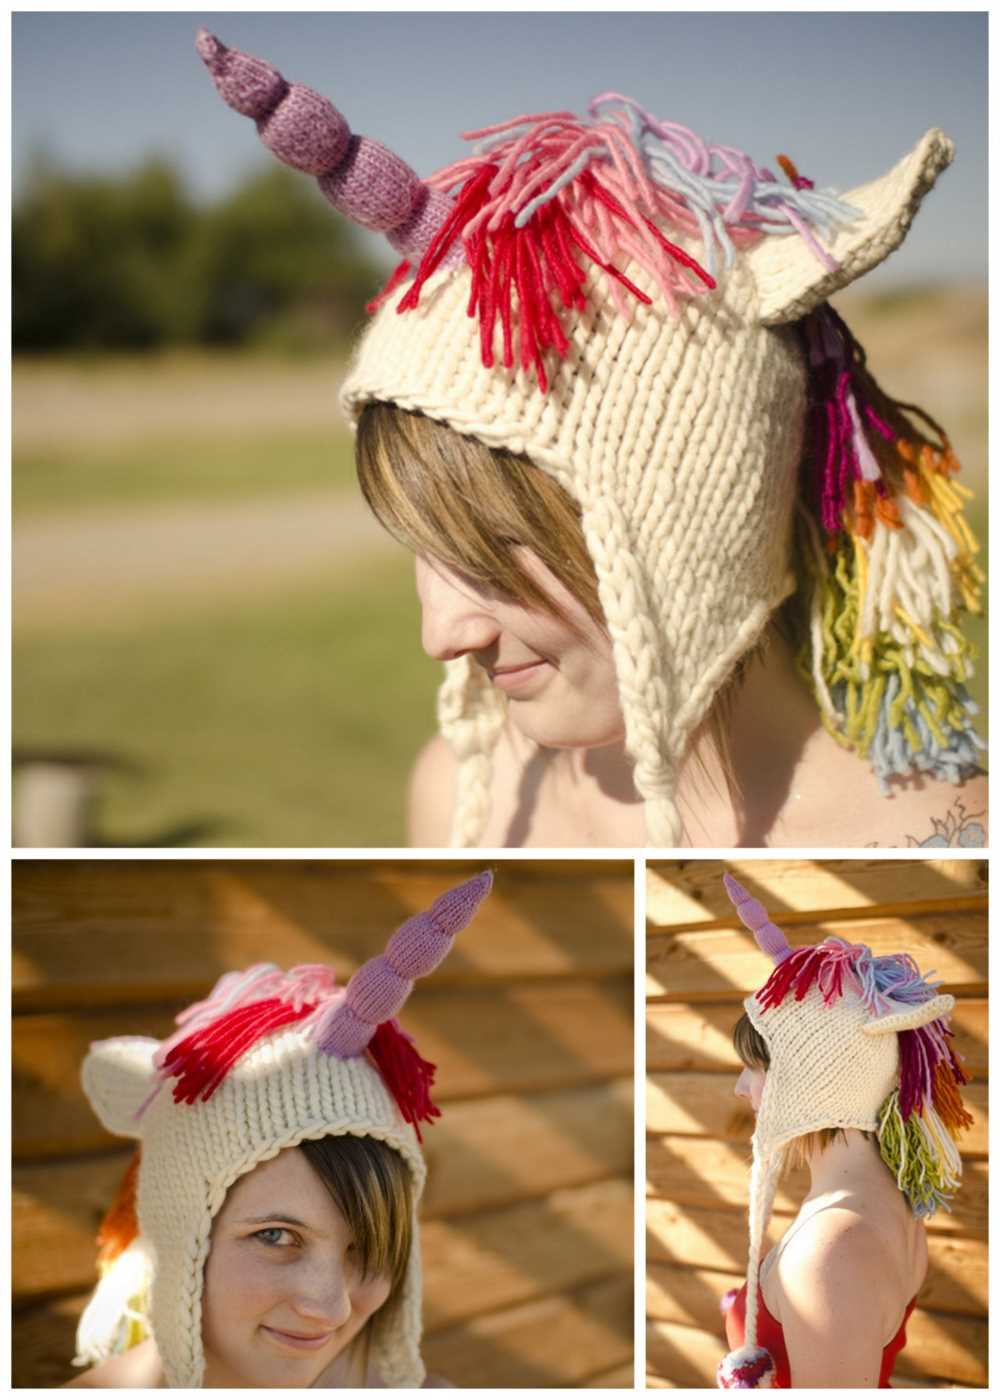
The final touch is the unicorn’s mane. You can create the mane by using multiple strands of different colored yarns and attaching them along the back of the hat body, starting from the horn and extending towards the center of the back. You can use a simple stitch to secure the strands in place, making sure they are evenly spaced.
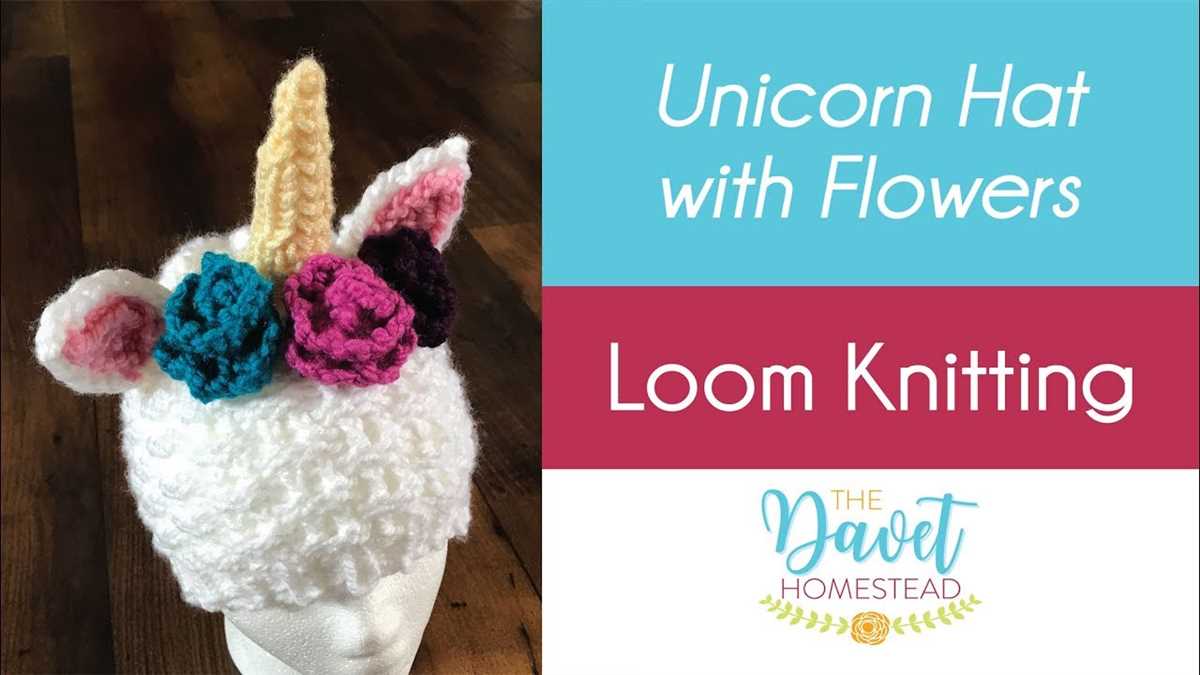
With these steps, you have successfully created the body of your unicorn hat. The pattern can be easily customized by adding additional embellishments such as flowers or a pom-pom. Once complete, your unicorn hat will be ready to bring a touch of magic and whimsy to any outfit!
Shaping the Unicorn Hat: Decreasing Stitches
When it comes to knitting the Unicorn Hat, shaping it to create the desired unicorn horn is an important step. To achieve the tapered shape of the horn, you will need to decrease stitches as you work your way up to the top of the hat.
1. Decreasing at the beginning of the row: To decrease stitches at the beginning of the row, you will need to work the first two stitches together as one. This can be done by inserting your right needle into the first stitch as if to knit, then inserting it into the second stitch as if to purl. Wrap the yarn around the right needle and pull it through both stitches, creating a single stitch. Repeat this decrease at the beginning of every row until the desired number of stitches is reached.
2. Decreasing in the middle of the row: To decrease stitches in the middle of the row, you can use a variety of techniques. One common method is the knit-two-together decrease. Insert your right needle into the next two stitches as if to knit, then wrap the yarn around the right needle and pull it through both stitches, creating a single stitch. Repeat this decrease as necessary to achieve the desired shaping.
Remember to keep track of your decreasing stitches and refer to the pattern instructions for guidance on when and how to decrease. With careful shaping and attention to detail, you can create a beautiful unicorn horn on your knitted hat.
Adding the Unicorn Horn
To complete the unicorn hat knitting pattern, you will now add the unicorn horn. Using the white yarn, cast on 4 stitches onto double-pointed needles. Join in the round, being careful not to twist the stitches. Knit in the round for approximately 4 inches, or until the horn reaches your desired length.
Once you have reached the desired length, it’s time to shape the horn. Begin by decreasing 1 stitch at the beginning and end of each round. Continue decreasing in this manner until you have 2 stitches remaining on your needles. Cut the yarn, leaving a long tail. Thread the tail through the remaining 2 stitches and pull tight to close the top of the horn.
To give the unicorn horn some structure, you can stuff it lightly with polyester fiberfill or a similar material. This will help the horn keep its shape and stand upright on the hat. Once the horn is stuffed, use the long tail from the top to sew the horn securely onto the front center of the hat.
For some extra flair, you can add a twisted cord or a small ribbon bow to the base of the unicorn horn. This will add a decorative touch and help secure the horn in place. Simply thread the cord or ribbon through the base of the horn and tie it in a knot or bow.
And there you have it! Your unicorn hat knitting pattern is complete with a beautiful and magical unicorn horn. Your little one will be thrilled to wear this hat and imagine themselves as a mystical unicorn. Enjoy the knitting process and the joy it brings!
Knitting the Ears of the Unicorn Hat
The ears are an essential part of a unicorn hat, as they give it its iconic and whimsical appearance. Knitting the ears can be a fun and creative process that allows you to add your personal touch to the hat.
Materials:
- Yarn in the color of your choice
- Knitting needles in the appropriate size
- Tapestry needle
Instructions:
- Cast on the desired number of stitches for the ear. This will depend on the size and shape of the ear you want to create.
- Begin knitting in your chosen stitch pattern, following the instructions for the pattern or creating your own. Consider using a ribbed stitch pattern for added texture.
- Continue knitting until the ear reaches your desired length. This will also depend on the size of the hat and your personal preference.
- Bind off the stitches, leaving a long tail for sewing the ear onto the hat.
- Repeat these steps to knit the second ear.
- Once both ears are knitted and bound off, use the tapestry needle to sew them onto the sides of the hat. Make sure to position them evenly and securely.
Tips:
- Experiment with different yarn colors and textures to create unique and magical unicorn ears.
- Consider adding embellishments such as bows or flowers to the base of the ears for extra flair.
- If you’re new to knitting, practice basic stitches and techniques before attempting to knit the ears.
With these instructions and tips, you’ll be able to knit the perfect ears for your unicorn hat. Get creative and have fun with your knitting!
Finishing Touches: Sewing and Attaching the Ears and Horn
Once you have completed knitting your unicorn hat pattern, it’s time to add the finishing touches by sewing and attaching the ears and horn. These details will really bring your unicorn hat to life and make it a magical accessory.
Sewing the Ears: Start by folding each ear in half so that the right sides are facing each other. Use a tapestry needle and some yarn that matches the color of your hat to sew along the curved edge of each ear, leaving the straight edge open for turning. Once you have sewn the ears, carefully turn them right side out and use your fingers to shape them into a nice curved shape.
Attaching the Ears: To attach the ears to the hat, you will want to position them on either side of the hat, about 1 inch above the brim. Use pins to hold the ears in place, making sure they are symmetrical. Then, using your tapestry needle and yarn, sew the ears securely to the hat, making sure to hide the yarn as much as possible.
Creating the Horn: To create the unicorn horn, you will need a small amount of yarn in a contrasting color. Start by making a magic ring, then work 6 single crochets into the ring. Next, continue to work in the round, increasing by 6 stitches in each round until the horn is the desired length. Then, carefully stuff the horn with some polyester fiberfill to give it shape. Finally, close the top of the horn by decreasing the stitches until you are left with a small opening. Secure the opening by weaving the yarn through the remaining stitches and pulling tight.
Attaching the Horn: To attach the horn to the hat, position it in the center of the forehead area, slightly above the brim. Use pins to hold the horn in place, making sure it is secure and centered. Then, using your tapestry needle and yarn, sew the horn securely to the hat, making sure to hide the yarn as much as possible.
Once you have finished sewing and attaching the ears and horn, your unicorn hat will be complete and ready to wear with pride. Whether you’re making it for yourself or as a gift, this fun and whimsical accessory is sure to bring a touch of magic to any winter outfit.
Blocking and Finishing Your Unicorn Hat
Blocking is an important step in finishing your unicorn hat. It helps to shape and enhance the stitch pattern, making your hat look more polished and professional. To block your hat, you will need a blocking mat or towel, rust-proof T-pins, and a spray bottle filled with water.
Step 1: Wet Blocking
Begin by filling the spray bottle with water and lightly misting your hat. Make sure to evenly distribute the water, but avoid soaking the hat. Lay your hat flat on the blocking mat or towel, and gently shape it to the desired size and shape. Use the T-pins to secure the hat in place, pinning along the edges and corners. Allow the hat to dry completely before removing the pins.
Step 2: Finishing Touches
Once your hat is dry, it’s time to add the finishing touches. This may include weaving in any loose ends, sewing on embellishments like ears or a horn, or adding a pom-pom to the top. Use a tapestry needle and matching yarn to neatly weave in any loose ends, making sure to secure them tightly. If you are attaching ears or a horn, follow the pattern instructions for placement and use a small stitch to securely attach them to the hat. Finally, if desired, make a pom-pom using coordinating yarn and attach it to the top of the hat using a tapestry needle.
By blocking and adding the finishing touches, you can take your unicorn hat from basic to extraordinary. These steps may require some additional time and effort, but the end result will be well worth it. Whether you’re making the hat for yourself or as a gift, the extra care and attention to detail will make it truly special.
Final Thoughts and Variations
Creating a unicorn hat with this knitting pattern can be a fun and rewarding project. Whether you’re making it for yourself or as a gift, the end result is sure to bring smiles and warmth.
Don’t be afraid to get creative and make some variations to personalize your unicorn hat. Here are a few ideas:
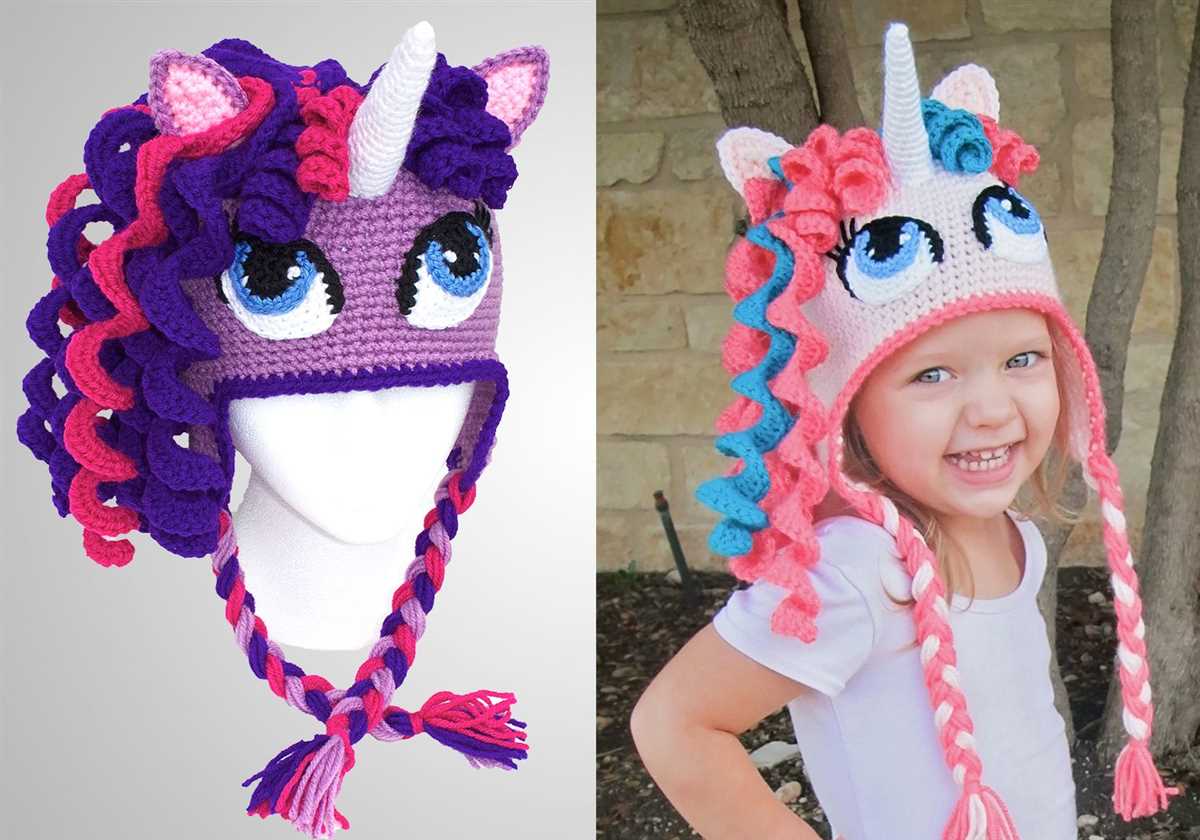
- Change up the colors: Instead of using traditional unicorn colors, why not experiment with different shades and combinations? Get inspired by your favorite colors or try a rainbow-themed unicorn hat.
- Add embellishments: If you want to add some extra sparkle to your unicorn hat, consider sewing on sequins, beads, or even attaching a small fabric flower or bow. This can give your hat a unique touch.
- Try different yarn weights: If you prefer a chunkier or finer hat, don’t be afraid to switch up the yarn weight. Just make sure to adjust your needle size accordingly to achieve the desired gauge.
- Make it earflap style: If you’re looking for a unicorn hat that provides extra warmth and coverage, consider adding earflaps to the design. This can be a great option for colder climates or if you simply prefer the added functionality.
Remember, knitting is all about personal expression and creativity. Feel free to make any modifications or additions that make the unicorn hat truly your own. Enjoy the process, and have fun bringing a little magic into your knitting!