
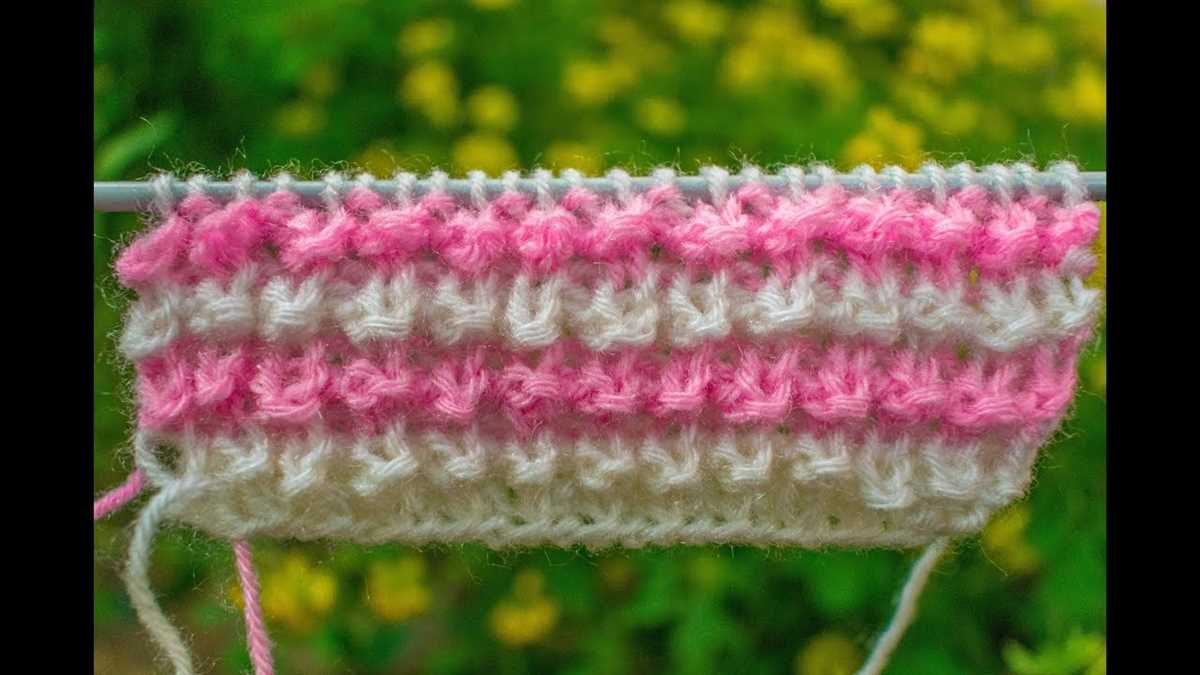
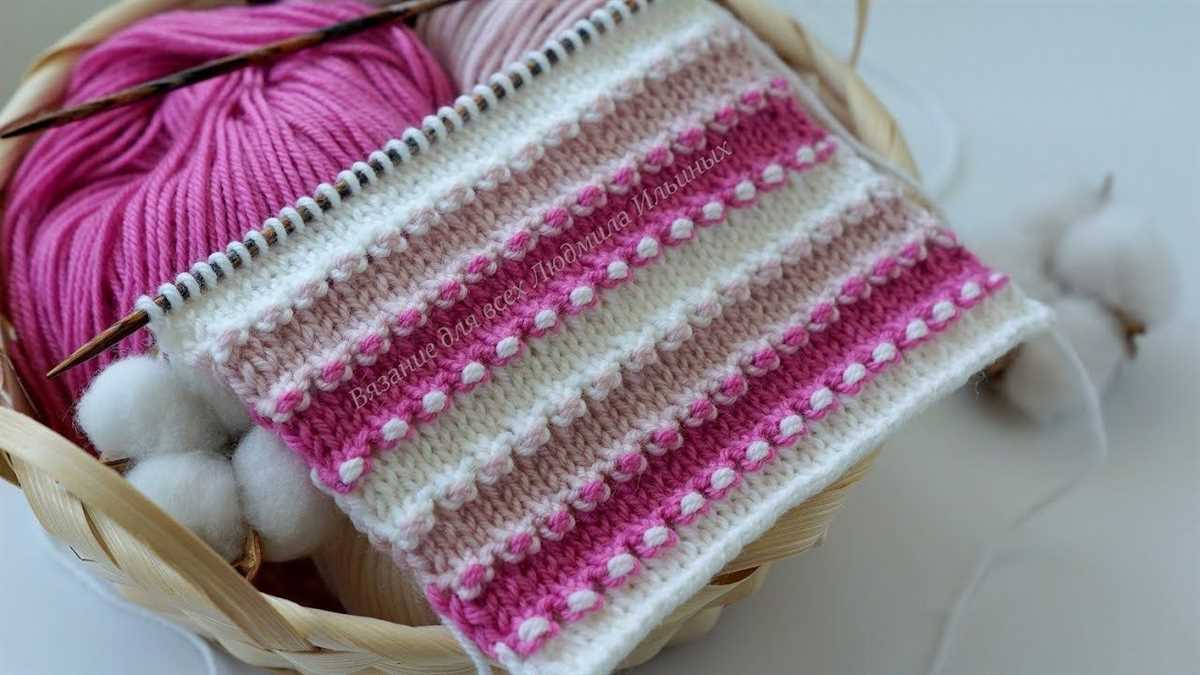
If you’re a fan of knitting and looking for a new pattern to try, our Two Colour Knitting Pattern No 1 might be just what you’re looking for. This pattern is perfect for beginners and experienced knitters alike, as it combines simple stitches with a two-colour technique to create a beautiful, eye-catching design.
With this pattern, you’ll be able to create a variety of items, from scarves and hats to blankets and sweaters. The possibilities are endless! Plus, by using two colours, you can create interesting patterns and designs that will impress your friends and family.
Whether you’re new to knitting or have been doing it for years, this pattern is a great way to experiment with different techniques. You can choose two contrasting colours for a bold look, or opt for two complementary shades for a more subtle effect. Whichever colours you choose, the end result is sure to be stunning!
What is two colour knitting
Two colour knitting, also known as stranded knitting or Fair Isle knitting, is a technique that involves using two different colors of yarn to create a pattern in a knitted garment. This technique is commonly used in traditional Nordic and Scottish knitting patterns, but it can also be found in contemporary designs.
In two colour knitting, both colors of yarn are carried along the back of the work while being knitted. The color not in use is stranded across the back of the work, creating floats. These floats are then trapped every few stitches to prevent long floats from snagging or catching on something. This technique requires concentration and careful tension control to ensure that the floats are not too tight or too loose.
One of the advantages of two colour knitting is that it allows for the creation of intricate and colorful patterns. By combining different colors and using different knitting techniques, such as stranded knitting, intarsia, or mosaic knitting, it is possible to achieve stunning results. Two colour knitting also adds warmth and thickness to the knitted fabric, making it ideal for winter garments like sweaters, hats, and mittens.
Tools and materials needed
In order to successfully complete the Two Colour Knitting Pattern No 1, you will need the following tools and materials:
- Yarn: Two different coloured yarns, preferably in the same weight. It is recommended to use wool or acrylic yarn for this project.
- Knitting Needles: A pair of knitting needles in the appropriate size for your chosen yarn. Make sure to check the gauge of your yarn and use the corresponding needle size.
- Tapestry Needle: A tapestry needle will be needed for weaving in ends and finishing the project.
- Scissors: You will need a pair of scissors for cutting the yarn and trimming any excess.
- Stitch Markers: Stitch markers will be useful for marking specific stitches or sections of your knitting.
- Pattern Chart: The Two Colour Knitting Pattern No 1 comes with a pattern chart, which you will need to follow along. You can print out the chart or keep it handy on your device.
With these tools and materials in hand, you will be well-equipped to tackle the Two Colour Knitting Pattern No 1 and create a beautiful two-colour knitted piece.
Choosing colours
When knitting a two-colour pattern, choosing the right colours can make a huge difference in the final outcome of your project. It is important to consider the colour wheel and the principles of colour theory to create visually appealing and harmonious designs.
Contrast is key when selecting colours for a two-colour knitting pattern. Choosing colours that are opposite each other on the colour wheel, such as blue and orange or red and green, will create a high level of contrast and make the pattern stand out. This is a great option if you want your project to have a bold and eye-catching look.
Tonal variation is another factor to consider when choosing colours. Using two shades of the same colour can create a subtle and sophisticated effect in your knitting. This technique works well for patterns with intricate details, as it allows the design to show more clearly.
Value is also an important aspect to consider. Choosing colours with similar values, or levels of lightness or darkness, will create a more subtle and cohesive look. On the other hand, choosing colours with contrasting values can make the pattern pop and create a dynamic effect.
Experimentation is encouraged when it comes to choosing colours for your two-colour knitting pattern. Don’t be afraid to mix and match different colours, try out different combinations, and see what works best for your design. Sometimes, unexpected colour choices can lead to truly unique and stunning results.
In conclusion, when choosing colours for your two-colour knitting pattern, consider contrast, tonal variation, value, and don’t be afraid to experiment. With careful consideration and a bit of creativity, you can create beautiful and visually appealing designs that truly stand out.
Understanding the pattern
In order to successfully knit the Two Colour Knitting Pattern No 1, it is important to have a clear understanding of the pattern instructions. The pattern uses two different colors, referred to as Color A and Color B, and requires basic knitting stitches such as knit and purl.
The pattern begins with a cast-on row using Color A, followed by several rows of knit stitches using Color B. The knitting pattern is created by alternating rows of Color A and Color B, with specific stitch instructions provided for each row.
Row 1:
With Color A, knit the first stitch, then purl the next stitch. Repeat this pattern across the row.
Row 2:
With Color B, purl the first stitch, then knit the next stitch. Repeat this pattern across the row.
The alternating pattern continues in this manner for the remaining rows, with each row having specific stitch instructions for both colors. It is important to carefully follow the pattern instructions to ensure the correct placement of each color and stitch type.
As you work through the pattern, you may notice that a repeating motif or design begins to emerge. This is the result of the specific combination of stitch patterns used in the Two Colour Knitting Pattern No 1. The pattern has been carefully designed to create a visually appealing and symmetrical pattern when worked in two colors.
Getting started
Rauma yarn is designed specifically for two colour knitting and is perfect for creating intricate patterns. Before you begin, make sure you have all the necessary materials:
- Rauma yarn in two different colours – the contrasting colours will help create a beautiful pattern
- Knitting needles in the correct size for your yarn – check the label on your yarn to determine the recommended needle size
- A stitch marker – this will help you keep track of your progress and ensure your pattern stays consistent
- A tapestry needle – you will need this to weave in any loose ends once you have finished knitting
Once you have your materials ready, take some time to familiarize yourself with the two colour knitting technique. It’s important to understand how to hold and manipulate your yarns for smooth knitting. If you are new to two colour knitting, it may be helpful to practice on a small swatch before starting your project.
Casting on
Begin by casting on the desired number of stitches for your project. Make sure to cast on loosely to ensure your work stays flexible. You can use either the traditional long-tail cast on or a stretchy cast on method.
To create a neat edge, you can also consider adding a few extra stitches at the beginning of each row and then knitting them together with the following stitches on the next row. This will create a smooth edge that is easy to seam or stitch onto other pieces.
Knitting the main body
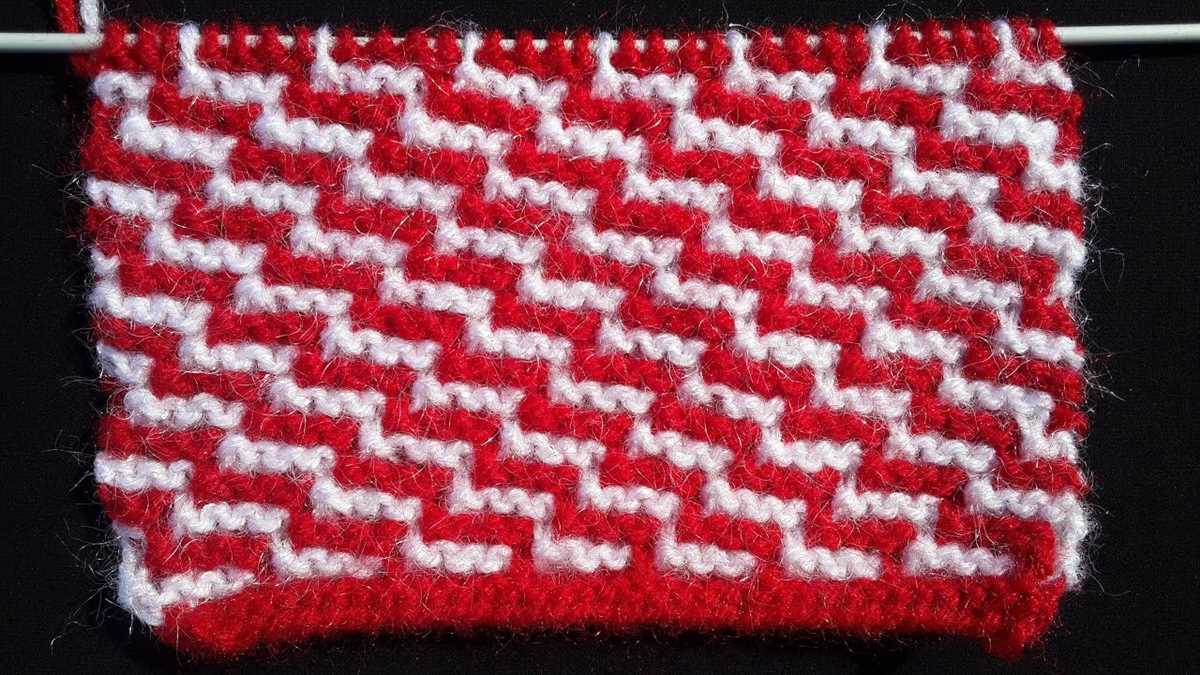
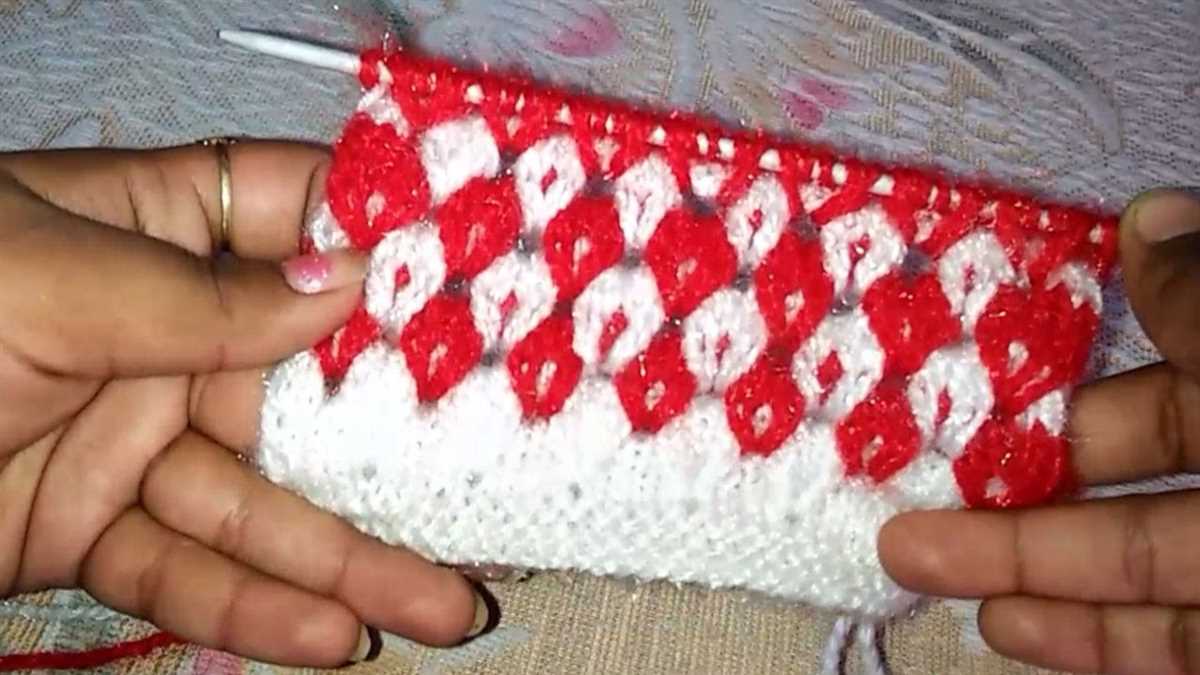
The main body of the Two Colour Knitting Pattern No 1 is worked in a repetition of a simple stitch pattern that creates a beautiful geometric design. To begin, cast on the desired number of stitches using one color of yarn. The stitches should be divisible by the stitch pattern repeat.
Row 1: Knit all stitches using the first color of yarn.
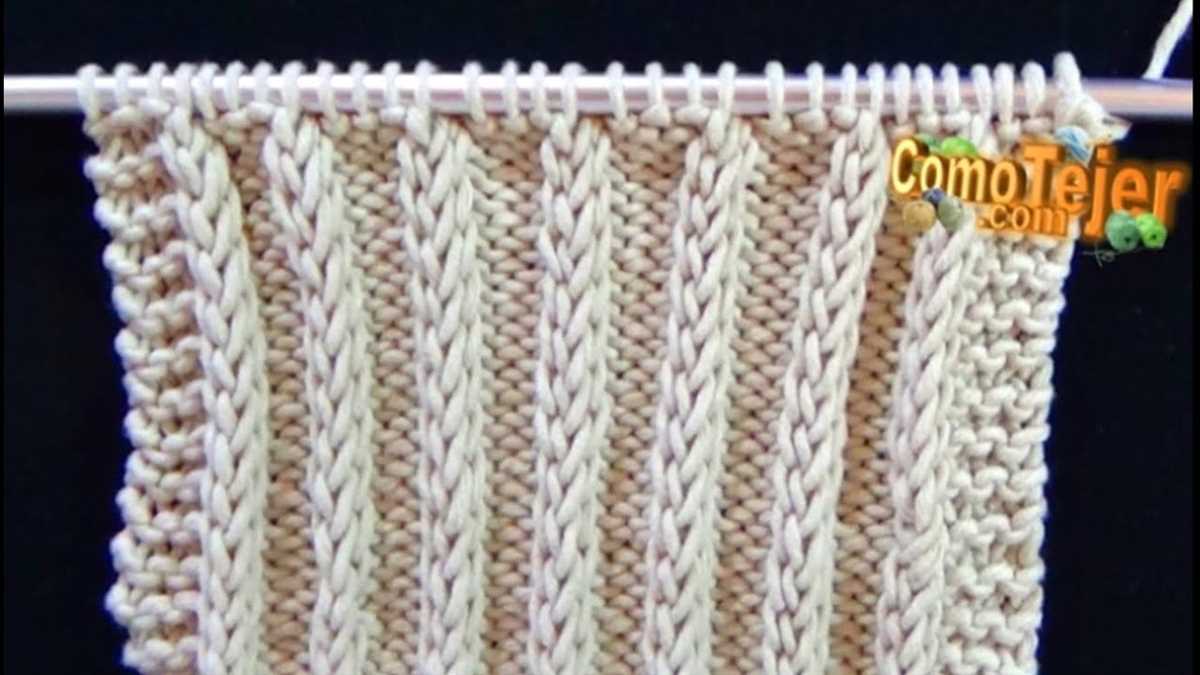
Row 2: Using the second color of yarn, *knit 2 stitches, purl 2 stitches*; repeat from * to * across the row.
Continue working Rows 1 and 2 in the established pattern until the main body reaches the desired length. You can easily customize the length by adding or subtracting rows.
Once the desired length is reached, bind off all stitches using the first color of yarn. Weave in any loose ends to finish the main body of your knitted piece.
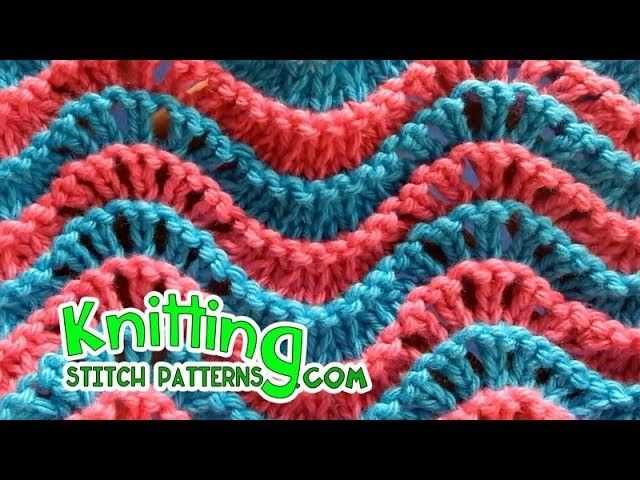
This simple stitch pattern creates a stunning geometric design that is perfect for a wide range of knit projects, from scarves and shawls to blankets and sweaters. Experiment with different color combinations to create unique and eye-catching designs.
Adding the second colour
Step 1: To add the second colour in your knitting pattern, you will need to first decide where and when you want to incorporate it. This could be anywhere in your pattern, depending on the design you are creating. Make sure to plan ahead and mark the stitches or rows where you want to switch colours.
Step 2: Once you have reached the designated point in your pattern where you want to start using the second colour, it’s time to introduce it. Take the new coloured yarn and hold it alongside the working yarn of your first colour. Make sure the two yarns are securely held together.
Step 3: Now, insert your right needle into the next stitch as if you were going to knit it. Instead of using the working yarn of the first colour, bring the second colour yarn over the right needle and knit the stitch using the new colour. This will create a neat and seamless transition between the two colours.
Step 4: Continue knitting the following stitches with the second colour as specified in your pattern. Remember to keep the tension of your yarn steady to maintain an even appearance.
Step 5: If you come across any areas in your pattern where you need to switch back to the first colour, simply drop the second colour yarn while holding the working yarn of the first colour. Knit the stitches with the first colour, and then pick up the second colour again when needed.
Step 6: Repeat steps 2 to 5 as necessary throughout your pattern, switching between the two colours to create the desired design. Make sure to secure any loose ends of yarn when changing colours by weaving them in later to prevent unraveling.
Creating patterns with colour changes
When it comes to knitting, adding colour changes to your patterns can help create stunning and unique designs. Whether you’re knitting a simple scarf or a complex sweater, incorporating different colours can add depth and visual interest to your project.
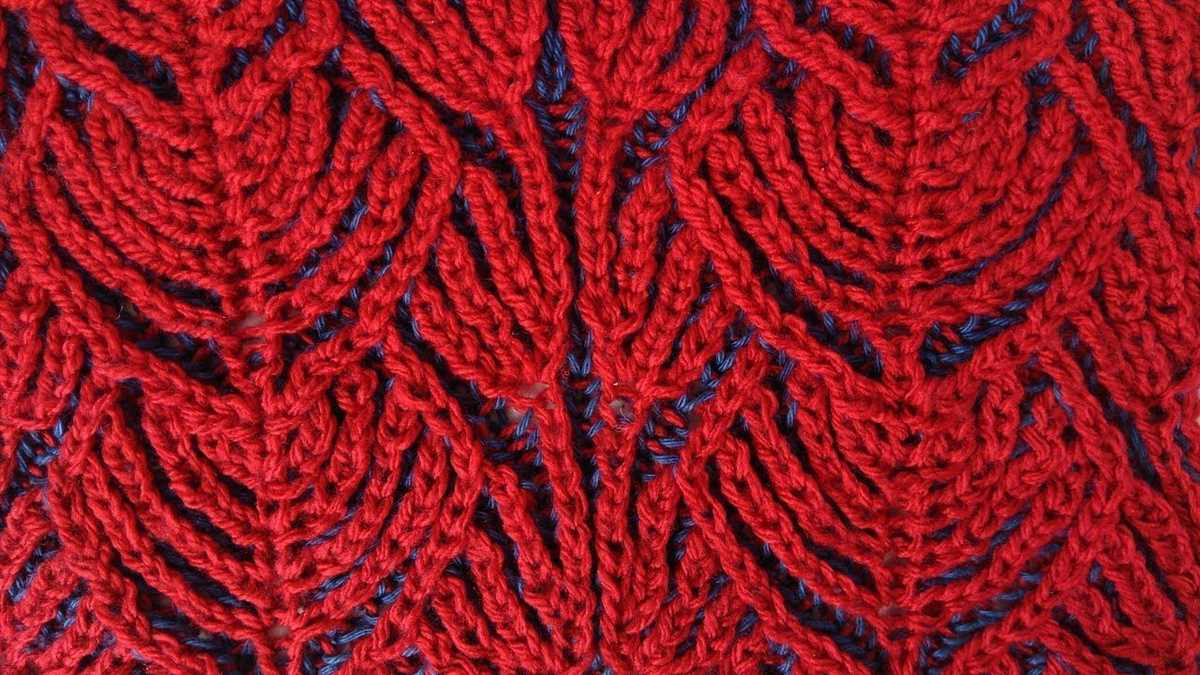
One popular technique for creating patterns with colour changes is stranded knitting, also known as Fair Isle knitting. In this technique, you use two or more colours of yarn in each row, with the unused colours carried along the back of the work. This allows you to create intricate designs and motifs by alternating between the colours.
To get started, you’ll need to choose your colours and decide on the pattern you want to create. You can find inspiration in traditional Fair Isle motifs, nature, or even create your own unique design. Once you have your colours and pattern chosen, you can begin knitting.
When working with colour changes, it’s important to keep in mind a few tips and tricks. First, make sure to keep your tension consistent throughout your project. Uneven tension can result in puckering or loose stitches, so practice keeping an even tension with both yarns. Additionally, remember to catch the floats of the unused colours every few stitches to prevent long floats from showing on the right side of the work.
As you become more comfortable with colour changes, you can experiment with different techniques, such as intarsia or slip stitch patterns. These techniques allow you to create even more complex designs and can be incorporated into your knitting projects to add texture and variation.
In conclusion, creating patterns with colour changes is a great way to elevate your knitting projects. With a little practice and creativity, you can take your knitting skills to the next level and create beautiful and eye-catching designs.
Finishing Touches
Once you have completed knitting the two colour pattern, it’s time to add the finishing touches to your project. These final steps will give your piece a polished and professional look.
- Weaving in Ends: Take the time to carefully weave in any loose ends from changing yarn colors or joining new skeins. This will ensure that your piece doesn’t unravel and will give it a clean finish.
- Blocking: Blocking is the process of gently stretching and reshaping your knitted fabric to achieve the desired shape and dimensions. This step can be especially important for maintaining the integrity of your two colour pattern and creating even tension throughout.
- Adding Edges: If desired, you can add a border or edging to your knitted piece to enhance its appearance. This could be a simple ribbed edge, a picot hem, or any other decorative stitch pattern that complements your design.
- Finishing Stitches: Finally, you may want to add any necessary finishing stitches, such as sewing on buttons, attaching a zipper, or joining seams. These details will give your project its final functionality and complete the overall look.
By taking the time to complete these finishing touches, you can elevate your two colour knitting pattern to a truly professional level. These details may seem small, but they can make a big difference in the final aesthetic and durability of your project. So, don’t rush through these final steps – enjoy the process of adding those final touches and creating a beautiful finished piece.
Tips and Tricks
When knitting with two colours, it can be easy to get confused or make mistakes. Here are some tips and tricks to help you master the technique:
1. Use a colour chart
A colour chart is an essential tool when working with two colours. It shows you which colour to use and when to switch colours. Follow the chart carefully, and you will create a beautiful pattern.
2. Carry the yarn
When switching between colours, make sure to carry the yarn along the back of your work. This will prevent loose strands and ensure a neat finish.
3. Tension is key
Keeping an even tension is crucial when working with two colours. Make sure not to pull the yarn too tightly or leave it too loose. Practice your tension until you achieve an even and consistent result.
4. Catch floats
If there are long strands of yarn between colour changes, catch them every few stitches to prevent them from snagging or getting caught. This technique is called “catching floats” and will help you maintain a smooth and even fabric.
5. Practice makes perfect
Like any knitting technique, knitting with two colours requires practice. Don’t get discouraged if your first attempts are not perfect – keep practicing, and you will improve over time. Remember, it’s all about enjoying the process!
By following these tips and tricks, you’ll be able to create stunning two-colour knitting patterns with ease. Happy knitting!
Common mistakes to avoid
When knitting a two colour knitting pattern, there are several common mistakes that beginners should be aware of in order to achieve a clean and polished final product.
1. Uneven tension: One of the most common mistakes is having uneven tension between the two colours. This can result in a distorted or puckered fabric. To avoid this, make sure to keep an even tension on both yarns throughout the project.
2. Twisted floats: Floats are the strands of yarn that are carried at the back of the work when switching between colours. Twisted floats occur when these strands twist around the working yarn, creating an untidy appearance. To prevent this, take care to keep the floats loose and untwisted as you knit.
3. Wrong side mistakes: It’s easy to get confused when working on the wrong side of the project, especially if the pattern is complex. Pay close attention to the instructions and charts to ensure that you are working the correct stitches on the wrong side rows.
4. Poor color dominance: Color dominance refers to the visual impact of one color over the other in the knitted fabric. In two colour knitting, it is important to establish which color will dominate in each pattern repeat. Failing to do so can result in an unbalanced or muddled design. Be mindful of color dominance and follow the pattern instructions accordingly.
5. Leaving long floats: Long floats, where the yarn is carried across multiple stitches, can easily get caught on fingers or jewelry and cause the fabric to snag or pull. Trim floats that exceed a certain length, usually around 4-5 stitches, to prevent this from happening.
By avoiding these common mistakes and practicing good knitting techniques, you can ensure that your two colour knitting patterns turn out beautifully and that you have a satisfying knitting experience. Happy knitting!
Further inspiration
If you enjoyed knitting the Two Colour Knitting Pattern No 1, there are many more patterns and designs you can explore. Here are some further sources of inspiration:
- Pattern books: Look for pattern books specifically dedicated to two colour knitting. They often contain a wide range of patterns, from simple designs to more complex motifs.
- Online knitting communities: Join online knitting communities, where you can share your projects, get advice, and find inspiration from other knitters. Websites like Ravelry and Knitting Paradise have countless patterns and forums dedicated to two colour knitting.
- Traditional knitting styles: Learn about traditional knitting styles from different regions and cultures. Fair Isle knitting from the Shetland Islands and Norwegian Selbu knitting are just a few examples. These styles often incorporate intricate two colour patterns.
- Experiment with colors: Play around with different color combinations to create unique designs. You can stick to contrasting colors for a bold look, or try more subtle shades for a softer effect.
With endless possibilities and resources available, two colour knitting offers a world of creativity and exploration. So grab your needles and yarn, and let your imagination run wild!