
If you’re looking for a cozy and practical accessory to keep your hands warm during the cold winter months, look no further than trigger finger mittens. These mittens are perfect for outdoor activities like hunting or shooting, as they allow your fingers to move freely while keeping your hands protected from the elements.
With our free knitting pattern for trigger finger mittens, you can create your own pair of these versatile and stylish mittens. The pattern includes step-by-step instructions and helpful tips, making it suitable for knitters of all skill levels.
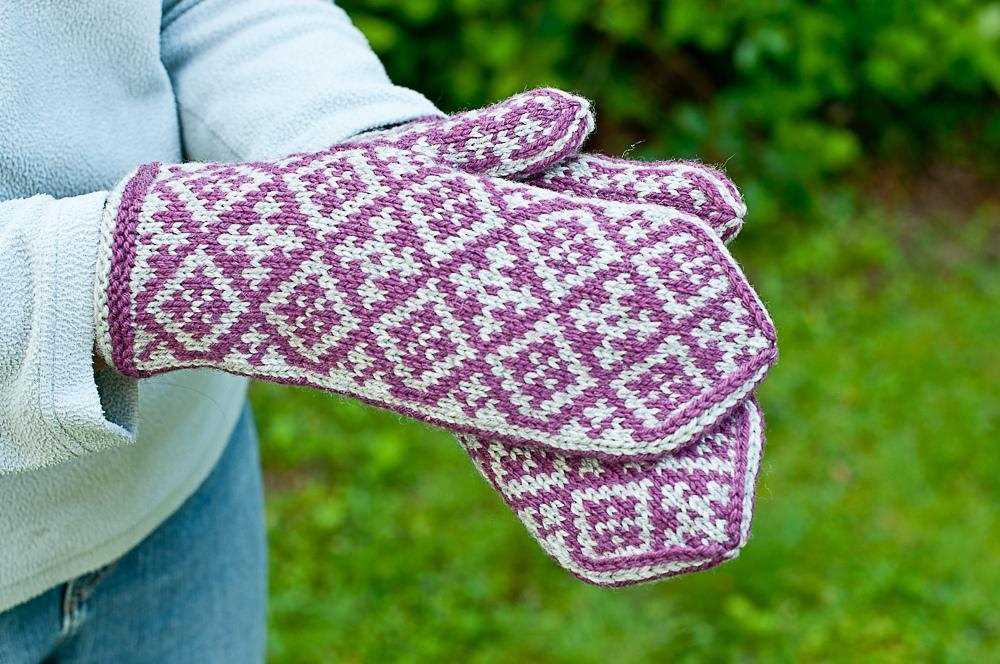
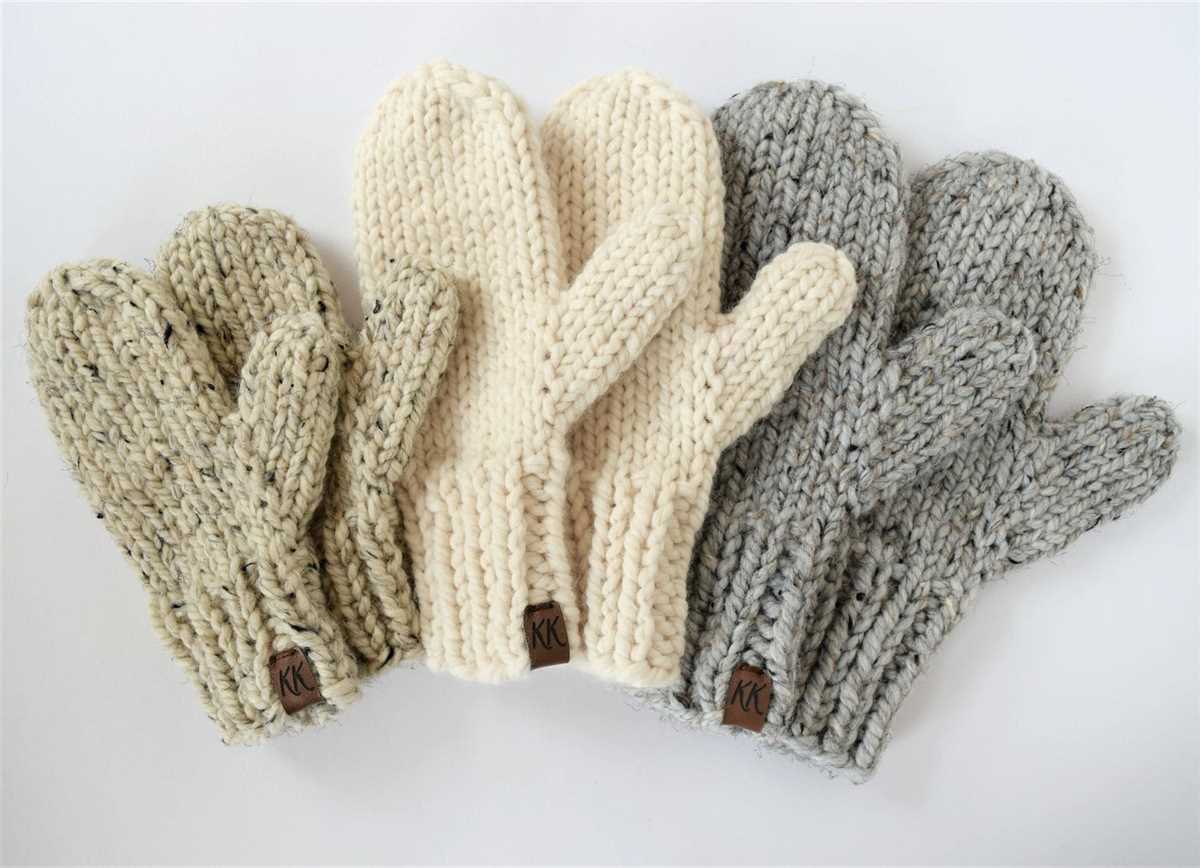
Knitting trigger finger mittens is a great way to use up leftover yarn from other projects, and you can easily customize the pattern to suit your own style. Whether you prefer a classic design or a more modern and colorful look, you can easily adapt the pattern to create the perfect pair of mittens for yourself or as a thoughtful gift for a loved one.
Benefits of Using Trigger Finger Mittens
Trigger finger mittens are a practical and functional solution for those experiencing discomfort or pain in their fingers. These mittens are designed with a unique feature that helps alleviate the symptoms of trigger finger, providing relief and support.
One of the key benefits of trigger finger mittens is their ability to reduce friction and pressure on the affected finger. The mitten design allows for the fingers to be enclosed together, preventing any rubbing or irritation that may occur when using traditional gloves or mittens. This can help to minimize pain and discomfort, allowing individuals to continue with their daily activities without hindrance.
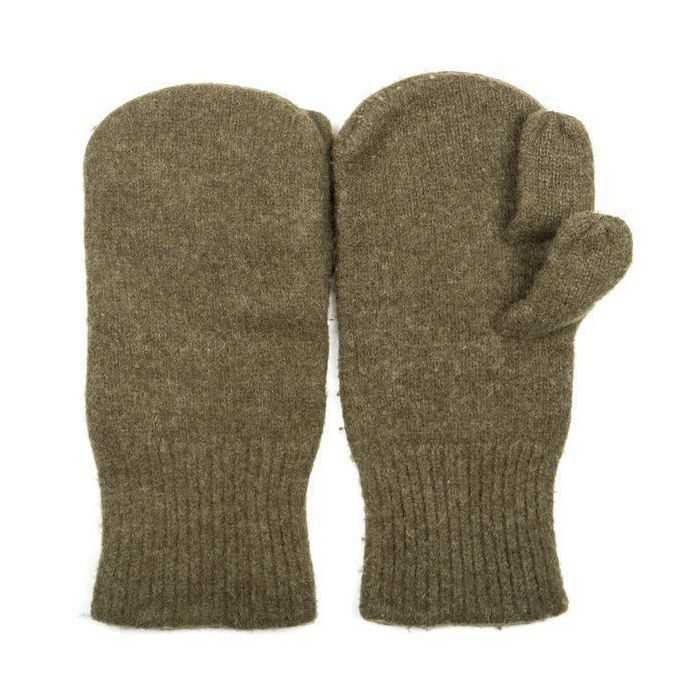
Trigger finger mittens also provide a level of insulation and warmth, making them suitable for use in cold weather conditions. The mittens are often made from cozy and soft materials, such as wool or fleece, which offer both comfort and protection from the elements.
Furthermore, trigger finger mittens are typically adjustable, allowing for a customizable fit. This is particularly beneficial for individuals with different hand sizes or those who require additional support for their fingers. The adjustable straps or closures help to secure the mittens in place, ensuring a snug and comfortable fit.
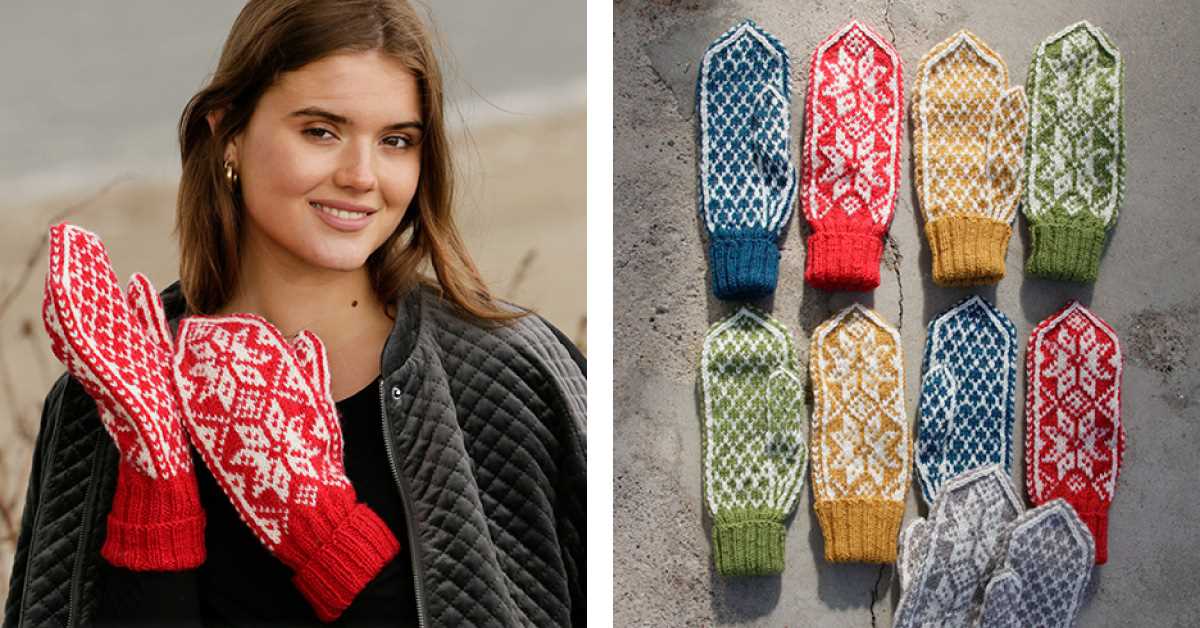
In addition to these functional benefits, trigger finger mittens can also be stylish and fashionable. They come in various colors and designs, allowing individuals to express their personal style while still benefiting from the practicality of the mitten design.
Overall, trigger finger mittens offer a range of benefits, from providing relief and support to reducing friction and pressure on the affected finger. Whether for therapeutic purposes or simply for added warmth, these mittens are a practical accessory for those experiencing trigger finger symptoms.
Protection from the Cold
When facing cold weather conditions, it is crucial to protect your body, especially your extremities, from the harsh elements. One of the most vulnerable areas are your hands, as they are constantly exposed and can easily become cold and numb. To combat this issue, trigger finger mittens can serve as a fantastic solution.
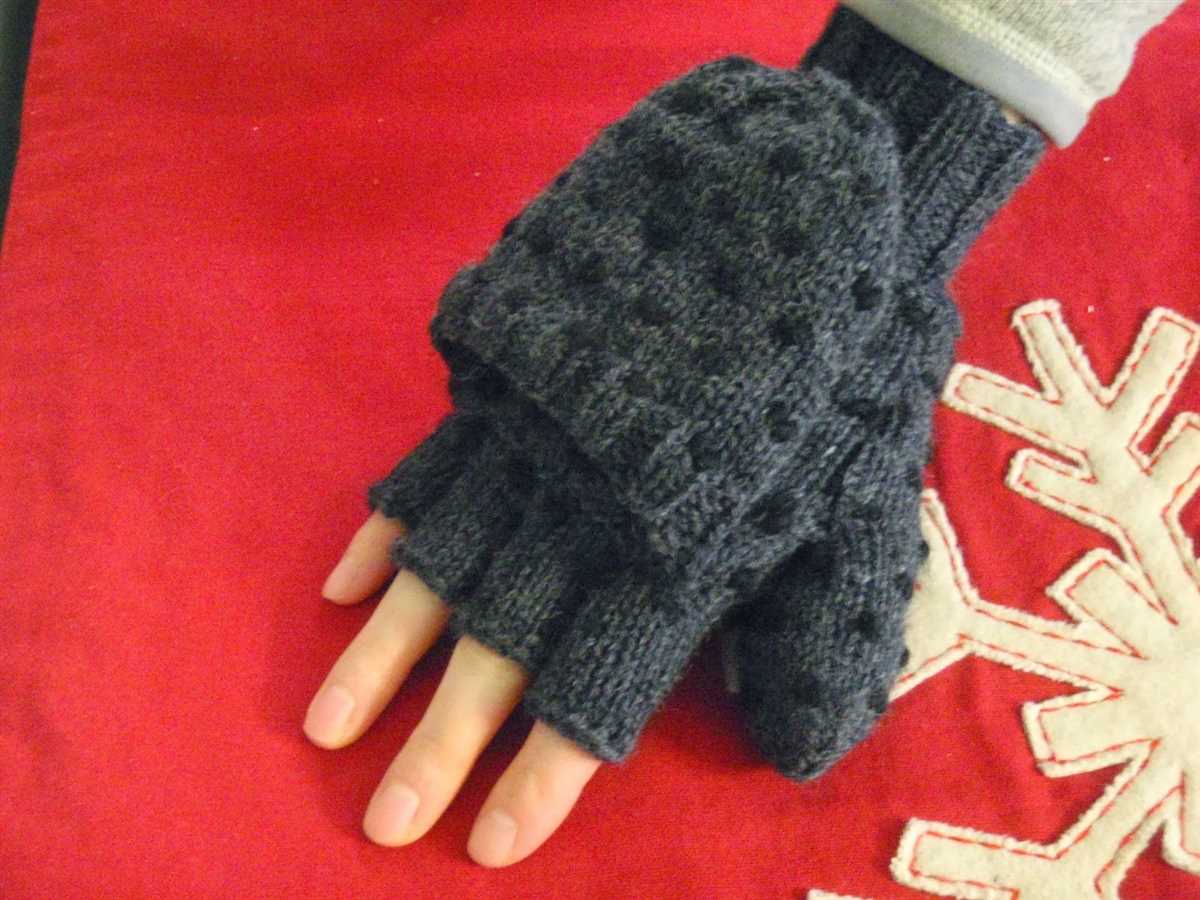
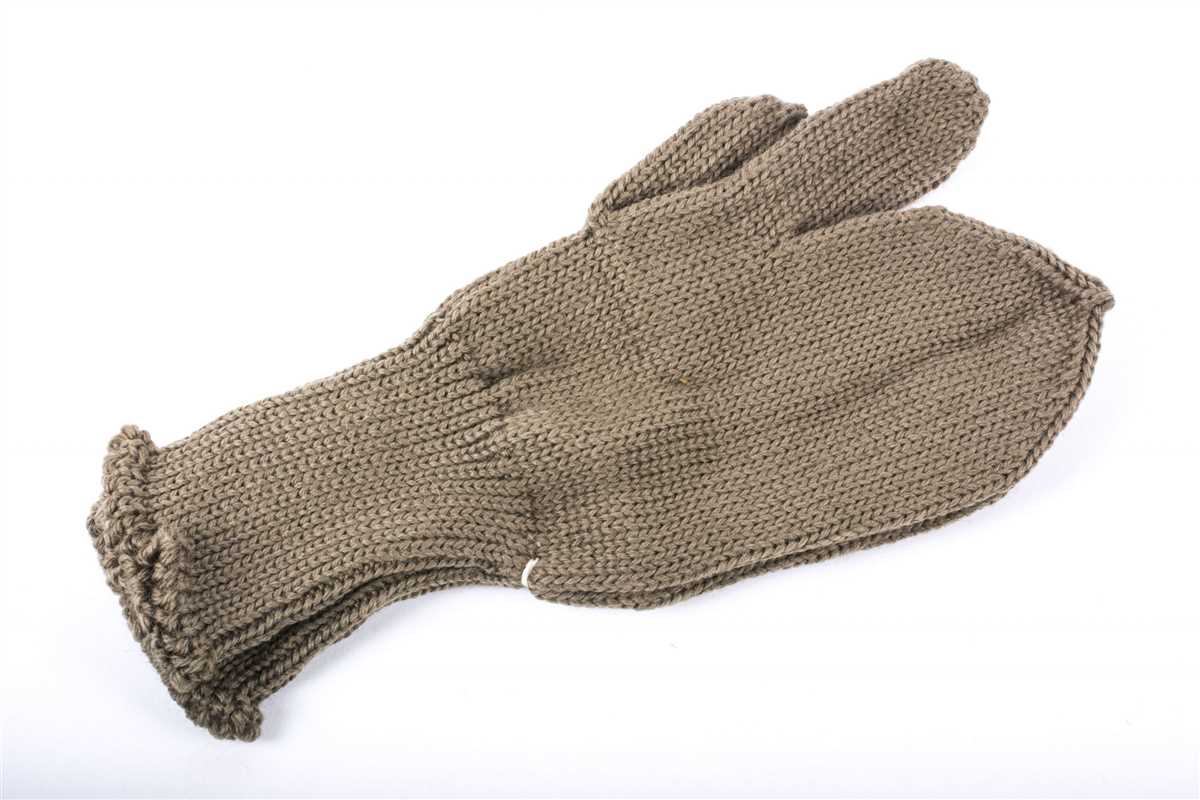
Trigger finger mittens are specifically designed to keep your hands warm in cold temperatures while providing functionality. The unique design features a separate compartment for your trigger finger, allowing you to keep it free while keeping the rest of your hand covered and protected. This design allows you to maintain dexterity and easily operate tools, firearms, or any other equipment requiring precise finger movement.
Knitting your own trigger finger mittens can be a rewarding and practical project. By following a knitting pattern, you can customize the mittens to fit your hand size and style preferences. Additionally, knitting your own mittens allows you to choose the type of yarn and insulation materials used, ensuring maximum warmth and comfort.
Whether you choose to knit your own trigger finger mittens or purchase a pair, this specialized accessory provides the necessary protection from the cold while allowing you to maintain functionality. Don’t let the cold weather hinder your activities; invest in a pair of trigger finger mittens and keep your hands warm and functional all winter long.
Ease of Use with Electronics
When it comes to using electronics, ease of use is an important factor to consider. Whether you’re operating a smartphone, tablet, or any other electronic device, you want the experience to be as smooth and user-friendly as possible.
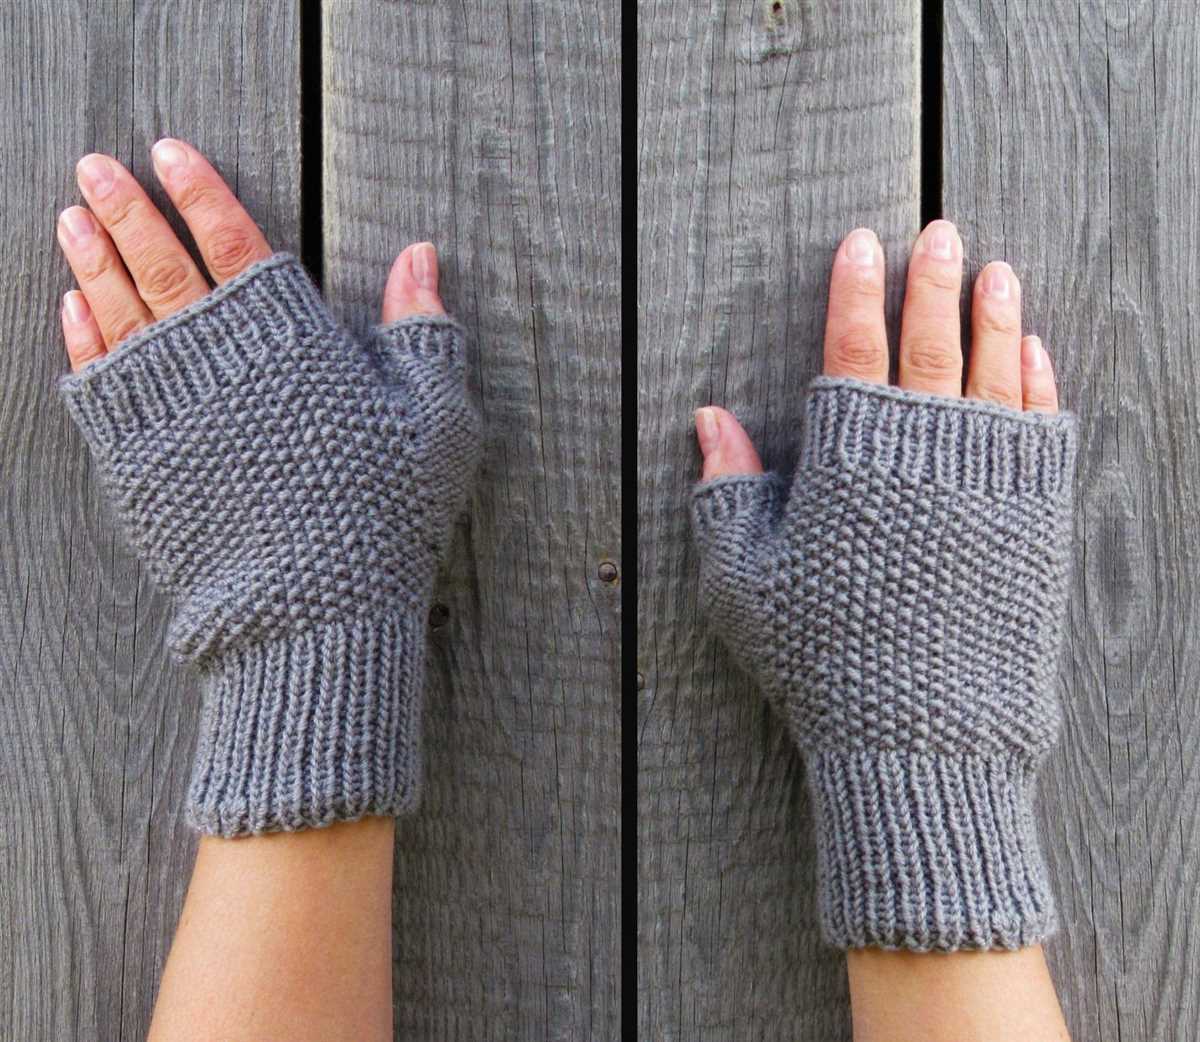
Trigger finger mittens can provide an added layer of convenience when using electronics in cold weather. These mittens are designed with a special opening that allows your index finger to be exposed, while the rest of your hand stays protected and warm. This means you can easily use touch screens or buttons on your device without having to take off your mittens.
Another aspect of ease of use with electronics is having clear instructions and intuitive interfaces. Manufacturers are making efforts to design devices with simple and user-friendly interfaces, making it easier for people of all ages and technical abilities to navigate their devices. Clear and concise instructions are also important, ensuring that users can easily understand how to set up and use their electronics without frustration.
Free knitting patterns for trigger finger mittens can be found online, allowing you to create your own pair of these convenient mittens. Knitting your own mittens allows you to customize the fit and color to your liking, and it can be a fun and satisfying project to take on.
Summary:
- Trigger finger mittens provide convenience when using electronics in cold weather.
- Clear instructions and intuitive interfaces make electronic devices more user-friendly.
- Knitting your own trigger finger mittens allows for customization and can be a fun project.
Versatility
When it comes to outdoor activities during cold weather, having the right gear is essential. One item that can provide both warmth and dexterity is a pair of trigger finger mittens. These mittens are designed with a separate opening for the index finger, allowing for more precision and control while still keeping the other fingers warm and protected. Whether you’re skiing, hunting, or simply taking a walk in the snow, trigger finger mittens are a versatile choice.
One of the great things about trigger finger mittens is their versatility. They can be worn in a variety of ways depending on the activity and the temperature. On mild days, you can wear the mittens with the trigger finger opening closed, providing full coverage and warmth for all your fingers. When you need to use your index finger for tasks like adjusting goggles or using a touchscreen device, simply open the trigger finger flap and have instant access. This flexibility makes trigger finger mittens a great choice for outdoor enthusiasts who need both warmth and dexterity.
Whether you’re knitting your own trigger finger mittens or looking for a pattern online, there are many options to choose from. Some patterns feature a fold-over design, where the trigger finger flap can be tacked down when it’s not in use. This provides an extra layer of protection and warmth when needed. Other patterns are designed with a button or snap closure, allowing for easy opening and closing of the trigger finger flap. No matter the design, trigger finger mittens are a versatile accessory that can enhance your winter outdoor experience.
Knitting Trigger Finger Mittens
Knitting trigger finger mittens is a fun and practical project for those who enjoy outdoor activities in cold weather. These mittens, also known as shooting mittens or flip-top mittens, are designed with a separate finger compartment for the trigger finger, allowing for easy access while providing warmth and protection for the other fingers.
To get started, you will need a set of double-pointed knitting needles and a suitable yarn. The pattern for trigger finger mittens typically involves knitting in the round, starting from the cuff and working your way up to the separate finger compartment. The mittens can be customized with various stitch patterns and colors to suit your personal style.
Materials:
- Double-pointed knitting needles
- Yarn in your preferred weight and color
- Stitch markers
- Tapestry needle
Pattern:
- Cast on the desired number of stitches (usually around 48-56 stitches) and join in the round, being careful not to twist.
- Work in ribbing stitch (knit 1, purl 1) for a few inches to create the cuff.
- Switch to stockinette stitch and continue knitting in the round until the mitten reaches the base of the fingers.
- Place stitch markers to indicate the position of the trigger finger compartment.
- With the designated stitches for the trigger finger, set up a separate working yarn and continue knitting the rest of the mitten.
- Knit the trigger finger compartment separately, using a smaller set of double-pointed needles if necessary. This section should be long enough to cover the trigger finger comfortably.
- Join the trigger finger compartment back to the main mitten and continue knitting in the round until the desired length is reached.
- Finish off by binding off and weaving in the loose ends with a tapestry needle.
Once you have completed your trigger finger mittens, you will have a practical and stylish accessory for outdoor activities such as hunting, photography, or simply braving the cold weather. They make great gifts and can be customized to match different outfits or preferences. So grab your knitting needles and get started on creating your very own trigger finger mittens!
Supplies Needed
When starting your knitting project to make trigger finger mittens, there are a few supplies that you will need to have on hand. These supplies will ensure that you have everything you need to complete the project successfully. Here is a list of the supplies needed:
- Knitting needles: You will need a set of double-pointed knitting needles in the appropriate size for your chosen yarn weight. The size of the needles will depend on the pattern you are following.
- Yarn: Select a yarn that is suitable for mittens knitting, as it needs to be both warm and durable. Choose the yarn in a color and weight that you prefer. The amount of yarn needed will depend on the size of the mittens and the pattern you are using.
- Stitch markers: These small, round markers are used to help you keep track of stitches and pattern repeats. It is helpful to have a variety of sizes and colors, so you can easily distinguish different markers throughout the project.
- Tapestry needle: This needle is used for weaving in loose ends and sewing seams. Choose a needle with a large eye that will easily thread the yarn.
- Scissors: Make sure to have a pair of sharp scissors on hand for cutting yarn and trimming loose ends.
- Measuring tape: A measuring tape is useful for checking your gauge and taking measurements of your mitten to ensure the correct fit.
Once you have gathered all of these supplies, you will be ready to start knitting your trigger finger mittens. Make sure to read through the pattern thoroughly before getting started, and familiarize yourself with any special stitches or techniques that may be required. Happy knitting!
Yarn
Yarn is a crucial component in knitting trigger finger mittens. It is the material that turns a knitting project from a simple idea into a tangible piece of clothing. Yarn comes in a variety of colors, thicknesses, and materials, allowing knitters to choose the perfect yarn for their project.
When knitting trigger finger mittens, it is important to select a yarn that is warm, durable, and soft. Wool is a popular choice for mittens, as it provides excellent insulation and is naturally moisture-wicking. Merino wool, in particular, is highly prized for its exceptional softness and warmth.
Another important consideration when choosing yarn for trigger finger mittens is the weight. The weight of the yarn will determine the thickness of the mittens and how warm they will be. Bulky weight yarn is often preferred for mittens, as it creates a thick fabric that traps heat effectively. However, lighter weight yarns can also be used, depending on the desired thickness and warmth of the mittens.
In addition to wool, other materials such as acrylic, cotton, and alpaca can also be used for knitting mittens. Acrylic yarn is often chosen for its affordability and wide range of colors, while cotton yarn is popular for its breathability and lightweight feel. Alpaca yarn is known for its luxurious softness, making it a favorite among knitters who want to create mittens with a touch of luxury.
Choosing the right yarn for trigger finger mittens is essential for creating a comfortable and functional pair of mittens. With a wide variety of options available, knitters can find the perfect yarn that meets their personal preferences and the requirements of the project.
Knitting Needles
Knitting needles are essential tools used in the art of knitting. They come in a variety of sizes, materials, and lengths, allowing knitters to create different types of projects with varying stitch patterns.
When choosing knitting needles, it is important to consider the type of yarn and the desired gauge of the project. Thicker yarns generally require larger needles, while thinner yarns work best with smaller needles. The material of the needles can also affect the knitting experience. Metal needles are durable and smooth, while wooden needles provide a warm and natural feel. Some knitters also prefer the flexibility of bamboo needles, which are lightweight and comfortable to use.
Types of Knitting Needles
- Straight Needles: These are the most common type of knitting needles and are used for flat knitting. They have a pointed end and a stopper at the other end, allowing stitches to be slipped onto the needle and worked row by row.
- Circular Needles: Circular needles consist of two needle tips connected by a flexible cable. They are used for both flat and circular knitting projects. They are great for knitting in the round, such as hats or socks, and can also be used for flat projects like scarves or blankets.
- Double-pointed Needles: Double-pointed needles (DPNs) come in sets of four or five and have points at both ends. They are used for knitting small items in the round, such as gloves, mittens, or socks. DPNs allow for seamless knitting without the need for circular needles.
Overall, knitting needles are an essential tool for knitters. Choosing the right needles for your project can affect the final result and the knitting process itself. Whether you prefer straight needles, circular needles, or double-pointed needles, having a variety of options in your knitting toolbox can help you tackle any project with confidence and creativity.
Step-By-Step Guide
Knitting trigger finger mittens can be a fun and rewarding project for any knitting enthusiast. Whether you’re a beginner or an experienced knitter, this step-by-step guide will help you create a pair of cozy mittens with a trigger finger opening.
Materials Needed: Before you begin, gather all the necessary materials. You will need yarn in your preferred color, knitting needles in the appropriate size, a stitch marker, scissors, and a yarn needle.
1. Cast On:
Start by casting on the required number of stitches onto your knitting needles. The specific number of stitches will depend on the size of the mitten and the thickness of your yarn. Use a stitch marker to mark the beginning of your round.
2. Ribbing:
Work a ribbing pattern for the cuff of the mitten. This can be done using knit and purl stitches in a 1×1 or 2×2 ribbing pattern. Continue knitting in the ribbing pattern for the desired length of the cuff.
3. Main Body:
Once the cuff is complete, switch to knitting in the round with stockinette stitch for the main body of the mitten. Continue knitting until the mitten reaches the base of your fingers, leaving an opening for the trigger finger.
4. Thumb Gusset:
For the thumb, create a gusset by increasing stitches on each side of a designated stitch marker. This will create a widening triangle shape for the thumb. Continue increasing until the desired number of stitches for the thumb is reached.
5. Thumb Opening:
Once the thumb gusset is complete, place the thumb stitches onto a stitch holder or scrap yarn to be worked on later. This will create an opening where the thumb will be inserted.
6. Finger Opening:

To create the trigger finger opening, separate a few stitches (typically 3-5 stitches) in the desired location of the mitten. Place these stitches onto a stitch holder or scrap yarn to be worked on later.
7. Finish:
Continue knitting the main body of the mitten until it reaches the desired length. Once complete, bind off all stitches and weave in any loose ends using a yarn needle. Sew the thumb and finger openings closed, leaving enough room for comfortable movement. Finally, try on your new trigger finger mittens and enjoy!
Cast On
When starting your knitting project, the first step is to cast on. This is the process of placing the first stitches onto your knitting needle. There are several methods to cast on, but the most common one is the long tail cast on.
Long tail cast on: To start, you will need to estimate the amount of yarn you will need for your cast on stitches. It is recommended to use the long tail method as it creates a stretchy and even edge. Take the end of your yarn and make a slipknot, leaving a tail that is about three times the width of the finished project. Place the slipknot onto the knitting needle and hold it in your right hand.
Next, with your left hand, insert the needle into the slipknot from front to back, with the working yarn going over the top of the needle. Hold the working yarn in your right hand and use it to wrap around the thumb and index finger of your left hand. Cross the yarn over the top of the needle and bring it down between the needle and your thumb.
Continue this process, bringing the yarn between the needle and your thumb, and then crossing it over the top of the needle. With your right hand, use the needle to catch the loop that is formed and bring it through the one already on the needle. Repeat this process until you have the desired number of stitches on your needle.
Once you have successfully cast on all your stitches, you’re ready to begin your knitting project. Make sure the stitches are evenly spaced on the needle and start following the knitting pattern. Happy knitting!
Knit the Cuff
When knitting trigger finger mittens, the cuff is an important part of the design. The cuff is the portion that goes around the wrist and helps to keep the mittens in place. To begin knitting the cuff, you will cast on the required number of stitches using the specified needle size and yarn type. The cast-on method can vary depending on your personal preference, but a commonly used method is the long-tail cast-on.
Once you have cast on the desired number of stitches, you will then begin the cuff pattern. This pattern is often a simple ribbing pattern, such as a knit 1, purl 1 rib or a knit 2, purl 2 rib. The ribbing creates a stretchy and snug cuff that comfortably fits around the wrist. The cuff pattern is typically worked for a specified number of rows, depending on the desired length of the cuff.
As you work on the cuff, it is important to maintain an even tension to ensure that the cuff is not too tight or too loose. This can be accomplished by knitting with consistent tension and using the recommended needle size for the yarn. Adjustments can be made if needed, such as using a smaller needle size if the cuff is too loose or a larger needle size if the cuff is too tight.
After completing the cuff, you will then continue on to knit the hand portion of the mittens. The hand portion is where the thumb hole and trigger finger opening will be located. The cuff sets the foundation for the rest of the mitten and provides a comfortable and secure fit. By following the pattern instructions and using the recommended materials, you can knit a cuff that is both functional and stylish for your trigger finger mittens.
Create the Trigger Finger
When it comes to cold weather activities, having the right gear is essential to stay warm and comfortable. One essential item for cold weather enthusiasts is a pair of trigger finger mittens. These mittens are designed with a separate compartment for the index finger, allowing for maximum dexterity while keeping the rest of the hand warm and protected.
To create your own pair of trigger finger mittens, you’ll need a knitting pattern that specifically includes instructions for this unique design. Luckily, there are many free knitting patterns available online that provide step-by-step instructions and diagrams to help you along the way.
Choosing the Right Yarn and Needles
Once you have your knitting pattern, it’s time to gather your materials. It’s important to choose a yarn that is warm and durable, such as wool or a wool blend, to ensure that your mittens will keep you cozy in even the coldest of temperatures. Additionally, you’ll want to select knitting needles that are the appropriate size for your chosen yarn, as indicated in the pattern.
Remember, knitting can be a relaxing and enjoyable activity, so take your time and enjoy the process. Before you know it, you’ll have a stylish and functional pair of trigger finger mittens that are ready to accompany you on all your cold weather adventures!
Shape the Thumb Opening
Now that you have completed the ribbing and the main part of the mitten, it’s time to shape the thumb opening. This is where you will create a gap for the thumb to comfortably fit through. Follow these steps to shape the thumb opening:
- Divide the stitches
- Transfer stitches to waste yarn
- Decrease stitches
- Resume knitting in the round
Count the total number of stitches on your needles and divide it in half. Take note of this number as it will be used to determine the placement of the thumb opening.
Starting at the beginning of the round, transfer the first half of the stitches onto a piece of waste yarn. This will hold these stitches temporarily while you shape the thumb opening.
Continue knitting in the round with the remaining stitches. Depending on the pattern, you may need to decrease a certain number of stitches to create the desired thumb opening size. Refer to your pattern for specific instructions on how to decrease.
Once you have decreased the necessary stitches, continue knitting in the round until the mitten reaches the desired length.
Remember to adjust these instructions based on your specific mitten pattern. The thumb opening should be large enough to comfortably fit your thumb through, but not too loose that it leaves a gap. With these steps, you’ll be able to shape the thumb opening and complete your trigger finger mittens.