
Every winter, as the temperatures drop and snow begins to fall, people scramble to find warm and cozy accessories to protect themselves from the cold. One popular choice is a toque, also known as a beanie or a knit cap. These hats not only keep your head warm, but they also add a touch of style to any outfit. If you enjoy knitting and want to try your hand at making your own toque, look no further! In this article, we will provide you with a toque knitting pattern that is absolutely free.
Knitting your own toque can be a fulfilling and rewarding project. Not only do you get to choose the colors and materials, but you also have the satisfaction of wearing something that you made with your own hands. Plus, with this free knitting pattern, you can make as many toques as you want without breaking the bank. Whether you are an experienced knitter or a beginner, this pattern is designed to be easy to follow and adaptable to your skill level.
When it comes to choosing the right pattern, there are countless options available online. However, finding a free and reliable pattern can be a challenge. That’s why we have compiled this toque knitting pattern that is not only free but has also been tested and approved by other knitters. With clear instructions and step-by-step guidance, this pattern will help you create a beautiful and cozy toque that you will love to wear throughout the winter season.
Toque Knitting Pattern Free: A Beginner’s Guide
Are you a beginner knitter looking for a free toque knitting pattern? Look no further! Knitting a toque is a great way to practice your skills and create a cozy and stylish accessory for the colder months. Whether you’re knitting for yourself or as a gift for a loved one, this guide will help you get started.
First, you’ll need to gather your materials. You’ll need a set of knitting needles in the appropriate size for your chosen yarn, as well as a skein of yarn in the color and weight of your choice. You may also want to have a stitch marker and a yarn needle on hand for finishing touches.
To begin your toque, you’ll need to cast on the required number of stitches. The pattern you choose will specify the cast on method and number of stitches. Make sure to follow these instructions carefully to ensure your toque turns out the way you want it to.
Once you’ve cast on your stitches, you’ll then begin knitting the body of the toque in the desired stitch pattern. Common stitch patterns for toques include ribbing, stockinette stitch, and seed stitch. If you’re new to knitting, it may be helpful to practice these stitches on a small swatch before starting your toque.
As you knit, remember to keep track of your rows and stitches. Using a stitch marker can help you keep track of any increases or decreases that may be required in the pattern.
Once you’ve completed the body of your toque, you’ll then move on to shaping the crown. This is where you’ll decrease the number of stitches to create the rounded shape of the toque. The pattern will specify how to do this, usually by knitting two stitches together or using a similar method. Make sure to follow the pattern instructions carefully to achieve the desired shape.
After shaping the crown, you’ll then need to bind off your stitches to finish the toque. This is done by knitting two stitches, then passing the first stitch over the second stitch and off the needle. Repeat this process until all stitches have been bound off.
Finally, you’ll need to weave in any loose ends and give your toque a good blocking to help it keep its shape. Use a yarn needle to weave in the ends, making sure to secure them tightly. Then, dampen your toque and gently shape it to the desired size. Allow it to dry completely before wearing or gifting.
With this beginner’s guide to toque knitting patterns, you’ll be able to create a cozy and fashionable accessory in no time. Remember to take your time, follow the pattern instructions, and don’t be afraid to ask for help if you need it. Happy knitting!
Getting Started: Materials and Tools You’ll Need
Before you begin knitting your toque, it’s important to gather all the necessary materials and tools. Here is a list of items you’ll need to get started:
Yarn:
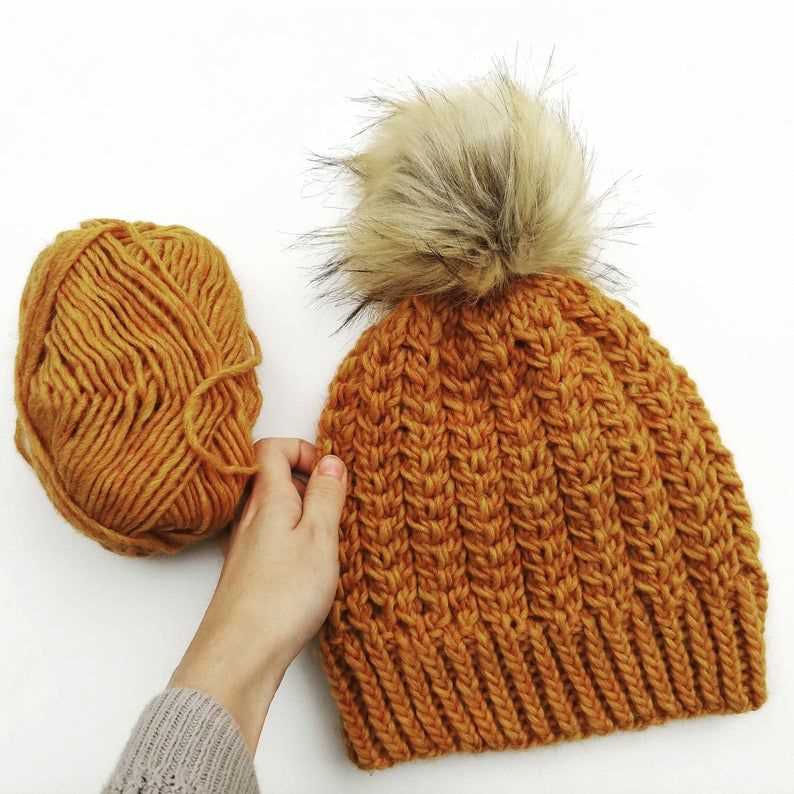
Choose a high-quality yarn that is suitable for the desired thickness and warmth of your toque. Look for yarns labeled as “worsted weight” or “chunky weight” for a thicker hat, or “fingering weight” for a lighter hat. Consider the fiber content of the yarn, such as wool or acrylic, based on your preferences and the intended use of the toque.
Knitting Needles:
Ensure you have the appropriate size of knitting needles for your chosen yarn. Refer to the yarn label or your knitting pattern for the recommended needle size. Most toque patterns require circular knitting needles with a length of 16 inches or longer, but you can also use double-pointed needles if you prefer.
Stitch Markers:
Stitch markers are essential for keeping track of specific sections or stitches in your knitting. They can be small rings or clips that easily slide onto the needles. These markers will help you identify the beginning of rounds, shaping points, or other significant pattern instructions.
Tapestry Needle:
A tapestry needle, also known as a yarn needle or darning needle, is used for finishing your knitting projects. This needle has a large eye and blunt tip, making it ideal for weaving in loose ends and sewing up any seams or gaps in your toque.
Scissors:
A pair of sharp scissors is essential for cutting the yarn as you work. Make sure your scissors are strong enough to cut through the yarn easily without causing any fraying or damage.
Measuring Tape:

A measuring tape or ruler will come in handy for checking your gauge and measuring the length of your toque. Gauge refers to the number of stitches and rows per inch in your knitting and is crucial for achieving the correct size and fit of your final project.
Once you have gathered all of these materials and tools, you’ll be fully equipped to begin knitting your toque. Take your time to familiarize yourself with your pattern and instructions before starting, and don’t forget to have fun along the way!
Choosing the Right Yarn for Your Toque
When it comes to knitting a toque, one of the most important decisions you’ll make is choosing the right yarn. The right yarn can make all the difference in the finished product, and can affect everything from the fit to the warmth and durability of the toque. Here are a few factors to consider when selecting the yarn for your toque.
Weight and Thickness
The weight and thickness of the yarn will determine the overall look and feel of your toque. Thicker yarns will create a bulkier, warmer toque, while thinner yarns will result in a lighter, more delicate toque. Consider the season and climate in which you’ll be wearing the toque, as well as your personal preference for thickness when choosing the yarn weight.
Fiber Content
The fiber content of the yarn can greatly impact the comfort and durability of your toque. Wool is a popular choice for toque knitting, as it is warm, breathable, and has a natural elasticity. Acrylic yarns are another common option, as they are often more affordable and easy to care for. Consider the specific properties of different fiber types when choosing your yarn.
Color and Pattern
The color and pattern of the yarn will have a significant impact on the overall look of your toque. Consider whether you want a solid color toque, or if you prefer a variegated or self-striping yarn for added visual interest. Additionally, consider whether the yarn pattern will complement the stitch pattern you plan to use for your toque.
Availability and Budget
Finally, consider the availability and budget for your chosen yarn. Some specialty yarns may be more difficult to find or more expensive, so it’s important to factor this into your decision. Consider your budget and the availability of the yarn in your area, or explore online options for a wider selection.
By considering these factors and selecting the right yarn for your toque, you’ll be on your way to creating a beautiful and functional accessory to keep you warm and stylish in the colder months.
Understanding Different Knitting Techniques
Knitting is a versatile craft that offers numerous techniques to create various patterns and textures. Understanding different knitting techniques allows knitters to expand their skills and create unique and beautiful projects. Here are a few key techniques to explore:
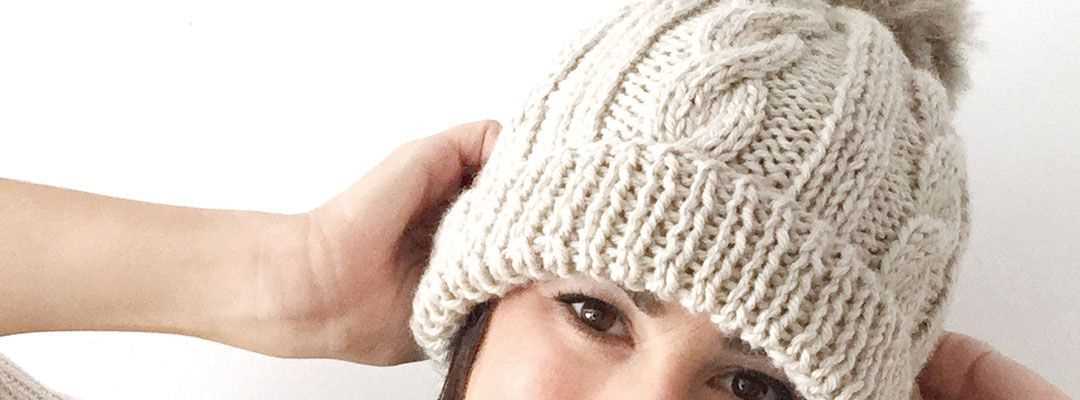
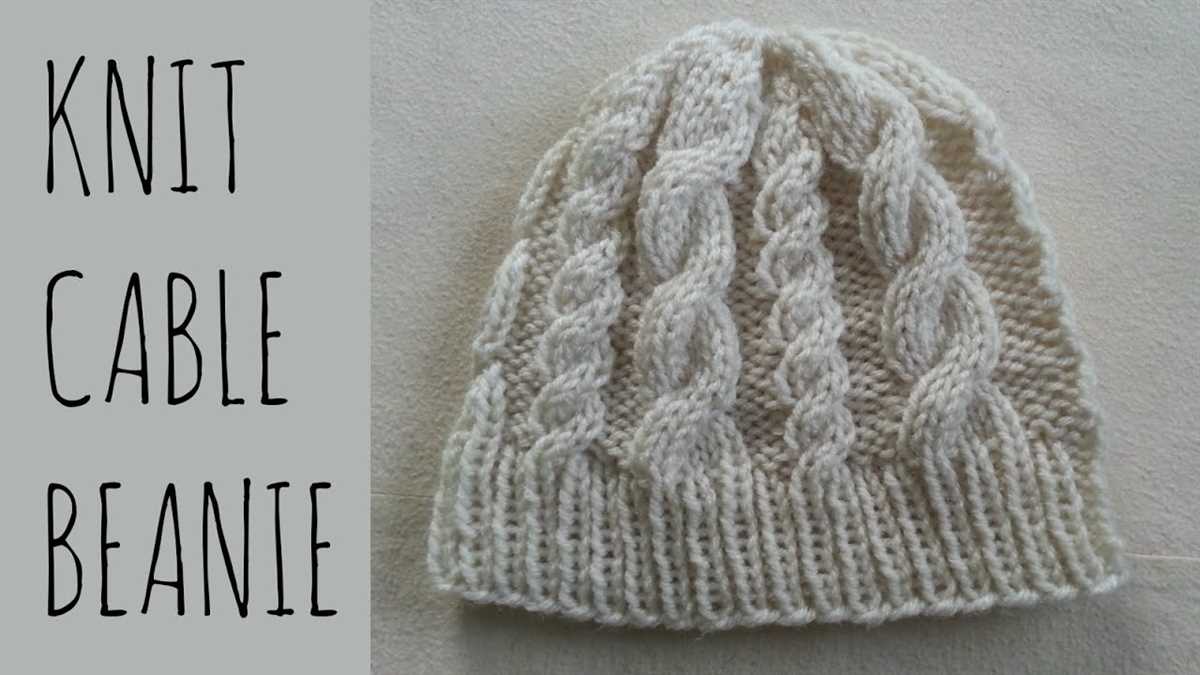
1. Cable Knitting
Cable knitting is a technique that creates interlocking patterns resembling twisted ropes or cables. This technique involves crossing stitches over each other to create visually appealing designs. Cable knitting can be used to add detail and texture to sweaters, hats, scarves, and more.
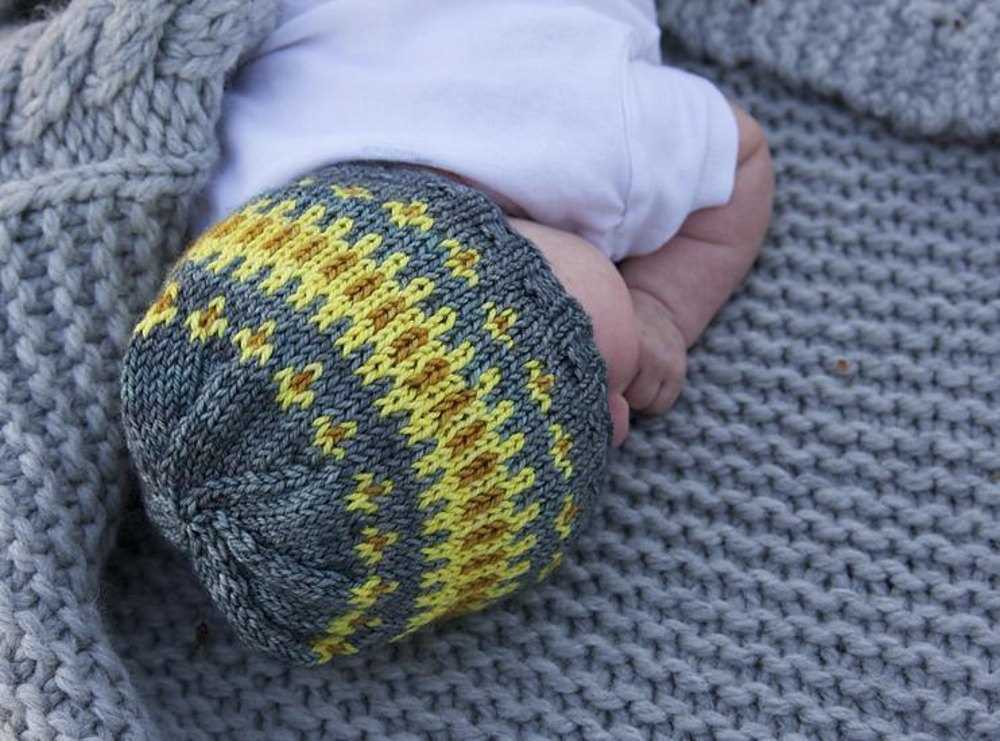
2. Fair Isle Knitting
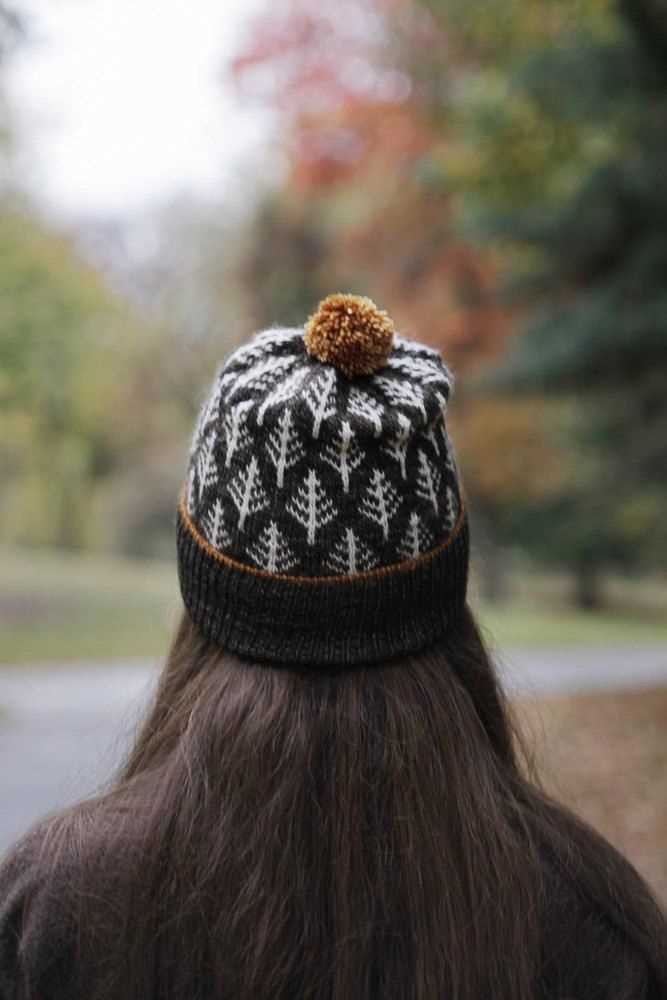
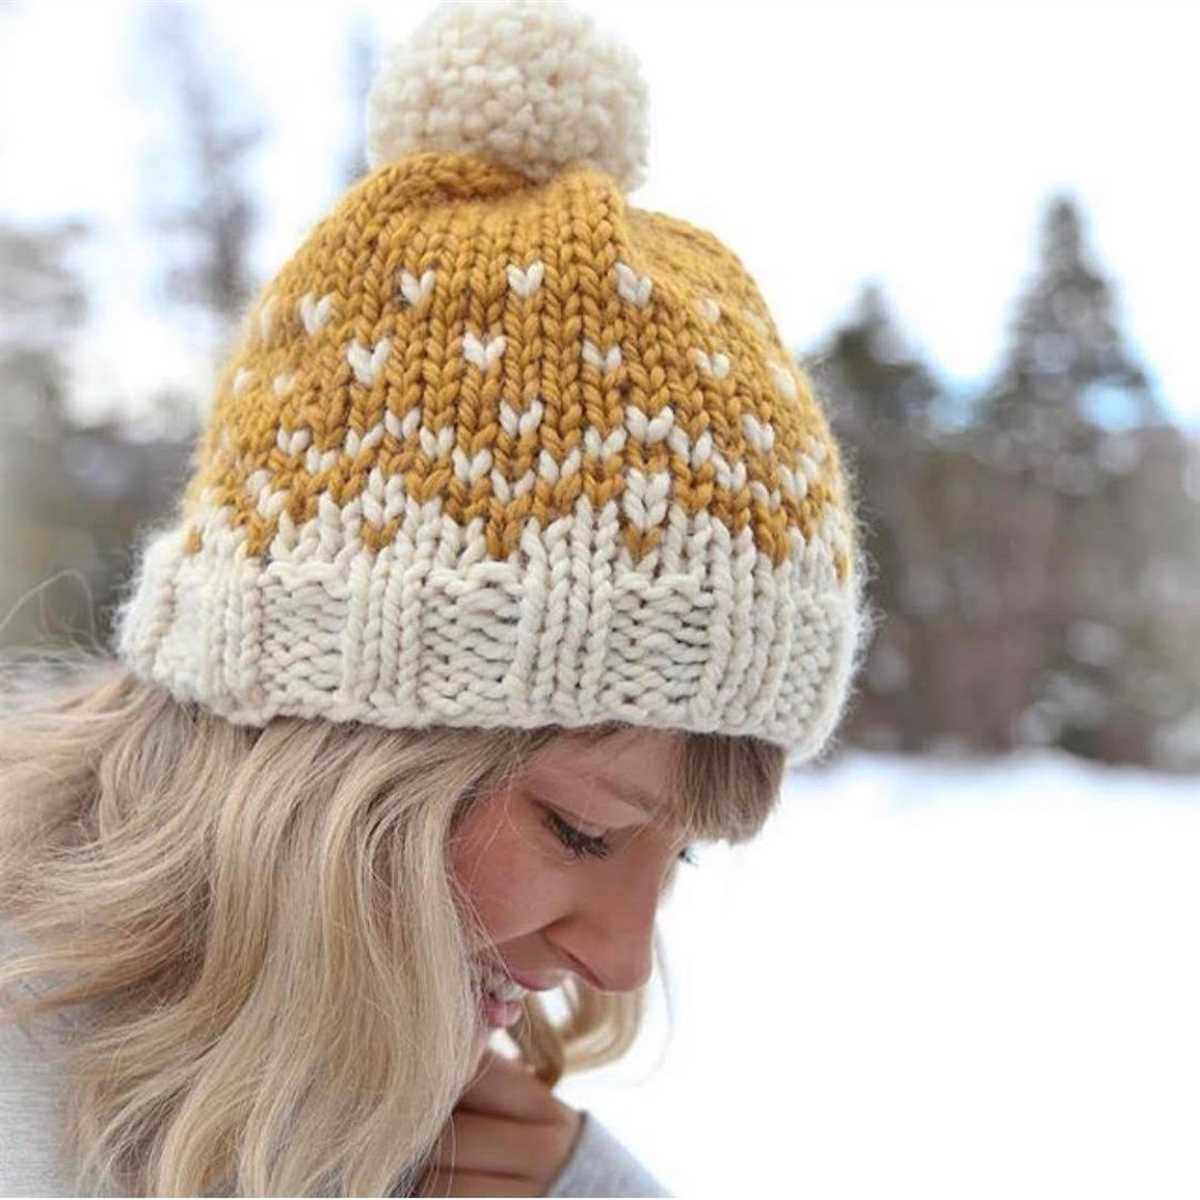
Fair Isle knitting, also known as stranded knitting, involves working with multiple colors in a row. This technique creates intricate and colorful patterns by carrying multiple strands of yarn across the back of the work. Fair Isle knitting is commonly used in creating sweaters, hats, and mittens with beautiful geometric or floral designs.
3. Lace Knitting

Lace knitting creates delicate and intricate patterns resembling lace fabrics. This technique involves creating holes or eyelets in the fabric by strategically increasing and decreasing stitches. Lace knitting is commonly used to create shawls, scarves, and delicate garments.
4. Entrelac Knitting
Entrelac knitting is a technique that creates a textured fabric resembling woven squares or diamonds. This technique involves working in short rows and picking up stitches along the edges to create the next set of squares. Entrelac knitting can be used to create visually interesting blankets, scarves, and accessories.
5. Intarsia Knitting
Intarsia knitting involves knitting with multiple colors to create large blocks of color and intricate designs. This technique requires using separate bobbins or small balls of yarn for each color section in the pattern. Intarsia knitting is commonly used to create pictorial designs, such as animals or logos, on sweaters, blankets, and accessories.
Learning and exploring different knitting techniques allows knitters to expand their creative possibilities and create projects with unique and intricate designs. Whether you’re a beginner or an experienced knitter, trying out different techniques is a great way to challenge yourself and enhance your knitting skills.
Basic Knitting Stitches for Your Toque
Knitting a toque can be a fun and rewarding project for both beginners and experienced knitters. To get started, it’s important to familiarize yourself with some basic knitting stitches. These stitches will form the foundation of your toque and allow you to create a variety of patterns and designs.
1. Knit stitch: The knit stitch is one of the most basic stitches in knitting. It is created by inserting the right needle into the first stitch on the left needle, wrapping the yarn around the right needle, and pulling it through the stitch. This stitch creates a smooth and flat texture, perfect for the main body of your toque.
2. Purl stitch: The purl stitch is the reverse of the knit stitch and is used to create a bumpy texture in your knitting. To purl, you insert the right needle into the first stitch on the left needle from right to left, wrap the yarn around the right needle, and pull it through the stitch. Purl stitches are often used to create ribbing or to add texture to your toque.
3. Stockinette stitch: The stockinette stitch is created by alternating rows of knit and purl stitches. This stitch creates a smooth fabric with one side showing the knit stitches and the other side showing the purl stitches. Stockinette stitch is commonly used for the main body of a toque to create a clean and polished look.
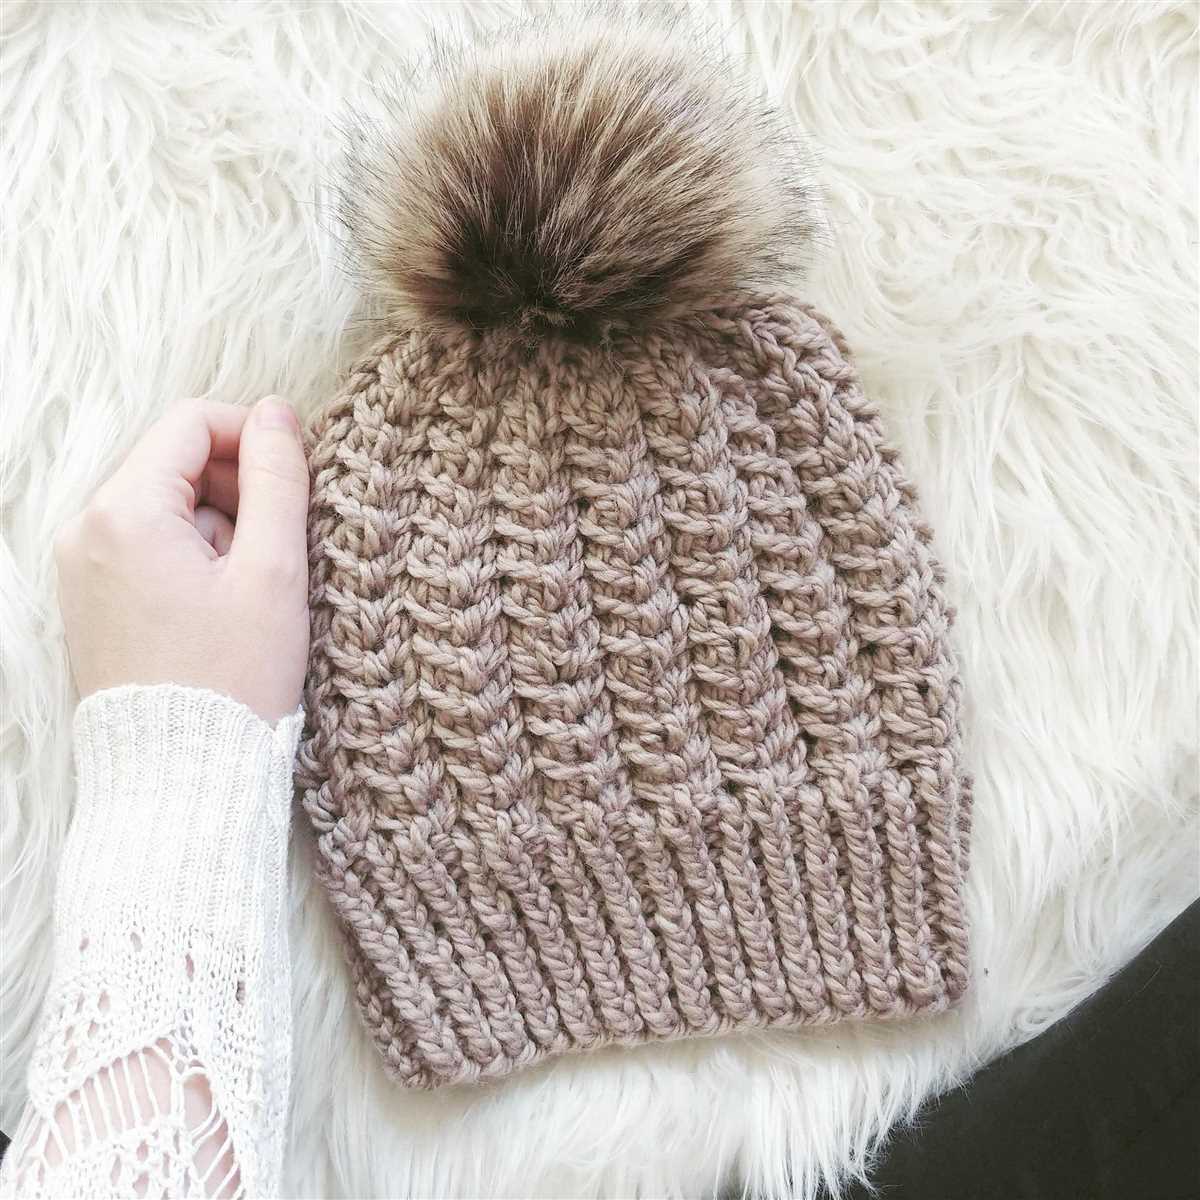
4. Ribbing: Ribbing is a combination of knit and purl stitches that creates a stretchy fabric. It is often used for the brim or cuff of a toque to provide a snug fit. Common ribbing patterns include the 1×1 rib (alternating one knit stitch and one purl stitch), the 2×2 rib (alternating two knit stitches and two purl stitches), and the 2×1 rib (alternating two knit stitches and one purl stitch).
By mastering these basic knitting stitches, you’ll have the skills to create a beautiful and cozy toque. Whether you’re following a pattern or designing your own, experimenting with different stitch combinations can help you achieve the desired look and texture for your toque.
Reading and Following a Toque Knitting Pattern
When it comes to knitting a toque, or a hat, having a knitting pattern can be incredibly helpful. However, reading and following a knitting pattern can sometimes be intimidating, especially for beginners. But fear not! With a little bit of patience and practice, you’ll soon be able to confidently read and follow any toque knitting pattern.
Step 1: Understanding the Terminology
One of the first things you’ll need to do when reading a toque knitting pattern is familiarize yourself with the terminology. Most knitting patterns use abbreviations to save space and make the instructions easier to read. Some common abbreviations you might come across include K (knit), P (purl), CO (cast on), BO (bind off), and inc (increase), among others. It’s a good idea to keep a list of these abbreviations handy until you become more familiar with them.
Step 2: Keep Track of Your Rows
Another important aspect of following a toque knitting pattern is keeping track of your rows. Most patterns will specify how many rows you need to complete for each section of the hat. It’s a good idea to use a stitch marker or a piece of contrasting yarn to mark the beginning of each section. This will help you keep track of where you are in the pattern and avoid any mistakes.
Step 3: Pay Attention to Gauge
Gauge refers to the number of stitches per inch or centimeter on a knitted fabric. It’s important to pay attention to the gauge specified in the knitting pattern, as it will ensure that the finished hat fits correctly. To determine your gauge, it’s recommended to knit a small swatch using the same yarn and needles specified in the pattern. If your gauge doesn’t match the one in the pattern, you may need to adjust your needle size or tension to achieve the correct gauge.
Step 4: Take It One Step at a Time
One of the key aspects of successfully following a toque knitting pattern is taking it one step at a time. Breaking the pattern down into smaller sections and focusing on completing each section before moving on to the next can make the process much more manageable. By following the instructions carefully and being patient with yourself, you’ll be able to create a beautiful toque that you can be proud of.
In conclusion, reading and following a toque knitting pattern may initially seem daunting, but with practice and patience, it becomes a rewarding and enjoyable process. By understanding the terminology, keeping track of your rows, paying attention to gauge, and taking it one step at a time, you’ll soon be able to create stunning toques and expand your knitting skills.
Adjusting the Size of Your Toque
When knitting a toque, it’s important to ensure that it fits just right. Whether you find a free knitting pattern online or create your own, you may need to adjust the size to fit your head or the recipient’s head perfectly. Here are a few tips to help you adjust the size of your toque:
1. Gauge Swatch
Before you begin knitting your toque, it’s essential to create a gauge swatch. This small sample will help you determine the number of stitches and rows per inch. By comparing your gauge to the pattern’s gauge, you can calculate how many stitches to cast on and how many rows to knit to achieve the desired size.
2. Changing Needles or Yarn
If your gauge swatch doesn’t match the pattern’s gauge, you may need to change your needle size or yarn weight. Using larger needles will create more significant stitches, resulting in a larger toque, while smaller needles will produce smaller stitches and a smaller toque. Similarly, using thicker or thinner yarn will also affect the size of your finished product.
3. Adjusting the Number of Stitches
If you need to make your toque wider or narrower, you can adjust the number of stitches in your cast on. Adding stitches will make the circumference larger, while decreasing stitches will make it smaller. However, be mindful that changing the number of stitches may also require adjustments to the pattern’s decreases or increases.
4. Altering the Length
If you want your toque to be longer or shorter, you can adjust the number of rows you knit. Adding rows will increase the length, while fewer rows will make it shorter. Keep in mind that altering the length of your toque may also affect the pattern’s shaping and decreases.
By following these tips, you can easily adjust the size of your toque to ensure a perfect fit. Happy knitting!
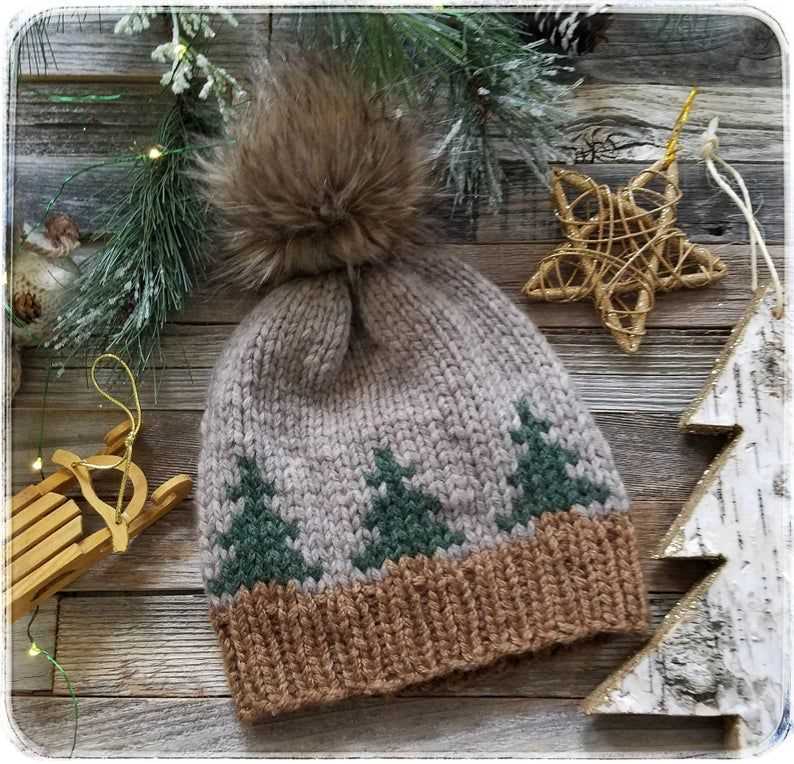
Adding Pattern and Color to Your Toque
Knitting a toque is a fun and creative project, as it allows you to experiment with different patterns and colors to make it truly unique. Adding a pattern to your toque can give it a textured and interesting look. There are many different stitch patterns you can try, such as ribbing, cables, or lace. Each pattern will create a different texture on your toque, so you can choose one that suits your style and skill level.
When it comes to color, the possibilities are endless. You can use a solid color for a classic look, or mix different colors to create a bold and vibrant toque. You can also use variegated or self-striping yarn to add more visual interest to your project. Consider using contrasting colors or gradients to create stripes or color blocks. You can even incorporate multiple colors within the same stitch pattern to create a unique and eye-catching design.
Traditional Fair Isle
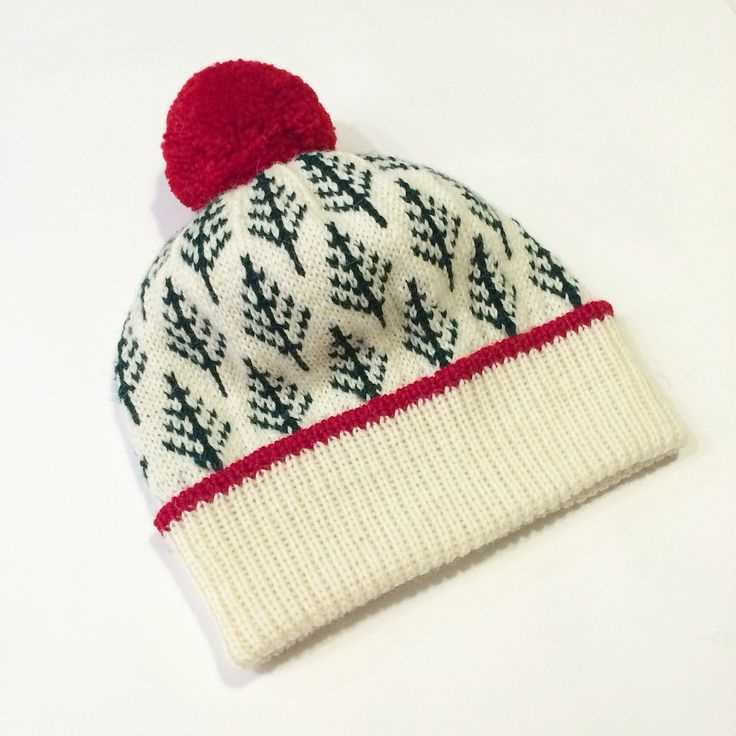
One popular technique for adding color to your toque is the traditional Fair Isle knitting. In Fair Isle knitting, you use two or more colors in each row to create intricate and colorful patterns. This technique is perfect for creating toques with a traditional and timeless look. You can choose to use traditional Fair Isle motifs or create your own design by combining different colors.
Intarsia
Another technique you can try is intarsia knitting, which allows you to create larger blocks of color in your toque. With intarsia, you knit with one color at a time and use bobbins or small balls of yarn to carry the unused colors along the back of your work. This technique is great for larger color blocks or for creating detailed pictures or patterns on your toque.
Stripes and Color Blocks
If you prefer a simpler approach, you can add pattern and color to your toque with stripes or color blocks. Stripes can be made by alternating two or more colors in regular intervals, creating a clean and modern look. Color blocks, on the other hand, involve knitting sections of your toque in different colors, creating a bold and graphic effect.
No matter what technique or design you choose, adding pattern and color to your toque will make it stand out and reflect your personal style. So grab your knitting needles, choose your favorite pattern and colors, and start creating your perfect toque!
Finishing Touches: Blocking and Sewing up Your Toque
With the completion of the knitting portion of your toque, you’re now ready to add the finishing touches. This includes blocking your project to ensure that it has the desired shape and sizing. Blocking helps to even out any irregularities in your knitting and gives your toque a more polished look.
To block your toque:
- Fill a sink or basin with lukewarm water and add a small amount of mild detergent.
- Submerge your toque in the water, gently squeezing it to ensure it is thoroughly soaked.
- Remove the toque from the water and gently squeeze out the excess water. Avoid wringing or twisting the fabric.
- Lay a clean towel flat on a surface and place the wet toque on top.
- Gently shape the toque to the desired size and shape, stretching or pinning it in place if needed.
- Leave the toque to dry completely. This may take a day or two, depending on the thickness of the yarn.
- Once the toque is dry, remove any pins used during the blocking process.
Sewing up your toque:
Now that your toque is blocked and dry, it’s time to sew up any remaining seams or gaps. Using a tapestry needle and yarn in a matching color, stitch the edges of the toque together using a mattress stitch or any other appropriate seam for your pattern. Make sure to sew neatly and evenly to achieve a professional finish.
Once all the seams are sewn up, weave in any loose ends of yarn to secure them and prevent unraveling. Trim any excess yarn carefully.
Your toque is now complete and ready to be worn or gifted! The blocking and sewing process adds the final touch to your knitted creation, ensuring that it looks and fits just as you intended. Enjoy the warmth and style of your handmade toque!
Common Mistakes to Avoid when Knitting a Toque
Knitting a toque can be a fun and rewarding project, but it’s important to avoid common mistakes that can potentially ruin your work. By being aware of these mistakes, you can ensure that your toque turns out beautifully and fits well. Here are some common mistakes to avoid when knitting a toque:
1. Incorrect Gauge
One of the most common mistakes knitters make when knitting a toque is not checking their gauge before starting. Gauge refers to the number of stitches and rows per inch, and it determines the size and fit of the finished toque. If your gauge is too tight or too loose, your toque may turn out too small or too large. It’s important to swatch and measure your gauge accurately before starting your project.
2. Not Using the Right Yarn
Choosing the right yarn is crucial when knitting a toque. Using the wrong yarn weight or fiber content can result in a toque that doesn’t have the right drape or warmth. Make sure to check the pattern requirements and choose a yarn that matches the recommended weight and fiber content. Using the wrong yarn can also affect the gauge and overall appearance of the toque.
3. Skipping or Misreading Instructions
Skipping or misreading instructions is another common mistake that can lead to a poorly knitted toque. Knitting patterns can be complex, so it’s important to read the instructions carefully and follow them step by step. Missing or misinterpreting even a single instruction can affect the final outcome of your project. Take your time and double-check the instructions at each stage to ensure you’re on the right track.
4. Incorrect Stitch Count
Another mistake knitters often make is not keeping track of their stitch count. Losing or gaining stitches can result in an uneven or misshapen toque. It’s important to count your stitches regularly, especially after completing each pattern repeat or section. This will help you catch any mistakes early on and ensure that your toque turns out symmetrical and well-shaped.
5. Neglecting to Block the Toque
Blocking is the process of shaping and stretching your finished knitting project to give it a more polished and professional look. Neglecting to block your toque can result in a finished product that is uneven, wrinkled, or lacks the desired fit. Take the time to properly block your toque according to the yarn and pattern instructions, and you’ll be pleased with the final result.
Avoiding these common mistakes can greatly improve the outcome of your knitted toque and ensure that you have a beautiful finished product that you can be proud of. Happy knitting!
Exploring Advanced Toque Knitting Patterns
Knitting a toque can be a fun and rewarding project for any knitter. While basic toque patterns are great for beginners, more experienced knitters may want to explore advanced toque knitting patterns to challenge their skills and create unique designs. These patterns often incorporate intricate stitch patterns, colorwork, or special techniques that add complexity and interest to the finished hat.
1. Intricate Stitch Patterns: Advanced toque knitting patterns may feature complex stitch patterns, such as cables, lace, or textured stitches. These patterns require careful attention to stitch placement and may involve charts or written instructions. Knitting an intricate stitch pattern can result in a stunning and eye-catching toque.
2. Colorwork: Colorwork is another advanced technique that can elevate a toque design. Fair Isle, stranded, or intarsia knitting techniques allow knitters to incorporate multiple colors into their toque, creating beautiful patterns and designs. Colorwork requires careful tension management and attention to detail, but the result is a vibrant and visually striking hat.
3. Special Techniques: Advanced toque knitting patterns may also include special techniques such as short rows, provisional cast ons, or knitting in the round with multiple needles. These techniques add interest and unique shaping to the toque. While they may require some extra practice and attention, they can create stunning and innovative hat designs.
Exploring advanced toque knitting patterns allows knitters to push their skills and create truly one-of-a-kind hats. Whether it’s through intricate stitch patterns, colorwork, or special techniques, advanced patterns offer endless possibilities for creativity. So why not challenge yourself and try your hand at an advanced toque knitting pattern? You might just discover a new favorite project!