
Sock pattern knitting is a popular craft that allows enthusiasts to create unique and personalized socks. Knitting socks is not only a practical way to keep your feet cozy and warm, but it is also a creative and relaxing pastime. With countless patterns available, knitters can experiment with different stitch combinations, colors, and textures to create their own one-of-a-kind designs.
One of the great advantages of knitting socks is that they can be customized to fit any foot size or shape. Whether you have narrow or wide feet, high arches or flat feet, you can easily adjust the pattern to ensure a perfect fit. This makes knitting socks a great option for those who struggle to find comfortable socks in stores.
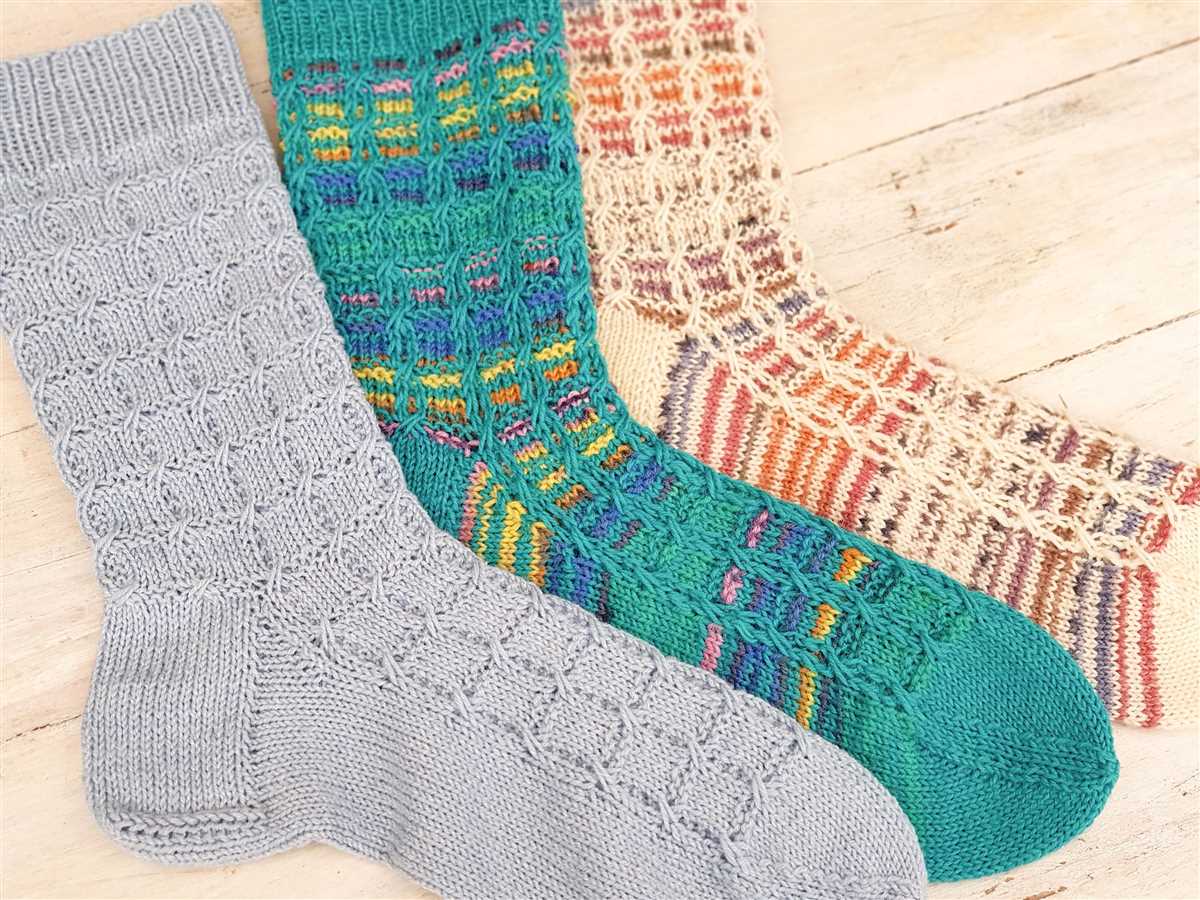
There are a variety of sock patterns to choose from, ranging from simple and beginner-friendly designs to more intricate and challenging patterns for experienced knitters. Some popular sock patterns include ribbed socks, cable socks, lace socks, and colorwork socks. Each pattern offers its own unique design elements and challenges, allowing knitters to continuously expand their skills and knowledge.
Sock Pattern Knitting: A Step-by-Step Guide to Creating Beautiful Socks
Knitting your own socks can be a rewarding and satisfying experience. With the right pattern and materials, you can create beautiful socks that are not only cozy but also unique to your personal style. Whether you’re a beginner or an experienced knitter, this step-by-step guide will help you navigate the world of sock knitting and create socks that you’ll be proud to wear.
First, you’ll need to select a sock pattern that suits your skill level and desired style. There are countless patterns available online and in knitting books, so take your time to find one that speaks to you. Consider factors such as the complexity of the pattern, the stitch pattern used, and the size and fit of the finished socks. Once you’ve chosen a pattern, gather your materials, including the appropriate yarn and knitting needles.
Begin by casting on the required number of stitches, following the instructions in the pattern. Pay attention to any specific cast-on methods or techniques recommended by the pattern designer. Once your stitches are cast on, divide them evenly onto double-pointed needles or circular needles, depending on your preference. This will allow you to work the sock in the round, creating a seamless tube that will eventually become the foot of the sock.
- From here, you’ll begin working the leg of the sock, which can include a variety of stitch patterns such as ribbing, lace, or cables. Follow the instructions in the pattern carefully, keeping track of any pattern repeats or stitch counts. It’s helpful to use stitch markers to mark the beginning and end of pattern repeats as you work.
- After the leg, you’ll move on to the heel of the sock. This is where the sock is divided to create the heel flap and turn. The heel flap is worked back and forth in rows, creating extra reinforcement for the back of the sock. Then, the stitches are turned to create the heel turn, which shapes the heel and prepares it for the foot of the sock.
- Once the heel is complete, you’ll work the foot of the sock. This section is usually worked in a simple stockinette stitch, allowing for a comfortable and snug fit. Be sure to measure your foot as you go to ensure the sock is the correct length.
- Finally, you’ll finish the sock by shaping the toe. This is done through a series of decreases, gradually reducing the number of stitches until only a few remain. The remaining stitches are then gathered and secured, creating a neat and tidy toe.
With these basic steps, you’ll be well on your way to knitting beautiful socks. Experiment with different stitch patterns, yarns, and colors to create socks that reflect your personal style. Don’t be afraid to ask for help or join a knitting community for support and inspiration. Happy knitting!
Getting Started: Essential Supplies and Materials for Sock Knitting
Knitting socks can be a rewarding and enjoyable project, but it’s important to have the right supplies and materials to get started. Here are some essential items you’ll need:
1. Yarn:

The first step in sock knitting is choosing the right yarn. Look for yarn that is specifically labeled for sock knitting, as it will typically have a blend of fibers that provide durability and elasticity. Sock yarn is usually made from wool or a wool blend, with added nylon or other synthetic fibers for strength.
2. Needles:
Next, you’ll need a set of double-pointed needles or circular needles. Double-pointed needles are commonly used for knitting socks, as they allow you to work in the round and create the tube shape of the sock. Circular needles can also be used, especially if you prefer the Magic Loop technique.
3. Stitch markers:

To keep track of your stitches and markers are essential. You can use simple plastic rings or buy special stitch markers specifically designed for sock knitting. These markers can be easily moved from one needle to another and help you keep track of important sections, such as the beginning and end of the round.
4. Tapestry needle:
A tapestry needle or yarn needle will be needed for weaving in loose ends and finishing your sock. It’s important to choose a needle with a large enough eye to easily thread your yarn.
5. Measuring tape:

A measuring tape or ruler is essential for checking gauge and ensuring that your socks will fit properly. This will help you determine the number of stitches and rows per inch, which is important for following a pattern or creating a custom fit.
6. Pattern or guidebook:
Finally, you’ll need a pattern or guidebook to help you get started with sock knitting. There are many resources available online or in knitting books that provide step-by-step instructions and helpful tips. Choose a pattern that is suitable for your skill level and desired sock style.
With these essential supplies and materials, you’ll be well-equipped to embark on your sock knitting journey. Happy knitting!
Understanding Sock Anatomy: Different Parts of a Knitted Sock
When knitting socks, it’s important to have a clear understanding of the different parts that make up the anatomy of a sock. This knowledge will not only help you in following patterns, but also in troubleshooting and adjusting the fit of your socks.
Toes: The toe section of a knitted sock is where the foot starts. It is usually worked in a rounded or wedge shape, tapering towards the end of the foot. The most common method for knitting the toe is using the technique known as “short row shaping.”
Foot: The foot of the sock is the part that covers the sole, instep, and heel of the foot. It is usually longer than the toe section and is where most of the shaping and stitch pattern variations take place. The length and width of the foot section can vary depending on personal preference and foot size.
Heel: The heel of a knitted sock is the part that covers the back of the foot. There are several different types of heel constructions, including the classic and durable “flap and gusset” method, as well as the more modern and quick “short row” or “afterthought” heel methods. The heel is often reinforced with a sturdy stitch pattern to add durability.
Leg: The leg of a knitted sock is the part that extends from the ankle to the top of the sock. It is often worked in a ribbed or patterned stitch to provide stretch and comfort. The length of the leg can vary, from ankle socks to knee-highs, depending on personal preference and style.
Cuff: The cuff of a knitted sock is the topmost part that sits around the calf. It is usually worked in a stretchy stitch pattern, such as ribbing, to provide a snug fit. The length and width of the cuff can vary depending on personal preference and desired sock length.
Understanding the different parts of a knitted sock will help you navigate through sock patterns with ease and confidence. It will also allow you to customize the fit and style of your socks to suit your own preferences, creating a truly unique and comfortable pair of socks.
Choosing the Right Yarn: Considerations for Sock Knitting
When it comes to sock knitting, choosing the right yarn is essential. Socks endure a lot of wear and tear, so it’s important to select a yarn that is durable, comfortable, and easy to care for. There are several factors to consider when choosing yarn for sock knitting.
Fiber Content: The fiber content of the yarn is one of the most important considerations. Wool is a popular choice for socks as it provides warmth, breathability, and natural moisture-wicking properties. Other fibers, such as nylon or silk, can be blended with wool to add strength and durability. Consider the intended use of the socks and choose a fiber content that aligns with your needs.
Sock Weight: The weight of the yarn will determine the thickness of the socks. Most sock patterns recommend using fingering weight or sock weight yarn, as these yarns create lightweight and comfortable socks. However, you can also experiment with other weights, such as sport or DK, to achieve different effects. Keep in mind that lighter weight yarns may require tighter tension and smaller needles.
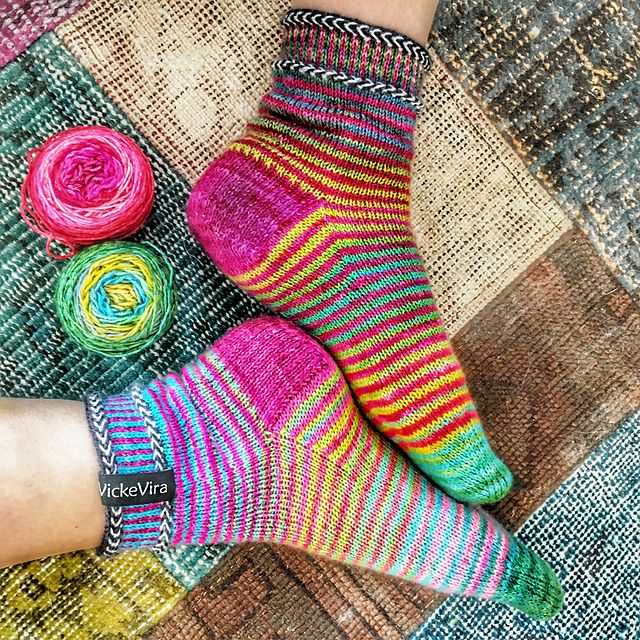
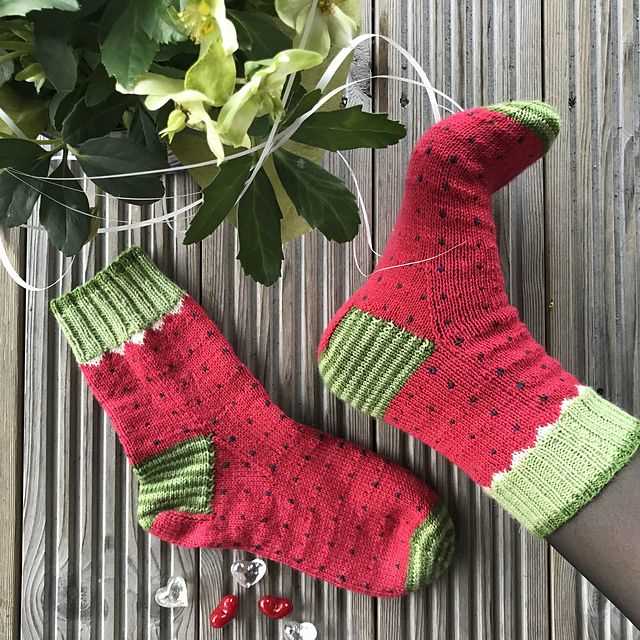
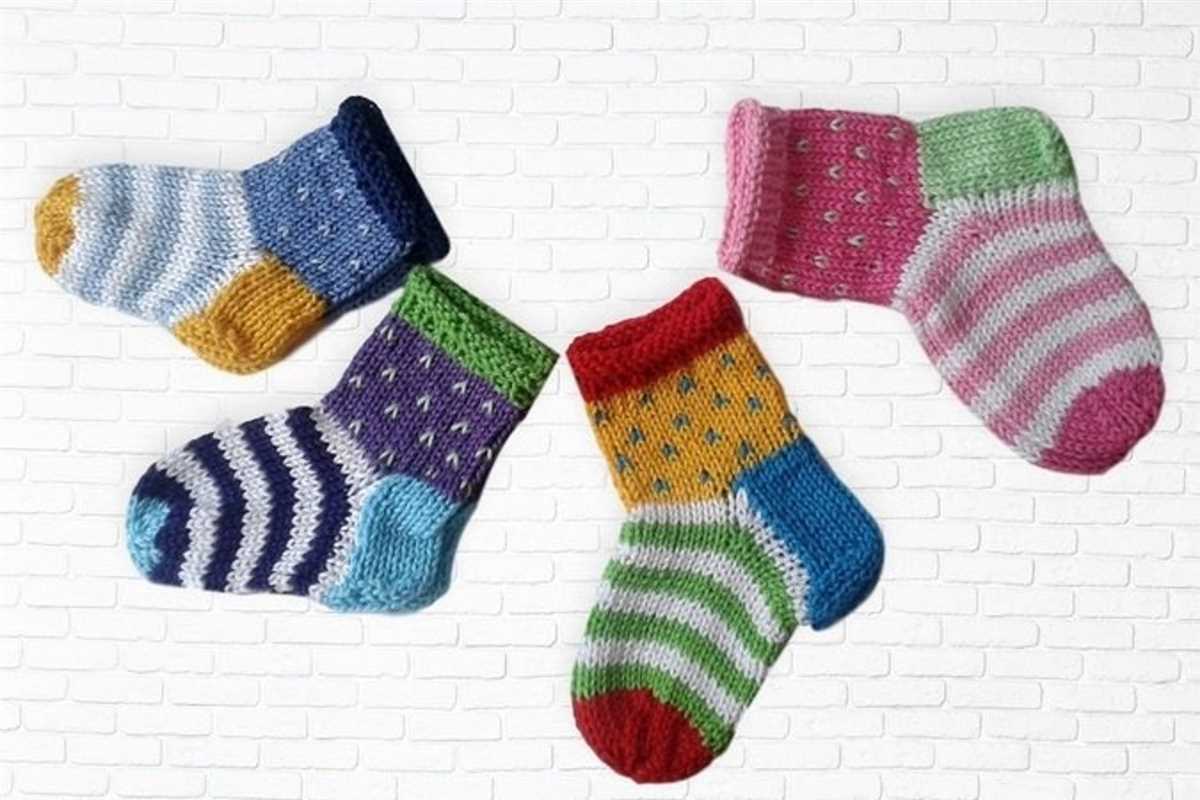
Color and Pattern: The color and pattern of the yarn is another consideration for sock knitting. Solid or semi-solid yarns are a popular choice as they showcase stitch patterns and intricate designs. Variegated or self-striping yarns can add visual interest and create unique patterns without the need for complex knitting techniques. Consider the recipient’s preferences and the overall look you want to achieve when selecting yarn color and pattern.
Care Instructions: Socks will need to be washed regularly, so it’s important to choose a yarn that can withstand frequent washing. Look for yarns that are machine washable or have specific care instructions that fit your lifestyle. Some yarns may require handwashing and laying flat to dry, while others can be machine dried. Consider your own preferences and the level of care you are willing to provide for your hand-knit socks.
Budget: Lastly, consider your budget when choosing yarn for sock knitting. There is a wide range of yarns available in different price points. While high-end luxury yarns may provide an exceptional knitting experience and produce luxurious socks, there are also affordable options that can still result in comfortable and durable socks. Set a budget and explore yarn options within that range.
Ultimately, the right yarn for sock knitting will depend on your personal preferences, budget, and the intended use of the socks. By considering factors such as fiber content, sock weight, color and pattern, care instructions, and budget, you can select a yarn that will result in beautiful, comfortable, and long-lasting socks.
Selecting the Perfect Needles: Which Type and Size to Use
Knitting socks can be a rewarding and enjoyable experience. However, selecting the perfect needles is essential to ensure a successful outcome. There are several factors to consider when choosing the type and size of needles for your sock knitting project.
Type of Needles: There are various types of needles available for knitting socks, including double-pointed needles (DPNs), circular needles, and magic loop method. DPNs are often preferred by experienced knitters for their versatility and ability to customize the fit of the socks. Circular needles are a popular choice for beginners as they are easier to handle and can accommodate a larger number of stitches. The magic loop method, which involves using a long circular needle, is ideal for those who prefer to knit socks in the round.
Size of Needles: The size of needles you choose will depend on your gauge and the desired fit of your socks. It is recommended to use a needle size that matches the recommended gauge stated in your chosen sock pattern. This will ensure that your socks turn out the correct size and fit comfortably. If you tend to knit tightly, you may need to use larger needles to achieve the desired gauge. Conversely, if you knit loosely, smaller needles may be required.
When selecting the perfect needles for your sock knitting project, it is important to consider both the type and size. The type of needles will depend on your personal preference and level of experience, while the size should be chosen based on your gauge and desired sock fit. By taking these factors into account, you can ensure that your sock knitting experience is enjoyable and successful, resulting in a beautiful pair of socks.
Casting On: Different Methods for Starting Your Sock
When you start knitting a sock, the first step is to cast on your stitches. There are several different methods you can use to cast on, each with its own benefits and drawbacks. The method you choose can depend on personal preference, the desired look of your finished sock, or the type of yarn you are using. Here are a few popular methods for casting on your sock.
Long-tail Cast On:
The long-tail cast on is a versatile method that creates a neat and stretchy edge for your sock. To use this method, you will need to estimate the length of yarn needed for your cast on stitches. This can sometimes be a bit tricky, but with practice, you will be able to gauge the right amount. The long-tail cast on is great for beginners and can be used for a variety of sock patterns.
Tubular Cast On:
The tubular cast on is a more advanced technique that creates a professional and polished look. It simulates a ribbed edge and is perfect for socks with ribbed cuffs. The tubular cast on requires some knowledge of basic knitting techniques, such as knit and purl stitches, but it is worth the effort for the finished result. This method creates a stretchy and comfortable edge for your sock.
Figure-eight Cast On:
The figure-eight cast on is a traditional method that is often used for toe-up sock knitting. It creates a strong and seamless toe that is great for socks that will see a lot of wear. This cast on creates a rounded shape and can be easily adjusted for different foot sizes. It is a bit more complicated than the previous methods, but with practice, it can become a quick and efficient way to start your sock.
Whether you choose the long-tail cast on, tubular cast on, or figure-eight cast on, the method you use to start your sock can affect the overall fit and appearance of your finished project. Experiment with different methods to find the one that works best for you and your sock knitting style.
Creating the Ribbed Cuff: Techniques for a Snug Fit

When knitting socks, one of the most important parts to consider is the ribbed cuff. The cuff not only adds a decorative touch to the sock but also plays a crucial role in providing a snug fit. A well-fitting cuff ensures that the socks stay in place and don’t slip down, keeping your feet warm and comfortable all day long.
Choosing the Right Ribbing Pattern: There are various ribbing patterns you can choose from for your sock cuff, such as 1×1, 2×2, or even 3×1 ribbing. These patterns involve alternating knit and purl stitches to create a stretchy and flexible fabric. Experiment with different ribbing patterns to find the one that best suits your knitting style and desired snugness.
Adjusting the Number of Rows: To achieve a snug fit, it’s important to consider the height of your ribbed cuff. Generally, a cuff that measures around 1.5 to 2 inches in height is recommended. However, you can adjust the number of rows to make it shorter or longer based on your preference. Keep in mind that a shorter cuff may be less secure, while a longer one may feel tighter around the leg.
Selecting the Right Needle Size: The needle size you choose can also affect the snugness of the cuff. Using a smaller needle size for the ribbed cuff compared to the rest of the sock can help create a tighter fabric. This can be particularly useful if you’re using a yarn with a lot of stretch or if you prefer a more fitted cuff. Remember to check your gauge before starting to ensure you’re achieving the desired fit.
Adding Elastics: If you want to add extra security and snugness to your ribbed cuff, consider incorporating some elastic into the knitting. You can do this by either using a yarn with elastic content or by threading an elastic thread through the stitches of the cuff while knitting. This can help the cuff maintain its shape and prevent it from stretching out over time.
Knitting the Leg: Patterns and Designs for Unique Sock Styles
When it comes to knitting socks, the leg portion offers endless opportunities for creativity and personalization. From simple ribbing to intricate lace patterns, the leg of a sock allows knitters to showcase their skills and add unique touches to their creations. Whether you prefer classic designs or are looking to experiment with new techniques, there are countless patterns and designs to choose from.
One popular option for sock legs is the traditional ribbing pattern. By alternating knit and purl stitches, this simple yet elegant design adds texture and stretch to the leg, ensuring a comfortable fit. Another classic choice is the seed stitch, which creates a bumpy, textured fabric that is both visually appealing and cozy to wear.
If you’re looking to add some flair to your sock legs, lace patterns offer a beautiful and feminine option. Whether you opt for delicate lace panels or all-over lace motifs, these patterns create an elegant and intricate look. They can be a bit more challenging to knit, but the end result is definitely worth it.
For those who prefer a more rustic and cozy feel, cable patterns are an excellent choice. By crossing stitches over each other, cable patterns create intricate braided designs that add depth and visual interest to the sock leg. These patterns can range from simple cables to complex cable panels, allowing knitters to create socks that truly stand out.
Whatever pattern or design you choose for your sock legs, remember to have fun and let your creativity shine. With so many options available, you can knit socks that are as unique and individual as you are.
Shaping the heel is an important step in knitting sock patterns. There are two main techniques that can be used: the turn and gusset method or the short-row technique.
Turn and Gusset Technique
The turn and gusset technique involves creating a heel flap and then picking up stitches along the sides of the flap to form the gussets. Here’s how it works:
- Step 1: Knit a heel flap by working back and forth on a portion of the stitches. This typically involves working in a slip stitch pattern to create a sturdy and cushioned heel.
- Step 2: Once the heel flap is complete, it’s time to start shaping the heel. This involves turning the work and working short rows to create a cup-shaped heel.
- Step 3: After shaping the heel, stitches are then picked up along the sides of the heel flap. These stitches will be used to decrease and form the gussets, which will give the sock a better fit around the ankle.
- Step 4: With the gussets formed, the sock can continue on with the foot portion of the pattern, usually worked in the round.
Short-Row Technique
The short-row technique is an alternative method for shaping the heel in sock knitting. Instead of creating a heel flap and forming gussets, this technique utilizes short rows to create a shaped heel. Here’s how it works:
- Step 1: Knit the foot of the sock to the desired length before starting the heel.
- Step 2: Begin by working a set number of stitches (typically half of the total sock stitches) and then turning the work before reaching the end of the row.
- Step 3: On each subsequent row, work fewer stitches before turning the work, creating a series of short rows that form a curved shape.
- Step 4: Once the heel is shaped with short rows, the sock can continue on with the leg portion of the pattern.
Both the turn and gusset method and the short-row technique have their advantages and disadvantages, and which one to use will ultimately depend on personal preference. Experimenting with both techniques can help you find the method that works best for you and your sock knitting projects.
Knitting the Foot: Tips for Achieving a Comfortable Fit
When knitting socks, it is essential to pay attention to the fit of the foot. The foot section of the sock is where comfort truly matters, as it is the part that will be in direct contact with the wearer’s foot. To ensure a comfortable fit, here are some tips to consider:
1. Measure the foot accurately: Before starting the foot section of the sock, it is crucial to measure the wearer’s foot accurately. Take measurements of the length, width, and circumference of the foot to determine the appropriate size for knitting the sock. This will help in achieving a snug, yet comfortable fit.
2. Use a stretchy stitch pattern: Choosing a stitch pattern for the foot section that has some stretch is recommended. This will allow the sock to accommodate the natural movement of the foot and provide a comfortable fit. Ribbing or a stretchy lace stitch pattern can work well for this purpose.
3. Consider the toe shaping: The shaping of the toe can greatly affect the comfort of the sock. It is essential to choose a toe shaping method that suits the wearer’s foot shape. Some common toe shaping methods include a wedge toe, a round toe, or a square toe. Experimenting with different toe shaping methods can help in achieving the best fit.
4. Adjust the length of the foot section: The length of the foot section should be customized to fit the wearer’s foot length. Make sure to measure the foot accurately from the back of the heel to the tip of the longest toe. Adding or reducing stitches in the foot section can be done to achieve the desired length for a comfortable fit.
5. Try the sock on as you go: To ensure a proper fit, it is recommended to try the sock on as you go. This will allow you to make any necessary adjustments in real-time and ensure that the sock fits well on the foot. It is easier to make modifications earlier in the knitting process rather than after the sock is complete.
6. Consider the yarn elasticity: The choice of yarn can also impact the fit of the foot section. Yarns with a good amount of elasticity, such as those with a blend of wool and nylon, can help in achieving a comfortable fit. Consider the stretchiness of the yarn when selecting the material for knitting the foot section of the sock.
By following these tips, you can knit a foot section of the sock that provides a comfortable fit and ensures a pleasant wearing experience for the recipient.
Adding Toe Shaping: Different Methods for Creating a Well-Fitted Toe

When knitting socks, one important aspect to consider is how to create a well-fitted toe. A well-fitted toe ensures that the sock hugs the foot comfortably and provides a comfortable wearing experience. There are various methods for adding toe shaping to a sock, each with its own advantages and considerations.
One commonly used method for toe shaping is the classic wedge toe. This method involves decreasing stitches along the toe section in a symmetrical manner, usually using a series of paired decreases. This creates an angled shape that narrows towards the tip of the toe, providing a roomy fit for the toes. The classic wedge toe is versatile and can be easily customized to fit different foot sizes.
Short-row shaping

Another popular technique for adding toe shaping is short-row shaping. Short-row shaping involves turning the work before reaching the end of the row, creating partial rows that add depth and shape to the toe. This method is particularly useful for creating a rounded shape and can be combined with other toe shaping techniques for added customization. However, it’s important to note that short-row shaping may require more advanced knitting skills and can be more challenging to execute.
Round toe shaping
For those seeking a seamless sock toe with a rounded shape, round toe shaping is the way to go. This method involves evenly decreasing stitches from different sections of the toe, creating a smooth curve. Round toe shaping can be achieved through a combination of paired decreases and centered double decreases. This method is often preferred for its aesthetic appeal and comfortable fit.
Choosing the right method
When deciding on the best toe shaping method for your sock project, it’s important to consider factors such as foot size, preferred fit, and personal knitting skills. Experimenting with different techniques and considering the specific needs of the wearer’s foot can help create a well-fitted sock that is both comfortable and visually appealing.
- The classic wedge toe is a versatile option that can be easily customized.
- Short-row shaping creates a rounded shape, but may require more advanced knitting skills.
- Round toe shaping provides a seamless, curved toe with a comfortable fit.
Finishing Touches: Weaving in Ends, Blocking, and Care Instructions
Once you have completed knitting your socks, it’s important to give them some finishing touches to ensure they look great and last a long time. This includes weaving in any loose ends, blocking the socks to shape, and providing proper care instructions.
Weaving in Ends
Before wearing or gifting your knitted socks, it’s crucial to weave in any loose ends to prevent them from unraveling. Take a tapestry needle and thread the loose end through the stitches on the wrong side of the sock. Weave the needle in a few directions to secure the end, then trim any excess yarn. Make sure to do this for each loose end on both socks.
Blocking
Blocking is an important step in finishing any knitted project, including socks. It helps even out the stitches, open up lace patterns, and give the socks a professional look. To block your socks, soak them in lukewarm water with a gentle wool wash or baby shampoo. Gently squeeze out the excess water, being careful not to wring or twist the socks. Lay them flat on a clean towel and gently shape them to the desired size and length. Allow them to air dry completely before wearing or storing.
Care Instructions
To ensure your knitted socks last a long time, it’s essential to provide proper care instructions. For most sock yarns, it’s recommended to hand wash them in lukewarm water with a gentle wool wash. Avoid using harsh detergents or bleach as they can damage the fibers. Gently squeeze out the water and lay the socks flat to dry. It’s also a good idea to avoid using fabric softener or drying the socks in a dryer, as these can cause shrinkage or damage. By following these care instructions, you can keep your knitted socks looking beautiful and cozy for years to come.
Advanced Techniques: Lace, Colorwork, and Cable Patterns for Socks
In addition to basic knit and purl stitches, there are many advanced techniques that can be used to create intricate and beautiful sock patterns. Lace, colorwork, and cable patterns are popular choices among experienced knitters looking to add extra flair to their sock designs.
Lace Patterns: Lace patterns are delicate and feminine, creating an airy and open design. They often feature intricate motifs such as flowers, leaves, or geometric shapes. Lace patterns can add a touch of elegance to any sock and are a great way to showcase the beauty of fine yarns. Knitting lace can be challenging, as it requires careful attention to stitch count and yarn overs, but the result is well worth the effort.
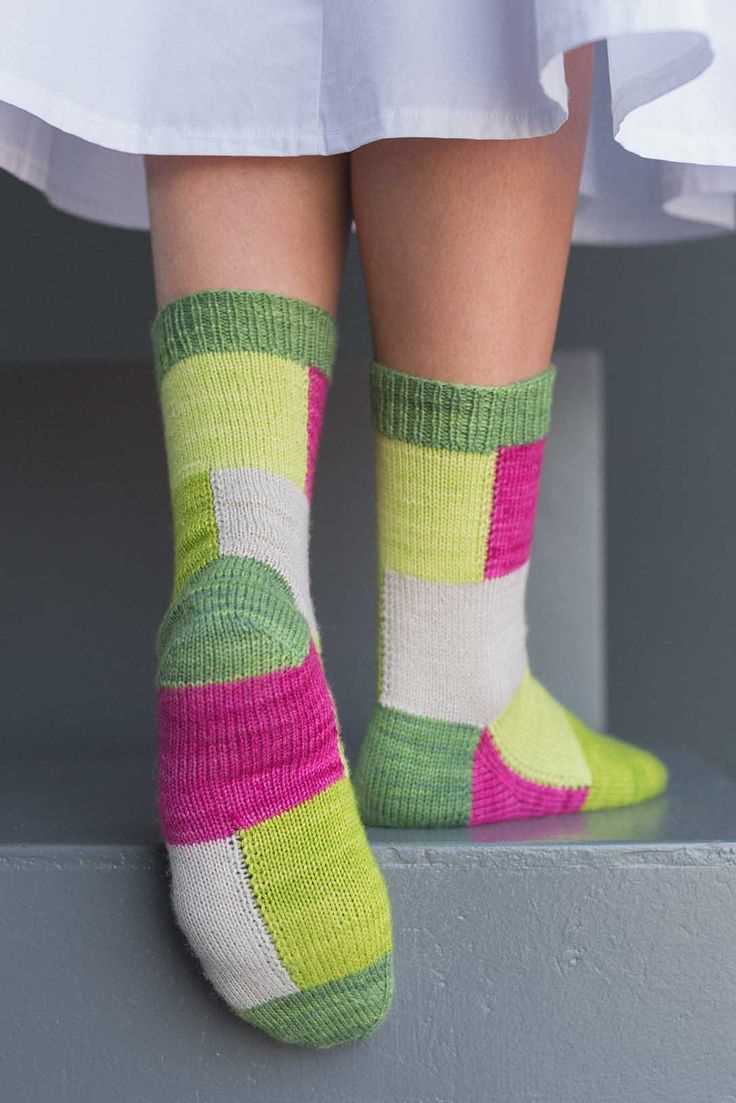
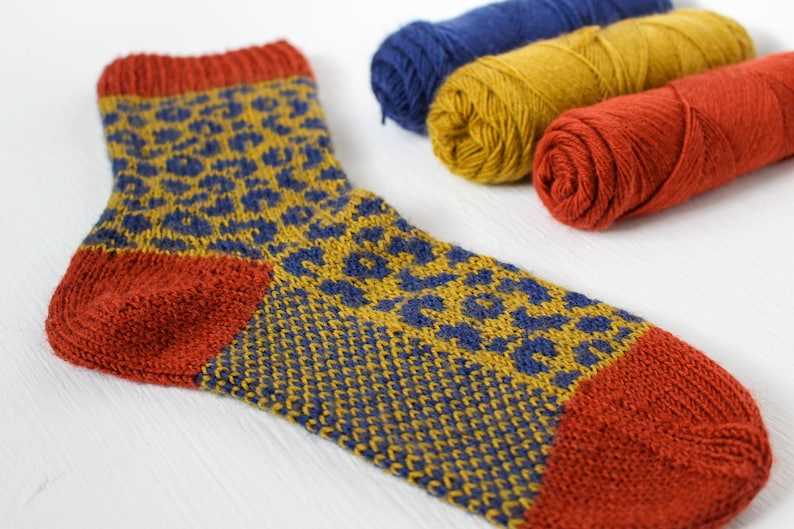
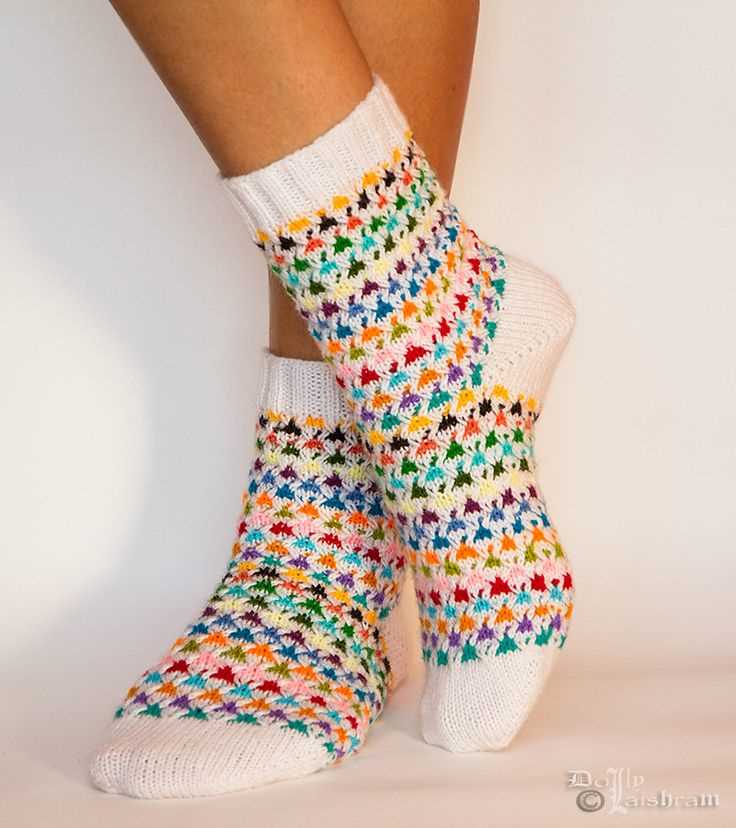
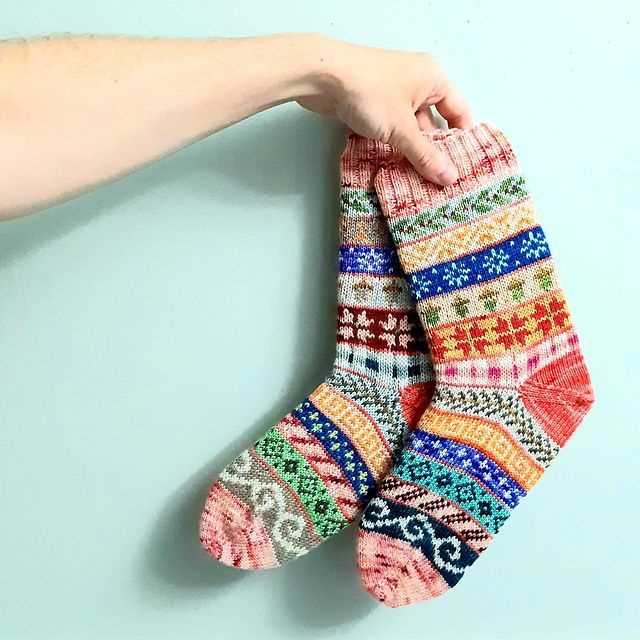
Colorwork Patterns: Colorwork patterns involve using multiple colors in a design to create intricate motifs and patterns. There are various techniques for colorwork, including stranded knitting, intarsia, and slip-stitch patterns. Stranded knitting, also known as Fair Isle knitting, involves carrying two or more colors across the back of the work as you knit. Intarsia involves using separate balls of yarn for each color and creating blocks of color within the work. Slip-stitch patterns create a colorwork effect by knitting with one color at a time and slipping stitches in the other color. Colorwork patterns can add visual interest and complexity to your socks, making them a true work of art.
Cable Patterns: Cable patterns create a textured design by crossing stitches over each other. They can range from simple twists to more complex braid-like patterns. Cable patterns are a popular choice for socks as they add depth and dimension to the fabric. Knitting cables requires using a cable needle or other method to hold the stitches in place while you cross them over each other. With practice, cable knitting can become a mesmerizing and rewarding technique to master.
Overall, using lace, colorwork, and cable patterns in your sock knitting can take your designs to the next level. These advanced techniques allow you to unleash your creativity and create unique and eye-catching socks. Whether you prefer delicate lace, bold colorwork, or intricate cables, there is a pattern out there that will suit your style and challenge your skills. So go ahead, grab your needles and explore the world of advanced sock knitting!