
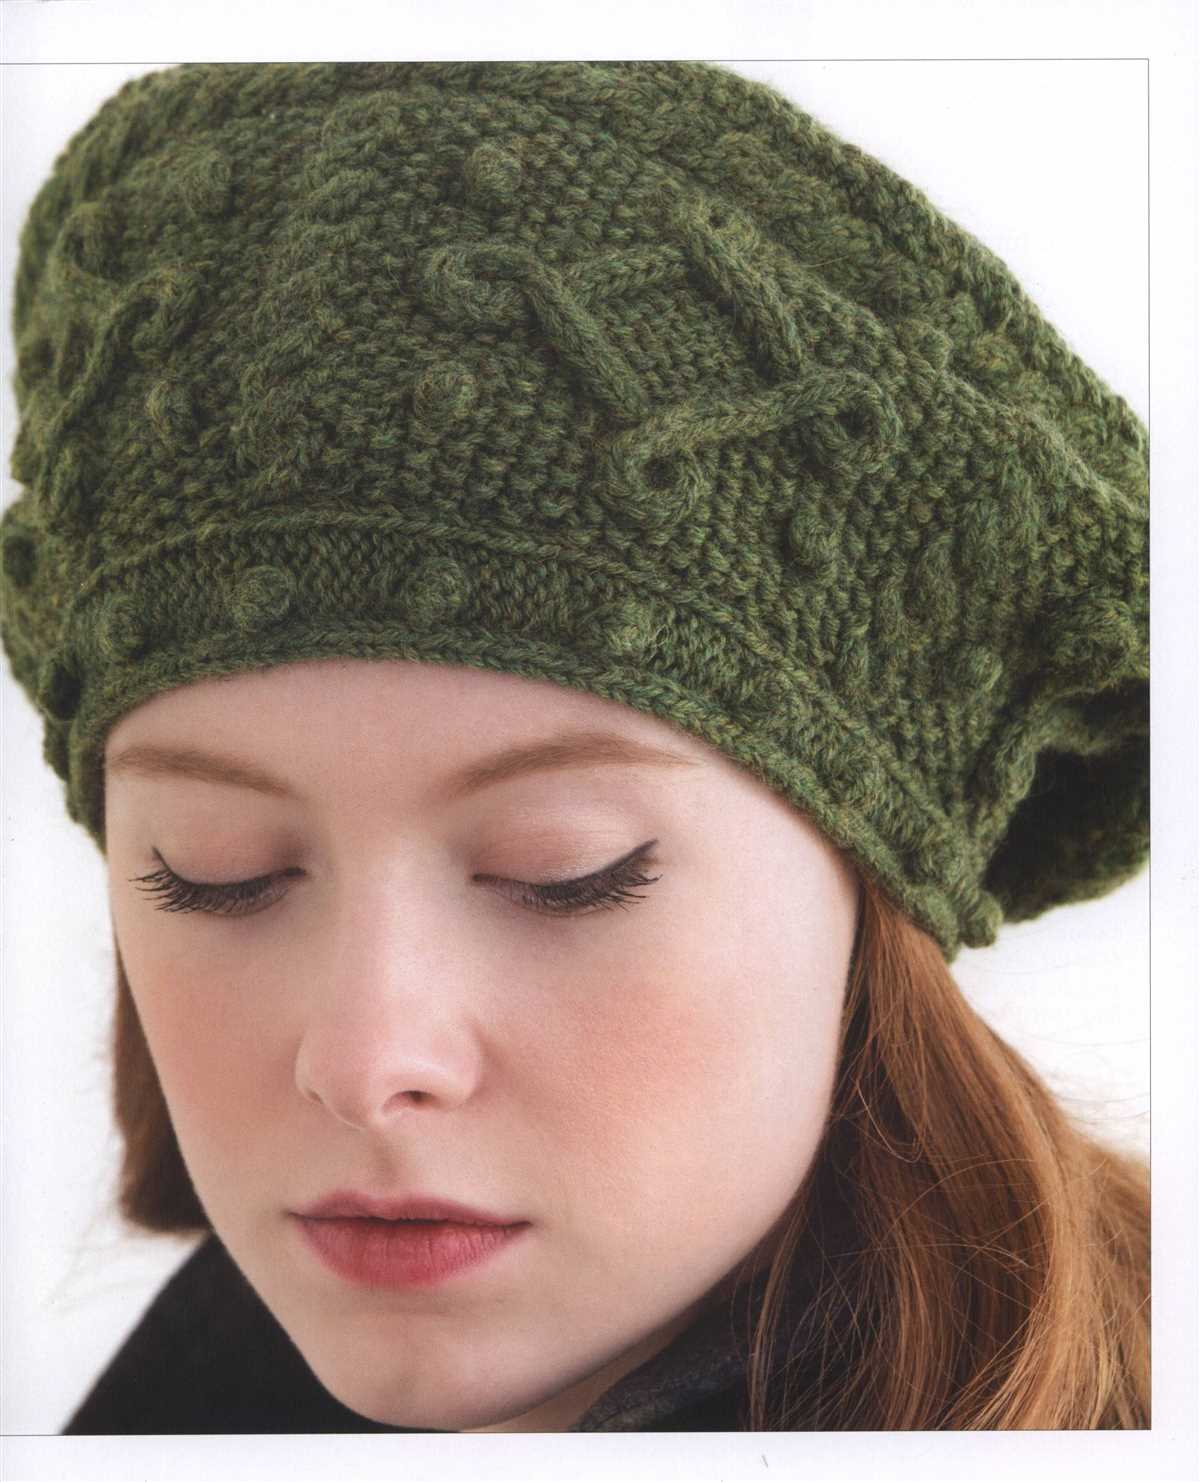
Whether you’re a beginner knitter looking to expand your skills or an experienced knitter in search of a quick and easy project, this simple knitted beret pattern is perfect for you. With just a few basic stitches and some soft yarn, you can create a stylish and cozy beret to keep you warm on those colder days.
This pattern is suitable for knitters of all levels, as it utilizes basic knitting techniques such as knit and purl stitches. The beret is knit in the round from the bottom up, creating a seamless and comfortable fit. The pattern provides instructions for two different sizes, so you can customize the beret to fit your head perfectly.
To complete this project, you will need a set of double-pointed needles or circular needles, depending on your preferred knitting method. Additionally, you will need a soft and chunky yarn, such as merino wool or alpaca, to achieve the desired warmth and texture. The pattern includes details on the stitch count, gauge, and materials needed, making it easy to gather all the necessary supplies before getting started.
Simple Knitted Beret Pattern
If you are a beginner knitter looking for a fun and stylish project, this simple knitted beret pattern is perfect for you. With just basic knitting stitches and techniques, you can create a trendy and cozy beret that will keep you warm during the colder months.
To begin, gather your materials. You will need a set of knitting needles (size 8 or 9), a tapestry needle, and one skein of medium-weight yarn. Choose a yarn color that matches your style and wardrobe.
Instructions:
- Cast on: Start by casting on 80 stitches onto your knitting needles.
- Ribbing: Knit 2 stitches, purl 2 stitches in a ribbing pattern for the first 1 inch of your beret.
- Body: Continue knitting in stockinette stitch (knit one row, purl one row) until your beret measures 7 inches in length. Make sure to knit the first stitch of each row to create a smooth edge.
- Decrease: Begin decreasing stitches to shape the top of the beret. Knit 2 stitches together at the beginning and end of each row until you have 4 stitches remaining.
- Finishing: Cut your yarn, leaving a long tail. Thread the tail through a tapestry needle and slip the remaining stitches onto the needle. Pull tight to close the top of the beret. Sew the side seam using the mattress stitch.
Once you have finished knitting and sewing, your simple knitted beret is ready to wear! Pair it with your favorite winter outfit for a chic and cozy look. This pattern is also great for making personalized gifts for friends and family.
Materials Needed
In order to create your own simple knitted beret, you will need a few materials. Here is a list of what you’ll need:
- Yarn: Choose a yarn that is suitable for a warm and comfortable beret. Look for a medium-weight yarn in your preferred color.
- Knitting Needles: You will need a pair of circular knitting needles in a size that matches the gauge of your chosen yarn. A size 7 or 8 needle should work well.
- Stitch markers: These are helpful for keeping track of your stitches and marking important points in the pattern.
- Tapestry needle: This needle is used for weaving in the ends of your yarn and any other finishing touches.
- Measuring tape: This will come in handy for determining the size and ensuring that your beret fits properly.
- Scissors: You’ll need a good pair of scissors for cutting the yarn and trimming any excess.
With these materials in hand, you will be ready to begin creating your own cozy knitted beret. Make sure to gather all the necessary supplies before you start to ensure a smooth and enjoyable knitting experience!
Choosing the Right Yarn
When it comes to knitting a beret, choosing the right yarn is essential to ensure the success of your project. The type and quality of yarn you use will affect the overall look, feel, and durability of your beret. Here are some important factors to consider when selecting yarn for your beret:
1. Fiber Content

Consider the fiber content of the yarn you choose. Different fibers have different properties and characteristics. Wool is a popular choice for berets as it is warm, breathable, and has good elasticity. Acrylic yarns are affordable and machine washable, but they may not have the same warmth and natural properties as wool. Silk or cashmere yarns can add a luxurious touch to your beret, but they may require special care.
2. Weight and Gauge
The weight of the yarn and the gauge it produces are important considerations. The weight of the yarn will determine the thickness and drape of your beret. Lighter weight yarns, such as fingering or sport weight, will create a more delicate and lightweight beret, while heavier weight yarns, such as worsted or bulky, will result in a more substantial and warm beret. Be sure to check the gauge recommendations for your pattern to ensure compatibility with your chosen yarn.
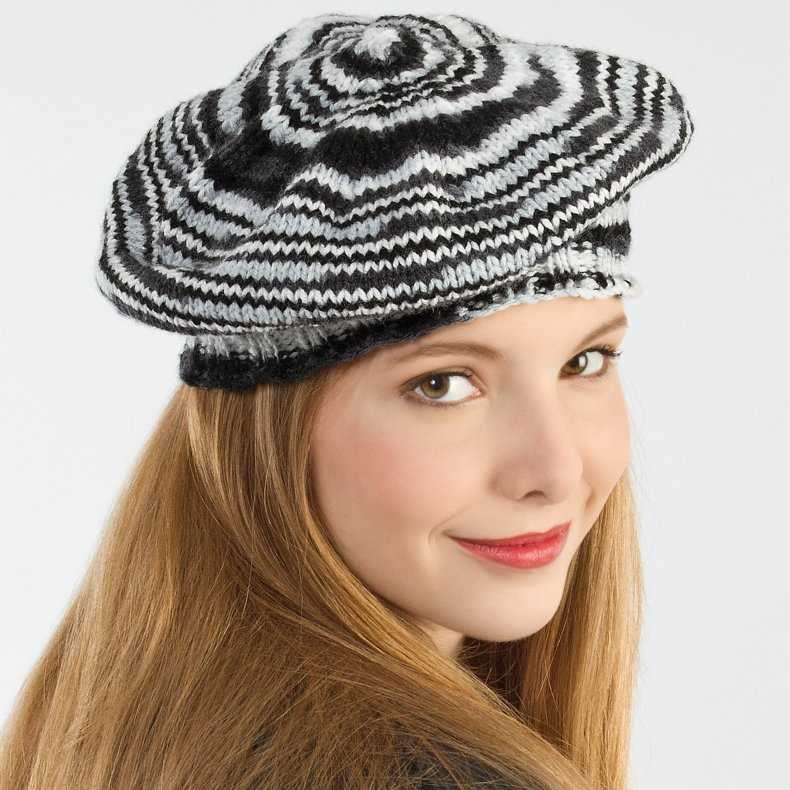
3. Color and Texture
The color and texture of the yarn can greatly impact the final appearance of your beret. Consider your personal style and the look you want to achieve. Solid or muted colors can create a classic and timeless beret, while variegated or self-striping yarns can add visual interest and dimension. Similarly, yarns with textured stitches or subtle variations in thickness can create unique and eye-catching designs.
4. Budget and Accessibility
Lastly, consider your budget and the accessibility of the yarn you choose. Yarn prices can vary greatly, and some specialty or luxury yarns may be more expensive. Additionally, certain types of yarn may be more readily available in your area or online. Consider these factors when making your decision.
By carefully considering these factors, you can choose the right yarn for your beret project, ensuring a beautiful and functional final product. Happy knitting!
Getting Started
This simple knitted beret pattern can be completed by even beginner knitters. With just a few basic knitting stitches and techniques, you can create a stylish and cozy beret that will keep you warm all winter long.
Before you begin, gather all the necessary materials for this project. You will need:
- Yarn: Choose a soft and warm yarn in your favorite color. Worsted weight or chunky yarn works best for this pattern.
- Knitting needles: Use a pair of circular or double-pointed needles in the recommended size for your yarn.
- Tapestry needle: This will be used for weaving in ends.
- Stitch markers: These will help you keep track of your stitches.
Once you have gathered all your materials, it’s time to cast on and start knitting. Follow the step-by-step instructions carefully, and don’t hesitate to refer to helpful online tutorials or knitting guides if needed.
Remember to take your time and enjoy the process of creating something with your own hands. Knitting can be a relaxing and rewarding hobby, and this simple beret pattern is a great way to start your knitting journey.
Knitting the Ribbing
Before you begin knitting the ribbing for your beret, it’s important to gather all the necessary materials. You will need a set of knitting needles in the appropriate size, as well as the specified type of yarn. Make sure to check the pattern for any specific instructions regarding needle size and yarn weight. It’s also helpful to have a tape measure and a stitch marker on hand.
To start the ribbing, cast on the required number of stitches. This is typically done using the long-tail cast-on method, but you can use any cast-on technique you prefer. The pattern will specify the number of stitches to cast on, so make sure to follow those instructions carefully.
Once you have cast on, you will begin working in a rib stitch pattern. This usually involves alternating between knit stitches and purl stitches. For example, the pattern may instruct you to *k1, p1* across the row. This means you will knit one stitch, purl one stitch, and repeat that sequence until the end of the row.
Continue working in the rib stitch pattern for the specified number of rows. It’s important to maintain an even tension and to count your rows as you go to ensure accuracy. You may find it helpful to place a stitch marker on the needle every few rows to help keep track of your progress.
Once you have completed the ribbing, you can move on to the next section of the pattern. The ribbing creates a stretchy edge that will help the beret fit snugly on the head. It also adds a decorative element to the design. With the ribbing complete, you’re ready to continue knitting and create the rest of the beret.
Increasing the Stitches
In order to create the desired shape and size for your knitted beret, you will need to increase the number of stitches. There are several methods for increasing stitches in knitting, but for this simple pattern, we will focus on two commonly used techniques: knitting into the front and back of a stitch (kfb) and yarn overs (yo).
The kfb method involves knitting into both the front and back of a stitch, effectively creating two stitches out of one. To do this, insert your right needle into the front of the stitch as if to knit, but instead of dropping the stitch off the left needle, bring the yarn around to the back and knit into the back of the same stitch. This will create an increase and add one stitch to your work.
Another common method for increasing stitches is a yarn over. To do a yarn over, simply bring the yarn to the front of your work, then bring it over the right-hand needle and to the back again before continuing with your pattern. This creates an extra loop of yarn on your needle, effectively increasing the stitch count by one.
When following the beret pattern, you will likely encounter specific instructions for increasing stitches at certain points. Make sure to pay close attention to these instructions and use the appropriate method to create the desired increase. By increasing the stitches in the correct manner, you will be able to create a beret that fits comfortably and has the desired shape.
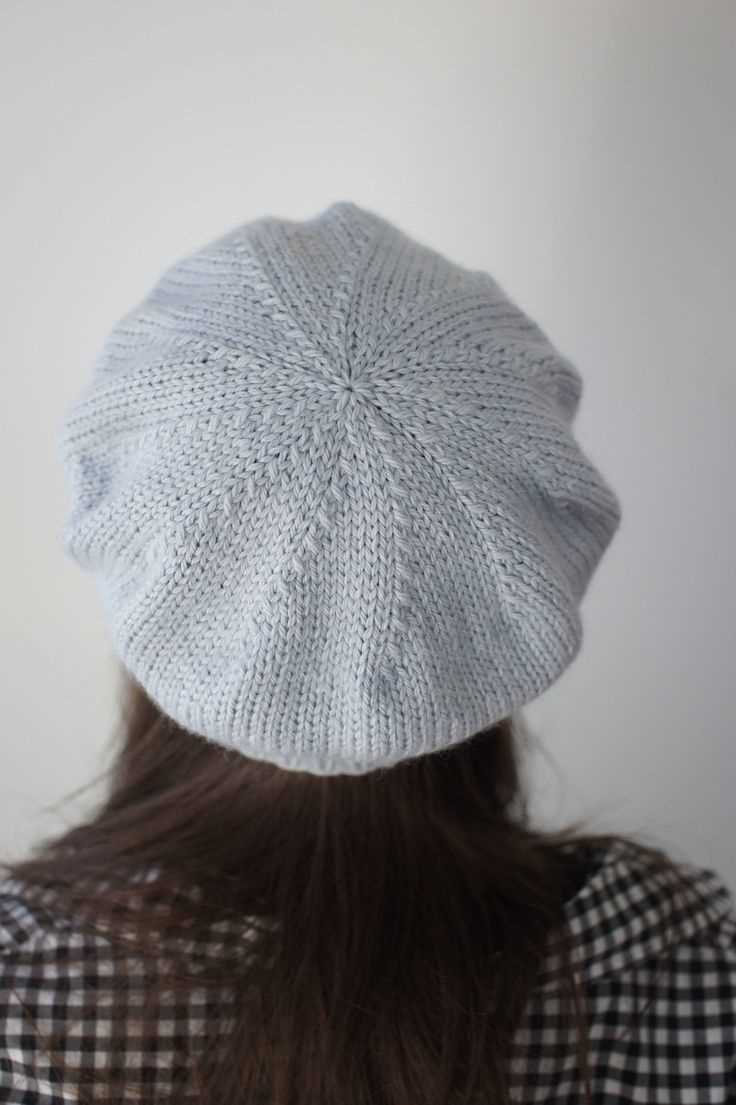
Shaping the Crown
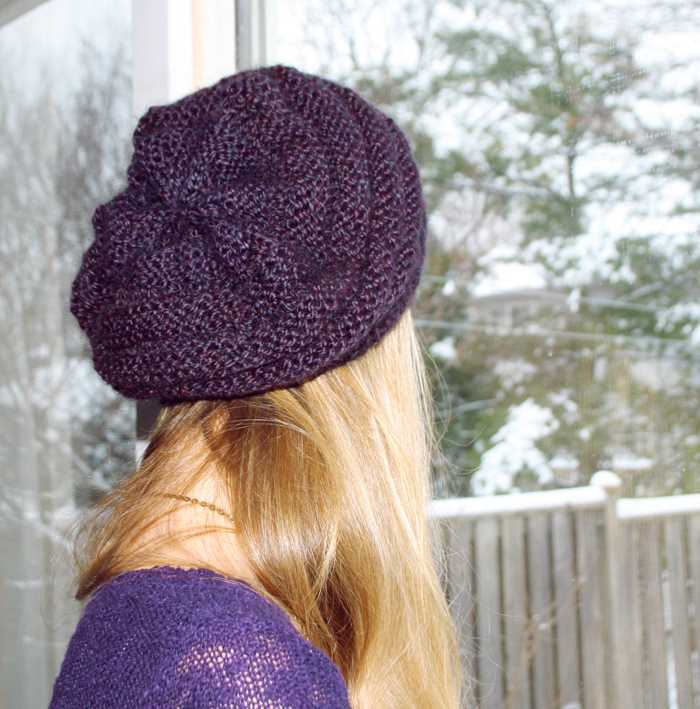
Once you have completed the ribbing section of the beret, it’s time to start shaping the crown. This is the part of the pattern where the beret begins to take shape and gain its characteristic slouchy look.
To shape the crown, you will need to decrease stitches evenly across the rounds. This can be done using various decrease techniques such as knit two together (k2tog) or slip, slip, knit (ssk). The specific decrease method will depend on the pattern you are following.
Start by dividing the stitches evenly onto double-pointed needles or using the magic loop method if you prefer. Then, follow the instructions in your pattern to begin the decrease rounds. These rounds typically involve decreasing a set number of stitches at regular intervals until you reach the desired crown size.
It’s important to keep track of your decreases and count your stitches after each decrease round to ensure you are following the pattern correctly. Markers can be helpful for keeping track of the beginning of each round and any stitch counts specified in the pattern.
Finishing Touches
After completing the knitting of your beret, it is time to add the finishing touches to make it look stylish and complete. Here are a few suggestions to consider:
Blocking
One of the most important steps in finishing your knitted beret is blocking. Blocking helps to even out the stitches and shape the beret to achieve the desired fit and look. To block your beret, you can either wet block or steam block it. Wet blocking involves soaking the beret in lukewarm water, gently squeezing out the excess water, and then pinning it to a blocking mat or towel in the desired shape. Steam blocking, on the other hand, involves using a steam iron or steamer to steam the beret, while stretching and shaping it with your hands. Whichever method you choose, make sure to let the beret dry completely before proceeding to the next step.
Adding a Pom Pom
A pom pom is a fun and playful addition to your beret. It can be made using leftover yarn from your project or you can purchase a ready-made pom pom. To attach the pom pom, thread a yarn needle with a length of yarn and insert it through the center of the pom pom. Then, thread the needle through the top of your beret and secure it by tying a knot on the inside. Trim any excess yarn if necessary. The pom pom can be positioned on the side or on top of the beret, depending on your preference.
Embellishments
If you want to add some extra flair to your beret, consider adding embellishments such as beads, buttons, or embroidery. These can be sewn onto the beret in a decorative pattern or randomly scattered. Make sure to choose embellishments that complement the color and style of your beret.
Finishing the Edges
To give your beret a polished look, you can finish the edges with a ribbed or rolled hem. To create a ribbed hem, you can use a smaller needle size and knit a few rows in a rib stitch pattern before binding off. To create a rolled hem, you can simply fold the edge of the beret to the desired width and tack it down with a few stitches using a matching yarn.
By following these finishing touches, you can transform your simple knitted beret into a stylish accessory that reflects your personal taste and creativity.
Adding a Pom Pom
Adding a pom pom to your knitted beret can be a fun and playful way to add some flair to your hat. Here are some simple steps you can follow to attach a pom pom to your beret:
1. Choose your pom pom: There are many different types of pom poms available, from faux fur to yarn pom poms. Choose a pom pom that matches the color and style of your knitted beret.
2. Thread a needle with a long string: Choose a color of string that matches your pom pom and thread it through a needle. Make sure the string is long enough to reach through the top of your beret and tie securely.
- Insert the needle from the inside of the beret, through the top of the hat.
- Thread the string through the center of the pom pom.
- Bring the needle back through the top of the beret, next to the initial insertion point.
- Tie the string securely in a knot to keep the pom pom in place.
3. Trim any excess string: Once your pom pom is securely attached, trim any excess string so that it doesn’t hang down and get in the way.
Adding a pom pom can be a great way to personalize your knitted beret and make it uniquely yours. Have fun experimenting with different colors and styles to find the perfect pom pom for your beret!
Blocking the Beret

Blocking is an important step in knitting projects, as it helps to shape the finished item and improve its overall appearance. To block the knitted beret, follow these simple steps:
1. Soak the beret
Begin by filling a basin or sink with lukewarm water. Gently place the knitted beret in the water, making sure it is completely submerged. Let it soak for about 15 minutes to ensure that the fibers are fully saturated.
2. Remove excess water

After soaking, carefully lift the beret out of the water and gently squeeze out the excess moisture. Avoid wringing or twisting the fabric, as this can stretch or distort the shape of the beret.
3. Shape the beret
Next, you’ll need to shape the beret to achieve the desired fit and style. Place a bowl or plate of the appropriate size on a clean towel. Lay the damp beret over the bowl or plate, pulling and stretching it gently to shape it. Smooth out any wrinkles or uneven areas with your hands.
4. Pin the beret
Using T-pins or blocking pins, secure the beret to the towel, making sure it maintains its shape. Pin around the edges and any areas that need to be stretched or flattened. Take care not to pull too tightly, as this could distort the stitches or create unwanted tension in the fabric.
5. Let it dry
Once the beret is pinned in place, leave it to air dry completely. This may take up to 24 hours, depending on the temperature and humidity in your environment. Avoid moving or disturbing the beret while it is drying to ensure that it retains its shape.
After the beret is completely dry, carefully remove the pins and take a moment to admire your finished creation. Blocking not only improves the overall appearance of the beret, but it also helps to set the stitches and achieve a more professional finish. Now, it’s ready to be worn and enjoyed!
Wearing and Styling Tips
Now that you have finished knitting your beret, it’s time to think about how to wear and style it. Here are some tips to help you make the most of your new accessory:
1. Pair it with various outfits: A knitted beret can be a versatile accessory that can be paired with different types of outfits. It can add a touch of style to a casual jeans and t-shirt look or be a chic addition to a more formal ensemble.
2. Experiment with different hairstyles: The beret is a hat that allows you to show off your hair. Try wearing it with your hair down, in a low ponytail, or even in a messy bun for a more relaxed look.
3. Play with colors: Don’t be afraid to experiment with different colors when choosing your yarn. Opt for a neutral color for a classic and timeless look, or go bold with a bright and vibrant hue to make a statement.
4. Consider the weather: While a knitted beret can be a stylish accessory, it is also functional. Choose a yarn that will provide warmth during colder months, or opt for a lighter yarn for a more breathable option in the spring or fall.
5. Rock it with confidence: The most important tip for wearing a knitted beret is to wear it with confidence. Own your style and rock your beret with pride!
With these tips in mind, you’re ready to showcase your new knitted beret and complete your outfit with a touch of style and warmth.