
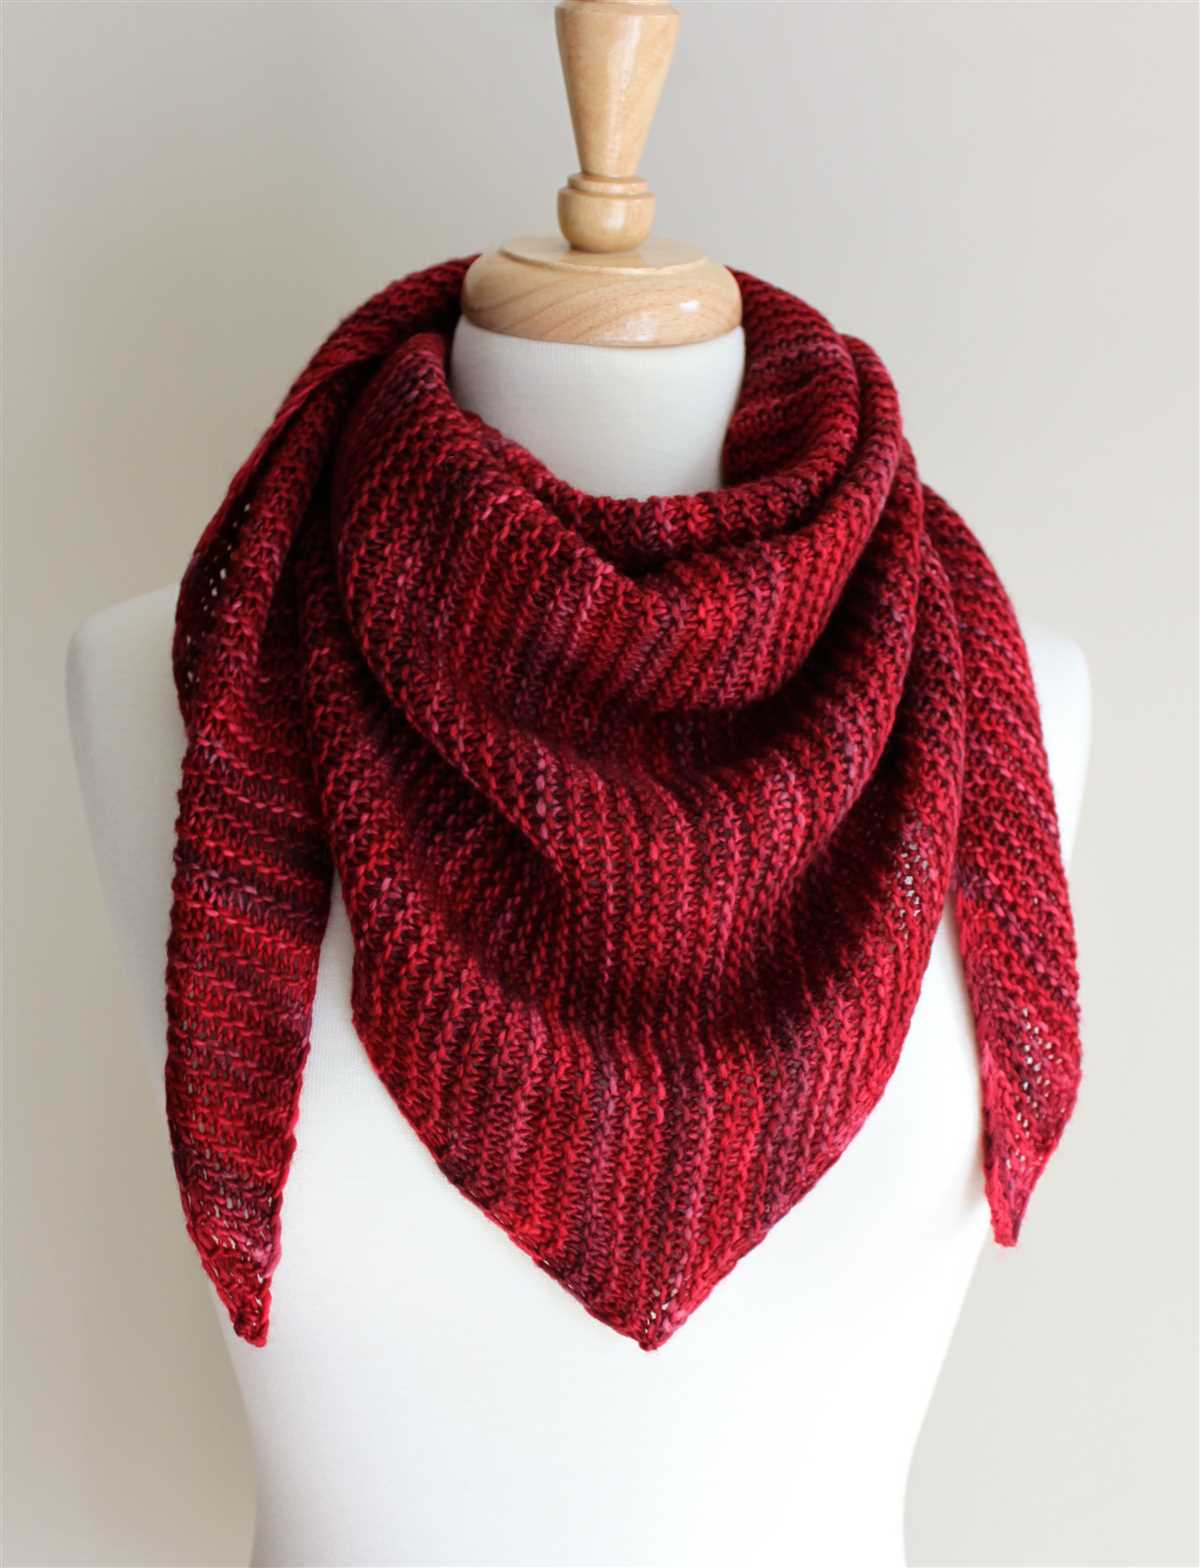
Are you looking for a stylish and versatile scarf pattern that you can wear in different ways? Look no further than the sideways triangle scarf knitting pattern! This unique pattern creates a triangle-shaped scarf that is knit horizontally, allowing you to easily customize the length and width to suit your preferences.
The sideways triangle scarf pattern is perfect for knitters of all skill levels, from beginners to advanced. The pattern uses basic knitting stitches, such as knits and purls, and requires only a single skein of yarn. You can choose any type of yarn you like, from lightweight cotton to cozy wool, depending on the season and your personal style.
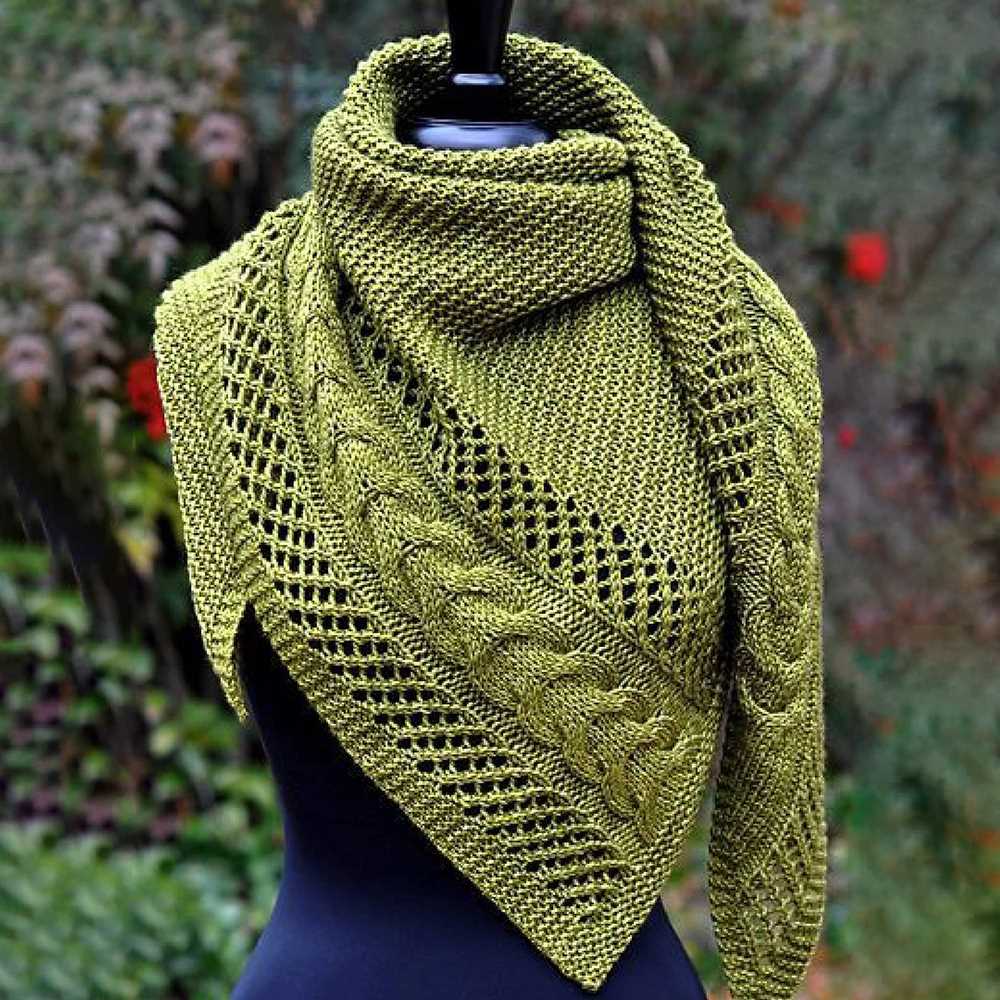
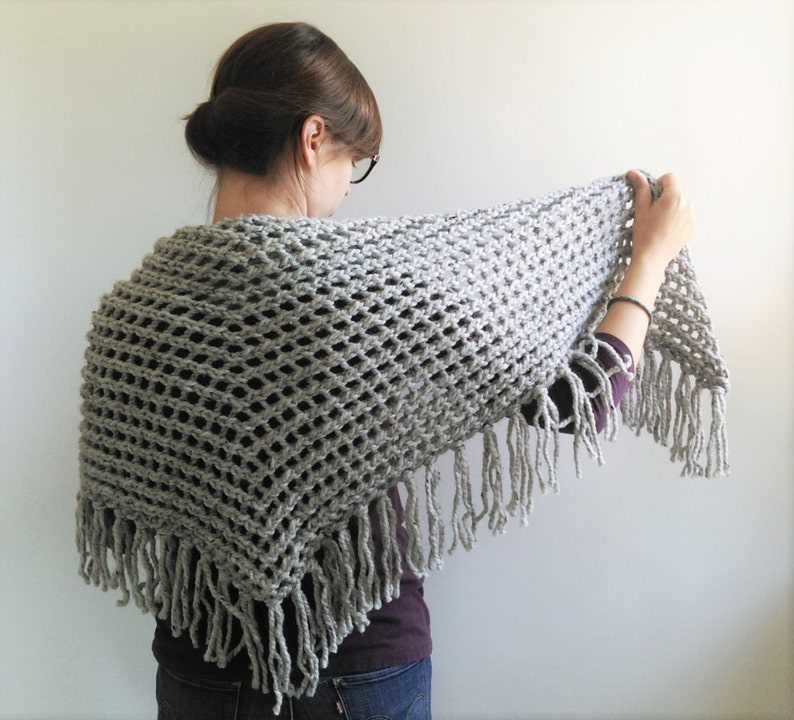
One of the best features of the sideways triangle scarf pattern is its versatility. You can wear it as a traditional scarf, draping it around your neck and letting the ends hang down in the front. Alternatively, you can wrap it around your shoulders like a shawl, or even button it together at the ends to create a cowl-like effect. With this pattern, you can easily switch up your look and stay warm and fashionable throughout the year.
Sideways Triangle Scarf Knitting Pattern: A Step-by-Step Guide
Knitting a sideways triangle scarf can be a fun and rewarding project for knitters of all skill levels. This versatile accessory can be worn in various ways, making it a must-have in any wardrobe. Whether you’re a beginner or an experienced knitter, this step-by-step guide will help you create your own stylish and cozy sideways triangle scarf.
Materials Needed:
- Yarn of your choice (preferably DK or worsted weight)
- Knitting needles in a size that complements your yarn
- Tapestry needle for weaving in ends
- Scissors
Step 1: Casting On
To begin, cast on an odd number of stitches. This will serve as the base of your triangle. For example, you can cast on 101 stitches.
Step 2: Garter Stitch
Next, knit every row in garter stitch until your scarf reaches the desired width. Garter stitch is created by knitting every row, resulting in a textured fabric. Continue knitting until you have achieved the desired width for your scarf.
Step 3: Increase Rows
Once your scarf has reached the desired width, it’s time to start increasing rows to create the triangular shape. To do this, you will increase one stitch at the beginning and end of each right-side row. This can be done by knitting into the front and back of the first and last stitch on each right-side row. Continue increasing rows until your scarf is the desired length.
Step 4: Decrease Rows
Now it’s time to create the point of the triangle by decreasing stitches. On each wrong-side row, knit the first and last two stitches together. This will decrease the number of stitches by two on each wrong-side row. Continue decreasing rows until only a few stitches remain.
Step 5: Bind Off
Finally, when only a few stitches are left, bind off all stitches to secure your work. Cut the yarn, leaving a tail for weaving in the ends.
Congratulations! You have successfully completed knitting a sideways triangle scarf. Now it’s time to weave in any loose ends and block your scarf to give it a polished and finished look. Enjoy wearing your cozy and stylish creation!
How to Choose the Right Yarn and Needles
Choosing the right yarn and needles is an important step in knitting a sideways triangle scarf. The yarn you choose will determine the softness, drape, and warmth of your scarf, while the needles will affect the size and tension of your stitches. Here are some tips to help you make the right choices.
Consider the Yarn Weight
The yarn weight refers to the thickness of the yarn and is typically categorized into different categories, such as lace, fingering, sport, worsted, and bulky. The weight of the yarn you choose will affect the overall look and feel of your scarf. A lace or fingering weight yarn will create a light and airy scarf, while a worsted or bulky weight yarn will be warmer and more substantial.
Look for Fiber Content
Consider the fiber content of the yarn as it will determine the characteristics of your scarf. Natural fibers like wool, alpaca, and cashmere are warm and provide good insulation. Synthetic fibers like acrylic and nylon are often more affordable and easier to care for. Blends of different fibers can offer the best of both worlds, combining warmth with ease of care.
Check the Gauge
Before starting your project, it’s important to match the yarn’s recommended gauge. The gauge refers to the number of stitches and rows per inch, and it ensures that your finished scarf will have the correct measurements. Use the recommended needle size and adjust if necessary to achieve the correct gauge. Swatching is a good practice to test your gauge before diving into the full project.
Consider Needle Length
The length of your needles will depend on the width of your scarf. For a wider scarf, longer needles such as circular needles or long straight needles may be more comfortable to accommodate the stitches. For a narrower scarf, shorter straight needles may be sufficient. Choose needles that feel comfortable in your hands and allow you to knit with ease.
Final Thoughts
Choosing the right yarn and needles for your sideways triangle scarf is essential to achieving the desired look and feel. Take your time to consider the yarn weight, fiber content, gauge, and needle length, ensuring that they all align with your preferences and the intended style of your scarf. With the right materials in hand, you’ll be well-equipped to knit a beautiful and cozy scarf.
Casting On: Getting Started with Your Sideways Triangle Scarf
Before you can start knitting your sideways triangle scarf, you’ll need to cast on your stitches. Casting on is the process of creating the foundation row of stitches that you will work with throughout the pattern. In this tutorial, we’ll go through the steps to help you get started on your scarf.
To begin, you’ll need your knitting needles and your chosen yarn. Make sure you have the appropriate size needles for your yarn, as indicated in the pattern. Once you have everything ready, you can start casting on.
1. Make a Slip Knot
The first step is to create a slip knot, which will serve as your first stitch. To do this, make a loop with the yarn, crossing the end over the main strand. Insert your needle through the loop and tighten it to create a secure knot.
2. Cast On Stitches
Now that you have your slip knot, you can start casting on stitches. Hold the needle with the slip knot in your right hand and the other needle in your left hand. Insert the left needle into the slip knot from front to back, creating a new loop with the yarn around the right needle. This loop will become your first cast on stitch. Repeat this process until you have cast on the required number of stitches for your pattern.
Note: Some patterns may specify a particular method of casting on, such as the long tail cast on or the cable cast on. Make sure to follow the instructions provided in your pattern if it specifies a specific method.
3. Continue with the Pattern
Once you have cast on your stitches, you can begin working the pattern for your sideways triangle scarf. Follow the instructions for each row, paying attention to any increases or decreases that may be required to create the triangular shape. Remember to maintain an even tension and check your gauge periodically to ensure your scarf turns out as desired.
Casting on is just the first step in creating your sideways triangle scarf. With these instructions, you’ll be well on your way to knitting a beautiful and cozy accessory to keep you warm. Happy knitting!
Knitting the First Section: Creating the Base of the Triangle
When knitting the sideways triangle scarf, the first section involves creating the base of the triangle. This section sets the foundation for the entire scarf and determines the width and length of the triangle shape.
To start, you will need to cast on a specific number of stitches, depending on your desired width. The pattern should provide the recommended number of stitches to cast on. Using a pair of knitting needles, cast on the stitches following the instructions in the pattern.
Once the stitches are cast on, you will proceed to knit each row according to the pattern instructions. This may involve a combination of knit and purl stitches or other knitting techniques. It’s important to carefully follow the pattern instructions to ensure the correct stitch pattern is created.
As you knit the first section of the sideways triangle scarf, you will gradually increase the number of stitches in each row. This creates the triangular shape of the scarf. Typically, the pattern will specify how many stitches to increase on each row. Repeat these increasing stitches until the desired width of the base is achieved.
The first section is an essential part of the sideways triangle scarf as it establishes the base of the triangle. Take your time and carefully follow the pattern instructions to ensure you are creating the correct shape. Once this section is complete, you can move on to the next section to continue building the triangle shape of the scarf.
Increasing Stitches: Shaping the Triangle
When knitting a sideways triangle scarf, increasing stitches is an essential technique used to shape the triangle. By gradually adding more stitches on each row, the scarf gradually widens and forms the triangular shape. There are several ways to increase stitches, and the choice depends on the desired aesthetic and the stitch pattern used in the scarf.
One common method of increasing stitches is the yarn-over (YO) increase. This simple technique involves wrapping the yarn around the needle before knitting the next stitch. The yarn-over creates a small hole in the fabric, which can add a decorative element to the scarf. Yarn-overs are typically used in lace or openwork stitch patterns to create an airy and delicate texture.
Another method of increasing stitches is the knit front and back (KFB) increase. With this technique, you knit into the front of the stitch as usual, but instead of sliding it off the needle, you knit into the back of the same stitch. This creates an additional loop on the needle, effectively increasing the stitch count by one. KFB increases create a clean and subtle increase, making it suitable for more solid or textured stitch patterns.
In addition to YO and KFB increases, other commonly used methods include the make one (M1) increase and the lifted increase. The make one increase involves picking up the horizontal strand between stitches and knitting into it, while the lifted increase involves picking up the bar between stitches and knitting into the back of it. These increases are versatile and can be used in a variety of stitch patterns.
When increasing stitches in a sideways triangle scarf, it’s important to space the increases evenly across each row to maintain the symmetry of the triangle. It may be helpful to use stitch markers or count stitches to ensure the increases are distributed appropriately. By skillfully increasing your stitches, you can create a beautifully shaped triangle scarf that is both stylish and functional.
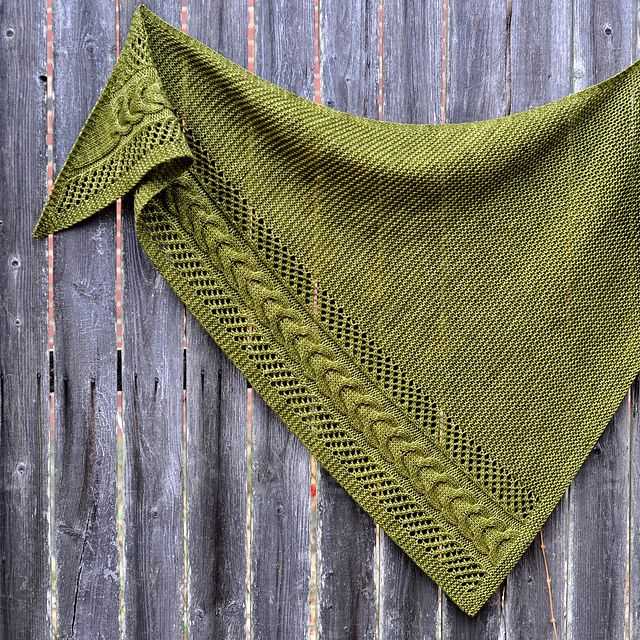
Garter stitch is a versatile knitting stitch pattern that adds texture and visual interest to any knitting project. When added as a border to a sideways triangle scarf, it can enhance the design by providing a clean and finished look. The garter stitch border not only frames the scarf and adds structure to the edges, but it also creates a contrast with other stitch patterns used in the body of the scarf.
Why Add Garter Stitch Borders?
Adding garter stitch borders to a sideways triangle scarf can serve multiple purposes. Firstly, it prevents the edges from curling, which is a common issue with certain stitch patterns. The garter stitch is naturally elastic and helps to keep the edges flat and stable. This makes the scarf more wearable and provides a polished finish.
Additionally, the garter stitch border can provide a decorative element to the scarf. By using a contrasting color or a different yarn texture, the border can create an eye-catching frame and add visual interest to the overall design. It can also serve as a design element that ties the scarf together with other knitted accessories, such as hats or mittens.
How to Add Garter Stitch Borders
To add garter stitch borders to a sideways triangle scarf, you will need to pick up stitches along the edges of the scarf. Start by casting on the required number of stitches for the border. Then, using a smaller needle size than the one used for the body of the scarf, pick up stitches along one edge of the scarf.
Continue to knit the border in garter stitch until it reaches the desired width. To ensure that the edges remain neat, it is recommended to slip the first stitch of every row purlwise and knit the last stitch of every row. This will create a smooth and clean edge.
Repeat the process on the other edge of the scarf to complete the garter stitch border. Once finished, bind off the stitches and weave in any loose ends. Blocking the scarf can help to further enhance the appearance of the garter stitch border and ensure that it lays flat.
By adding garter stitch borders to a sideways triangle scarf, you can elevate the design and create a finished look. Whether you choose to use a contrasting color or stick with the same yarn as the body of the scarf, the garter stitch border will provide a clean edge and prevent curling. Experiment with different yarns and colors to create a unique and personalized sideways triangle scarf.
Changing Colors: Creating a Beautiful Contrast
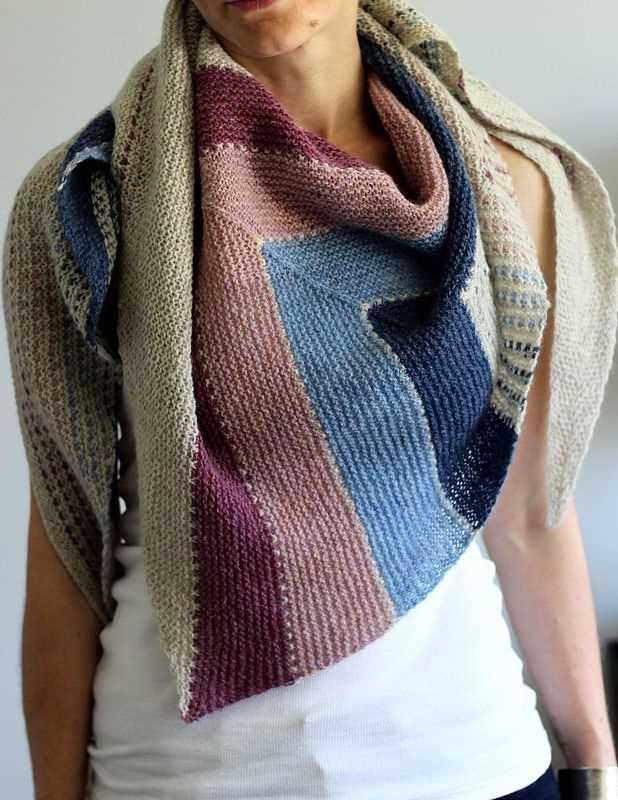
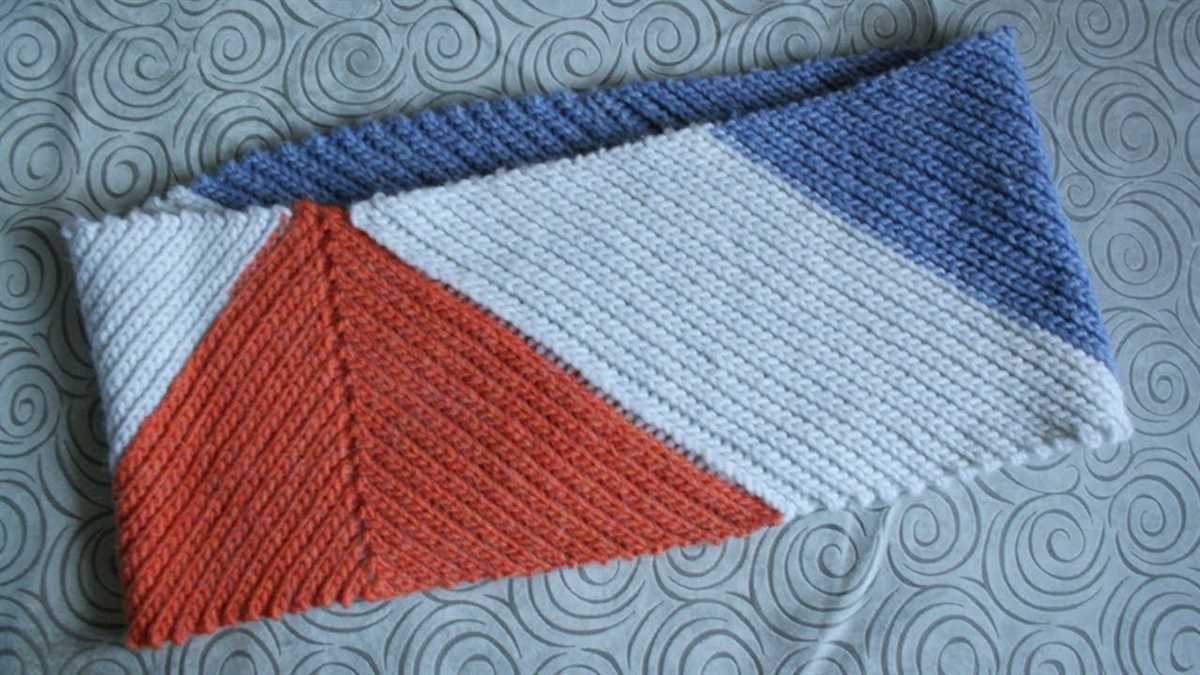
When knitting a sideways triangle scarf, one of the most effective ways to create visual interest and make your project truly stand out is by changing colors. By strategically incorporating different shades and hues, you can create a beautiful contrast that adds depth and dimension to your design.
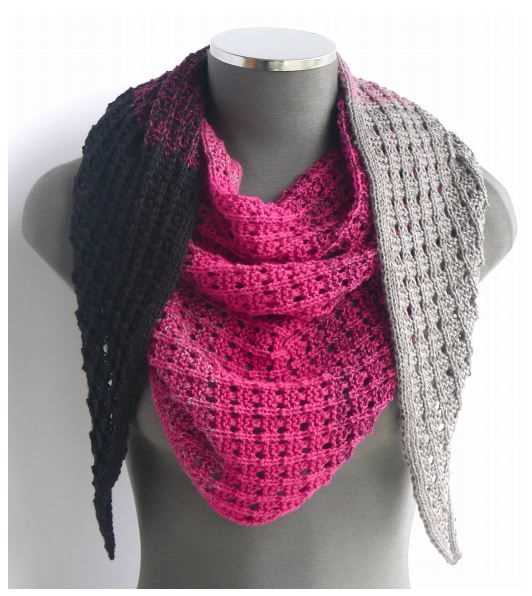
One way to achieve this contrast is by using complementary colors. Complementary colors are those that are opposite each other on the color wheel, such as blue and orange or red and green. When these colors are placed next to each other, they create a vibrant and eye-catching effect. You can use this technique to create stripes or blocks of contrasting colors in your scarf, or even incorporate one color as a border to make it pop.
Another option is to choose colors that are more tonal or gradient in nature. This means selecting colors that are similar in hue but vary in shade or intensity. For example, you can combine different shades of blue or green to create a subtle ombre effect. This approach results in a more subtle contrast that adds a sense of depth and texture to your knitting.
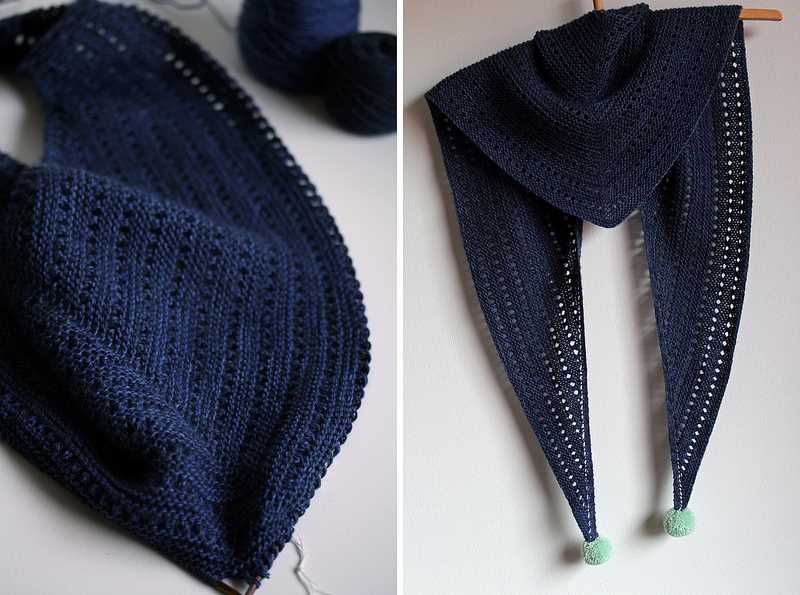
If you prefer a more bold and dramatic contrast, you can opt for high-contrast colors. These are colors that are very different from each other in terms of brightness and intensity. For instance, pairing a dark, rich color like navy blue with a bright, vibrant color like yellow can create a striking visual impact. This technique works particularly well when using a variegated or multicolored yarn as it already contains a range of contrasting shades.
Incorporating different colors into your sideways triangle scarf allows you to express your creativity and personalize your project. Whether you choose complementary colors, tonal gradients, or high-contrast combinations, the key is to experiment and have fun with the process. With careful color selection, you can create a beautiful contrast that adds visual interest and makes your sideways triangle scarf truly unique.
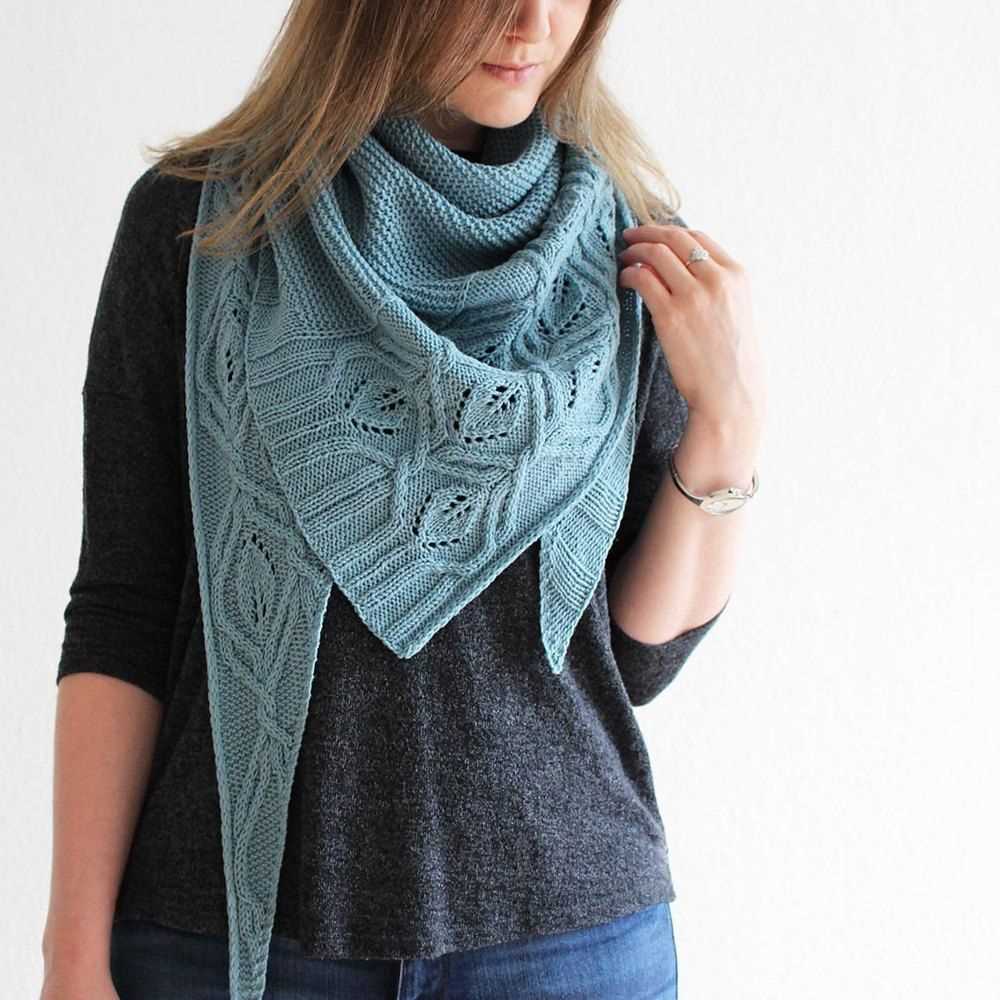
Creating Eyelets: Adding a Delicate Detail
When knitting a sideways triangle scarf, adding eyelets can be a beautiful way to incorporate a delicate detail into your design. Eyelets are small holes that are created in the fabric through a series of yarn overs, resulting in a lacy and airy pattern. This technique not only adds visual interest to your scarf but also allows for better drape and breathability.
To create eyelets in your scarf, you can follow a simple pattern that involves strategically placing yarn overs at specific points in your knitting. Yarn overs are made by wrapping the yarn over the needle without knitting or purling a stitch. These extra loops of yarn will form the holes that make up the eyelets.
One common method for creating eyelets is to work a yarn over followed by a decrease stitch, such as a knit two together (k2tog) or a slip, slip, knit (ssk). This combination of stitches creates a balanced eyelet that maintains the overall symmetry of the pattern. You can experiment with different combinations of yarn overs and decreases to create unique and intricate eyelet designs.
If you want to add eyelets to your existing sideways triangle scarf pattern, it’s important to consider the placement and frequency of the eyelets. Too many eyelets can overwhelm the design, while too few may not have enough impact. You can evenly distribute the eyelets throughout the scarf or create a more intentional pattern by grouping them together in certain sections.
Once you’ve completed your sideways triangle scarf with eyelets, you can further enhance the delicate detail by blocking the finished piece. Blocking involves gently wetting the scarf, shaping it to your desired dimensions, and allowing it to dry flat. This process helps to even out the stitches, open up the eyelets, and give the scarf a polished and professional look.
Binding Off: Finishing the Sideways Triangle Scarf
After completing all the rows of your sideways triangle scarf knitting pattern, it’s time to bind off and finish your project. Binding off is a technique used to secure the stitches in place and create a neat edge for your scarf.
To bind off, start by knitting the first two stitches of your row. Then, using your left needle, lift the first stitch over the second stitch and off the needle. You have now bound off one stitch. Continue knitting one stitch and binding off one stitch until you reach the end of the row. This will create a neat and even edge.
Once you have bound off all the stitches, cut your yarn, leaving a tail of about 6 inches. Thread this tail through the last stitch and pull tight to secure. You can then weave in the loose ends using a tapestry needle to make sure they are hidden and secure.
After binding off and weaving in the ends, you can block your scarf if desired. Blocking is the process of wetting or steaming your knitted piece to even out the stitches and give it a professional finish. To block your sideways triangle scarf, soak it in lukewarm water for about 15 minutes, gently squeeze out the excess water, and then lay it flat to dry. Alternatively, you can steam block it by hovering a steam iron over the scarf without actually touching it.
Once your scarf is dry and blocked, it’s ready to wear or gift to someone special. The sideways triangle shape creates a unique and versatile accessory that can be styled in various ways. Whether you wear it as a traditional scarf, a wrap, or a shawl, your finished project is sure to be a beautiful addition to your wardrobe.
Blocking the Finished Scarf: Improving the Drape and Shape
Once you have finished knitting your sideways triangle scarf, you may notice that the fabric does not have the desired drape and shape. This is especially true if you used a yarn with less drape or if your tension was tight while knitting. Blocking is an essential step in the knitting process that can help improve the overall look and feel of your finished scarf.
Blocking: Blocking is the process of wetting or steaming your finished knitted piece to relax the fibers and shape the fabric to the desired dimensions. It can also help even out any uneven stitches or tension issues. Blocking is particularly important for lace patterns or garments that need to have an open and drapey fabric.
Here are the steps to block your sideways triangle scarf:
- Soak the scarf: Fill a basin or sink with lukewarm water and add a small amount of wool wash or mild detergent. Submerge your scarf and gently squeeze it to ensure the entire piece is soaked.
- Remove excess water: After soaking for about 15 minutes, carefully lift the scarf out of the water and gently squeeze out the excess water. Avoid wringing or twisting the fabric, as this can cause it to stretch or lose its shape.
- Lay out the scarf: Lay a clean towel flat on a clean surface and place the soaked scarf on top. Gently shape the scarf to its desired dimensions, making sure the edges are straight and the triangle shape is well-defined.
- Pin the scarf: Using rust-proof T-pins or blocking wires, pin the edges of the scarf to the towel, securing it in place. This will help the fabric retain its shape as it dries.
- Let it dry: Leave the scarf undisturbed and allow it to air dry completely. This can take anywhere from a few hours to overnight depending on the thickness of the yarn and the ambient humidity.
- Remove the pins: Once the scarf is completely dry, carefully remove the pins or wires. The fabric should now have a better drape and shape.
By following these blocking steps, you can greatly improve the drape and shape of your sideways triangle scarf, giving it a more professional finish. Remember to always read and follow the care instructions for your specific yarn to ensure the best results.
Styling and Wearing Your Sideways Triangle Scarf: Tips and Ideas
Now that you have finished knitting your sideways triangle scarf, it’s time to style and wear it! Here are some tips and ideas to help you make the most of your new accessory.
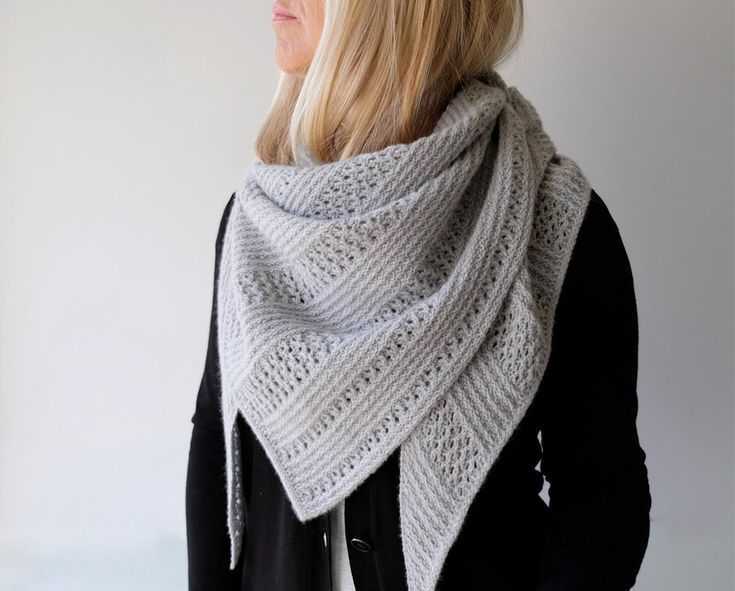
1. Draped Over One Shoulder: One of the classic ways to wear a triangular scarf is to drape it over one shoulder. This style adds a touch of elegance and can be paired with a dress or a blouse. You can secure the scarf with a brooch or let it hang freely.
2. Wrapped Around the Neck: For a cozy and functional look, wrap your sideways triangle scarf around your neck. You can either let the ends hang loose or tie them together in a loose knot. This style works well with both casual and more formal outfits.
3. Belted Around the Waist: Transform your sideways triangle scarf into a unique belt by tying it around your waist. This adds an interesting detail to a simple outfit and creates a flattering silhouette. You can use a thin belt to secure the scarf or simply tie it in a knot.
4. Headscarf or Turban: If you’re feeling adventurous, try wearing your sideways triangle scarf as a headscarf or turban. This style is perfect for adding a bohemian or vintage touch to your look. Experiment with different tying techniques to achieve your desired look.
5. Layered with Other Scarves: Don’t be afraid to mix and match your sideways triangle scarf with other scarves for a layered look. You can pair it with a chunky knit scarf or a lightweight silk scarf to add texture and dimension to your outfit.
Remember, the versatility of the sideways triangle scarf allows you to get creative and explore different styling options. Have fun experimenting with different ways to wear your scarf and make it a standout piece in your wardrobe!