
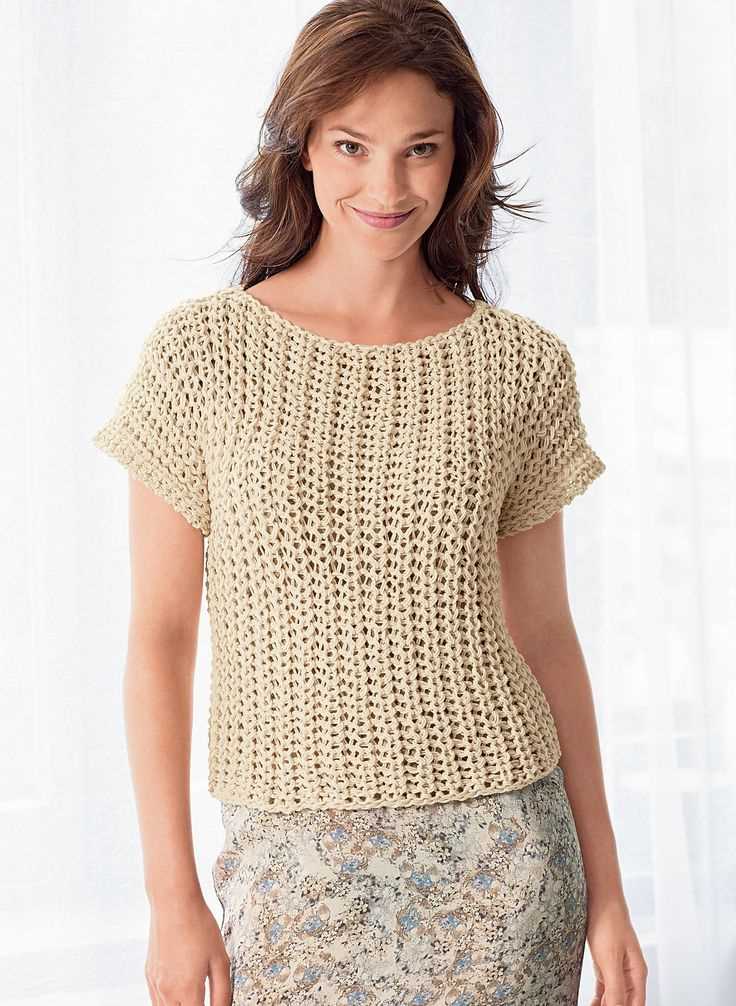
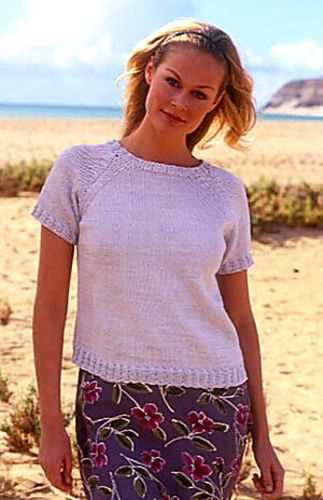
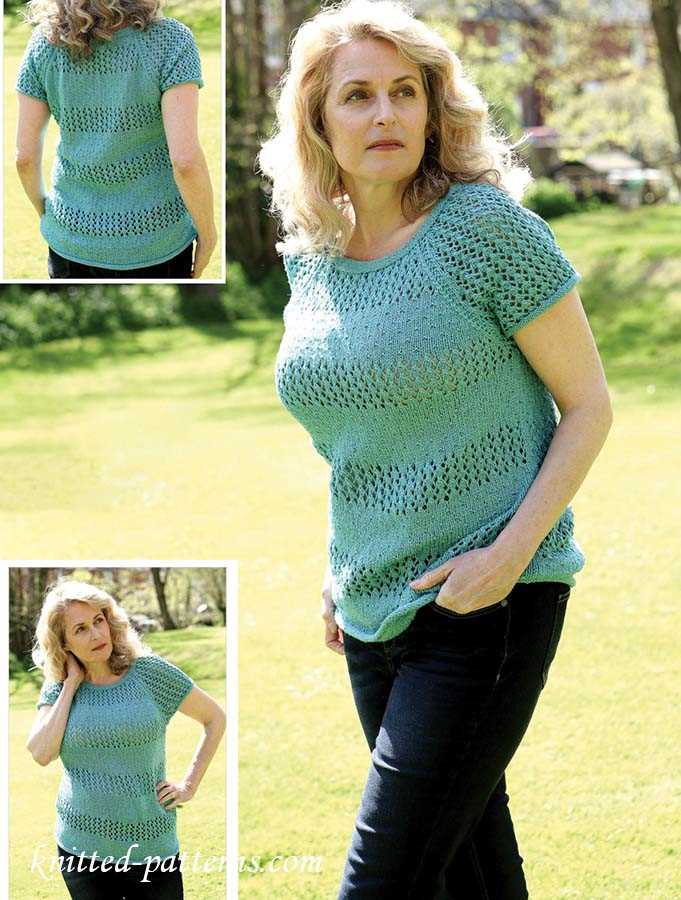
Knitting is not only a relaxing and fulfilling hobby but also a way to create unique and stylish garments. If you are looking for a new project to showcase your knitting skills, a short sleeve top may be just what you need.
A short sleeve top is a versatile and practical addition to any wardrobe. Perfect for the transitional seasons or even hot summer days, it can be layered with a cardigan or worn on its own. With a variety of knitting patterns available, you can easily customize the design to suit your personal style.
When choosing a short sleeve top knitting pattern, consider the level of difficulty and the techniques involved. Whether you are a beginner or an experienced knitter, there are patterns available for all skill levels. From simple stockinette stitch to intricate lace patterns, you can find the perfect pattern to challenge yourself and create a stunning garment.
One of the advantages of knitting your own short sleeve top is the opportunity to choose the yarn and colors that you love. Whether you prefer soft and luxurious merino wool or lightweight cotton, selecting the right yarn can make all the difference in the final result. Additionally, experimenting with different colors and textures can add a unique touch to your garment and make it truly one-of-a-kind.
Short Sleeve Top Knitting Pattern
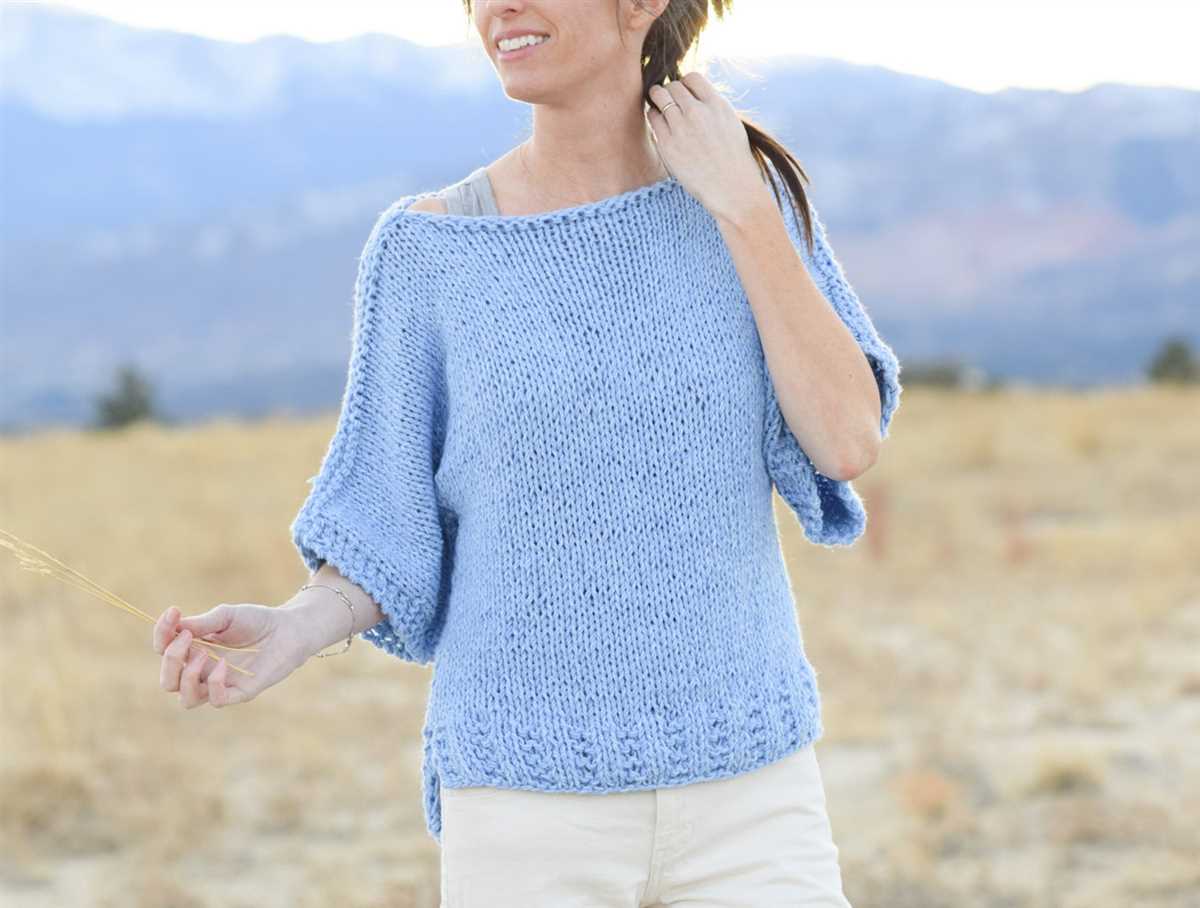
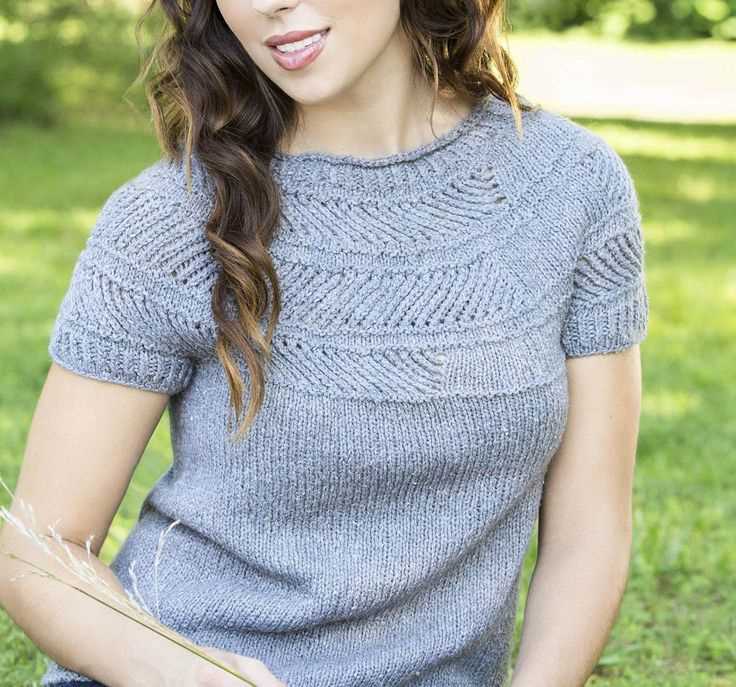
A short sleeve top is a versatile and stylish addition to any wardrobe. Whether you’re knitting for yourself or as a gift, a short sleeve top can be worn during the warmer months or layered with a cardigan during cooler weather.
When choosing a knitting pattern for a short sleeve top, it’s important to consider the style and fit you’re looking for. There are many different patterns available, ranging from basic designs to more intricate lace or cable patterns. For beginners, a simple stockinette stitch pattern may be a good place to start, while more experienced knitters may enjoy the challenge of a more complex design.
Materials
- Yarn: Choose a yarn that is appropriate for the season and the desired drape of the top. Cotton or linen blends are often preferred for summer tops, while wool or acrylic blends may be better for cooler weather.
- Knitting Needles: Select knitting needles in the size recommended by the pattern or based on your gauge swatch.
- Stitch Markers: These are helpful for marking pattern repeats or shaping sections.
- Tapestry Needle: This will be used for weaving in ends and sewing any seams.
- Buttons or Other Closure (if applicable): Some short sleeve top patterns may include a button closure at the back or front.
Pattern Instructions
- Begin by casting on the required number of stitches, following the pattern instructions.
- Work the specified stitch pattern for the body of the top, following any shaping or increases/decreases as indicated.
- Continue working in the stitch pattern until the desired length for the body is reached.
- Begin working the sleeves, following the pattern instructions. This may involve picking up stitches around the armholes or casting on additional stitches.
- Work the sleeve pattern, incorporating any shaping or decreases as directed.
- Complete the required number of rows or rounds for the sleeves, then bind off all stitches.
- If necessary, sew any seams or closures indicated in the pattern.
- Weave in any loose ends using a tapestry needle.
Once your short sleeve top is complete, it’s ready to be worn and enjoyed. Pair it with jeans or a skirt for a casual look, or dress it up with trousers or a statement necklace for a more formal occasion. With a variety of yarns and patterns to choose from, you can create a short sleeve top that is unique and tailored to your personal style.
Choosing the Right Yarn and Needles
When planning to knit a short sleeve top, choosing the right yarn and needles is essential to ensure the desired outcome and fit. Different yarns have different characteristics, such as the weight, fiber content, and texture, which can affect the drape and appearance of the finished garment. Additionally, the size and material of the needles used can also impact the overall look and feel of the knitted fabric.
Yarn Choice: When selecting yarn for a short sleeve top, consider factors such as the season, the desired level of breathability, and the desired drape. For warmer temperatures, lighter-weight yarns such as cotton or linen blends can be a good choice, as they tend to be more breathable. For cooler climates, wool or acrylic blends can provide warmth and comfort. It is also important to consider the drape of the yarn, as certain fibers have more natural drape than others.
Needle Selection: The size and material of the knitting needles can greatly affect the tension and drape of the knitted fabric. The recommended needle size for a specific yarn can usually be found on the yarn label or in the knitting pattern. It is important to use the correct needle size to ensure the stitches are not too tight or too loose. Additionally, the material of the needles can impact the overall feel of the knitting process. Metal or plastic needles can provide a smooth and fast knitting experience, while wooden or bamboo needles can offer more control and a warmer feel.
In conclusion, when knitting a short sleeve top, taking the time to choose the right yarn and needles can greatly impact the final result. Consider factors such as the season, breathability, drape, needle size, and material to help achieve a garment that is not only visually appealing but also comfortable to wear. Happy knitting!
Getting Started with the Pattern
Welcome to the short sleeve top knitting pattern! This pattern is perfect for those looking to create a stylish and comfortable top for the warmer months. Whether you’re a beginner or an experienced knitter, this pattern will guide you through the process step by step.
Gauge: Before you begin, it’s important to check your gauge to ensure that your finished top will fit correctly. The gauge for this pattern is 18 stitches and 24 rows = 4 inches in stockinette stitch. Make sure to swatch and adjust your needle size if necessary to match the gauge.
Materials
- Yarn: For this pattern, you will need [insert yarn type and amount needed]. Choose a yarn that is suitable for the season and provides the desired drape for the top.
- Needles: You will need a set of [insert needle size] circular needles with a length of [insert desired length].
- Stitch markers
- Tapestry needle
Instructions
- First, start by casting on [insert number of stitches] stitches. You can use your preferred cast-on method.
- Next, begin knitting in the round using the stockinette stitch pattern. Repeat this pattern for [insert number of rows] rows.
- After completing the stockinette stitch section, it’s time to shape the sleeves. Follow the pattern instructions to complete the necessary increases or decreases to achieve the desired sleeve shape.
- Once the sleeve shaping is complete, continue knitting in the round for the body of the top until you reach the desired length.
- Finally, finish off your top by binding off all stitches and weaving in any loose ends.
That’s it! With these simple instructions, you’ll be well on your way to creating a beautiful short sleeve top. Feel free to customize the pattern as desired with different stitch patterns or color variations. Happy knitting!
Preparing for the Short Sleeves
As you prepare to knit a short sleeve top, there are a few important steps to take to ensure that your finished garment is exactly what you envision. From selecting the right yarn to taking accurate measurements, these steps will set you up for success when knitting your short sleeve top.
Choosing the Right Yarn
When it comes to knitting a short sleeve top, it’s important to choose a yarn that is suitable for warmer weather. Look for yarns that are lightweight and breathable, such as cotton or linen blends. These types of yarns will help to keep you cool and comfortable when wearing your short sleeve top. Additionally, consider the color of the yarn you choose. Lighter colors tend to reflect heat, making them a great choice for summer garments.
Taking Accurate Measurements
Before you start knitting your short sleeve top, it’s crucial to take accurate measurements of your body. This includes measuring your bust, waist, and hips, as well as the length from your shoulder to where you want the top to end. By taking these measurements, you can ensure that your short sleeve top will fit you perfectly. It’s also a good idea to check the pattern’s sizing guide and compare your measurements to determine which size to knit.
Reading and Understanding the Pattern
Once you have your yarn and measurements ready, it’s time to carefully read and understand the knitting pattern for the short sleeve top. Pay attention to the abbreviations, stitch patterns, and any specific instructions provided. Take the time to familiarize yourself with the pattern and make sure you understand each step before you begin knitting. This will help you avoid mistakes and ensure that your short sleeve top turns out as intended.
Gauge Swatch
Before starting on the actual garment, it’s essential to knit a gauge swatch to determine your knitting tension and achieve the correct size. Follow the pattern instructions for the suggested needle size and stitch pattern, and then measure a 4×4 inch square of your work. If your gauge matches the pattern’s gauge, you can proceed with confidence. If not, adjust your needle size accordingly to achieve the correct tension and size for your short sleeve top.
By following these steps and properly preparing for the short sleeves, you’ll be on your way to creating a beautiful and well-fitting short sleeve top that you can enjoy wearing all summer long.
Knitting the Short Sleeves
When it comes to knitting the short sleeves for a top, there are a few key steps to keep in mind to ensure a successful and stylish outcome. First, it is important to have the correct measurements for the sleeves. This includes the length, width, and any shaping required. Taking accurate measurements will help to ensure the sleeves fit properly and have a flattering shape.
Next, it is time to choose the right yarn and needles for the project. Consider the desired drape and texture of the fabric, as well as the gauge required for the chosen pattern. Select a yarn that will create a cohesive look and feel with the rest of the top, and make sure the needles are the appropriate size for achieving the correct gauge.
1. Casting On
To begin knitting the short sleeves, cast on the required number of stitches onto your needles. This can be done using any preferred cast-on method, such as the long-tail cast-on or the cable cast-on.
2. Knitting the Body of the Sleeve
Once the stitches are cast on, begin knitting the body of the sleeve using the chosen stitch pattern. Follow the instructions provided in the pattern for any shaping or other design elements. Remember to keep track of the number of rows and stitches to ensure consistency between both sleeves.
3. Shaping the Sleeve
As the sleeve progresses, it may be necessary to shape it to achieve the desired fit. This can be done through various methods, such as increasing or decreasing stitches, working short rows, or adding decorative stitches. Pay close attention to the pattern instructions to ensure that the shaping is accurate and symmetrical.
4. Finishing the Sleeve
Once the desired length and shaping of the sleeve have been achieved, it is time to bind off the stitches and secure any loose ends. This can be done using a standard knit or purl bind-off, or any other preferred method. Make sure to weave in any loose ends neatly to give the sleeve a polished and professional appearance.
- Take accurate measurements for the sleeves.
- Choose the right yarn and needles.
- Cast on the required number of stitches.
- Knit the body of the sleeve using the chosen stitch pattern.
- Shape the sleeve as necessary for the desired fit.
- Finish the sleeve by binding off the stitches and securing any loose ends.
Shaping the Body
When knitting a short sleeve top, one key aspect to consider is shaping the body. Shaping the body ensures that the top fits well and flatters the wearer’s figure. There are various techniques and methods that can be used to shape the body of a knitted top, depending on the desired style and fit.
To create a fitted silhouette, decreases are often used to shape the waist. This can be achieved by knitting two stitches together (k2tog) at regular intervals, which reduces the total number of stitches and creates a narrower waistline. Alternatively, one can also use slip, slip, knit (ssk) or centered double decrease (cdd) techniques to shape the waistline, depending on the desired effect.
On the other hand, to create a more loose and relaxed fit, increases can be used to add ease to the body of the top. This can be done by knitting into the front and back of a stitch (kfb) or using yarn overs (yo) to create additional stitches. These increases can be strategically placed in specific areas, such as the bust or hips, to create a more flattering shape and enhance the overall fit of the top.
Additionally, when shaping the body of a short sleeve top, it is important to pay attention to the overall length and width of the garment. The desired length can be achieved by knitting the body to the desired measurement or by adding or reducing rows as needed. The width can be adjusted by adding or reducing stitches along the sides of the body, ensuring a comfortable and flattering fit.
Overall, shaping the body of a short sleeve top plays a crucial role in achieving the desired fit and style. Whether it’s through decreases or increases, it’s important to consider the wearer’s measurements and the desired silhouette to create a knitted top that is both comfortable and flattering.
Finishing Touches
Once you have completed knitting your short sleeve top, it’s time to add those finishing touches that will make it truly special. Whether you’re knitting for yourself or someone else, these extra details can make all the difference in the final look and feel of the garment.
First, you may want to consider blocking your knitted piece. This involves gently wetting the fabric and then laying it out flat to dry, shaping it to the desired measurements. Blocking can help even out any uneven stitches and give the finished garment a more polished look.
Next, it’s time to sew in any loose ends. Throughout the knitting process, you may have left behind some yarn tails that need to be securely woven into the fabric. Take the time to carefully sew in these ends, making sure they are hidden and won’t unravel over time.
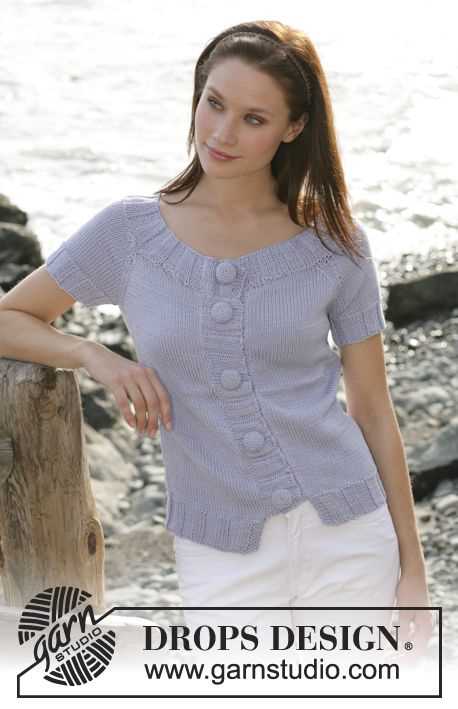
Button bands: If your short sleeve top has buttons, you’ll need to create a button band. This entails picking up stitches along the front edges of the garment and knitting a strip of fabric that will serve as the button closure. You can use a contrasting color or matching yarn to create a decorative band.
Seaming: If your short sleeve top is knitted in multiple pieces (front, back, and sleeves), you’ll need to seam them together. Use a tapestry needle and matching yarn to sew the pieces together, making sure to align the stitches and create a seamless finish.
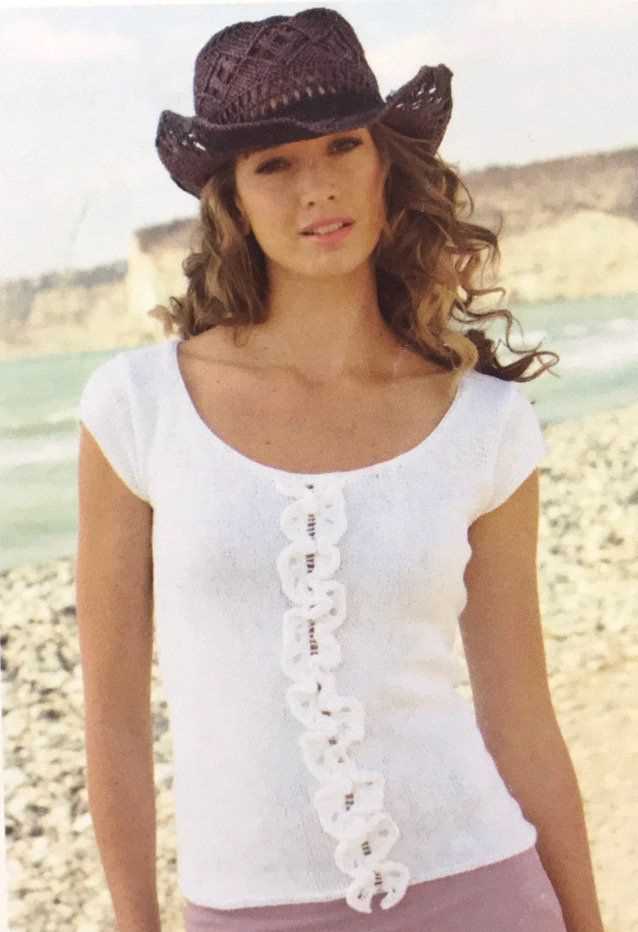
Finally, don’t forget to add any desired embellishments. This could be embroidery, lace inserts, or even small appliques. These little details can really elevate the look of your short sleeve top and make it truly one-of-a-kind.
Adding Decorative Details
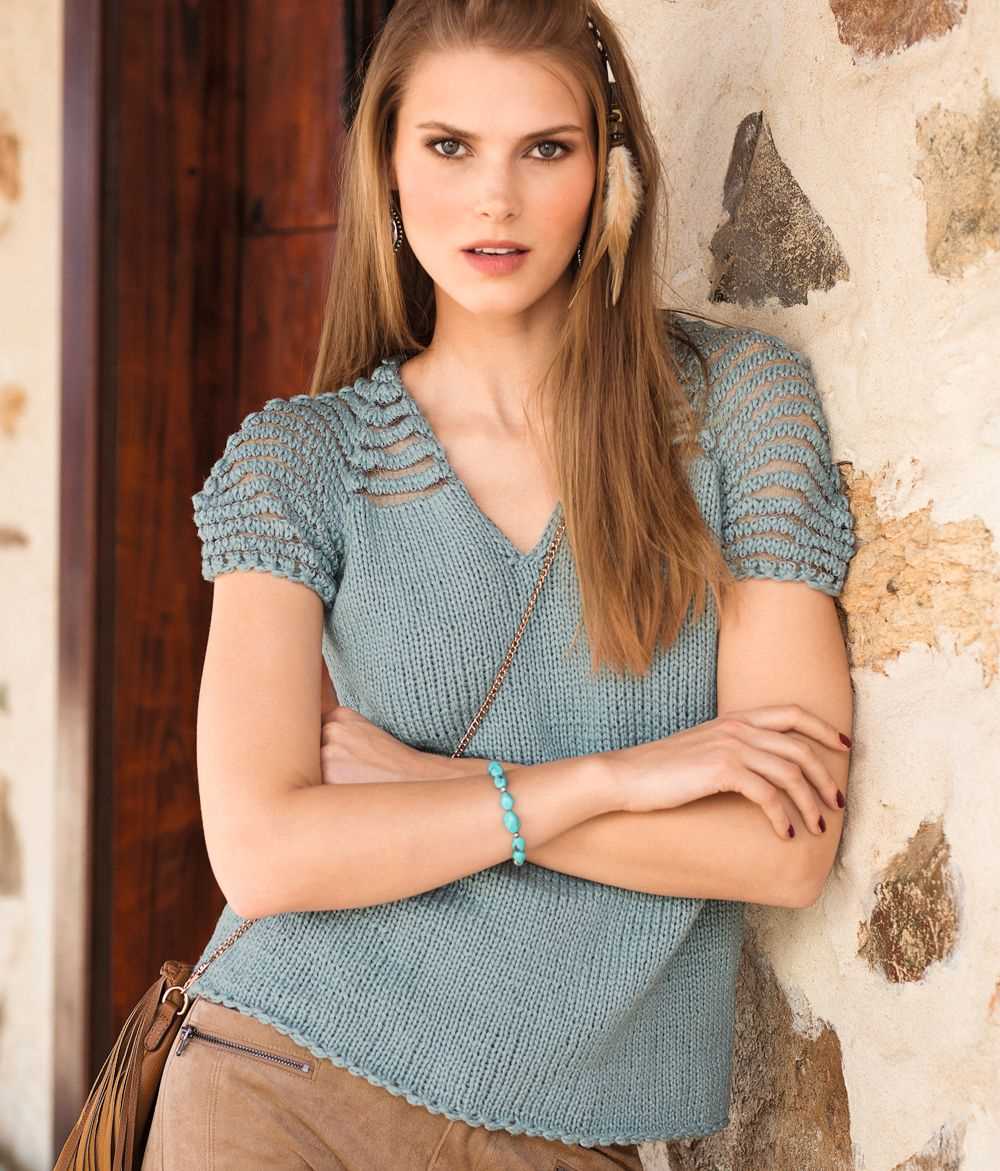
When knitting a short sleeve top, adding decorative details can elevate the design and make it more unique. There are several ways to incorporate decorative elements into your knitting project, from stitch patterns to embellishments.
One way to add decorative details is by using different stitch patterns. You can experiment with textured stitches like ribbing, cables, or lace to create beautiful motifs. These stitches can be worked on specific sections of the top, such as the neckline, cuffs, or hem, to draw attention to those areas and create visual interest.
Another option is to add embellishments like buttons, beads, or sequins. These can be strategically placed on the top to create a focal point or add a touch of sparkle. You can sew on buttons along the neckline or use beads to create a pattern on the sleeves. These small details can make a big difference in the overall look of your knitted top.
If you prefer a more subtle approach, you can also consider adding colorwork to your short sleeve top. Fair Isle knitting or stranded colorwork can be used to create intricate patterns and designs. You can choose contrasting or complementary colors to add depth and dimension to your project.
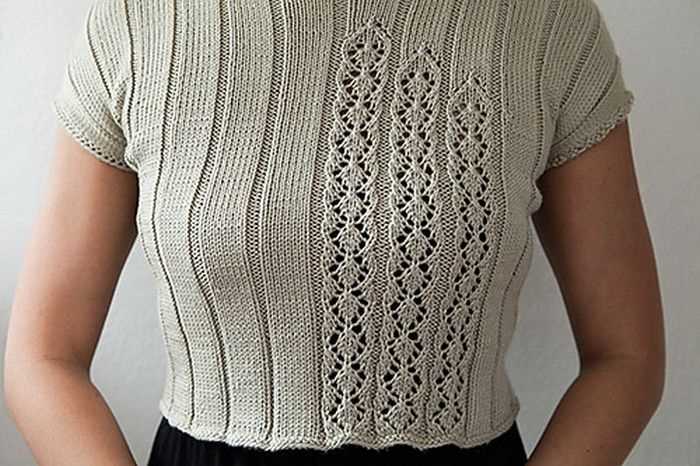
- Stitch Patterns: Experiment with ribbing, cables, or lace to create unique motifs.
- Embellishments: Try adding buttons, beads, or sequins to draw attention and add a touch of sparkle.
- Colorwork: Consider using Fair Isle or stranded colorwork techniques to create intricate patterns and designs.
By adding these decorative details, you can make your knitted short sleeve top stand out from the crowd and showcase your creativity and personal style.
Blocking and Finishing
Blocking and finishing are crucial steps in completing your short sleeve top knitting project. Blocking is the process of shaping and sizing your knitted piece to ensure that it fits properly and looks its best. It involves wetting your knitted garment, carefully stretching and pinning it into shape, and allowing it to dry completely. This helps to even out any uneven stitches, open up lace patterns, and give your knitting a polished and professional finish.
To block your short sleeve top, start by filling a basin or sink with lukewarm water and adding a gentle wool wash or mild detergent. Gently submerge your knitting in the water, making sure it is completely soaked. Allow it to sit for about 10-15 minutes, then carefully lift it out and gently squeeze out the excess water.
Next, lay a clean towel on a flat surface and place your knitted piece on top. Gently smooth out any wrinkles or folds, and use rust-proof pins or blocking wires to secure it into shape. Pay attention to any specific measurements or schematics provided in the knitting pattern, and adjust the shape accordingly. Leave your knitted piece to dry completely, which may take a day or two depending on the yarn and climate.
Once your short sleeve top is dry, it’s time for finishing touches. This may involve weaving in any loose ends or joining seams if you have knitted your top in separate pieces. Use a yarn needle to carefully thread the ends through the stitches, making sure they are secure and concealed. If necessary, you can also block any separate pieces before sewing them together.
Finally, take the time to thoroughly examine your finished garment. Check for any errors or imperfections, such as missed stitches or uneven tension, and fix them if needed. Give your short sleeve top a gentle steam or press with a warm iron, using a pressing cloth to protect the yarn. This will help to smooth out any remaining wrinkles and give your knitting that extra touch of perfection.
Tips and Tricks for a Perfect Short Sleeve Top
Knitting a short sleeve top can be a fun and rewarding project. Whether you are a beginner or an experienced knitter, there are several tips and tricks that can help you create a perfect short sleeve top. Here are some useful tips:
1. Choose the Right Yarn
Choosing the right yarn is essential for a successful knitting project. Consider the fiber content, weight, and color of the yarn. Opt for a yarn that drapes well and is comfortable to wear. Experiment with different yarns to find the perfect one for your short sleeve top.
2. Use the Right Needles
Using the right needles for your short sleeve top is crucial. The needle size should match the yarn weight to achieve the desired gauge. Invest in a set of high-quality knitting needles that are comfortable to use and durable.
3. Check Your Gauge
Always check your gauge before starting your short sleeve top. Knit a swatch using the recommended needle size and yarn, and measure the number of stitches and rows per inch. Adjust your needle size if necessary to match the gauge mentioned in the pattern.
4. Take Accurate Measurements
Take accurate measurements of the person who will be wearing the short sleeve top. Measure the bust, waist, and hip circumference, as well as the desired length of the top. Use the measurements to choose the appropriate size and make any necessary modifications to the pattern.
5. Seam and Finish Neatly
Take the time to seam and finish your short sleeve top neatly. Use a mattress stitch or your preferred seaming method to join the front and back pieces. Weave in all loose ends securely to ensure a professional-looking finish.
6. Block Your Finished Top
Blocking your finished short sleeve top can make a big difference in the final appearance. Wet blocking or steam blocking can help even out stitches, relax the fabric, and give the top a polished look. Follow the blocking instructions for your selected yarn.
7. Add Personal Touches
Don’t be afraid to add personal touches to your short sleeve top. Experiment with different stitch patterns, color combinations, or embellishments to make the top unique and reflective of your personal style.
By following these tips and tricks, you’ll be able to knit a perfect short sleeve top that fits well and looks great. Enjoy the process and have fun with your knitting project!