
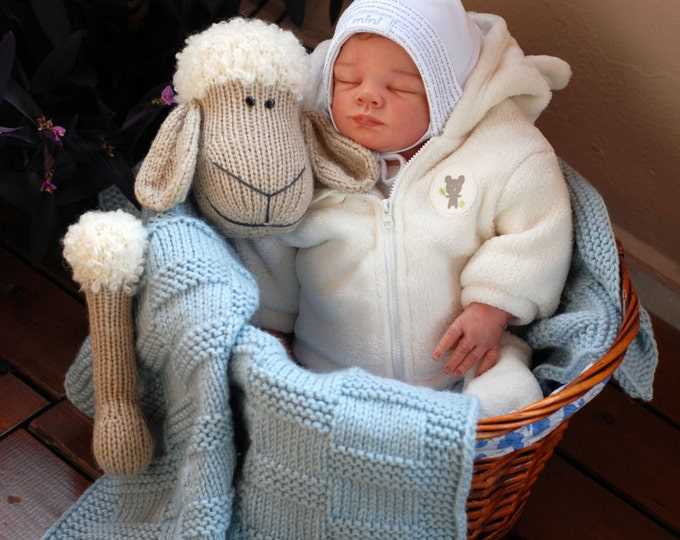
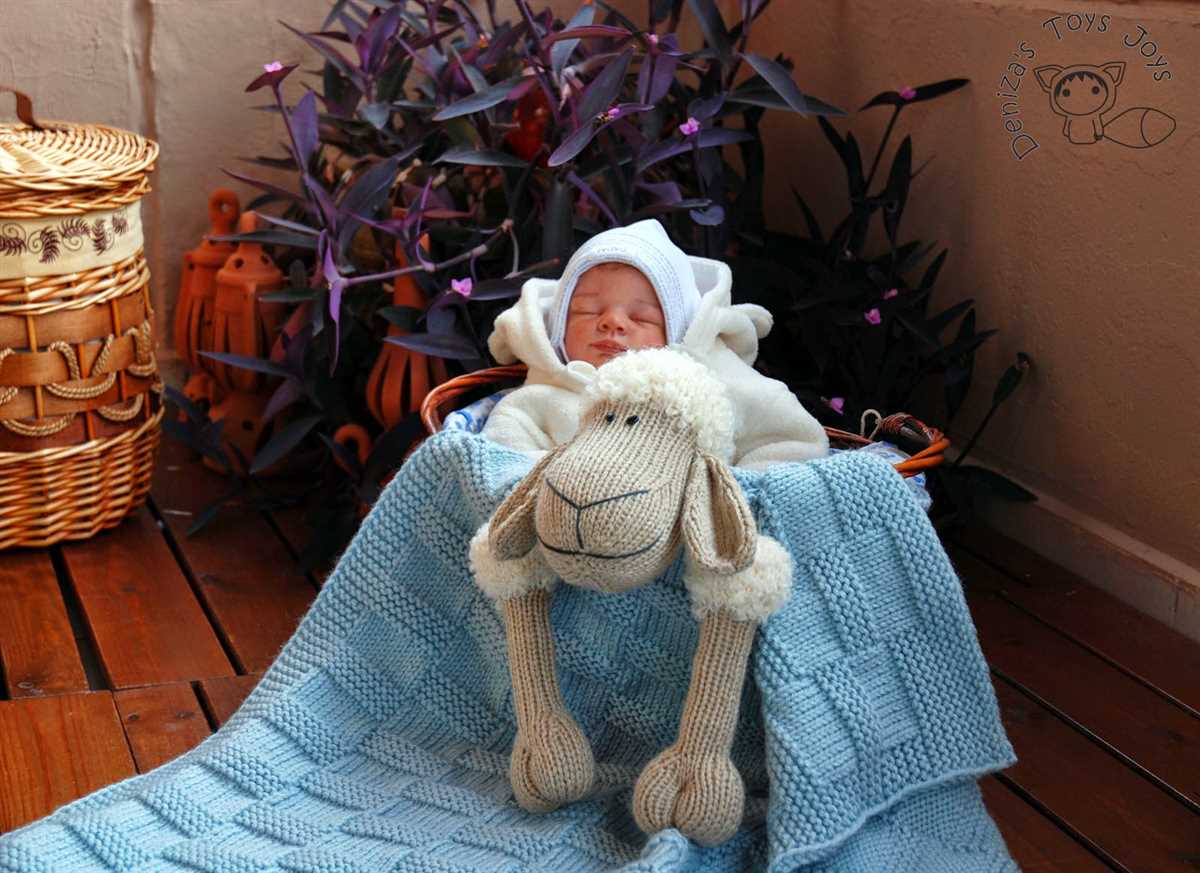
If you’re looking for a fun and cozy project to work on, look no further than knitting a sheep blanket. Not only is it a practical and warm accessory, but it also adds a touch of adorable charm to any room. Whether you’re a beginner or an experienced knitter, this sheep blanket knitting pattern will be a breeze to follow.
One of the best things about this pattern is that it’s available as a free download. That means you can easily access it and get started on your project right away. The pattern includes detailed instructions and helpful tips to guide you through the process. Even if you’re new to knitting, you’ll find all the information you need to successfully complete this adorable sheep blanket.
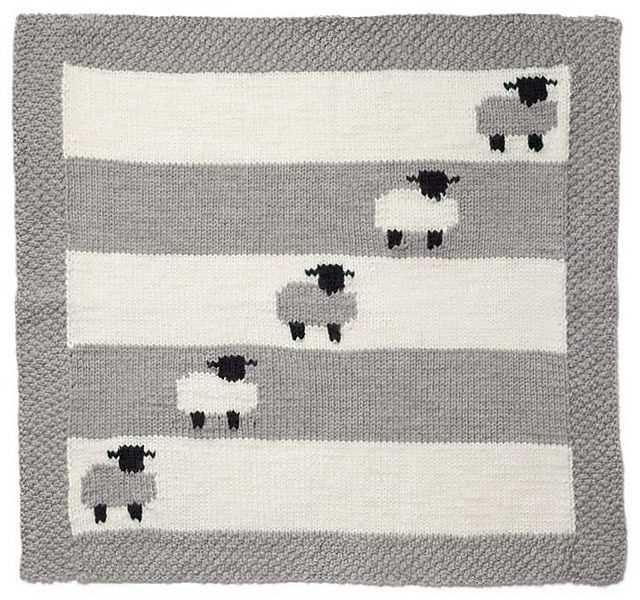
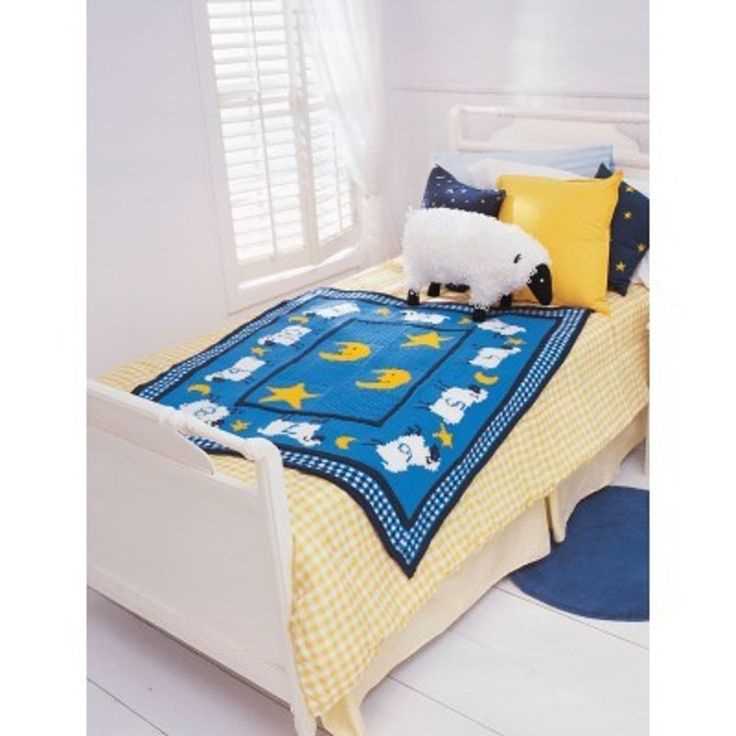
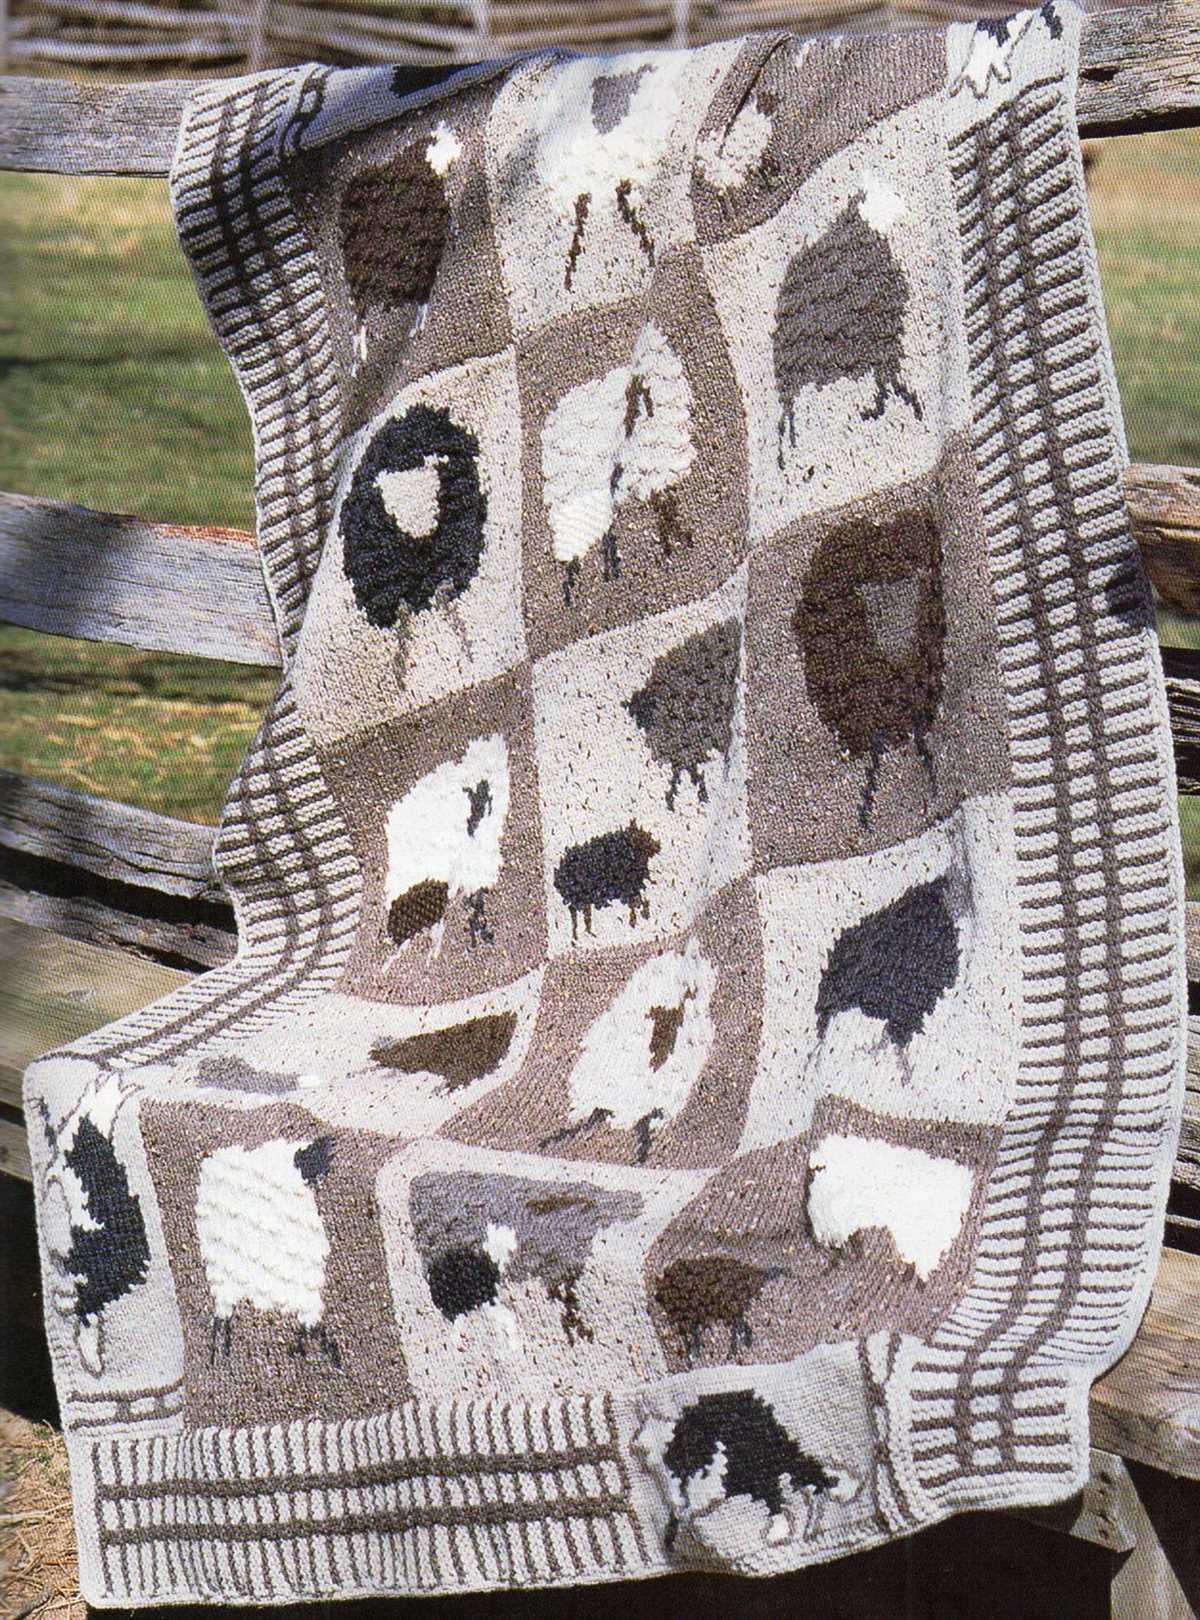
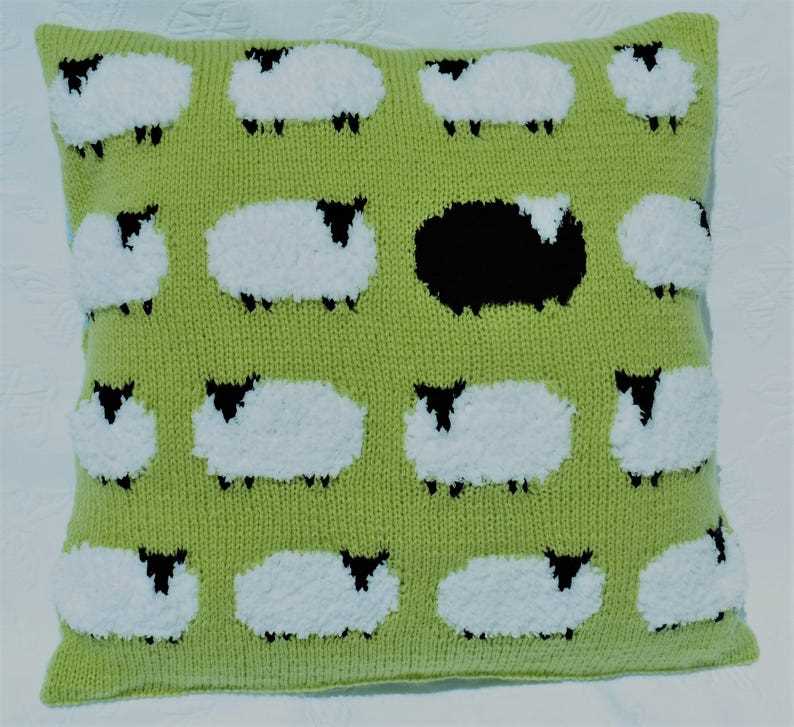
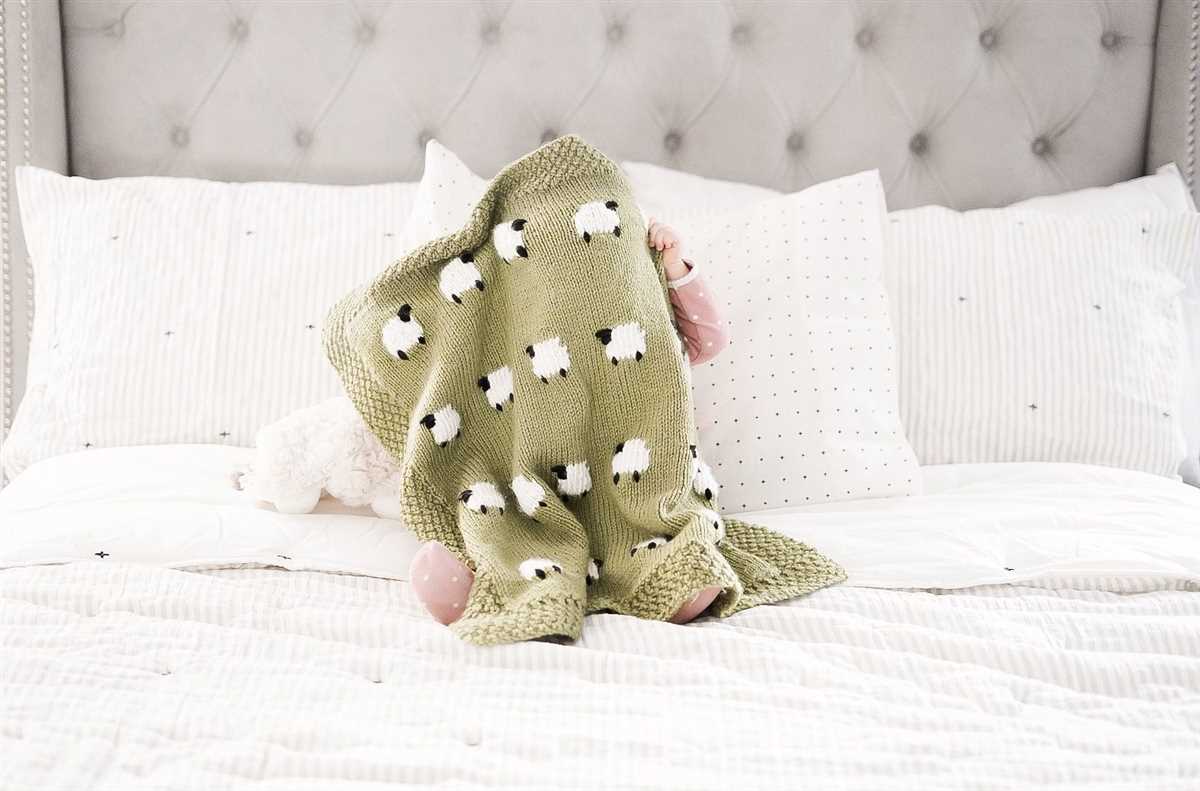
The sheep blanket knitting pattern features a lovely texture that resembles wool, making it perfect for creating a cozy and inviting atmosphere. The pattern also includes instructions for adding cute sheep-shaped motifs to your blanket, which adds an extra element of cuteness. This is a great way to personalize your project and make it truly unique.
Best Sheep Blanket Knitting Pattern Free Download: Step-by-Step Guide
Knitting a sheep blanket can be a fun and rewarding project for any knitting enthusiast. Whether you’re a beginner or an experienced knitter, having a reliable and easy-to-follow knitting pattern is essential. In this guide, we will provide you with the best sheep blanket knitting pattern free download, along with a step-by-step guide to help you create your own cozy and adorable sheep blanket.
Materials
Before you dive into knitting your sheep blanket, make sure you have all the necessary materials. Here’s a list of what you’ll need:
- Yarn: Choose a soft and warm yarn in the desired color for your sheep blanket.
- Knitting needles: Select the appropriate size of knitting needles based on the yarn thickness.
- Scissors: You’ll need a pair of sharp scissors to cut the yarn.
- Tapestry needle: This needle will be used for weaving in the loose ends of yarn.
Step-by-Step Guide
- Cast on: Start by casting on the desired number of stitches on your knitting needles. This will depend on the size of the blanket you want to make. Refer to the pattern for the specific instructions.
- Knit the base: Follow the pattern instructions to knit the base of the blanket. This may involve a combination of knit and purl stitches to create a textured or patterned design.
- Sheep motif: To create the sheep motif, you’ll need to follow the pattern for the specific stitch and color changes. This may involve knitting stitches in different colors or using a technique like intarsia or fair isle knitting.
- Finishing touches: Once you’ve completed the sheep motif, continue knitting the rest of the blanket according to the pattern instructions. Finish off by binding off the stitches and weaving in any loose ends of yarn.
With this step-by-step guide and the best sheep blanket knitting pattern free download, you’ll be able to create a beautiful and cozy sheep blanket that you can cherish or gift to a loved one. Knitting is not only relaxing but also allows you to unleash your creativity and express yourself through handmade projects.
Materials Needed for Sheep Blanket Knitting
When starting a knitting project, it’s important to gather all the necessary materials before getting started. For knitting a sheep blanket, you will need the following:
- Yarn: Choose a soft and cozy yarn in white or cream color to mimic the fluffy fur of a sheep. Make sure to read the pattern for the required yarn weight and yardage.
- Knitting Needles: Depending on the pattern, you will need a pair of knitting needles suitable for the yarn weight. Circular or straight needles can be used, depending on your preference.
- Tapestry Needle: This needle is used for weaving in loose ends and sewing pieces together.
- Stitch Markers: Stitch markers can be used to mark specific stitches or sections in the pattern, making it easier to keep track of your progress.
- Scissors: A pair of sharp scissors is essential for cutting yarn and trimming ends.
- Measuring Tape: Use a measuring tape to check your gauge and ensure that your blanket is the desired size.
- Optional Accessories: You may also want to have a row counter, a stitch holder, and blocking tools (such as blocking wires and pins) for a more professional finish.
By gathering these materials before starting your sheep blanket knitting project, you can ensure that you have everything you need to create a beautiful and cozy blanket that resembles a fluffy sheep. Happy knitting!
Choosing the Right Yarn for Your Sheep Blanket
When it comes to knitting a sheep blanket, choosing the right yarn is essential to achieve the desired look and feel. The yarn you choose will not only impact the appearance of the finished blanket but also its warmth, durability, and overall comfort. Here are some factors to consider when selecting the perfect yarn for your sheep blanket.
Fiber Type
The fiber type of the yarn will greatly influence the characteristics of your sheep blanket. Wool is a popular choice for knitting blankets as it is warm, insulating, and has a natural elasticity. Merino wool is especially soft and luxurious, making it a great option for a cozy and comfortable blanket. Other natural fibers like alpaca and cashmere can also provide warmth and softness. Alternatively, synthetic fibers like acrylic and nylon can offer durability and affordability.
Weight
The weight of the yarn will determine the thickness and heaviness of your sheep blanket. Depending on your desired result, you can choose from various yarn weights, ranging from lace to super bulky. A lighter weight yarn will create a delicate and airy blanket, while a heavier weight yarn will result in a chunky and warm blanket. Consider the intended use of the blanket when selecting the yarn weight, as a lighter weight may be more suitable for decorative purposes, while a heavier weight will provide additional warmth.
Color
The color of the yarn is another important aspect to consider when knitting a sheep blanket. You can opt for natural shades of wool for a traditional and rustic look, or choose vibrant and contrasting colors for a fun and modern design. The color palette you choose will depend on your personal preference and the overall aesthetic you want to achieve with your blanket. Additionally, keep in mind that lighter colors may show stains more easily, while darker colors can hide dirt and wear.
Texture
The texture of the yarn can add an extra dimension to your sheep blanket. You can choose a smooth and even yarn for a classic and refined look, or opt for a textured yarn to add interest and depth to your knitting. Textured yarns can include features like twists, loops, and bouclé, which can create unique patterns and visual appeal. Consider the texture of the yarn and how it will complement the design and theme of your sheep blanket.
By considering these factors and taking the time to choose the right yarn, you can ensure that your sheep blanket turns out exactly as you envisioned. Whether you prefer a soft and luxurious wool blanket or a durable and affordable synthetic option, selecting the perfect yarn will make all the difference in creating a cozy and beautiful sheep blanket.
How to Read a Knitting Pattern for Sheep Blanket
Knitting patterns can sometimes be overwhelming, especially if you are new to knitting or if you are accustomed to a different style of pattern. However, with a little bit of practice and understanding, you will be able to confidently read and follow any knitting pattern, including those for sheep blankets. Here are some tips to help you decipher and navigate a knitting pattern for a sheep blanket.
1. Start with the Materials List
Before you begin knitting, it’s essential to gather all the necessary materials. The pattern will typically provide a list of materials needed for the sheep blanket, including the type and weight of yarn, knitting needles, and any additional notions, such as stitch markers or a tapestry needle. Make sure you have everything on the list before you start.
2. Understand the Abbreviations
Knitting patterns often use abbreviations to save space and make the instructions more concise. It’s crucial to familiarize yourself with common knitting abbreviations, which can usually be found at the beginning or end of the pattern. Take note of any unique abbreviations specific to the sheep blanket pattern you are working on, as these may differ from standard knitting abbreviations.
3. Read the Stitch Instructions
The heart of any knitting pattern is the stitch instructions. These instructions will guide you on the specific stitches and techniques needed to create the sheep blanket. The pattern will often include written instructions and, in some cases, charts or diagrams. Take your time to read and understand each step. If you come across a stitch or technique you are unfamiliar with, don’t worry. There are numerous online resources, tutorials, and videos available that can help you learn and master new knitting techniques.
4. Pay Attention to Repeat Sections and Stitch Patterns
Many knitting patterns, including those for sheep blankets, will have repeat sections or stitch patterns. These sections indicate that a specific set of stitches or a pattern should be repeated a certain number of times. It’s crucial to pay attention to these repeat sections and follow them carefully. They are often denoted by asterisks (*) or specific instructions, such as “repeat rows 3-6 five times.”
5. Take Accurate Measurements
Before starting your sheep blanket, the pattern may include measurements for gauge, size options, or specific dimensions. Accurate measurements are essential to ensure that your final project matches the intended size and fit. Use a ruler or measuring tape to carefully check your gauge and take necessary measurements while working on the sheep blanket.
By following these tips and taking your time to understand the knitting pattern, you will be well-equipped to create a beautiful sheep blanket. Enjoy the process and embrace any challenges that may come along the way. Happy knitting!
Getting Started: Casting On Stitches
When it comes to knitting a sheep blanket, the first step is to cast on your stitches. Casting on is the process of creating the foundation row of stitches that you will work with throughout your knitting project. It is important to cast on the correct number of stitches in order to achieve the desired size and shape of your blanket.
To get started, you will need a pair of knitting needles and your chosen yarn. Make sure to choose a yarn that is suitable for a blanket and that you like the feel and color of. Once you have your materials ready, follow these steps to cast on your stitches:
- Make a slipknot: To begin, make a slipknot by forming a loop with the yarn and then pulling the end through to secure it. Place the slipknot on one of your knitting needles. This will be your first stitch.
- Hold the needle: Hold the needle with the slipknot in your right hand, and the empty needle in your left hand. The slipknot should be at the end of the needle, and the working yarn should be coming from the ball of yarn.
- Insert the needle: Insert the tip of the empty needle into the slipknot from front to back. Hold the working yarn in your right hand, and use it to wrap around the tip of the needle in a counter-clockwise direction.
- Pull the loop: With the tip of the empty needle, pull the loop of yarn through the slipknot, creating a new stitch on the needle. This is the second stitch of your cast on.
- Continue casting on: Repeat steps 3 and 4 until you have cast on the desired number of stitches for your blanket. Make sure to keep your tension even and the stitches snug but not too tight.
- Count your stitches: Once you have finished casting on, count the number of stitches on your needle to ensure you have the correct number. This is especially important if you are following a specific pattern or size for your blanket.
Once you have successfully cast on your stitches, you are ready to begin knitting your sheep blanket. From here, you can start working on the main body of the blanket using various knitting stitches and techniques. Enjoy the process and have fun creating your cozy and adorable sheep blanket!
Knitting the Body of the Sheep Blanket
Once you have cast on and completed the border of your sheep blanket, it’s time to start knitting the body. This is where the sheep pattern really starts to take shape and come to life.
To begin, you will continue using the main color yarn and knit each row in the stockinette stitch. Remember to read the pattern carefully and follow the instructions for any color changes or additional stitches that may be required.
Row 1: Knit across all stitches in the main color.
Rows 2-5: Repeat Row 1.
As you knit the body, it’s important to pay attention to the tension of your stitches. Make sure they are not too tight or too loose, as this can affect the overall appearance of the blanket.
If you are new to knitting, you may find it helpful to use stitch markers to keep track of increases or decreases in the pattern. This can help you stay organized and ensure that your sheep blanket turns out beautifully.
Continue knitting the body according to the pattern instructions, making any necessary color changes or stitch variations along the way. As you progress, you will see the adorable sheep design emerge, creating a charming and cozy blanket that is perfect for snuggling up with on a chilly day.
Creating the Cute Sheep Pattern
Knitting your own sheep blanket can be a fun and rewarding project. With a cute sheep pattern, you can create a cozy and adorable blanket for yourself or as a gift. Whether you’re an experienced knitter or just starting out, this pattern is perfect for all skill levels.
To start, you’ll need to gather your materials. You’ll need knitting needles, a ball of yarn in your desired color, and a tapestry needle. You can choose any size of knitting needles depending on the desired thickness of your blanket. A bulky weight yarn will create a thicker and warmer blanket, while a lighter weight yarn will result in a lighter and more delicate blanket.
Once you have your materials ready, it’s time to begin. The sheep pattern consists mainly of simple knit and purl stitches, making it easy to follow along. You’ll start by casting on the desired number of stitches, depending on the width of your blanket. Then, you’ll follow the pattern row by row, creating the sheep design as you go.
The sheep pattern typically includes a combination of knit and purl stitches, as well as increases and decreases to shape the design. You’ll also need to pay attention to any color changes or additional details, such as the sheep’s face or legs. The pattern will provide you with step-by-step instructions on how to create these elements.
As you work through the pattern, you’ll see the adorable sheep design come to life. The repetitive nature of the pattern makes it easy to memorize, so you can knit while watching your favorite TV show or chatting with friends. Before you know it, you’ll have a completed sheep blanket that you can proudly display or give as a thoughtful gift.
Overall, knitting a sheep blanket with a cute sheep pattern is a creative and enjoyable project. It allows you to showcase your knitting skills while creating a cozy and adorable blanket. So grab your knitting needles and get started on your very own sheep blanket today!
Adding the Finishing Touches: Knitting the Border
The border is an essential part of any blanket, as it gives the final touch and adds a polished look to the overall design. Knitting the border requires attention to detail and precision to ensure a neat and professional finish.
Step 1: Choosing the Border Pattern
Start by selecting a border pattern that complements the main body of the sheep blanket. You can choose a simple garter stitch or ribbing pattern for a classic look, or experiment with more intricate lace or cable designs for a more elaborate finish. Consider the texture and complexity of the pattern, keeping in mind the difficulty level and the time you are willing to invest.
Step 2: Calculating the Number of Stitches
Before starting the border, it is essential to calculate the number of stitches required. This will depend on the size of your blanket and the gauge of your knitting. Measure the length of your blanket sides and multiply it by the number of stitches per inch. This will give you an estimate of the total number of stitches needed for the border. Make sure to account for any stitch pattern repeats or increases/decreases necessary for your chosen design.
Step 3: Starting the Border
With the necessary number of stitches determined, you can begin knitting the border. Start by picking up stitches along the edge of your blanket, using a smaller needle size if necessary to ensure a tight and clean edge. Begin knitting the border pattern according to the chosen design, following the instructions and paying attention to any stitch repeats or changes in the pattern.
Step 4: Finishing the Border
Once you have completed knitting the border pattern, it is time to finish it off. Bind off the stitches using a suitable method, such as a basic bind-off or a stretchy bind-off for a more flexible edge. Make sure to weave in any loose ends and block the blanket to give it a smooth and even finish.
By following these steps and giving attention to detail, you can create a beautiful border that enhances the overall look of your sheep blanket. Take your time, enjoy the process, and admire your finished masterpiece!
Blocking and Finishing Your Sheep Blanket
Once you have finished knitting your sheep blanket, the next step is to block and finish it. Blocking is the process of shaping and sizing the finished knitted piece, while finishing involves adding any final touches to the blanket.
To block your sheep blanket, you will need to gather a few materials. Start by laying out a clean, flat surface where you can pin down the blanket. You will also need rust-proof T-pins or blocking wires to secure the edges and corners of the blanket. Make sure to have a measuring tape on hand to check the dimensions as you block.
Step 1: Wet blocking
To block your sheep blanket, you can use the wet blocking method. Start by soaking the blanket in cool water with a gentle detergent. Gently squeeze out the excess water, being careful not to wring or twist the blanket. Lay the blanket flat on your prepared surface and shape it to the desired dimensions. Use the T-pins or blocking wires to secure the edges and corners, making sure the blanket is evenly stretched. Allow the blanket to air dry completely before removing the pins or wires.
Step 2: Finishing touches
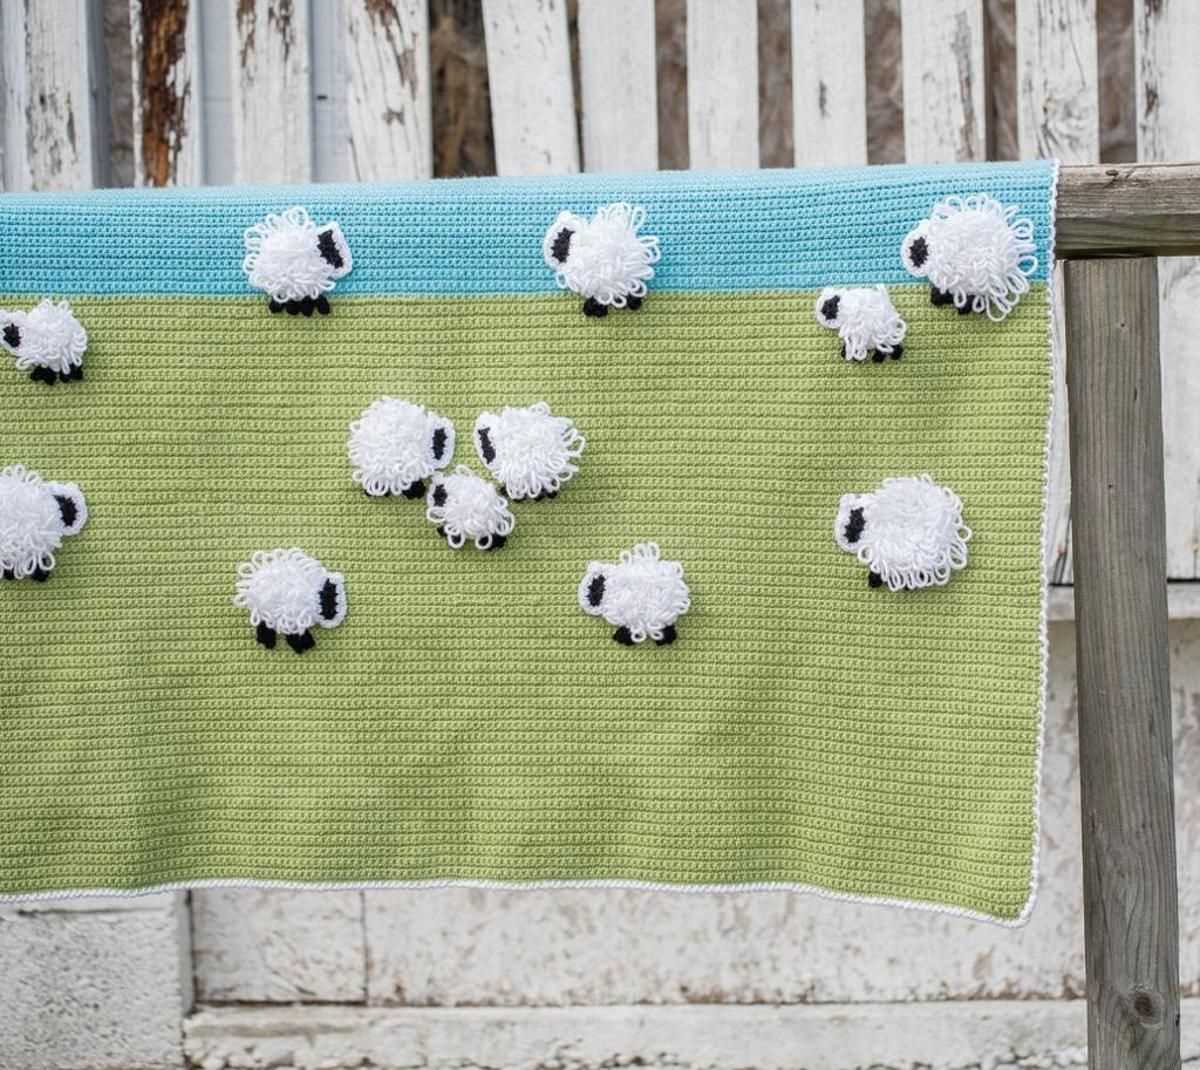
Once your sheep blanket is dry, you can add any finishing touches to complete the look. This can include weaving in loose ends, adding a border, or attaching any embellishments, such as sheep-shaped buttons or appliques. Take the time to carefully inspect your blanket for any imperfections or mistakes and make any necessary corrections.
Finally, fold or roll up your finished sheep blanket and store it in a clean, dry place. Your blanket is now ready to be used or gifted to someone special. Enjoy the cozy warmth and adorable sheep design of your handmade creation!
Washing and Caring for Your Sheep Blanket
Sheep blankets provide warmth and comfort, but they also require proper care to ensure their longevity and performance. Here are some guidelines to help you wash and care for your sheep blanket.
1. Washing instructions:
It is recommended to hand wash your sheep blanket to avoid damaging the delicate fibers. Fill a basin or sink with lukewarm water and add a mild detergent specifically designed for wool. Gently agitate the blanket in the soapy water, making sure to avoid excessive rubbing or twisting. Rinse the blanket thoroughly in clean, lukewarm water until all soap is removed. Do not wring or twist the blanket.
If you prefer to use a washing machine, select the delicate or wool cycle with cold water and a wool-specific detergent. Place the blanket in a mesh laundry bag or pillowcase to protect it from agitation and avoid excessive stretching.
2. Drying and reshaping:
After washing, gently squeeze out excess water from the blanket without wringing or twisting it. Lay the blanket flat on a clean, dry towel and roll it up to absorb more moisture. Unroll the blanket and reshape it to its original dimensions, gently stretching it if necessary. Avoid hanging the blanket to dry, as this can cause it to stretch and lose its shape. Instead, lay it flat on a drying rack or clean surface away from direct sunlight or heat sources.
3. Storage:
When not in use, store your sheep blanket in a cool, dry place, away from direct sunlight or humidity. Avoid folding or piling heavy objects on top of the blanket, as this can cause it to lose its shape. Instead, store it flat or roll it up loosely to prevent creasing or flattening of the fibers. If possible, place the blanket in a breathable fabric bag to protect it from dust and pests.
By following these care instructions, you can ensure that your sheep blanket stays soft, cozy, and beautiful for many years to come.
Showcasing Your Sheep Blanket: Tips for Photography and Display
Once you have finished knitting your sheep blanket, you will want to showcase your masterpiece to its fullest potential. Whether you plan on selling your creation or simply want to document it for your own personal collection, here are some tips for photography and display to make your sheep blanket shine.
1. Lighting
Good lighting can make a huge difference when it comes to photographing your sheep blanket. Natural light is usually the best option, so try to take your photos near a window or outside on a bright day. Avoid using flash, as it can create harsh shadows and distort the colors of your blanket.
2. Background
Choose a clean and simple background that won’t distract from the beauty of your sheep blanket. A solid-colored wall or a simple backdrop can work well. If you prefer a more styled look, consider using props that complement the theme of your blanket, such as a basket of yarn or knitting accessories.
3. Composition
When framing your blanket in the photograph, consider different angles and perspectives to highlight its texture and design. You could try capturing a close-up of a specific section or a full shot of the entire blanket. Play around with different compositions to find the one that best showcases your unique pattern and stitches.
4. Details
Don’t forget to capture the details of your sheep blanket. Take close-up shots of the intricate stitches, the softness of the wool, or any other unique features that make your blanket special. These detailed shots can help to tell the story behind your creation and add depth to your overall display.
5. Displaying Your Blanket
Once you have your photographs, you may want to consider different ways to display your sheep blanket. If you plan on selling it, you could hang it on a clothesline or drape it over a rustic ladder. If it’s for personal use, you could fold it neatly and place it on a shelf or drape it over a couch or chair. Experiment with different display options to find the one that enhances the overall aesthetic of your blanket.
By following these tips, you can create stunning photographs and displays that truly showcase the beauty and craftsmanship of your sheep blanket. Whether you are sharing your work online or displaying it in person, these techniques will help you capture the attention and admiration it deserves.