
Are you looking for a cozy and stylish accessory for the winter season? Look no further than a ribbed beanie! Ribbed beanies are not only trendy but also provide warmth and comfort throughout the cold months. And the best part? You can easily knit one yourself with our free pattern!
Knitting a ribbed beanie is a great project for both beginners and experienced knitters. The ribbed texture adds an interesting design element to the hat and also allows it to stretch and fit snugly on any head size. Whether you’re making it for yourself or as a gift for a loved one, this knitting pattern is sure to impress.
Our free ribbed beanie knitting pattern includes easy-to-follow instructions and materials required. You’ll need basic knitting skills such as casting on, knitting, purling, and decreasing. With just a few hours of your time, you’ll have a stylish and functional accessory that will keep you warm and cozy throughout the winter season.
So, why wait? Download our ribbed beanie knitting pattern for free and get started on your next knitting project today. Stay warm, stylish, and comfortable with a handmade ribbed beanie!
Ribbed Beanie Knitting Pattern Free
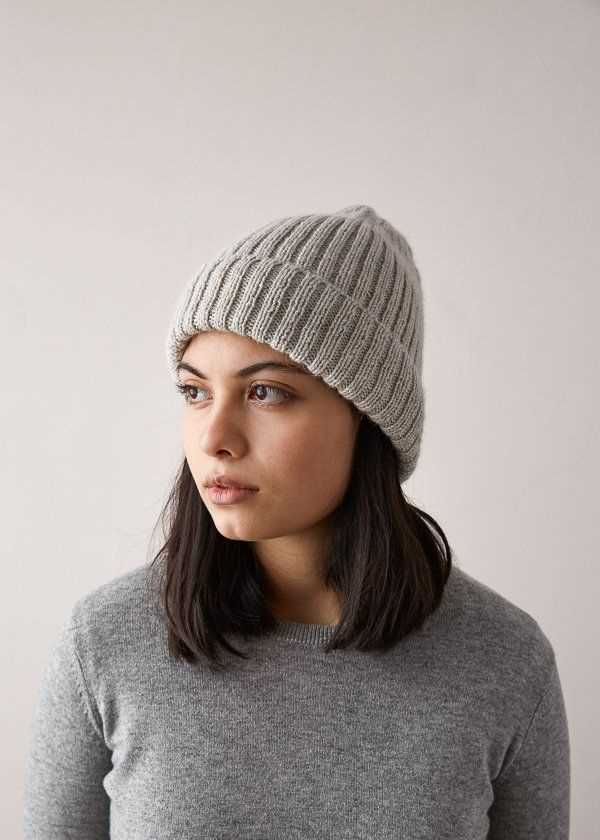
If you’re looking for a cozy and stylish accessory to add to your winter wardrobe, a ribbed beanie is the perfect choice. This classic hat design features a ribbed texture that adds both visual interest and warmth. The best part? You can find numerous ribbed beanie knitting patterns for free online, allowing you to create your own personalized hat without spending a fortune. Whether you’re an experienced knitter or just starting out, there’s sure to be a free pattern that suits your skill level and desired style.
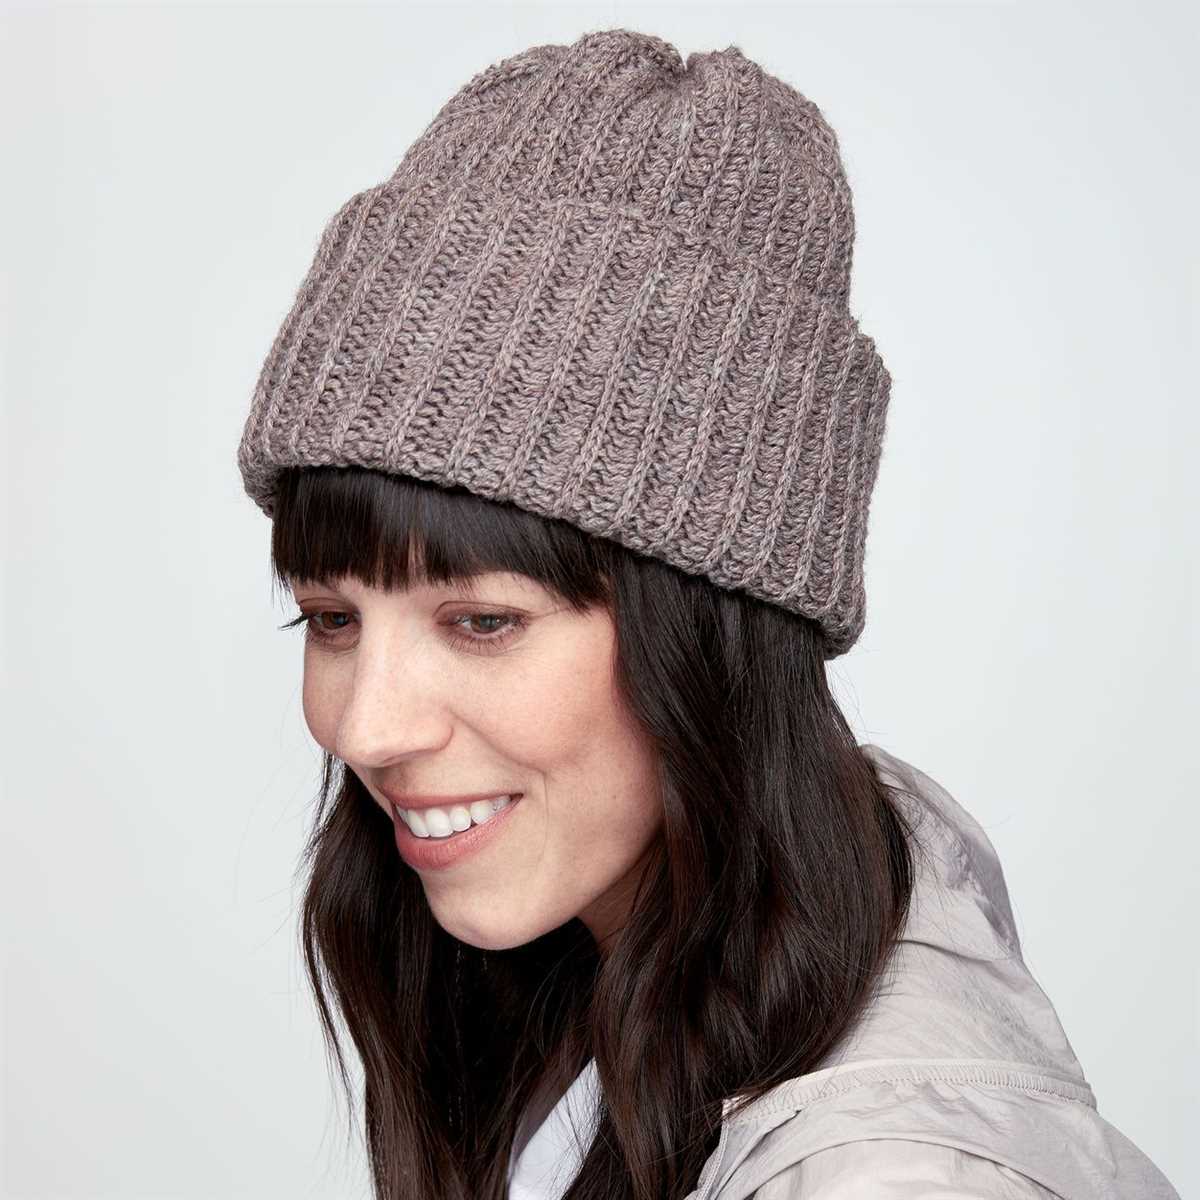
A ribbed beanie is a versatile accessory that can be worn by anyone, regardless of age or gender. The ribbed texture of the hat provides a snug fit that helps to trap heat and keep your head warm during cold winter days. Additionally, the ribbed design adds stretch and elasticity to the hat, ensuring a comfortable and secure fit. This makes ribbed beanies an ideal choice for outdoor activities such as skiing, snowboarding, or simply braving the cold during your daily commute.
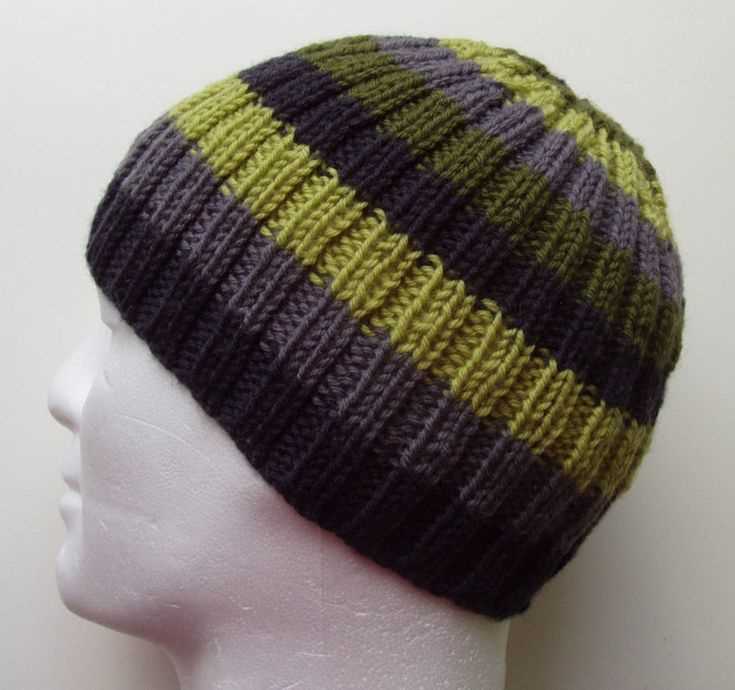
There are countless free ribbed beanie knitting patterns available online, ranging from simple designs to more intricate and decorative styles. Some patterns may feature a traditional ribbed stitch pattern, while others may incorporate additional details such as cables, lace, or colorwork. Whether you prefer a classic and understated beanie or something more eye-catching, you’re sure to find a pattern that suits your preferences.
To get started, all you’ll need is some yarn and a set of knitting needles. Most ribbed beanie patterns will specify the size of needles and type of yarn recommended for the best results. Once you’ve gathered your materials, simply follow the pattern instructions and create your own customized ribbed beanie. Not only will you have a cozy accessory to keep you warm, but you’ll also have the satisfaction of knowing that you created it with your own hands.
So why not give it a try? Explore the world of ribbed beanie knitting patterns and unleash your creativity. Whether you’re knitting for yourself or making a heartfelt gift for a loved one, a ribbed beanie is a practical and stylish choice that will keep you warm and fashionable throughout the winter season.
What is a Ribbed Beanie
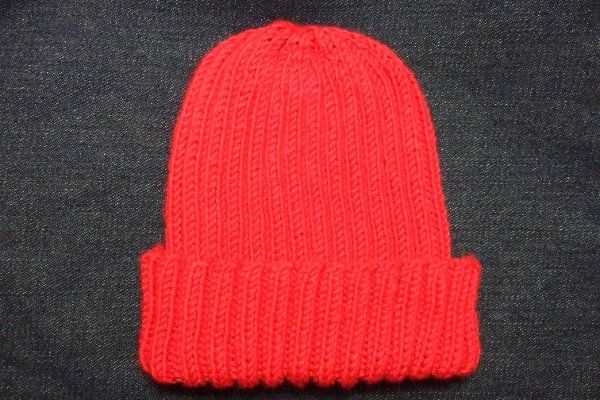
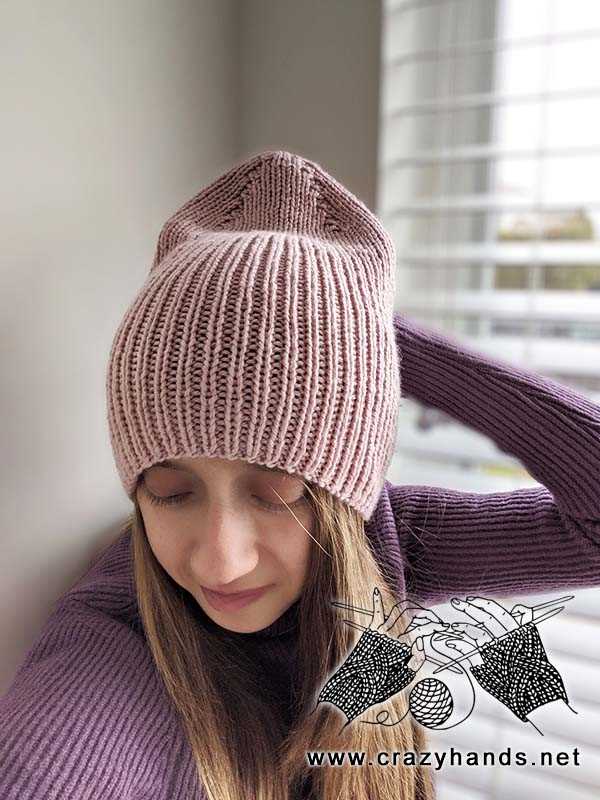
A ribbed beanie is a type of knitted hat that features a specific pattern called ribbing. Ribbing is created by alternating knit stitches and purl stitches, which creates a textured and stretchy fabric. The ribbing pattern is often used for accessories like hats, scarves, and socks because it helps the items retain their shape while providing flexibility and comfort.
The ribbed beanie is a popular choice for winter accessories because it provides warmth while also being stylish. The ribbing pattern allows the hat to fit snugly on the head, trapping heat and keeping the wearer cozy in cold weather. The stretchiness of the ribbed fabric also ensures that the beanie can accommodate different head sizes comfortably.
One of the advantages of knitting a ribbed beanie is that it is relatively easy to create for knitters of all skill levels. The ribbing pattern is simple to master and can be easily adjusted to create different sizes and styles. Additionally, the ribbed texture gives the beanie a timeless and classic look, making it a versatile accessory that can be worn with a variety of outfits and in different occasions.
Overall, a ribbed beanie is a practical and fashionable choice for anyone looking to keep their head warm during the colder months. With its stretchy and textured fabric, it provides both comfort and style, making it a must-have item for any winter wardrobe.
Benefits of Knitting a Ribbed Beanie
Knitting a ribbed beanie not only provides you with a stylish and cozy headwear option, but it also offers several other benefits. Whether you are an experienced knitter or a beginner, this project can be a great way to hone your skills and create something practical and beautiful.
1. Versatile Design: The ribbed pattern used in a beanie allows for stretch and flexibility, making it suitable for a variety of head sizes. Whether you are knitting for yourself or as a gift, a ribbed beanie is sure to fit comfortably and provide a snug fit.
2. Warmth and Insulation: The ribbed texture of the beanie helps to trap air between the stitches, creating an extra layer of insulation. This makes ribbed beanies ideal for keeping your head warm and protecting it from cold weather, wind, and snow.
3. Timeless Style: Ribbed beanies have stood the test of time in the fashion world, and they continue to be a popular choice among both men and women. The classic ribbed design adds a touch of sophistication and versatility to any outfit, making it suitable for casual or formal settings.
4. Portable Project: Knitting a ribbed beanie is a portable project that can be easily carried with you wherever you go. Whether you enjoy knitting while traveling, waiting in line, or simply relaxing at home, a ribbed beanie allows you to work on your project anytime, anywhere.
5. Creativity and Personalization: Knitting your own ribbed beanie allows you to unleash your creativity and personalize it according to your preferences. You can choose from a wide range of yarn colors, texture, and decorative elements to make your beanie unique and special.
In conclusion, knitting a ribbed beanie not only offers a practical and stylish headwear option but also provides several other benefits. From its versatile design to its warmth and insulation properties, a ribbed beanie is a timeless accessory that allows you to showcase your creativity and enjoy the process of knitting.
Choosing the Right Yarn and Needles
When it comes to knitting a ribbed beanie, one of the first things you need to consider is the type of yarn you will be using. The yarn you choose will greatly affect the fit, feel, and overall look of your finished beanie. It is important to choose a yarn that has enough stretch and elasticity to create the ribbed texture. Look for yarns that are labeled as “stretchy” or “springy” to ensure that your ribbing will be well-defined and snug.
In addition to stretch, you will also want to consider the weight and fiber content of the yarn. If you are knitting a ribbed beanie for the colder months, you may want to opt for a heavier yarn, such as a bulky or worsted weight, to provide more warmth. On the other hand, if you are making a beanie for a milder climate, a lighter weight yarn, such as a fingering or sport weight, may be more appropriate.
When it comes to needles, the size you choose will depend on your tension and the desired gauge of your beanie. It is a good idea to check the recommended needle size on the yarn label and use that as a starting point. However, keep in mind that everyone’s tension is different, so you may need to go up or down a size to achieve the correct gauge. It is always a good idea to knit a gauge swatch before starting your project to ensure that your needles are the right size.
Overall, choosing the right yarn and needles for your ribbed beanie is crucial to the success of your project. By considering the stretch, weight, and fiber content of the yarn, as well as experimenting with different needle sizes, you can create a ribbed beanie that is not only stylish but also comfortable and well-fitting.
Understanding Ribbing Stitch
Ribbing stitch is a common knitting technique used to create a stretchy and flexible fabric. It is often used for the cuffs, hems, and borders of knitted garments, as well as for creating ribbed accessories like beanies and scarves. Ribbing stitch creates a vertical pattern of alternating knit and purl stitches, which gives the fabric its characteristic ribbed texture.
When working ribbing stitch, the pattern is typically a combination of knit and purl stitches in a specific sequence. The most common ribbing patterns are 1×1 ribbing (alternating one knit stitch and one purl stitch) and 2×2 ribbing (alternating two knit stitches and two purl stitches). The choice of ribbing pattern depends on the desired width of the ribs and the overall design of the knitted piece.
The ribbing stitch is created by working the knit stitches and purl stitches in a consistent pattern. The knit stitches create raised columns, while the purl stitches create recessed columns, resulting in the ribbed texture. The tension and spacing of the stitches in the ribbing pattern can be adjusted to achieve different effects. A tighter tension and closer spacing will create narrower, more defined ribs, while a looser tension and wider spacing will create wider, softer ribs.
To work ribbing stitch, you will need to know how to knit and purl stitches. The pattern is generally easy to memorize, making ribbing stitch a great option for beginner knitters. Once you understand the basic technique, you can experiment with different ribbing patterns and incorporate them into your knitting projects to add texture and visual interest.
Step-by-Step Guide to Knitting a Ribbed Beanie
If you’re looking for a cozy and stylish hat to knit, a ribbed beanie is a perfect choice. The ribbed texture adds extra warmth and stretch to the hat, making it comfortable and snug. Plus, ribbing is a great pattern for beginner knitters to practice their skills. Follow this step-by-step guide to create your own ribbed beanie.
Materials:
- Worsted weight yarn (about 200-300 yards)
- Size 8 circular knitting needles (16-inch)
- Set of size 8 double-pointed needles
- Stitch marker
- Tapestry needle
Step 1: Cast On
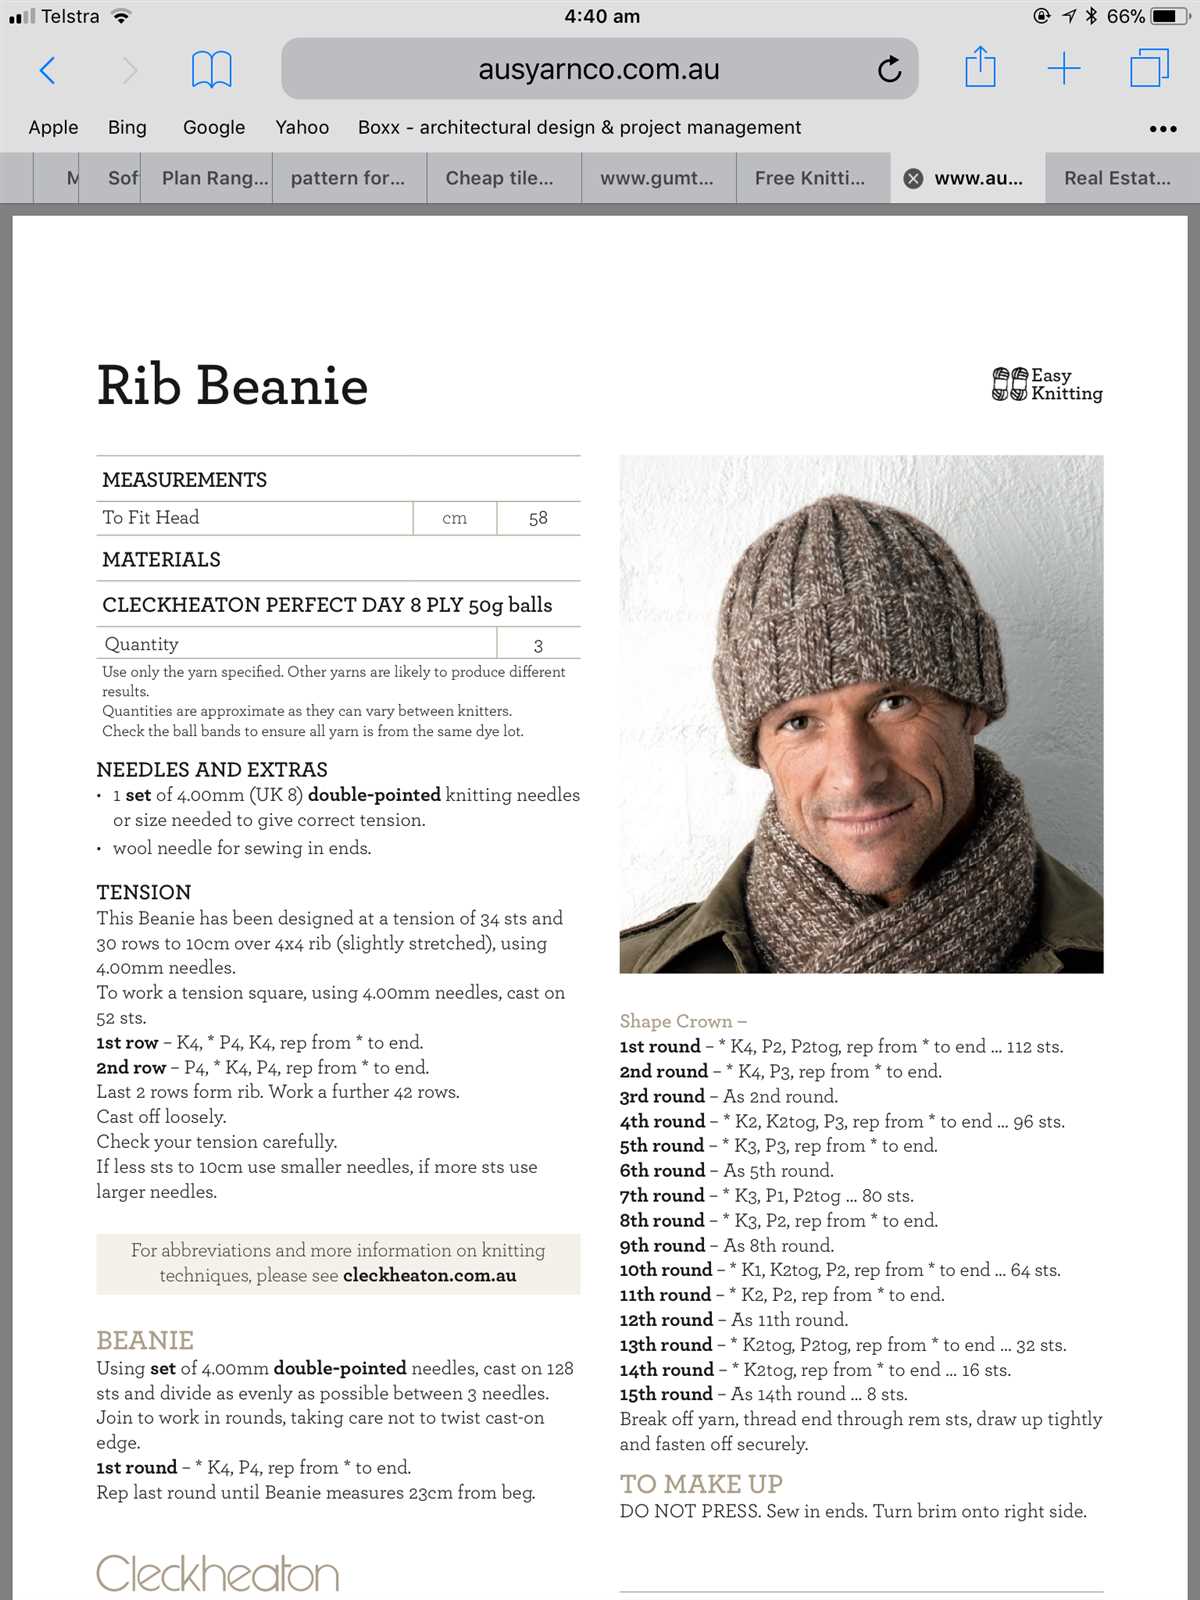
Using the circular needles, cast on 88 stitches. This will create a ribbing pattern of K2, P2. Place a stitch marker to mark the beginning of the round.
Step 2: Knit in Ribbing Pattern
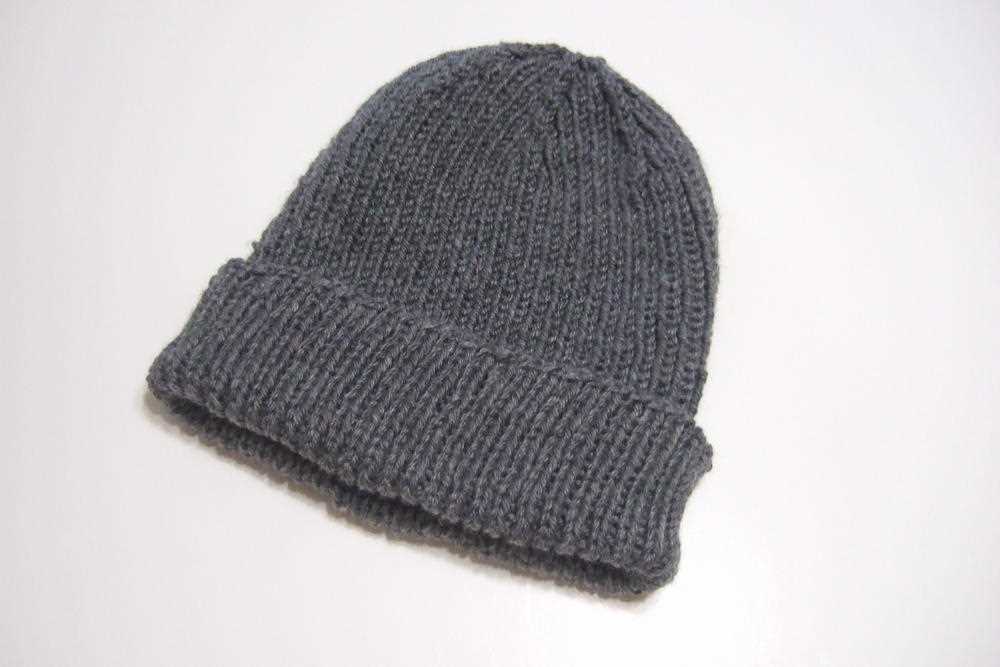
Continue knitting in the ribbing pattern of K2, P2 for about 1-2 inches. The ribbing creates a stretchy brim for the beanie and adds a nice texture.
Step 3: Switch to Stockinette Stitch
Next, switch to stockinette stitch by knitting every round. Continue knitting in stockinette stitch until the hat measures about 7-8 inches from the cast-on edge.
Step 4: Decrease Rounds
It’s time to start decreasing the number of stitches to shape the crown of the beanie. Switch to double-pointed needles when there are too few stitches to comfortably fit on the circular needles.
Begin the decrease rounds by knitting two stitches together (K2tog) every 10 stitches. Repeat this decrease round every round until you have about 8-10 stitches left.
Step 5: Finishing
Cut the yarn, leaving a long tail. Thread the tail through a tapestry needle and slip the needle through the remaining stitches, removing them from the needles. Pull tight to close the top of the hat.
Weave in any loose ends and block the hat to give it a nice shape. Your ribbed beanie is now ready to wear or gift to someone special!
How to Measure Your Head for the Perfect Fit
When knitting a ribbed beanie, it is important to have the perfect fit to ensure both comfort and style. To achieve this, you need to accurately measure your head circumference. Follow these simple steps to measure your head:
1. Gather Your Materials
Before starting the measurement process, gather a flexible measuring tape or a piece of string and a ruler. These tools will help you get the most accurate measurement.
2. Find the Widest Part of Your Head
Locate the widest part of your head. This is usually above the ears and about an inch above the eyebrows. It’s important to measure at this point to ensure the beanie will fit comfortably over your head without being too tight.
3. Measure Your Head Circumference
Wrap the measuring tape or string around your head, making sure it is parallel to the ground. Keep it snug but not too tight. Take note of the measurement in inches or centimeters, depending on your preference. If you are using a string, mark where it crosses over and then measure it with a ruler.
4. Adjust for a Perfect Fit
Take into consideration the desired fit of your beanie. If you prefer a snug fit, subtract around 0.5 inches (1.27 cm) from your head measurement. If you prefer a looser fit, add around 1 inch (2.54 cm). This adjustment will ensure you achieve the desired fit for your ribbed beanie.
By accurately measuring your head circumference and making the necessary adjustments, you can be confident in knitting a ribbed beanie that will provide the perfect fit. Get ready to enjoy both warmth and style with your handcrafted creation!
Tips for Customizing Your Ribbed Beanie
A ribbed beanie is a classic and versatile accessory that can be customized to suit your personal style and preferences. Whether you’re an experienced knitter or just starting out, here are some tips to help you create a ribbed beanie that is uniquely yours.
Choose your yarn: The type of yarn you choose will greatly impact the look and feel of your ribbed beanie. Consider the weight, fiber content, and texture of the yarn to achieve the desired result. A lightweight yarn will create a more delicate and stretchy hat, while a heavier yarn will result in a chunkier and warmer beanie.
Experiment with stitch patterns: While the rib stitch is a classic choice for a beanie, don’t be afraid to mix it up and try different stitch patterns. You can incorporate cables, lace, or colorwork to add visual interest and make your beanie stand out. Remember to adjust the stitch count and pattern repeat accordingly to ensure a proper fit.
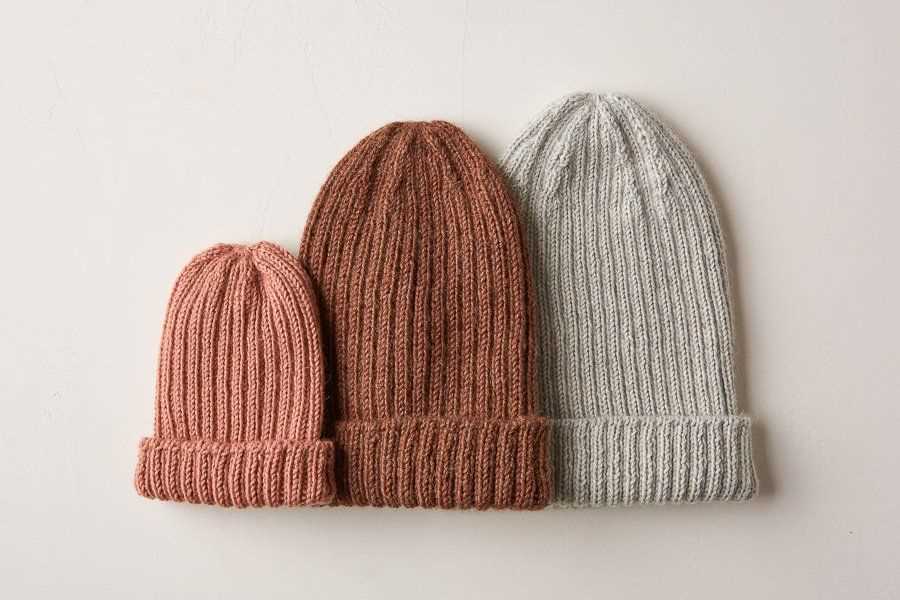
Personalize the fit: Everybody’s head shape and size are different, so it’s important to customize the fit of your ribbed beanie. You can easily adjust the circumference and length by adding or subtracting stitches. Additionally, you can experiment with different ribbing patterns, such as 1×1 or 2×2, to achieve the desired snugness or stretchiness.
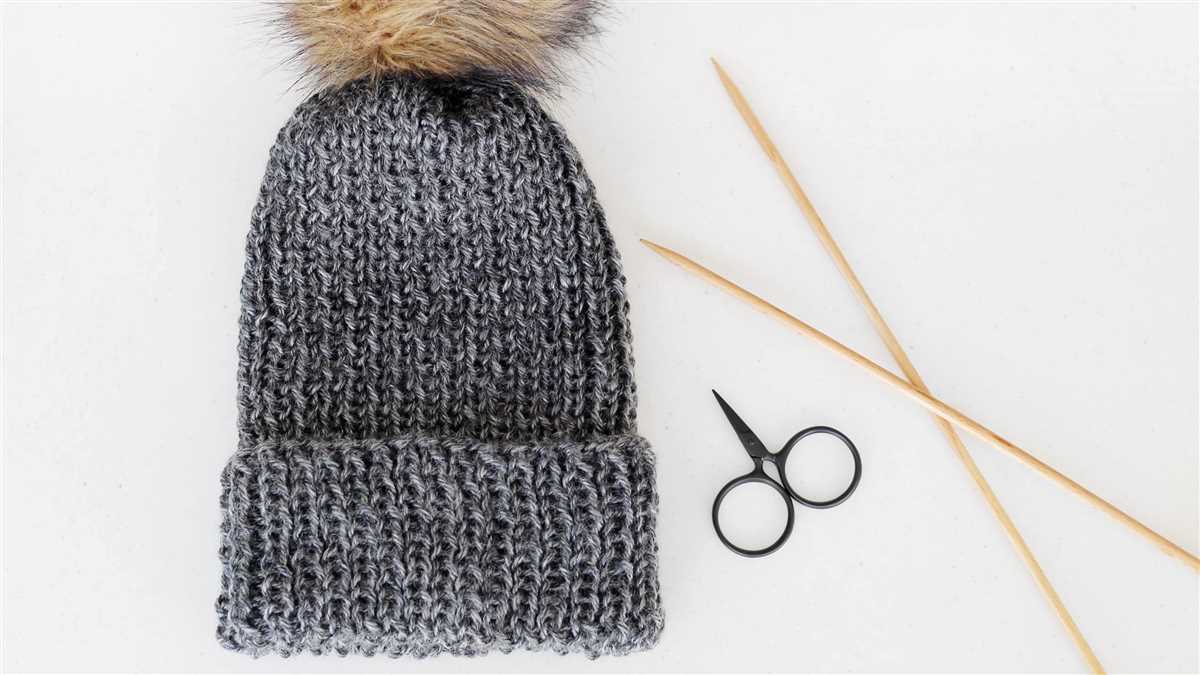
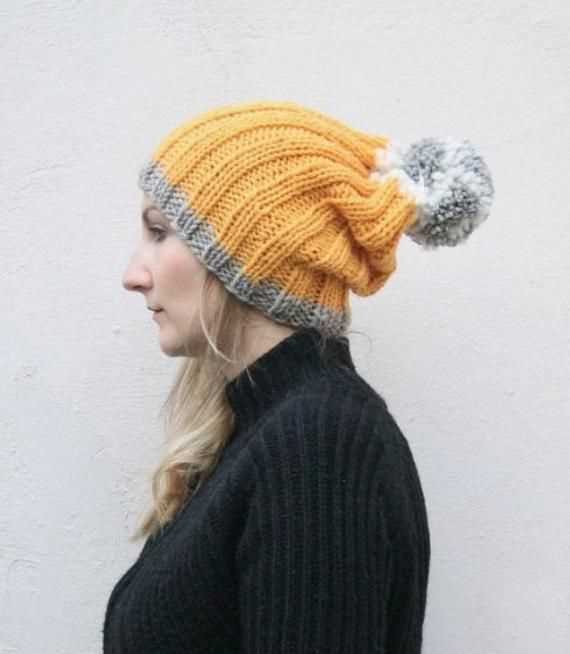
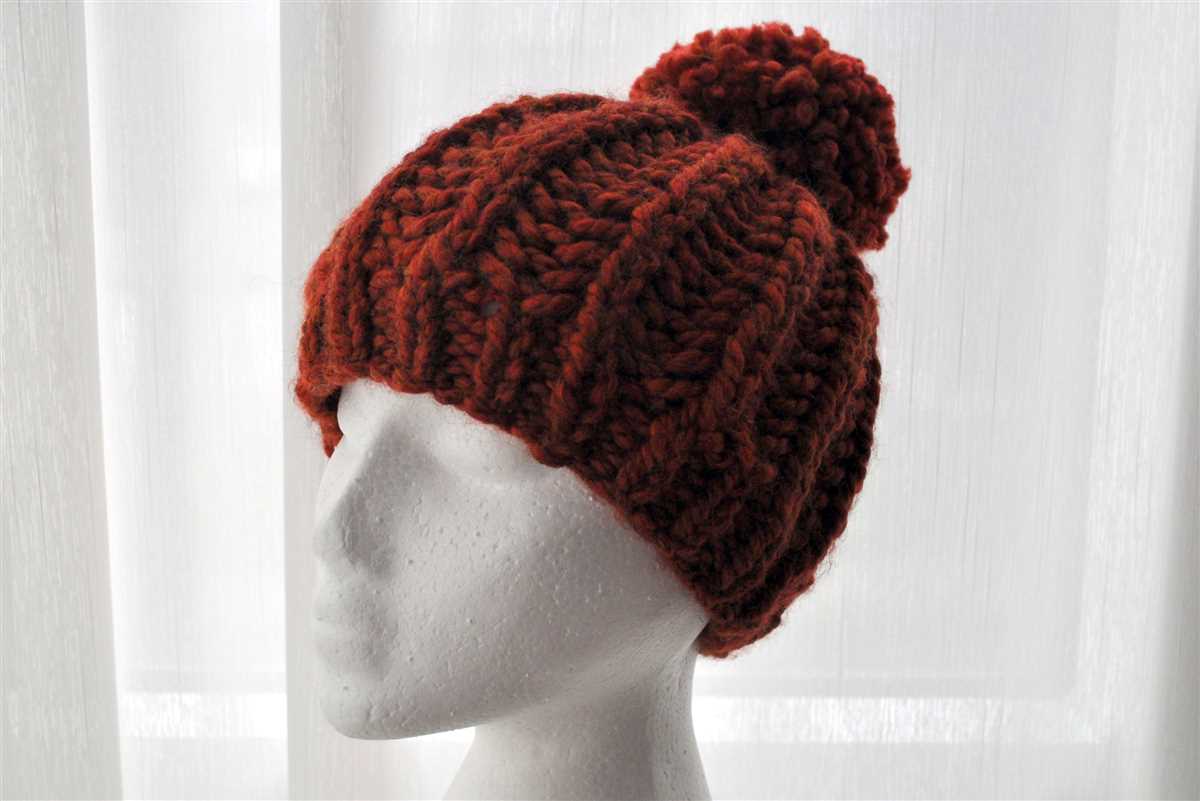
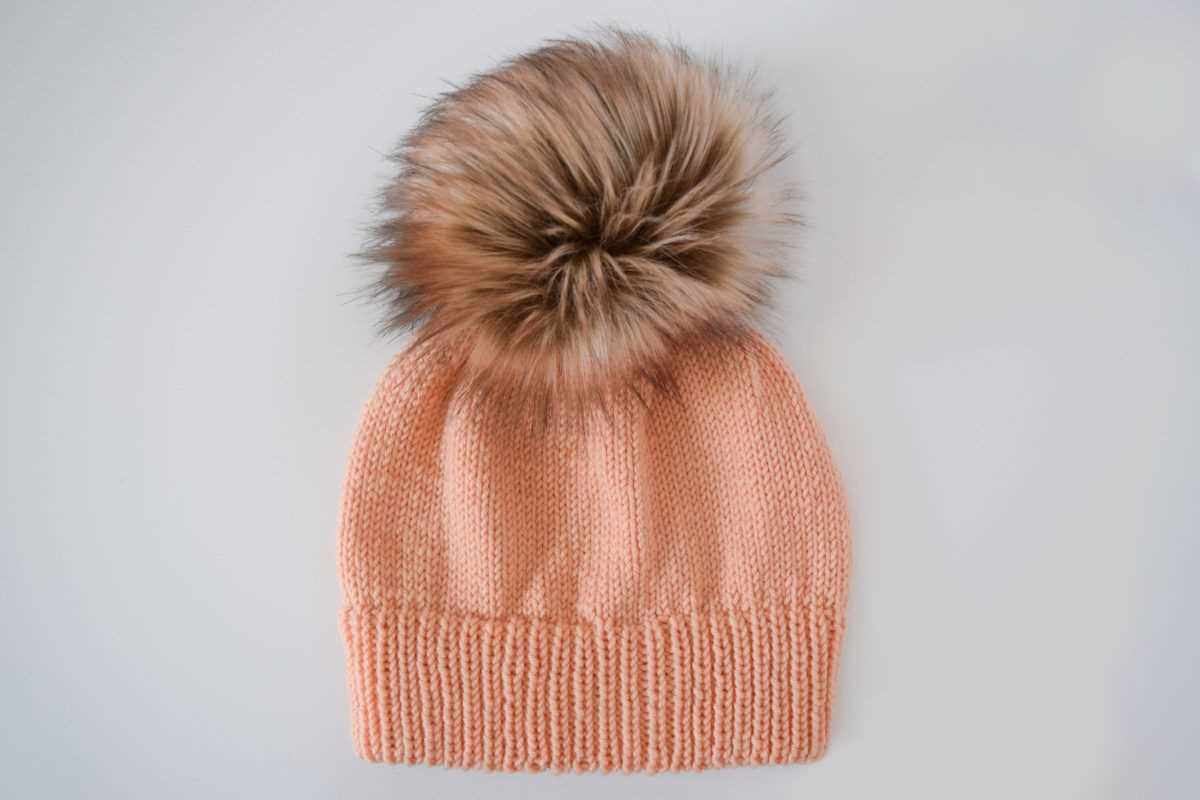
Add embellishments: Once you have the basic ribbed beanie completed, you can further personalize it by adding embellishments. Consider adding a pom-pom, a decorative button, or even embroidery to give your beanie a unique touch. Just make sure the added embellishments are securely attached and won’t create any discomfort when wearing the hat.
Consider the season: Depending on the climate and the intended use of your ribbed beanie, you may want to consider the season when customizing it. For colder months, you can opt for a thicker yarn and a longer length to provide extra warmth. In warmer weather, you can choose a lighter weight yarn and a shorter length to create a breathable and lightweight beanie.
Customizing your ribbed beanie allows you to create a hat that perfectly suits your style and needs. By considering yarn choice, stitch patterns, fit adjustments, embellishments, and seasonal considerations, you can create a one-of-a-kind accessory that you’ll love to wear.
Common Mistakes to Avoid
When knitting a ribbed beanie, there are several common mistakes that beginners often make. By being aware of these mistakes, you can avoid them and create a flawless beanie that you can be proud of.
1. Using the wrong yarn weight
One of the most common mistakes is using the wrong yarn weight for the pattern. Make sure to check the yarn weight recommended in the pattern and use a compatible yarn. Using a different weight can result in a beanie that is either too loose or too tight.
2. Not checking the gauge
Another mistake to avoid is not checking the gauge before starting your project. The gauge is the number of stitches and rows per inch that the pattern requires. If your gauge is off, the sizing and fit of your beanie will be affected. Take the time to knit a gauge swatch and adjust your needle size if necessary.
3. Skipping the blocking process
Blocking is an important step in finishing your beanie. It helps to smooth out any uneven stitches and gives your beanie a professional look. Skipping this step can result in a beanie that looks unfinished or lacks shape. Follow the blocking instructions provided in the pattern to achieve the best results.
4. Not counting stitches correctly
Counting stitches is essential to ensure that your ribbed beanie has the correct number of stitches throughout the pattern. Not counting correctly can result in a beanie that is lopsided or has uneven ribbing. Take your time to count each stitch as you go to avoid any mistakes.
5. Ignoring the pattern instructions
Lastly, it is important to carefully read and follow the pattern instructions. Ignoring or misinterpreting the instructions can lead to mistakes that are difficult to fix later on. Take the time to familiarize yourself with the pattern and refer back to it as needed.
Avoiding these common mistakes will help you create a beautiful ribbed beanie that you can be proud to wear or give as a gift. Remember to take your time, follow the instructions, and enjoy the process of knitting!
Adding Embellishments to Your Ribbed Beanie

Are you looking to add a little extra flair to your ribbed beanie? There are several ways you can embellish your hat to give it a unique and personalized touch. Whether you prefer a simple and classic design or a bold and statement-making accessory, here are a few ideas to get you started.
1. Pom-Poms
Add a playful touch to your ribbed beanie by attaching a pom-pom on top. Pom-poms can be made by hand using yarn or you can purchase pre-made ones in various sizes and colors. Simply sew or glue the pom-pom to the crown of your hat, and you’ll instantly have a fun and whimsical accessory.
2. Embroidery
Give your ribbed beanie a personalized touch by adding some embroidered designs. Whether you choose to embroider your initials, a favorite symbol, or a decorative pattern, embroidery can add a pop of color and detail to your hat. Use contrasting colored yarn and a simple embroidery stitch to create your desired design.
3. Buttons

Add some visual interest to your ribbed beanie by sewing on a few buttons. Choose buttons in different colors, shapes, and sizes to create a unique pattern or design. Sew them onto the brim or throughout the ribbed sections of your hat to create an eye-catching and stylish accessory.
4. Ribbed Texture Variations
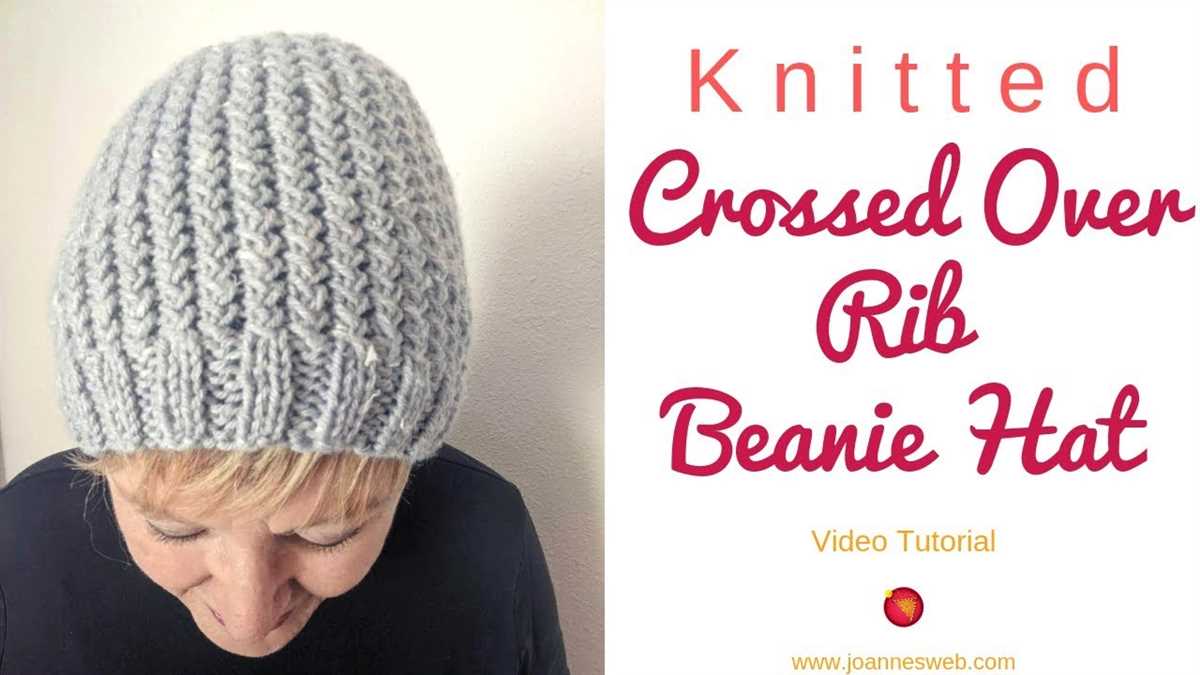
Instead of sticking with the traditional ribbing pattern, you can experiment with different ribbed textures for your beanie. Try alternating between knits and purls to create a waffle-like pattern or incorporate different stitch patterns like cables or bobbles to add some depth and texture to your hat.
5. Appliques
Add some extra dimension to your ribbed beanie by attaching appliques. Appliques can be made from felt, fabric, or even crochet motifs. Whether you choose to add flowers, animals, or geometric shapes, appliques can instantly transform your beanie into a unique and eye-catching accessory.
With these embellishment ideas, you can take your ribbed beanie from simple to standout. Get creative and experiment with different techniques and materials to make your hat truly one-of-a-kind.
How to Care for Your Knitted Beanie

Knitted beanies are a popular accessory for colder months, providing warmth and style. To keep your beanie looking its best and to prolong its lifespan, proper care is important. Here are some tips to help you care for your knitted beanie:
Hand Wash
It is best to hand wash your knitted beanie to avoid damaging the delicate fibers. Fill a basin or sink with cool water and add a gentle detergent. Gently swirl the beanie in the soapy water, making sure to focus on any soiled areas. Rinse the beanie with cool water until the water runs clear.
Avoid Aggressive Scrubbing
When washing your beanie, it is important to avoid aggressive scrubbing or wringing. This can cause the fibers to become misshapen or damaged. Instead, handle the beanie with care and gently squeeze out excess water without twisting or wringing.
Dry Flat
After washing, reshape the beanie to its original form and lay it flat on a clean towel to dry. Avoid hanging or using a dryer, as this can stretch or distort the shape of the beanie. Allow the beanie to air dry completely before wearing or storing.
Store Properly
When not in use, it is important to store your knitted beanie properly to maintain its shape and prevent any damage. Fold the beanie neatly and place it in a dry, clean storage bag or drawer. Avoid storing it with heavy items that can cause it to become flattened or misshapen.
Following these simple care instructions will help keep your knitted beanie looking its best and ensure that it lasts for seasons to come. Remember to always check the care instructions provided by the yarn manufacturer for any specific guidelines or recommendations.
Other Knitting Patterns to Try
If you enjoyed knitting the ribbed beanie pattern, there are many other knitting patterns that you can try. Here are a few suggestions:
- Chunky Scarf Pattern: This pattern is perfect for cold winter days. Knit with chunky yarn, it will keep you warm and stylish.
- Fingerless Gloves Pattern: Keep your hands cozy while still being able to use your fingers with this fingerless gloves pattern. It’s a quick and easy project.
- Cable Knit Sweater Pattern: For more experienced knitters, a cable knit sweater pattern is a fun challenge. It creates beautiful textures and is perfect for colder months.
- Blanket Pattern: Knitting a blanket is a large-scale project, but it’s incredibly rewarding. Choose your favorite colors and create a cozy blanket to enjoy.
- Baby Booties Pattern: If you’re looking for a cute and small project, try knitting baby booties. They make adorable gifts for newborns.
These are just a few examples of the many knitting patterns available. Whether you’re a beginner or an experienced knitter, there is something for everyone to enjoy. Grab your knitting needles and get started on your next project!
Happy knitting!