
Are you looking for a fashionable and cozy addition to your wardrobe? Look no further than the rectangle shrug knitting pattern! This versatile and easy-to-make garment is perfect for keeping warm during the cooler months while adding a touch of style to any outfit. Made from a simple rectangular shape, this pattern is suitable for knitters of all skill levels.
The rectangle shrug knitting pattern is a great project for beginners who are looking to expand their knitting skills. With its basic stitches and straightforward construction, this pattern provides an excellent opportunity to practice and improve your knitting techniques. The simplicity of the design also allows for customization, so you can make this shrug your own by choosing the colors and yarn weights that best suit your personal style.
What makes the rectangle shrug knitting pattern even more appealing is its versatility. Whether you’re dressing up for a night out or keeping it casual for a day at the office, this shrug can easily be dressed up or down to suit any occasion. Wear it over a dress for an elegant look or pair it with jeans and a t-shirt for a more laid-back vibe. No matter how you style it, this shrug is sure to become a staple in your wardrobe.
Rectangle Shrug Knitting Pattern
Are you looking for a stylish and versatile knitting project? Look no further than the Rectangle Shrug knitting pattern. This pattern creates a beautifully draped shrug that can be worn in multiple ways, making it a must-have addition to your wardrobe.
The Rectangle Shrug is a beginner-friendly project that only requires basic knitting skills. The design is created by knitting a simple rectangle, which is then folded and seamed to create the shrug’s sleeves. The pattern allows for customization in terms of sizing and length, so you can easily tailor the shrug to fit your preferences.
Materials
- Yarn: Choose a soft and lightweight yarn in your preferred color.
- Knitting needles: Select a pair of needles that are appropriate for the yarn weight you’ve chosen.
- Tapestry needle: This will be used for seaming the shrug.
Instructions
- Cast on the desired number of stitches. The width of your rectangle will determine the final length of the sleeves.
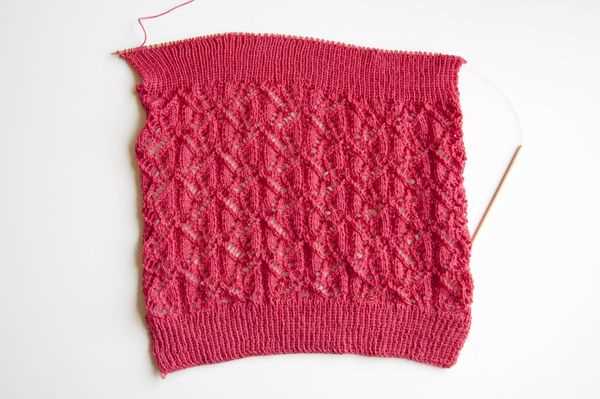
- Continue knitting in your chosen stitch pattern until the rectangle reaches your desired length.
- Bind off all stitches.
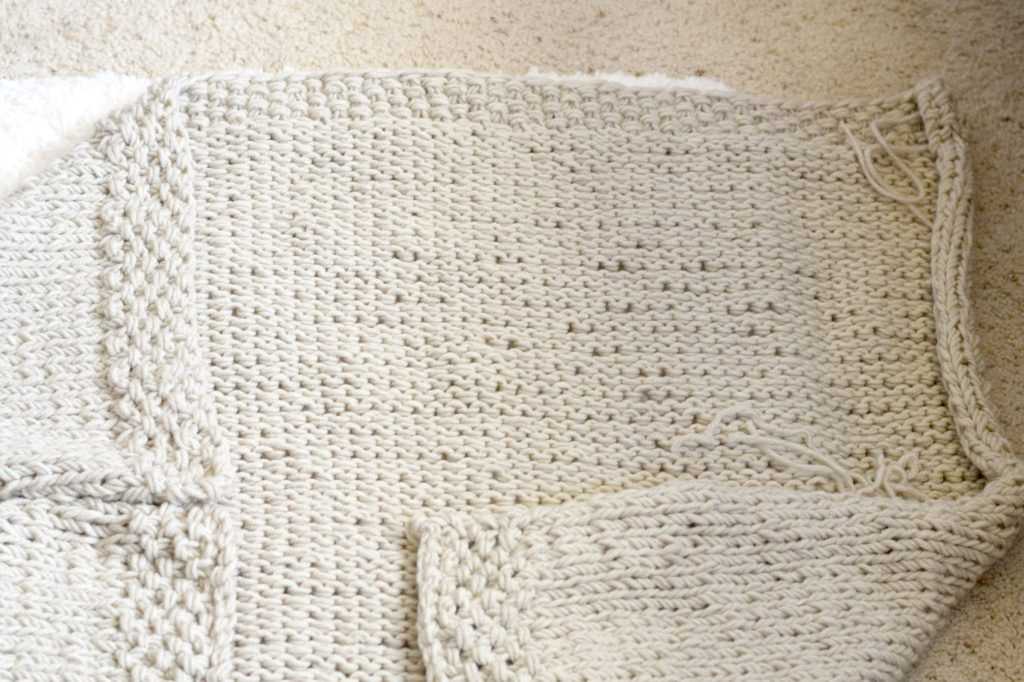
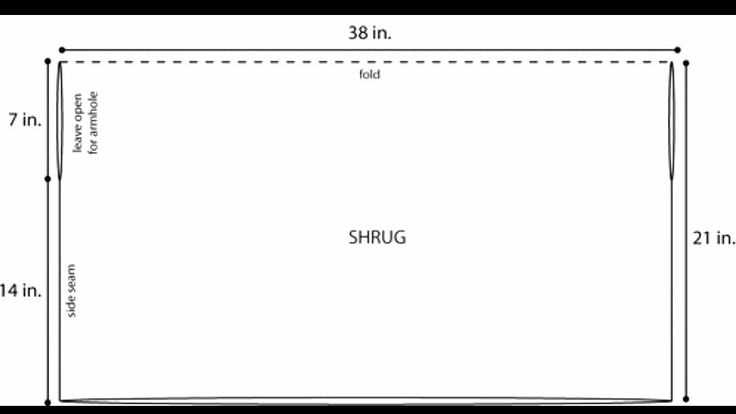
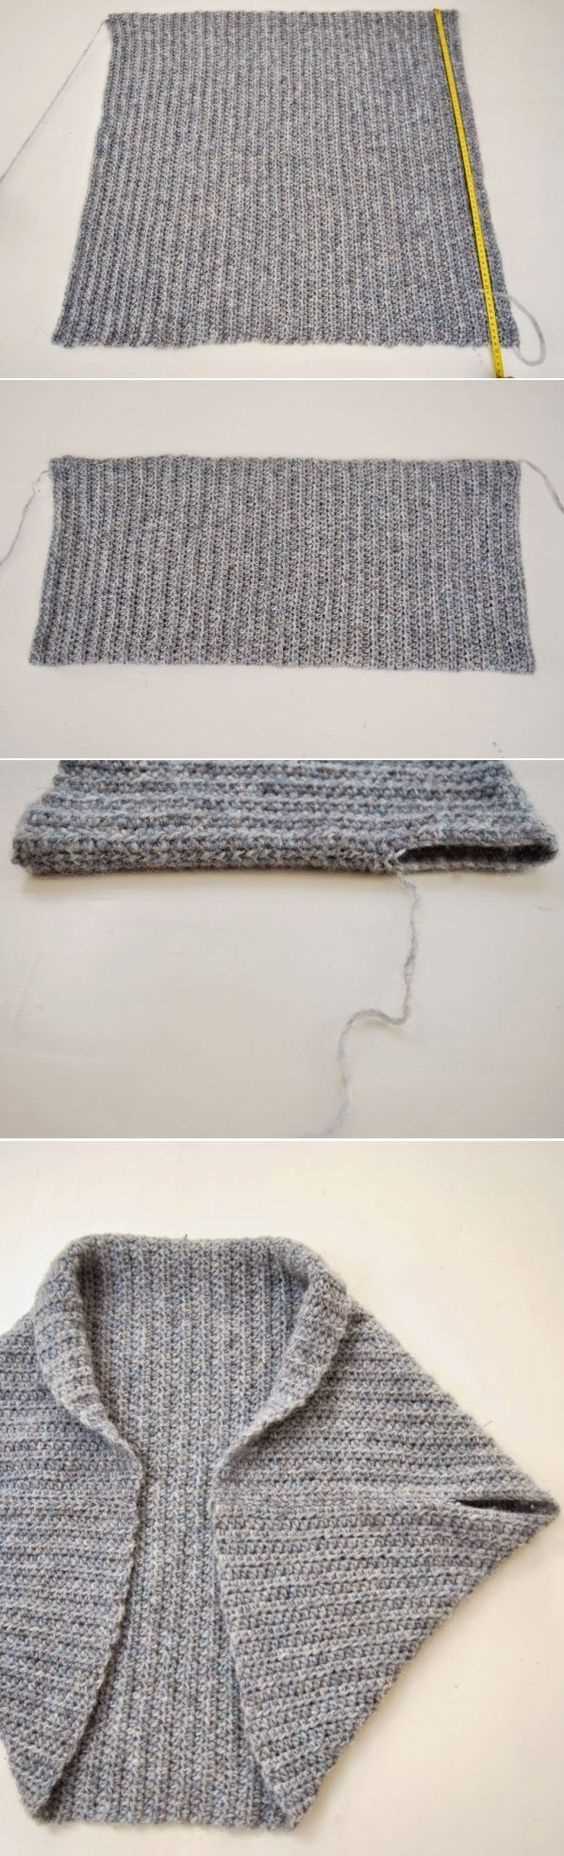
- Fold the rectangle in half widthwise, with the wrong sides facing each other.
- Using the tapestry needle, seam the sides together starting from the fold and ending at the cast on edge, leaving appropriate spaces for armholes.
- Weave in any loose ends and your Rectangle Shrug is ready to wear!
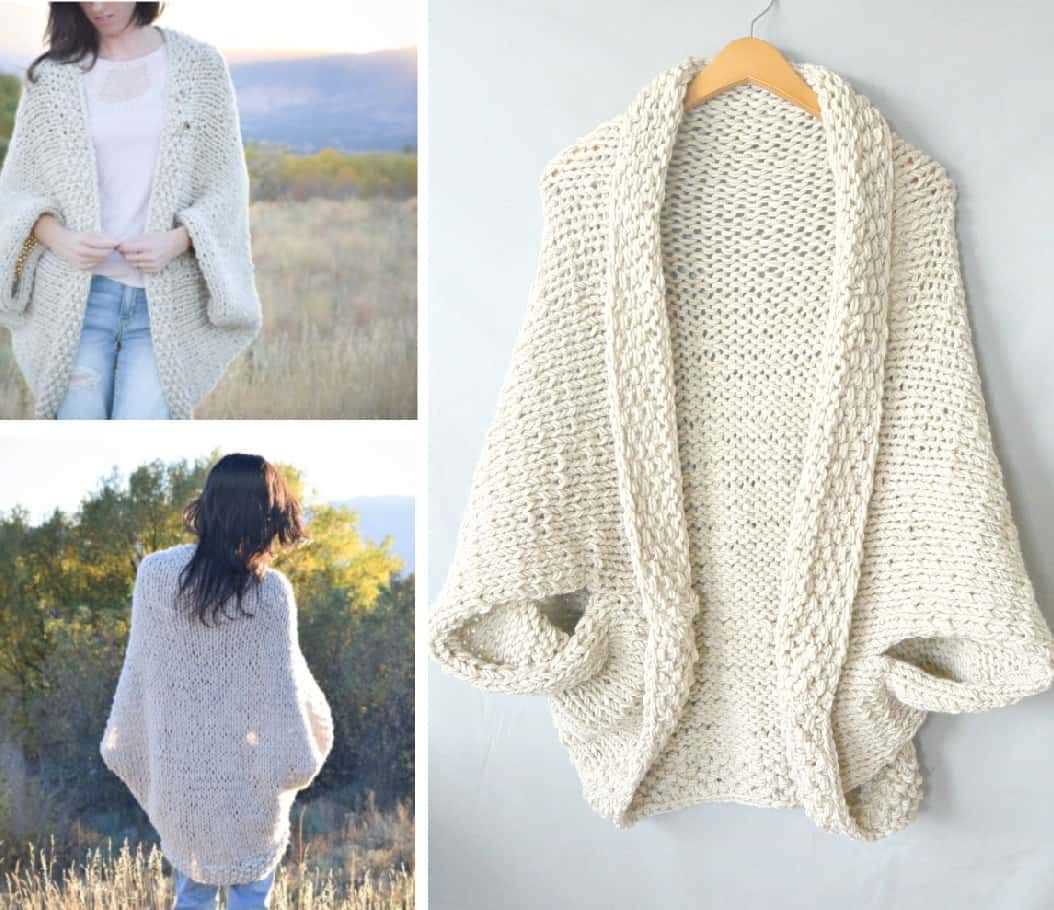
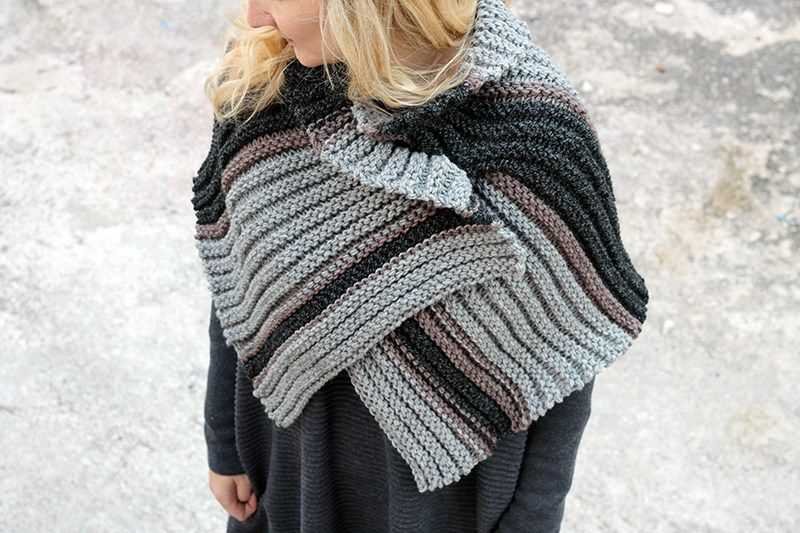
The versatility of the Rectangle Shrug makes it a great accessory for any outfit. Wear it as a traditional shrug by pulling the sleeves around your shoulders, or drape it over your arms for a more cape-like look. You can also experiment with different ways to wrap and style the shrug to create unique and personalized looks.
So grab your knitting needles and start creating your own Rectangle Shrug. It’s a fun and rewarding project that will add a touch of elegance to your wardrobe.
About the Rectangle Shrug

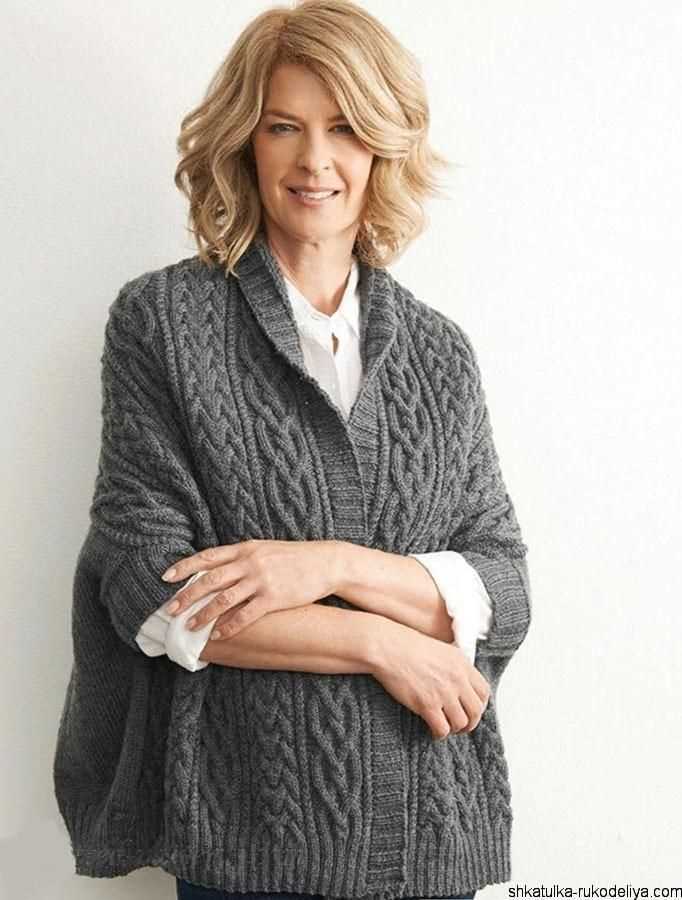
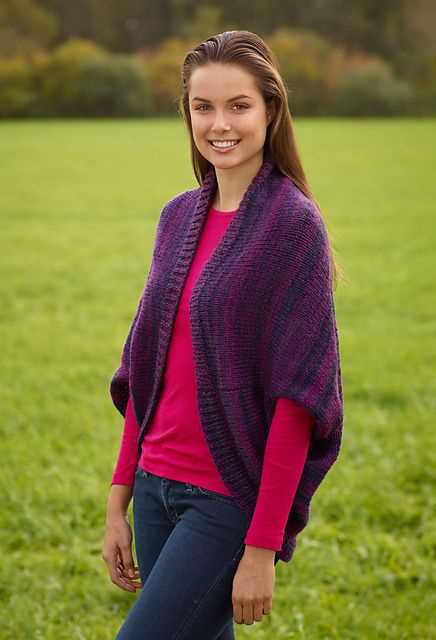
The rectangle shrug is a versatile and stylish garment that can be worn in a variety of ways. It is an ideal addition to any wardrobe, providing both warmth and fashion. The design of the shrug is simple yet elegant, making it suitable for both casual and formal occasions. Whether you want to dress up a simple outfit or add a cozy layer to your ensemble, the rectangle shrug is the perfect choice.
This knitting pattern allows you to create your own rectangle shrug, customized to your size and style preferences. The pattern includes detailed instructions and helpful tips to ensure a successful knitting experience. The design of the shrug features a rectangular shape, making it easy to knit even for beginners. With basic knitting techniques, you can create a beautiful shrug that can be worn year-round.
One of the key features of the rectangle shrug is its versatility. You can wear it as a traditional shrug, with the ends hanging loosely over your shoulders. Alternatively, you can fold it in half and wear it as a cozy scarf. You can also experiment with different ways to drape it over your shoulders for a unique and stylish look. The rectangle shrug can be paired with anything from dresses and skirts to jeans and t-shirts, making it a truly versatile accessory.
The rectangle shrug knitting pattern is available in various sizes, allowing you to create a shrug that fits you perfectly. You can choose from a range of colors and yarns to suit your personal style. Whether you prefer soft and cozy yarns for a winter shrug, or lightweight and breathable yarns for a summer shrug, the pattern can be adapted to your needs. With the rectangle shrug, you can add a touch of elegance and sophistication to any outfit.
Materials Needed
If you’re interested in knitting a shrug in the rectangle shape, you’ll need a few materials to get started. Here’s a list of what you’ll need:
- Yarn: Choose a yarn that you love, and that has enough stretch to give your shrug a comfortable fit. Worsted weight yarn is a popular choice for this project.
- Knitting Needles: You’ll need a pair of knitting needles in the appropriate size for your chosen yarn. Check the yarn label for needle size recommendations.
- Tapestry Needle: A tapestry needle will be useful for weaving in ends and sewing any seams.
- Scissors: A good pair of scissors will be handy for cutting yarn and trimming any excess.
- Stitch Markers: Stitch markers can be helpful for marking certain points in your pattern, such as the beginning of a round or the placement of buttonholes.
- Buttons or Other Fasteners: Depending on your design, you may want to have buttons or other fasteners on hand to add a finishing touch to your shrug.
- Measuring Tape: A measuring tape will come in handy for checking your gauge and ensuring that your shrug fits properly.
With these materials in hand, you’ll be ready to start knitting your rectangle shrug. Gather everything together and find a comfortable spot to begin your project.
Gauge and Sizing
Getting the right gauge is essential for the success of your rectangle shrug knitting project. Gauge refers to the number of stitches and rows per inch in your knitted fabric. It determines the overall size of your finished piece and ensures that it fits properly.
To achieve the correct gauge, it is important to use the recommended yarn and needle size stated in the pattern. Make sure to check the gauge swatch instructions provided. Knit a small test swatch using the specified needle size and yarn, and measure the number of stitches and rows per inch. Adjust your needle size if necessary to achieve the correct gauge.
Size options:
- The rectangle shrug pattern typically provides instructions for multiple sizes, such as small, medium, and large. Make sure to choose the size that best fits your measurements.
- Before starting your project, take accurate body measurements, especially for the width and length of the shrug.
- Refer to the pattern’s sizing chart to determine the appropriate size based on your measurements.
- If your measurements fall between two sizes, consider your desired fit and adjust accordingly.
By paying attention to gauge and selecting the correct size, you can ensure that your rectangle shrug will fit well and be a beautiful addition to your wardrobe.
Knitting Instructions
If you’re looking for a cozy and stylish accessory to add to your wardrobe, look no further than the Rectangle Shrug knitting pattern. With its simple yet elegant design, this pattern is perfect for knitters of all skill levels.
To get started, you will need a set of knitting needles and your choice of yarn. The pattern calls for a worsted weight yarn, but feel free to experiment with different yarn weights to achieve the desired look and feel.
Begin by casting on the required number of stitches, as specified in the pattern. The rectangle shrug is knit in one piece, so there is no need to worry about sewing any seams together. As you work through the pattern, you will be creating a stockinette stitch pattern, which is achieved by knitting on the right side and purling on the wrong side.
As you knit your way towards the desired length, keep in mind that the shrug should fit comfortably around your shoulders and arms. You can customize the length of the shrug by adding or subtracting rows as necessary. Once you have reached the desired length, bind off your stitches and you’re ready to wear your new rectangle shrug!
Whether you’re a beginner knitter or an experienced one, the Rectangle Shrug knitting pattern is a great project to take on. With its simple yet elegant design, it’s sure to become a staple in your wardrobe.
A cast on is the first step in starting a knitting project. It is the process of creating the first row of stitches on your knitting needle, which will form the foundation of your project. There are several different methods for casting on, each with its own advantages and uses.
Common Cast On Methods
One common cast on method is the long-tail cast on. This method creates a strong and flexible edge, making it suitable for a wide range of knitting projects. To perform the long-tail cast on, you will need to estimate the amount of yarn needed for your desired number of stitches, as it requires a long tail of yarn to be left before you start casting on.
Another popular cast on method is the knitted cast on. This method is simple and versatile, making it a great choice for beginners. It creates a more even and stretchy edge compared to the long-tail cast on. To perform the knitted cast on, you will need to know how to make a knit stitch and have your working yarn at the back of your needle.
- The cable cast on is another commonly used method. It creates a firm and stable edge, making it ideal for projects that require a sturdy start, such as sweaters or blankets. This method involves using the knitting needle to create new stitches on the left-hand needle.
- The backward loop cast on is a quick and easy method that is often used for adding stitches to an already established piece of knitting. However, it can create a loose edge that may not be as durable as other cast on methods.
These are just a few examples of the many cast on methods that knitters use. The choice of cast on method will depend on the specific project and desired outcome. It’s always a good idea to practice different cast on techniques to expand your knitting skills and find the method that works best for you.
Divide for Back and Sleeves
Once you have completed the necessary number of rows for the body of your rectangle shrug, it’s time to divide the work for the back and sleeves. To do this, you will need to mark the center stitch of the rectangle.
Step 1: Count the total number of stitches in your row. Divide this number by 2 and make a small marker or place a stitch holder on the stitch in the middle of your work.
Step 2: From the center stitch, count the number of stitches to the right and left based on the desired width of your back and sleeves. For example, if you want 10 stitches for the back and 7 stitches for each sleeve, count 5 stitches to the right and left of the center stitch for the back, and 3 stitches to the right and left of the center stitch for each sleeve.
Once you have determined the placement of the stitches for the back and sleeves, place markers or use stitch holders to separate the sections. This will help you keep track of where to continue each section as you work on them separately.
- Note: Make sure the number of stitches for the back and sleeves adds up to the total number of stitches in the row.
With the work divided, you can now begin working on the back and sleeves separately, following the instructions for each section. This division allows you to create the shape of the shrug and provides the necessary openings for the sleeves. Happy knitting!
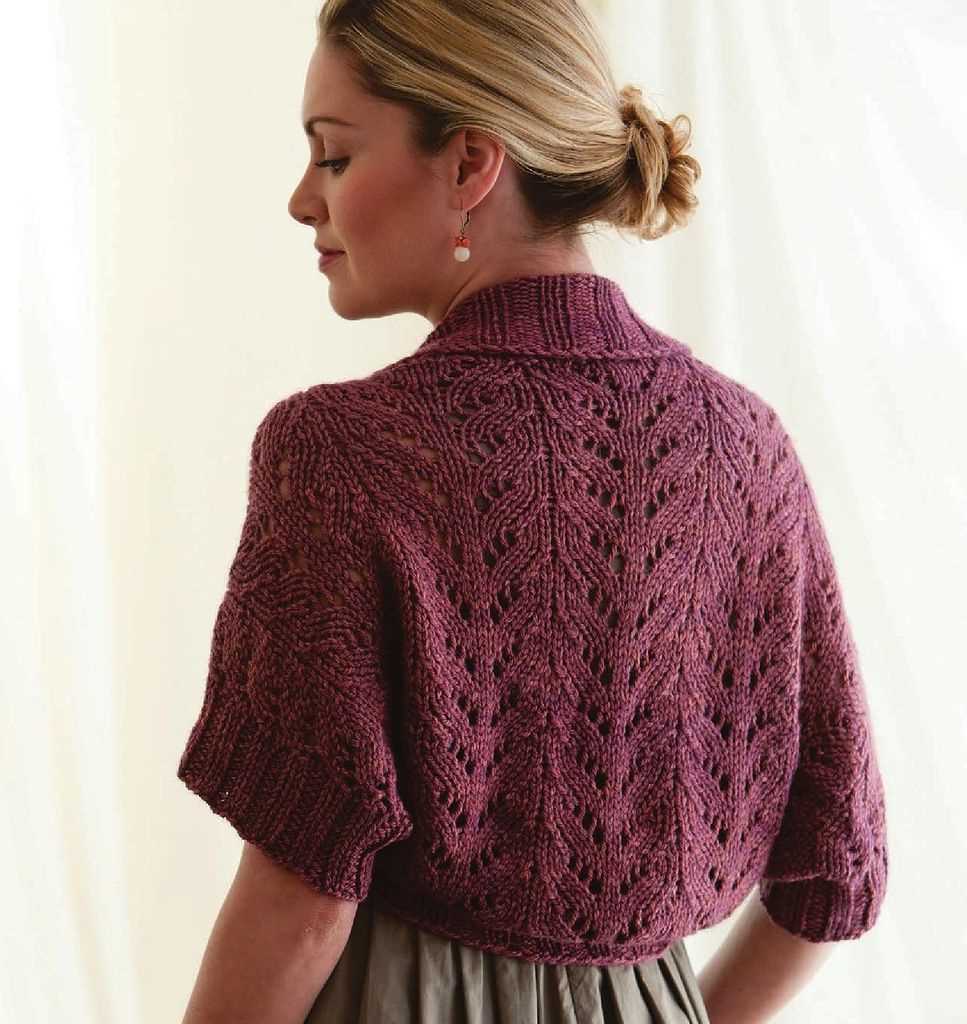
Back Panel
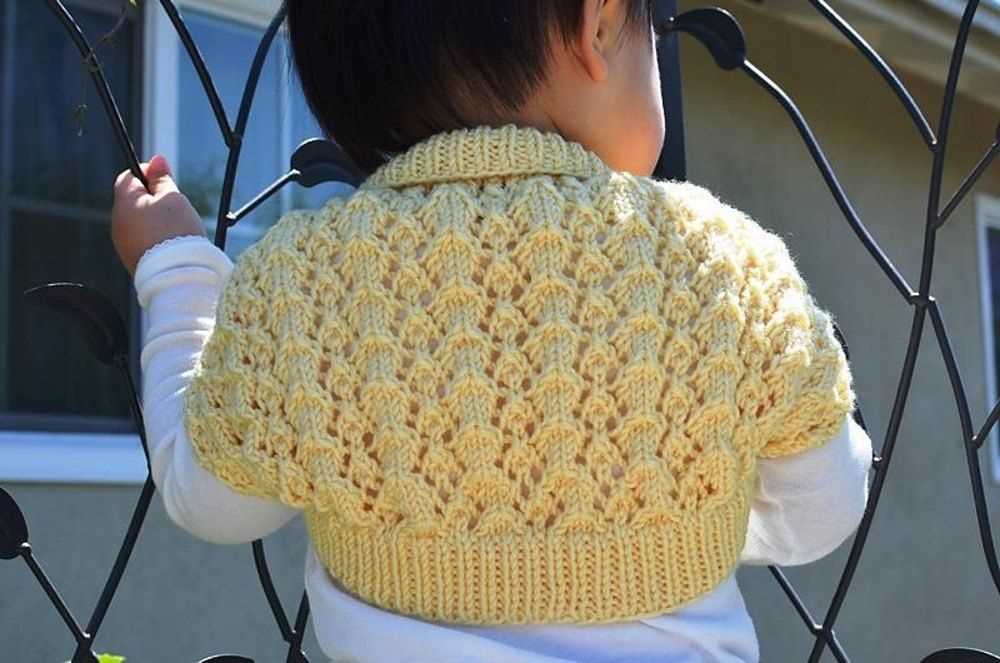
The back panel of the rectangle shrug is an integral part of the knitting pattern. It is knitted separately and then sewn onto the main body of the shrug. The back panel provides structure and support to the garment, ensuring that it sits properly on the wearer’s shoulders.
To begin knitting the back panel, cast on the required number of stitches using the specified yarn and needle size. The pattern may include instructions for ribbing or other stitch patterns to add texture and interest to the back panel. Follow the pattern instructions carefully to ensure that you create the correct size and shape.
Row 1: Knit across all stitches.
Row 2: Purl across all stitches.
Row 3: Repeat Row 1.
Row 4: Repeat Row 2.
Continue in this manner, following the pattern instructions, until the back panel reaches the desired length. Once the knitting is complete, bind off all stitches and weave in any loose ends.
Note: The back panel is typically rectangular in shape, with straight sides and a slightly curved top edge. This curved edge will align with the neckline of the shrug when the back panel is sewn onto the main body.
- Size: Small (Medium, Large)
- Yarn: Worsted weight
- Needles: US size 8 (5mm)
The back panel is an essential element in creating a well-fitting and visually appealing rectangle shrug. It adds structure and shape to the garment while also providing a comfortable and flattering fit. Make sure to follow the instructions carefully and use the specified materials to achieve the desired results.
Sleeves
The sleeves of the rectangle shrug are an important part of the design. They add warmth and coverage to the arms while also adding a stylish and modern flair to the overall look of the garment.
To create the sleeves, you will need to follow the instructions provided in the knitting pattern. The pattern will specify the number of stitches and rows needed to create each sleeve, as well as any special stitch patterns or techniques that should be used.
One important thing to note is that the sleeves are knit separately from the body of the shrug. This means that you will need to knit each sleeve individually and then attach them to the body of the shrug once they are complete. This can be done using a variety of techniques, such as sewing or knitting the sleeves directly onto the body.
When knitting the sleeves, it is important to pay attention to gauge and measurements to ensure that they fit properly. It can be helpful to take regular measurements of your arm as you go to ensure that the sleeves are the correct length and width. If necessary, you can also make adjustments to the pattern to accommodate your specific measurements.
Overall, the sleeves of the rectangle shrug are a key component of the design. They add both functionality and style to the garment, and can be customized to fit your own personal preferences and measurements. By following the pattern and paying attention to gauge and measurements, you can create sleeves that perfectly complement the body of the shrug and ensure a comfortable and flattering fit.
Joining the Sleeves and Back
Once you have completed knitting the back piece and the two sleeves separately, it’s time to join them together to create the shrug. This process involves stitching the sleeves onto the sides of the back piece to form the armholes. Here’s a step-by-step guide on how to do it:
1. Prepare the pieces
Before you begin, make sure that you have blocked and laid out all the pieces flat on a surface. This will help ensure that they are properly aligned and ready to be stitched together.
2. Position the sleeves
Take one sleeve and place it on one side of the back piece, with the right sides facing each other. Align the edges, starting from the shoulder down to the bottom of the armhole. Repeat the same process with the other sleeve on the opposite side.
3. Stitch the sleeves
Using a tapestry needle and the same yarn that you used for knitting, begin stitching the sleeves to the back piece. Start at the shoulder and work your way down to the bottom of the armhole, using a mattress stitch or any preferred method of joining. Make sure to keep the tension even and secure as you go.
4. Weave in ends
Once both sleeves are attached, weave in any loose ends of yarn to ensure a neat and finished look. Trim any excess yarn if necessary.
And there you have it! Your sleeves and back are now joined, and your rectangle shrug is starting to take shape. The next step would be to continue knitting the collar or any additional details as specified in your pattern.
Finishing Touches
Once you’ve completed knitting your rectangle shrug, it’s time to add the finishing touches to make it look polished and complete. There are a few final steps you can take to ensure your shrug looks its best.
Blocking: Start by blocking your shrug to even out any inconsistencies in your knitting and give it a smooth, professional finish. Wet blocking is typically recommended for most knitted garments. To wet block, soak your shrug in lukewarm water and gentle detergent, then lay it flat on a towel and gently reshape it to the desired dimensions. Allow it to dry completely before moving on to the next step.
Seaming: Once your shrug is dry, you’ll need to seam the two ends together to create the armholes. Use a whip stitch or mattress stitch to join the two sides, making sure to line up the stitches evenly. Take your time with this step to ensure a seamless and sturdy seam.
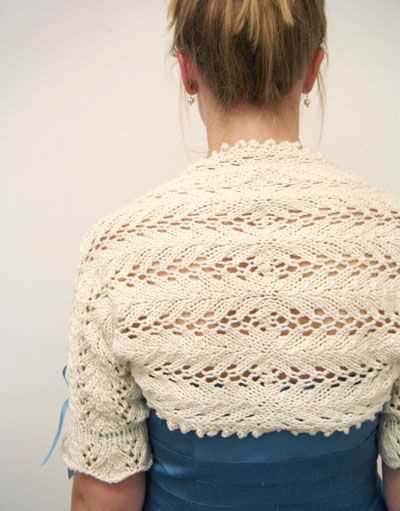
Edging: Next, you can add an edging to the front opening and neckline of your shrug for a finished look. This can be done using a simple single crochet or slip stitch edging, or you can get creative and add a decorative lace or picot edging if you prefer. Choose a stitch that complements the overall design of your shrug and work the edging evenly along the edges.
Finishing details: Finally, consider adding any additional finishing touches to personalize your shrug. This could include sewing on buttons or other embellishments, adding a ribbon tie closure, or even attaching a fabric lining for extra comfort and style. Let your creativity shine through in these final details!
By following these steps and adding these finishing touches, you’ll be able to transform your knitted rectangle shrug into a beautiful and wearable garment that you’ll be proud to show off.
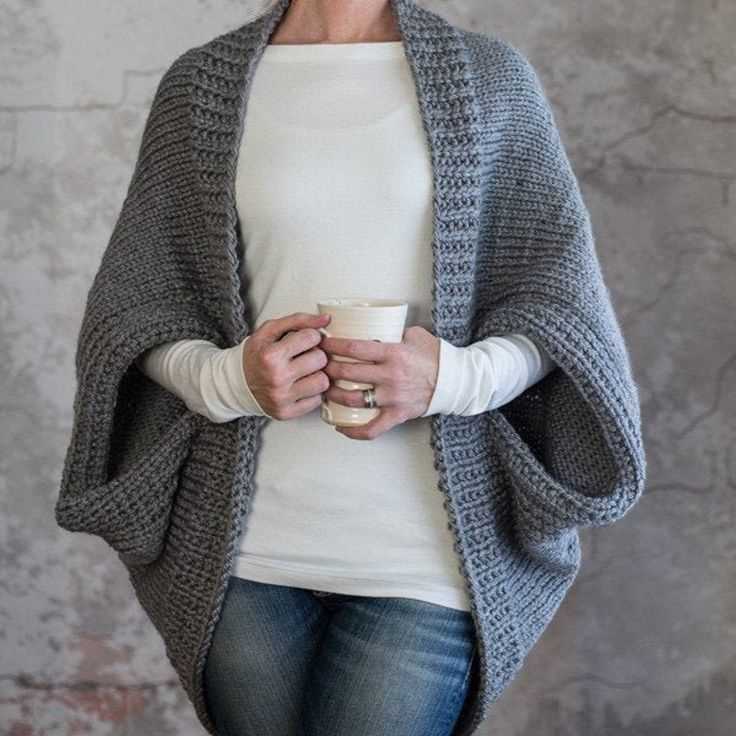
How to Wear the Rectangle Shrug
The rectangle shrug is a versatile accessory that can be worn in a variety of ways to complement your outfit. Here are some ideas on how to style and wear your rectangle shrug:
Casual and Cozy Look:
For a relaxed and casual look, pair your rectangle shrug with a simple t-shirt or tank top and jeans. Throw on some sneakers or sandals to complete the laid-back vibe. The rectangle shrug adds an extra layer of warmth and style to your outfit while keeping you cozy.
Dressy and Elegant Look:
To create a dressier and more elegant look, wear your rectangle shrug over a stylish dress or a blouse and skirt. Opt for a shrug in a luxurious knit or a textured fabric to add a touch of sophistication to your ensemble. Complete the outfit with heels and some statement jewelry for a polished and refined look.
Layered Winter Look:
- During the colder months, layer your rectangle shrug over a long-sleeved turtleneck or a chunky sweater. Pair it with leggings or skinny jeans and boots for a cozy and chic winter look. This layered outfit will keep you warm while adding an extra dimension to your style.
- You can also try layering your rectangle shrug under a coat or jacket for added warmth. The shrug will peek out from the sleeves and collar, adding a unique and stylish touch to your outerwear.
In conclusion, the rectangle shrug is a versatile accessory that can elevate any outfit. Whether you’re going for a casual look or dressing up for a special occasion, the rectangle shrug adds style and warmth to your ensemble. Experiment with different ways to wear it and have fun incorporating it into your wardrobe!
Q&A:
What is a rectangle shrug knitting pattern?
A rectangle shrug knitting pattern is a type of knitting pattern that uses a rectangular shape to create a shrug or cropped cardigan. The pattern typically involves knitting a rectangle, which is then folded and seamed to create the sleeves and front opening of the shrug.
How do you knit a rectangle shrug?
To knit a rectangle shrug, you need to cast on the desired number of stitches for the width of the shrug. Then, you will knit in your chosen stitch pattern (such as ribbing or stockinette stitch) for the desired length of the shrug. Finally, you will fold the rectangle in half and seam the ends together to create the sleeves and front opening.
What size needles are typically used for a rectangle shrug knitting pattern?
The size of needles used for a rectangle shrug knitting pattern will depend on the desired gauge and yarn weight. It is recommended to use needles that will give you the correct gauge specified in the pattern. Common needle sizes for knitting shrugs range from US size 7 (4.5 mm) to US size 10.5 (6.5 mm).
Are rectangle shrugs one size fits all?
No, rectangle shrugs are not necessarily one size fits all. The finished size of a rectangle shrug will depend on the number of stitches cast on and the desired dimensions specified in the pattern. Some patterns may provide instructions for adjusting the size of the shrug, such as by adding or subtracting stitches or rows.
Can I make modifications to a rectangle shrug knitting pattern?
Yes, you can make modifications to a rectangle shrug knitting pattern to suit your preferences. Common modifications include adjusting the length or width of the shrug, adding or removing stitches for a better fit, or changing the stitch pattern used. It is always a good idea to make a gauge swatch before making any modifications to ensure your finished shrug will have the desired fit.