
Are you looking for a cozy and stylish addition to your winter wardrobe? Look no further than a poncho! Ponchos are incredibly versatile and can be dressed up or down depending on the occasion. Whether you’re attending a holiday party or enjoying a brisk walk in the park, a poncho is the perfect accessory to keep you warm and fashionable.
If you are a knitting enthusiast, you’ll be thrilled to know that ponchos are relatively easy to make, even for beginners. With just a few basic stitches and some patience, you can create a beautiful and unique poncho that reflects your personal style. Plus, knitting your own poncho allows you to choose the yarn, color, and pattern, ensuring that you end up with a garment that fits perfectly.
In this article, we will provide you with a simple poncho knitting pattern that you can try at home. We’ll guide you through the process step by step, from selecting the right yarn and needles to casting on and creating the stitches. Whether you prefer a classic cable knit pattern or a more intricate lace design, we have a variety of options to suit every taste.
So dust off your knitting needles and join us as we dive into the world of poncho knitting. With our easy-to-follow instructions and helpful tips, you’ll be able to create a stunning poncho that you’ll be proud to show off. Get ready to showcase your knitting skills and stay warm and stylish all winter long!
Choosing the right yarn for your poncho
When it comes to knitting a poncho, one of the most important factors to consider is choosing the right yarn. The type of yarn you select will greatly impact the final look, feel, and functionality of your poncho. Here are some key factors to keep in mind when choosing the perfect yarn for your project.
1. Fiber content:
The first thing to consider is the fiber content of the yarn. Different fibers have different properties and characteristics. For example, wool yarn is known for its warmth, while cotton yarn is breathable and lightweight. Synthetics like acrylic and nylon offer durability and easy care. Consider the climate you live in and the desired purpose of your poncho, whether it’s for chilly winters or cool summer evenings, to help determine the best fiber content for your yarn.
2. Weight and thickness:
The weight and thickness of the yarn will also play a role in the final outcome of your poncho. Thicker yarns will result in a chunkier, cozier poncho, while thinner yarns will create a more delicate and lightweight garment. Consider the overall aesthetic you’re aiming for and the level of warmth you desire when selecting the weight and thickness of your yarn.
3. Color and texture:
The color and texture of the yarn can greatly enhance the design of your poncho. Whether you prefer solid colors, variegated yarns, or yarns with interesting textures, there are endless options to choose from. Consider the style and purpose of your poncho, as well as your personal taste, when selecting the color and texture of your yarn.
By carefully considering the fiber content, weight and thickness, as well as the color and texture of your yarn, you can ensure that your poncho turns out exactly how you envision it. The right yarn choice will not only contribute to the overall aesthetic of your poncho but also enhance its functionality and comfort.
Getting started with your poncho
Knitting a poncho can be a fun and rewarding project for knitters of all skill levels. Whether you’re an experienced knitter looking for a new challenge or a beginner eager to try your hand at garment knitting, creating your own poncho is a great way to showcase your creativity and stay warm and stylish during the colder months.
Choosing the right pattern: Before you start knitting your poncho, it’s important to choose a pattern that matches your skill level and desired style. There are a wide variety of poncho knitting patterns available, ranging from simple and basic designs to more complex lace or cable patterns. Take your time to browse through different patterns and find one that suits your preferences.
Gathering your materials:
- Yarn: The type of yarn you choose for your poncho will depend on the pattern and your personal preferences. Consider the weight, fiber content, and color of the yarn when making your selection.
- Knitting needles: Check the recommended needle size in the pattern and ensure you have the correct needles. Circular needles are often used for knitting ponchos.
- Notions: Other supplies you may need include stitch markers, a tapestry needle for weaving in ends, and scissors.
Casting on: Once you have your pattern, yarn, and needles ready, it’s time to cast on and begin your poncho. Follow the pattern instructions for the cast-on method and number of stitches required. Pay attention to any special stitch patterns or increases/decreases that may be involved.
Tip: It’s a good idea to make a gauge swatch before you start knitting your poncho to ensure that your stitch count and tension match the pattern. This will help ensure that the finished poncho fits properly.
With these steps in mind, you’re ready to start knitting your own poncho. Take your time, enjoy the process, and soon you’ll have a beautiful and cozy poncho to wear and show off.
Casting on and creating the base of your poncho
When beginning your knitting project for a poncho, the first step is to cast on the stitches. This is the foundation of your poncho and will determine the size and shape of the finished product. It is important to use the appropriate size needles and yarn weight for your desired outcome.
To cast on, start by making a slipknot and placing it on your knitting needle. Hold the working yarn in your right hand and the empty needle in your left hand. Insert the right needle into the slipknot from left to right, moving under the left-hand needle. With your right hand, grab the working yarn and bring it between the two needles, making a loop around the right needle.
Continue this process until you have cast on the desired number of stitches needed for your poncho pattern. Remember to keep your tension even and not too tight, as this can make it difficult to knit later on. You can use a stitch marker to mark the beginning of your round if you are knitting in the round, or simply continue knitting in rows if you are working a flat piece.
If you are following a specific knitting pattern, make sure to carefully read and follow the instructions for casting on. Some patterns may require a specific cast-on technique or stitch count to achieve the desired design. Once you have cast on your stitches, you are ready to proceed to the next steps in knitting your poncho!
Creating the body of your poncho
Once you have selected a suitable knitting pattern for your poncho, it’s time to start creating the body. The body of the poncho is usually created by knitting a large rectangular piece, which will later be folded in half to form the poncho shape.
Start by casting on the required number of stitches, as indicated in the pattern. The number of stitches will depend on the size of the poncho and the desired width. Make sure to use the recommended type and size of knitting needles for your chosen yarn to achieve the desired tension and gauge.
Working the body pattern
Follow the pattern instructions to work the body pattern. This may involve working in a specific stitch pattern, such as ribbing, garter stitch, or a more intricate lace or cable pattern. Pay attention to any stitch counts or pattern repeats that are specified in the instructions, as these will ensure that your poncho is symmetrical and balanced.
Continue working the body pattern until the piece reaches the desired length. The length can vary depending on personal preference and the style of the poncho. Keep in mind that the poncho will naturally drape and hang lower when worn, so it is recommended to make it slightly shorter than the intended final length.
Finishing the body

Once the desired length is reached, finish the body by binding off all stitches. Cut the yarn, leaving a long tail for seaming later. You should now have a rectangular piece that will form the body of your poncho.
At this point, you can choose to block the piece to ensure that it lays flat and has even dimensions. Blocking involves wetting the piece and shaping it to the desired size, then allowing it to dry completely before proceeding to the next steps of assembly and finishing.
Once the piece is blocked (if desired), it is ready to be folded in half and seamed along the sides to create the poncho shape. Use the long tail of yarn left from binding off to seam the sides together, using a suitable seaming technique such as mattress stitch or whip stitch.
With the body of your poncho complete, you can now move on to adding any desired embellishments, such as fringe, buttons, or decorative edging. The finishing touches will give your poncho a unique and personalized look.
Adding color and texture to your poncho
When it comes to knitting a poncho, there are endless possibilities for adding color and texture to make your project unique and personal. Adding these elements can transform a basic poncho into a beautiful and eye-catching garment.
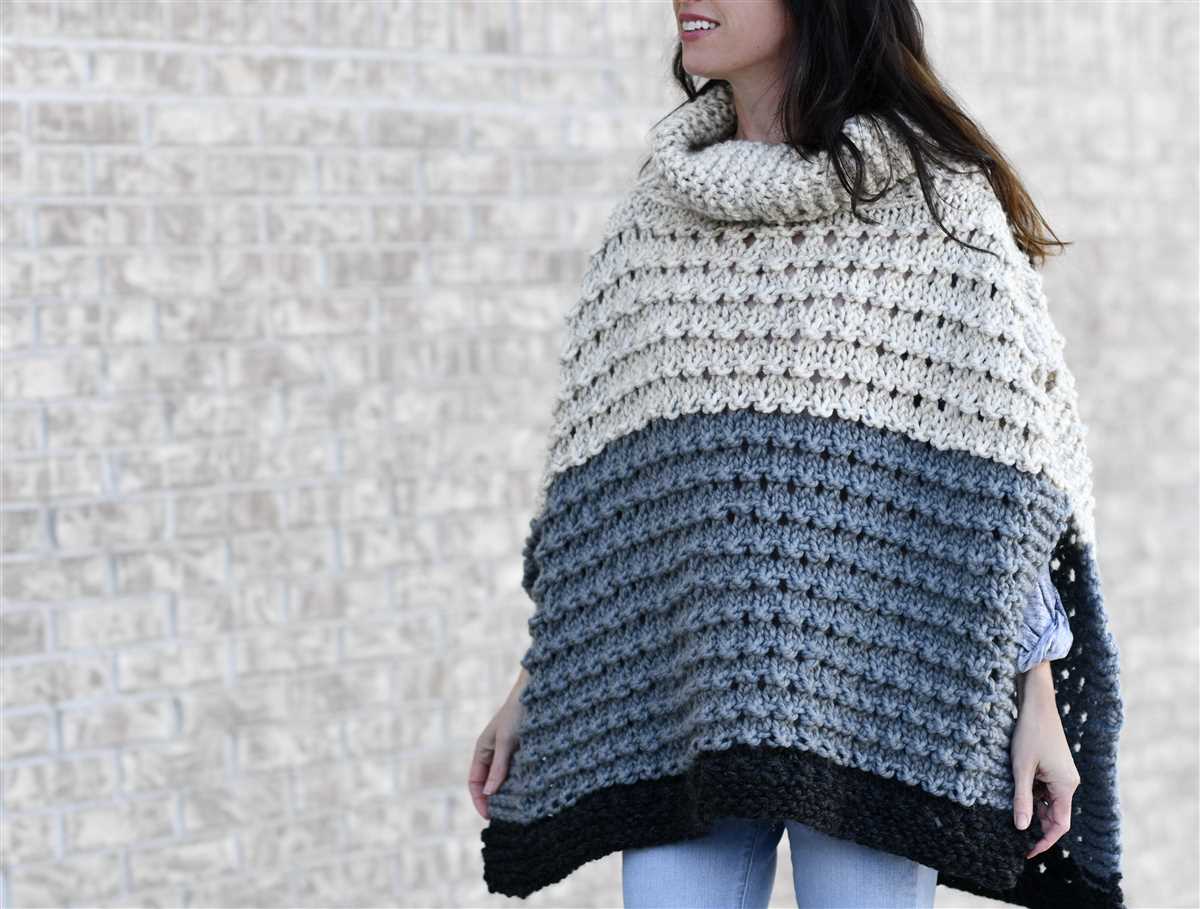
Color: One of the easiest ways to add color to your poncho is by using different colored yarns. You can opt for a single color throughout the poncho or experiment with multiple colors to create stripes, patterns, or even a gradient effect. Another option is to incorporate color through color blocking, where different sections of the poncho are knitted in contrasting or complementary hues.
Texture: To add texture to your poncho, you can choose from a variety of knitting stitches and techniques. For example, you can use ribbing or cables to create a raised pattern or add depth to your poncho. Another option is to experiment with different stitch patterns such as lace, bobbles, or seed stitch to add interesting texture and visual appeal to your poncho.
One way to incorporate both color and texture into your poncho is by using multiple yarns with different textures and colors. For instance, combining a smooth yarn with a fuzzy yarn can create a unique texture, while combining yarns of different colors can add depth and visual interest to your project.
When choosing colors and textures for your poncho, it’s important to consider your personal style, outfit preferences, and the overall look you want to achieve. You can browse knitting magazines, websites, and social media platforms for inspiration and ideas. Additionally, experimenting with different color and texture combinations on a small swatch can help you visualize how they will look on your poncho before committing to the final design.
In summary, adding color and texture to your poncho can elevate its visual appeal and make it a truly one-of-a-kind piece. Whether you prefer bold and vibrant colors or subtle and muted hues, or if you love intricate textures or simple patterns, the options are endless. With a little creativity and experimentation, you can create a poncho that reflects your unique style and personality.
Shaping the neckline of your poncho
The neckline of a poncho is an important design element that can greatly affect the overall look and fit of the garment. Properly shaping the neckline is crucial to ensure that the poncho sits comfortably on the shoulders and frames the face beautifully.
There are different techniques to shape the neckline of a poncho, depending on the desired style and design. One common method is to work short rows to create a gentle curve along the back of the neck. This technique helps to prevent the poncho from sliding off the shoulders and creates a more flattering shape.
To shape the neckline using short rows, start by knitting or crocheting the poncho in the desired pattern until you reach the point where the neckline shaping begins. At this point, you will need to divide the stitches into three sections: the center back and the two sides of the neckline.
Now, work the short rows by knitting or crocheting a certain number of stitches on one side of the neckline, then turning your work and working back in the opposite direction without completing the full row. Repeat this process until you have shaped a curve along the center back of the neckline.
Once the short rows are complete, you can continue working on the remaining sections of the poncho. You may need to pick up stitches along the curved edge of the neckline to create a clean finish. This can be done by inserting the needle or hook into the stitches along the curved edge and pulling up a loop of yarn. Repeat this process across the neckline until all the necessary stitches have been picked up.
After the neckline is shaped and the stitches are picked up, you can proceed with the rest of the pattern, whether it’s continuing a stitch pattern, adding embellishments, or finishing the edges. By shaping the neckline properly, you can create a poncho that not only looks stylish but also fits comfortably.
Creating the sleeves for your poncho
When knitting a poncho, one of the key elements is creating the sleeves that will give it shape and structure. The sleeves not only add functionality, but also contribute to the overall aesthetic of the garment.
1. Measuring and planning
Before you start knitting the sleeves, it is important to take accurate measurements of your arms and shoulders. This will ensure that the sleeves fit properly and provide the desired level of comfort. Use a flexible measuring tape to measure the circumference of your upper arm, wrist, and forearm. Additionally, measure the length of your arm from the shoulder to the desired sleeve length.
2. Choosing a sleeve pattern
Once you have your measurements, you can select a sleeve pattern that fits your style and skill level. There are various sleeve styles to choose from, including fitted, flared, and bell-shaped sleeves. Consider the type of yarn and the stitch pattern of your poncho when selecting a sleeve pattern to ensure that they complement each other.
Here are a few popular sleeve patterns to consider:
- Raglan sleeves: These sleeves are knit in a diagonal style, starting from the underarm and extending up to the neckline. They create a seamless look and are often favored for their comfortable fit.
- Balloon sleeves: These voluminous sleeves add drama and whimsy to a poncho. They are gathered at the wrist and create an elegant and feminine look.
- Bell sleeves: These sleeves flare out from the elbow or mid-arm, creating a bell-like shape. They add a touch of retro charm to any poncho.
3. Knitting the sleeves
Once you have chosen a sleeve pattern, follow the instructions provided to knit the sleeves separately. Start by casting on the required number of stitches and work in the specified stitch pattern until you reach the desired length. Pay attention to any shaping instructions, such as increases or decreases, to ensure that the sleeves fit properly.
After completing the sleeves, you can attach them to the body of the poncho using the preferred method, such as sewing or grafting. Make sure to try on the poncho as you attach the sleeves to ensure that they are positioned correctly and that the overall fit is comfortable.
By following these steps and using the right sleeve pattern, you can create sleeves that add style and functionality to your poncho.
Finishing touches for your poncho
Knitting your own poncho can be a rewarding project that allows you to create a stylish and unique accessory. Once you have completed knitting your poncho, there are a few finishing touches you can add to enhance its overall look and functionality.
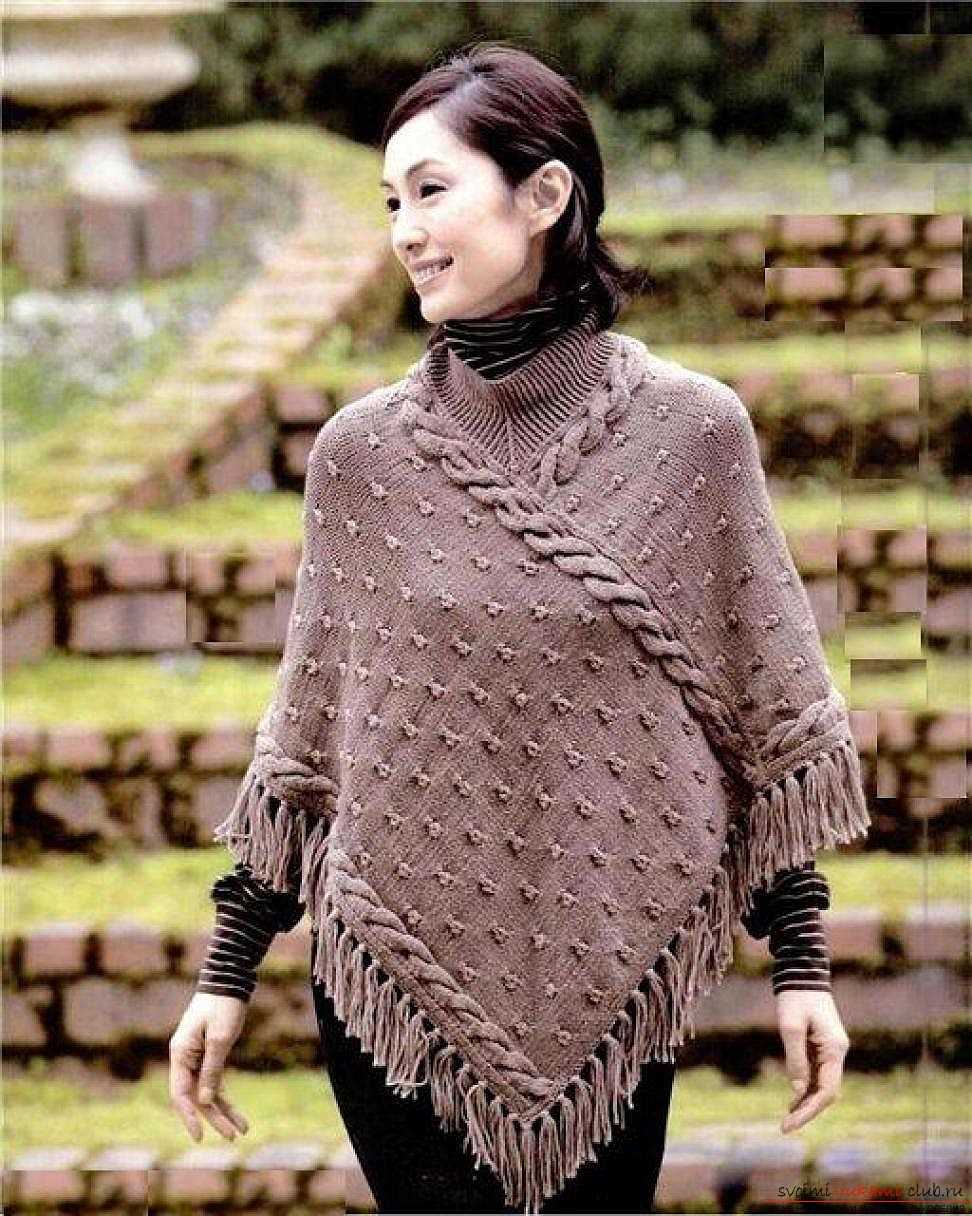
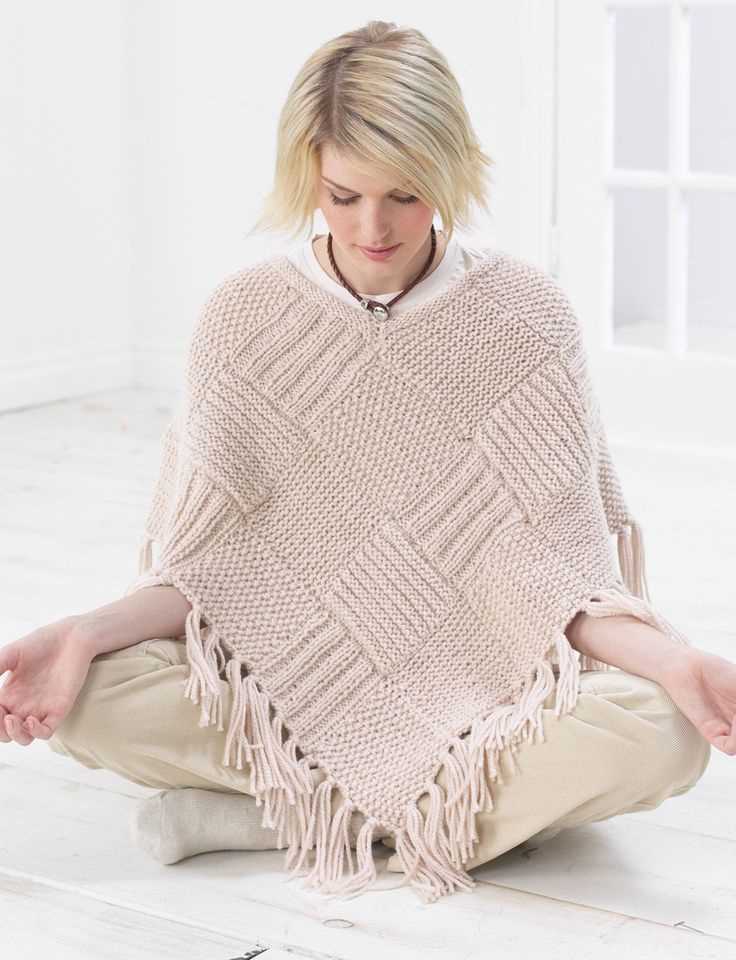
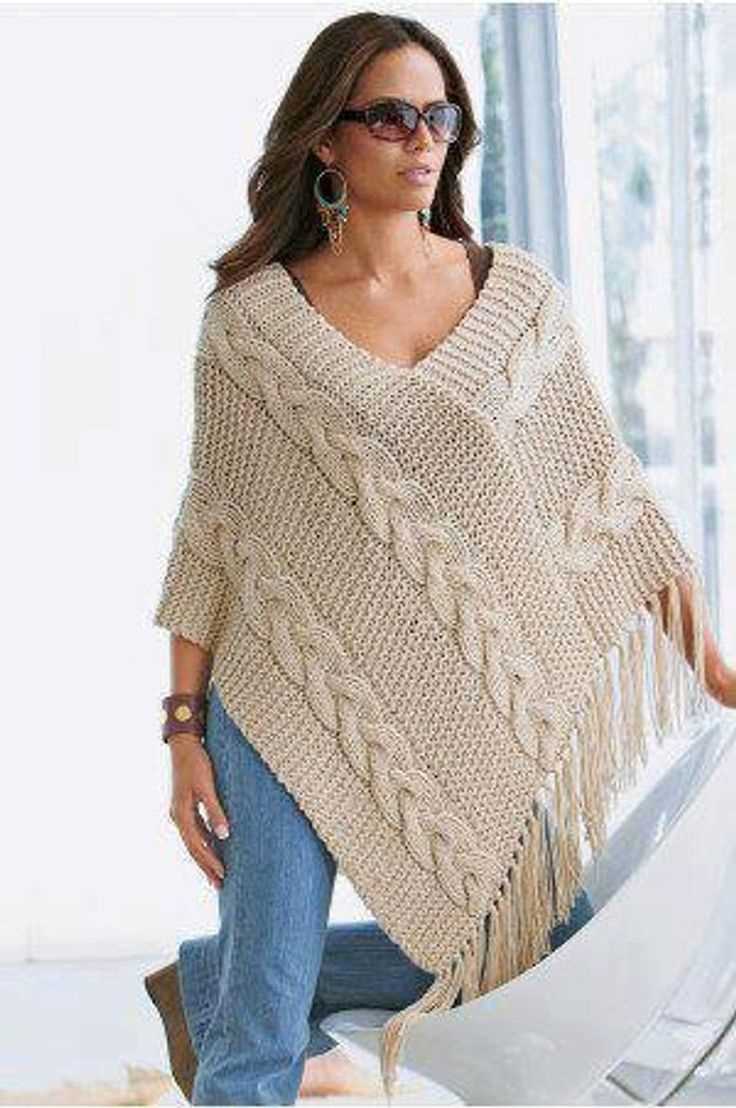
Add fringe
Fringe can add an extra touch of flair to your poncho. You can easily attach fringe to the bottom edge or along the border of your poncho. Choose a color that complements your poncho or adds a contrasting pop. You can use yarn of the same weight as your poncho or experiment with different textures for added visual interest.
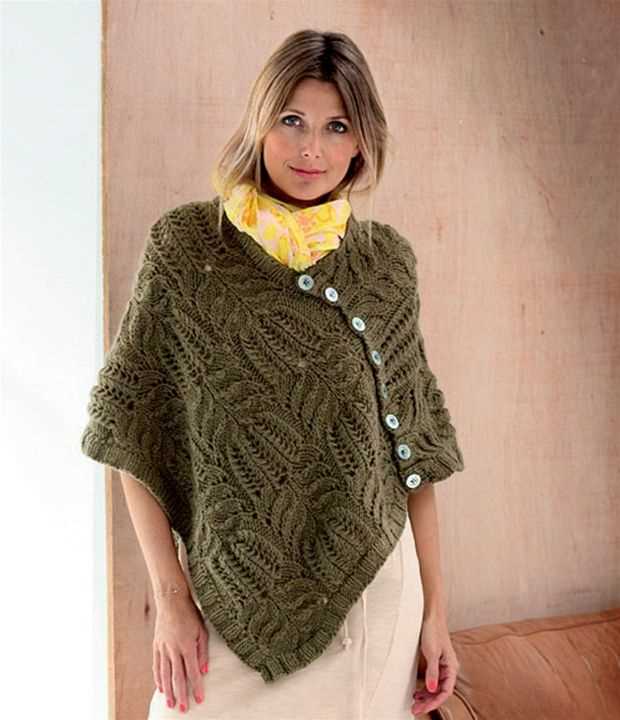
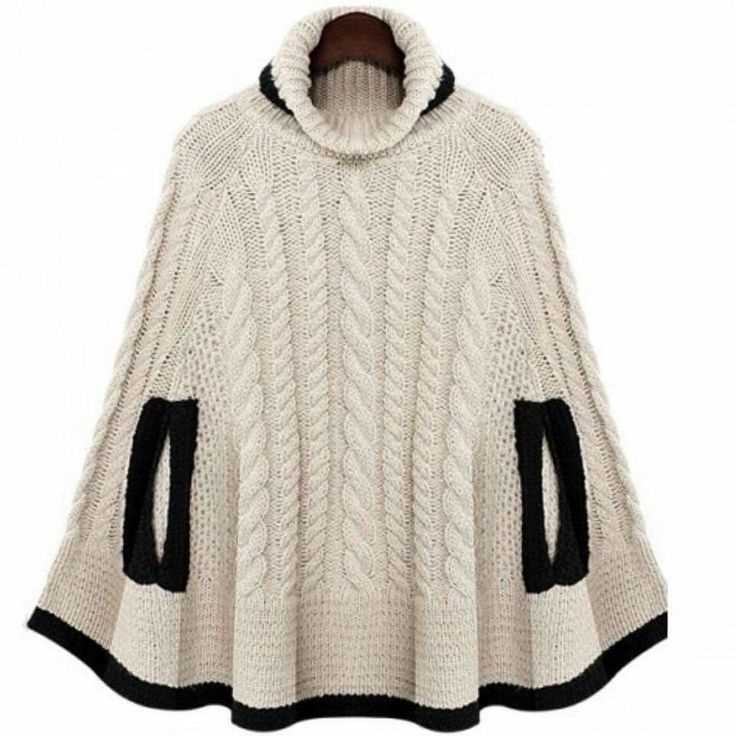
Sew on buttons
If your poncho has a neckline or requires closure, sewing on buttons can be a practical and decorative solution. You can choose buttons that match the overall color scheme of your poncho or make a statement with unique and eye-catching buttons. Consider using large and oversized buttons for a bold and fashionable look.
Add a decorative border
A decorative border can give your poncho an extra touch of elegance. You can use a different stitch pattern, such as a lace or cable pattern, for the border to create a visually appealing contrast. Alternatively, you can add a row of crochet edging to create a delicate and intricate border.
Personalize with embroidery
If you want to add a personal touch to your poncho, consider adding embroidery. You can embroider your initials, a small design, or even a meaningful quote onto your poncho. Embroidery can be done using a contrasting color of yarn or embroidery thread to create a noticeable and customized embellishment.
With these finishing touches, you can elevate your knitted poncho from a simple project to a stylish and unique accessory that reflects your personal taste and creativity.
Blocking and Caring for Your Poncho
Once you’ve finished knitting your poncho, it’s important to properly block it to ensure that it retains its shape and drape. Blocking is a process where you wet the knitted piece and shape it to the desired dimensions. This helps to even out any tension inconsistencies and gives the poncho a polished finished look.
To block your poncho, start by filling a basin or sink with lukewarm water. Gently immerse the poncho in the water, making sure it is completely saturated. Let it soak for about 10-15 minutes, allowing the fibers to absorb the water.
After the soaking phase, carefully remove the poncho from the water and gently squeeze out the excess moisture. Avoid wringing or twisting the fabric, as this can cause stretching or distortion. Lay the poncho flat on a clean, absorbent towel and roll it up tightly, pressing down to further remove excess water.
Once the poncho is no longer dripping wet, it’s time to shape it. Lay the poncho out on a flat surface, like a blocking board or an ironing board covered with a towel. Pin the edges of the poncho to the desired dimensions using blocking pins or rust-proof T-pins. Use a measuring tape to ensure the dimensions are consistent and symmetrical.
Leave the poncho to dry completely, which can take anywhere from 24 to 48 hours depending on the humidity and thickness of the fabric. Once dry, remove the pins and gently reshape the poncho if needed.
In terms of caring for your poncho, it’s best to hand wash it using a gentle detergent and lukewarm water. Avoid using harsh chemicals or bleach, as they can damage the fibers. After washing, gently squeeze out excess water and lay the poncho flat to dry on a clean towel.
If you prefer to machine wash your poncho, place it in a mesh laundry bag to protect it from snagging or stretching. Select a delicate or wool cycle on your washing machine and use a mild detergent. Avoid high-speed spin cycles and instead opt for a gentle spin to minimize excessive strain on the poncho.
When storing your poncho, make sure it is clean and dry to prevent any potential damage from moisture or pests. Fold it neatly and store it in a cool, dry place away from direct sunlight. Consider using a moth repellent sachet or cedar blocks to further protect the poncho from pests.
By blocking and caring for your poncho properly, you can ensure that it stays in great condition for many years to come. Enjoy wearing your handmade poncho with confidence and style!
Styling and Wearing Your Poncho
When it comes to styling and wearing your poncho, there are endless possibilities to explore. Ponchos are versatile garments that can be dressed up or down depending on the occasion and your personal style. Whether you’re going for a casual and cozy look or a more polished and elegant ensemble, here are some ideas to help you make the most of your poncho.
Accessorize with a belt: One way to add shape and definition to your poncho is by cinching it at the waist with a belt. This not only creates a more tailored and structured look but also helps to accentuate your figure. You can choose a wide belt for a boho-chic vibe or a sleek leather belt for a more sophisticated touch.
Layer it over a turtleneck: For those cooler days, layering your poncho over a turtleneck sweater is a stylish and practical option. This combination not only keeps you warm but also adds depth and dimension to your outfit. Opt for a contrasting color or experiment with different textures to create an interesting visual effect.
Pair it with skinny jeans: For a casual and effortless look, pair your poncho with a pair of skinny jeans. The loose and flowy silhouette of the poncho contrasts beautifully with the fitted jeans, creating a flattering and comfortable outfit. Complete the look with ankle boots or flats for added style.
Dress it up with a skirt: If you want to elevate your poncho from casual to dressy, try wearing it with a skirt. A midi or maxi skirt in a flowy fabric can create a beautiful and feminine look when paired with a poncho. Choose a skirt in a complementary color or pattern to create a cohesive outfit.
Experiment with different lengths: Ponchos come in various lengths, from cropped styles to longer, more dramatic ones. Depending on your body type and personal preference, you can choose a length that flatters your figure and suits your style. Play around with different lengths to find the one that makes you feel confident and comfortable.
Layer it over a dress: For a chic and effortless outfit, layer your poncho over a simple dress. This combination creates a stylish and cohesive look while adding an extra layer of warmth during colder months. Opt for a dress in a solid color or a subtle pattern to allow the poncho to take center stage.
Accessorize with statement jewelry: To enhance your poncho’s overall look, don’t forget to accessorize with statement jewelry. Whether it’s a chunky necklace, bold earrings, or a stack of bangles, adding some eye-catching accessories can elevate your outfit and make a fashion statement.
Remember, with a poncho, the key is to have fun and experiment with different styles and combinations. Don’t be afraid to mix and match different pieces until you find the perfect look that showcases your personal style and makes you feel confident.
Advanced techniques and variations for your poncho
Once you have mastered the basic poncho knitting pattern, you can take your skills to the next level with advanced techniques and variations. These techniques will allow you to create unique and intricate designs that will make your poncho stand out from the rest.
1. Lace knitting
One way to add a delicate and elegant touch to your poncho is by incorporating lace knitting techniques. Lace patterns can range from simple eyelets to more intricate motifs, such as leaves or flowers. Knitting with lace requires careful attention to detail and concentration, but the results are well worth it. You can try adding lace panels to the sides of your poncho or create an overall lace pattern for the entire garment.
2. Colorwork
If you want to create a bold and vibrant poncho, consider experimenting with colorwork techniques. This involves knitting with multiple colors to create patterns and designs. Fair Isle and stranded knitting are popular colorwork techniques that can add depth and interest to your poncho. You can incorporate colorwork into the body or borders of your poncho, or even create a colorwork yoke for a unique and eye-catching look.
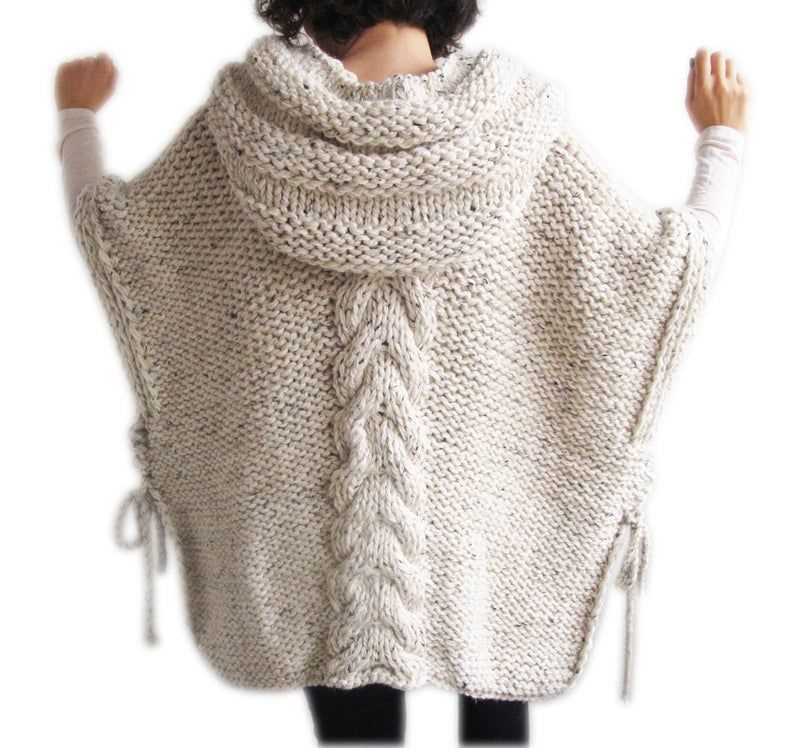
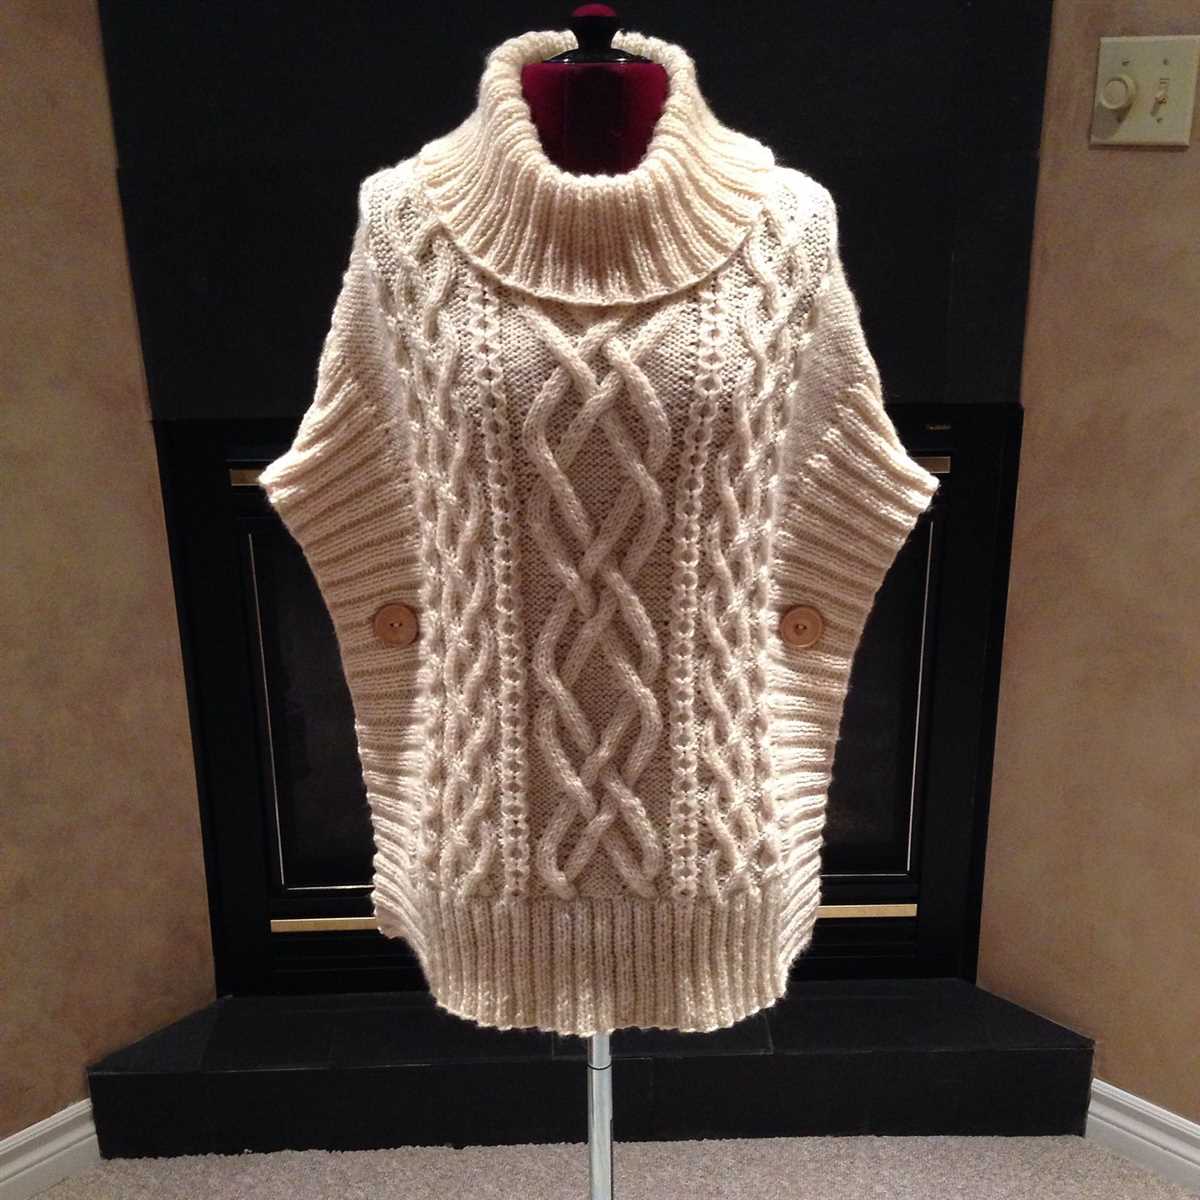
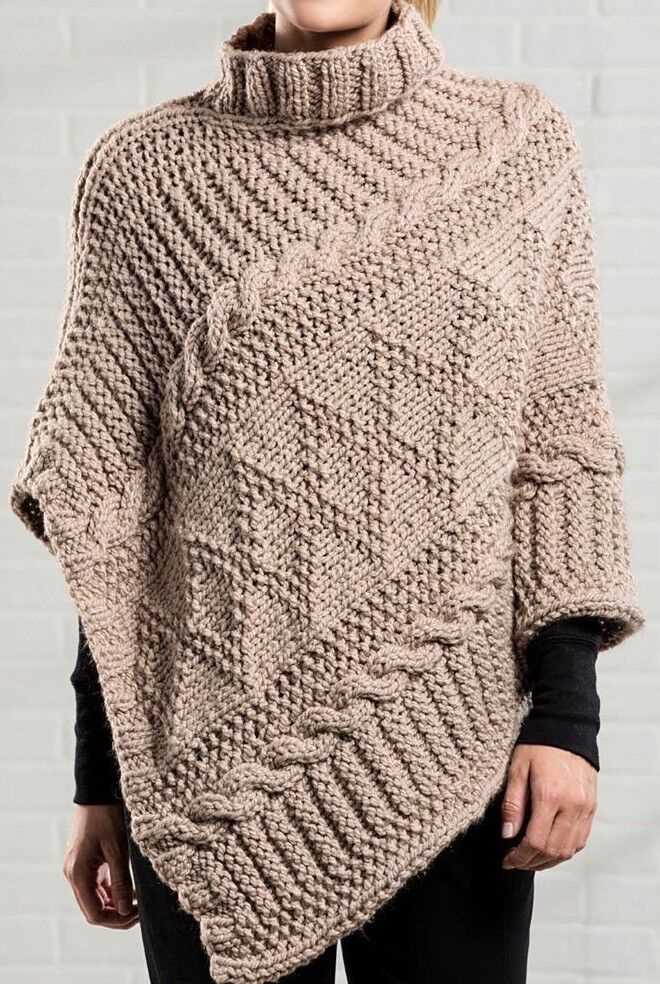
3. Cables
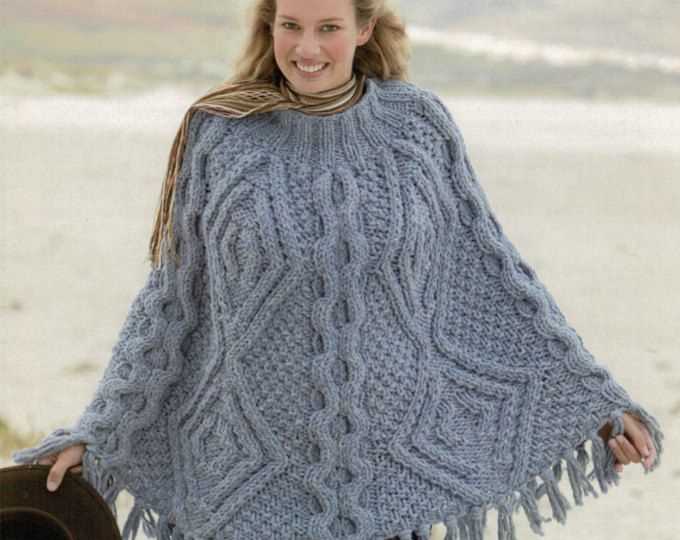
Cables are another advanced technique that can add texture and dimension to your poncho. Cable knitting involves crossing stitches to create intricate patterns that resemble twisted ropes or braids. You can add cables to the body, borders, or even the neckline of your poncho. Experiment with different cable patterns, such as twists, braids, or honeycomb designs, to create a truly unique and stunning poncho.
4. Crochet edging
If you want to add a decorative touch to your poncho, consider adding a crochet edging. Crochet edgings can range from simple picot edges to more intricate lace motifs. You can choose a contrasting color for the crochet edging to make it stand out, or use the same color as your poncho for a more subtle look. Crochet edgings are a great way to add a finishing touch and give your poncho a polished and professional look.
Overall, advanced techniques and variations can take your poncho knitting to new heights. Whether you choose to incorporate lace, colorwork, cables, or crochet edgings, these techniques will allow you to create a poncho that is unique, beautiful, and personalized to your own style. So go ahead and explore these advanced techniques to make your poncho truly one-of-a-kind!