
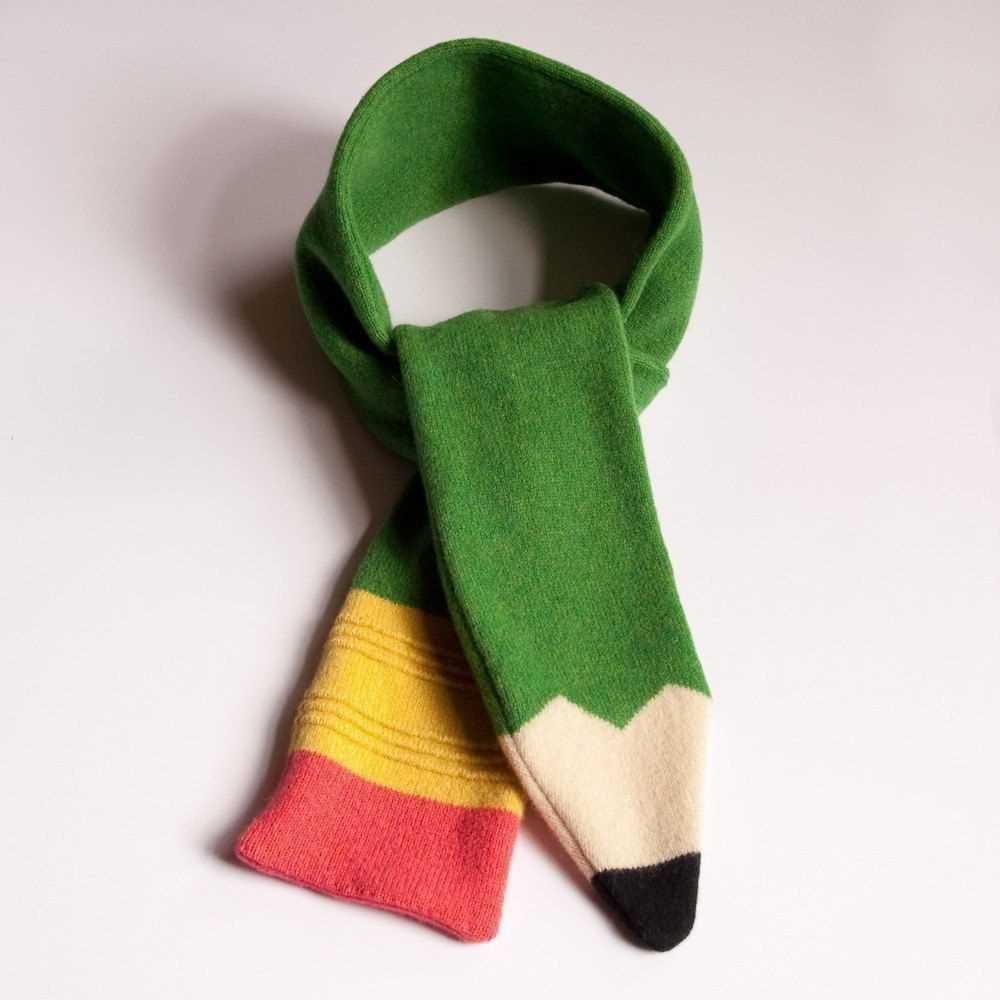
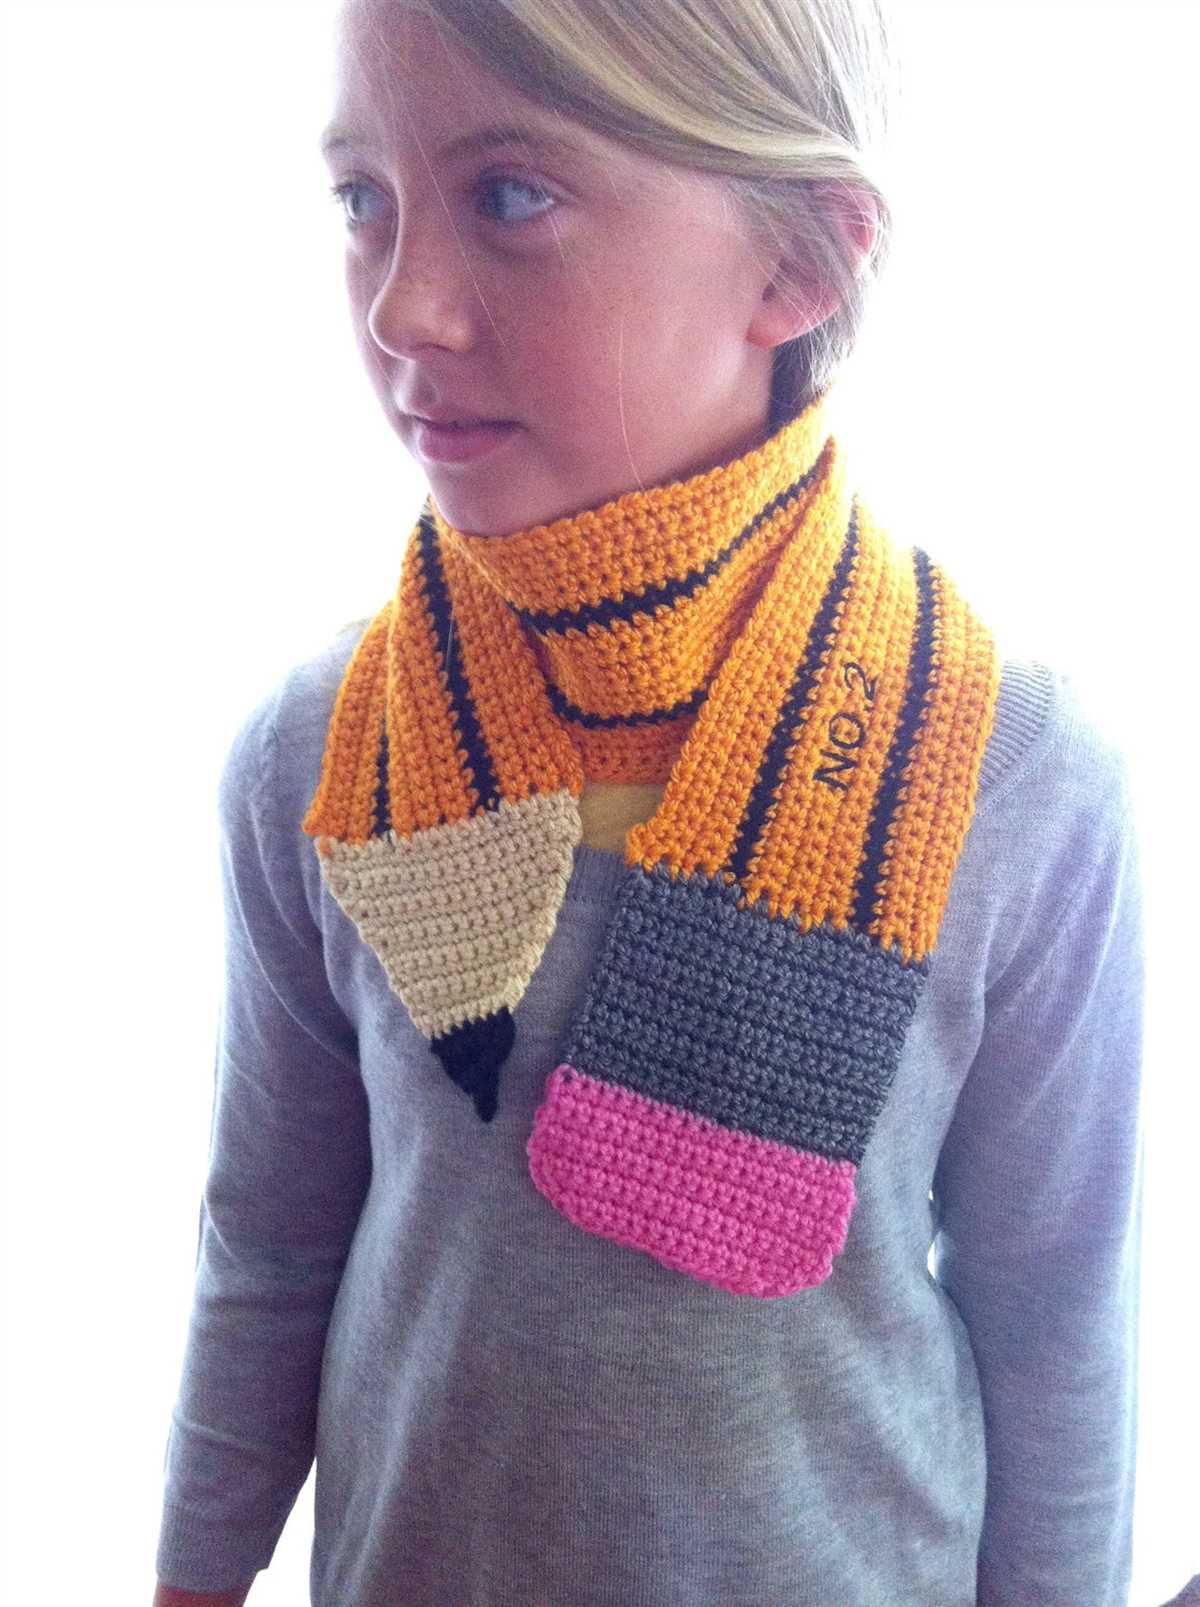
If you’re looking for a fun and quirky knitting project, then a pencil scarf is the perfect choice! This unique design is sure to turn heads and make a statement. Whether you’re a beginner knitter or have years of experience, this pattern is simple enough for anyone to follow.
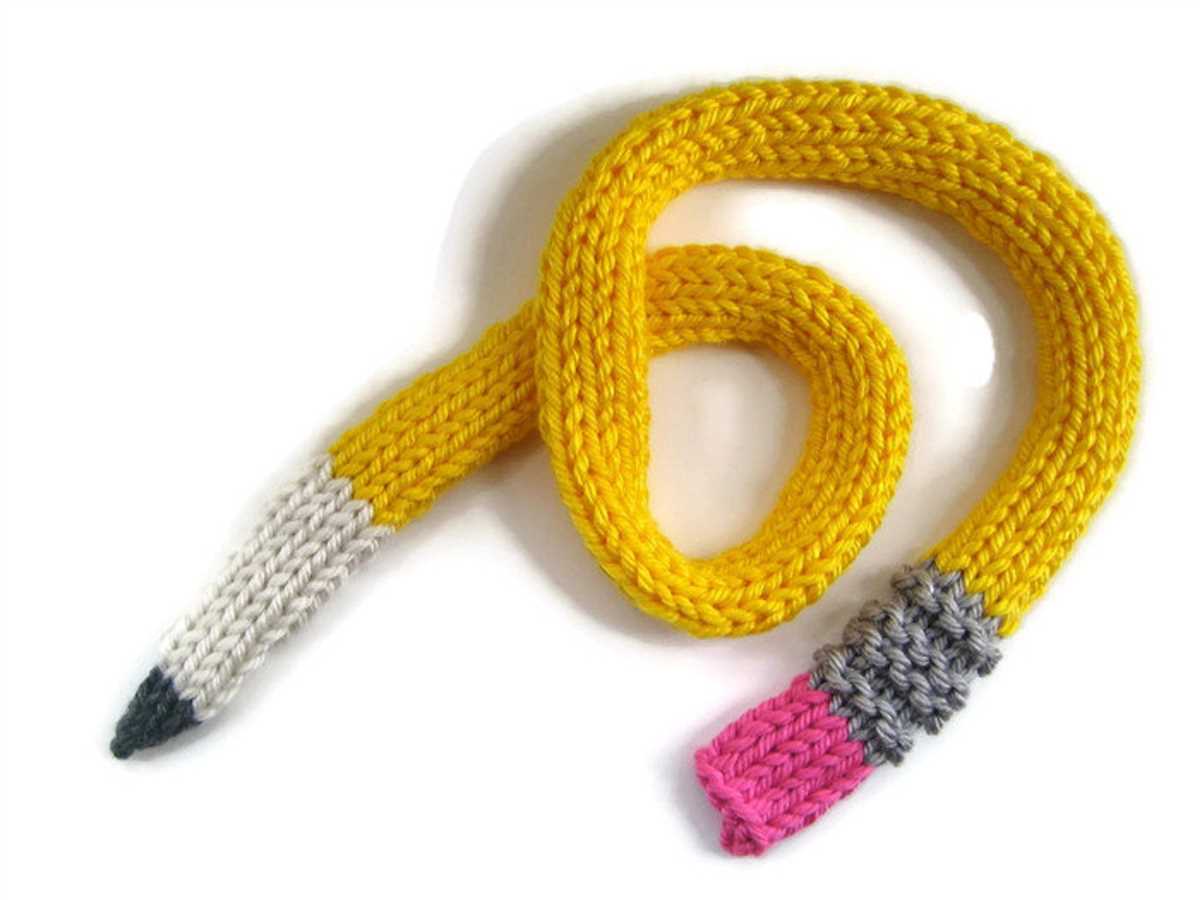
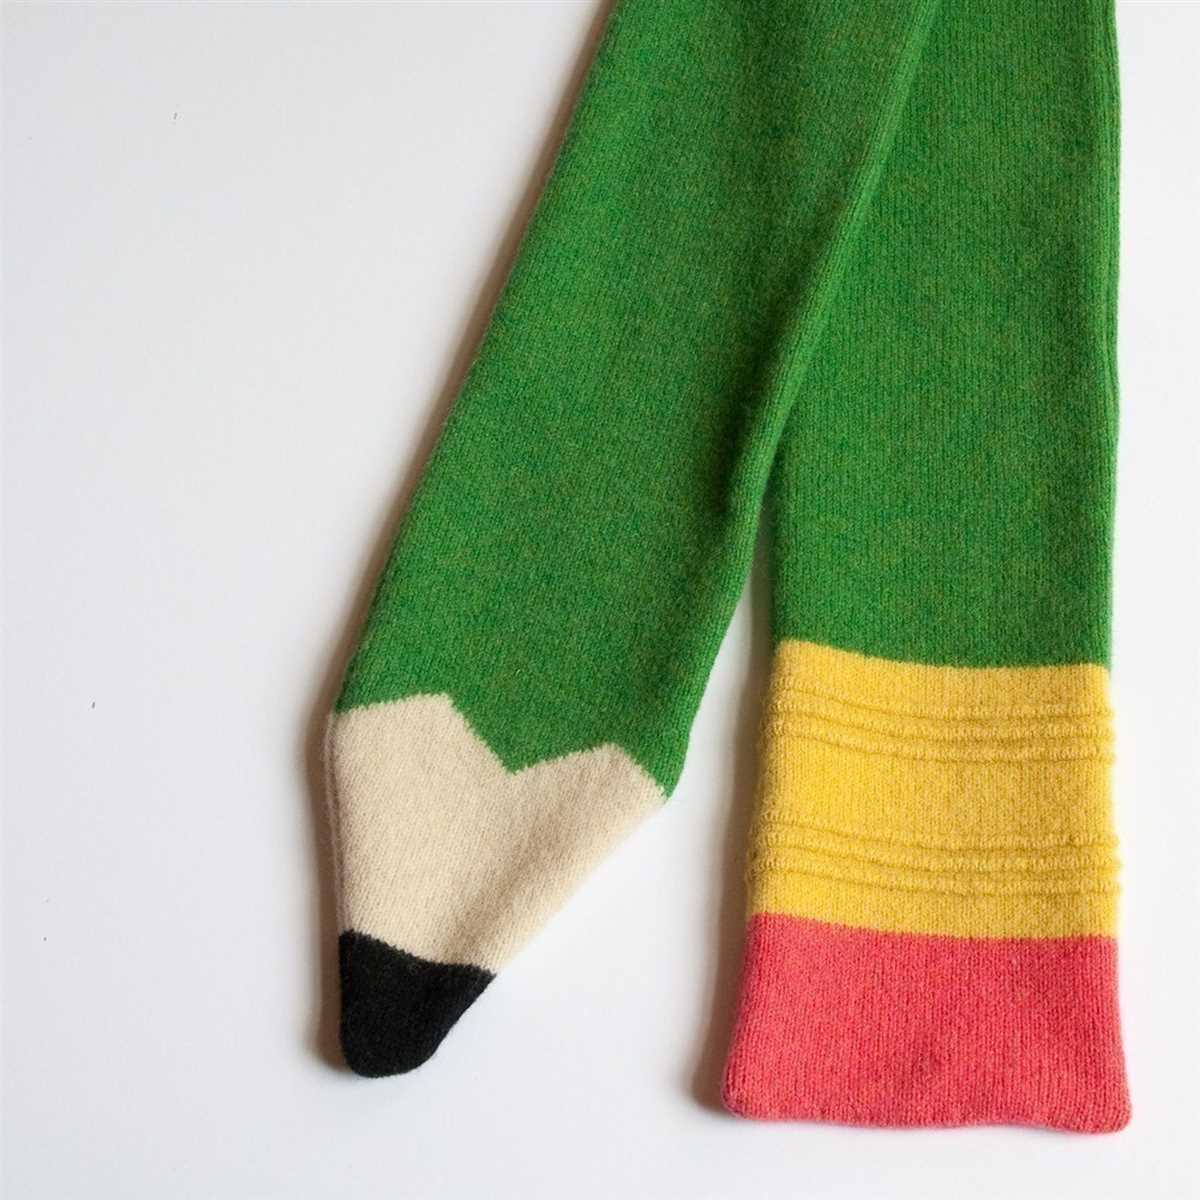
The pencil scarf features a colorful and playful design that resembles a row of pencils. The pattern includes instructions for knitting both the pencil body and the eraser end, allowing you to create a scarf that is as long or as short as you like. You can also customize the colors to match your personal style or create a scarf that makes a bold fashion statement.
This knitting pattern is a great way to practice your colorwork and intarsia skills. The design uses basic knitting techniques, such as knit and purl stitches, making it accessible to knitters of all skill levels. With the detailed instructions provided, you’ll be able to create a beautiful and unique scarf that is sure to become a conversation starter.
Pencil Scarf Knitting Pattern: A Step-by-Step Guide to Create a Unique Fashion Accessory
If you’re looking to add a touch of creativity and personality to your wardrobe, a pencil scarf is the perfect accessory. Not only does it provide warmth and comfort during colder months, but it also adds a unique and vibrant touch to any outfit. Whether you’re a knitting enthusiast or a beginner looking for a new project, this step-by-step guide will help you create your very own pencil scarf.
Materials Needed:
- Knitting needles (size 6)
- Yarn (main color and accent color)
- Scissors
- Tapestry needle
Step 1: Cast-On
To start your pencil scarf, cast-on 40 stitches using the main color yarn. This will be the base of your scarf. Make sure to leave a long tail at the beginning for later use.
Step 2: Knit Rows
Using the main color yarn, knit every row until your scarf reaches your desired length. You can choose to make it as long or as short as you like. This will be the body of your pencil scarf.
Step 3: Change to Accent Color
Once you’ve reached your desired length, switch to the accent color yarn. Knit a few rows using the accent color to create the pencil tip. You can also add a small cable stitch or pattern to mimic the texture of a pencil tip.
Step 4: Return to Main Color
After creating the pencil tip, switch back to the main color yarn. Knit a few more rows to create the body of the pencil. You can add stripes or different stitch patterns to add visual interest to your scarf.
Step 5: Finish Off
Once you’re happy with the length of your pencil scarf, bind off all the stitches. Cut the yarn, leaving a long tail at the end. Use a tapestry needle to weave in any loose ends and secure them in place. Your unique and stylish pencil scarf is now complete!
Whether you choose to wear your pencil scarf with a casual outfit or dress it up for a special occasion, you’re sure to turn heads with this one-of-a-kind fashion accessory. So grab your knitting needles and get started on creating your very own pencil scarf today!
Choosing the Right Yarn and Needles
When it comes to knitting a pencil scarf, one of the most important decisions you’ll need to make is choosing the right yarn and needles. The yarn you choose will determine the overall look and feel of your scarf, while the needles will affect the gauge and drape of the finished piece.
Yarn: When selecting yarn for your pencil scarf, consider the weight and fiber content. A lightweight yarn, such as a fingering or sport weight, will create a delicate and dainty scarf, while a chunky or bulky yarn will result in a chunkier and warmer scarf. The fiber content can also influence the final product. Natural fibers, like wool or alpaca, will provide warmth and durability, while synthetic fibers, such as acrylic or nylon, may offer more affordability and easy care.
Needles: The size and type of knitting needles you choose will impact the gauge and tension of your knitting. For a pencil scarf, it is recommended to use smaller needles, such as size US 3 or 4 (3.25mm or 3.5mm), in order to create a tighter fabric that will showcase the fine details of the pattern. Circular needles are often preferred for scarves as they allow for easier handling of the large number of stitches, but straight needles can also be used if that is your preference.
In conclusion, choosing the right yarn and needles for your pencil scarf is essential in creating the desired look and feel of the finished piece. Consider the weight and fiber content of the yarn, as well as the size and type of needles to achieve the desired gauge and tension. With the right materials, you’ll be on your way to knitting a beautiful and functional pencil scarf.
Understanding the Different Yarn Weights
When it comes to knitting, one of the most important factors to consider is the yarn weight. Yarn weight refers to the thickness and heaviness of the yarn, which can greatly impact the look and feel of your finished project. Understanding the different yarn weights can help you choose the right yarn for your project and achieve the desired result.
In the world of knitting, there are several standard yarn weight categories, including lace, fingering, sport, worsted, bulky, and super bulky. Each category represents a different thickness and has its own unique characteristics.
- Lace: Lace-weight yarn is the finest and thinnest yarn available. It is often used for delicate, lightweight projects such as shawls and doilies. Due to its delicate nature, lace yarn is typically knit using small needles to create intricate patterns and delicate stitches.
- Fingering: Fingering-weight yarn is slightly thicker than lace-weight yarn. It is commonly used for making socks, baby garments, and lightweight accessories. Fingering yarn is typically knit with small to medium-sized needles to create fine, detailed stitches.
- Sport: Sport-weight yarn is slightly thicker than fingering yarn and is often used for making garments such as sweaters and scarves. It is also suitable for lightweight blankets and wraps. Sport yarn is knit using medium-sized needles to achieve a balance between drape and structure.
- Worsted: Worsted-weight yarn is one of the most common yarn weights and is widely used for a variety of projects. It is versatile and can be used for making garments, accessories, and home decor items. Worsted yarn is typically knit with medium-sized needles and creates a sturdy, durable fabric.
In conclusion, understanding the different yarn weights is essential for choosing the right yarn for your project. Each yarn weight category has its own unique characteristics and is suitable for specific types of projects. By considering the thickness and heaviness of the yarn, you can achieve the desired look and feel of your finished project.
Selecting the Appropriate Needle Size
When knitting a pencil scarf, selecting the right needle size is crucial for achieving the desired outcome. The needle size will determine the thickness and overall appearance of the finished scarf.
Before starting the project, it is important to consider the type of yarn being used and the desired drape of the scarf. A thinner yarn usually requires smaller needles, while a thicker yarn may require larger needles.
It is recommended to consult the yarn label for a recommended needle size range for that specific yarn. This information can serve as a starting point for selecting the appropriate needle size. Additionally, using a gauge swatch can help determine if the needle size is suitable for the selected yarn and desired drape.
Remember that needle size can also affect the stitch definition and overall texture of the scarf. Smaller needles will result in tighter and more defined stitches, while larger needles will create looser and more open stitches. Consider the desired level of detail in the scarf and adjust the needle size accordingly.
Ultimately, selecting the appropriate needle size for a pencil scarf pattern involves a combination of personal preference, yarn choice, and desired outcome. By taking the time to carefully consider these factors, you can ensure that your scarf turns out just as you imagined.
Gathering the Necessary Materials
Before you begin knitting your pencil scarf, it is important to gather all the necessary materials. This will ensure that you have everything you need to successfully complete the project.
1. Yarn:
First and foremost, you will need the appropriate yarn for your pencil scarf. Choose a yarn that is soft, warm, and durable to ensure the scarf will be comfortable to wear. Opt for a yarn in the colors of your choice, such as yellow for the pencil body and pink for the eraser.
2. Knitting Needles:
The next essential tool you will need is a pair of knitting needles. The size of the needles will depend on the type of yarn you choose and your preferred tension. Consult the yarn label for the recommended needle size or use a gauge swatch to determine the appropriate needles for your project.
3. Notions:
In addition to yarn and knitting needles, there are a few other notions you will need. These include scissors for cutting the yarn, a tapestry needle for weaving in ends, and stitch markers to help keep track of your stitches. You may also find it helpful to have a row counter or a pen and paper to keep track of your progress.
4. Pattern:
Finally, you will need the pattern for the pencil scarf. This can be found online, in a knitting book, or you can create your own pattern if you are an experienced knitter. Make sure to familiarize yourself with the pattern and any special techniques or stitches before you begin.
Once you have gathered all of these materials, you will be ready to start knitting your pencil scarf. Take your time to ensure you have everything you need, as it will make the knitting process much smoother and more enjoyable.
Pencil Scarf Knitting Pattern: Casting On Your Stitches
Before you can start knitting the pencil scarf, you need to cast on your stitches. Casting on is the process of creating the first row of stitches on your knitting needle. It’s the foundation of your project, so it’s important to do it correctly to ensure a successful outcome.
Here are the steps to cast on your stitches for the pencil scarf knitting pattern:
- Make a slipknot: Start by making a slipknot, which will be the first stitch on your needle. To make a slipknot, create a loop with your yarn and pull the working end through the loop. Adjust the loop size to fit loosely around your needle.
- Insert the needle: Insert your knitting needle into the slipknot from right to left, with the slipknot at the base of the needle. Hold the needle in your right hand and the working yarn in your left hand.
- Wrap the yarn: With the working yarn in your left hand, bring it over the needle from back to front, creating a loop around the needle.
- Pull through the loop: Using the tip of your right needle, pull the loop of the working yarn through the slipknot loop, forming a new stitch on your right needle.
- Repeat: Continue steps 3 and 4 until you have cast on the required number of stitches for your pencil scarf. Remember to count your stitches as you go to ensure accuracy.
Casting on your stitches may feel a bit tricky at first, but with practice, it will become easier. Take your time and make sure your stitches are even and not too tight. Once you have cast on all your stitches, you’re ready to begin knitting the pencil scarf pattern!
Creating the Pencil Pattern
When knitting a pencil scarf, it is important to follow the pattern carefully to achieve the desired look. The pattern typically consists of multiple rows and stitches, which create the pencil design. Here is a step-by-step guide on how to create the pencil pattern.
Gather the necessary materials
Before starting, make sure you have all the necessary materials. This includes knitting needles appropriate for your yarn, yarn in the desired colors, scissors, and a tape measure. It is also helpful to have a pencil or pen to keep track of your progress in the pattern.
Cast on stitches
To begin the pattern, cast on the required number of stitches needed to create your scarf. The exact number will depend on the width you want your scarf to be. It is recommended to use a long-tail cast on method for a neat and stretchy edge.
Follow the stitch chart or written instructions
Once you have cast on your stitches, you will need to follow either a stitch chart or written instructions to create the pencil design. The stitch chart will provide a visual representation of the pattern, while the written instructions will guide you step-by-step. Pay close attention to any symbols or abbreviations used in the pattern, as they may indicate specific knitting techniques.
Change colors as necessary
To create the pencil design, you will need to change colors at specific points in the pattern. This is typically done by simply dropping one color and picking up the next. Be sure to weave in any loose ends as you go to keep your work tidy.
Continue knitting until desired length
Once you have completed the pencil pattern, continue knitting in your main color until you reach the desired length for your scarf. Remember to measure your work periodically to ensure it is the desired size.
Bind off and finish
Finally, when you have reached the desired length, bind off your stitches to secure your work. Cut the yarn, leaving a long tail for weaving in the end. Take the time to block your scarf if desired, to give it a polished and professional finish.
With these steps, you can create a beautiful pencil scarf using the knitting pattern of your choice. Enjoy the process and show off your knitting skills with this unique and stylish accessory!
Knitting the Body of the Pencil
After completing the ribbed edge of the pencil scarf, it’s time to move on to knitting the body of the pencil. Using the main color yarn, continue knitting in stockinette stitch for the desired length of the pencil. This section will determine the length of the pencil scarf, so knit until it reaches the desired measurement.
For the body of the pencil, it’s important to keep track of the number of rows knitted to ensure a consistent and even look. You can use stitch markers or simply count the rows as you go along. This will help in creating a neat and uniform texture for the pencil scarf.
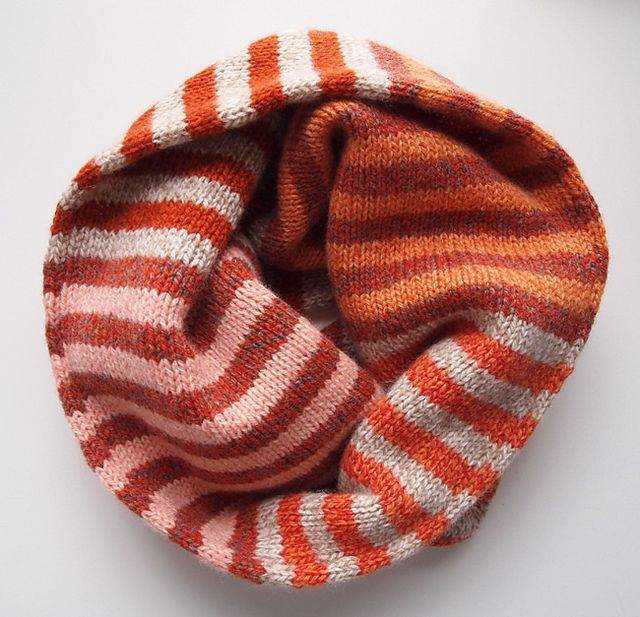
To add some visual interest to the pencil, you can incorporate additional colors for stripes or create a gradient effect. This can be done by changing yarn colors every few rows or using a variegated yarn. Experiment with different color combinations to make your pencil scarf truly unique.
If you prefer a more realistic pencil shape, consider adding some shaping to the body. This can be achieved by decreasing stitches evenly on both sides of the work to create a tapered end. Alternatively, you can also increase stitches to create a flared or rounded tip.
Once you have reached the desired length and shape for the pencil body, it’s time to move on to the next step – knitting the pencil tip. Stay tuned for more instructions on how to create a realistic and fun-looking pencil scarf!
Adding Details with Different Colored Yarns
In the world of knitting, one of the simplest ways to add interest and depth to a project is by incorporating different colored yarns. Whether you’re working on a pencil scarf or any other pattern, using contrasting or complementary colors can create eye-catching details that make your finished piece truly unique.
To begin, choose a main color for your scarf and select a contrasting color that will act as the “pencil lead”. This could be a darker shade, such as black or gray, or even a bold color like red or blue. By knitting rows or sections with the contrasting color, you can create the illusion of a pencil drawing or sketch.
Another way to add details with different colored yarns is by using them to create patterns or motifs. For example, you could incorporate a stripe pattern by alternating between two different colors every few rows. This can create a visually appealing design that adds complexity to your scarf.
If you’re feeling adventurous, consider adding in a third or fourth color to really make your pencil scarf stand out. Experiment with different color combinations and placement to find the look that you love. Remember, knitting is a personal art form, and the possibilities are endless!
Binding Off Your Stitches
Once you have finished knitting your pencil scarf, it’s time to bind off your stitches to create a finished edge. Binding off is an essential step in any knitting project, as it helps to secure your stitches and prevent them from unraveling.
To bind off, start by knitting the first two stitches as usual. Then, insert the left needle into the first stitch on the right needle and lift it over the second stitch and off the needle. This creates one bound-off stitch. Repeat this process, knitting the next stitch and lifting the previous stitch over it, until you have bound off all of your stitches.
It’s important to note that when binding off, you’ll want to keep your tension consistent to ensure an even edge. If your bound-off edge is too tight, it can cause the scarf to pucker and not lay flat. On the other hand, if your bound-off edge is too loose, it can create a floppy and unstructured edge.
Pro-tip: One helpful technique to maintain consistent tension while binding off is to use a larger needle or a crochet hook. This can make the process easier and help you achieve the desired tension for your scarf.
Once all of your stitches are bound off, cut the yarn, leaving a tail long enough to weave in later. Pull the tail through the last stitch to secure it. You can then use a yarn needle to weave in the ends of the yarn, hiding them within the stitches of the scarf.
By binding off your stitches properly, you’ll be able to create a polished and finished edge for your pencil scarf. This final step completes your knitting project and allows you to proudly show off your handmade creation.
Blocking and Finishing the Scarf
After completing the knitting process, it is important to block and finish the pencil scarf to ensure that it looks its best and maintains its shape. Blocking is the process of shaping and setting the knitted fabric by wetting it and allowing it to dry in the desired shape. This helps to even out any irregularities in the stitches and gives the finished piece a more professional look.
To block the pencil scarf, start by filling a clean sink or basin with lukewarm water and adding a small amount of gentle wool wash. Gently submerge the knitted scarf in the water, making sure it is fully saturated. Allow the scarf to soak for about 15 minutes, ensuring that the water and soap penetrate the fibers.
Carefully remove the scarf from the water and gently squeeze out any excess moisture. Lay a clean towel on a flat surface and place the scarf on top, arranging it into the desired shape and dimensions. Use rustproof pins or blocking wires to secure the edges and corners of the scarf, stretching it slightly if needed to achieve the desired length and width.
Leave the scarf to dry completely, preferably in a well-ventilated area where it can lay undisturbed. This may take several hours or even overnight. Once the scarf is completely dry, remove the pins or wires and gently pat it to fluff up the fibers. Give it a final inspection for any loose ends or imperfections, and weave them in using a yarn needle. Your pencil scarf is now ready to be worn or gifted to someone special.
Adding Fringe Details (Optional)
If you want to add some extra flair to your pencil scarf, you can consider adding fringe details. Fringe can add texture and movement to your scarf, giving it a fun and playful look.
To add fringe, you will need some additional yarn in a coordinating color. Cut several strands of yarn, each measuring twice the desired length of your fringe. For example, if you want your fringe to be 4 inches long, cut strands that are 8 inches long.
Here’s how to add fringe to your pencil scarf:
- Starting at one end of the scarf, use a crochet hook or your fingers to create a small loop.
- Fold the loop in half and insert the folded end through the stitch where you want to add the fringe.
- Bring the loose ends of the fringe through the loop and pull tightly to secure.
- Repeat these steps along the edge of the scarf, spacing the fringe evenly.
- Once you have added all the fringe, trim the ends to your desired length.
You can get creative with your fringe by using different colors or mixing up the lengths. Play around with the placement and distribution of the fringe to achieve your desired look. Remember, fringe is optional, so you can choose to add it or leave your pencil scarf as is. Either way, your scarf is sure to make a statement!
Styling and Wearing Your Pencil Scarf
Now that you have completed your pencil scarf, it’s time to style and wear it with confidence. Here are some tips to help you make the most of your new accessory:
1. Choose the right outfit: The pencil scarf is a versatile accessory and can be worn with a variety of outfits. It pairs well with both casual and formal attire. You can style it with a simple t-shirt and jeans for a casual look or with a dressy blouse and skirt for a more formal occasion.
2. Experiment with different ways to wear it: The pencil scarf can be worn in multiple ways, allowing you to create different looks. You can wrap it around your neck once for a simple and elegant style, or you can double wrap it for extra warmth. You can also tie it in a knot or let it hang loose for a more relaxed look.
3. Accessorize with complementary items: Consider pairing your pencil scarf with other accessories to create a cohesive look. You can add a matching hat or gloves for a coordinated winter ensemble. Alternatively, you can choose a contrasting color to create a bold and eye-catching outfit.
4. Care for your scarf: To keep your pencil scarf looking its best, it’s important to properly care for it. Hand wash it with mild soap and lay it flat to dry. Avoid wringing or twisting the scarf, as this can cause it to lose its shape.
By following these tips, you can confidently style and wear your pencil scarf in a way that reflects your personal style. Whether you’re heading out for a walk in the park or attending a special event, your pencil scarf will not only keep you warm but also add a touch of style to your outfit.