
Parallelogram knitting pattern is a versatile and unique technique that creates stunning geometric designs in knitting projects. With its sleek lines and modern aesthetic, this pattern is perfect for creating bold accessories and stylish garments.
The key to achieving the parallelogram pattern is by working short rows, which are essentially rows that are partially completed before turning back. This creates the slanted and overlapping effect that gives the pattern its distinctive look. By controlling the number of short rows and their placement, you can create a variety of different parallelograms.
One of the advantages of the parallelogram knitting pattern is its flexibility. It can be used to create a wide range of projects, from scarves and shawls to sweaters and blankets. The pattern can be worked in any weight of yarn and easily customized to fit your desired size and shape.
Whether you’re a beginner knitter looking to expand your skills or an experienced crafter looking for a new challenge, the parallelogram knitting pattern is a fun and rewarding technique to master. With its sleek and modern design, this pattern is sure to add a touch of contemporary style to your knitting projects.
Parallelogram Knitting Pattern
Knitting is a craft that allows you to create beautiful and unique pieces using a variety of techniques and patterns. One such pattern is the parallelogram knitting pattern, which creates a unique shape that can be used to make a variety of items such as scarves, shawls, and blankets.
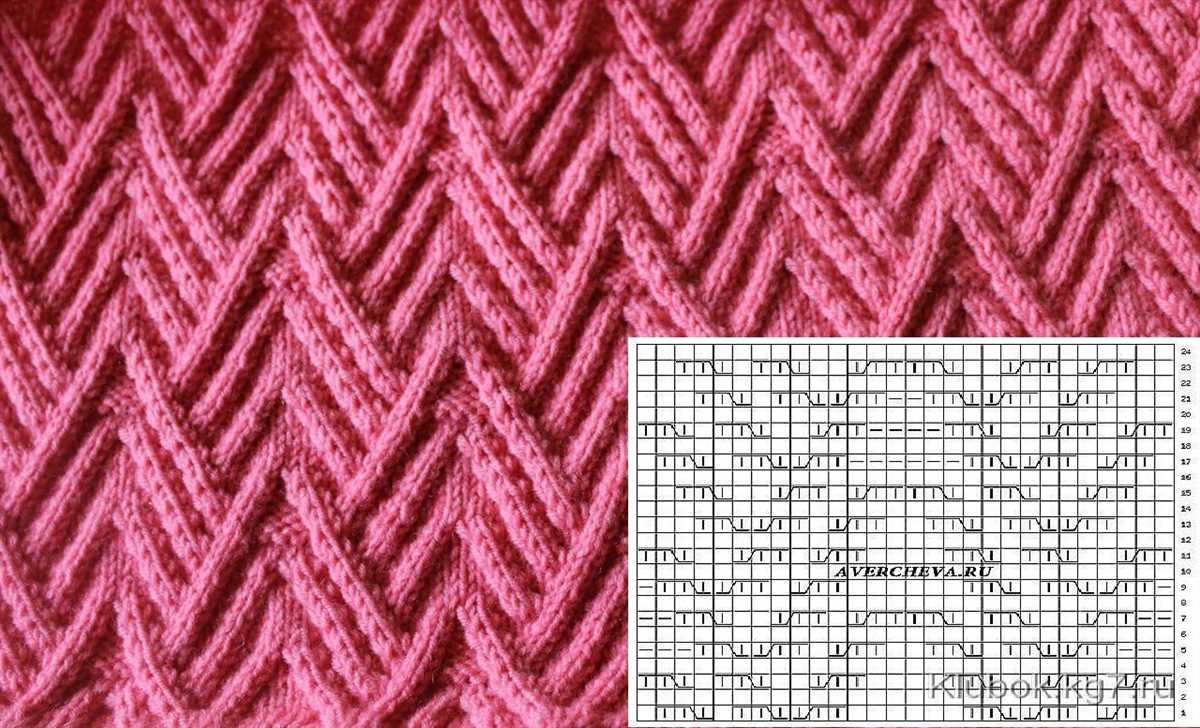
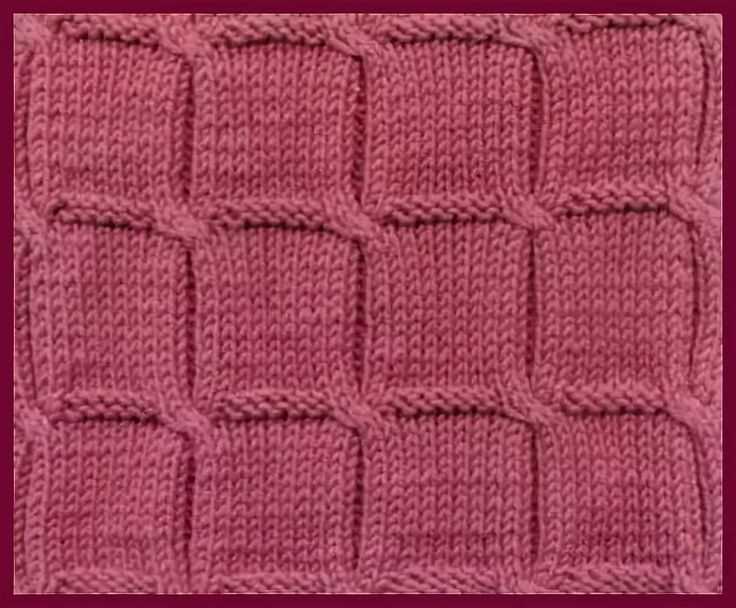
The parallelogram knitting pattern is created by using a combination of knit and purl stitches to create a fabric that has a distinct slanted shape. This shape is created by increasing or decreasing stitches on one side of the fabric while maintaining the same number of stitches on the other side. By repeating this pattern, you can create a parallelogram shape that adds visual interest to your knitting projects.
To create a parallelogram knitting pattern, you will first need to cast on an even number of stitches. Then, you will work the following pattern: knit 2, purl 2, repeat to the end of the row. On the next row, you will purl 2, knit 2, repeating to the end of the row. You will continue to alternate between these two rows until your piece reaches the desired length. By following this simple pattern, you can create a beautiful parallelogram shape that can be used in a variety of knitting projects.
One of the advantages of using the parallelogram knitting pattern is that you can easily customize it to create different sizes and shapes. For example, if you want to create a larger parallelogram, you can simply cast on more stitches at the beginning. Additionally, you can experiment with different yarn weights and needle sizes to create different textures and effects.
Overall, the parallelogram knitting pattern is a versatile and visually interesting technique that can be used to create a variety of knitting projects. Whether you are a beginner or an experienced knitter, this pattern can add a unique touch to your creations. So pick up your needles and give the parallelogram knitting pattern a try!
What is a parallelogram knitting pattern?
A parallelogram knitting pattern is a type of knitting pattern that creates a parallelogram shape instead of the traditional rectangular or square shape. It involves using specific stitch combinations and techniques to create a unique and visually interesting design.
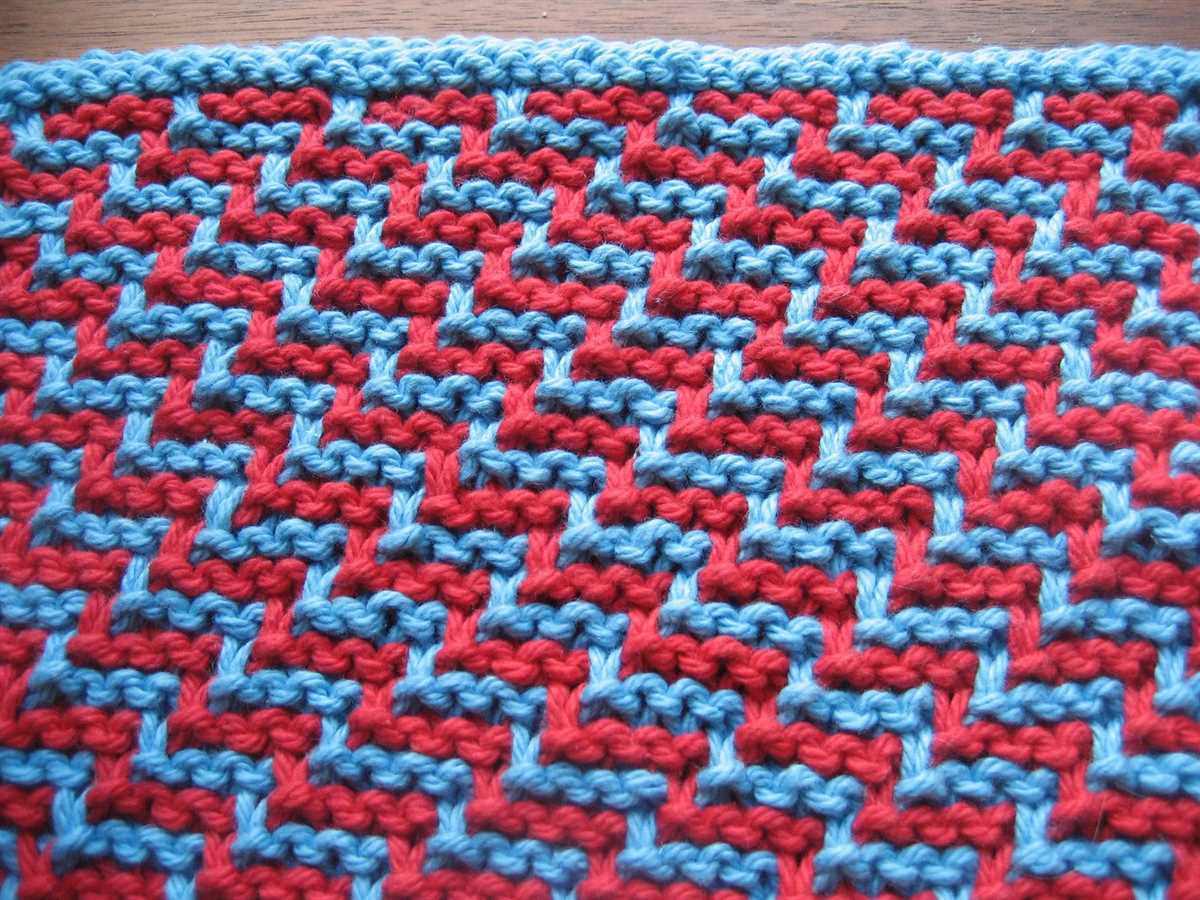
Unlike traditional knitting patterns that typically follow a straight and linear pattern, parallelogram knitting patterns create a diagonal or slanted shape. This can add depth and dimension to knitted garments, accessories, and home decor items.
One common technique used in parallelogram knitting patterns is the use of increases and decreases. By strategically increasing or decreasing stitches at certain intervals, knitters can manipulate the shape of the fabric to form a parallelogram. This can be done through techniques such as yarn overs, knit 2 together (k2tog), and slip slip knit (ssk).
Another way to create a parallelogram knitting pattern is by incorporating various stitch patterns and textures. By combining different stitch patterns, such as garter stitch, stockinette stitch, and cable stitch, knitters can create unique designs that form parallelograms. The choice of yarn and color can also enhance the visual appeal of the pattern.
Parallelogram knitting patterns offer knitters an opportunity to explore different techniques and create visually striking pieces. Whether it’s a scarf, shawl, blanket, or sweater, using a parallelogram knitting pattern can add an interesting twist to your knitting projects and showcase your skills as a knitter.
Why choose a parallelogram knitting pattern?
When it comes to knitting patterns, there are numerous options to choose from. However, a parallelogram knitting pattern can offer unique benefits that make it worth considering.
1. Versatility: One of the main advantages of using a parallelogram knitting pattern is its versatility. Unlike traditional rectangular or square patterns, a parallelogram pattern can be used to create a wide range of projects. Whether you’re looking to make a shawl, a scarf, or even a blanket, a parallelogram shape provides endless possibilities.
2. Modern and trendy: Parallelogram patterns are becoming increasingly popular in the knitting world. Their unique shape and geometric design add a modern touch to any project. If you’re looking to stay up-to-date with the latest knitting trends, choosing a parallelogram pattern can help you achieve that contemporary look.
When working with a parallelogram knitting pattern, it’s important to pay attention to the angles and proportions to ensure a balanced and well-shaped finished project. Additionally, the flexibility of the parallelogram shape allows for interesting stitch patterns and color combinations, adding further depth and complexity to your knitting project.
3. Skill-building: Knitting a parallelogram pattern can also be a great opportunity for skill-building. The unique shape and construction of a parallelogram require knitters to work with different stitch patterns and shaping techniques. This can help improve your knitting skills and challenge you to learn new techniques.
4. Customization: Another advantage of choosing a parallelogram knitting pattern is the opportunity for customization. Since the shape is not fixed like with other patterns, you can easily adjust the size, length, and width of your project. This allows you to tailor it to your specific needs and preferences.
Overall, a parallelogram knitting pattern offers versatility, modernity, skill-building opportunities, and customization possibilities. Whether you’re an experienced knitter looking for a new challenge or a beginner wanting to try something different, a parallelogram pattern can be an excellent choice for your next knitting project.
Basic Techniques for Knitting a Parallelogram

Knitting a parallelogram is a fun and versatile technique that can be used to create a variety of projects, from scarves and shawls to blankets and pillows. The key to knitting a parallelogram is to maintain a consistent tension throughout your work, so that the sides of the shape remain equal in length and the angles remain equal. Here are some basic techniques to help you get started:
1. Casting On:
Start by casting on the desired number of stitches onto your knitting needle. For a parallelogram, you will typically cast on a multiple of two stitches, as this will allow you to work the pattern using a simple repeat. You can use any cast-on method that you prefer, such as the long-tail cast on or the knitted cast on.
2. Knitting the Rows:
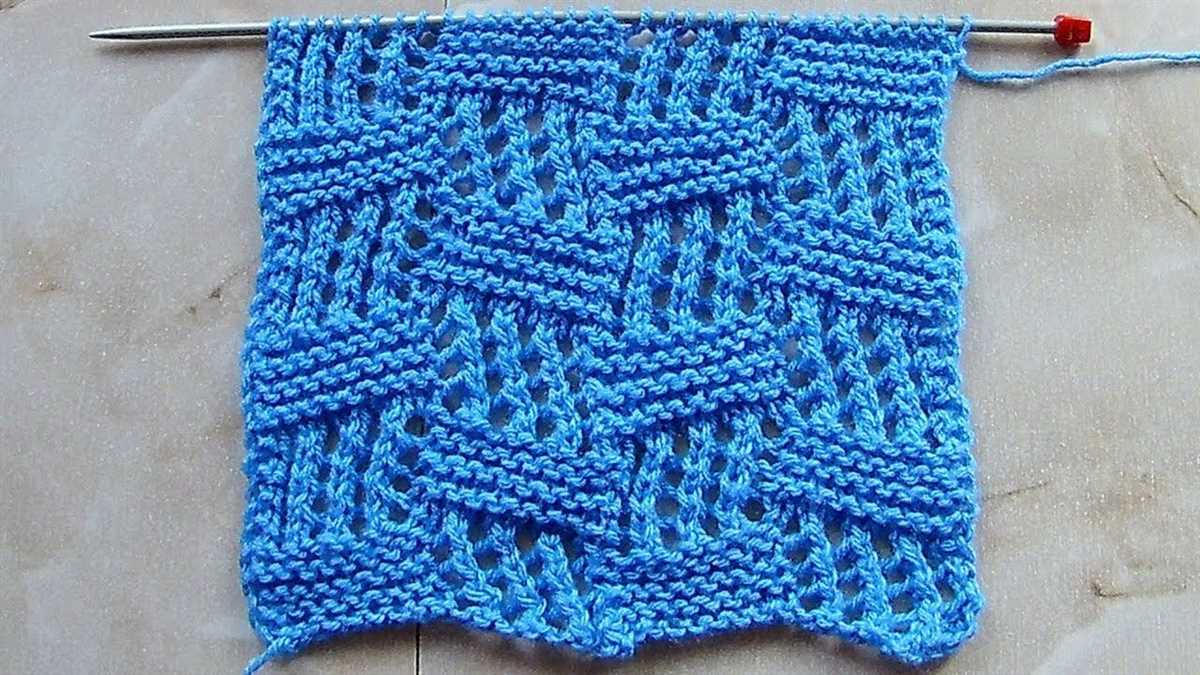
Once you have cast on your stitches, you will begin knitting the rows. To create the parallelogram shape, you will need to work a specific pattern called the “slip stitch pattern.” In this pattern, you will knit one stitch, then slip the next stitch purlwise onto the right needle without knitting it. Repeat this pattern across the row. This slip stitch pattern creates diagonal lines that give the parallelogram its distinctive shape.
Note: The slip stitch pattern can be adjusted based on your desired width and length for the parallelogram. You can choose to knit more than one stitch before slipping the next stitch, or you can knit fewer stitches before slipping the next stitch. Experiment with different variations to achieve the desired effect.
3. Shaping the Edges:
To shape the edges of the parallelogram, you can work decreases or increases at the beginning or end of each row. This will create a tapered or triangular shape, depending on your desired outcome. You can use common decrease stitches such as knit two together (k2tog) or slip, slip, knit (ssk), or increase stitches such as yarn over (yo) or make one (m1) to shape the edges.
Tip: If you want to create a straight edge, without any tapering or shaping, simply knit the same number of stitches at the beginning and end of each row.
4. Binding Off:
Once you have finished knitting your parallelogram, you will need to bind off to secure the stitches and create a neat edge. You can use any binding off method that you prefer, such as the basic bind off or the stretchy bind off, depending on the desired finish for your project.
With these basic techniques, you can start knitting your own parallelogram projects and explore the endless possibilities of this versatile shape. Whether you choose to knit a simple scarf or a complex blanket, the parallelogram pattern is sure to add a unique touch to your knitting repertoire.
Choosing the right yarn for your parallelogram project
When it comes to knitting a parallelogram pattern, choosing the right yarn can make all the difference in the final result. The right yarn will not only enhance the beauty of your project but also ensure its durability. Here are a few factors to consider when selecting the yarn for your parallelogram project.
Fiber content: The fiber content of the yarn plays a crucial role in determining the overall look and feel of your knitted parallelogram. Natural fibers like wool, alpaca, or cotton are popular choices for their breathable and soft properties. However, synthetic fibers like acrylic or nylon can provide additional durability and ease of care.
Weight: The weight of the yarn will determine the thickness and drape of your parallelogram. For a lightweight and airy project, consider using lace or fingering weight yarn. If you want a more substantial and warm result, choose a bulky or super bulky weight yarn. Keep in mind that the weight of the yarn should be proportional to the size of your stitches and the desired finished dimensions of your parallelogram.
Color and pattern: The color and pattern of the yarn can significantly impact the aesthetic appeal of your parallelogram. Solid or semi-solid colors can highlight the stitch pattern, while variegated or self-striping yarns can add visual interest and dimension. Consider the overall style and mood you want to achieve with your parallelogram, and choose a yarn color and pattern that complements your vision.
Texture: The texture of the yarn can also add depth and complexity to your knitting project. Smooth and plied yarns are great for showcasing intricate stitch patterns, while brushed or boucle yarns can create a cozy and textured finish. Experiment with different textures to find the one that best suits your parallelogram pattern.
Price: Finally, consider your budget when selecting yarn for your parallelogram project. Yarn prices can vary greatly depending on the fiber content, quality, and brand. Set a budget and look for options that fit within your price range without compromising on the desired qualities of your yarn.
By considering these factors, you can choose the right yarn that will not only make knitting your parallelogram pattern enjoyable but also result in a beautiful and functional finished project.
Tips for casting on and starting your parallelogram
When starting your parallelogram knitting pattern, it is important to begin with a strong and secure cast on. This will ensure that your stitches stay in place and the edges of your parallelogram remain neat and tidy. One popular and reliable method for casting on is the long tail cast on. It creates a sturdy foundation and is relatively easy to learn.
To execute the long tail cast on, you will need to estimate the amount of yarn needed to create the desired number of stitches. A general rule of thumb is to measure the length of yarn needed by multiplying the width of your final parallelogram by the number of stitches per inch. Once you have determined the appropriate length, make a slipknot and place it on your knitting needle.
Next, hold the tail of the yarn in your right hand and the working yarn in your left hand, with the slipknot on the needle. Using your right thumb and index finger, hold the yarn in a V shape, with the tail on top and the working yarn beneath. Insert the needle into the loop created by the slipknot, going under the tail and over the working yarn. With your left hand, grab the working yarn and pull it through the loop on the needle, creating a new loop.
Continue this process, alternating between inserting the needle under the tail and over the working yarn, and pulling the working yarn through the loop on the needle. Keep your tension consistent, neither too loose nor too tight, to ensure an even and balanced cast on. Once you have cast on the desired number of stitches, you are ready to move on to the next step of your parallelogram knitting pattern.
Creating the pattern for your parallelogram
When it comes to knitting a parallelogram shape, there are a few important steps to follow in order to create a successful pattern. First, it is crucial to determine the size of the parallelogram you want to knit. This can be done by measuring the desired length and width of the finished piece.
Once the size is determined, you can start by casting on the required number of stitches. It is important to consider the stitch pattern you want to use for your parallelogram. Some common stitch patterns that work well for this shape include stockinette stitch, garter stitch, or even lace patterns.
After casting on the stitches, you can begin working the rows in your chosen stitch pattern. It is important to maintain consistency in your tension and gauge throughout the knitting process to ensure an even and balanced finished piece. You may also want to consider adding markers to help keep track of the edges and corners of the parallelogram.
As you continue knitting each row, it is important to keep in mind the desired dimensions of the parallelogram and make any necessary adjustments as you go. This may involve increasing or decreasing stitches at the edges or changing the stitch pattern to create the desired shape.
Once you have reached the desired length and width for your parallelogram, you can finish off the piece by binding off your stitches. Blocking or steam blocking may also be necessary to help shape and smooth out the finished piece.
With these steps in mind, you can confidently create your own knitting pattern for a parallelogram shape. Whether you’re knitting a scarf, shawl, or even a blanket, mastering the art of creating parallelogram patterns will open up a world of possibilities for your knitting projects.
Knitting the body of the parallelogram
The body of the parallelogram is where the main knitting action takes place. It is where you will be continuously repeating the pattern to create the shape. To begin, you will start with a certain number of stitches, depending on the size and dimensions of your project.
Once you have cast on the required number of stitches, you will begin knitting rows following the specified pattern. The pattern will typically include a combination of knit and purl stitches, as well as increases and decreases, to create the unique shape of the parallelogram.
For example:
- Row 1: Knit all stitches
- Row 2: Purl all stitches
- Row 3: Knit 1, Purl 1 (repeat to end of row)
- Row 4: Purl 1, Knit 1 (repeat to end of row)
The specific pattern will depend on the design you are following, so it is important to carefully read and understand the instructions before beginning. As you continue knitting the body of the parallelogram, you will start to see the shape take form.
It is important to keep track of your rows and stitches to ensure accuracy and consistency in your knitting. Using stitch markers or keeping notes can help you stay organized and avoid mistakes.
Shaping your parallelogram project
When working on a parallelogram knitting pattern, shaping is an important aspect to consider. Whether you are creating a shawl, blanket, or garment, shaping can help give your project a more tailored and finished look.
One common way to shape a parallelogram is by increasing or decreasing stitches along the edges. This can be done by working increases or decreases at the beginning or end of each row. For example, if you want to create a tapered shawl, you can gradually decrease the number of stitches on one side while maintaining the stitch count on the opposite side. This will create a sloping effect that gives the shawl its shape.
Another method of shaping is by introducing short rows. Short rows involve working partial rows, typically by turning your work before reaching the end of a row. This can be used to create curves or angles within the parallelogram. For example, if you want to create a triangle within your parallelogram blanket, you can work short rows at the corners to create the desired shape.
Remember to carefully follow the shaping instructions provided in your knitting pattern. It may be helpful to keep track of your stitch count and use stitch markers to mark the shaping points. Take your time and work at a comfortable pace to ensure accurate shaping and a successful outcome for your parallelogram project.
Key phrases: parallelogram knitting pattern, shaping, tapered shawl, curved corners, stitch count, stitch markers, accurate shaping.
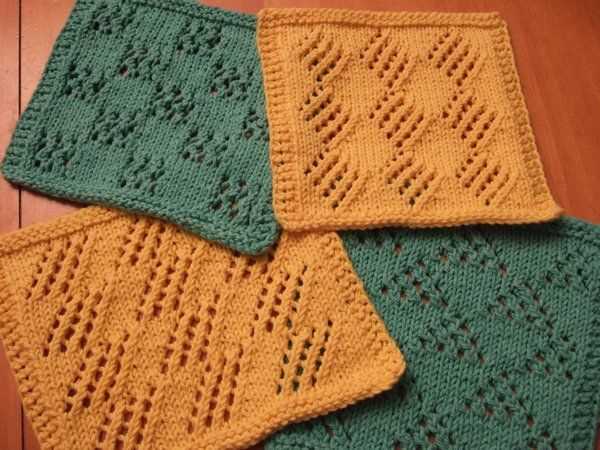
Adding decorative elements to your parallelogram
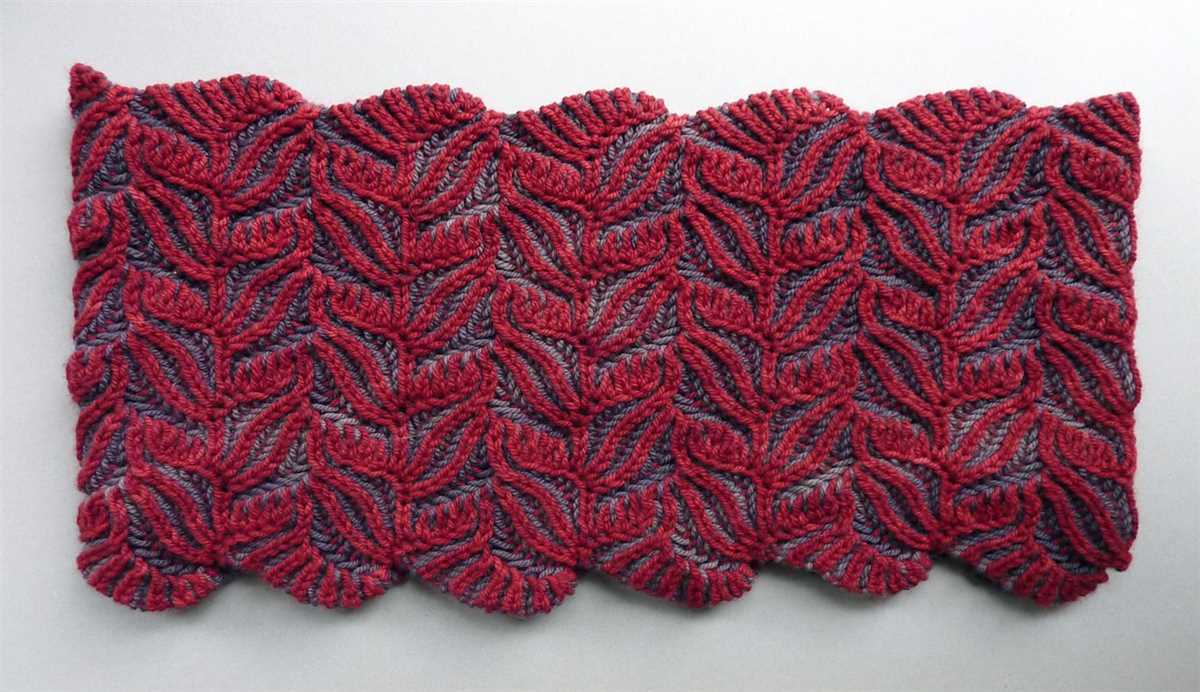
When knitting a parallelogram, you have the opportunity to add decorative elements to enhance the overall look of your project. Whether you want to add texture, color, or a combination of both, there are numerous techniques and stitches you can incorporate into your design.
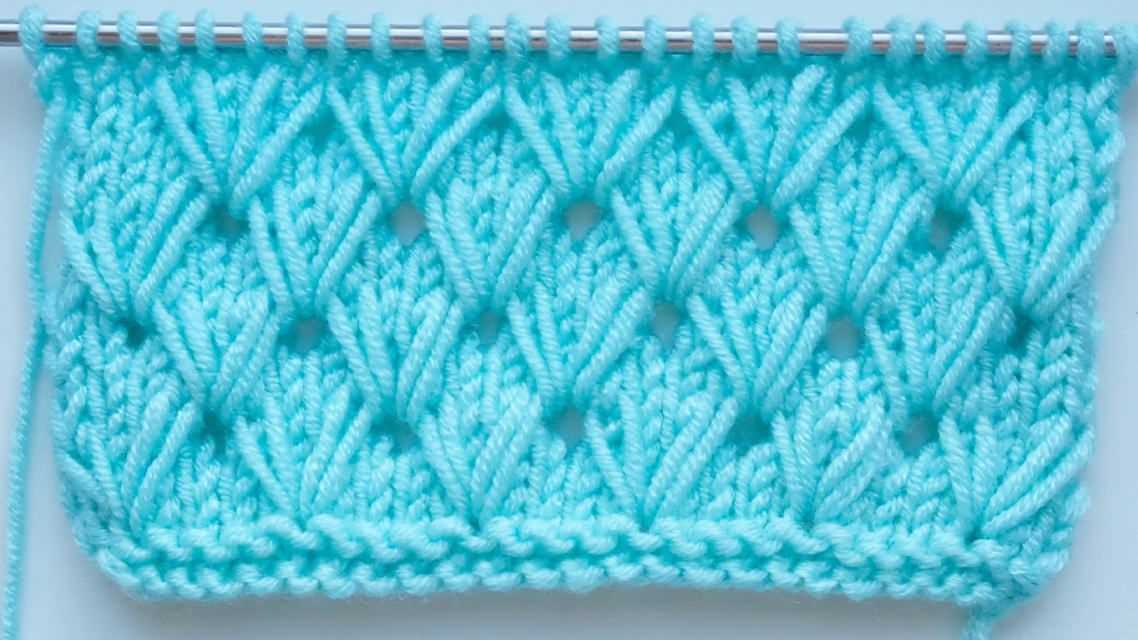
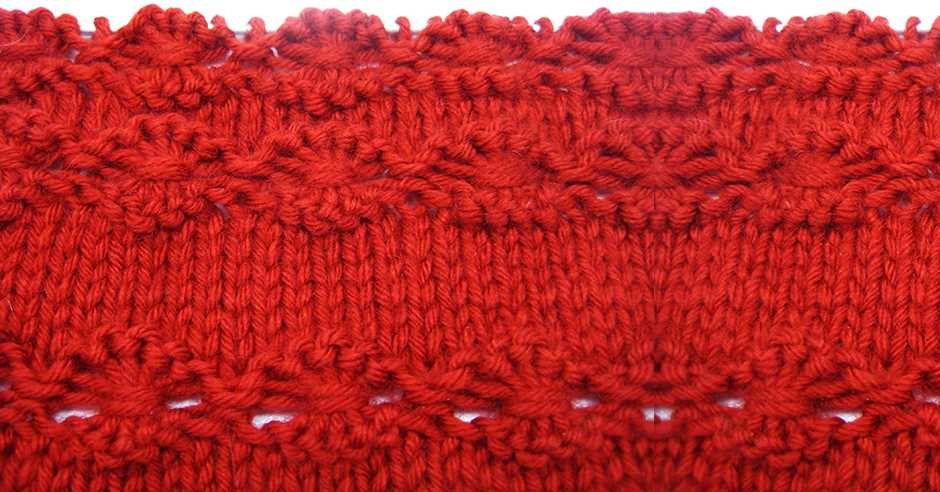
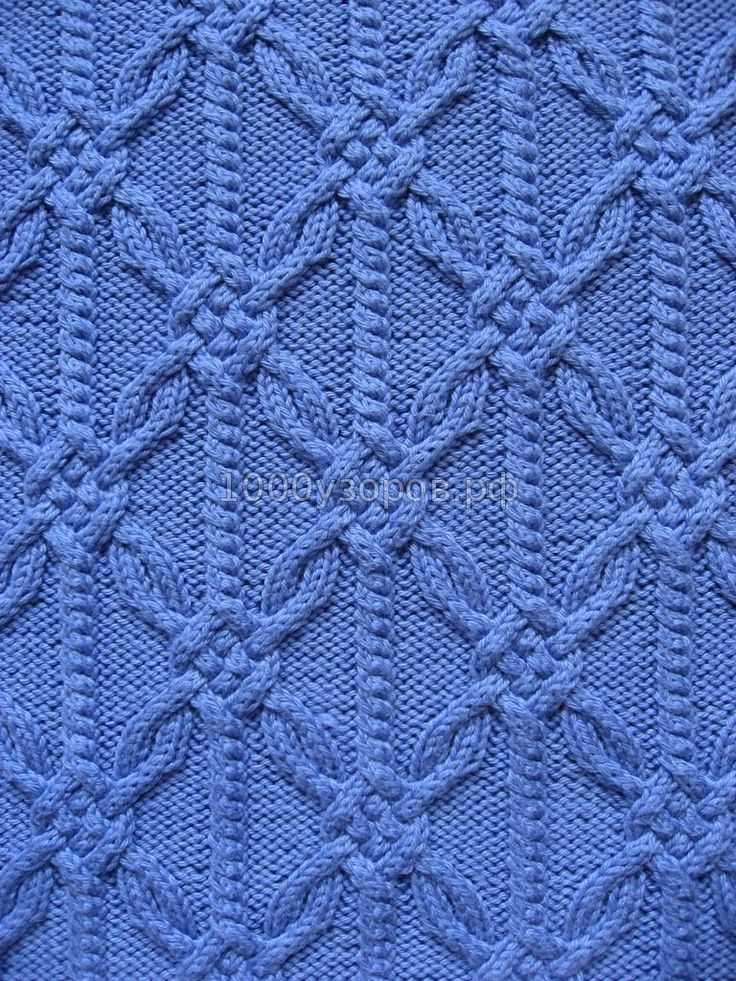
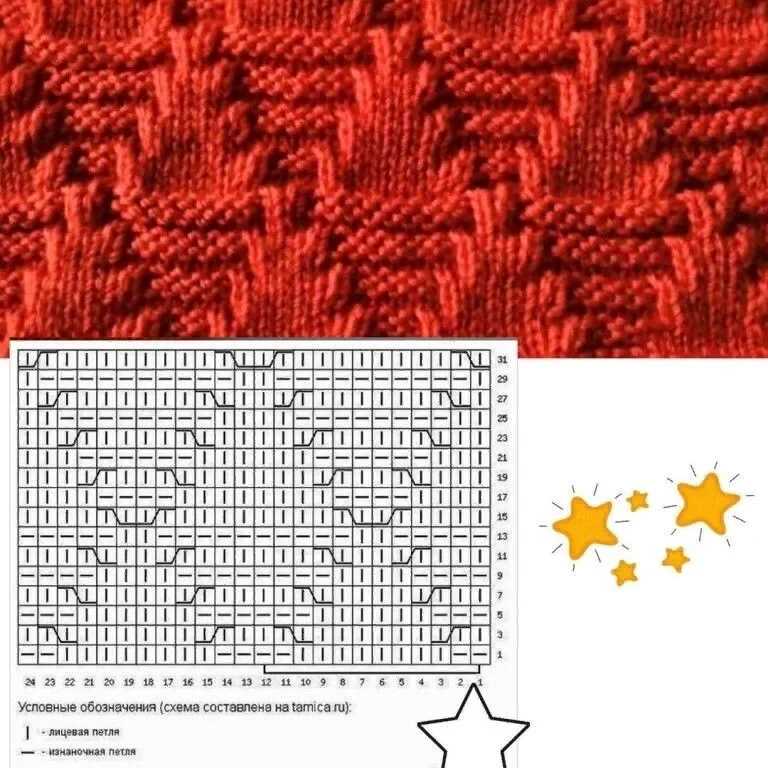
1. Texture: One way to add texture to your parallelogram is by using different stitch patterns. For example, you can alternate between knit and purl stitches to create a ribbed effect. You can also experiment with different cable patterns to create a more intricate texture. Adding texture can give your parallelogram a unique and interesting look.
2. Colorwork: Another way to make your parallelogram more visually appealing is by incorporating color. You can use stranded colorwork techniques, such as Fair Isle or Intarsia, to create intricate patterns and motifs. By working with multiple colors, you can create a vibrant and eye-catching design. Additionally, you can experiment with different color gradients or ombre effects to create a more subtle and soft look.
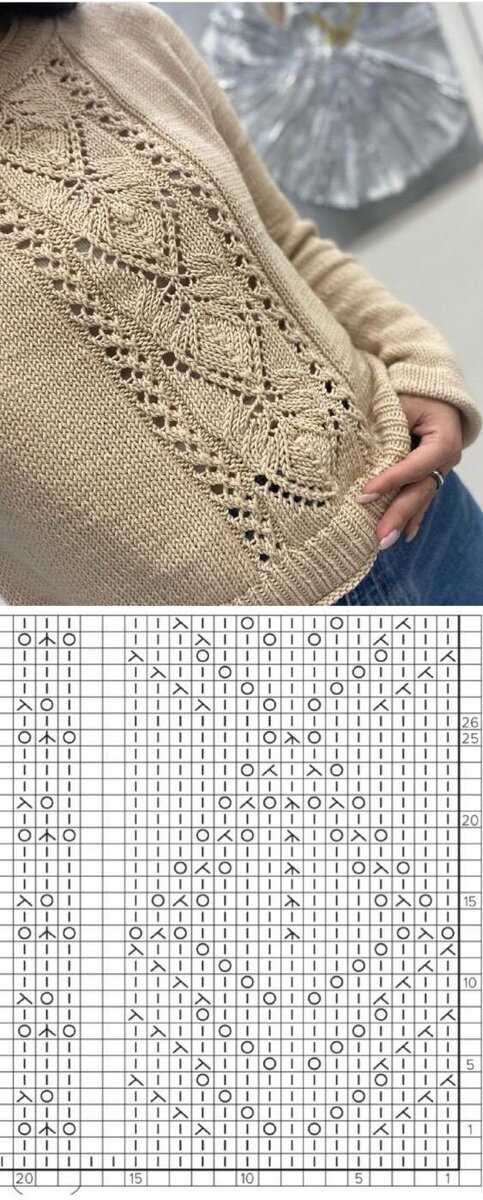
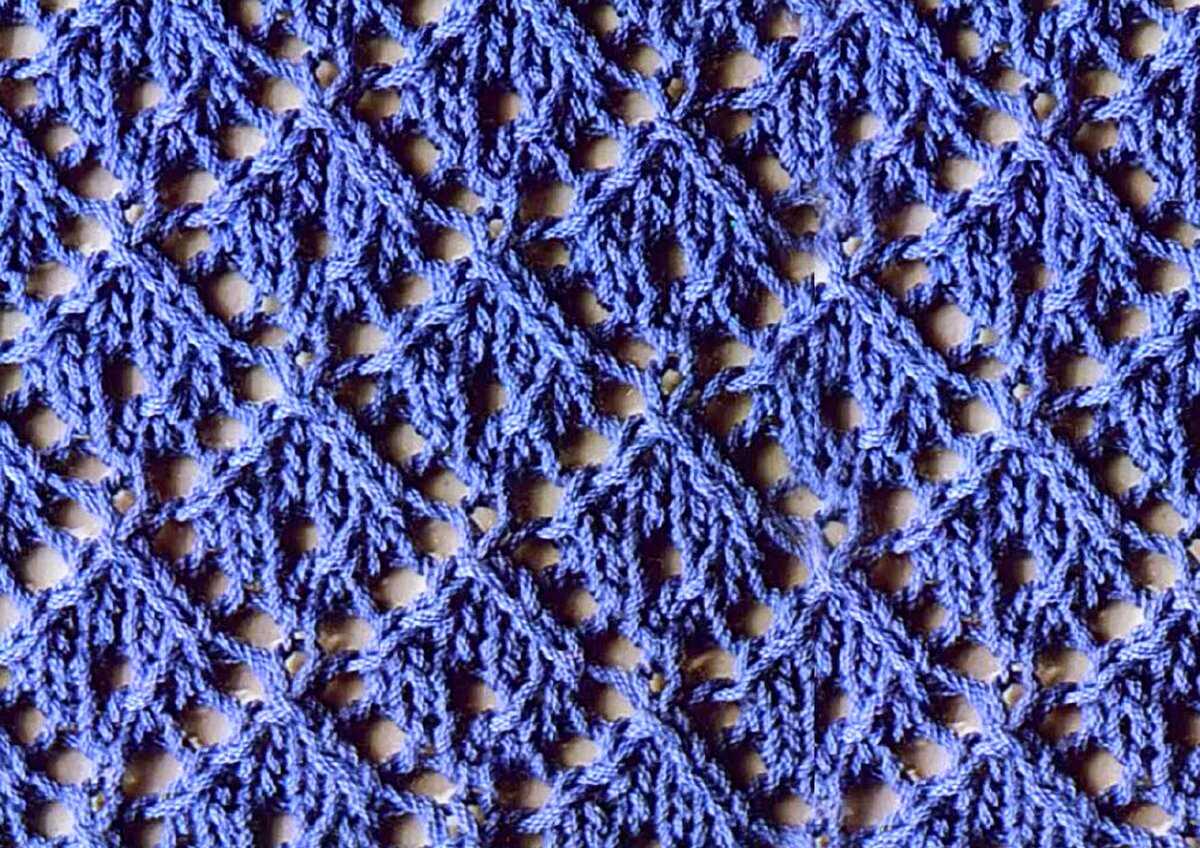
3. Lacework: Lacework is another popular option for adding decorative elements to your parallelogram. By working yarn overs and decreases, you can create delicate and intricate lace patterns. Lacework adds a feminine and elegant touch to your project, making it perfect for shawls, scarves, or other accessories. You can choose from a wide variety of lace patterns, ranging from simple and beginner-friendly to more complex designs.
4. Beads and embellishments: If you want to add some extra sparkle or dimension to your parallelogram, you can incorporate beads or other embellishments. You can thread beads onto your yarn and include them in your knitting, creating a beautiful and unique pattern. You can also sew on sequins, pearls, or other decorative elements once your parallelogram is finished. Beads and embellishments can add a touch of glamour and make your project stand out.
5. Edgings: Finally, you can consider adding decorative edgings to your parallelogram. This can be done by using a different stitch pattern, such as a picot or scalloped edge, or by incorporating lace or colorwork along the edges. Edgings can give your parallelogram a finished and polished look, and they can also provide a nice frame for your design.
With these various techniques and options, you can truly personalize your parallelogram knitting project and create a unique and stunning piece. Whether you choose to incorporate texture, color, lacework, beads, or edgings, the possibilities are endless, allowing you to express your creativity and make your project one-of-a-kind.
Finishing and blocking your parallelogram
Once you have completed knitting your parallelogram, it is important to finish it off properly to ensure a clean and polished look. Here are the steps to follow:
1. Weaving in ends
Start by weaving in any loose ends of yarn from your knitting project. You can use a tapestry needle to thread the yarn ends through the stitches on the wrong side of the work. Make sure to weave them in securely to prevent unraveling.
2. Blocking the parallelogram
Blocking is an essential step in the finishing process of your parallelogram. It helps to even out the stitches, relax the fabric, and give the project its intended shape and dimensions. Here’s how to block your parallelogram:
- Fill a sink or basin with lukewarm water and add a gentle wool wash or a few drops of mild detergent.
- Submerge the parallelogram in the water and gently press it down to ensure it is fully soaked.
- Let the parallelogram soak for about 10-15 minutes, allowing the fibers to relax.
- Drain the water and gently squeeze out the excess moisture from the fabric. Avoid wringing or twisting.
- Lay the parallelogram flat on a clean towel and roll it up tightly, pressing out the remaining water.
- Unroll the towel and reshape the parallelogram to its desired dimensions, gently pulling and stretching the fabric if needed.
- Pin the edges of the parallelogram to a blocking board or mat, using rustproof pins, and let it air dry completely.
Blocking can help smooth out any uneven stitches and give your parallelogram a more professional look. It is an essential step in creating a finished and polished final product, so don’t skip it!
Inspirational project ideas using parallelogram knitting patterns
If you’re looking to try something new and exciting with your knitting, parallelogram patterns can provide a unique challenge. With their diagonal shaping, these patterns open up a world of creative possibilities. Whether you’re a beginner or an experienced knitter, there are endless projects you can create using parallelogram knitting patterns.
Here are a few inspirational ideas to get your creative juices flowing:
1. Scarves and Shawls

Scarves and shawls are a perfect canvas for experimenting with parallelogram knitting patterns. The diagonal shaping adds an interesting twist to the traditional rectangular designs. You can use different stitch patterns and color combinations to create unique and eye-catching accessories.
2. Ponchos and Wraps
Parallelogram patterns can also be used to create stylish ponchos and wraps. The diagonal lines add movement and texture, making these garments stand out. By incorporating different stitch patterns and yarns, you can create a versatile wardrobe staple that can be dressed up or down.
3. Baby Blankets
Parallelogram knitting patterns can be easily adapted to create beautiful baby blankets. The diagonal shaping adds visual interest, while the soft and cozy fabric will keep little ones warm and comfortable. You can use playful colors and patterns to create a personalized and meaningful gift.
4. Home Decor
Think beyond wearing your knitted creations and consider using parallelogram patterns for home decor as well. You can make stylish cushion covers, table runners, or even wall hangings using this unique shaping technique. Use different yarn weights and colors to match your home decor style.
Overall, parallelogram knitting patterns offer a fresh and exciting way to explore your knitting skills and create unique and stylish projects. Whether you’re a beginner or an expert, the possibilities are endless, and the results are sure to impress. So grab your needles and get ready to unleash your creative side!