
When the winter chill sets in, it’s time to break out the warm accessories. And what better way to stay cozy and stylish at the same time than with a knitted hat? Whether you’re an expert knitter or just starting out, a men’s hat knit pattern free is the perfect project to take on. With endless design possibilities and an abundance of yarn choices, you can create a hat that is as unique as you are.
Knitted hats are not only functional but also fashionable. They can add a touch of style to any outfit, whether you’re heading to the office or out for a weekend adventure. And with a men’s hat knit pattern free, you don’t have to spend a fortune to stay on trend. This pattern allows you to customize your hat to suit your personal style, from choosing the colors and textures of yarn to adding embellishments like pom-poms or buttons.
One of the benefits of knitting your own hat is that you can ensure a perfect fit. Unlike store-bought hats, which sometimes come in limited sizes, a knitted hat can be tailored to fit your head perfectly. With a men’s hat knit pattern free, you can easily adjust the circumference and length of the hat to suit your preferences. Plus, the stretchy nature of knitted fabric means that your hat will stay snug and comfortable all day long.
Men’s Hat Knit Pattern Free
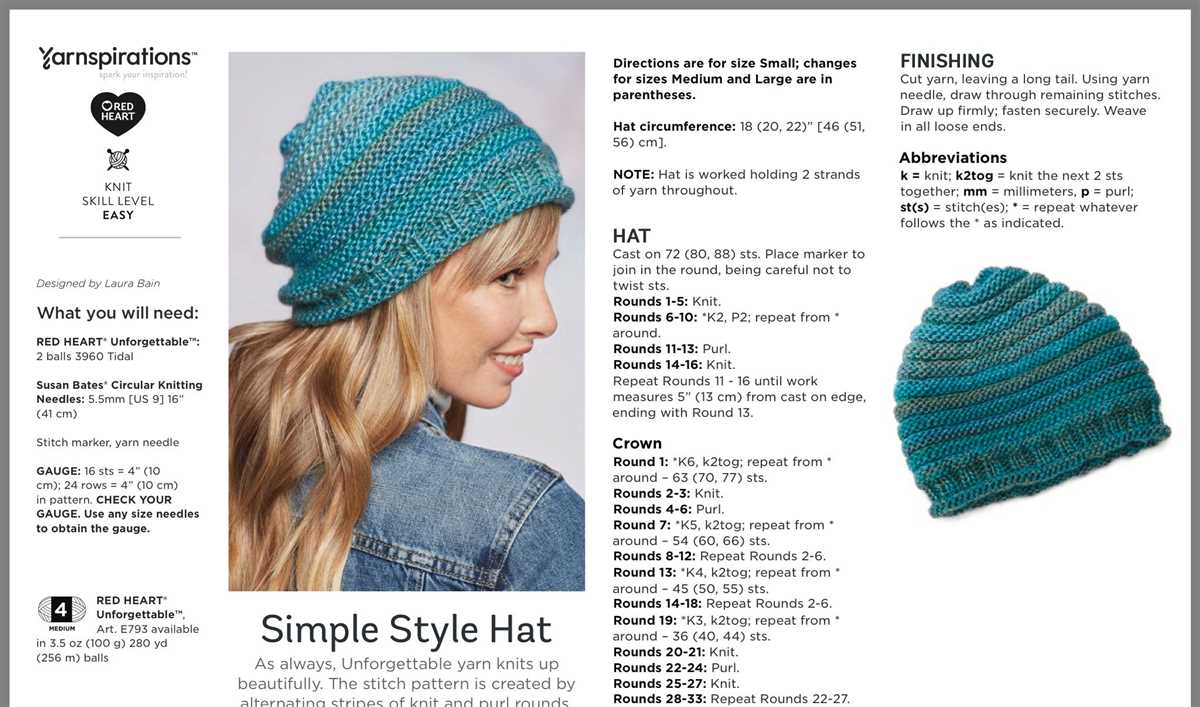
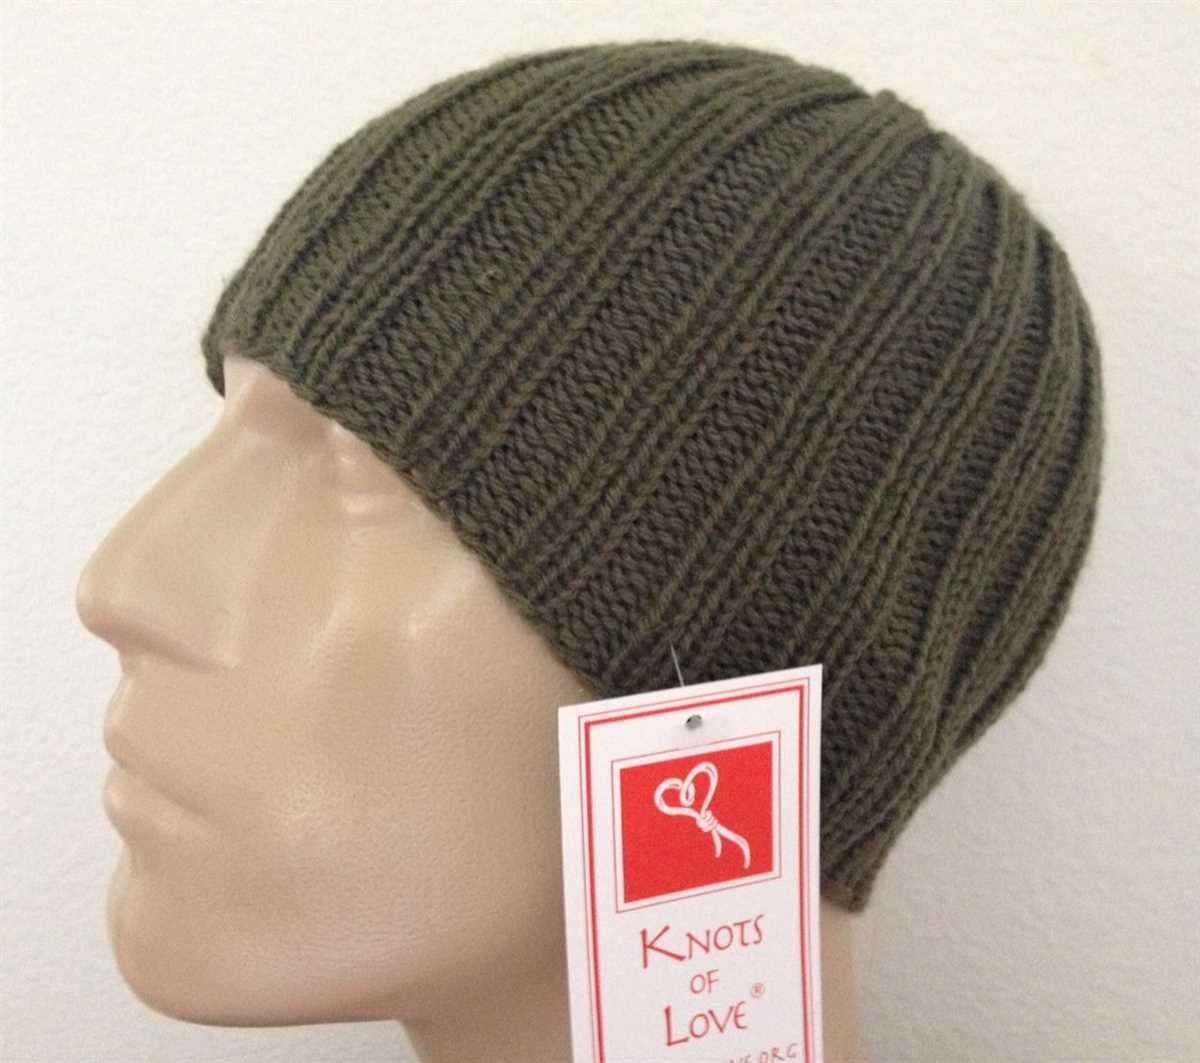
If you’re looking for a stylish and cozy accessory to keep your head warm during the colder months, look no further than this men’s hat knit pattern. With its classic design and easy-to-follow instructions, this pattern is perfect for both beginner and experienced knitters.
The pattern calls for medium weight yarn and size 8 (5.0mm) circular needles, making it a quick and enjoyable project to complete. The hat is worked in the round, starting with a ribbed brim and transitioning into a simple stockinette stitch for the body. The pattern also includes instructions for decreasing and shaping the crown to create a snug fit.
To make the hat even more unique, you can customize it with your favorite colors or add a personal touch with a contrasting stripe or pattern. This versatile pattern is also great for gift-giving, as it can be easily adjusted to fit different head sizes.
Whether you’re knitting for yourself or someone else, this men’s hat knit pattern free is a great way to showcase your knitting skills and create a practical and stylish accessory. So grab your yarn and needles and get ready to enjoy the satisfying process of knitting a cozy hat that will keep you warm all winter long. Download the pattern now and get started on your next knitting project!
Choosing the Right Yarn and Needles
When it comes to knitting a hat for men, choosing the right yarn and needles is essential to achieve the desired results. The yarn you choose will determine the look, feel, and durability of the hat, while the needles will dictate the gauge and overall size of the finished project.
Yarn: Consider the type of hat you want to knit and the intended use. If you’re knitting for winter warmth, opt for a bulky or super bulky weight yarn, which will create a thick, insulated hat. On the other hand, if you’re aiming for a lightweight, breathable hat for transitional seasons, a fingering or sport weight yarn would be more suitable. Additionally, consider the fiber content of the yarn. Wool is a popular choice for its warmth and elasticity, while blends with acrylic or cotton can offer added durability or softness.
Needles: The size and type of needles you choose will affect the tension and drape of your knitted fabric. For a hat knit in bulky or super bulky yarn, you’ll likely need larger needles such as US size 10 or larger to achieve the desired gauge. For finer weight yarns, smaller needles like US size 5 or 6 may be appropriate. Circular needles are often used for knitting hats as they allow for knitting in the round without the need for seams. Additionally, using double-pointed needles or a magic loop method is necessary for knitting the crown decreases at the top of the hat.
Experimentation: It’s important to keep in mind that these suggestions are just starting points and that personal preference plays a significant role in choosing the right yarn and needles. Different yarns and needle sizes can create unique textures and stitch patterns, so feel free to experiment and swatch before starting your project to ensure you achieve the look and fit you desire.
Gauge and Swatching
When knitting a hat for men, it is important to consider the gauge and swatching before starting the project. Gauge refers to the number of stitches and rows per inch in the knitting. It determines the size and fit of the finished hat. Swatching, on the other hand, is a small sample of knitting that helps determine the gauge.
Before starting the project, it is recommended to take the time to create a swatch. This involves knitting a small square using the same yarn and needles that will be used for the hat. The swatch should be at least 4 inches by 4 inches in size. The purpose of the swatch is to measure the gauge and ensure that the hat will be the correct size.
To measure the gauge, use a ruler or a gauge tool that has measurements marked on it. Count the number of stitches and rows within a 1-inch area of the swatch. This will give you the stitch gauge and row gauge, respectively. Compare these measurements to the gauge specified in the hat pattern. If the measurements match, then you have achieved the correct gauge and can proceed with knitting the hat.
If the gauge is not correct, adjustments may need to be made. If the stitch gauge is too small, try using larger needles. If it is too large, try using smaller needles. For the row gauge, adjust the tension of the knitting. Practice knitting with a looser or tighter tension until the row gauge matches the pattern’s specifications.
Taking the time to swatch and measure gauge may seem like an extra step, but it is crucial for ensuring that the hat will fit properly. It can save time and frustration in the long run, as it prevents the need to frog or rip out the entire hat if it ends up being too big or too small. So, make sure to gauge and swatch before starting your next men’s hat knitting project!
Casting On and Ribbing
When starting a knitting project, the first step is to cast on. Casting on refers to creating the first row of stitches on the knitting needle. There are many different methods for casting on, but one common method is the long-tail cast on. In this method, you use a long tail of yarn to create the first row of stitches. To begin, make a slipknot and place it on the needle. Then, hold the yarn in your right hand and the needle in your left hand. With your left hand, make a loop with the yarn and insert the needle into the loop from left to right. Bring the loop through the slipknot and tighten. Repeat this process until you have the desired number of stitches.
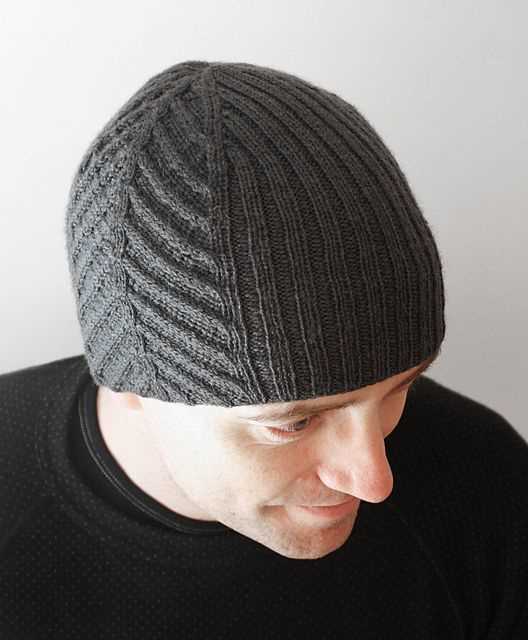
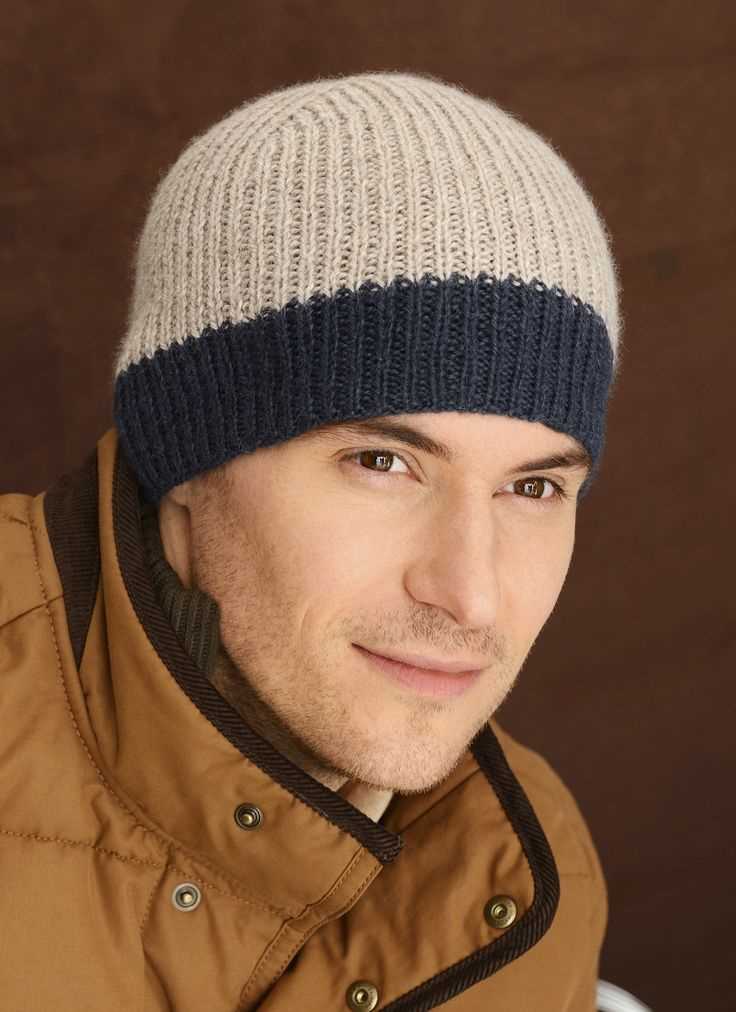
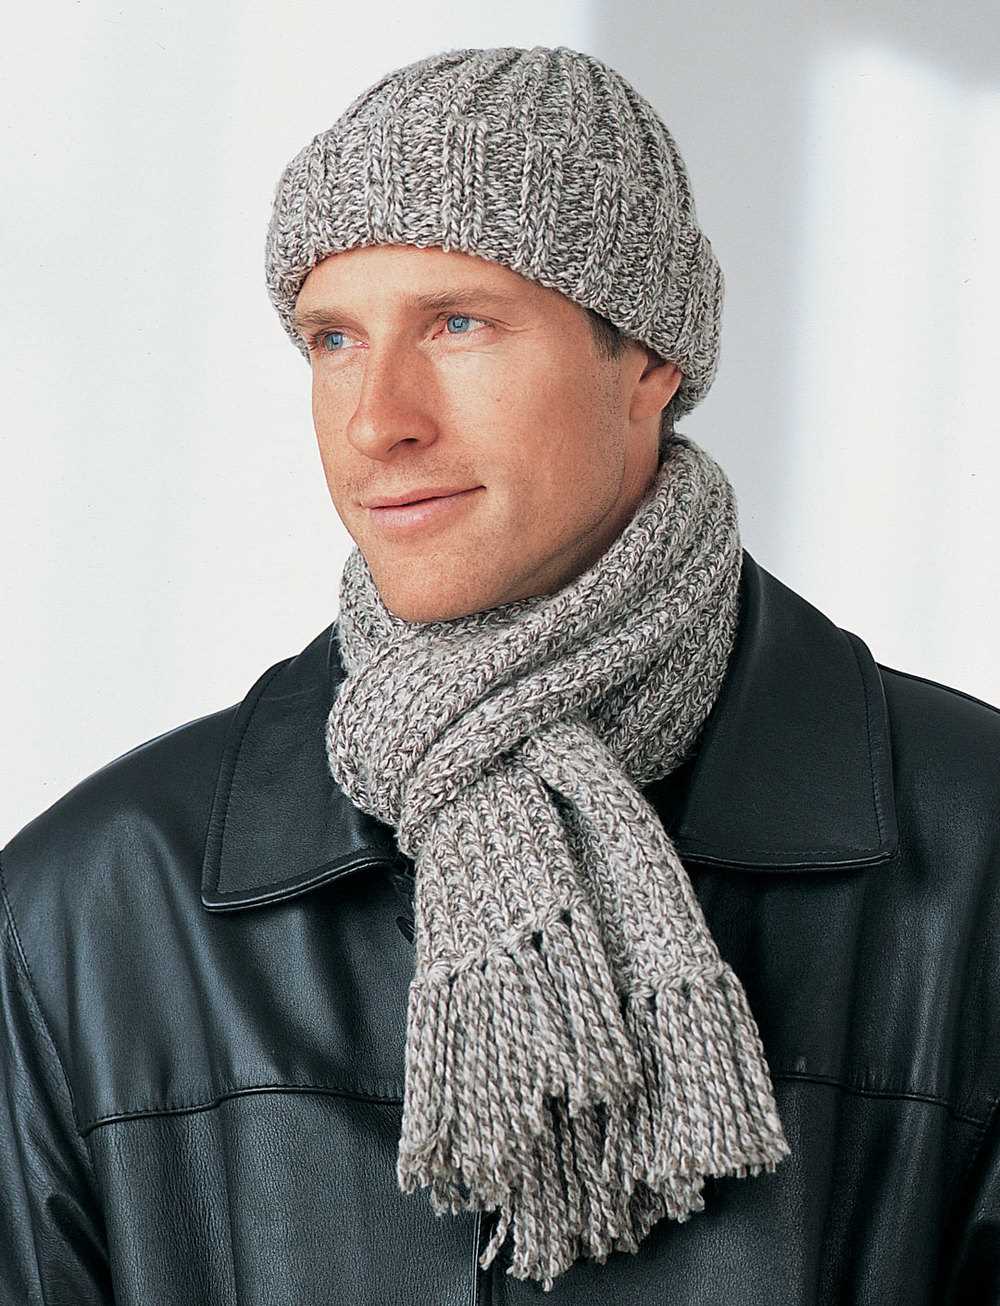
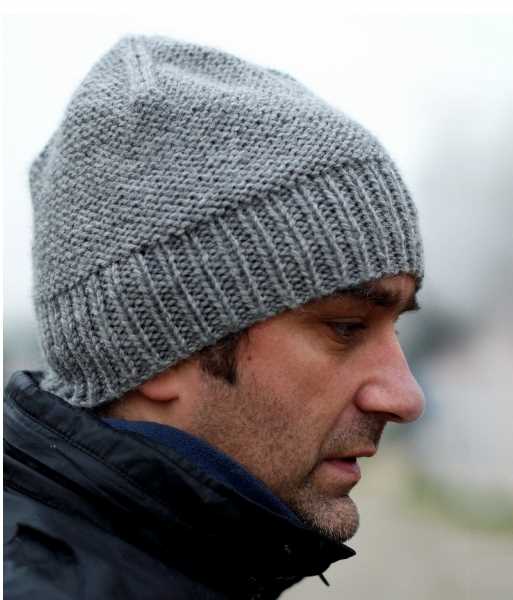
After casting on, the next step is often to work ribbing. Ribbing is a stitch pattern that creates a stretchy, textured fabric. It is commonly used for the brims of hats, cuffs of sleeves, and bands of sweaters. Ribbing is created by alternating knit and purl stitches in a specific pattern. The most common ribbing pattern is called “k1, p1” or “knit 1, purl 1.” This means that you knit one stitch, then purl one stitch, and repeat this pattern across the row. The next row will be the same pattern but shifted, so you will purl the knit stitches and knit the purl stitches. This creates a ribbed effect that is both attractive and functional.
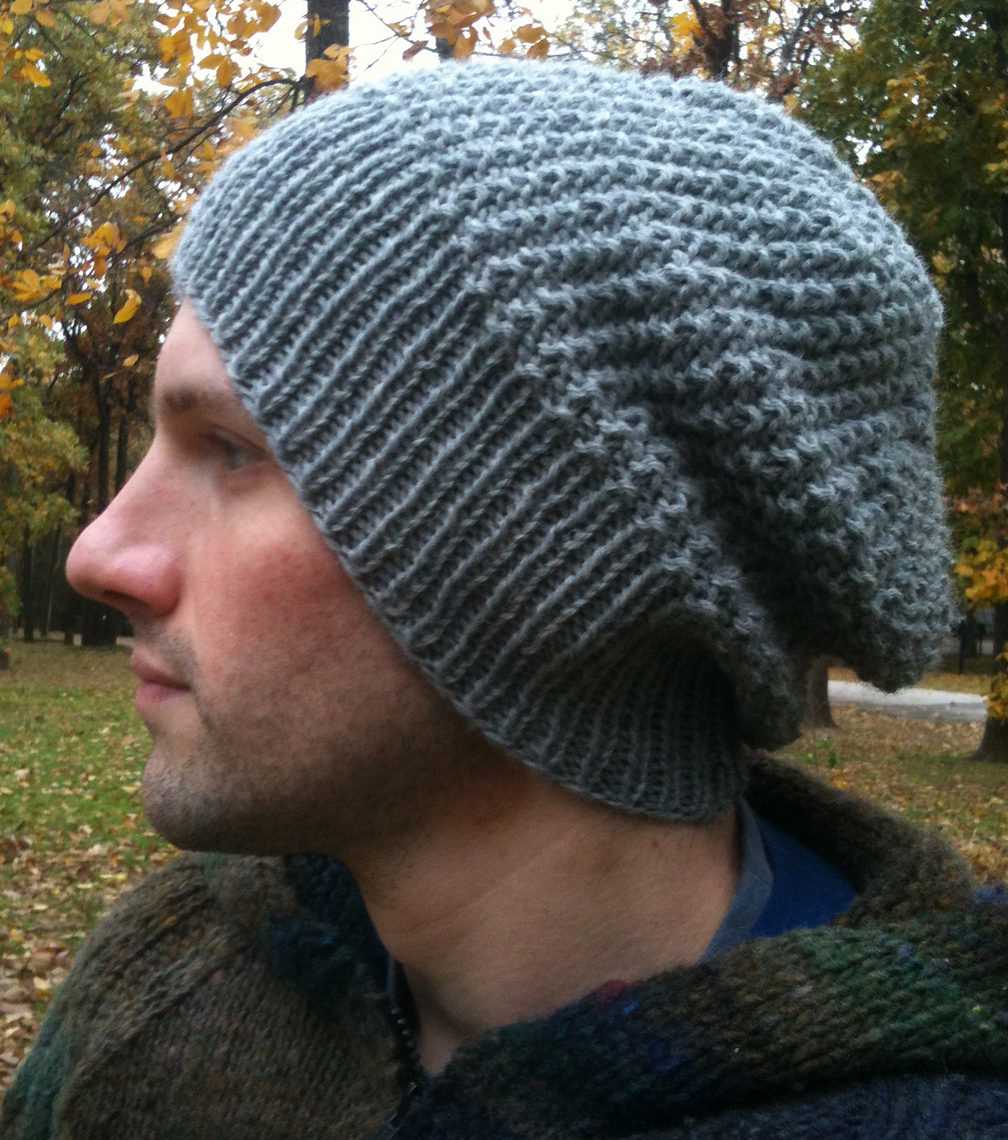
Ribbing is a great choice for men’s hats because it provides a snug fit and allows for some stretch. The ribbed texture also adds visual interest to the design. To create ribbing for a hat, you will typically cast on a multiple of two stitches. This ensures that the ribbing pattern can be easily repeated. For example, you might cast on 80 stitches for a standard-size adult hat. Then, you would work the “k1, p1” ribbing pattern for a few inches before moving on to the main body of the hat. Ribbing can be worked with straight knitting needles or circular needles, depending on your preference and the pattern instructions.
Overall, casting on and working ribbing are essential steps in knitting a men’s hat. They provide a strong foundation for the rest of the project and create a functional and attractive texture. Whether you are a beginner or an experienced knitter, mastering these techniques will set you up for success in creating stylish and cozy hats.
The Body of the Hat
Once you have cast on and completed the brim of your hat, it’s time to start working on the body. This is where the pattern really starts to take shape and you can see the hat coming together.
To create the body of the hat, you will continue knitting in the round, following the stitch pattern specified in the pattern you are using. This could be ribbing, stockinette stitch, or any other stitch pattern that you have chosen for your hat.
Knitting in the Round
When knitting in the round, you will always be working on the right side of your project. You will continue to knit each round without turning your work. This creates a seamless tube, which is perfect for a hat.
Make sure to carefully follow the instructions in the pattern regarding the stitch pattern, stitch count, and any shaping or decreases that need to be made as you work on the body of the hat. This will ensure that your hat turns out just as you intended.
As you work your way through the body of the hat, take the time to periodically try it on to check the fit. Adjustments can always be made by adding or removing rows as needed.
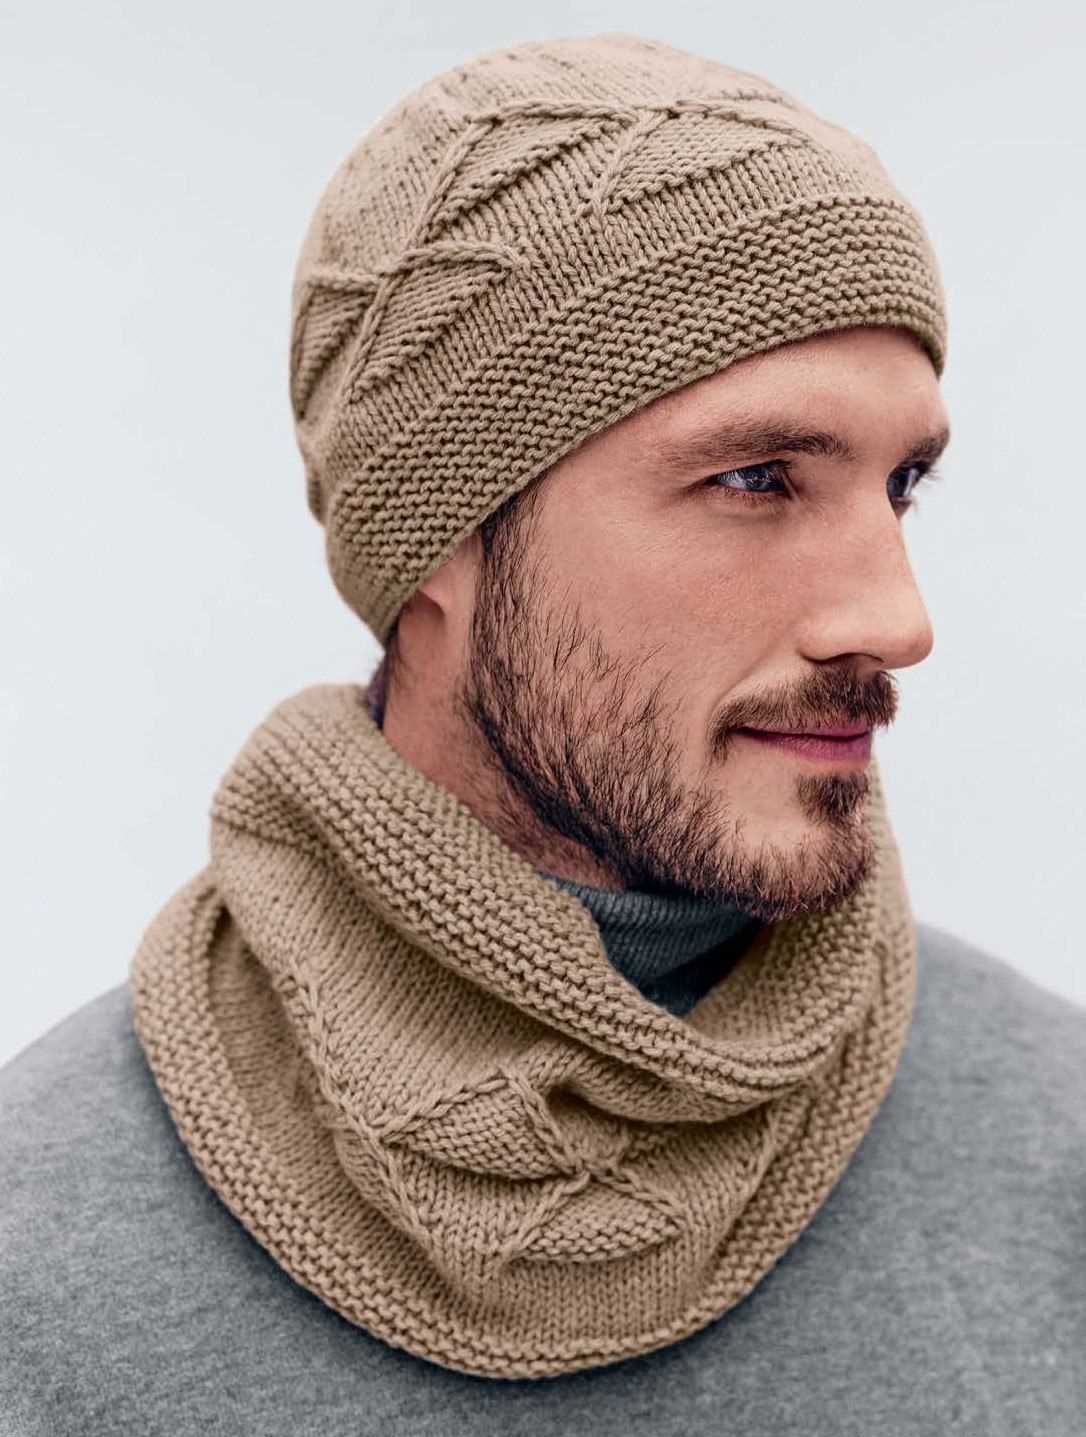
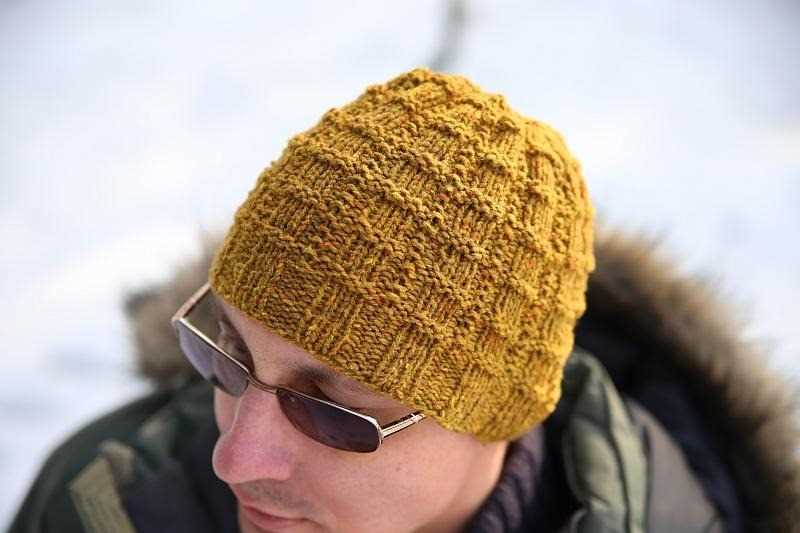
Adding Texture and Design
If you want to add some texture or design elements to the body of your hat, there are many options available. You can incorporate cables, colorwork, or even simple ribbing to add visual interest.
Remember to refer to the pattern you are using for specific instructions on how to incorporate these design elements. It may require a different stitch pattern or extra steps to create the desired effect.
The body of your hat is where you can get creative and really make the hat your own. Experiment with different stitch patterns and techniques to create a unique and personalized hat that you will be proud to wear.
Decreasing and Shaping
In knitting, decreasing and shaping are essential techniques used to create shaping and structure within a knitted garment. Decreasing involves reducing the number of stitches on the needle, while shaping refers to changing the overall shape of the knitted piece, such as adding curves or contours.
There are several ways to decrease stitches in knitting, with each method creating a different effect. The most common decrease method is the knit two stitches together (k2tog). This method involves knitting two stitches as if they were one, effectively reducing the stitch count by one. Another common decrease method is the slip slip knit (ssk), which involves slipping two stitches individually, then knitting them together through the back loop. This method creates a left-leaning decrease.
When shaping a knitted hat, you may need to decrease stitches evenly to create a tapered crown. To achieve this, you can work a series of decrease rounds, spacing the decreases evenly around the hat. For example, you could work a round of *k6, k2tog*, where you knit six stitches, then knit two stitches together, repeating this sequence around the round. This would decrease the stitch count by one for every eight stitches.
In addition to decreasing, shaping can also be accomplished through increases. One common increase method is the yarn over (yo), which creates an eyelet hole in the fabric. Another common increase method is the make one (M1), which involves picking up the bar between two stitches and knitting into it. These increase methods can be used to create curves or add extra stitches for shaping.
Overall, decreasing and shaping are important techniques in knitting that allow you to create a variety of designs and structures in your projects. Understanding how to decrease and shape stitches will give you greater control over the fit and style of your knitted garments.
Binding Off and Finishing
After completing the knitting part of your men’s hat, the next step is to bind off the stitches. Binding off is the process of securing the stitches and creating a neat edge. To bind off, you will knit the first two stitches as normal, and then pass the first stitch over the second stitch and off the needle. Continue this process until only one stitch remains, then cut the yarn and pull it through the final stitch to secure it.
Once you have bound off all the stitches, you can begin the finishing process. This involves weaving in the loose ends of yarn to prevent them from unraveling and creating a clean, polished look. To weave in the ends, thread the loose end onto a yarn needle and carefully weave it through the stitches on the wrong side of the fabric. Make sure to weave in the end for a few inches to ensure it is secure.
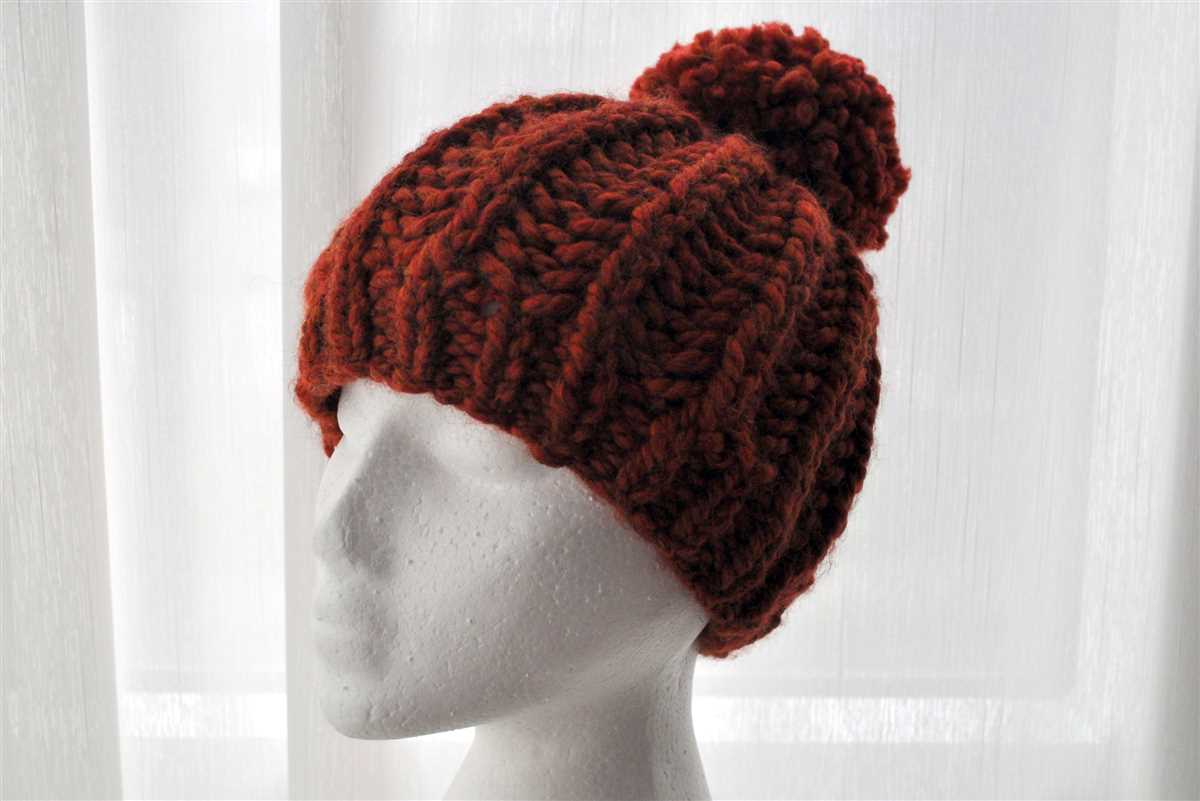
To complete the finishing touches on your men’s hat, you can also add any additional embellishments or details. This could include attaching a pom-pom to the top of the hat, adding a ribbed or cabled border, or sewing on a decorative patch. Take some time to explore different options and personalize your hat to suit your style.
Summary:
- Binding off is the process of securing the stitches and creating a neat edge.
- To bind off, knit the first two stitches, pass the first stitch over the second stitch, and continue until only one stitch remains.
- Weave in the loose ends of yarn to prevent them from unraveling.
- Add any additional embellishments or details to personalize your men’s hat.
Add-ons and Embellishments
When it comes to men’s hat knit patterns, there are various add-ons and embellishments that can elevate the design and make it unique. From simple details to intricate elements, these additions can enhance the overall look and style of the hat.
One popular add-on for men’s hats is a pom-pom. Whether it’s a small pom-pom on top or a large one hanging down the side, this playful decoration adds charm and character to the hat. Pom-poms can be created using the same yarn as the hat or a contrasting color to create a striking pop.
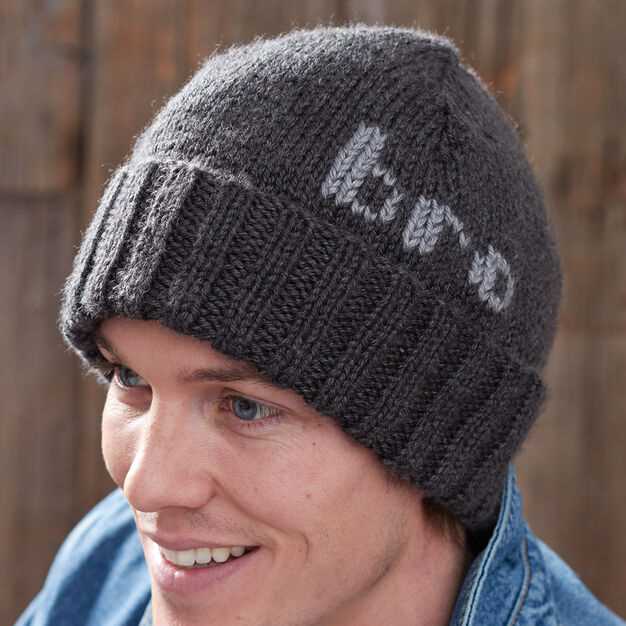
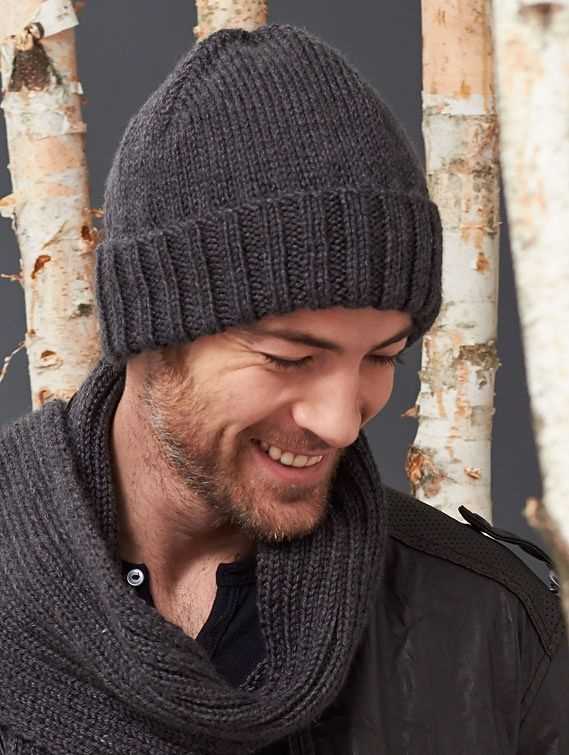
Another embellishment that can be incorporated into men’s hat knit patterns is a ribbed brim. This adds both style and functionality to the hat, as the ribbing provides a snug fit and helps the hat stay in place. The ribbed brim can be a different color or pattern than the rest of the hat, creating a visually appealing contrast.
Buttons, patches, and badges are also popular add-ons for men’s hats. These can be sewn onto the brim or side of the hat to add a touch of personalization and style. Whether it’s a favorite sports team logo, a vintage-inspired patch, or a quirky button, these embellishments can make the hat truly unique and reflective of the wearer’s personality.
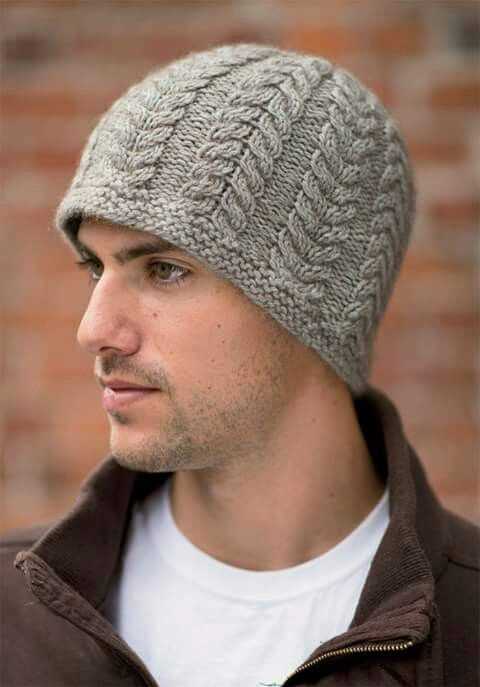
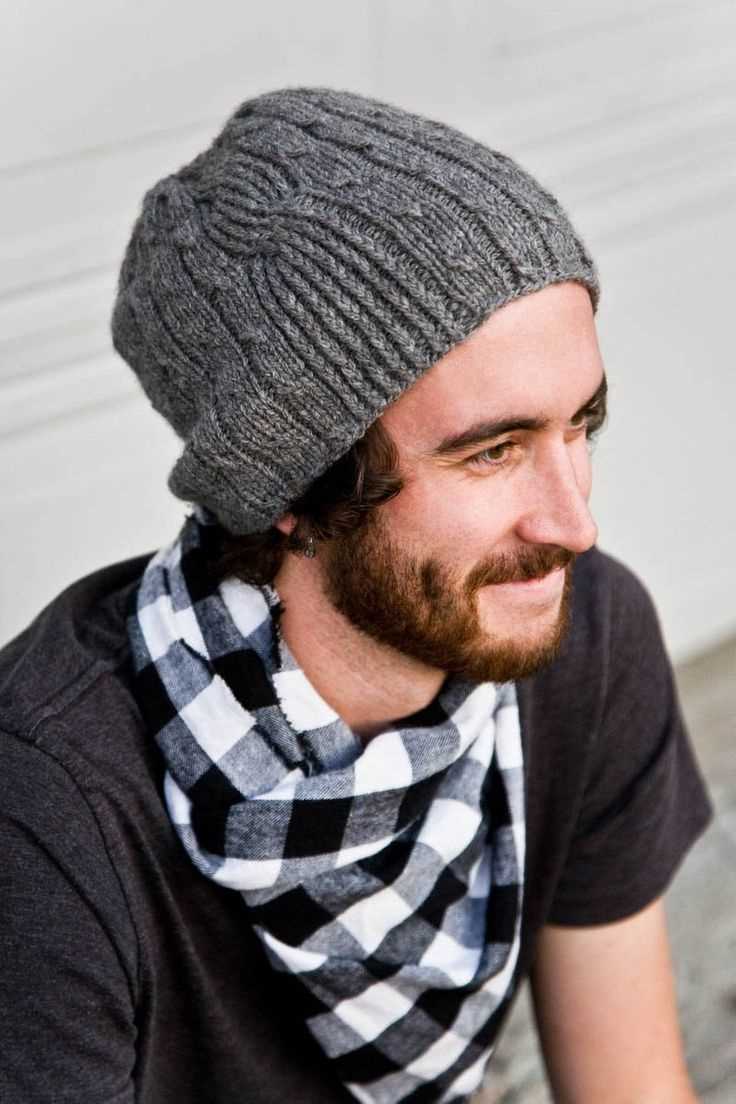
For those looking for a more intricate design, cables, and textured stitches can be incorporated into the knit pattern. These add depth and dimension to the hat, creating an eye-catching and visually interesting design. Whether it’s a simple cable or an elaborate textured pattern, these details can take the hat to the next level.
In conclusion, when it comes to men’s hat knit patterns, add-ons and embellishments offer endless possibilities for customization. From pom-poms to ribbed brims, buttons to cables, these details can transform a basic hat into a stylish and unique accessory.
Tips for a Professional Finish
When knitting a hat for men, achieving a professional finish is key to creating a polished and stylish look. Here are some tips to help you achieve that professional finish:
1. Choose the Right Yarn and Needles
Choosing the right yarn and needles is crucial to achieving a professional finish. Opt for a yarn that is of good quality and appropriate for the hat design you are knitting. The yarn should be easy to work with and create nice stitch definition. Similarly, choose the right needles that give you the correct gauge for the pattern. Using the right materials will ensure that your stitches are even and neat.
2. Pay Attention to Tension
Tension plays a crucial role in achieving a professional finish. It is important to maintain an even tension throughout your knitting to avoid any unevenness or tightness in the stitches. Take the time to check your tension as you knit and make any necessary adjustments to ensure consistency in your stitches.
3. Finishing Techniques
The finishing techniques you use can make a huge difference in the final appearance of your hat. Pay attention to the details such as weaving in ends neatly, sewing seams invisibly, and blocking your hat to give it a professional shape and finish. These small finishing touches can elevate your hat from homemade to professional-looking.
4. Take Your Time with Blocking
Blocking is an important step in achieving a professional finish for your knitted hat. Take your time to shape and block your hat correctly, following the instructions provided in the pattern. Blocking helps to even out the stitches, open up any lacework, and give the hat a polished look. Allow your hat to completely dry before removing the blocking pins or wires for best results.
By following these tips and paying attention to the details, you can create a knitted hat for men that has a professional finish, making it a stylish and sophisticated accessory.
Common Mistakes to Avoid
When knitting a hat, it’s important to be mindful of common mistakes that can affect the final outcome of your project. Avoiding these mistakes can help you create a well-fitting and visually appealing hat.
Here are some common mistakes to avoid:
- Incorrect gauge: Failing to match the gauge specified in the pattern can result in a hat that is either too large or too small. Take the time to swatch and check your gauge before starting the project.
- Twisted stitches: Ensure that all stitches are properly aligned on the knitting needle. Twisted stitches can affect the overall appearance and fit of the hat.
- Unsightly seams: When joining the ends of the hat, make sure to neatly sew the seam to avoid any visible bumps or irregularities.
- Skipping row or stitch counts: Following the pattern instructions accurately is crucial. Skipping rows or stitches can result in an uneven or misshapen hat.
- Choosing the wrong yarn: Using a yarn that is too thick or too thin can affect the final size and drape of the hat. Always choose a yarn that is suitable for the pattern and check the recommended yarn weight.
By being aware of these common mistakes and taking the necessary precautions, you can ensure a successful knitting project and end up with a high-quality knitted hat. Happy knitting!