
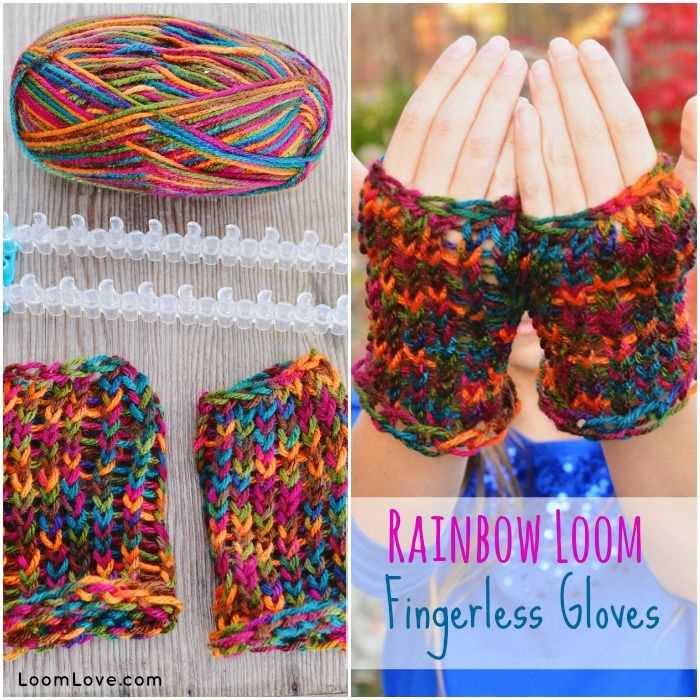
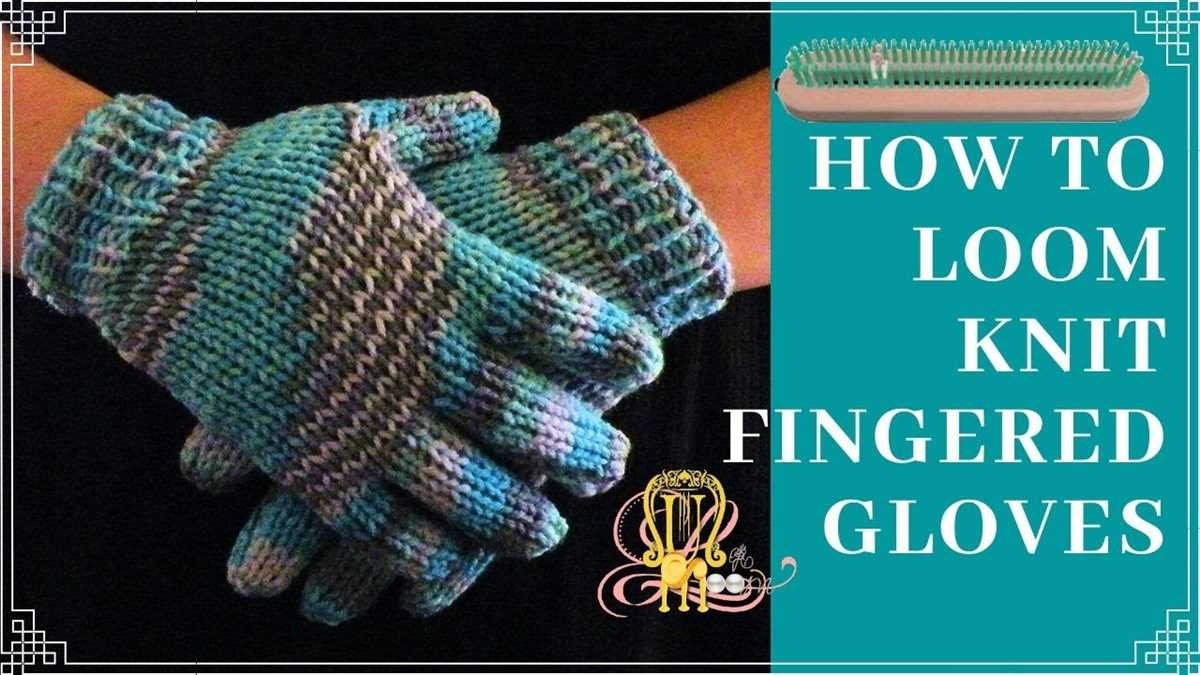
Gloves are an essential accessory during the colder months, providing warmth and protection for your hands. If you are a fan of loom knitting, you’ll be delighted to know that you can easily create your own gloves using a loom knitting pattern. Loom knitting is a technique that uses a circular or rectangular loom to create knitted items without the need for knitting needles.
One of the advantages of loom knitting is that it is beginner-friendly and accessible to those who may struggle with traditional knitting techniques. With a few basic tools and some yarn, you can quickly whip up a pair of cozy gloves to keep your hands snug and stylish.
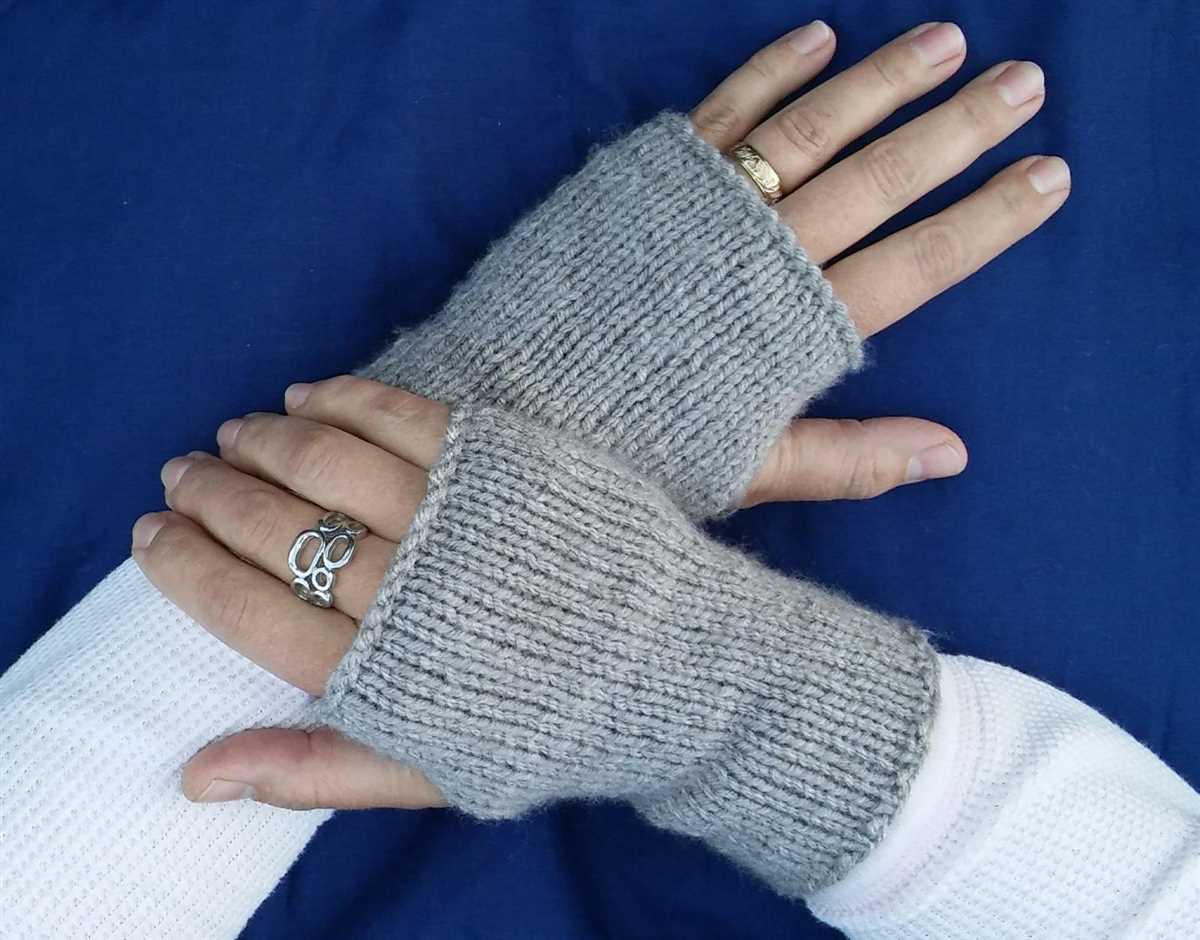
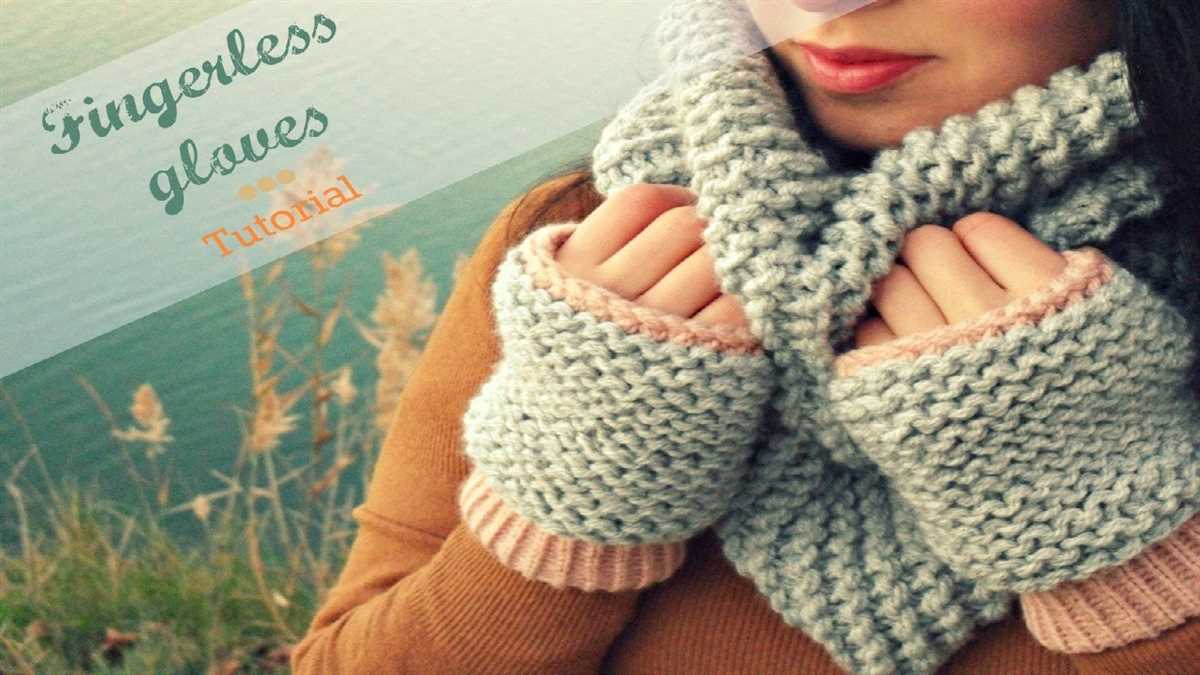
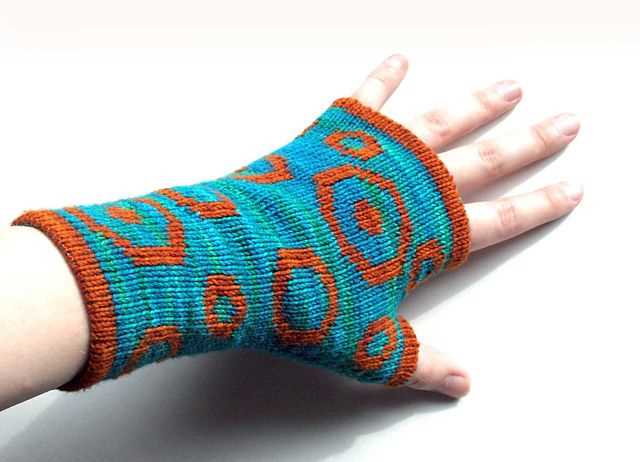
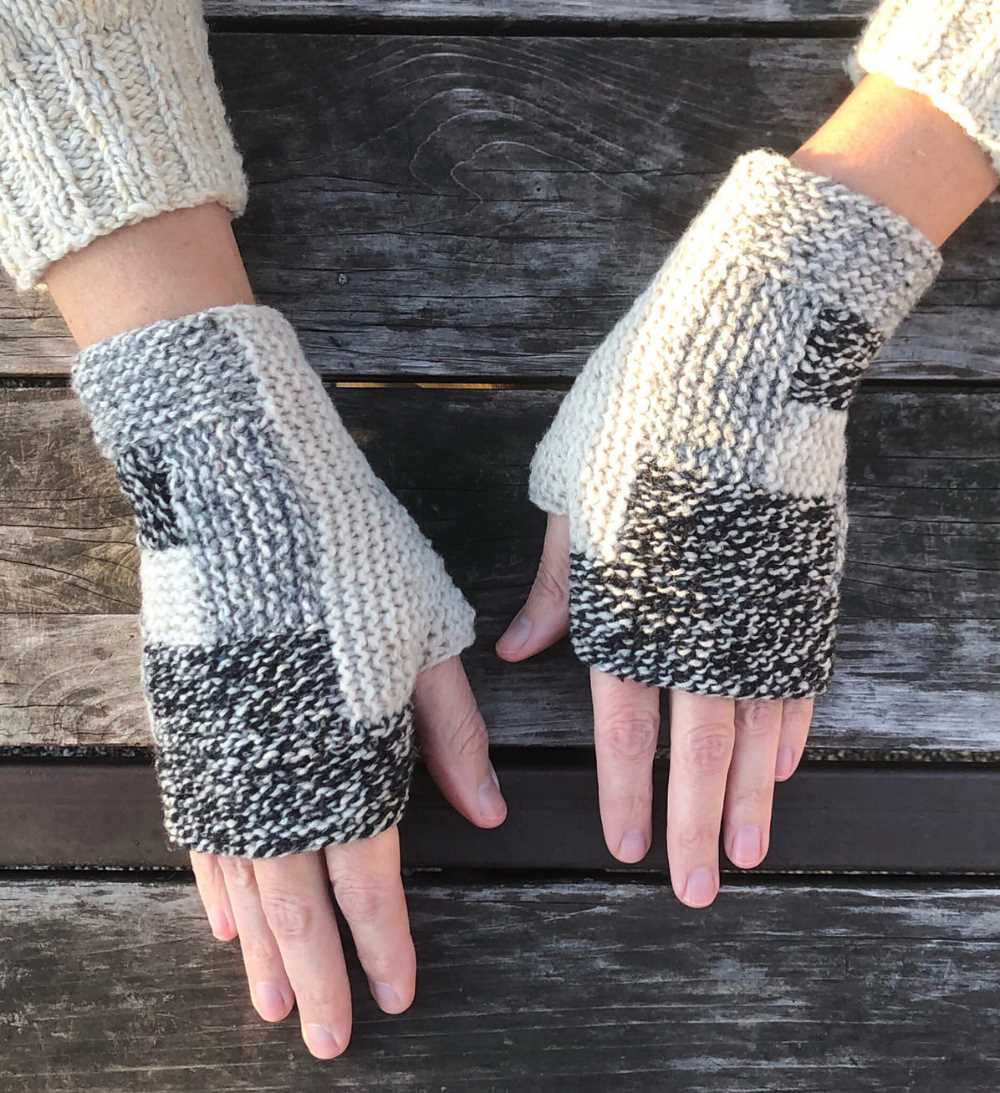
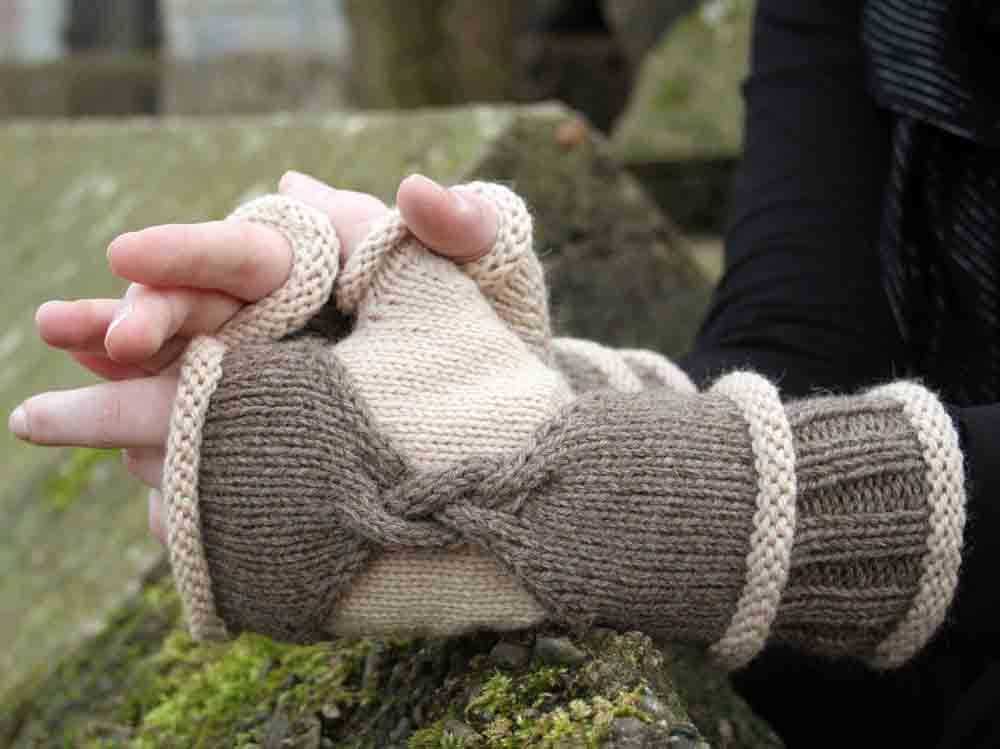
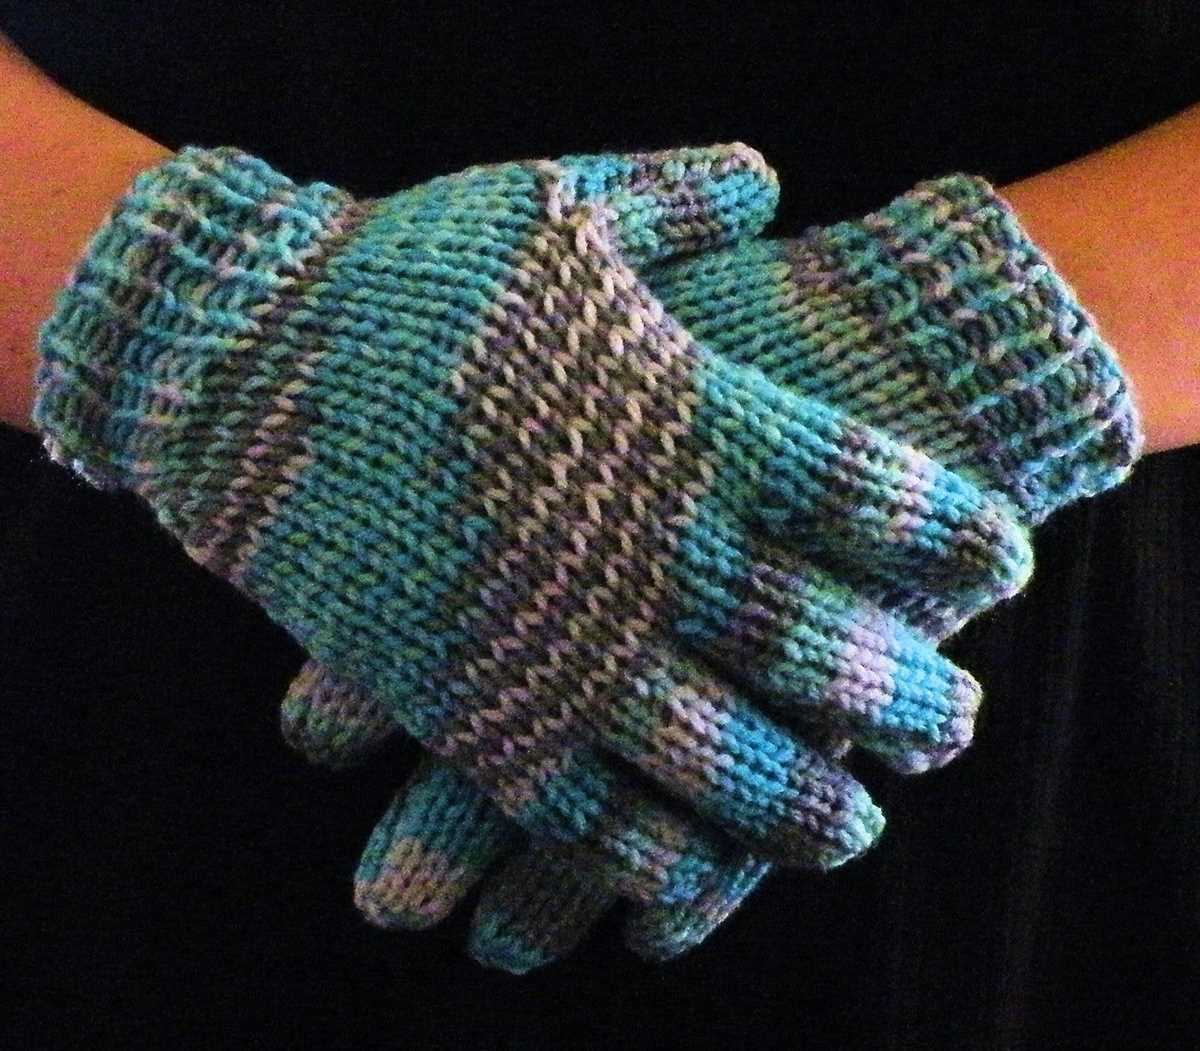
There are various loom knitting patterns available for gloves, from fingerless gloves to full fingered gloves. Fingerless gloves are particularly popular as they allow you to maintain dexterity while keeping your hands warm. Alternatively, if you prefer full finger coverage, you can choose a pattern that includes individual fingers for maximum warmth.
Whether you’re a beginner or an experienced loom knitter, creating your own gloves can be a rewarding and enjoyable project. With the right loom knitting pattern, you can customize the gloves to fit your own unique style and preferences. So why not give loom knitting a try and create a cozy pair of gloves for yourself or as a thoughtful handmade gift for a loved one?
Loom Knit Gloves Pattern
Loom knitting is a popular technique that allows you to create beautiful and cozy items using a specialized knitting loom. One of the items you can make using this technique is gloves. Loom knit gloves are a great project for beginners and experienced loom knitters alike, as they involve simple stitches and can be easily customized to fit any hand size.
To create loom knit gloves, you will need a set of knitting looms, preferably in different sizes to accommodate different hand sizes. You will also need yarn of your choice, a loom knitting hook, and a pair of scissors. The pattern for loom knit gloves involves knitting the fingers individually and then joining them together to create a complete glove.
To start, you will need to cast on stitches on the loom using the e-wrap method. The number of stitches will depend on the size of the glove you want to make. Once you have cast on the stitches, you can begin knitting the body of the glove using a basic knit stitch. You will need to continue knitting until the glove reaches the desired length.
After knitting the body of the glove, you can move on to knitting the fingers. To do this, you will need to divide the stitches on the loom into separate sections for each finger. You can do this by skipping a certain number of stitches in between each section. Once the stitches are divided, you can knit each finger individually using the knit stitch.
Once all the fingers are knitted, you can join them together to create the complete glove. To do this, you will need to use a sewing needle and thread to sew the sides of each finger together. Make sure to leave an opening for the thumb. Once the fingers are joined, you can finish off the glove by knitting a cuff using a rib stitch.
Overall, loom knitting gloves can be a fun and rewarding project. With a few simple steps, you can create a pair of cozy gloves that are perfect for keeping your hands warm during the colder months.
Choosing the Right Loom for Knitting Gloves
Knitting gloves on a loom can be an enjoyable and rewarding project for crafters of all skill levels. However, finding the right loom for this specific project is crucial for achieving the desired results. Here are some factors to consider when choosing the right loom for knitting gloves:
Size and Gauge
One of the most important factors to consider when choosing a loom for knitting gloves is its size and gauge. The size of the loom should match the desired finished size of the gloves. Additionally, the gauge of the loom should match the recommended gauge for the chosen yarn. This ensures that the gloves will fit properly and have a consistent texture.
Number of Pegs
The number of pegs on the loom is another important consideration. Gloves typically require a loom with a smaller number of pegs than larger projects like hats or scarves. A loom with fewer pegs allows for better control and precision when working on the fingers of the gloves.
Type of Loom
There are various types of looms available for knitting gloves, including round looms, double-sided looms, and adjustable looms. Each type has its own advantages and disadvantages, so it’s important to choose one that best suits your preferences and knitting style. Round looms are great for beginners and can easily be used for knitting seamless gloves. Double-sided looms allow for more complex stitch patterns but may require more skill to use. Adjustable looms offer flexibility in size and gauge, making them suitable for a wide range of glove projects.
By considering these factors and choosing the right loom for knitting gloves, you can ensure a successful and enjoyable knitting experience. Whether you’re a beginner or an experienced knitter, finding the perfect loom will help you create beautiful and unique gloves that are both stylish and functional.
Selecting the Right Yarn for Loom Knit Gloves
When it comes to loom knitting gloves, selecting the right yarn is crucial for achieving the desired fit, warmth, and durability. The yarn will determine the overall feel and look of the finished gloves, so it’s important to carefully consider your options.
First, think about the weight of the yarn. For gloves, a medium to lightweight yarn is usually recommended. This ensures that the gloves won’t be too bulky and will provide enough warmth without making your hands sweaty. Look for yarns labeled as “worsted” or “sport” weight for a good balance.
Type of Yarn
When choosing the type of yarn, consider the fiber content. Wool is a popular choice for gloves as it is warm, breathable, and has natural moisture-wicking properties. Alpaca and bamboo yarns are also great options for their softness and warmth. If you prefer synthetic fibers, acrylic or nylon blends can be used for their durability and easy care.
Color and Pattern
Another aspect to consider is the color and pattern of the yarn. Solid colors are versatile and classic, but you can also experiment with variegated or self-striping yarns to add some visual interest to your gloves. Patterns can also be created by using different stitch techniques or combining multiple colors in a fair isle style.
Recommended Yarns
Some popular yarns recommended for loom knitting gloves include Lion Brand Wool-Ease, Plymouth Yarn Encore Worsted, and Red Heart Soft. These yarns offer a good balance of warmth, durability, and affordability. Ultimately, the best yarn for your loom knit gloves will depend on your personal preferences and the intended use of the gloves.
- Lion Brand Wool-Ease
- Plymouth Yarn Encore Worsted
- Red Heart Soft
In conclusion, selecting the right yarn for loom knit gloves is essential for achieving the desired fit, warmth, and durability. Consider the weight, fiber content, color, and pattern of the yarn, and choose one that suits your preferences and the intended use of the gloves. With the right yarn, you’ll be on your way to creating cozy and stylish gloves on your loom.
Getting Started with Loom Knit Gloves
Whether you’re a beginner or an experienced loom knitter, making gloves on a loom can be a fun and rewarding project. With just a few basic materials and some knowledge of loom knitting, you can create cozy gloves to keep your hands warm during the colder months.
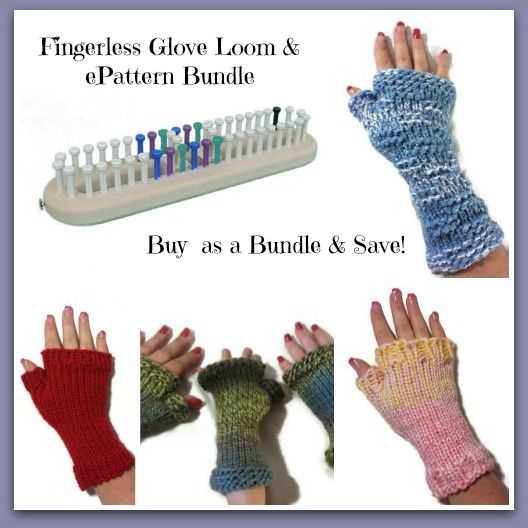
To get started, you’ll need a loom knitting set that includes a loom, a knitting hook, and a yarn needle. You’ll also need a soft and warm yarn of your choice, preferably one that is suitable for gloves. It’s important to choose a yarn that is both comfortable to wear and easy to work with.
Once you have your materials ready, you’ll need to choose a suitable loom size for your gloves. The size of the loom will determine the size of your gloves, so be sure to check the measurements before starting. You can find patterns for different glove sizes online or in loom knitting books.
Next, start by casting on the desired number of stitches on your loom. This will depend on the size of your gloves and the pattern you’re following. Make sure to leave a long tail of yarn for sewing up the sides of the glove later. Once the stitches are cast on, you can begin knitting the body of the glove using the stitch pattern of your choice, such as the e-wrap or the u-wrap stitch.
After knitting the appropriate length for the glove body, you’ll need to create the thumb opening. This can be done by skipping a certain number of stitches and then continuing to knit the rest of the stitches. The thumb hole should be big enough to comfortably fit your thumb, but not too large that it compromises the fit of the gloves.
Once the body and thumb opening are complete, it’s time to work on the fingers. You can either continue knitting the fingers in the same stitch pattern or switch to a different stitch for a textured look. Follow the pattern instructions for each finger, decreasing the number of stitches gradually to create a tapered shape.
Finally, when all the fingers are complete, bind off the stitches and cut the yarn, leaving a long tail for sewing up the sides of the gloves. Use a yarn needle to sew up the sides, making sure to leave an opening for the thumb. Once the sides are sewn up, weave in any loose ends, and your loom knit gloves are ready to keep your hands warm and cozy!
Casting On Stitches on the Loom
Casting on stitches on the loom is the first step in starting any loom knitting project. This process is essential for creating the foundation row of your project and sets the stage for the rest of the knitting. There are various methods for casting on stitches on the loom, and the method you choose will depend on the pattern instructions and your personal preference.
One common method for casting on stitches on the loom is the e-wrap cast on. To do this, start by placing a slipknot on one peg of the loom. Then, bring the working yarn around the peg in a clockwise direction, creating a loop. Bring the yarn across the front of the next peg and continue wrapping it around each peg in a clockwise direction, creating individual loops on each peg. Repeat this process until all desired stitches are cast on.
E-Wrap Cast On
- Start with a slipknot on one peg.
- Wrap the yarn around the peg in a clockwise direction, creating a loop.
- Bring the yarn across the front of the next peg and continue wrapping it around each peg in a clockwise direction.
- Repeat until all desired stitches are cast on.
Another method for casting on stitches on the loom is the crochet cast on. This method starts with a slipknot on one peg and requires a crochet hook. Begin by inserting the crochet hook into the first loop on the peg and pulling a loop of yarn through. Then, insert the hook into the next loop on the peg and pull another loop of yarn through. Continue this process until all desired stitches are cast on.
Crochet Cast On
- Start with a slipknot on one peg.
- Insert the crochet hook into the first loop on the peg and pull a loop of yarn through.
- Insert the hook into the next loop on the peg and pull another loop of yarn through.
- Repeat until all desired stitches are cast on.
Once the stitches are cast on, you are ready to begin your loom knitting project. The foundation row of stitches will determine the width of your project, so make sure to cast on the correct number of stitches according to your pattern instructions. Practice different casting on methods to find the one that works best for you and gives you the desired result in your loom knitting projects.
Knitting the Cuff of the Gloves
When knitting gloves, the cuff is an important element to consider. The cuff of the gloves provides a snug and secure fit around the wrist, helping to keep the hands warm and protected from the elements. It also adds a stylish touch to the overall design of the gloves.
To start knitting the cuff, you will first need to cast on an appropriate number of stitches, depending on the size of the gloves and the desired width of the cuff. You can use a long tail cast on or any other cast on method of your preference. Make sure to leave a long tail of yarn for later use.
Once the stitches are cast on, you can begin knitting the cuff using your preferred stitch pattern. Some popular stitch patterns for cuffs include ribbing, garter stitch, seed stitch, and moss stitch. These stitch patterns create a stretchy and textured cuff that is both functional and visually appealing.
If you are creating a ribbed cuff, you can alternate between knit and purl stitches to create a stretchy fabric. A common ribbing pattern for cuffs is a 1×1 rib, where you knit one stitch and purl one stitch across the row. This pattern creates a nice, snug fit around the wrist.
As you knit the cuff, make sure to periodically try it on to ensure that it is the desired length and snugness. You can adjust the length of the cuff by adding or removing rows of the stitch pattern. Once the cuff is the desired length, you can then bind off the stitches using your preferred bind off method.
In conclusion, the cuff of the gloves is an important element in knitting patterns. Carefully choosing the stitch pattern and adjusting the length can result in a functional and stylish cuff that adds both comfort and a touch of elegance to the gloves.
Creating the Thumb Opening
When knitting gloves, creating a thumb opening is an important step to ensure a comfortable fit and ease of movement. The thumb opening allows the thumb to be free while keeping the rest of the hand covered and warm. Here is a step-by-step guide on how to create the thumb opening in your loom knit gloves.
1. Mark the Thumb Placement
To start, you will need to determine the placement of the thumb on your glove. Measure your hand from the base of your palm to where you want the thumb to start. Mark this spot on your loom knitting tool or the loom itself with a stitch marker or a piece of contrasting yarn.
2. Create a Gap in the Knitting
Next, you will need to create a gap in the knitting at the marked spot. To do this, you can simply skip a few pegs or remove a few stitches, depending on the pattern you are following. This gap will serve as the thumb opening.
3. Continue Knitting the Glove
After creating the thumb opening, you can continue knitting the rest of the glove as directed by the pattern. Make sure to keep the gap for the thumb opening in place and maintain the correct stitch count.
4. Pick Up Stitches for the Thumb
Once you have completed the glove, it’s time to pick up the stitches for the thumb. Attach a new yarn strand to the first peg of the thumb opening and begin knitting in the round. Take care to evenly distribute the stitches around the thumb opening.
5. Shape the Thumb

To shape the thumb, you can gradually decrease the number of stitches or follow a specific pattern for thumb shaping. This will give the thumb a snug fit and prevent any gaps or loose areas. Continue knitting until the thumb reaches the desired length.
By following these steps, you can successfully create a thumb opening in your loom knit gloves, providing comfort and functionality. Remember to consult your specific pattern for any additional instructions or variations. Happy knitting!
Knitting the Main Body of the Gloves
Once you have cast on the required number of stitches for your gloves, you can begin knitting the main body. This is the part of the gloves that will cover your hand and fingers.
Instructions:
1. Knit in the round: Using your preferred method, join the round and begin knitting in the round. This will create a seamless tube for the main body of the gloves.
2. Knit the desired length: Continue knitting in the round until the main body of the gloves reaches the desired length. This will depend on the size of the gloves and your personal preference. You may want to try the gloves on periodically to check the fit as you go.
Note: If you are following a specific pattern, be sure to follow the instructions provided for the main body of the gloves.
3. Create the thumb opening: If your gloves have a thumb opening, you will need to knit a section with fewer stitches to create the opening. Follow the pattern instructions for the placement and size of the thumb opening. This typically involves knitting a set number of stitches flat, then rejoining in the round.
4. Continue knitting in the round: Once the thumb opening is created, continue knitting the main body of the gloves in the round until the desired length is reached.
5. Bind off: When you have reached the desired length, bind off all the stitches to finish the main body of the gloves. Cut the yarn, leaving a long tail for weaving in later. Your gloves are now ready for the next steps, such as knitting the fingers or adding any additional details.
Shaping the Fingers of the Gloves
When it comes to knitting gloves on a loom, shaping the fingers is an important step. This is what gives the gloves their form and allows for comfortable movement of the fingers. There are different methods you can use to shape the fingers, depending on the style and design of the gloves.
To start shaping the fingers, you will typically divide the stitches evenly among the fingers. This can be done by separating the stitches onto separate pegs or by using a stitch holder to hold the stitches for each finger. Once the stitches are divided, you can begin decreasing or increasing the stitches to shape the fingers.
One common method for shaping the fingers is to decrease the stitches gradually to form a tapered shape. This can be done by working a series of decrease rounds, where you knit or purl two stitches together at specific intervals. This helps create a more fitted and tapered finger. The number of decrease rounds and intervals will depend on the size and length of the fingers.
Another method for shaping the fingers is to increase the stitches to create a fuller, rounded shape. This can be done by working a series of increase rounds, where you add stitches by making yarn-overs or working specific increase stitches. This helps create a roomier finger that allows for better flexibility and movement.
It is important to try on the gloves as you go along to ensure the fingers are the right length and fit. This will help you make any necessary adjustments and ensure a comfortable fit. Once the fingers are shaped to your liking, you can continue knitting the rest of the glove, such as the hand and cuff.
In conclusion, shaping the fingers of loom knit gloves is a crucial step in creating a well-fitting and comfortable pair of gloves. Whether you choose to decrease or increase the stitches, it is important to take your time and make any necessary adjustments along the way. With practice and patience, you can create beautifully shaped fingers that will make your gloves both functional and stylish.
Finishing Off the Fingers
When it comes to finishing off the fingers on your loom knit gloves, there are a few different methods you can use. One popular option is to bind off the stitches using a crochet hook. This involves removing the stitches from the loom and then using the crochet hook to create a chain stitch that securely closes off the finger. This method gives the fingers a neat and clean finish.
Another option for finishing off the fingers is to use the Kitchener stitch. This technique involves grafting the stitches together to create a seamless join. To use this method, you will need to have some basic knitting skills, as it requires you to work with two separate pieces of yarn. The Kitchener stitch results in a smooth and seamless finish, making it a popular choice for loom knitters.
If you prefer a simpler method, you can also choose to gather the stitches at the top of each finger and then tie them off securely with a piece of yarn. This method creates a slightly more rustic look, but it is quick and easy to do.
Whichever method you choose, it’s important to take your time and ensure that the stitches are securely finished off. After all, the fingers are the parts of the gloves that will receive the most wear and tear, so you want to make sure that they are as strong and durable as possible.
Knitting the Thumb of the Gloves
When it comes to knitting the thumb of the gloves, there are a few steps to follow to ensure a proper fit and comfortable wear. The thumb is an important part of the gloves and needs to be knitted carefully to provide flexibility and movement for the hand.
To start knitting the thumb, first, locate the stitches that were set aside for the thumb opening. These stitches should have been held on a stitch holder or scrap yarn. Carefully transfer these stitches back onto the knitting needle, making sure to keep the same order as they were on the holder.
Next, join the new yarn to the working yarn, leaving a tail for weaving in later. Knit across the thumb stitches as instructed in the pattern, making sure to maintain an even tension.
Once the thumb stitches have been worked, it’s time to shape the thumb. This is usually done by decreasing stitches on each side of the thumb to create a tapered shape. Follow the pattern instructions for the specific decreases and continue working until the desired length for the thumb is reached.
After completing the thumb, it’s important to neatly weave in any loose ends of yarn and secure them so they don’t unravel. This can be done using a yarn needle or crochet hook. Once all the loose ends have been secured, the gloves are ready to be worn and enjoyed.
Binding Off Stitches and Finishing the Gloves
Once you have completed knitting all the necessary rows for your gloves, it is time to bind off the stitches and finish them off. Binding off is the process of securing the stitches and creating a neat edge. There are several methods you can use to bind off, but for loom knitting gloves, the basic bind off method works well.
To bind off, start by knitting two stitches. Then, using a knitting tool or crochet hook, lift the first stitch over the second stitch and off the peg. Continue this process until you have only one stitch left on the loom. Finally, cut the working yarn, leaving a long tail, and pull it through the final stitch to secure it.
After binding off, you will need to finish off any loose ends of yarn. Use a tapestry needle to weave these ends into the fabric of the gloves, making sure to hide them in the stitches so they are not visible. This will give your gloves a clean and professional look.
Once the loose ends are woven in, you can try on your gloves and see how they fit. If necessary, you can make adjustments by adding or removing rows. When you are satisfied with the fit, you can consider adding any additional embellishments or decorations to personalize your gloves.
Remember to take your time and be patient with the process of binding off and finishing your gloves. With practice, you will become more comfortable and confident in your loom knitting skills. Enjoy the satisfaction of completing your own handmade gloves, ready to keep your hands warm and cozy during the colder months!
Tips and Tricks for Perfect Loom Knit Gloves
Making gloves on a loom can be challenging, but with the right tips and tricks, you can create perfect gloves every time. Here are some handy tips to help you on your loom knitting journey:
1. Use the right loom size
Choosing the right loom size is crucial for a perfect fit. Measure your hand and refer to a size chart to determine the appropriate loom size for your gloves. Remember that loom knitting tends to produce stretchier fabric, so it’s better to size down if you’re in between sizes.
2. Pay attention to gauge
Gauge refers to the number of stitches and rows per inch. It is essential to check your gauge before starting your project to ensure the correct sizing. If your gauge doesn’t match the pattern, try changing loom size or adjusting your tension until you achieve the desired gauge.
3. Use stitch markers
When working on gloves, it’s easy to get confused about the thumb and finger placements. Using stitch markers can help you keep track of the different sections and ensure proper placement for the thumb and fingers.
4. Try different stitch patterns
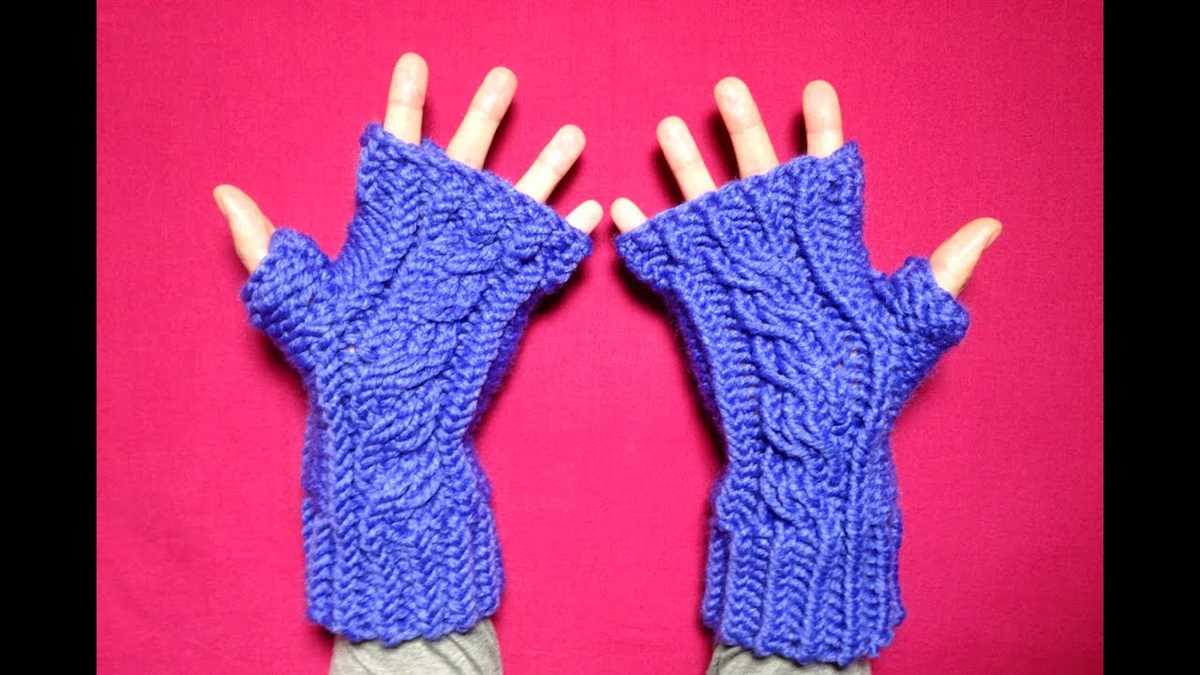
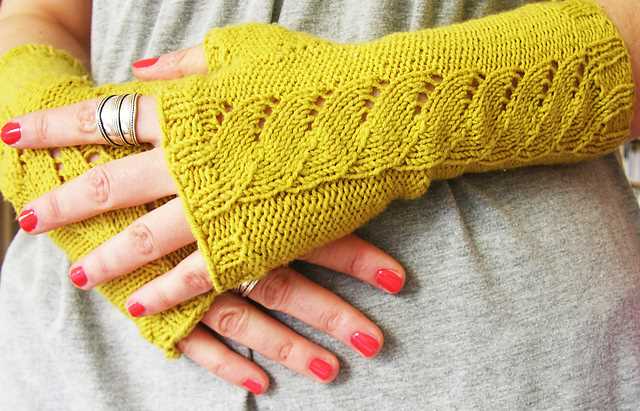
Don’t be afraid to experiment with different stitch patterns to add some texture and variety to your gloves. Ribbing, cables, or simple lace patterns can elevate the look of your gloves and make them more interesting.
5. Pay extra attention to the thumb
The thumb is a vital part of a glove, and it’s essential to give it extra attention. You can try different techniques like an afterthought thumb or a thumb gusset to achieve the perfect fit and comfort.
6. Blocking and seaming
Once you have finished knitting your gloves, don’t forget to block them to shape and size. Blocking helps relax the stitches and evens out the tension. Additionally, take your time to seam your gloves neatly for a professional finish.
In conclusion
Knitting gloves on a loom requires attention to detail, patience, and practice. By following these tips and tricks, you’ll be well on your way to creating perfect loom knit gloves. Don’t be afraid to experiment and customize your gloves to suit your preferences. Happy knitting!