
Knitting is a popular craft that has been enjoyed by people of all ages for centuries. It is not only a creative way to stay busy, but it also helps to promote relaxation and reduce stress. If you are a beginner knitter looking to start a new project, knitting squares is a great way to practice your skills and create something beautiful at the same time.
Knitting squares is perfect for beginners because it allows you to learn and practice different techniques, such as casting on, knitting, purling, and binding off. By knitting squares, you can experiment with different stitch patterns and colors, giving you the opportunity to put your own personal touch on your knitting.
In this article, we will explore various knitting squares patterns that are perfect for beginners. Whether you are interested in creating a blanket, a scarf, or even a pillow, these patterns will help you enhance your knitting skills and create a finished project that you can be proud of. So grab your knitting needles and let’s get started on your knitting journey!
Knitting Squares Patterns for Beginners
If you’re a beginner at knitting and looking for a simple yet rewarding project, knitting squares is a great place to start. Knitting squares allows you to practice the basic knitting stitches and techniques while creating something useful and versatile. Whether you’re a complete novice or have some knitting experience, there are numerous square patterns available that are perfect for beginners.
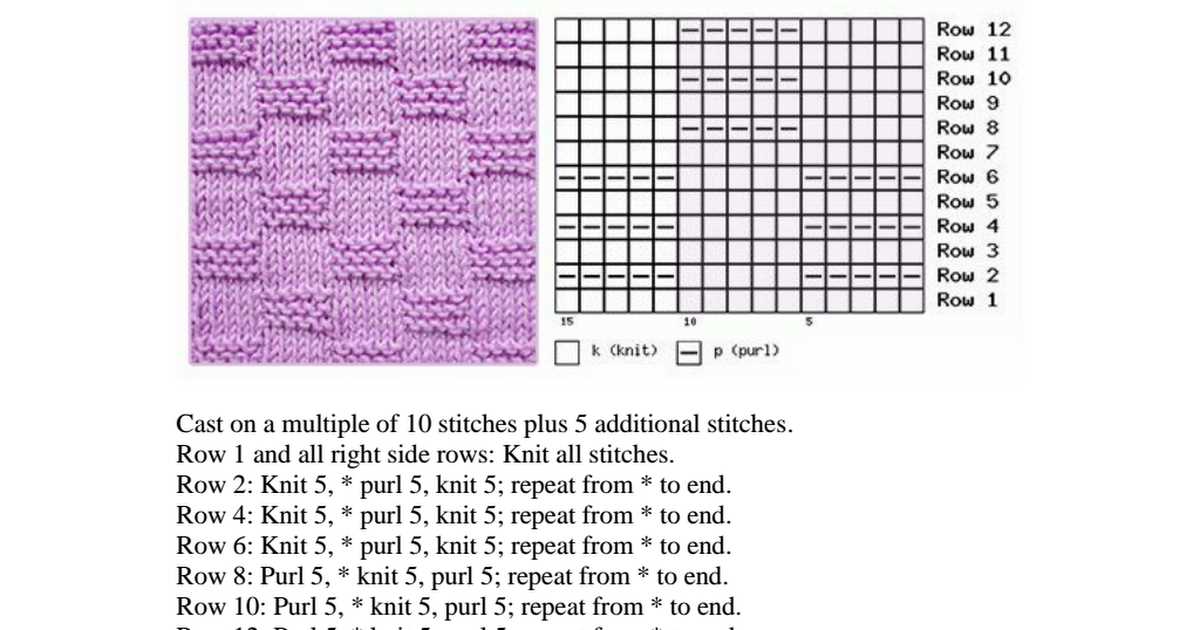
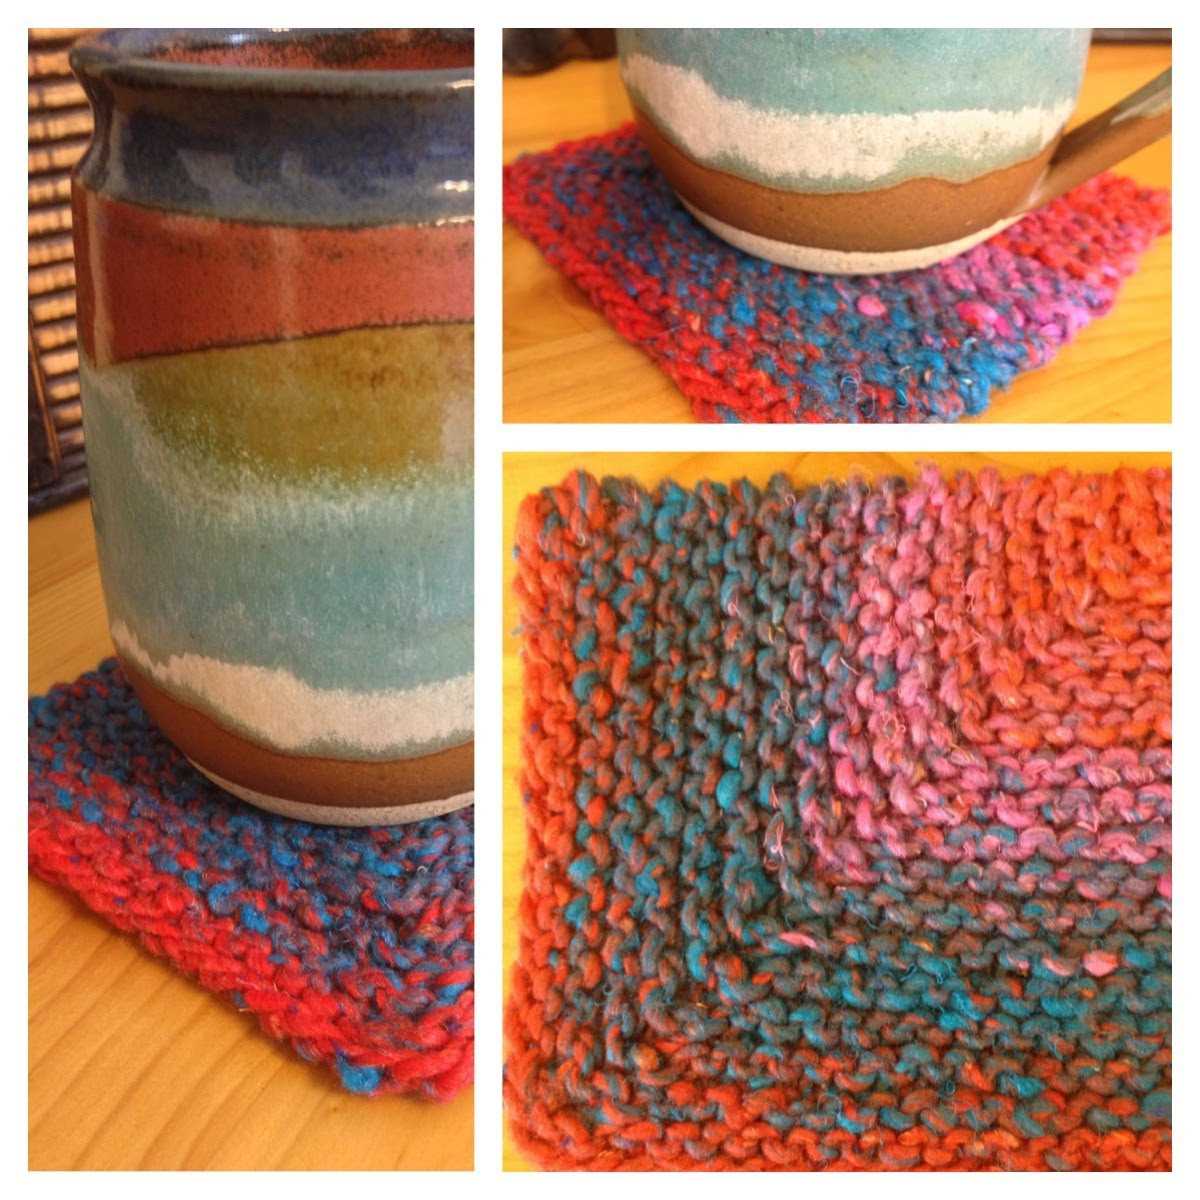
Basketweave Square: The basketweave pattern is a classic and timeless design that is ideal for beginners. It involves alternating knits and purls to create a textured pattern that resembles a woven basket. This pattern is easy to memorize and creates a beautiful square that can be used for blankets, pillows, or even as standalone coasters.
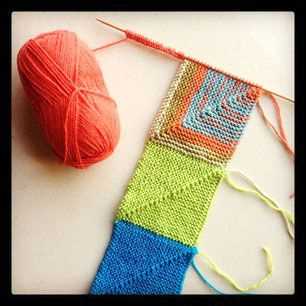
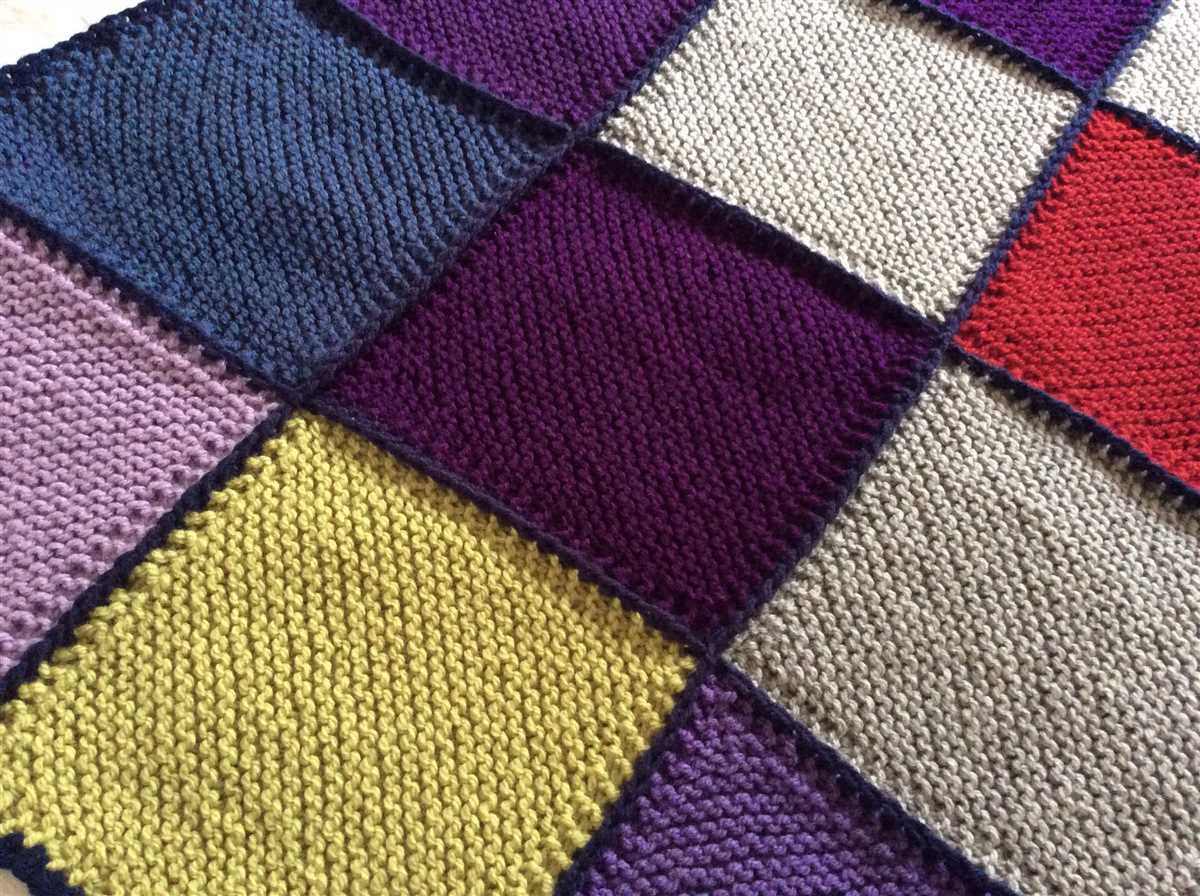
Garter Stitch Square: The garter stitch is the most basic knitting stitch, making it perfect for beginners. It involves knitting every stitch in every row, creating a squishy and textured fabric. A garter stitch square is simple to knit and can be used as a building block for larger projects like blankets or scarves.
- Materials: Worsted weight yarn and appropriate-sized knitting needles.
- Instructions:
- Cast on 20 stitches.
- Knit every row until the square measures desired size (e.g., 6 inches).
- Bind off all stitches.
Seed Stitch Square: The seed stitch is another beginner-friendly pattern that creates a textured and reversible fabric. It involves alternating knits and purls in a specific pattern to create a bumpy texture. A seed stitch square can be used to add interest and visual appeal to any knitting project.
| Row | Stitches |
|---|---|
| 1 | K1, P1, repeat to end of row. |
| 2 | P1, K1, repeat to end of row. |
| 3 and all odd rows | Repeat row 1. |
| 4 and all even rows | Repeat row 2. |
These are just a couple of examples of knitting square patterns for beginners. The key is to start with simple stitches and gradually increase the complexity as you gain more confidence. Remember to practice, be patient, and enjoy the process of learning and creating with knitting.
Basic Knitting Stitches
When it comes to knitting, understanding and mastering the basic knitting stitches is essential. These stitches form the foundation of many knitting patterns and can be used to create a wide range of designs. Whether you’re a beginner or an experienced knitter looking to refresh your skills, learning these basic stitches is the first step towards creating beautiful knitted items.
1. Knit Stitch
The knit stitch, often simply referred to as the ‘k’, is one of the most basic stitches in knitting. It creates a ‘v’ shape on the fabric and is commonly used for creating a smooth and flat texture.
2. Purl Stitch
The purl stitch, denoted as the ‘p’ in knitting patterns, is the reverse of the knit stitch. It creates a raised bump on the fabric and is often used to create a textured surface or to add variety to a knitted piece.
3. Garter Stitch
The garter stitch is created by knitting every row, resulting in a fabric with ridges on both sides. It is a simple and reversible stitch that is often used for scarves, blankets, and other projects where you want a squishy and textured fabric.
4. Stockinette Stitch
The stockinette stitch is created by alternating rows of knit and purl stitches. This stitch creates a smooth and flat fabric on one side, called the “right side”, and a textured surface on the other side, called the “wrong side”. It is commonly used for creating clothing items, such as sweaters, hats, and socks.
5. Ribbing Stitch
The ribbing stitch is a combination of knit and purl stitches repeated in a specific pattern. It creates a stretchy and elastic fabric that is often used for cuffs, hems, and collars. Common ribbing patterns include the 1×1 rib (alternating one knit stitch and one purl stitch) and the 2×2 rib (alternating two knit stitches and two purl stitches).
These are just a few of the basic knitting stitches that every knitter should know. By mastering these stitches, you’ll have a solid foundation to create a wide range of knitting projects and explore more advanced techniques.
Choosing the Right Yarn and Needles
When it comes to knitting squares, choosing the right yarn and needles is essential to ensure that your project turns out as planned. The yarn and needles you select will determine the size, texture, and appearance of your squares, so it’s important to consider several factors before making your final decision.
Yarn Weight: One of the first things to consider is the weight of the yarn. For beginners, it’s often recommended to start with a medium or worsted weight yarn. This type of yarn is easier to work with and can help you achieve consistent tension in your stitches. However, if you prefer a lighter or chunkier look, you can choose a different weight of yarn.
Needle Size: The size of your knitting needles will also affect the outcome of your squares. The larger the needle size, the looser and larger your stitches will be. Conversely, smaller needle sizes will result in tighter and smaller stitches. For beginners, it’s generally recommended to use medium-sized needles that match the yarn weight you’ve chosen.
Material: Another factor to consider is the material of the yarn and needles. Yarn comes in various materials such as acrylic, wool, cotton, and blends. Each material has its own characteristics, so it’s important to choose one that suits your preferences and the intended use of your squares. Similarly, knitting needles can be made of different materials, including wood, metal, and plastic. Some knitters prefer the grip and flexibility of wooden needles, while others prefer the smoothness of metal needles.
Color and Texture: Lastly, consider the color and texture of the yarn you choose. This is where you can let your creativity shine and select a yarn with the desired color palette and texture. Solid-colored yarn can give your squares a classic and clean look, while variegated or self-striping yarn can add visual interest. Additionally, yarns with different textures, such as boucle or mohair, can create unique and textured squares.
Overall, choosing the right yarn and needles requires some consideration and experimentation. Don’t be afraid to try different options to find what works best for you and your project. Remember to have fun and enjoy the process of knitting your squares!
Simple Square Pattern
Creating knitted squares is a great way for beginners to practice their knitting skills and create simple yet beautiful projects. A square is a basic shape that can be used in a variety of ways, making it a versatile piece for any project. Here is a simple square knitting pattern that is perfect for beginners.
Materials:
- Worsted weight yarn (color of your choice)
- Size 8 knitting needles
- Scissors
- Tapestry needle
Instructions:
- Cast on 20 stitches.
- Knit every row until your work measures 4 inches in length.
- Bind off all stitches.
- Cut the yarn, leaving a 6-inch tail.
- Thread the tapestry needle with the yarn and weave in any loose ends.
Once you have completed your square, you can use it as a base for other projects such as blankets, pillows, or even as a patch on a bag or sweater. The simplicity of this pattern allows for endless possibilities and creativity. Experiment with different colors and textures of yarn to create unique and personalized squares.
Knitting squares is a relaxing and rewarding activity for beginners and experienced knitters alike. It is a great way to practice different stitches and techniques, and also provides a sense of accomplishment when you see your finished square. So grab your knitting needles and yarn, and start creating beautiful squares today!
Garter Stitch Square Pattern
For beginners looking to practice their knitting skills and create something simple yet beautiful, the garter stitch square pattern is a great option. The garter stitch is one of the most basic and versatile knitting stitches, making it perfect for those starting out in the craft.
To get started on your garter stitch square, you’ll need some basic knitting supplies, including knitting needles and yarn. Choose a yarn weight that you feel comfortable working with, and select a pair of needles that is appropriate for your yarn. Once you have your supplies ready, you’re all set to begin!
Instructions:
- Cast on an even number of stitches. For example, you can start with 20 stitches.
- Knit every stitch in each row, without any purling or other stitch variations. This creates the garter stitch pattern.
- Continue knitting row after row until your square reaches the desired size. You can measure your square periodically to ensure it’s coming along as planned.
- Once you’re satisfied with the size of your garter stitch square, bind off all stitches to finish the piece.
Tips:
- Pay attention to your tension while knitting, and try to keep it consistent throughout your project.
- If you’re unsure about the size of your square, you can use a tape measure or ruler to measure the dimensions as you go.
- If you want to add some color to your garter stitch square, you can experiment with using different colored yarns or create stripes by switching yarns every few rows.
- Once you’ve mastered the garter stitch square, you can use it as a building block for other projects, such as blankets, scarves, or even garments.
Overall, the garter stitch square pattern is a fantastic way for beginners to practice their knitting skills and create a simple yet beautiful piece. With its versatility and ease, the garter stitch is a stitch that should be in every knitter’s repertoire.
Stockinette Stitch Square Pattern
The Stockinette Stitch is one of the basic knitting stitches that is perfect for beginners. It creates a smooth, flat fabric with a distinct pattern on one side and a neat, uniform texture on the other side. This pattern is often used for creating simple and classic garments like sweaters, scarves, and blankets. In this article, we will provide a simple pattern for knitting a Stockinette Stitch square.
To begin knitting the Stockinette Stitch square, you will need a pair of knitting needles and a ball of yarn. Start by casting on an even number of stitches, such as 20 stitches. Then, begin knitting every row in the “knit” stitch. This means that you will insert the needle into each stitch from left to right, wrapping the yarn around the needle, and pulling it through to create a new stitch. Repeat this process for every stitch in the row until you reach the end.
To create the desired smooth texture of the Stockinette Stitch, you need to alternate between knitting and purling rows. After completing a row of knit stitches, turn your work and start the purl row by inserting the needle from right to left into each stitch. Instead of wrapping the yarn around the needle, you will bring it in front of the work and wrap it around the needle in the opposite direction. Then, pull the yarn through to create a new stitch. Repeat this process for every stitch in the row.
Continue alternating between knitting and purling rows until your square reaches the desired size. To finish, bind off the stitches by knitting the first two stitches, then using the left needle to lift the first stitch over the second stitch and off the needle. Repeat this process for each stitch until only one stitch remains. Cut the yarn, leaving a tail of about 6 inches, and pull it through the last stitch to secure it.
The Stockinette Stitch square pattern is a great way for beginners to practice the basics of knitting and create a simple yet elegant fabric. Once you have mastered this pattern, you can experiment with different yarns, colors, and stitch combinations to create unique and personalized projects.
Seed Stitch Square Pattern
The seed stitch is a popular knitting pattern that creates a richly textured fabric with a combination of knit and purl stitches. It is perfect for beginners who want to practice different stitch techniques and create beautiful squares for various knitting projects.
To knit a seed stitch square, you will need a pair of knitting needles and your choice of yarn. Begin by casting on an odd number of stitches for the desired width of the square. This pattern can be easily adapted to any size square by adjusting the number of cast-on stitches.
Once you have cast on your stitches, the seed stitch pattern is simple to follow. Begin by knitting the first stitch, then purling the next stitch. Repeat this pattern across the row until you reach the end. When you start the next row, purl the first stitch and then knit the next stitch. Repeat this pattern across the row.
Tips:
- Use stitch markers or a piece of contrasting yarn to keep track of your rows and stitches.
- Make sure to keep your tension consistent throughout the project to create an even and professional-looking square.
- Experiment with different yarn colors and textures to create unique seed stitch squares.
By knitting seed stitch squares, beginners can gain confidence in their knitting skills and create a versatile fabric that can be used in a variety of projects, such as blankets, scarves, or even a patchwork sweater. With practice and patience, you will master the seed stitch pattern and be able to incorporate it into your knitting repertoire.
Ribbing Stitch Square Pattern
If you’re a beginner knitter looking for an easy yet stylish project, the ribbing stitch square pattern is a great choice. Ribbing stitch gives your knitting a stretchy, textured look, making it perfect for cuffs, collars, and borders. With this pattern, you’ll learn the basic ribbing stitch pattern and create a simple square that you can use as a patch, coaster, or even incorporate into a larger project.
Materials Needed:

- Worsted weight yarn in your desired color
- Size 8 knitting needles or size needed to obtain gauge
- Tapestry needle for weaving in ends
- Scissors
Instructions:
- Cast on an even number of stitches (e.g. 20 stitches).
- Row 1: *Knit 1, purl 1; repeat from * to the end of the row.
- Row 2: *Purl 1, knit 1; repeat from * to the end of the row.
- Repeat Rows 1 and 2 until the knitting measures the desired size for your square.
- Bind off all stitches in pattern.
- Weave in any loose ends and trim excess yarn.
The ribbing stitch square pattern is a great way to practice your knitting skills and create a versatile square that can be used in various projects. You can experiment with different yarn colors and sizes to create squares of different dimensions. This simple pattern is sure to become a staple in your knitting repertoire.
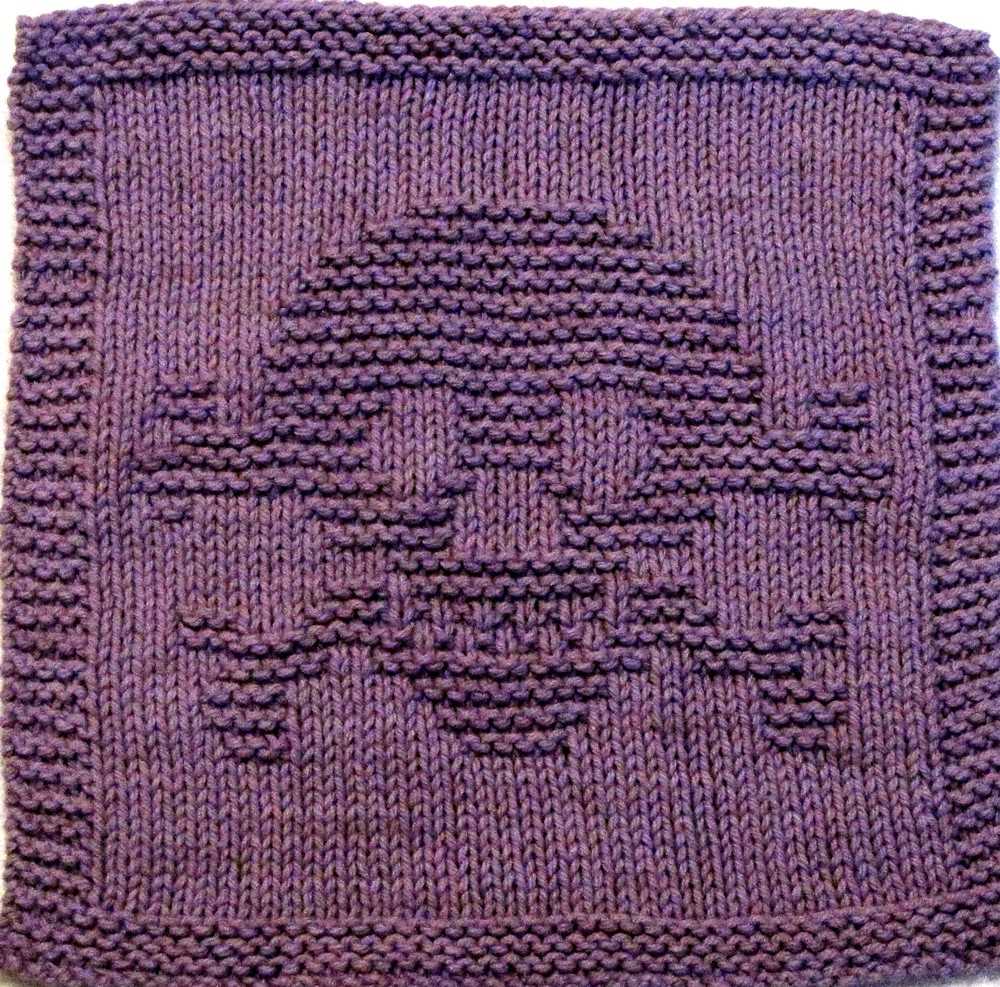
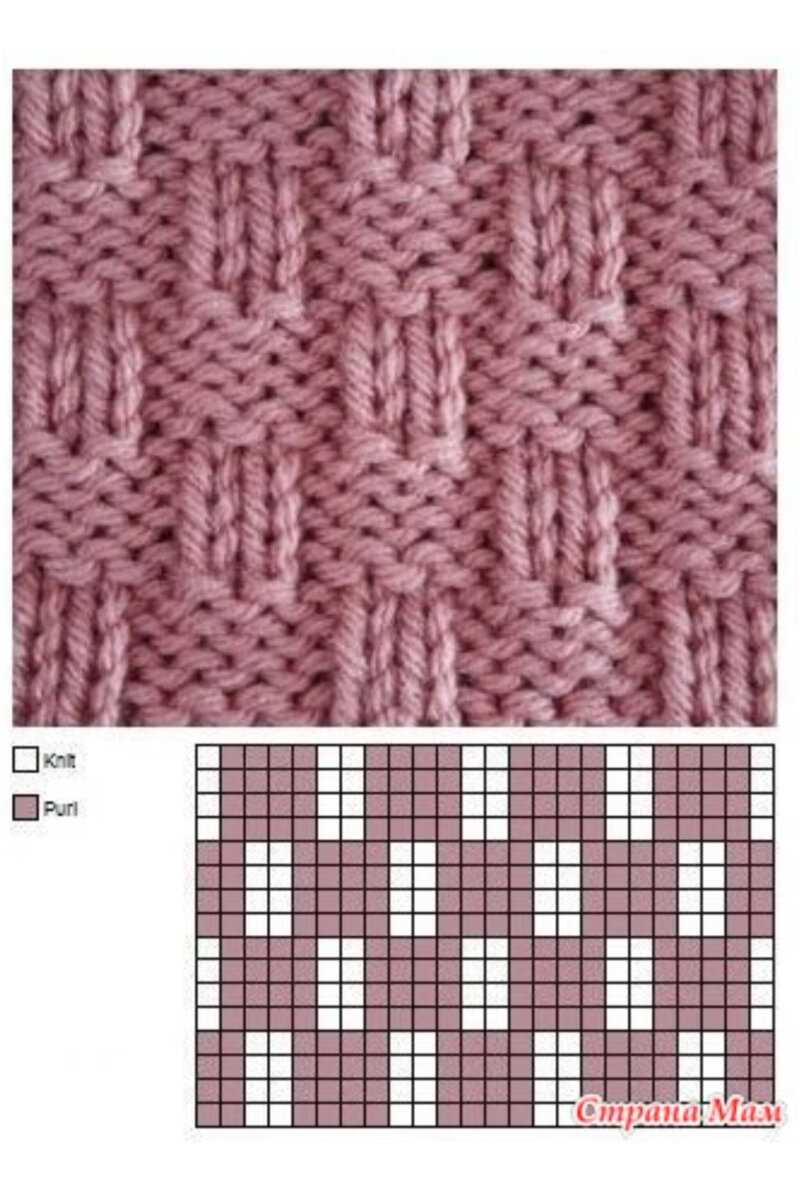
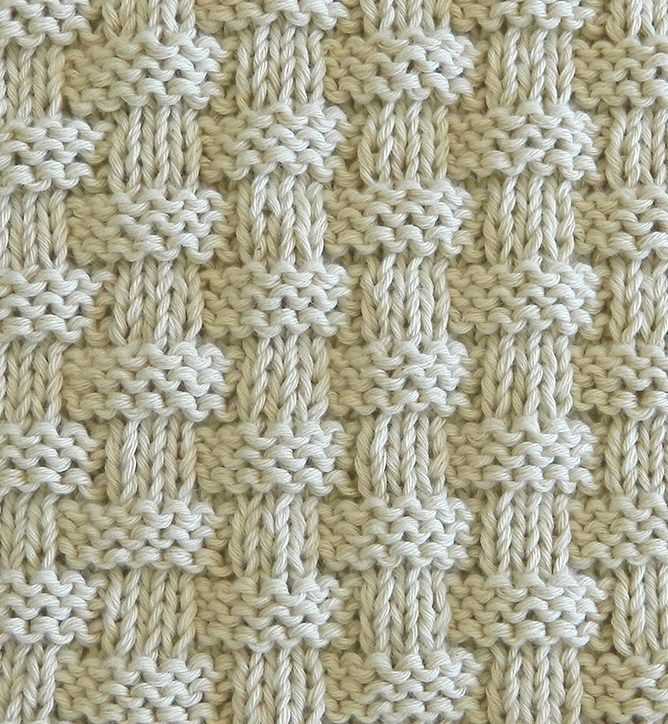
Basketweave Stitch Square Pattern
The basketweave stitch is a classic knitting pattern that creates a textured, woven look. It is a great choice for beginners as it is relatively easy to learn and creates a visually appealing square. This pattern is perfect for making blankets, scarves, and other cozy knit items.
To knit the basketweave stitch square, you will need a pair of knitting needles and yarn of your choice. Begin by casting on an even number of stitches. For this pattern, we will use a total of 20 stitches.
Row 1: Knit across all stitches.
Row 2: Purl across all stitches.
Repeat these two rows for the desired length of the square. The basketweave pattern is created by alternating between knitting and purling rows. This creates a series of raised and recessed blocks that resemble a woven basket.
You can customize the size of your basketweave stitch square by adjusting the number of stitches you cast on and the number of rows you knit. Experiment with different yarns and needle sizes to achieve the desired texture and drape.
Once you have completed your basketweave stitch square, you can continue knitting additional squares to create a larger project or use it as a standalone piece. The possibilities are endless with this versatile stitch pattern!
Cable Stitch Square Pattern
The cable stitch is a popular and intricate pattern in knitting that adds texture and visual interest to any project. It is commonly used to create cables, twists, and braids in knitted fabric. With its combination of crossing stitches, the cable stitch creates a classic and timeless look.
To create a cable stitch square pattern, you will need basic knitting skills and some knowledge of cable knitting techniques. The pattern consists of a center cable flanked by simple textured stitches. This square can be used as a standalone piece or combined with other squares to create larger projects such as blankets, scarves, or even garments.
To knit the cable stitch square, you will need yarn, appropriate knitting needles, and a cable needle. The pattern typically begins with a few rows of a basic stitch pattern, such as garter stitch or stockinette stitch, to serve as the foundation for the cable. Then, the cable pattern is worked over a set number of stitches. This usually involves holding some stitches on the cable needle while crossing other stitches in front or behind them.
- Cast on the required number of stitches for the square.
- Knit a few rows in your chosen stitch pattern.
- Begin the cable pattern by following the instructions for the specific cable stitch design you have chosen.
- Repeat the cable pattern as specified for the desired number of times.
- End the square with a few rows of your chosen stitch pattern.
- Bind off all stitches to finish the square.
By experimenting with different cable stitch designs and combining them with other square patterns, you can create unique and beautiful knitted projects. The cable stitch square pattern is a great way for beginners to practice and master cable techniques while creating something functional and aesthetically pleasing.
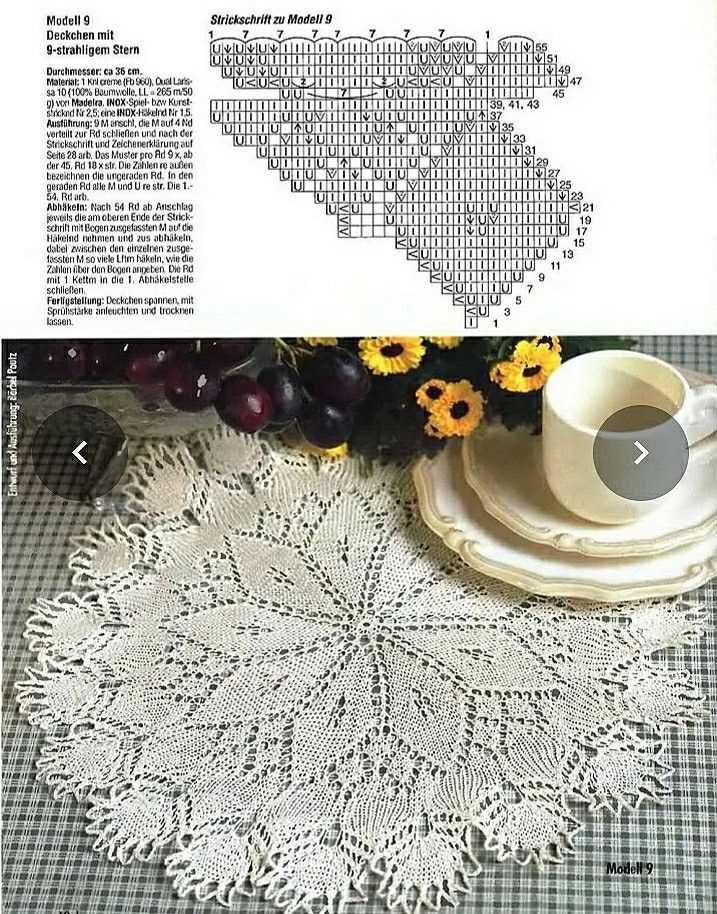
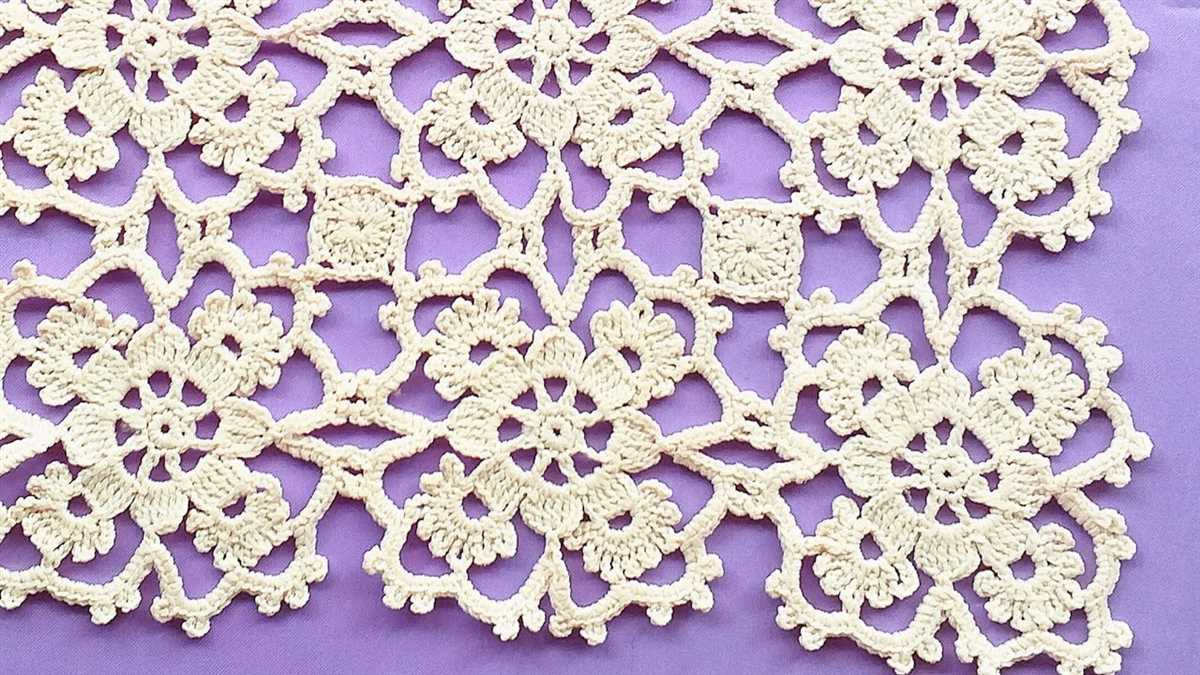
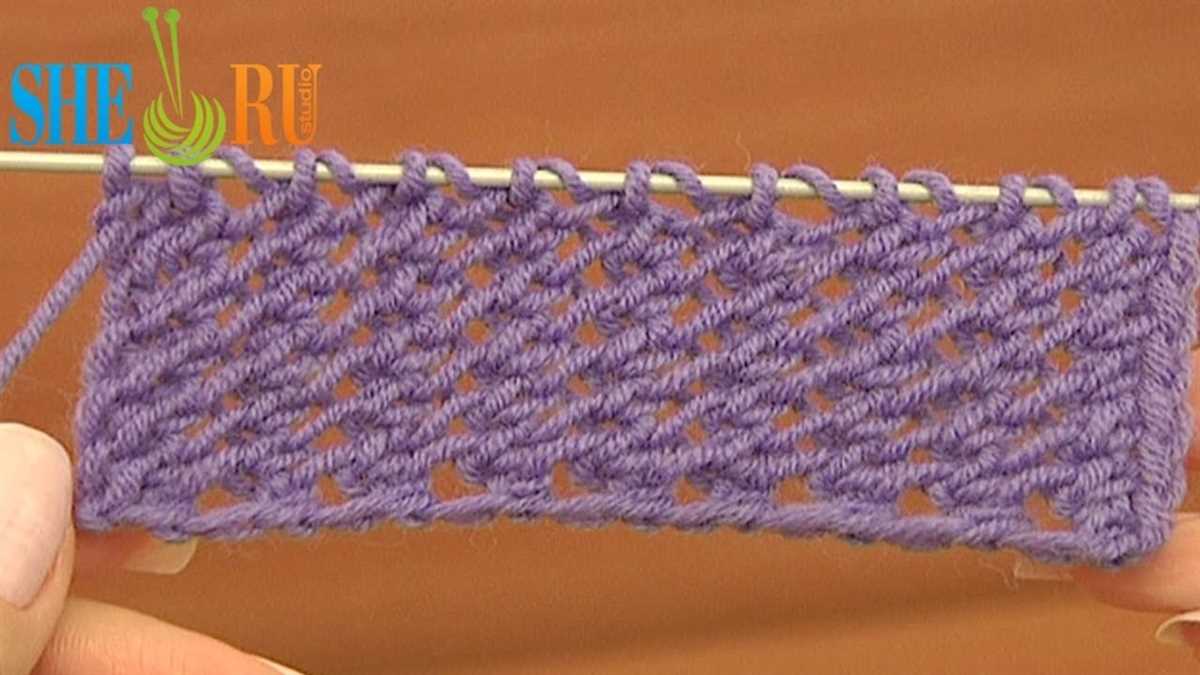
Lace Stitch Square Pattern

If you’re looking to add a touch of elegance to your knitting project, the lace stitch square pattern is the perfect choice. The delicate and intricate design will create a stunning visual effect that will impress everyone who sees it.
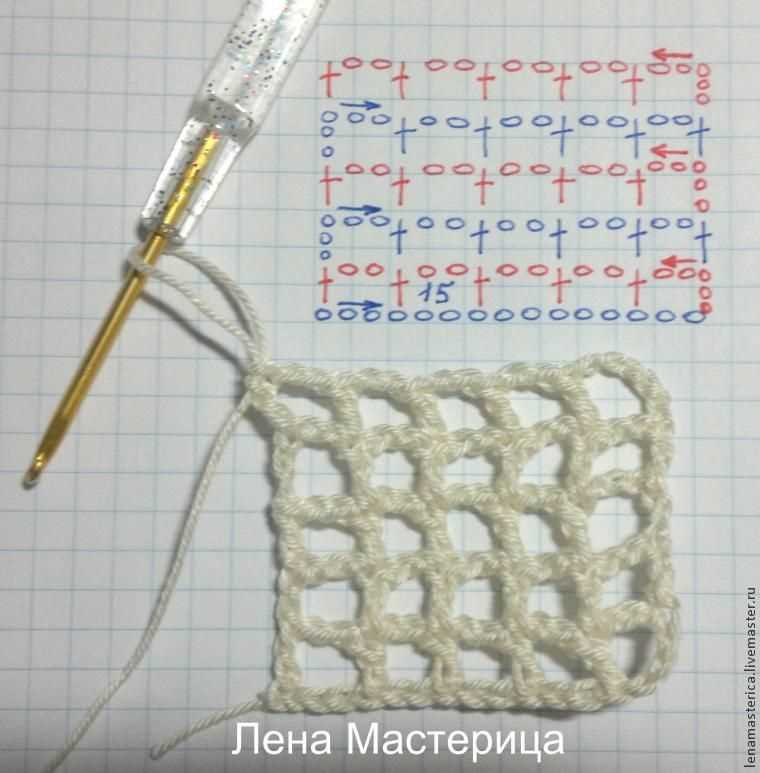
To create the lace stitch square pattern, you’ll need to follow a specific knitting pattern. This pattern will guide you through the steps of creating the lace stitches, which involves creating yarn overs and knitting two stitches together to form eyelets and decreases. The result is a beautiful lace-like pattern.
To begin the lace stitch square pattern, cast on the required number of stitches and follow the chart or written instructions provided. The pattern will indicate how to work the yarn overs, decreases, and other stitches necessary to create the lace design. Pay close attention to the pattern and take your time to ensure accuracy.
Once you’ve completed the lace stitch square pattern, you can use it in a variety of ways. It can be a standalone square to create a unique knitted piece, or you can combine multiple lace stitch squares to make a larger project, such as a blanket or a shawl. The possibilities are endless!
In conclusion, the lace stitch square pattern is an excellent choice for knitters looking to challenge themselves and create something truly beautiful. With its delicate and intricate design, it’s sure to impress and amaze. So grab your needles, choose your yarn, and dive into the world of lace knitting!
Tips for Caring for Your Knitted Squares
Once you’ve finished knitting your squares, it’s important to care for them properly to ensure their longevity and durability. Here are some tips to help you take care of your knitted squares:
1. Handwash or Use a Gentle Cycle

Knitted squares are often delicate, so it’s best to handwash them to avoid any damage. Fill a basin with lukewarm water and a mild detergent specifically designed for wool or delicate fabrics. Gently agitate the squares in the water, then rinse them thoroughly. Avoid wringing or stretching the squares to prevent them from losing their shape. If you prefer to use a washing machine, choose the gentle cycle and use a mesh laundry bag to protect the squares.
2. Dry Flat
To avoid any distortion, it’s important to dry your knitted squares flat. Lay them on a clean, absorbent towel or a mesh drying rack, making sure they are in their original shape. Avoid hanging them up to dry, as this can cause the squares to stretch or lose their shape.
3. Store Carefully
When storing your knitted squares, fold them neatly and place them in a breathable fabric bag or container. Avoid storing them in plastic bags, as this can trap moisture and lead to mold or mildew growth. It’s also a good idea to add some lavender sachets or cedar balls to deter moths and other pests.
4. Mend and Repair
If you notice any loose stitches or yarn ends on your knitted squares, make sure to mend them promptly. Use a darning needle or crochet hook to weave in any loose ends or secure loose stitches. Regularly inspect your squares for any signs of wear and tear, and address any issues before they become more significant.
Summary:
- Handwash or use a gentle cycle when cleaning your knitted squares.
- Dry them flat to maintain their shape.
- Store them in a breathable fabric bag or container.
- Mend any loose stitches or yarn ends promptly.
By following these tips, you’ll be able to keep your knitted squares in great condition for years to come. Happy knitting!