
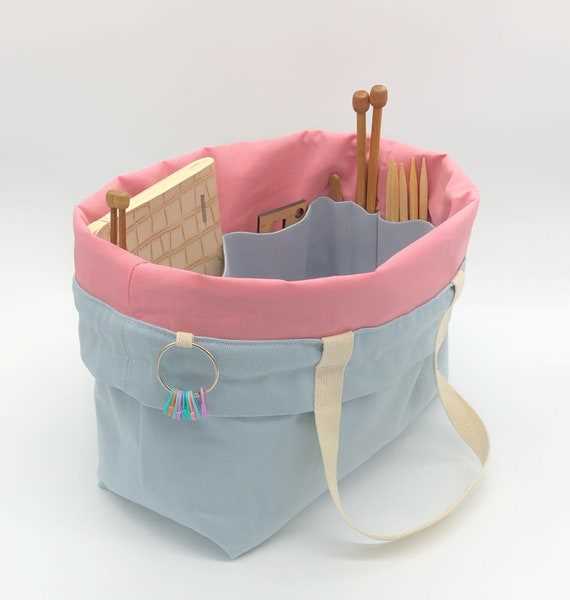
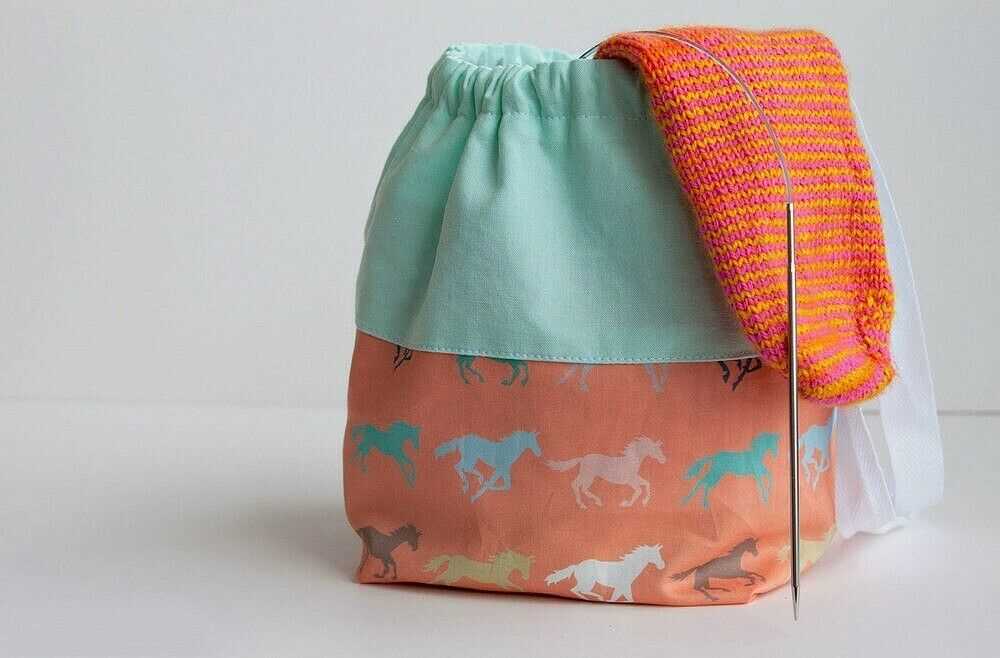
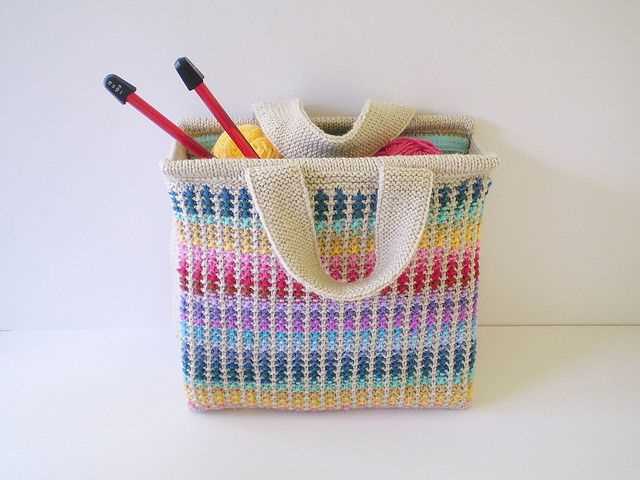
If you’re an avid knitter, you know how important it is to keep all of your supplies organized and easily accessible. A good knitting project bag is a must-have for any knitting enthusiast. It not only keeps your yarn, needles, and other tools in one place, but it also allows you to take your knitting projects on the go. Whether you’re knitting at home or on a long journey, you can always have your current project with you and continue working on it whenever you have some free time.
While there are many knitting project bags available for purchase, making your own bag can be a fun and rewarding experience. Not only do you get to choose your own fabric and design, but you can also customize the bag to fit your specific needs. Plus, knitting project bags make great gifts for fellow knitters!
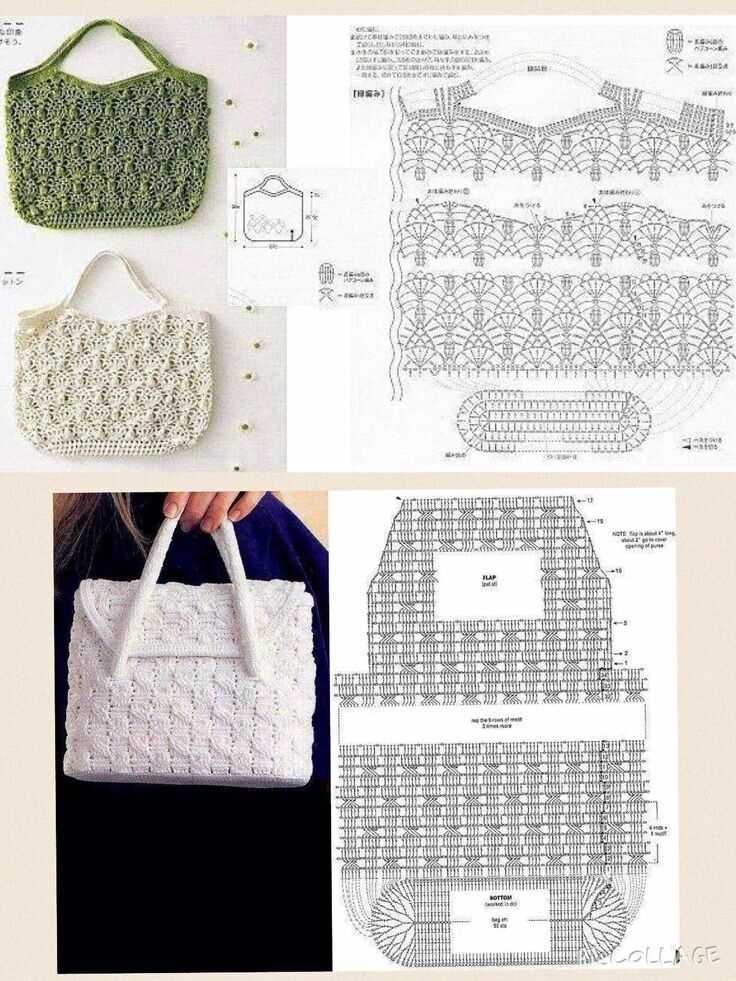
In this article, we will provide you with a knitting project bag pattern that you can easily follow to create your own bag. The pattern includes step-by-step instructions and a list of materials needed. Whether you’re a beginner or an experienced knitter, you’ll find this pattern easy to follow and the end result will be a functional and stylish knitting project bag.
How to Make a Knitting Project Bag: Step-by-Step Guide
A knitting project bag is a convenient and stylish accessory for any knitter. It helps to keep your knitting supplies organized and easily accessible, whether you’re knitting at home or on the go. Making your own knitting project bag allows you to customize the size, design, and features to suit your specific knitting needs.
Here is a step-by-step guide on how to make a knitting project bag:
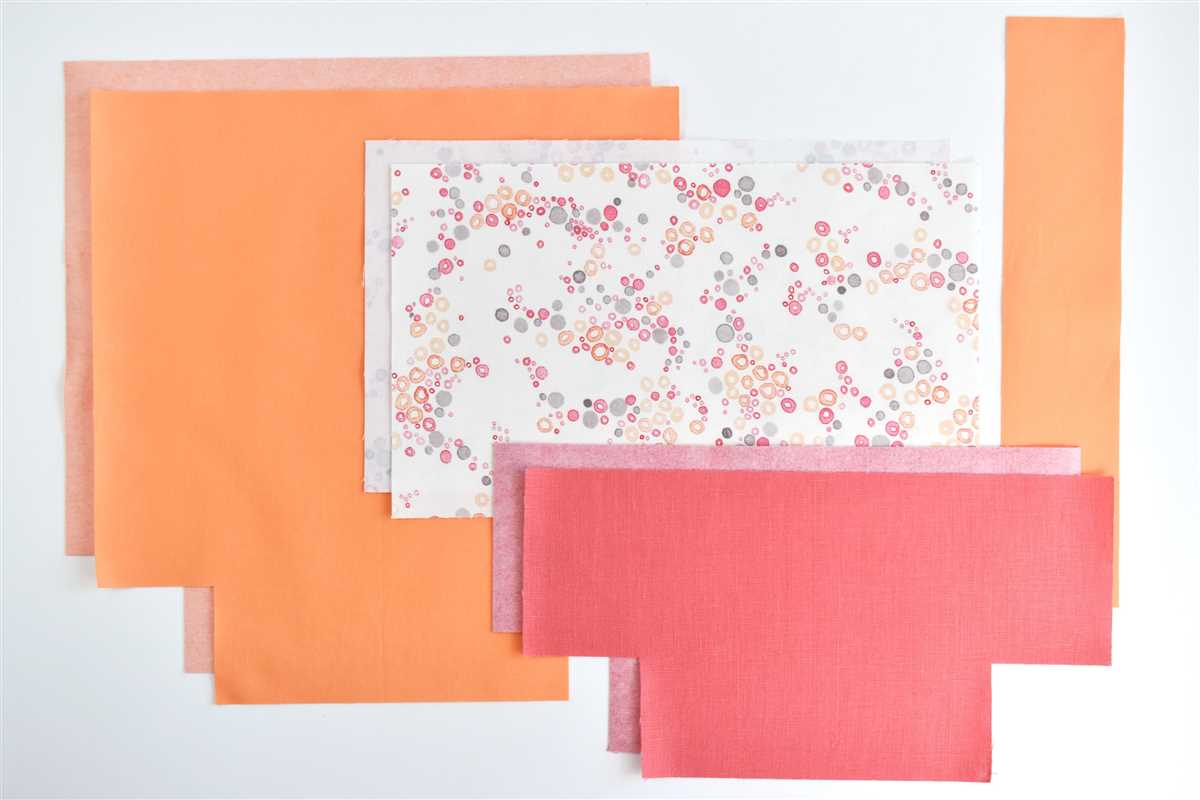
- Gather Your Materials: To make a knitting project bag, you will need fabric for the exterior and lining, a zipper, interfacing, thread, and basic sewing supplies such as scissors, pins, and a sewing machine. Choose a fabric that is durable and easy to wash.
- Measure and Cut the Fabric: Begin by measuring and cutting the fabric for the exterior, lining, and interfacing. The size of your bag will depend on the size of your knitting project, but a typical size is around 12 inches by 12 inches. Make sure to add seam allowances to your measurements.
- Apply Interfacing: Iron the interfacing onto the wrong side of the exterior fabric. This will give the bag structure and stability.
- Sew the Zipper: Place the zipper face down on the right side of the exterior fabric, aligning the edges. Sew along the edges using a zipper foot on your sewing machine.
- Attach the Lining: Place the lining fabric right sides together with the exterior fabric and zipper. Sew along the edges, leaving a small opening for turning. Trim the excess fabric and clip the corners to reduce bulk.
- Finish the Bag: Turn the bag right side out through the opening. Press the bag to flatten the seams and topstitch around the edges to give it a finished look.
- Add Optional Features: Depending on your personal preferences, you can add additional features to your knitting project bag, such as interior pockets, a keychain holder, or a strap for easy carrying.
Once you have completed these steps, you will have your very own handmade knitting project bag. It’s now ready to be filled with your favorite knitting projects and supplies. Enjoy your organized and stylish knitting experience!
Choosing the Right Fabric for Your Knitting Project Bag
When it comes to knitting project bags, choosing the right fabric is an important decision. The fabric you choose will determine the durability, functionality, and overall aesthetic of your bag. Here are some factors to consider when selecting fabric for your knitting project bag:
Durability
- One of the key considerations when choosing fabric for your knitting project bag is its durability. You want a fabric that can withstand the weight and pressure of your knitting projects, as well as frequent use and handling. Look for fabrics that are strong, sturdy, and able to withstand the wear and tear of everyday use.
- Cotton canvas is a popular choice for knitting project bags due to its durability. It is a heavy-duty fabric that can withstand heavy loads without tearing or stretching.
Water Resistance
- Another important factor to consider is water resistance. Knitting projects often involve working with water or getting wet, so having a bag that can protect your projects from moisture is essential.
- Nylon or polyester fabrics with a water-resistant coating are a good option for knitting project bags. They can repel water and help keep your projects safe and dry.
Size and Shape

- Consider the size and shape of your knitting projects when choosing fabric for your bag. If you mostly work on smaller projects like socks or hats, a smaller bag made of lightweight fabric may be sufficient.
- If you work on larger projects like sweaters or blankets, you may need a bigger bag with more substantial fabric to accommodate the size and weight of your projects.
Aesthetic
- Lastly, consider the aesthetic appeal of the fabric. Your knitting project bag is an extension of your personal style, so choose a fabric that you love and that reflects your taste.
- There are countless options available, from fun and colorful prints to elegant and sophisticated designs. Consider the overall look and feel you want for your bag and choose a fabric that complements your style.
By considering factors such as durability, water resistance, size and shape, and aesthetic appeal, you can choose the right fabric for your knitting project bag that will be both functional and stylish. Happy knitting!
Gathering the Necessary Tools and Materials
When embarking on a knitting project, it’s important to gather all the necessary tools and materials beforehand to ensure a smooth and enjoyable knitting experience. Having everything within reach will save you time and frustration, allowing you to focus on the project at hand. Here are the essential tools and materials you’ll need:
Knitting Needles
Choose the appropriate knitting needles for your project. The size and type of needles will depend on your yarn weight and the desired gauge. Commonly used types of knitting needles include straight needles, circular needles, and double-pointed needles.
Yarn
Select a yarn that suits your project. Consider the fiber content, weight, and color. The pattern you’re following will typically specify the recommended yarn type and gauge. Make sure to buy enough yarn to complete your project, accounting for any additional skeins needed.
Stitch Markers
Stitch markers are small rings or clips used to mark specific stitches or sections in your project. They help you keep track of your progress and differentiate between different stitch patterns. Use stitch markers when working with intricate patterns or shaping techniques.
Tape Measure
A tape measure is an essential tool for checking your gauge and measuring the dimensions of your project. Use it to ensure your finished piece matches the pattern’s specifications and to track your progress as you knit.
Scissors
A good pair of sharp scissors is indispensable for any knitting project. Use them to cut yarn, trim stray ends, or make adjustments to your work. Keep them nearby to quickly access when needed.
Knitting Bag or Organizer
Invest in a knitting bag or organizer to conveniently store and transport your tools and materials. Look for one with compartments or pockets to keep everything organized and easily accessible. It should be large enough to hold your project and accommodate any additional items you may need, such as a pattern or notes.
Measuring and Cutting the Fabric
Before starting your knitting project bag, it is important to measure and cut the fabric to the appropriate size. This will ensure that your bag is the right dimensions and able to hold all of your yarn and knitting supplies.
1. Determine the Dimensions
First, determine the dimensions you want for your knitting project bag. Consider how much yarn and supplies you typically carry, as well as any specific features you want to include, such as pockets or compartments. Measure and note down the desired length, width, and depth of your bag.
2. Prepare the Fabric
Once you have the dimensions, prepare the fabric for cutting. Lay it out on a flat surface, ensuring it is free of wrinkles and creases. If necessary, iron the fabric to smooth out any wrinkles. Then, use a fabric pencil or chalk to mark the measurements on the fabric.
3. Cut the Fabric
Using sharp fabric scissors or a rotary cutter, carefully cut along the marked measurements to create the fabric pieces for your project bag. Take your time to ensure clean and straight cuts. If you plan to add any additional features, such as handles or pockets, cut those pieces as well.
4. Double-Check the Measurements
After cutting the fabric, double-check the measurements to ensure they match your desired dimensions. If any adjustments need to be made, trim the fabric accordingly. It’s better to make small adjustments now than to end up with a bag that doesn’t properly fit your supplies.
By carefully measuring and cutting your fabric, you will be off to a great start in creating a functional and stylish knitting project bag. Once your fabric is ready, you can move on to sewing the pieces together and adding any desired embellishments.
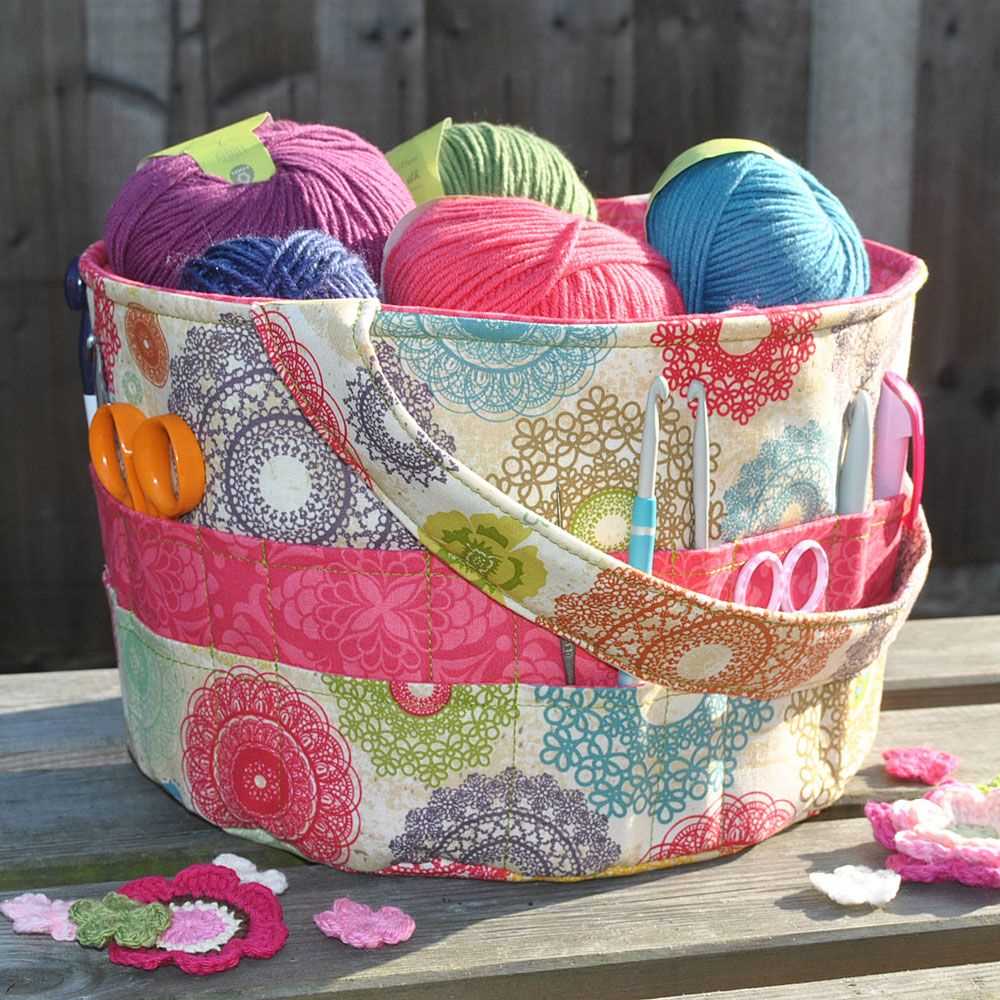
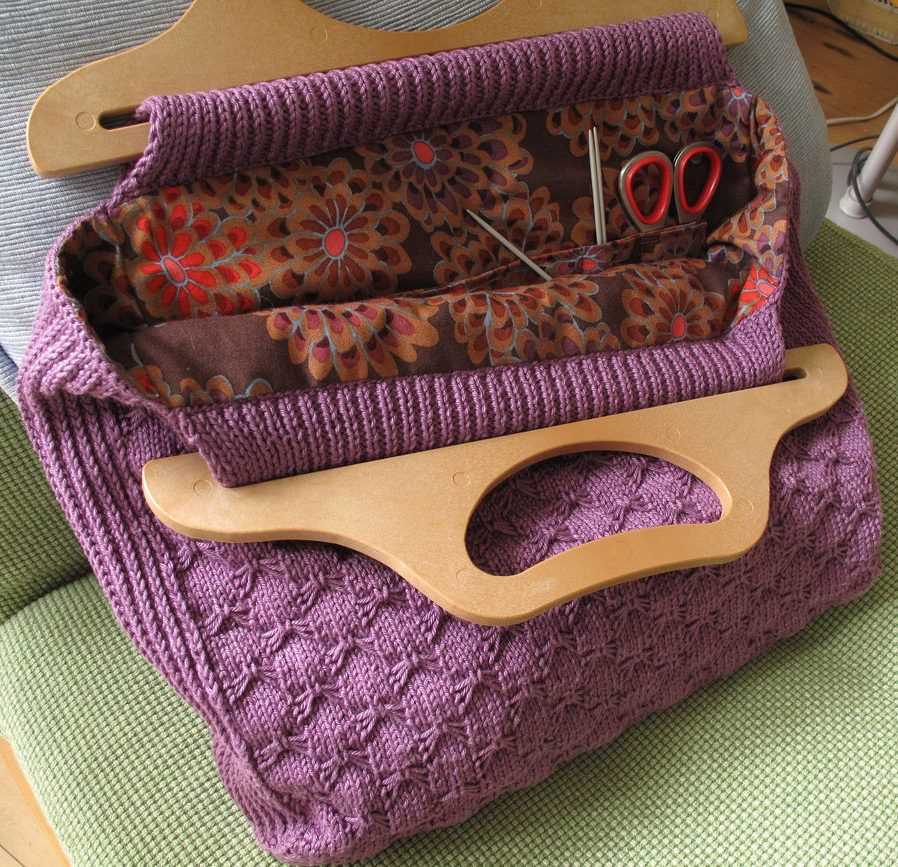
Adding Pockets and Compartments
When it comes to knitting project bags, having pockets and compartments can be incredibly helpful for organizing your supplies. Whether you need a place to store your needles, stitch markers, or even your phone, adding pockets and compartments to your bag can make it easier to keep everything in one place and find what you need when you need it.
Pockets are a great way to keep small items like stitch markers, measuring tapes, and small scissors easily accessible. You can add pockets to the inside or outside of your bag, depending on your preference. To make a pocket, simply cut out a piece of fabric in the desired size and shape, fold it in half, and sew the sides onto your bag. You can also add a secure closure, such as a button or Velcro, to ensure your items don’t fall out.
Compartments are larger sections within your bag that can be used to store bulkier items like skeins of yarn, knitting project books, or even your knitting project itself. You can create compartments by sewing additional fabric panels onto the inside of your bag, dividing it into sections. You can also create removable compartments by sewing a fabric panel onto the inside of your bag and attaching it with buttons or snaps, allowing you to easily customize the layout of your bag based on your specific needs.
To take your bag organization to the next level, you can also incorporate dividers into your compartments. Dividers can be made by sewing additional fabric panels perpendicular to the existing panels, creating smaller sections within each compartment. This can help keep different types of yarn separate, or allow you to sort your projects by size or complexity.
With pockets, compartments, and dividers, you can create a knitting project bag that is not only functional but also customized to fit your needs. So gather your supplies, get creative, and start adding those pockets and compartments to your next knitting project bag!
Constructing the Body of the Bag
To begin constructing the body of the knitting project bag, you will first need to gather your materials. This includes your chosen yarn, knitting needles, and any additional accessories such as buttons or zippers. Once you have everything ready, you can start knitting the main body of the bag.
Step 1: Knitting the Bottom Base
Start by casting on the desired number of stitches for the bottom base of the bag. This will be the foundation of the bag and determine its width. You can use any type of cast-on method you prefer, such as the long tail cast-on or the knitted cast-on. Once the stitches are cast on, you can begin knitting the rows for the bottom base.
Tip: Consider using a stitch marker at the beginning of each row to help you keep track of your progress.
Step 2: Working in the Round
After knitting the desired number of rows for the bottom base, you will transition to knitting in the round to create the body of the bag. This can be done by joining the ends of the bottom base and using circular knitting needles. Alternatively, you can also use double-pointed knitting needles or the Magic Loop method.
Tip: Be mindful of any pattern or stitch changes if you are incorporating any decorative elements, such as cables or colorwork, into the body of the bag.
Step 3: Knitting the Body of the Bag
Continue knitting in the round until the body of the bag reaches the desired height. This can be determined by measuring from the bottom of the bag to where you want the bag to end. You can knit the body using a simple stockinette stitch or experiment with different stitch patterns for added texture and visual interest.
- Make sure to periodically try on the bag to ensure it is the desired size and shape.
- Consider adding pockets or compartments to the interior of the bag for added functionality.
By following these steps, you can construct the body of your knitting project bag and create a functional and stylish accessory for your knitting projects.
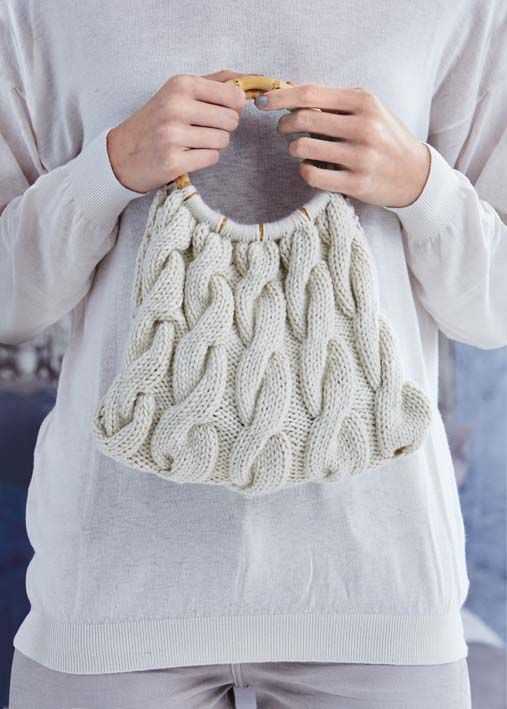
Adding Handles or Straps

When making a knitting project bag, one important feature to consider is the addition of handles or straps. Having sturdy and convenient handles can make the bag more functional and portable, allowing you to easily carry your project wherever you go.
Options for handles:
- Fabric handles: One option is to sew fabric handles onto the bag. You can use a sturdy fabric that complements the design of the bag. Measure the desired length for the handles and cut two pieces of fabric accordingly. Fold each piece in half lengthwise and sew along the open edge. Attach the handles to the bag by stitching them securely to the sides.
- Leather handles: For a more durable and stylish option, you can use leather handles. Measure and cut the desired length of leather straps. Punch holes at each end of the straps and attach them to the bag using rivets or strong stitching.
- Rope handles: Another option is to use rope or thick cord as handles. Measure the desired length of the handles and cut two pieces of rope accordingly. Attach the ends of the ropes to the bag by sewing them securely to the sides. You can reinforce the stitching with fabric or leather patches for added strength.
Considerations:
- Length and comfort: Make sure to choose a handle length that suits your preferred carrying style. Longer handles allow for shoulder carry, while shorter handles are more suitable for hand carry. Additionally, consider the comfort of the handles by choosing materials that won’t dig into your hands or shoulders.
- Reinforcement: Handles should be securely attached to the bag to withstand the weight of your knitting projects. Reinforce the attachment points with double stitching or additional fabric patches to ensure durability.
- Aesthetics: The choice of handles can also affect the overall appearance of the bag. Consider using handles that match the color scheme or design of the bag to create a cohesive and visually appealing look.
Adding handles or straps to your knitting project bag can greatly enhance its functionality and style. Choose the option that best suits your needs and enjoy the convenience of carrying your knitting projects with ease.
Installing a Zipper or Closure
Adding a zipper or closure to your knitting project bag is a great way to keep your project secure and prevent it from falling out. There are several techniques you can use to install a zipper or closure, depending on your preference and skill level.
Here is a step-by-step guide to help you install a zipper or closure in your knitting project bag:
Materials Needed:
- Zipper or closure of your choice
- Pins
- Thread that matches your fabric
- Scissors
- Sewing machine or needle and thread
- First, measure the opening of your knitting project bag to determine the length of zipper or closure you will need. Add a few inches to this measurement to ensure that the zipper or closure will extend beyond the edges of the bag.
- Place the zipper or closure on the right side of the fabric, aligning the edges. Pin the zipper or closure in place, making sure it is centered and straight.
- Using a sewing machine or needle and thread, sew along the edge of the fabric, attaching the zipper or closure. Start sewing at one end of the zipper or closure, and continue sewing all the way to the other end. Be sure to backstitch at the beginning and end to secure the stitches.
- Once the zipper or closure is attached, fold the fabric in half, right sides together, and pin the sides together. Sew along the sides, from the bottom edge to the top edge, leaving a small opening at the top for turning the bag right side out.
- Trim the excess zipper or closure fabric and any excess fabric from the seam allowance.
- Turn the bag right side out through the opening left in the top seam. Use a pencil or chopstick to push out the corners and edges for a clean finish.
- Carefully hand stitch the opening closed using a slip stitch or ladder stitch.
- Your knitting project bag is now complete with a zipper or closure! You can now use it to store your knitting projects and keep them safe and secure.
Decorating and Personalizing Your Knitting Project Bag
Knitting project bags are essential for keeping your yarn, needles, and other supplies organized and easily accessible. But why settle for a plain and boring bag when you can personalize it and make it uniquely yours? Decorating and personalizing your knitting project bag not only adds a touch of creativity, but it also makes it easier to identify your bag among others at knitting events and gatherings.
Here are some ideas for decorating and personalizing your knitting project bag:
- Embroidery: Add a pop of color and a personal touch to your bag by embroidering your initials, a simple design, or even a favorite knitting-related quote. Embroidery can be done by hand or with a sewing machine, and you can use different colors and stitches to create unique and eye-catching designs.
- Patches and Pins: Show off your love for knitting by adding patches or pins featuring knitting-related images or phrases to your bag. You can find an array of cute and stylish knitting-themed patches and pins online or at craft stores. Simply attach them to your bag using fabric glue or stitching.
- Fabric Appliques: Another way to add some flair to your knitting project bag is by using fabric appliques. Choose appliques that match your personal style or reflect your favorite hobbies and interests. You can iron them onto your bag or sew them on for added durability.
- Buttons and Ribbons: Buttons and ribbons are versatile and inexpensive embellishments that can instantly transform the look of your knitting project bag. Sew on a few colorful buttons or loop a ribbon through the handles of your bag to add a playful and whimsical touch.
- Custom Stencils: If you enjoy DIY projects, you can create your own custom stencils and use fabric paint to transfer designs onto your bag. This allows for complete creative freedom and gives your bag a truly unique and personalized look.
Remember, the key to decorating and personalizing your knitting project bag is to have fun and let your creativity shine. Whether you choose to use embroidery, patches, fabric appliques, buttons, ribbons, or custom stencils, your bag will become a one-of-a-kind piece that reflects your personality and passion for knitting.
Adding a Lining for Extra Durability
When it comes to knitting project bags, one way to enhance their durability is by adding a lining. A lining serves as an extra layer of protection for your knitting projects, preventing them from getting tangled or damaged while being transported. It can also add structure to the bag, ensuring it retains its shape over time.
A lining can be made from a variety of fabrics, such as cotton, canvas, or even waterproof materials. The choice of fabric depends on your personal preference and the intended use of the bag. For example, if you plan to use the bag for carrying your projects outdoors, a waterproof lining would be a great choice to protect your projects from rain or moisture.
When adding a lining, it’s important to measure and cut the fabric to fit the dimensions of your bag. Start by measuring the width, height, and depth of the bag, and then add a few extra inches for seam allowances. Once you have the fabric cut to size, you can sew it together using a sewing machine or by hand stitching.
Pro tip: To ensure that the lining stays securely in place, consider attaching it to the bag using fabric glue or by stitching it directly onto the bag. This will prevent it from shifting or bunching up inside the bag.
Once the lining is attached, you can add additional features to enhance the functionality of your bag. This could include pockets or compartments to store knitting needles, yarn, or other accessories. By adding a lining and customizing the bag to your specific needs, you can create a knitting project bag that is not only durable but also functional and stylish.
Finishing Touches and Details
When it comes to completing your knitting project bag, there are a few finishing touches and details that can make all the difference. These little extras add both functionality and style to your bag, making it truly unique and perfect for your needs.
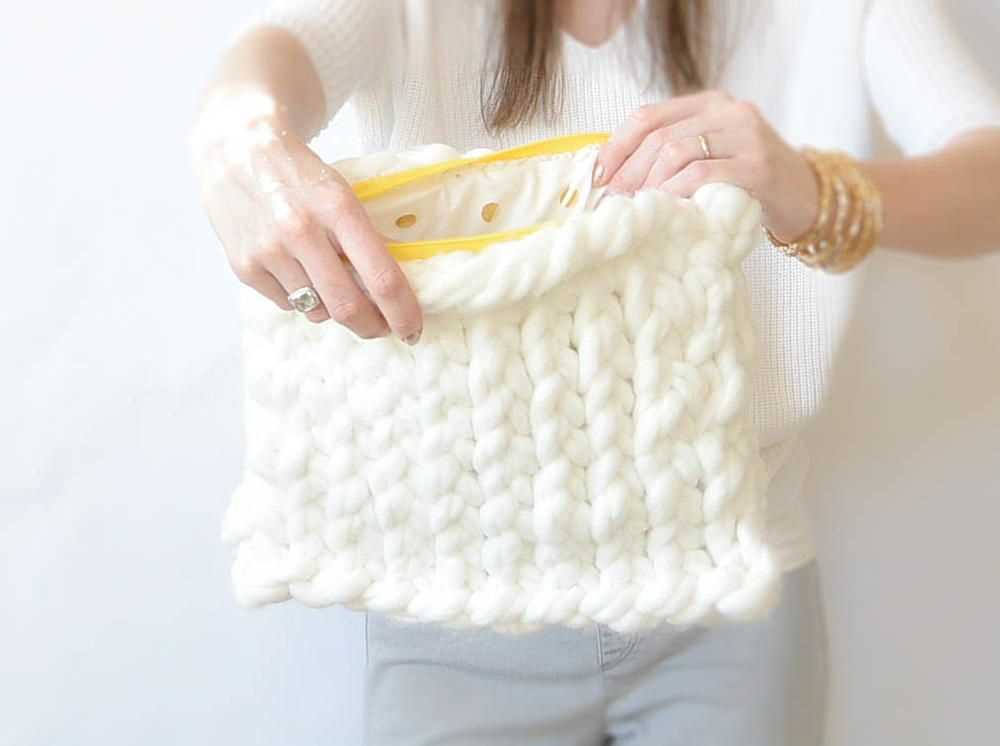
One important detail to consider is the closure of your bag. You can choose from different options like zippers, buttons, or drawstrings, depending on your preference. A sturdy zipper can keep your knitting supplies secure and prevent them from falling out, while buttons or drawstrings give your bag a more rustic and handmade look.
Another detail to think about is the straps or handles of your bag. They should be strong and comfortable to carry, especially if you plan on using your bag for long periods of time. Consider using wide and padded straps for added comfort, or opt for adjustable straps to customize the length according to your needs.
When it comes to organizing your knitting supplies within the bag, you can add pockets or compartments. These can be used to separate your yarn, needles, and other accessories, making it easier to find what you need. You can also consider adding a small pocket on the outside of the bag for easy access to essentials like scissors or stitch markers.
Finally, don’t forget to add some personal touches to your bag. You can decorate it with embroidery, buttons, or appliques to give it a unique and personalized look. Consider adding a label with your name or initials to make sure your bag doesn’t get mixed up with others. These little details will make your knitting project bag truly one-of-a-kind.
Tips and Tricks for Using Your Knitting Project Bag
Once you have your knitting project bag, here are some tips and tricks to make the most of it:
- Organize your supplies: Use small pouches or ziplock bags to separate your knitting needles, stitch markers, and other accessories. This will make it easier to find what you need and prevent items from getting lost.
- Label your projects: If you have multiple projects on the go, use project tags or sticky notes to label each bag. This way, you can quickly identify which bag contains which project.
- Use a yarn guide: If you’re working with multiple colors or yarns, consider using a yarn guide. This will help keep your yarn strands organized and prevent tangling.
- Keep a knitting journal: Use a small notebook or jot down notes on a notepad to keep track of your progress, pattern modifications, and any other important details. This will come in handy if you need to put your project on hold and resume it later.
- Take it on the go: Your knitting project bag is perfect for taking your projects with you on the go. Whether you’re traveling or have some downtime during the day, you can easily pack up your knitting and take it with you.
Remember, your knitting project bag is not only a functional accessory but also a way to express your personal style. Have fun customizing and using your bag to enhance your knitting experience!
Q&A:
What is a knitting project bag pattern?
A knitting project bag pattern is a set of instructions or guidelines on how to make a bag specifically designed for knitting projects. It includes details on the measurements, materials needed, and step-by-step instructions for knitting or sewing the bag.
What are the essential features of a knitting project bag pattern?
Essential features of a knitting project bag pattern include a spacious main compartment to hold yarn, needles, and other knitting supplies, smaller compartments or pockets for organizing smaller items like stitch markers or scissors, and sturdy handles or straps to carry the bag comfortably.
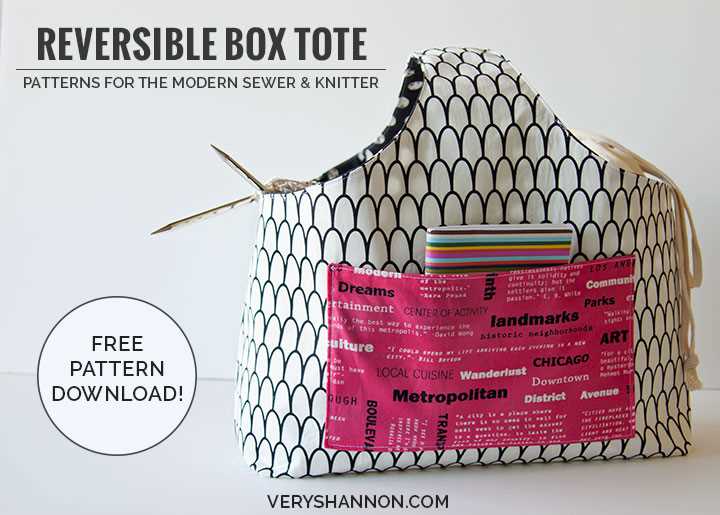
Are there different types of knitting project bag patterns available?
Yes, there are various types of knitting project bag patterns available. Some patterns are for knitting bags that can be carried over the shoulder, while others are designed as backpacks or tote bags. There are also patterns for smaller pouches or cases specifically made for holding knitting needles.
Can I customize a knitting project bag pattern?
Yes, you can customize a knitting project bag pattern according to your preferences. You can choose different colors, add extra pockets or compartments, or adjust the size of the bag to fit your needs. Some patterns may also include options for different closure types like zippers or drawstrings.
Where can I find knitting project bag patterns?
Knitting project bag patterns can be found in various places. You can search for free patterns online on knitting or craft websites, or you can purchase patterns from independent designers or craft stores. There are also knitting books or magazines that include bag patterns.
Where can I find a knitting project bag pattern?
You can find knitting project bag patterns on various websites and online platforms. Some popular options include Ravelry, Etsy, and Pinterest. You can also find patterns in knitting magazines, books, and even through online knitting communities and forums.
What materials do I need to make a knitting project bag?
The materials you need to make a knitting project bag depend on the specific pattern you are using. However, some common materials include fabric (such as cotton or canvas), thread, a sewing machine, scissors, pins, and a zipper or other closure option. You may also need interfacing or stabilizer to add structure to the bag.