
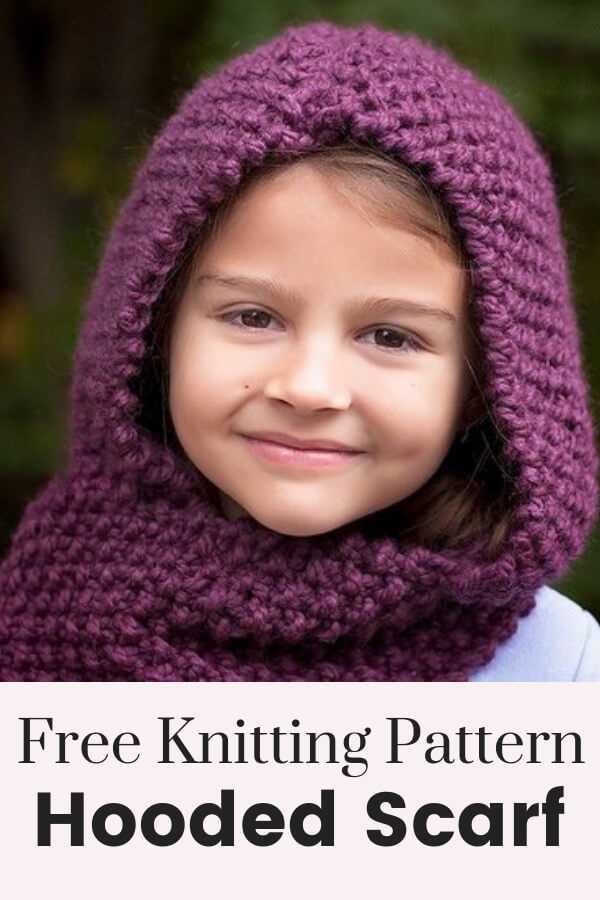
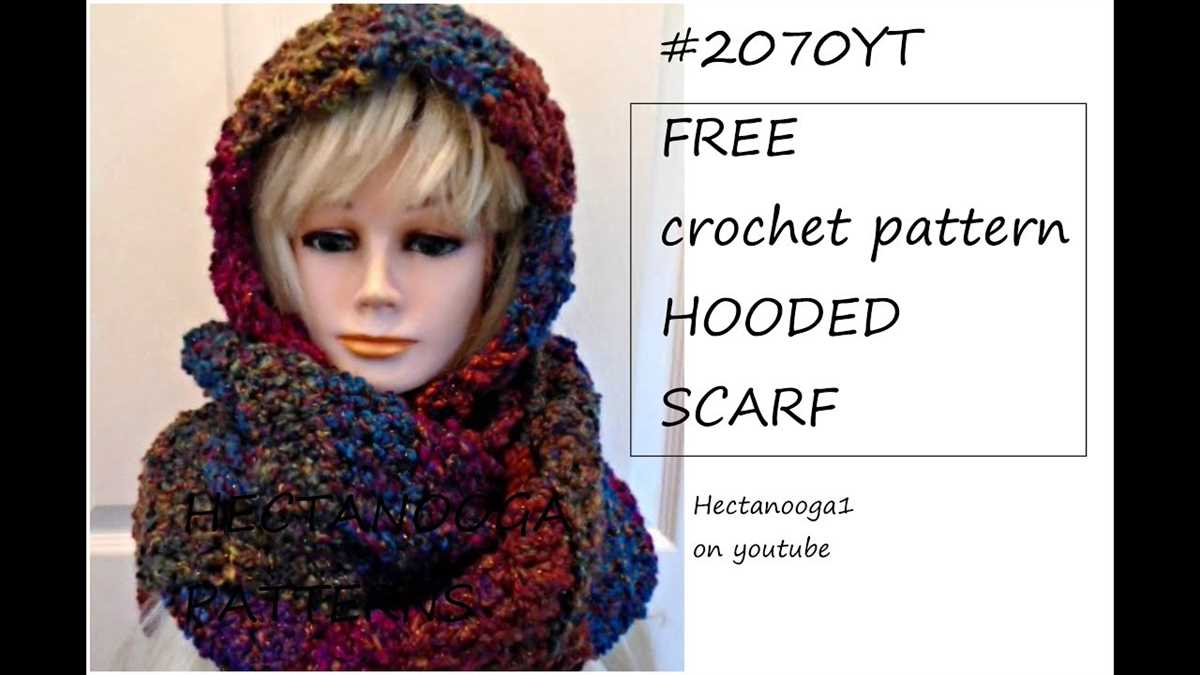
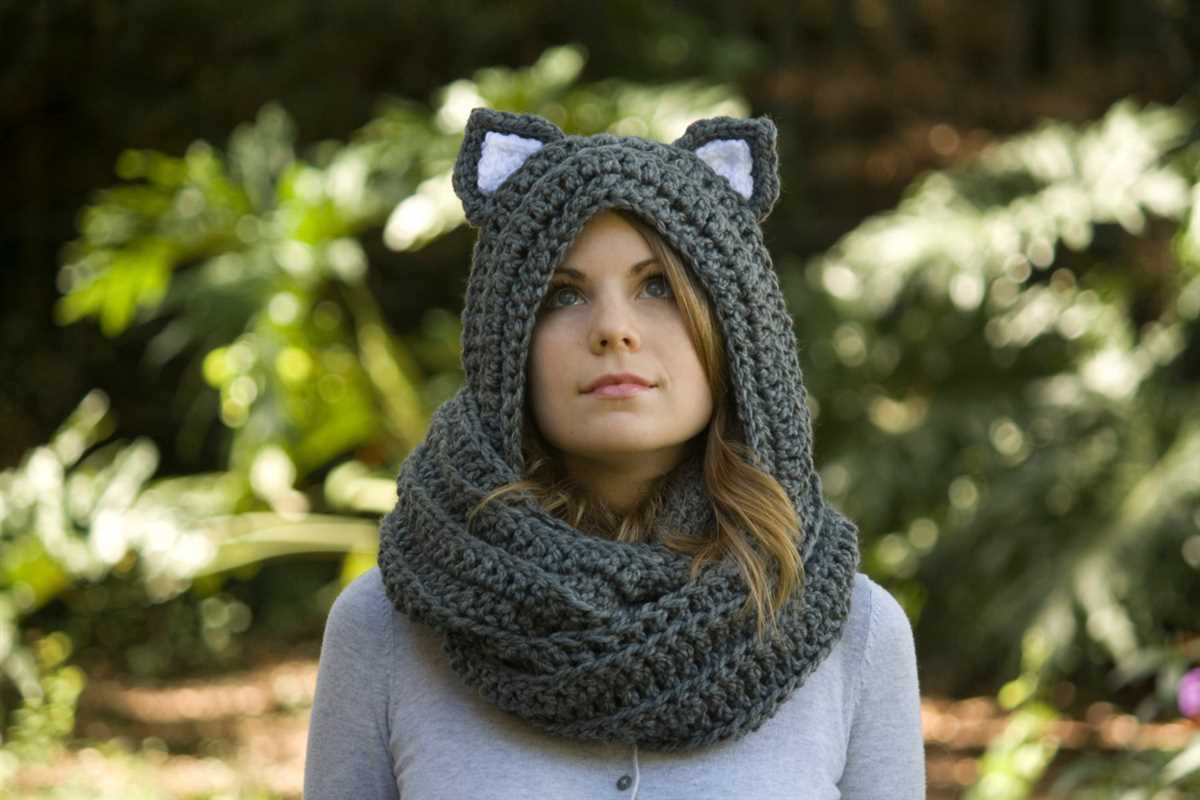
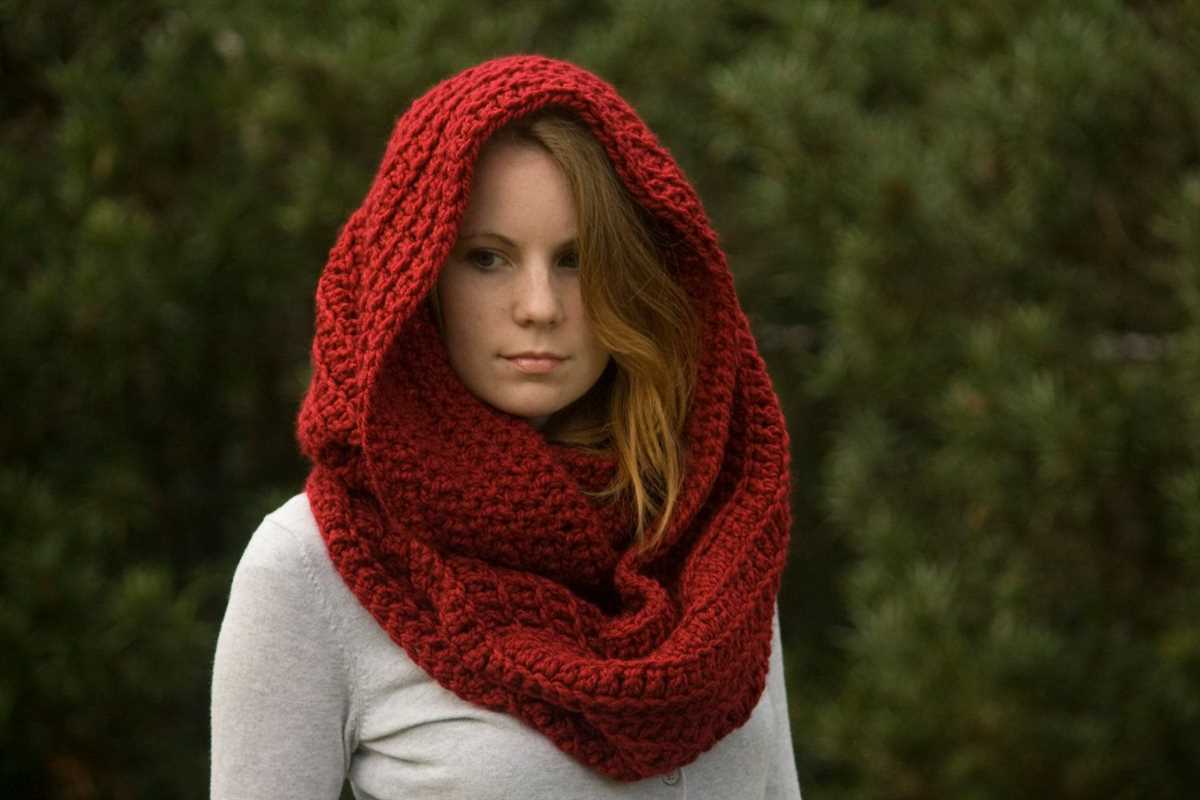
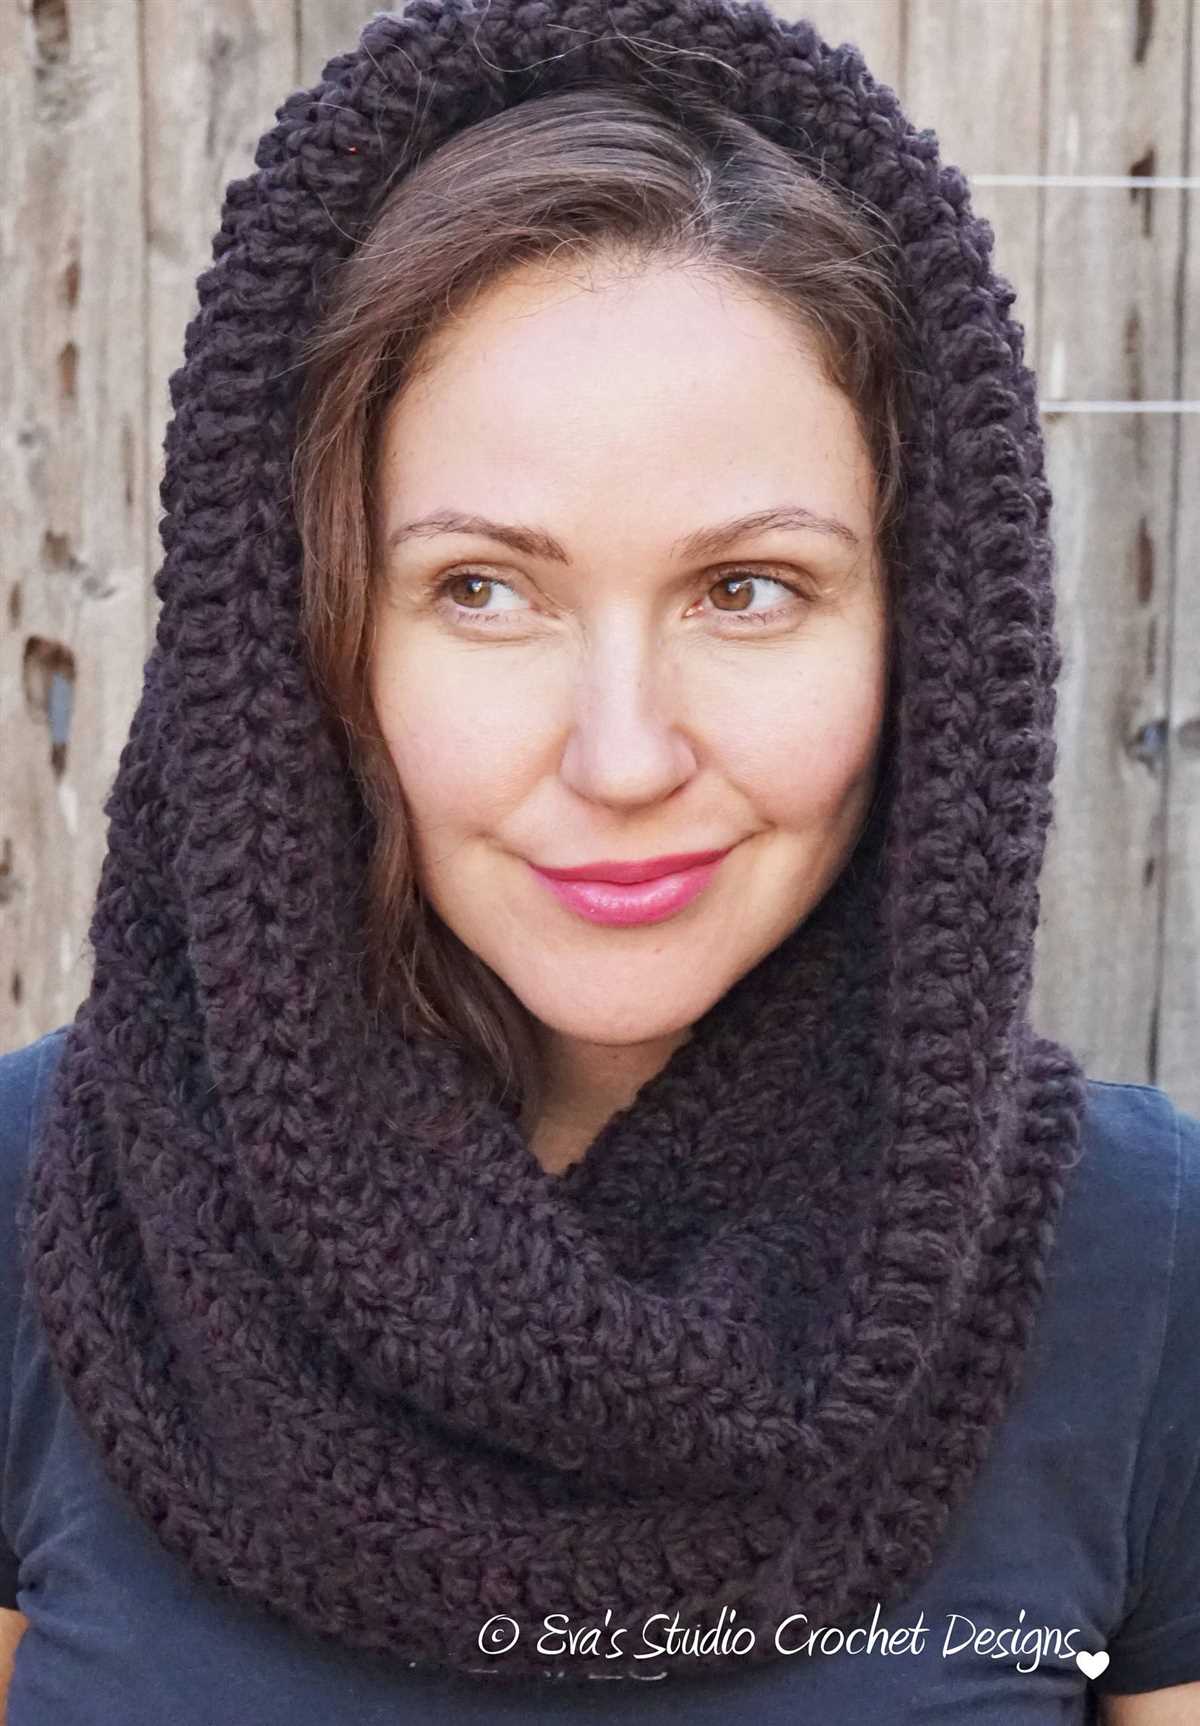
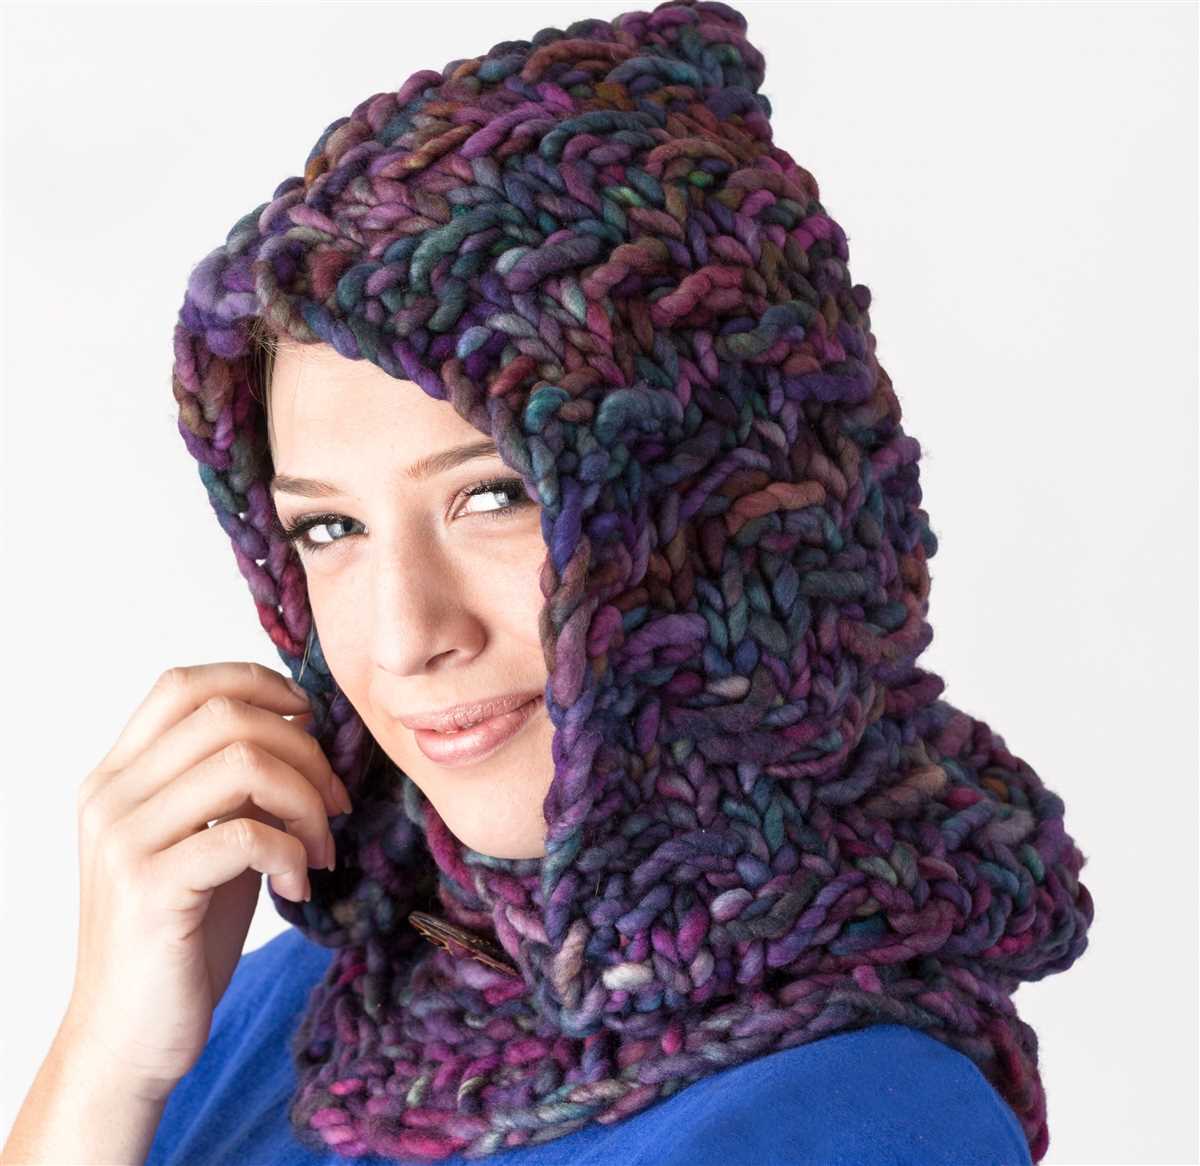
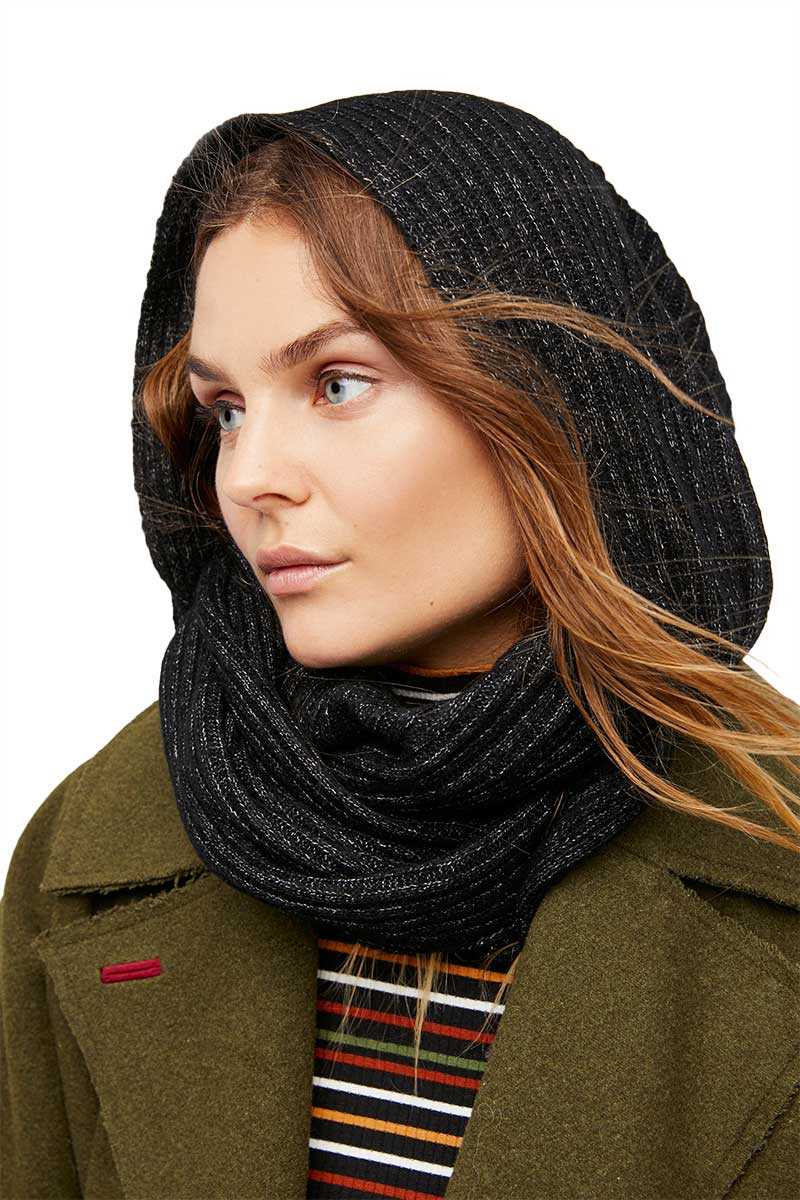
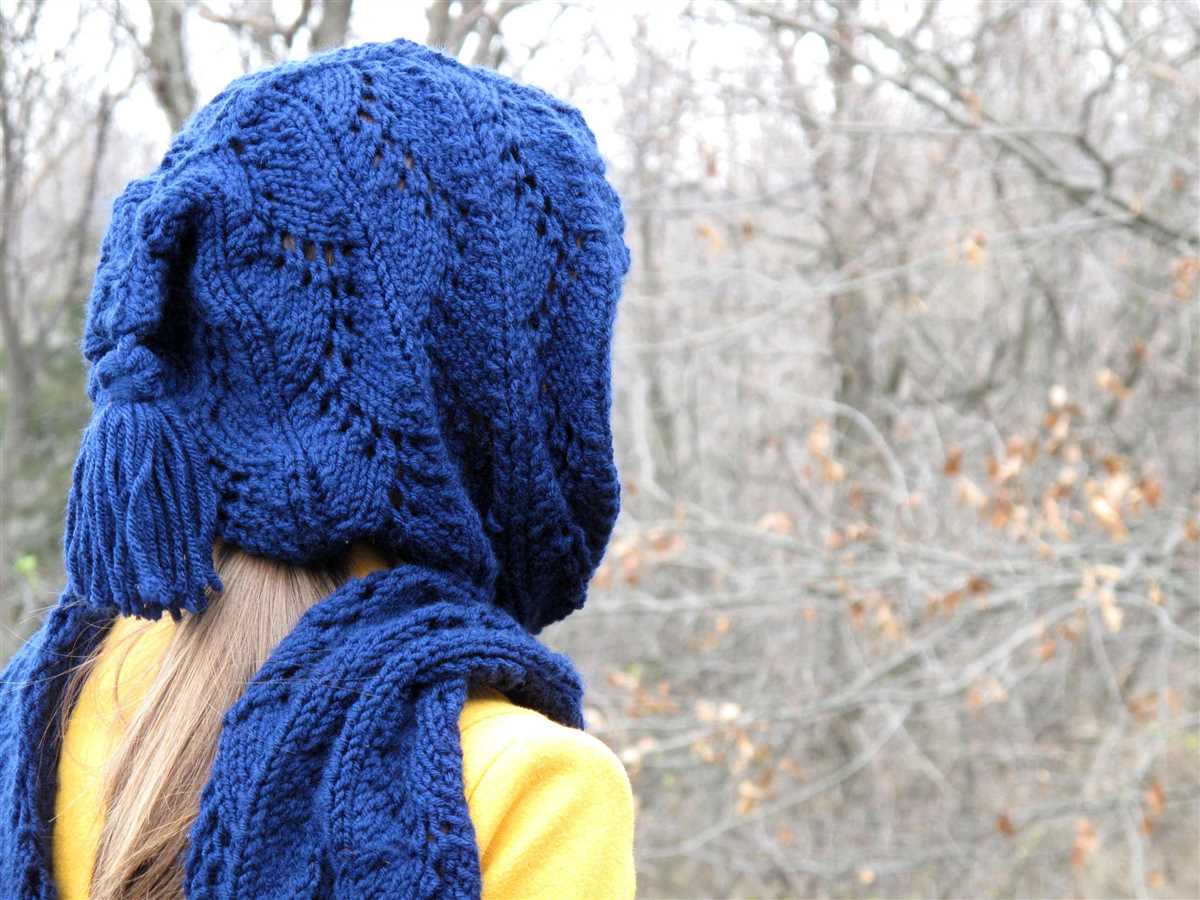
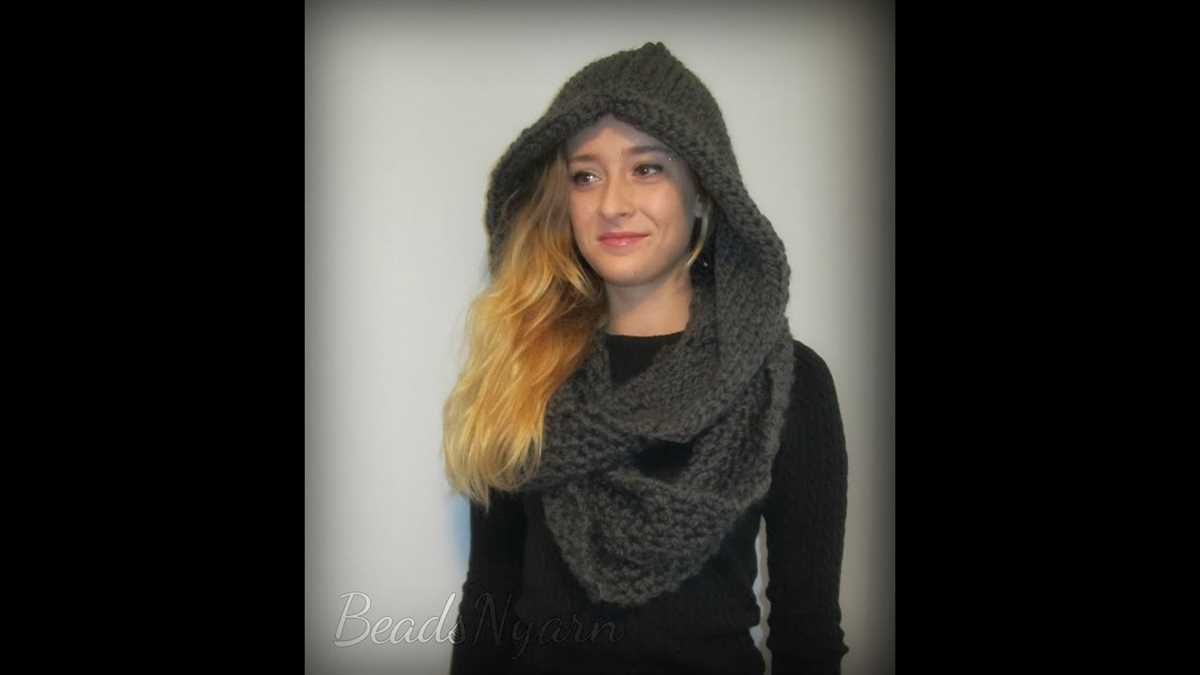
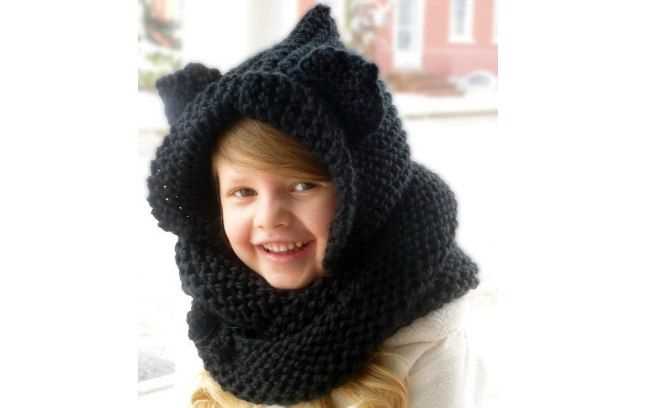
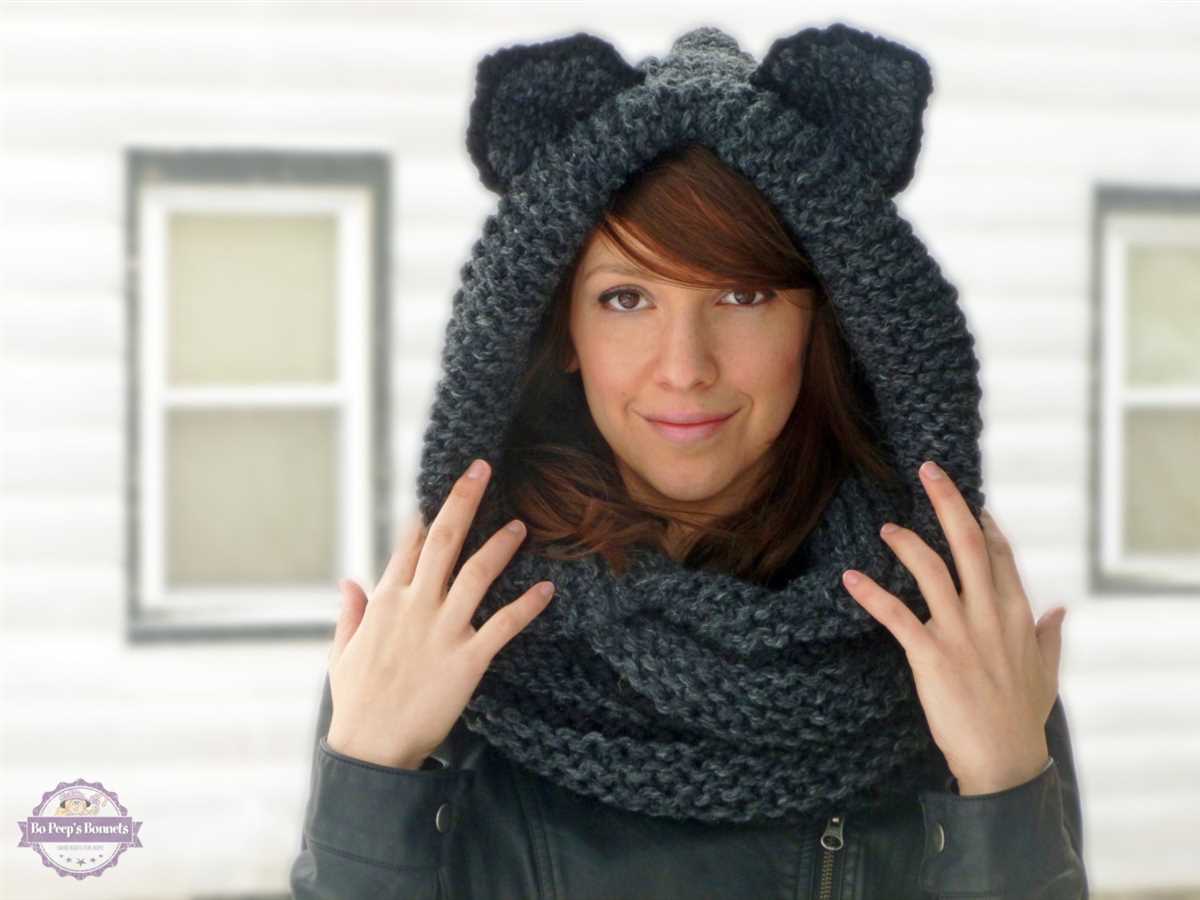
If you love both scarves and hoods, this knitting pattern is perfect for you! The infinity scarf hood combines the warmth and style of a scarf with the versatility and coziness of a hood. It’s the ultimate winter accessory that will keep you warm and stylish all season long.
This knitting pattern is suitable for both beginners and experienced knitters. It uses basic knitting techniques such as knit and purl stitches, so even if you’re just starting out, you can give it a try. The pattern also includes detailed instructions and a stitch diagram to help you along the way.
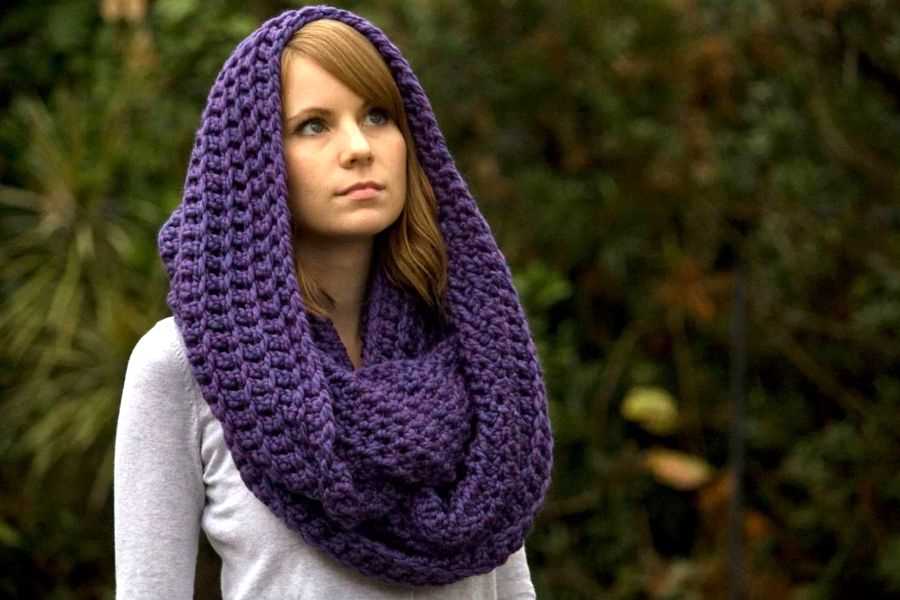
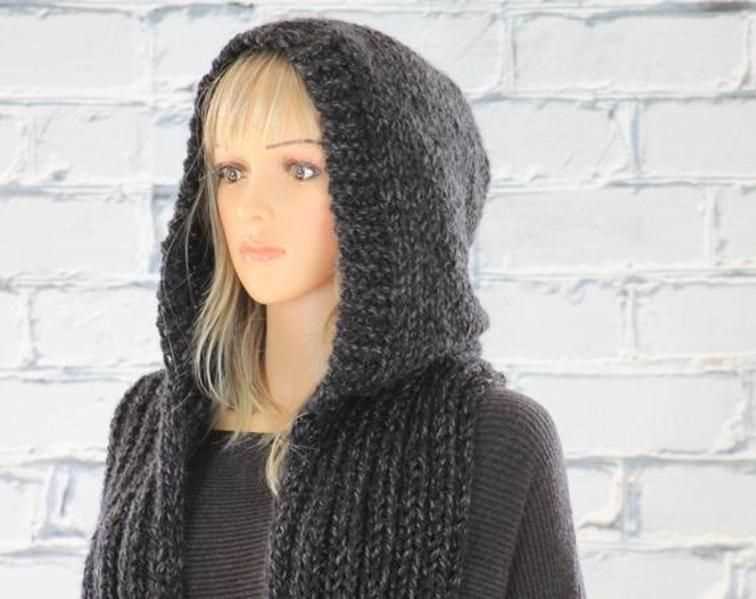
The infinity scarf hood is a versatile accessory that can be worn in many ways. You can wear it as a traditional scarf, or pull it up over your head to use it as a hood. It’s perfect for those cold and windy days when you need extra protection for your neck and head.
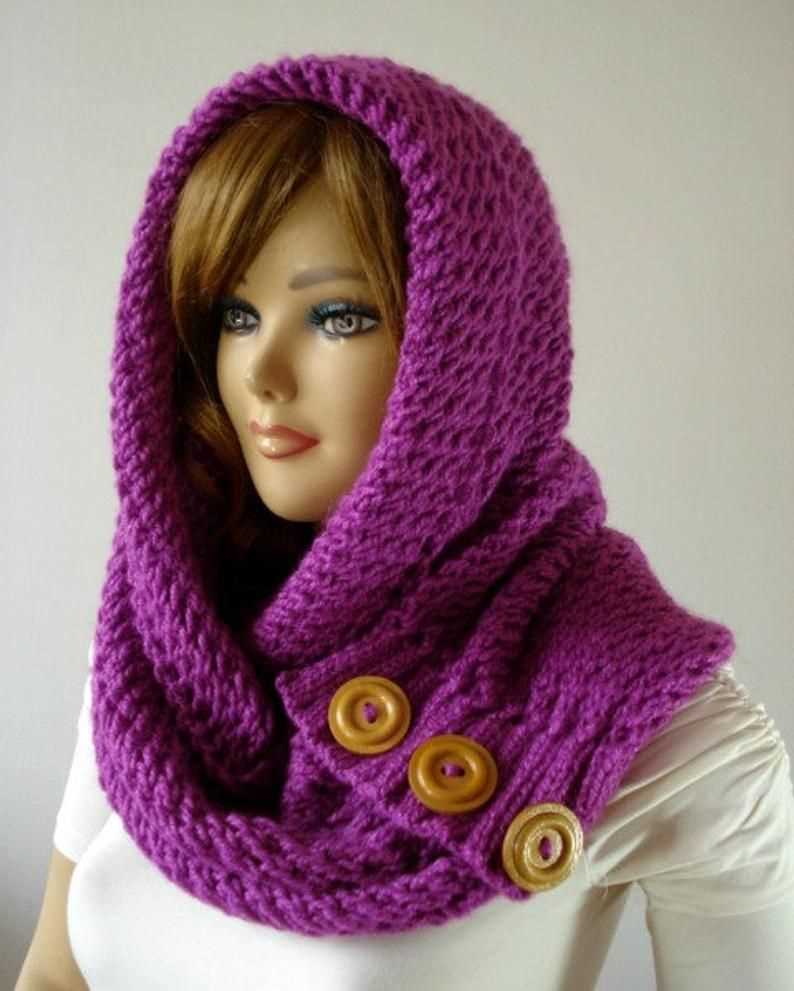
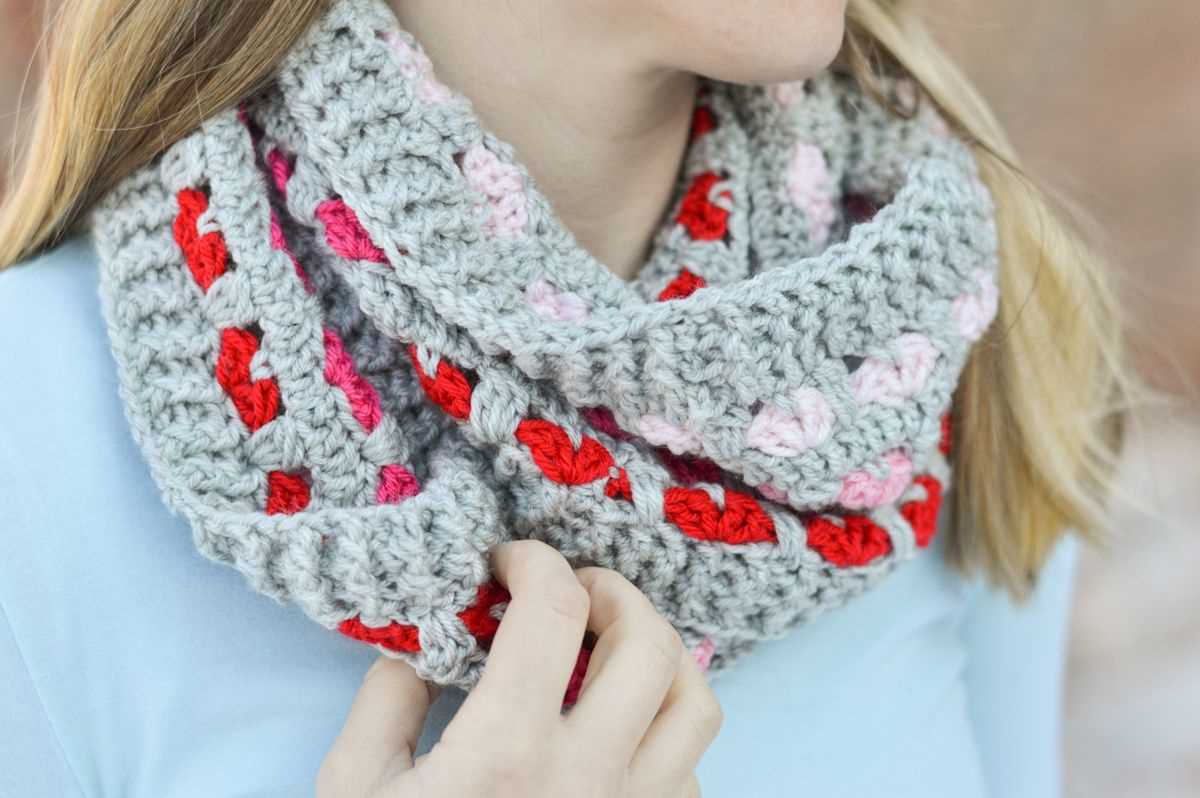
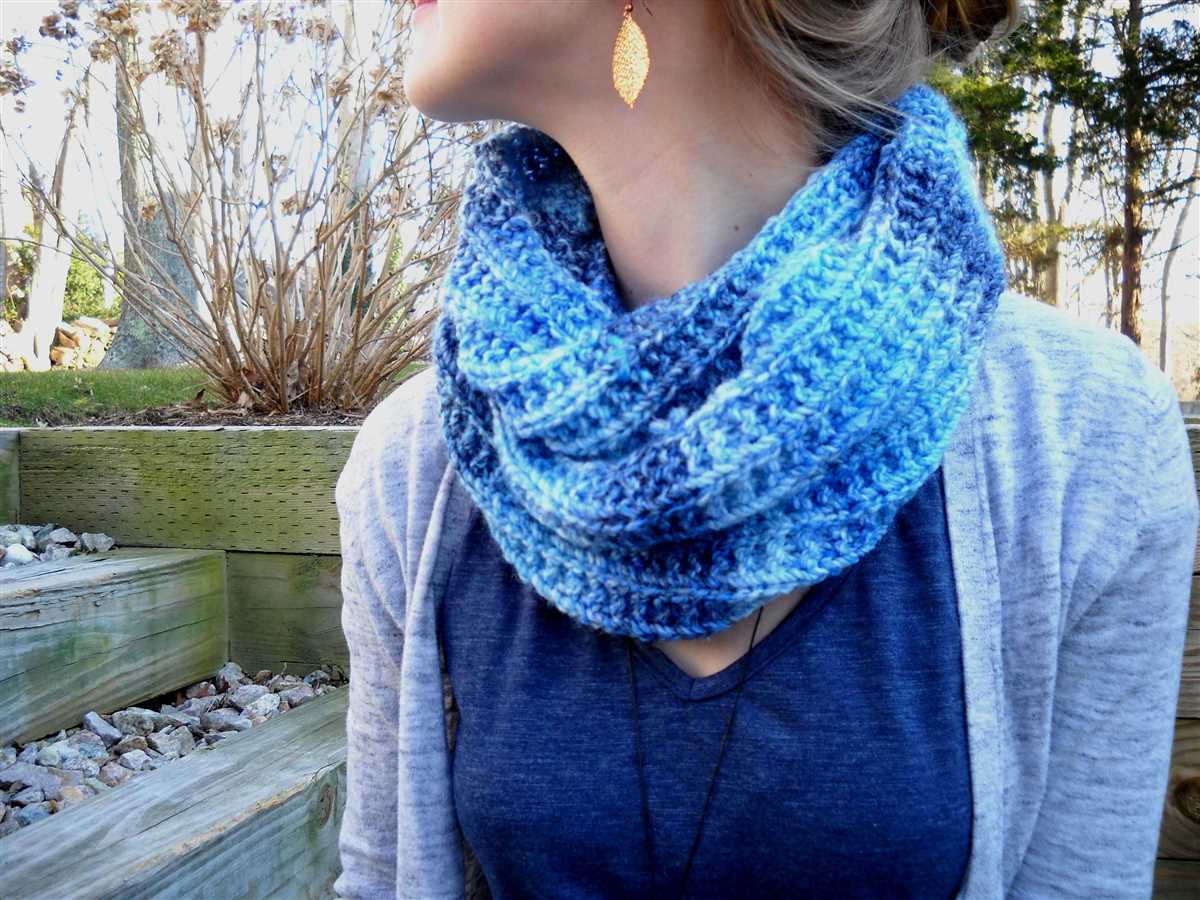
Not only is the infinity scarf hood practical, but it’s also a stylish addition to any outfit. You can choose from a variety of colors and patterns to match your personal style. Whether you prefer bold and bright or subtle and neutral, there’s a knitting pattern for everyone.
How to Create a Knitting Pattern for an Infinity Scarf Hood
Creating a knitting pattern for an infinity scarf hood is a great way to combine fashion and function. This versatile accessory is perfect for keeping warm during colder months while adding a stylish touch to any outfit. With the right materials and a few simple steps, you can create your own infinity scarf hood.
Materials:
- Yarn: Choose a soft and warm yarn in a color of your choice.
- Knitting needles: Select the appropriate size needles for your yarn.
- Scissors
- Tapestry needle
- Measuring tape
Instructions:
1. Cast on: Begin by casting on the desired number of stitches, depending on the width you want for your infinity scarf hood. You can use a long tail cast on or any other cast on method you prefer.
2. Knit in the round: Once you have cast on, join the ends of your stitches to form a continuous loop. This will create the infinity shape of the scarf hood. Use circular knitting needles or double-pointed needles if necessary.
3. Knit the body: Continue knitting in the round until your scarf hood reaches the desired length. You can use any stitch pattern you like, such as ribbing or a simple stockinette stitch, to add texture to your design.
4. Create the hood: To create the hood shape, you will need to decrease stitches gradually. You can do this by knitting two stitches together at regular intervals or by using a more complex decrease pattern. Continue decreasing until you reach the desired height of the hood.
5. Finish off: Once you have completed the body and the hood of your infinity scarf, finish off by binding off all the stitches. Cut the yarn, leaving a long tail for sewing. Use a tapestry needle to weave in any loose ends and secure the final seam.
With these simple instructions, you can create your own knitting pattern for an infinity scarf hood. Customize the design by choosing your favorite yarn color, stitch pattern, and adjusting the width and height according to your preferences. Stay warm and stylish with this cozy and fashionable accessory!
Choosing the Right Yarn for Your Infinity Scarf Hood
When it comes to knitting an infinity scarf hood, choosing the right yarn is crucial for creating a beautiful and functional accessory. The yarn you select will determine the look, feel, and warmth of your finished project, so it’s important to consider a few factors before making your choice.
Weight:
The weight of the yarn refers to its thickness or thinness. For an infinity scarf hood, it’s generally best to choose a yarn that is not too heavy or bulky, as this can make the hood feel too thick and uncomfortable to wear. Medium weight yarn, also known as worsted weight or 4-ply, is a popular choice for scarves and hoods, as it provides a good balance between warmth and drape.
Fiber:
The fiber content of the yarn will affect the characteristics of your infinity scarf hood. Natural fibers like wool and alpaca are popular choices for winter accessories, as they provide excellent insulation and warmth. They are also known for their durability and ability to retain their shape. However, if you’re looking for a vegan or allergy-friendly option, consider synthetic fibers like acrylic or nylon, which can be just as soft and cozy.
Texture:
The texture of your yarn will add visual interest and dimension to your infinity scarf hood. Smooth and even-textured yarns will give your hood a polished and classic look, while yarns with a boucle or fuzzy texture can create a more playful and cozy feel. Consider the overall style you want to achieve and choose a yarn with a texture that complements your vision.
Color:
Lastly, consider the color palette for your infinity scarf hood. Neutral tones like black, gray, or beige can be versatile and timeless, while bold and vibrant colors can add a pop of personality to your outfit. Pay attention to your personal style and the colors that best suit your complexion to ensure that your infinity scarf hood becomes a beloved staple in your wardrobe.
In conclusion, when selecting yarn for your infinity scarf hood, consider the weight, fiber content, texture, and color to create a finished project that is both visually appealing and practical. Whether you opt for a soft and warm wool or a colorful and fun acrylic, the right yarn choice will make all the difference in your knitting experience and the final result.
Measuring and Calculating the Gauge for Your Knitting Pattern
When starting a knitting project, one of the most important steps is measuring and calculating the gauge. The gauge refers to the number of stitches and rows per inch in your knitted fabric. It helps ensure that your finished piece will be the correct size and fit according to the pattern.
To measure the gauge, you will need the recommended yarn and needle size for your knitting pattern. Start by casting on a few stitches and knitting a small swatch using the specified stitch pattern. Make sure to use the same knitting technique and tension that you will use for the actual project.
Next, use a ruler or a gauge tool to measure your swatch. Count the number of stitches and rows within a 4-inch area. For example, if you have 20 stitches and 24 rows within 4 inches, your gauge would be 5 stitches and 6 rows per inch.
If your gauge does not match the recommended gauge in the pattern, you will need to adjust your needle size or tension. A larger needle size will create fewer stitches per inch, while a smaller needle size will create more stitches per inch.
Keep in mind that the gauge can vary depending on the yarn, needle size, knitting technique, and individual tension. It is essential to measure and calculate the gauge before starting your project to ensure the finished piece is the correct size and fits well.
Cast-On and Ribbing for the Infinity Scarf Hood
When starting the knitting pattern for an infinity scarf hood, it is important to begin with the proper cast-on method and create a ribbing to give the edge a finished look. The cast-on method and ribbing will not only provide structure to the hood but also add a touch of elegance.
To begin, you will need to choose a suitable cast-on method. There are various options available, such as the long-tail cast-on or the cable cast-on. The long-tail cast-on is commonly used and provides a neat edge, while the cable cast-on creates a slightly more decorative edge. Choose the cast-on method that you are most comfortable with and that matches the overall style you want for your infinity scarf hood.
Once you have casted on the desired number of stitches, it is time to work on the ribbing. The ribbing adds elasticity to the edge of the hood, allowing it to stretch comfortably around the head. One popular ribbing pattern is the classic 1×1 ribbing, which alternates between knitting one stitch and purling one stitch. This pattern creates a reversible texture and gives a clean and polished look to the edge.
While knitting the ribbing, make sure to maintain an even tension to ensure a consistent look throughout the hood. It is also recommended to use smaller needles for the ribbing section to create a tighter fabric. This will help the hood stay in place and prevent it from stretching out over time.
By starting your infinity scarf hood with a proper cast-on method and adding ribbing, you will ensure that your project has a professional finish and fits comfortably around the head. These simple techniques will elevate your knitting skills and allow you to create a beautiful and functional accessory.
Creating the Base of the Infinity Scarf Hood
When starting to knit the base of the infinity scarf hood, it is important to choose the right yarn and needle size. A medium weight yarn, such as worsted or aran, is generally a good choice for this project. The needles should be large enough to create a loose and airy fabric, so a size 10 or 11 needle is recommended.
To begin the base of the infinity scarf hood, cast on the desired number of stitches onto the circular needles. It is important to have a multiple of 6 stitches, so keep this in mind when determining the width of your scarf hood. Once the stitches are cast on, join in the round and place a marker to indicate the beginning of the round.
Row 1: Knit all stitches.
Row 2: Purl all stitches.
Row 3: Knit all stitches.
Row 4: *Knit 2 stitches, yarn over, knit 4 stitches together, yarn over, repeat from * to the end of the round.
These 4 rows create the base pattern for the infinity scarf hood. Repeat rows 1-4 until the desired length is reached, making sure to end on row 2 or 4. The base can be made as long or short as desired, depending on how oversized or fitted you want the scarf hood to be.
Note: It is important to remember to always work in the round when knitting the base of the infinity scarf hood, as this creates a seamless fabric.
Shaping the Hood for a Perfect Fit
When knitting a pattern for an infinity scarf hood, one of the most important aspects to consider is shaping the hood for a perfect fit. The hood should comfortably cover the head and neck, providing warmth and protection from the elements. Here are some tips for achieving the ideal fit:
1. Measuring the Head
Before starting the hood, it is important to measure the head circumference of the person who will wear it. This measurement will determine the number of stitches to cast on and the overall size of the hood. Use a tape measure to measure around the widest part of the head, usually just above the ears and eyebrows. Write down this measurement to refer to later.
2. Calculating the Number of Stitches
To determine the number of stitches to cast on for the hood, multiply the head circumference measurement by the gauge of your knitting. The gauge is the number of stitches and rows per inch achieved with the chosen yarn and needle size. For example, if your gauge is 5 stitches per inch and the head circumference is 22 inches, you would cast on 110 stitches (5 x 22 = 110).
3. Shaping the Hood
To shape the hood, you will need to decrease stitches gradually to create a rounded shape. The specific decreases will depend on the pattern you are working with, but common methods include knitting two stitches together (k2tog) or slipping one stitch and knitting the next two stitches together (ssk). Follow the instructions provided in your pattern to shape the hood and ensure a perfect fit.
4. Adding Extra Length
If you prefer a longer hood that can also be worn as a scarf, you can add extra length to the knitting pattern. This can be done by simply knitting more rows before shaping the hood or by adding extra rows between decreases. Be sure to consider the desired length when calculating the number of stitches to cast on.
By following these tips and techniques, you can shape the hood of your infinity scarf to achieve a perfect fit that is both comfortable and stylish. Whether you are knitting for yourself or someone else, taking the time to measure, calculate, and shape the hood will ensure a finished project that is both functional and fashionable.
Knitting the Body of the Infinity Scarf Hood
Once you have finished knitting the ribbed brim of your infinity scarf hood, it’s time to work on the body of the scarf. The body is where the scarf will take its shape and length, and it’s an important step in creating a cozy and stylish accessory.
To start knitting the body, you will continue working in the same stitch pattern as the ribbed brim. If you are using a simple knit stitch for the brim, you will continue knitting all rows in the body. If you are working a more intricate stitch pattern, make sure to follow the instructions accordingly.
For the body, you will need to determine the desired length of your infinity scarf hood. This can vary depending on personal preference or the pattern you are following. In general, most infinity scarf hoods are between 36-40 inches long. Once you have decided on the length, you can begin knitting.
It’s important to keep track of your stitches and rows as you knit the body. You can use stitch markers or a row counter to help you keep count. This will ensure that your scarf hood turns out the correct size and shape.
Continue knitting in the designated stitch pattern until you have reached your desired length. Keep in mind that the body may be slightly shorter than the full length of the scarf, as the hood portion will be folded and sewn together. Once you have completed the body, you can move on to finishing the scarf hood, which will involve shaping and seaming the top.
Adding a Beautiful Cable Pattern to Your Infinity Scarf Hood
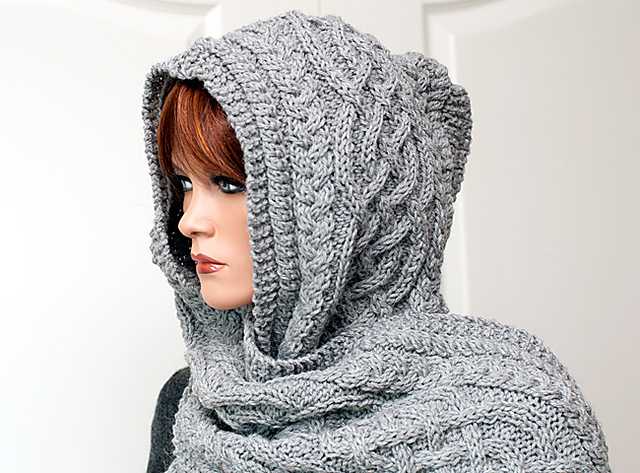
When it comes to knitting patterns, cable patterns add a touch of elegance and sophistication to any project. If you’re looking to create a stunning infinity scarf hood, incorporating a cable pattern can take it to the next level. Whether you’re an experienced knitter or just starting out, adding cables to your design is a great way to showcase your skills and create a unique and beautiful accessory.
Choosing the Right Cable Pattern: With so many cable patterns to choose from, it’s important to select one that complements the style and design of your infinity scarf hood. Consider the thickness of the cables, the direction of the twists, and the overall complexity of the pattern. A simple, classic cable pattern might be ideal for a sleek and modern hood, while a more intricate pattern could work well for a cozy, rustic design.
Knitting the Cable Pattern: Once you’ve chosen your cable pattern, it’s time to start knitting. Make sure you have the necessary knitting needles and yarn to complete your project. The cable pattern will involve different types of stitches, such as knit, purl, and twists, so familiarize yourself with the instructions before starting. Take your time and follow the pattern carefully to achieve the desired result.
Blocking and Finishing: After completing the cable pattern, it’s important to block your infinity scarf hood to give it a polished and professional look. Blocking involves soaking the knitted piece and then shaping it to the desired dimensions. Use blocking pins and a blocking board to ensure that the cables are neat and well-defined. Once your hood is dry, carefully remove the pins and any excess water before wearing or gifting your beautiful creation.
If you’re ready to take your infinity scarf hood to the next level, consider adding a beautiful cable pattern. With careful selection, knitting, and finishing, you’ll create a stunning accessory that will keep you warm and stylish throughout the colder months. So grab your knitting needles, choose a cable pattern, and get started on your next knitting project!
Finishing Touches: Binding Off and Blocking Your Infinity Scarf Hood
Once you have completed knitting your infinity scarf hood, it is time to add the finishing touches. First, you will need to bind off your stitches to secure them and create a clean edge. To bind off, knit two stitches, then pass the first stitch over the second stitch and off the needle. Continue this process until you have only one stitch left on the needle. Cut the yarn, leaving a tail, and pull it through the last stitch to secure it.
After binding off, your infinity scarf hood may look a bit uneven or curled up. This is where blocking comes in. Blocking is the process of gently reshaping and setting your knitted item to its final dimensions. To block your infinity scarf hood, you will need a blocking mat or towel, rust-proof pins, and a spray bottle filled with water. Lay your scarf hood flat on the blocking mat or towel, gently stretching and pinning it to the desired dimensions. Mist the scarf hood with water until it is damp but not soaked, then let it dry completely.
Blocking Tips:
- Always follow the yarn manufacturer’s blocking instructions, as different fibers may require different methods.
- Use rust-proof pins to avoid any staining or damage to your knitted item.
- Make sure to measure your infinity scarf hood before blocking, so you know how much to stretch it to achieve the desired dimensions.
- Allow your scarf hood to dry completely before unpinning it to maintain its shape.
Once your infinity scarf hood is dry, remove the pins and admire your finished project. The binding off and blocking process ensures that your scarf hood has a clean edge and is evenly shaped. Now it is ready to be worn or gifted to someone special. Enjoy the warmth and style of your handmade infinity scarf hood!
Adding a Button or Toggle Closure to Your Infinity Scarf Hood
If you are looking to add a little extra functionality to your knitted infinity scarf hood, consider adding a button or toggle closure. This simple addition can help keep your scarf securely in place, especially during windy days, and can also add some visual interest to your accessory.
To add a button or toggle closure to your infinity scarf hood, you will need a few basic supplies. Firstly, choose a button or toggle that complements the colors and style of your scarf. You will also need a needle and thread in a matching color, as well as scissors to trim any excess thread.
Here is a step-by-step guide to help you add a button or toggle closure:
- Start by deciding where you want the closure to be placed on your scarf hood. This can be near the edge, in the middle, or anywhere that feels comfortable and secure.
- Thread your needle with the matching thread and make a knot at the end.
- If you are using a button closure, position the button on one side of the scarf hood and use the needle and thread to sew it in place. Make sure to sew through the inner layers of the scarf hood to ensure a secure attachment.
- If you are using a toggle closure, position one part of the toggle on one side of the scarf hood and the other part on the opposite side. Use the needle and thread to sew them in place, again sewing through the inner layers of the scarf hood for stability.
- Once you have securely attached the button or toggle, try on your scarf hood and test the closure to ensure it is secure and functions as desired. Make any necessary adjustments to the placement or tightness of the closure.
- Trim any excess thread, and your infinity scarf hood with a button or toggle closure is now ready to be worn!
Adding a button or toggle closure to your infinity scarf hood is a simple and effective way to enhance both the functionality and style of your accessory. Give it a try and enjoy the added versatility and security that it brings to your knitted creation.
Wrapping Up: Styling and Wearing Your Infinity Scarf Hood
Knitting your own infinity scarf hood not only allows you to express your creativity, but also provides you with a stylish and functional accessory for the colder months. Now that you have completed your knitting project, it’s time to explore different ways to style and wear your infinity scarf hood.
One of the most common ways to wear an infinity scarf hood is by simply looping it around your neck. This provides warmth and a cozy, layered look. You can wear it loose for a casual vibe or wrap it more tightly for added insulation.
Styling Tips
Here are some styling tips to help you make the most of your infinity scarf hood:
- Layering: Pair your infinity scarf hood with other winter accessories like gloves, a hat, or a coat for a coordinated and put-together look.
- Color Coordination: Choose colors for your infinity scarf hood that complement your wardrobe for versatile styling options.
- Accessorize: Add brooches, pins, or decorative buttons to your infinity scarf hood to add a personal touch and make it truly unique.
Wearing Options
Here are some different ways you can wear your infinity scarf hood:
- Hooded Look: Pull the top of the infinity scarf hood over your head to create a hood for extra warmth and protection from the wind.
- Head Scarf: Fold your infinity scarf hood in half and wrap it around your head, tying it at the back for a chic head scarf look.
- Shoulder Wrap: Drape your infinity scarf hood over your shoulders like a shawl for a stylish and cozy accessory.
- Double Loop: Loop your infinity scarf hood twice around your neck for a snug and fashionable look.
Experiment with these different styling and wearing options to find the ones that you feel most comfortable and confident in. Let your creativity shine and enjoy your handmade infinity scarf hood!