
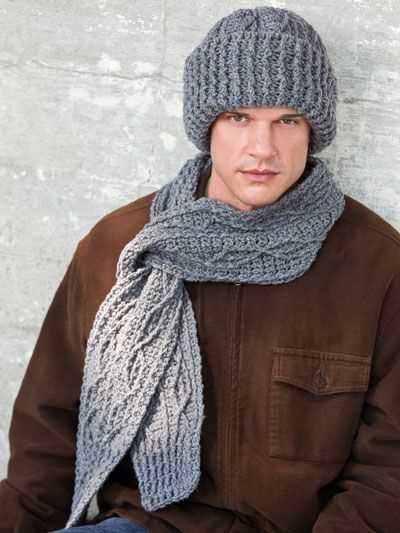
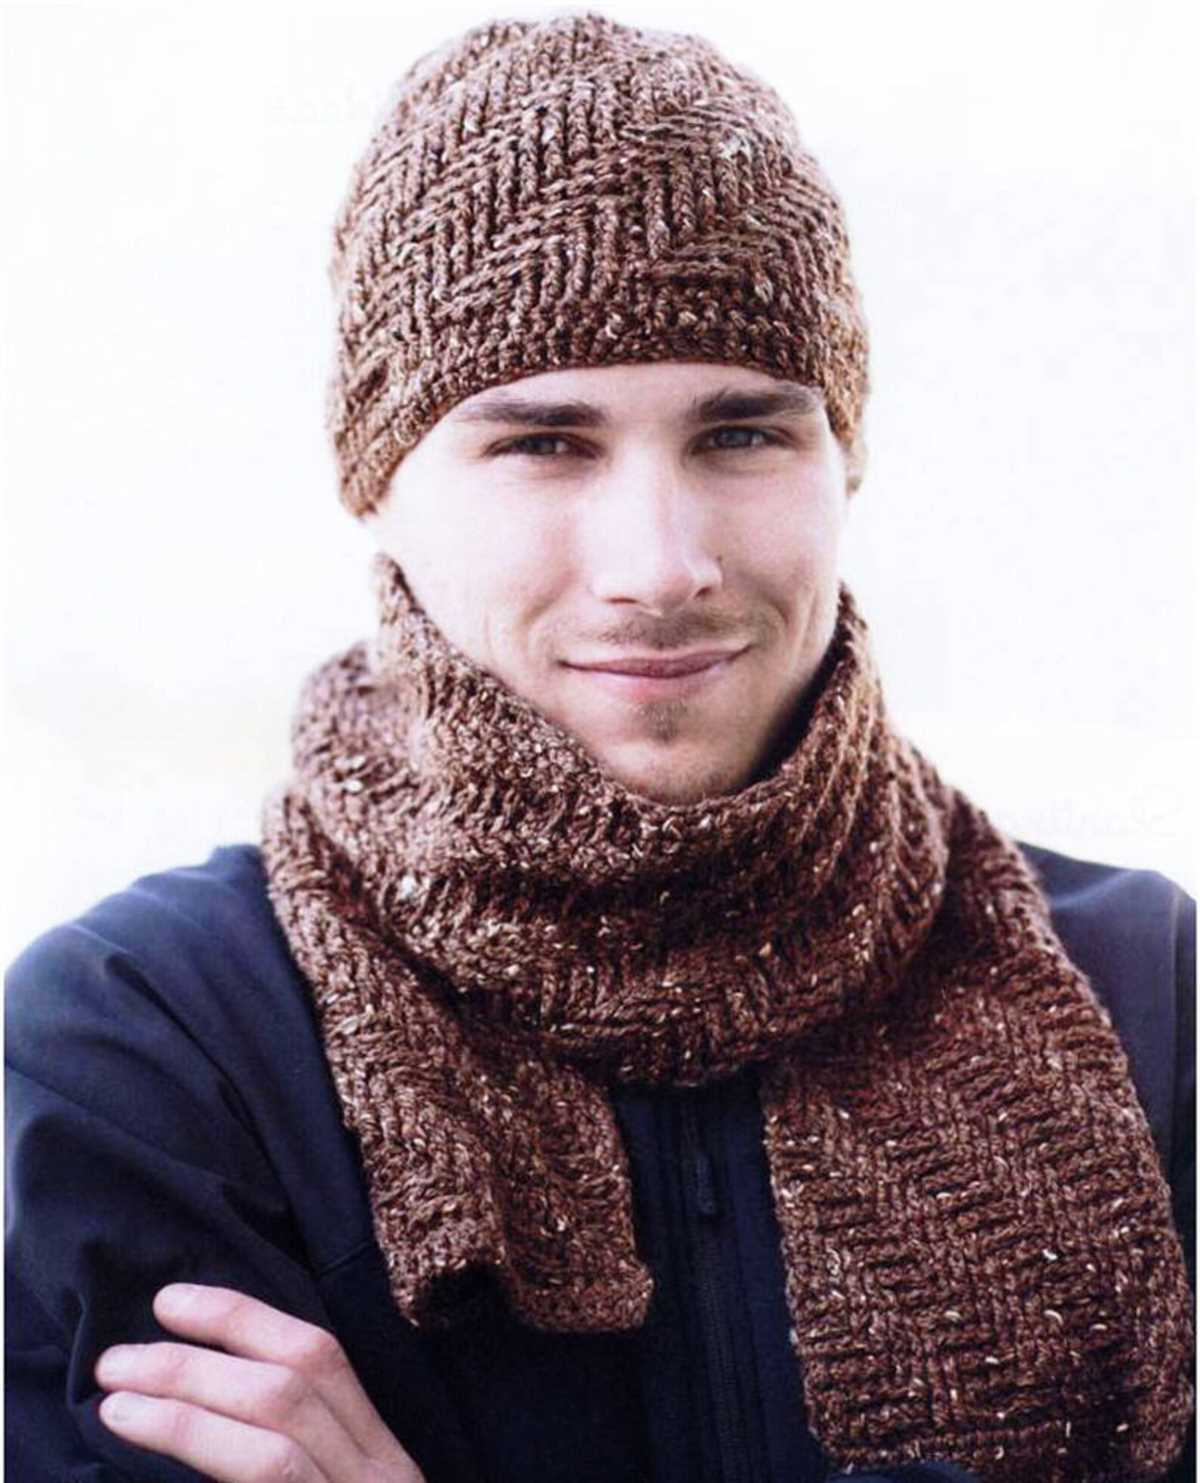
If you’re looking for a stylish and practical knitting project for the men in your life, look no further than this knitting pattern for a men’s scarf and hat. Whether you’re an experienced knitter or just starting out, this pattern is perfect for all skill levels.
The men’s scarf and hat set is not only a great way to keep the men in your life warm during the colder months, but it also makes a thoughtful and personalized gift. By choosing your own yarn colors and patterns, you can create a one-of-a-kind accessory that reflects the recipient’s personality and style.
This knitting pattern provides detailed instructions on how to create both the scarf and hat, including the recommended yarn weight and needle size, as well as step-by-step instructions for each stitch. The pattern also includes helpful tips and tricks to ensure your finished project looks polished and professional.
Choose the right yarn and needles
When it comes to knitting a scarf and hat for men, it’s important to choose the right yarn and needles that will result in a durable and stylish end product. The type of yarn you choose will greatly impact the overall look and feel of the scarf and hat.
Firstly, consider the season or climate in which the scarf and hat will be worn. For colder climates, a thicker yarn such as a bulky or worsted weight would be ideal to provide warmth. For milder climates, a lighter weight yarn such as a DK or sport weight would be more appropriate.
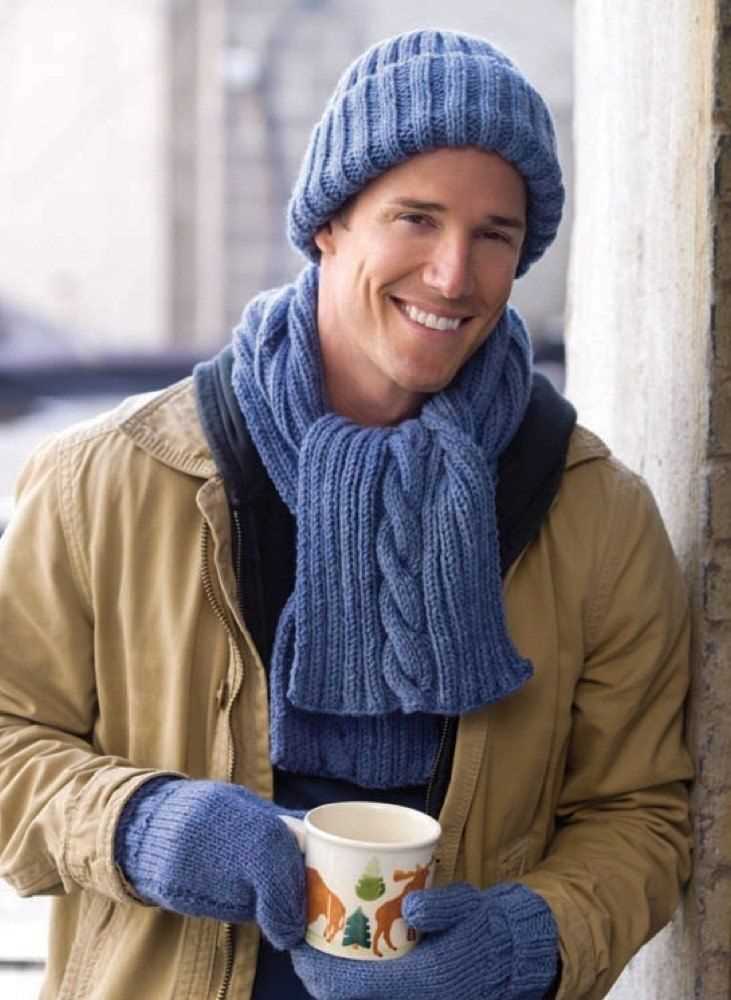
When choosing the color of the yarn, keep in mind the recipient’s personal style and preferences. Neutral colors such as black, gray, or navy are versatile and timeless, while bolder colors such as red or mustard can add a pop of personality. Consider the existing wardrobe and any specific color preferences when making your selection.
Next, consider the fiber content of the yarn. Natural fibers such as wool or alpaca are excellent choices for a warm and cozy scarf and hat. They have excellent thermal properties and can retain heat even when wet. Other options like acrylic or cotton yarns can be more lightweight and easier to care for, making them suitable for everyday use.
The size of the needles you choose will also impact the finished product. Generally, larger needles result in a looser, more drapey fabric, while smaller needles create a denser, more structured fabric. Consider the desired look and feel of the scarf and hat when selecting your needle size.
To ensure a successful knitting project, make sure to check the recommended gauge on the yarn label and adjust your needle size accordingly. Swatching is always recommended before starting a larger project, as it allows you to check your tension and make any necessary adjustments.
Start with the scarf
If you’re looking to knit a cozy scarf and hat set for a man in your life, starting with the scarf is a great choice. The scarf is a versatile accessory that can be worn in various styles and provides warmth during colder months. Plus, it’s a relatively easier project compared to the hat, making it a good starting point for beginners.
Choose the right yarn: When selecting yarn for the scarf, consider the preferred level of warmth and the recipient’s personal style. Opt for a medium-weight or bulky yarn for a thick and cozy scarf, or a lighter weight yarn for a more delicate look.
Take measurements: Before starting, measure the desired length and width of the scarf. Men’s scarves are typically longer and wider than women’s scarves. A typical measurement is around 60 inches long and 8-10 inches wide, but adjust based on personal preference.
Once you have your yarn and measurements ready, it’s time to choose a knitting pattern. There are plenty of free patterns available online for men’s scarves, ranging from simple ribbed designs to more intricate cable patterns. Choose a pattern that matches your skill level and desired aesthetic.
Cast on and knit: To start, cast on the desired number of stitches based on the width of your scarf. Follow the knitting pattern, working row by row, until you reach the desired length. Remember to keep track of your rows and pattern repeats if necessary.
Finish off: Once you’ve reached the desired length, it’s time to finish off the scarf. To do this, simply bind off your stitches. Cut the yarn, leaving a tail, and weave in any loose ends.
Congratulations! You’ve completed the first part of your scarf and hat set. Now, you can move on to knitting the matching hat using a similar yarn and pattern. With a cozy scarf and hat, your loved one will be ready to face the cold weather in style!
Cast on stitches
In order to begin your knitting project, you will need to cast on stitches. Casting on is a technique used to create the foundation row of your knitting. It is important to cast on the correct number of stitches, as this will determine the width of your scarf or hat.
To cast on stitches, you will need a pair of knitting needles and the yarn you have chosen for your project. Start by making a slip knot at the end of the yarn and place it on one of the needles. Hold the needle with the slip knot in your right hand.
Using your left hand, hold the other needle. With the yarn attached to the ball, bring it over the top of the needle in your left hand, forming a loop. Insert the needle in your right hand through the loop from left to right, and then bring the yarn under and over the needle.
Continue this process until you have cast on the required number of stitches. Keep the tension of the yarn even, neither too loose nor too tight. Once you have cast on all the stitches, you are ready to begin your knitting project!
Work the body of the scarf
Once you have finished the ribbing section, you will begin working on the body of the scarf. To do this, you will continue in the established pattern stitch, following the instructions provided in the knitting pattern.
Using the specified yarn and needle size, you will work in rows to create the body of the scarf. The pattern may include various stitch patterns and techniques, such as cables, lace, or colorwork, to add texture and interest to the design.
Row 1: Start by knitting or purling the first stitch, depending on the pattern instructions. Then, continue working in the established pattern stitch for the specified number of stitches.
Row 2 and subsequent rows: Follow the pattern instructions to determine the stitch pattern for each row. Repeat the specified pattern stitch until you reach the desired length for the scarf.
It is important to keep track of your progress and refer to the pattern frequently to ensure you are following the correct stitch pattern and row count. Use stitch markers to help you keep track of any pattern repeats or shaping instructions.
Continue working in the established pattern stitch until the scarf has reached the desired length, as indicated in the knitting pattern. Once you have completed the body of the scarf, you will move on to finishing the ends and blocking the finished piece.
Add decorative patterns
Enhance the look and style of your knitted scarf and hat set by incorporating decorative patterns. These patterns can add visual interest and make your accessories stand out. Here are a few ideas to inspire you:
1. Cable knit design
A cable knit design is a classic choice for adding texture to your scarf and hat. This pattern involves crossing stitches over one another to create a twisting, rope-like effect. It can be a bit challenging for beginners, but with practice, you can achieve beautifully intricate cables.
2. Fair Isle pattern
The Fair Isle technique involves knitting with multiple colors to create intricate patterns. You can create plaid, geometric, or nature-inspired motifs using this technique. Fair Isle is a great way to add color and interest to your scarf and hat set, making them truly unique.
3. Lacework
Lacework patterns add delicate and feminine touch to your accessories. They typically involve creating decorative holes or eyelets in the fabric, which creates an airy effect. Lacework patterns are perfect for lightweight scarves and hats, adding a touch of elegance to your winter wardrobe.
4. Textured stitches
Experiment with different textured stitches like ribbing, seed stitch, or garter stitch to create interesting patterns. These stitches add depth and dimension to your knitting and can be used to create stripes or patterns. Mixing and matching different textured stitches can give your scarf and hat set a unique and personalized look.
Incorporating decorative patterns into your mens scarf and hat set can elevate their style and make them more visually appealing. Whether you choose a classic cable knit design, a colorful Fair Isle pattern, delicate lacework, or textured stitches, these patterns will help you create fashionable accessories that will keep you warm and stylish throughout the winter season.
Finish the scarf
Once you have completed knitting the scarf according to the pattern, it’s time to finish it off. Follow these steps to give your scarf a polished look:
1. Bind off: Start by binding off the stitches. This will secure the last row of your knitting and prevent it from unraveling. To bind off, knit the first two stitches as usual. Then, use the left needle to lift the first stitch over the second stitch and off the right needle. Knit one more stitch and repeat the process until you have one stitch left. Cut the yarn, leaving a long tail, and pull it through the last stitch to secure it.
2. Weave in ends: To give your scarf a neat finish, you need to weave in any loose ends. Thread the yarn tail onto a tapestry needle and carefully weave it through the stitches on the wrong side of the scarf. Make sure to weave it in securely and trim any excess yarn.
TIP: If you have different color sections in your scarf, you can use a different yarn color to weave in the ends. This will help camouflage the ends and make them less noticeable.
3. Block the scarf: Blocking your scarf will help even out the stitches and give it a professional finish. To block the scarf, dampen it with water and gently squeeze out the excess. Lay the scarf flat on a towel or blocking mat, shaping it to the desired dimensions and smoothing out any wrinkles. Use T-pins or blocking wires to secure the edges in place. Leave the scarf to dry completely before removing the pins or wires.
4. Optional: Add fringe or tassels: If you want to add a decorative touch to your scarf, consider adding fringe or tassels. Cut equal lengths of yarn and attach them to the ends of the scarf. You can find tutorials online for different types of fringe and tassel designs.
TIP: Before adding fringe or tassels, make sure to check the pattern instructions to see if it includes them. Some patterns may have specific instructions for adding these embellishments.
Move on to the hat
Now that you have completed your scarf, it’s time to move on to the hat! The hat pattern follows a similar design to the scarf, making it a great companion piece.
To begin, gather your materials, including your preferred yarn and knitting needles. You’ll also need a tape measure, scissors, and a yarn needle for finishing touches.
Step 1: Casting on

Start by casting on the desired number of stitches, typically around 80 to 100 stitches. This will depend on the gauge of your yarn and the size of the hat you want to create.
Remember to leave a long tail for sewing up the seam later on. Once you have cast on, join the round by carefully sliding the first stitch from the left needle onto the right needle, being careful not to twist the stitches.
Step 2: Knitting the body of the hat
Continue knitting in the round, using your preferred stitch pattern or the same stitch pattern as the scarf if you want a cohesive look. Knit until the hat reaches your desired length, typically around 7 to 9 inches from the cast on edge.
Remember to periodically measure the hat against your head or a hat that fits well to ensure it will fit properly.
Step 3: Decreasing for the crown
Once the hat has reached the desired length, it’s time to start decreasing for the crown. This will give the hat its tapered shape.
There are a variety of ways to decrease stitches, such as knitting two stitches together or using a slip, slip, knit technique. Follow the specific instructions for the hat pattern you are using to decrease evenly and create the desired shape.
Continue decreasing until you have a small number of stitches remaining, typically around 6 to 8 stitches.
Step 4: Finishing touches
Finish off your hat by cutting the yarn, leaving a long tail for sewing up the remaining stitches. Use a yarn needle to thread the tail through the remaining stitches, and cinch them closed tightly.
Weave in any loose ends and block your hat if necessary to give it a polished look. Voila! You now have a completed hat to match your scarf.
With this knitting pattern, you can create a stylish and cozy set for the colder months. Whether you’re knitting for yourself or a loved one, this pattern is sure to impress. Happy knitting!
Cast on stitches for the hat
When starting to knit a hat, it is important to cast on the appropriate number of stitches to achieve the desired size and fit. This will ensure that the hat is not too tight or too loose.
To cast on stitches for the hat, you can use a variety of methods such as the long-tail cast on, the cable cast on, or the knitted cast on. The specific method you choose will depend on your personal preference and the look you are trying to achieve.
One common approach is to use the long-tail cast on method. To do this, you will first need to estimate the amount of yarn you will need for the cast on based on the number of stitches you plan to cast on. Then, make a slipknot and place it on your knitting needle.
- Hold the slipknot and the working yarn in your right hand, with the slipknot loop over your thumb and the working yarn over your index finger.
- Insert the needle into the slipknot from left to right, going under the thumb loop and over the index finger yarn.
- Using the needle, pull the working yarn through the slipknot loop, creating a new loop on the needle.
Continue this process, pulling new loops through the previous loops, until you have cast on the desired number of stitches for the hat. Remember to keep the tension even as you go to ensure that all the stitches are the same size.
Once you have cast on the stitches, you can then begin knitting the hat according to the pattern instructions. Ensure that you follow the pattern carefully and keep track of any shaping or stitch changes that may be required.
Work the ribbing
The ribbing is an essential part of any knitted scarf and hat. It adds texture and elasticity to the finished item, making it more comfortable to wear. In this knitting pattern for a men’s scarf and hat, the ribbing is worked in a simple 1×1 rib stitch pattern.
To work the ribbing, you will need to cast on an even number of stitches. The exact number will depend on the desired width of the scarf or hat. Once you have cast on the required number of stitches, you can begin working the ribbing.
Step 1: Start by knitting one stitch. Then, bring the yarn to the front of your work and purl one stitch. Continue alternating between knitting and purling stitches until you reach the end of the row.
Step 2: For the next row, repeat the pattern established in the first row. Knit one stitch, then purl one stitch, and continue alternating until the end of the row. Repeat these two rows until the desired length of the ribbing is reached.
If you prefer a wider or narrower ribbing, you can adjust the number of stitches you cast on. Keep in mind that the ribbing will naturally contract, so it’s a good idea to use a larger needle size to achieve the desired width.
Once you have completed the ribbing, you can continue with the main body of the scarf or hat, following the instructions in the knitting pattern. The ribbing adds a professional finish to the garment and ensures a snug fit, making it both stylish and comfortable to wear.
Continue with the body of the hat
Once you have completed the ribbing section, it’s time to continue with the body of the hat.
Switch to the main stitch pattern for the hat. This can be a simple stockinette stitch, a cable pattern, or any other stitch pattern of your choice.
Knitting the body in stockinette stitch
If you prefer a clean and simple look, you can continue knitting the body of the hat in stockinette stitch. This means you will knit all rows for a smooth, uniform texture.
Continue working in the round, knitting every stitch until the hat measures your desired length. Remember to periodically try the hat on to ensure a proper fit.
Adding a cable pattern
If you’re looking to add some texture and interest to your hat, try incorporating a cable pattern into the body.
To do this, you will need to follow a cable chart or written instructions for the specific cable pattern you choose. Cable patterns typically involve crossing stitches over each other to create a twisted, interwoven effect.
Continue knitting in the round, following the cable pattern as instructed, until the hat reaches the desired length.
Remember to always keep track of your stitch count, especially when working with cable patterns, to ensure the pattern is maintained correctly.
Once you reach the desired length, you can either continue knitting straight or start decreasing stitches to shape the crown of the hat, depending on the style you prefer.
Shape the crown
After completing the ribbed band, it’s time to start shaping the crown of the hat. This is where the hat starts to take its final shape and become more fitted.
Begin by dividing the stitches equally onto four double-pointed needles, or onto a circular needle if you prefer. This will allow you to easily work in the round and shape the crown. Make sure to distribute the stitches evenly so that each needle holds an equal number of stitches.
Decrease rounds:
- Round 1: *K2, k2tog; repeat from * to the end of the round.
- Round 2: Knit all stitches.
- Round 3: *K1, k2tog; repeat from * to the end of the round.
- Round 4: Knit all stitches.
- Continue alternating between decrease rounds and knit rounds until you have a small number of stitches remaining, typically around 8-10 stitches.
Once you have a few stitches left, cut the yarn, leaving a long tail. Thread the tail through the remaining stitches and pull tight to close the crown of the hat. Secure the end of the yarn by weaving it into the inside of the hat.
Finish the Hat
Once you have completed knitting the scarf, it’s time to finish off the hat. Here are the final steps to complete your knitted hat:
- Bind Off: To finish the top of the hat, you need to bind off the stitches. Knit the first two stitches, then use the tip of the left-hand needle to pass the first stitch over the second stitch and off the right-hand needle. Continue knitting one stitch and passing the previous stitch over until you have one stitch left. Cut the yarn, leaving a long tail, then thread it through the remaining stitch and pull tight to secure.
- Weave in Ends: Using a tapestry needle, weave in any loose ends on the inside of the hat. Make sure to secure the yarn so that it doesn’t unravel over time.
- Block the Hat (optional): If you want your hat to have a more finished look, you can block it. Wet the hat, then gently shape it to the desired size and let it dry flat.
Congratulations! You have successfully completed your knitted hat. It’s ready to be worn or gifted to someone special. Enjoy the warmth and style this hat will bring during the cold winter months.
Q&A:
Can you recommend a knitting pattern for a men’s scarf and hat?
Yes, I can! One popular knitting pattern for a men’s scarf and hat is the “Cable Knit Set for Men” pattern. It features a classic cable design and is suitable for intermediate knitters. The pattern provides instructions for both the scarf and hat, and includes sizes for different head circumferences. You can find this pattern and many others on knitting websites or in knitting pattern books.
What type of yarn should I use for a men’s scarf and hat?
There are many types of yarn you can use for a men’s scarf and hat, depending on your preferences and the desired look and functionality. Some popular choices include wool, acrylic, and blends of different fibers. For a warm and cozy scarf and hat, you may want to consider using a bulky or chunky yarn. However, if you prefer a lighter and more breathable option, you can go for a worsted weight yarn. Ultimately, the choice of yarn will depend on the specific pattern you are using and the intended use of the scarf and hat.
Are there any free knitting patterns available for men’s scarf and hat?
Yes, there are many free knitting patterns available for men’s scarf and hat. You can find these patterns on various knitting websites, such as Ravelry or Knitting Patterns Central. Some popular free patterns include the “Simple Ribbed Scarf and Hat” pattern, which is great for beginners, and the “Classic Cabled Set” pattern, which features a more complex design. These patterns usually come with detailed instructions and sometimes even video tutorials to help you along the way.
How long should a men’s scarf be?
The length of a men’s scarf can vary depending on personal preference and the style of the scarf. However, a typical length for a men’s scarf is around 60 to 70 inches (150 to 180 cm). This length allows for wrapping the scarf around the neck and tucking it into a coat or jacket for added warmth. Of course, you can adjust the length to your liking or modify it based on the specific pattern you are using.
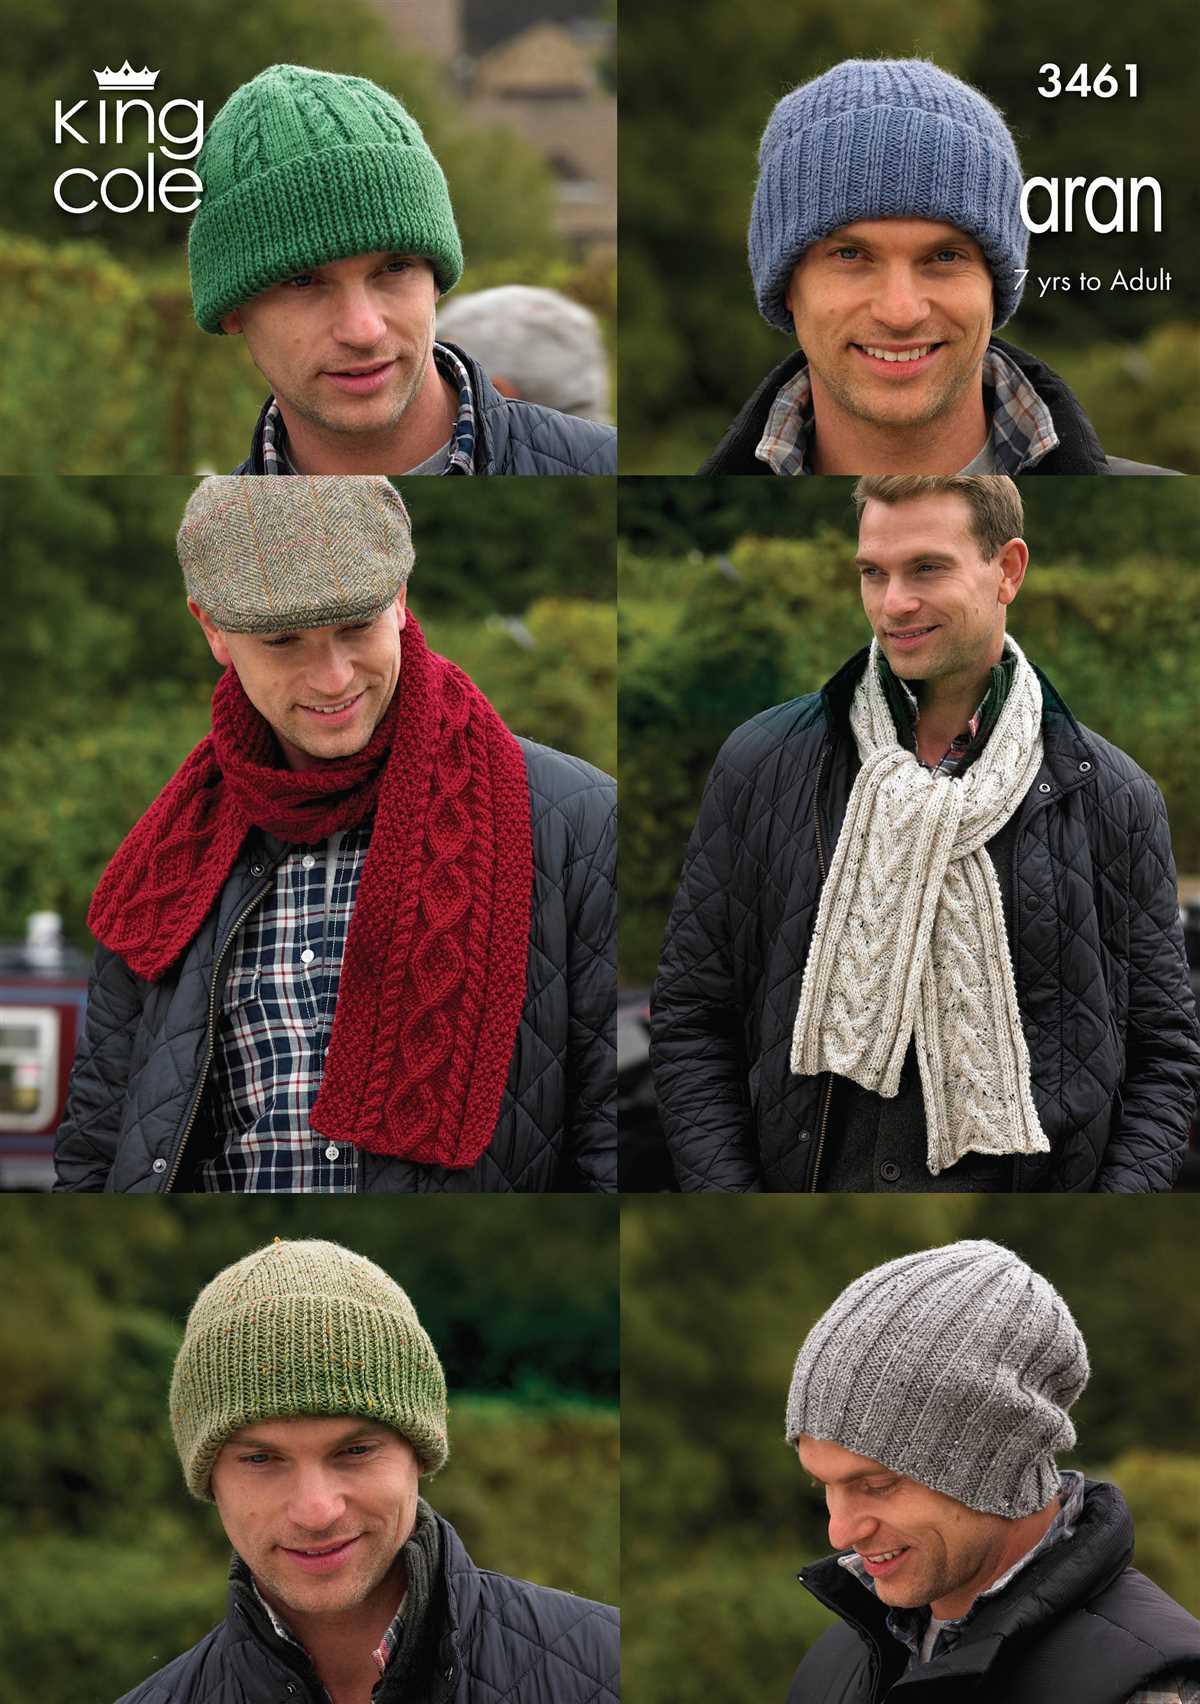
What is a good stitch pattern for a men’s scarf and hat?
There are many stitch patterns that work well for men’s scarf and hat sets. Some popular choices include the classic rib stitch, the basketweave stitch, or the seed stitch. These stitch patterns create a textured and visually appealing fabric that is masculine and suitable for men’s accessories. However, feel free to experiment with different stitch patterns and find the one that you like the most. Just make sure to consider the thickness of the yarn and the overall look you want to achieve when choosing a stitch pattern.
What kind of knitting pattern can I use for a men’s scarf and hat?
There are many options for knitting patterns for men’s scarves and hats. Some popular choices include simple ribbing patterns, cable patterns, and colorwork patterns. It really depends on the style and design you are looking for.