
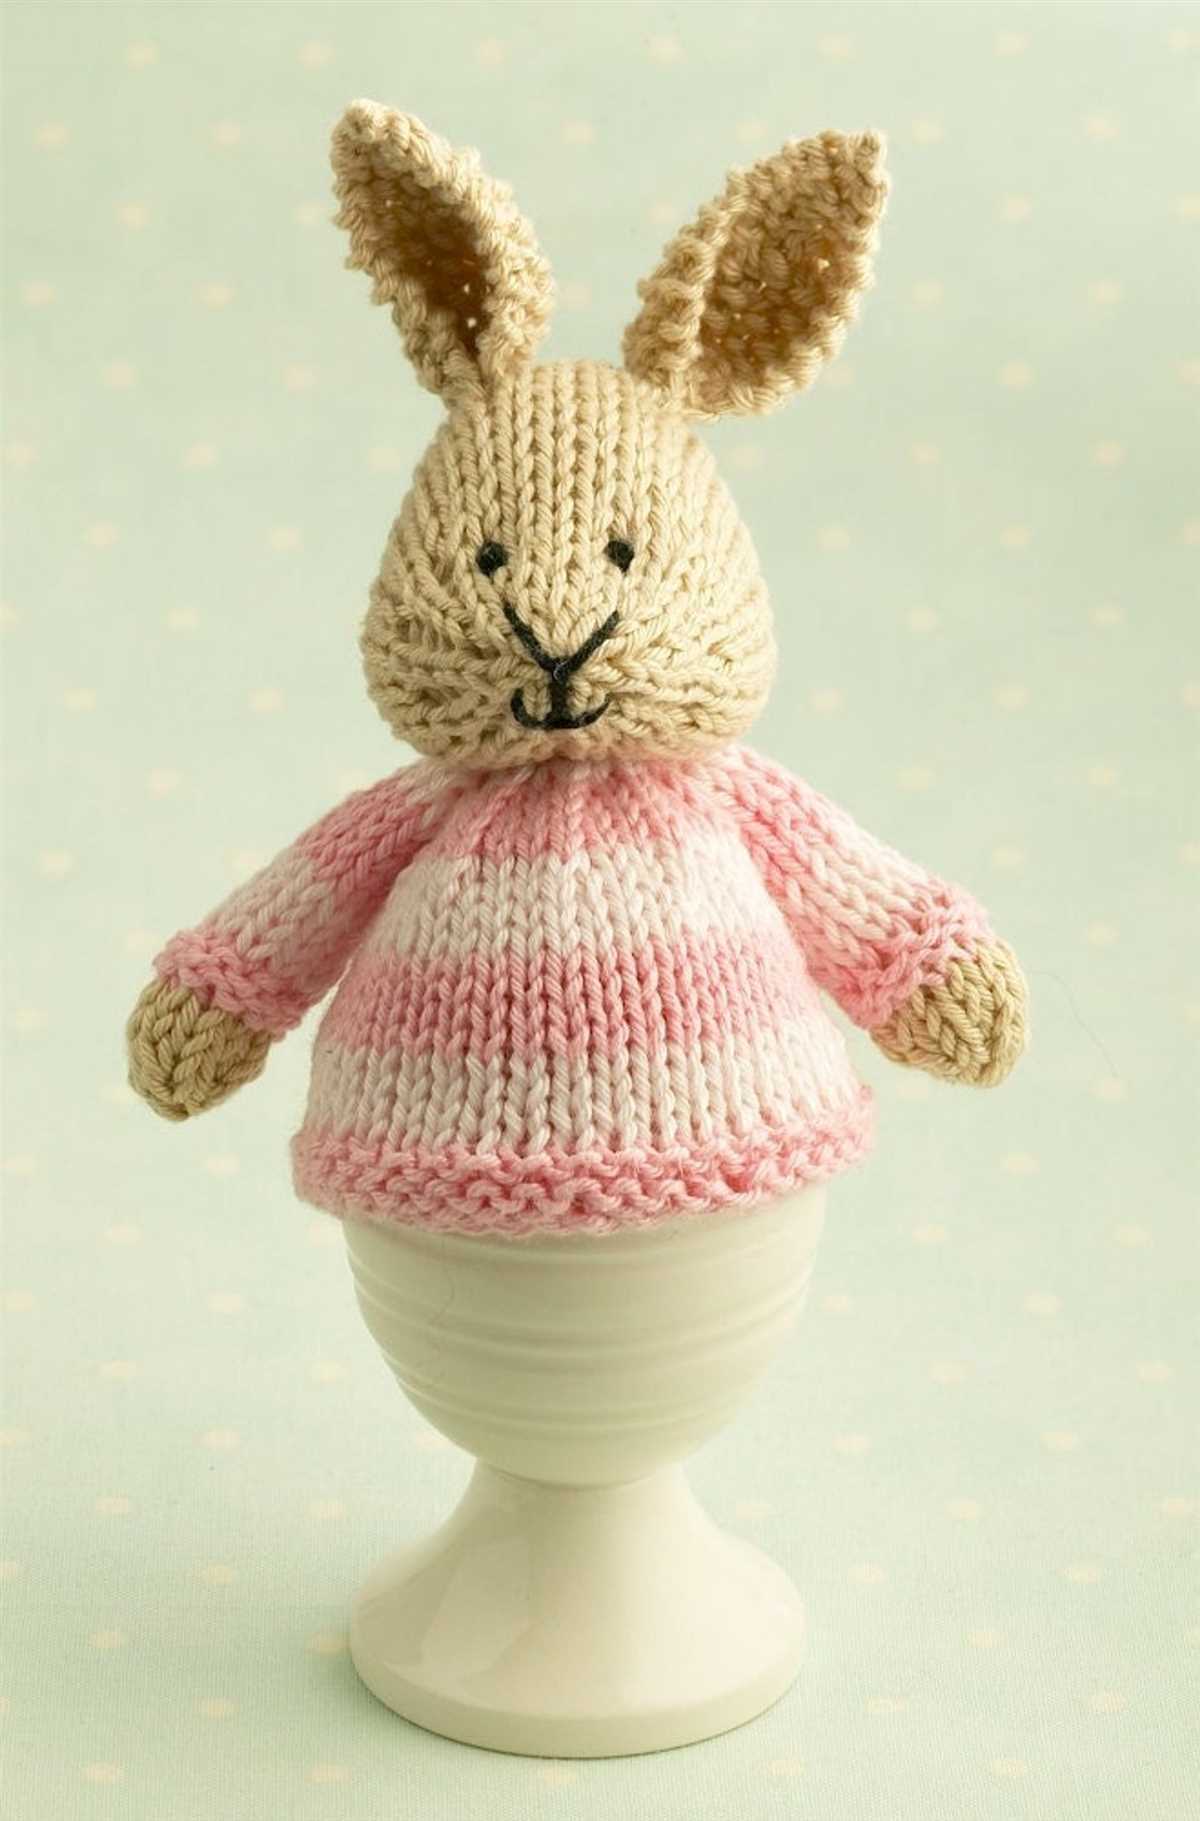
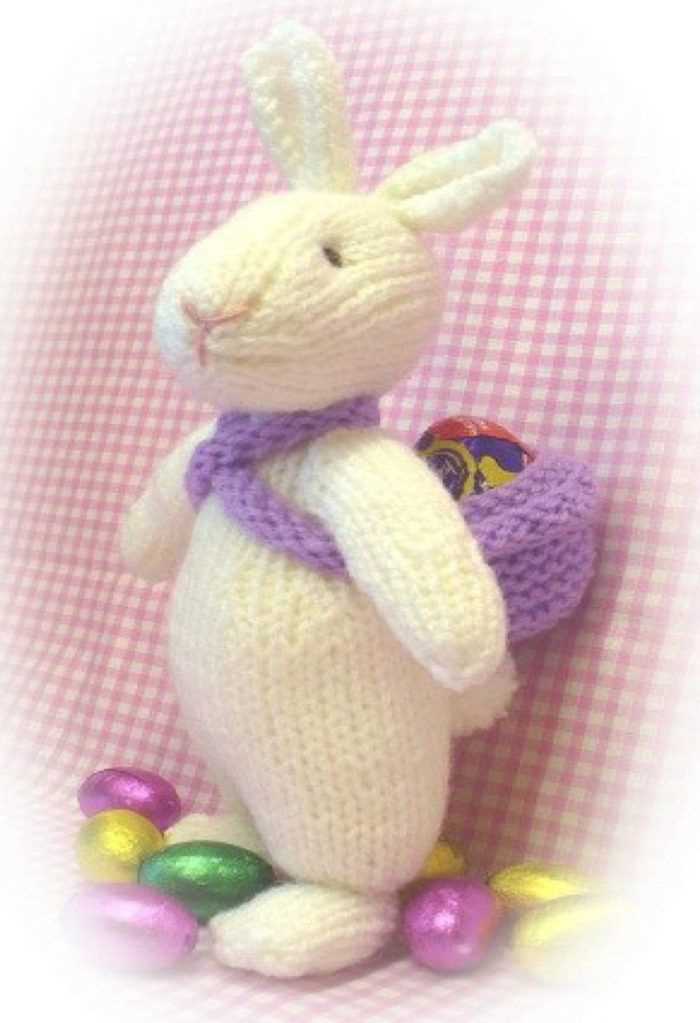
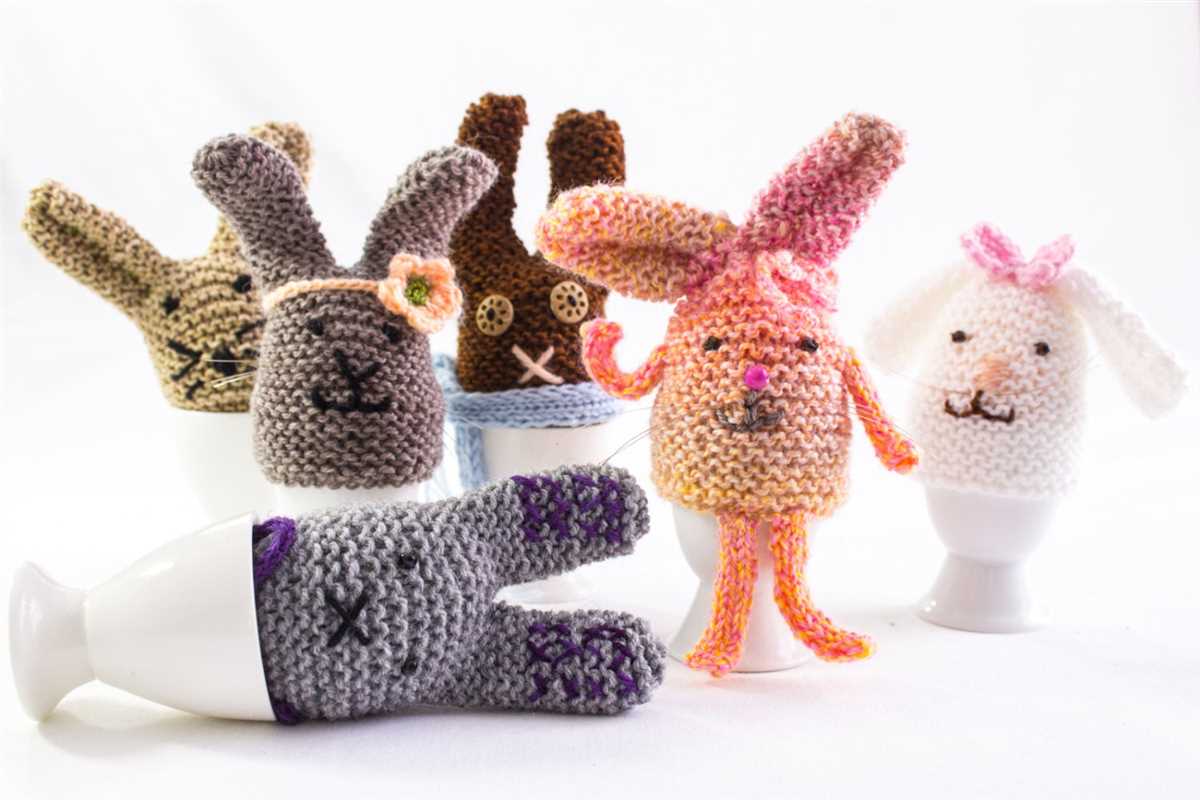
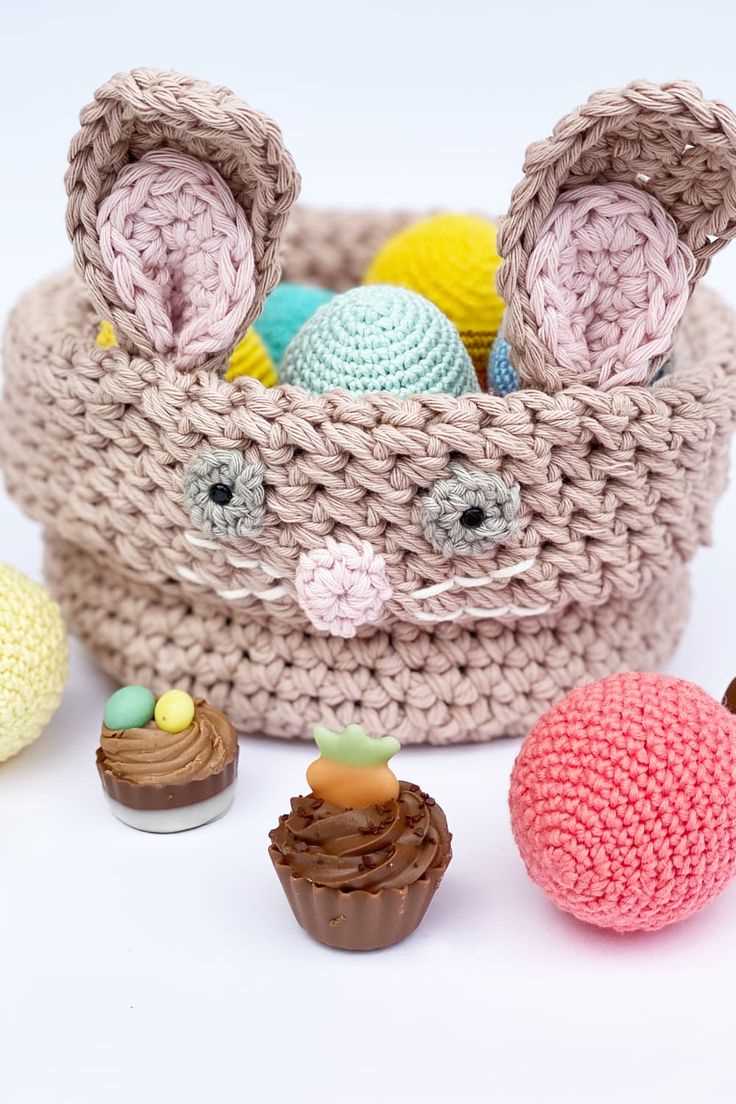
Easter is a time for celebrating new beginnings, and what better way to embrace the spring season than with a cute and festive addition to your morning breakfast routine? This knitting pattern for an Easter Bunny Egg Cosy will bring a touch of whimsy and charm to your table.
Whether you are a seasoned knitter or just starting out, this pattern is beginner-friendly and a great way to practice your knitting skills. The finished cosy will fit a standard-sized egg and is the perfect gift for friends and family during the Easter season.
The pattern uses basic knitting techniques such as casting on, knitting, purling, and decreasing stitches. You will need a set of double-pointed knitting needles, a small amount of yarn in the colors of your choice, and some stuffing for the bunny’s head. The pattern includes step-by-step instructions with photos, making it easy to follow along and create your own adorable Easter Bunny Egg Cosy.
What is an egg cosy?

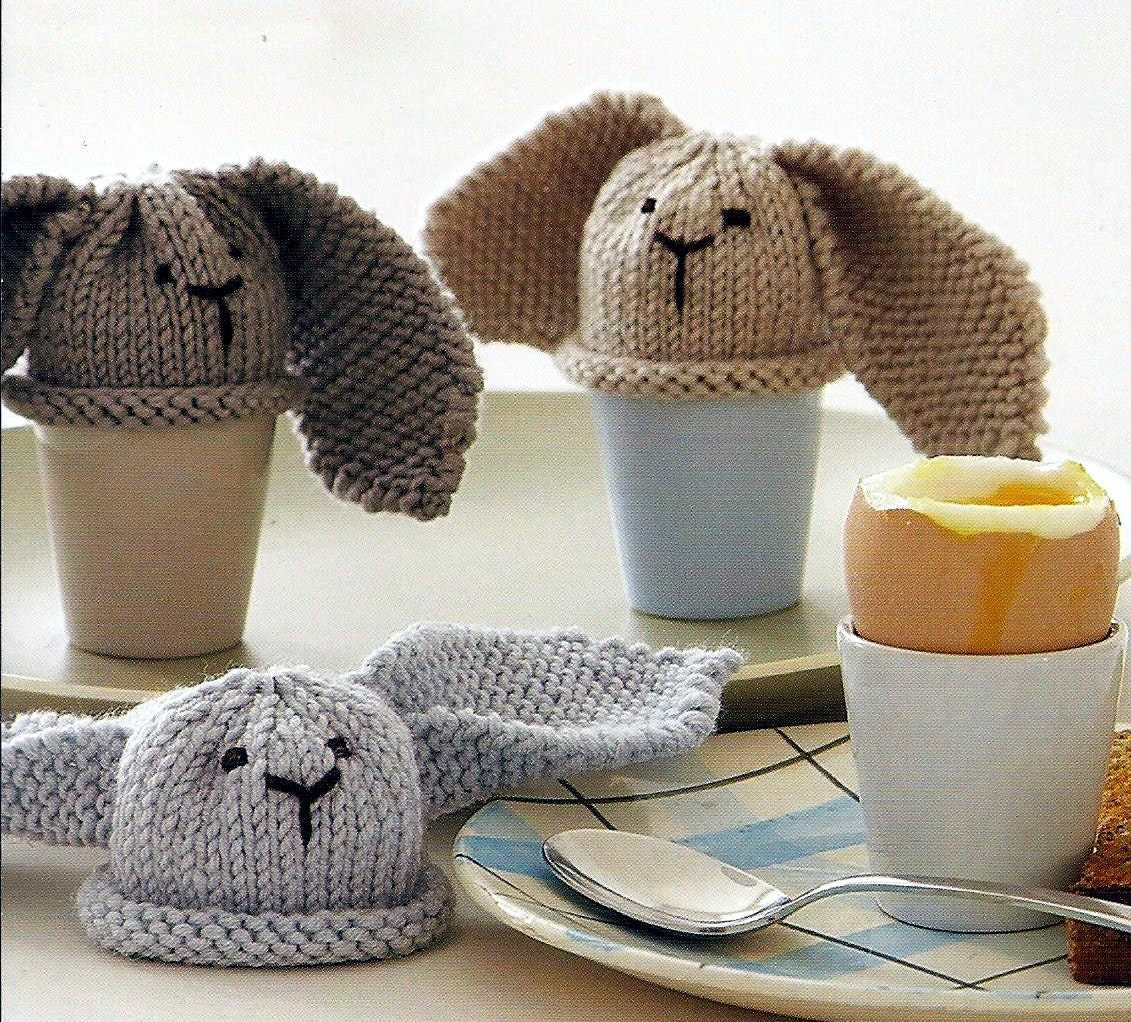
An egg cosy is a small knitted or crocheted cover that is designed to keep a boiled egg warm once it has been taken out of the pot and placed on a plate. It is often used during breakfast or brunch to ensure that the egg stays at the desired temperature while it is being eaten.
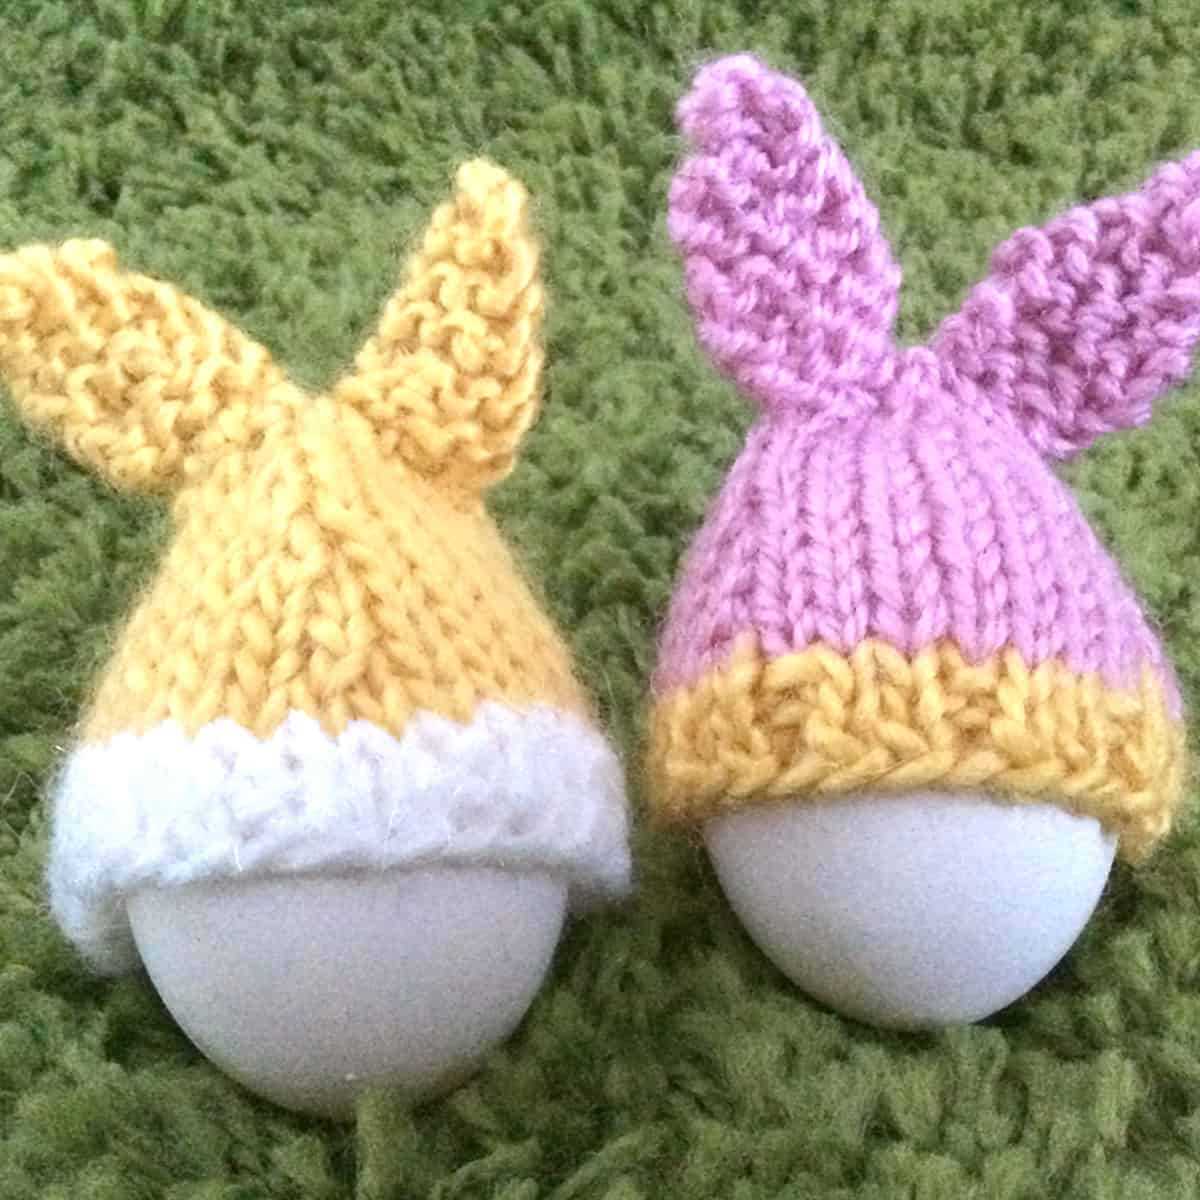
The egg cosy is typically shaped like a small hat or bonnet, with a snug fit that encloses the top and sides of the egg. It is made using a thick yarn or wool, which provides insulation and helps to retain the heat of the egg. The cosy is usually decorated with a variety of patterns, colors, and embellishments, making it a fun and decorative addition to the breakfast table.
Egg cosies have been used for centuries, with the first recorded use dating back to the Victorian era. They were originally made by hand using traditional knitting techniques, and were often intricate and highly detailed. Today, egg cosies are still popular and can be found in a wide range of styles and designs, including ones that are shaped like animals, flowers, or other objects.
Using an egg cosy not only helps to keep the egg warm, but also adds a touch of whimsy and charm to mealtime. It can be a great conversation starter and a fun way to add a bit of personality to your breakfast routine. Whether you prefer a classic design or something more unique, an egg cosy is a must-have accessory for any egg lover.
Why knit your own egg cosy?
Knitting your own egg cosy can be a rewarding and enjoyable experience. Not only does it allow you to showcase your knitting skills, but it also enables you to create a unique and personalized accessory for your Easter celebrations.
1. Customization: By knitting your own egg cosy, you have complete control over the design, color, and size. This means that you can create an egg cosy that perfectly matches your style and preferences. Whether you prefer a simple and classic design or a fun and whimsical one, knitting allows you to bring your vision to life.
2. Handmade with love: A hand-knit egg cosy carries a special touch of love and care. It is a thoughtful gift that can be treasured for years to come. Knitting takes time and patience, and by making an egg cosy yourself, you are putting effort into creating a unique and heartfelt item.
3. Eco-friendly and sustainable: Knitting your own egg cosy allows you to embrace a more sustainable lifestyle. By utilizing yarn and needles, you are reducing waste and promoting the use of natural materials. Additionally, knitting allows you to reuse and repurpose yarn, making it an eco-friendly option.
4. Fun and fulfilling hobby: Knitting not only produces beautiful and functional items but also serves as a form of relaxation and creativity. It is a satisfying and calming activity that can help reduce stress and promote mindfulness. Knitting an egg cosy can be a fun and fulfilling project to undertake, especially during the Easter season.
5. Unique and personal touch: By knitting your own egg cosy, you add a unique and personal touch to your Easter decorations. Whether you choose to incorporate special stitches, add embroidery, or attach buttons, you can make each egg cosy one-of-a-kind. This personalization adds charm and character to your Easter festivities.
In conclusion, knitting your own egg cosy offers numerous benefits, including customization, the sentimental value of a handmade item, eco-friendliness, the joy of knitting as a hobby, and the ability to add a unique and personal touch to your Easter celebrations. So why not pick up your knitting needles and start creating your very own egg cosy today?
Materials needed
To create this adorable Easter bunny egg cosy, you will need the following materials:
- Yarn: Choose a soft and lightweight yarn in your preferred color for the bunny body. You will also need a small amount of contrasting color for the bunny’s ears, nose, and tail.
- Knitting Needles: Use a pair of needles that match the recommended gauge for your chosen yarn. Typically, US size 6 (4mm) needles work well for worsted weight yarn.
- Tapestry Needle: This needle will be used to sew the bunny together and weave in any loose ends.
- Scissors: A pair of scissors will be handy for cutting the yarn and trimming any excess.
- Polyester Fiberfill: This stuffing will be used to give the bunny its shape and make it nice and plush.
- Stitch Markers: Optional but helpful for keeping track of your stitches and shaping.
- Buttons or Embroidery Floss: These additional embellishments can be used to add eyes and other facial features to your bunny, if desired.
Make sure you gather all of these materials before starting the project to make the knitting process smooth and enjoyable. Once you have everything ready, you’ll be all set to create an adorable Easter bunny egg cosy!
Choosing the right yarn
When it comes to knitting a pattern for an Easter bunny egg cosy, choosing the right yarn is an important decision. The yarn you choose will not only impact the overall look and feel of the finished product, but also its durability and functionality. Here are some factors to consider when selecting yarn for your Easter bunny egg cosy:
1. Fiber content
One of the first things to consider is the fiber content of the yarn. The most commonly used fibers for knitting are wool, cotton, acrylic, and blends. Each fiber has its own unique characteristics and properties. Wool, for example, is known for its warmth and elasticity, making it a good choice for cozy and stretchy egg cosies. Cotton, on the other hand, is breathable and hypoallergenic, making it a great option for those with sensitive skin. Acrylic yarns are often chosen for their affordability and easy care. Blends, which combine different fibers, can offer the best of both worlds.
2. Weight and gauge

The weight of the yarn refers to its thickness, and it is typically categorized into different weight classes, such as lace, fingering, sport, worsted, and bulky. The weight of the yarn will affect the size and drape of the finished project. For an Easter bunny egg cosy, you’ll want to choose a yarn that is light enough to create a snug fit around the egg, but not too bulky that it becomes cumbersome. Additionally, the gauge, or the number of stitches and rows per inch, should be considered to ensure that your egg cosy turns out the right size.
3. Color and texture
The color and texture of the yarn will play a big role in the overall aesthetic of your Easter bunny egg cosy. Consider the color scheme you have in mind and choose a yarn that complements it. Opting for pastel shades or vibrant Easter-inspired colors can enhance the festive feel. Additionally, consider the texture of the yarn. Some yarns have a smooth finish, while others have a chunky or boucle texture. The texture you choose can add visual interest and dimension to your egg cosy.
By considering factors such as fiber content, weight and gauge, as well as color and texture, you can select the perfect yarn to bring your Easter bunny egg cosy pattern to life. Enjoy the process of choosing and working with yarn, and let your creativity shine through in your finished project!
Step-by-Step Instructions for Knitting an Easter Bunny Egg Cosy
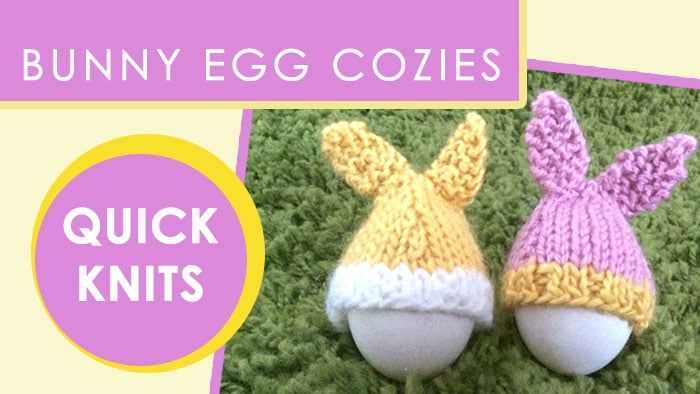
If you’re looking for a cute and festive way to dress up your Easter eggs, why not try knitting an Easter bunny egg cosy? This step-by-step guide will walk you through the process of creating this adorable accessory.
Gather Your Materials
To get started, gather the necessary materials. You will need:
- Knitting needles (size 3.5mm)
- Yarn in your desired color (preferably pastel shades)
- Yarn needle
- Scissors
- Toy stuffing
Cast On and Knit the Base
Begin by casting on 28 stitches. This will form the base of your egg cosy. Knit in stocking stitch for 6 rows, which means knitting one row and purling the next.
Shape the Top of the Egg Cosy
To create the bunny ears, you will need to decrease stitches. On the next row, knit 2 stitches together, then knit 12 stitches. Repeat this pattern twice more. You should now have 22 stitches remaining.
Continue Knitting
Knit the following rows in stocking stitch until the egg cosy measures approximately 10cm from the cast-on edge. This will create the body of the bunny.
Finish the Bunny’s Face and Ears
For the bunny’s face, knit the next 4 stitches and then cast off 4 stitches. Knit the remaining 4 stitches, then cast off another 4 stitches. Knit the final 4 stitches to complete the row.
Next, knit a separate piece for each ear. Cast on 12 stitches for each ear and knit in stocking stitch for 6 rows. Decrease stitches on the next row by knitting 2 stitches together, then knitting 8 stitches. Repeat this pattern once more. You should now have 10 stitches remaining. Knit 3 more rows and then cast off.
Assemble and Finish
Using a yarn needle, sew the back seam of the egg cosy together. Stuff the egg cosy with toy stuffing and sew the top closed. Then, attach the bunny ears to the top corners of the egg cosy.
And there you have it! Your adorable Easter bunny egg cosy is complete and ready to add a touch of whimsy to your Easter celebration.
Casting on
When starting a knitting project, the first step is to cast on the stitches. This is the process of creating the foundation row of stitches on the needle. There are various methods of casting on, but for this Easter bunny egg cosy pattern, we recommend using the long-tail cast on.
The long-tail cast on is a versatile method that creates a neat and elastic edge. To begin, measure a length of yarn that is approximately three times the width of your finished project. Make a slipknot at one end, leaving a long tail. With the slipknot on the needle, hold the needle in your right hand and the tail in your left hand.
Step 1: Insert the needle into the slipknot from front to back, and then bring the working yarn around the thumb of your left hand.
Step 2: Using the needle tip, catch the working yarn that is wrapped around your thumb, and pull it through the slipknot loop, creating a new loop on the needle.
Step 3: Repeat steps 1 and 2, each time creating a new loop on the needle until you have the desired number of stitches. Remember to keep the tension of the yarn consistent throughout the process.
Once you have cast on all the stitches required for your pattern, you can continue with the next steps of the Easter bunny egg cosy. Happy knitting!
Knitting the body

Once you have completed knitting the head of the bunny, it’s time to move on to the body. The body is knitted separately and then attached to the head.
To begin knitting the body, cast on the required number of stitches using the specified yarn and needle size. You can use any stitch pattern you like, but for a simple bunny egg cosy, a stockinette stitch would work well. Knit every row for the desired length of the body, making sure to leave a long tail of yarn for sewing later.
Once you’ve finished knitting the body, you can start shaping it. This can be done by decreasing stitches evenly across each row. You can use techniques like k2tog (knit two stitches together) or ssk (slip, slip, knit) to achieve the desired shape. Keep decreasing until you have a small opening at the bottom of the body, just big enough to fit over an egg.
If you want to add some extra details, like a pom-pom tail or embroidered eyes and nose, now is the time to do it. Once you’re happy with the shape and details of the body, it’s time to attach it to the head. Align the bottom opening of the body with the bottom of the head, and using the long tail of yarn, sew them together, making sure to sew securely and evenly. Once the body is attached, your bunny egg cosy is almost complete!
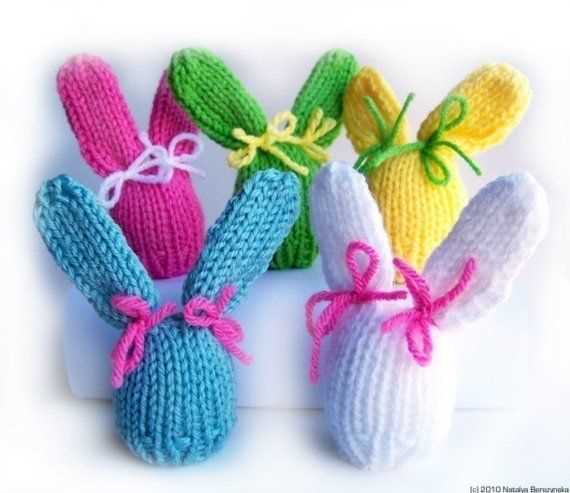
Shaping the ears
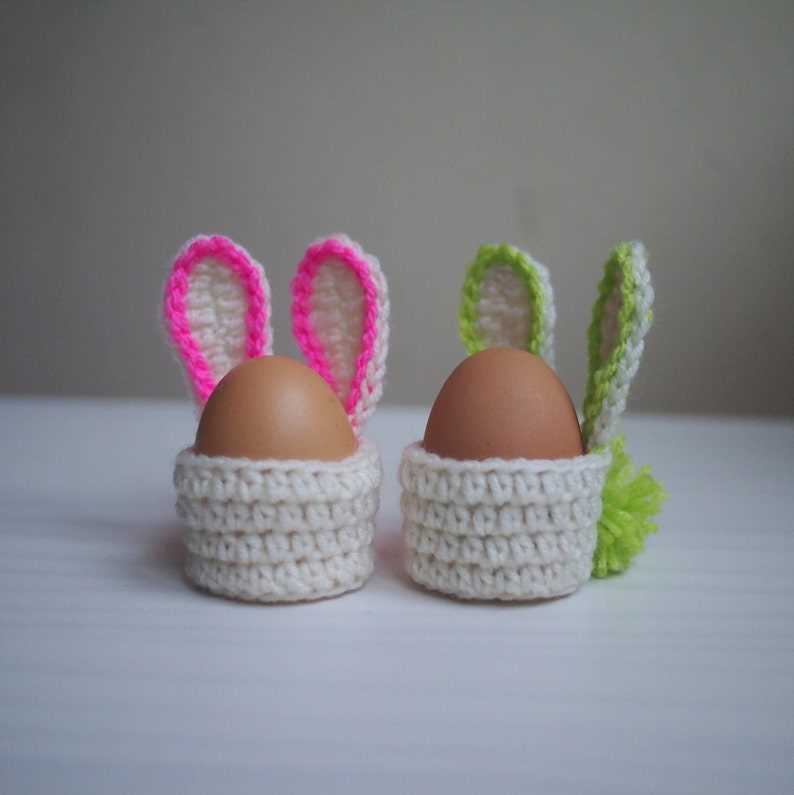
The ears are an adorable and important detail of the Easter bunny egg cosy. They give the cosy a playful and whimsical look. To shape the ears, follow these steps:
Step 1: Using a contrasting color of yarn, start by making a slip knot and then chain 10 stitches. This will be the foundation chain for the ear.
Step 2: Once you have the foundation chain, turn your work and single crochet into the second stitch from the hook. Continue single crocheting across the chain, working one stitch in each stitch. This will create the first row of the ear.
Step 3: Turn your work again and chain 1 stitch. Single crochet into the second stitch from the hook and continue single crocheting across the row, just like in step 2. Repeat this process for a few more rows, depending on the desired size of the ear. You can make the ear taller by adding more rows, or shorter by making fewer rows.
Step 4: Once you have reached the desired height for the ear, cut the yarn, leaving a long tail for sewing. Thread the yarn tail through the last stitch and pull tight to secure. This will close off the top of the ear.
Step 5: Repeat steps 1 to 4 to create the second ear. Make sure to keep the dimensions and stitch count consistent with the first ear.
Once you have both ears completed, you can attach them to the top of the egg cosy by sewing them on securely. Position the ears so that they are symmetrical and give the bunny a cute, floppy look. You can choose to sew them straight up or at a slight angle, depending on your preference.
Note: If you prefer knitted ears, you can use the same shaping method described above, but follow a knitting pattern instead of crochet.
Adding the face details
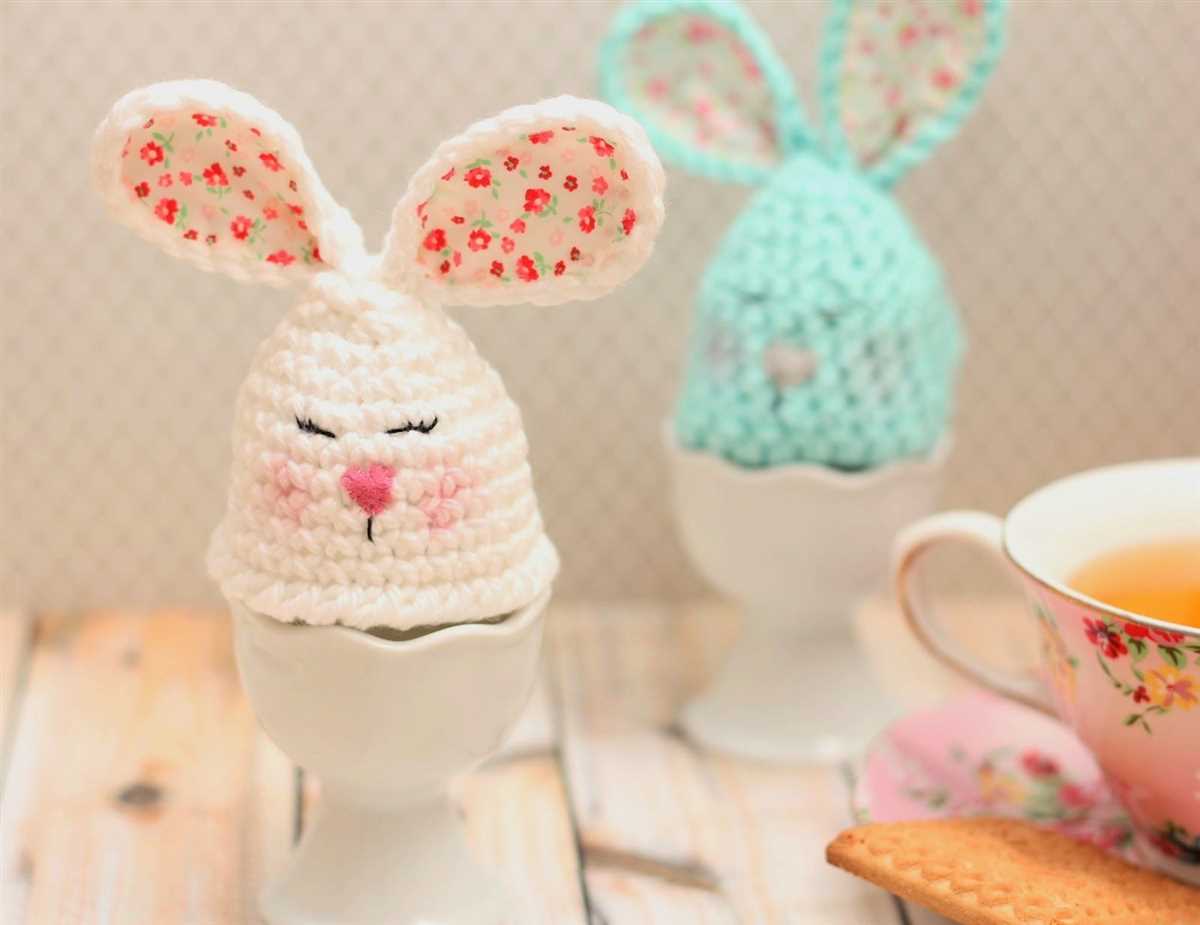
Now that you have finished knitting the body of the Easter bunny egg cosy, it’s time to add the adorable face details! These little details will give your egg cosy its personality and make it even more charming.
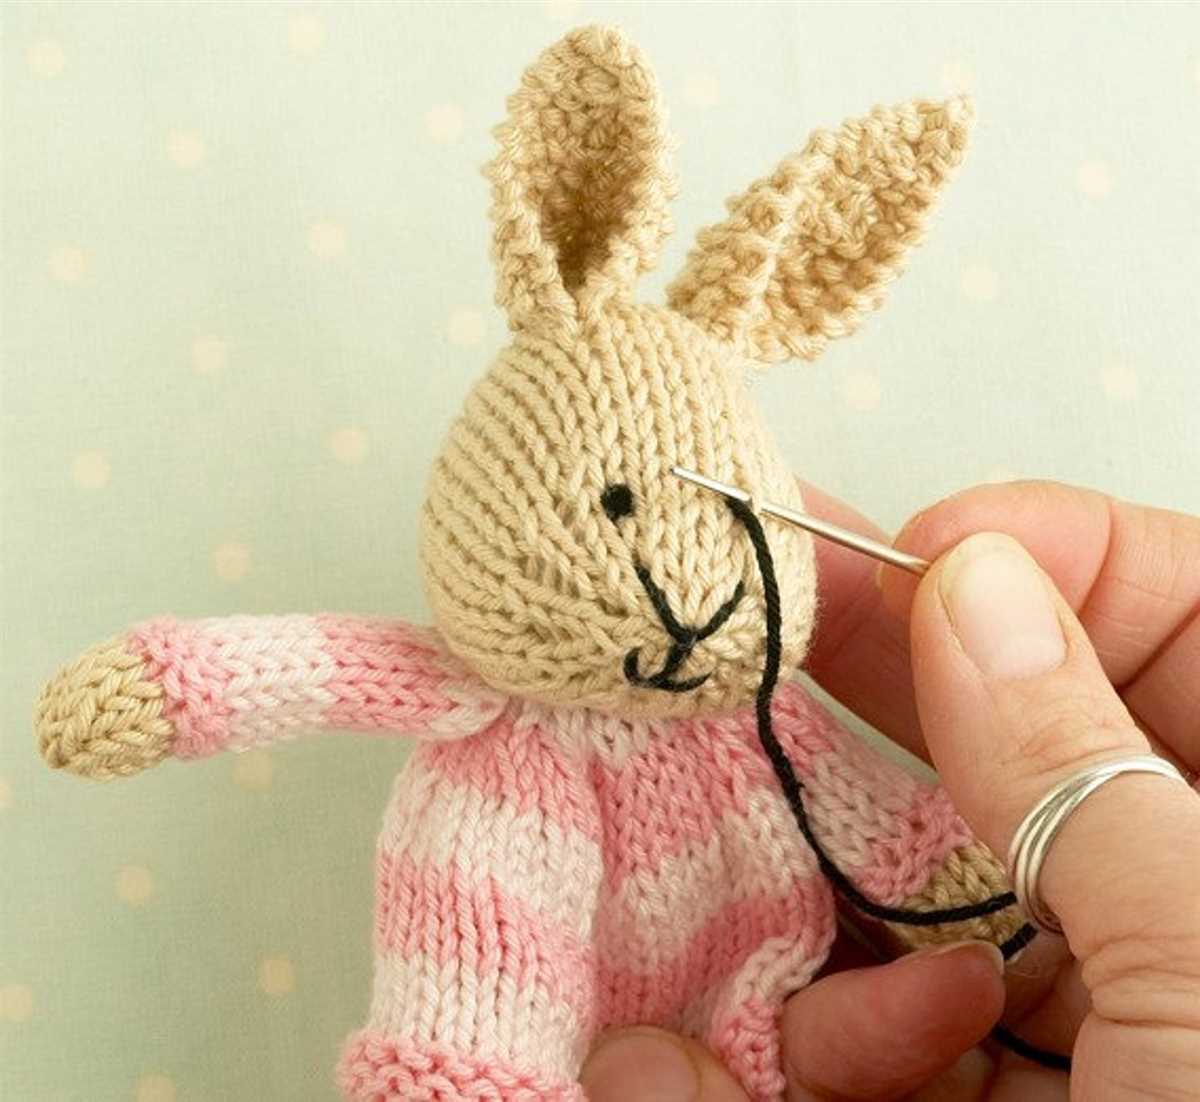
Step 1: Using a small amount of black yarn, embroider two eyes on the front of the egg cosy. You can use simple straight stitches to create oval-shaped eyes. Be sure to leave enough space between the eyes to accommodate the nose and mouth.
Step 2: Next, using pink yarn, embroider a small triangle-shaped nose below the eyes. You can make the nose as big or as small as you like, depending on how cute you want your bunny to look. Use a satin stitch or a simple straight stitch to create the nose.
Step 3: For the mouth, use black yarn and create a small curved line below the nose. You can make the mouth smile or frown, depending on the expression you want your bunny to have. Use a back stitch or a chain stitch to create the mouth.
Step 4: Finally, you can add some whiskers to your Easter bunny egg cosy. Cut six small pieces of white yarn and attach three to each side of the nose. Tie a knot at one end of each piece of yarn and use a needle to attach them. Trim the whiskers to your desired length.
Once you have finished adding the face details, your Easter bunny egg cosy will be complete and ready to bring a festive touch to your Easter decorations. Display it next to your Easter eggs or give it as a gift to someone special!
Finishing touches
Once you have completed the main body of the Easter bunny egg cosy, it’s time to add some finishing touches to bring it to life. These details will add charm and character to your cosy, making it a delightful addition to your Easter table or gift.
1. Embroidered facial features: Use a contrasting thread color to embroider the bunny’s eyes, nose, and mouth. Make small stitches to create a sweet and expressive face for your cosy. You can use a satin stitch for the eyes and a French knot for the nose.
2. Pom-pom tail: Attach a small pom-pom to the back of the bunny to mimic a fluffy tail. You can make a pom-pom using yarn or use a pre-made pom-pom from a craft store. Secure it firmly to ensure it doesn’t come off during use.
3. Decorative accessories: Get creative with small accessories to enhance the overall look of your egg cosy. You can add a tiny ribbon bow around the bunny’s neck or attach a miniature Easter egg charm to its paw. These small details will make your cosy even more adorable.
4. Customization: Feel free to customize your Easter bunny egg cosy further to suit your preferences. You can experiment with different yarn colors, patterns, and embellishments. Let your imagination run wild and create a unique cosy that reflects your personal style.
Variations and Customizations
Once you have mastered the basic pattern for the Easter Bunny Egg Cosy, you can let your creativity flow by trying out different variations and customizations. Here are a few ideas to get you started:
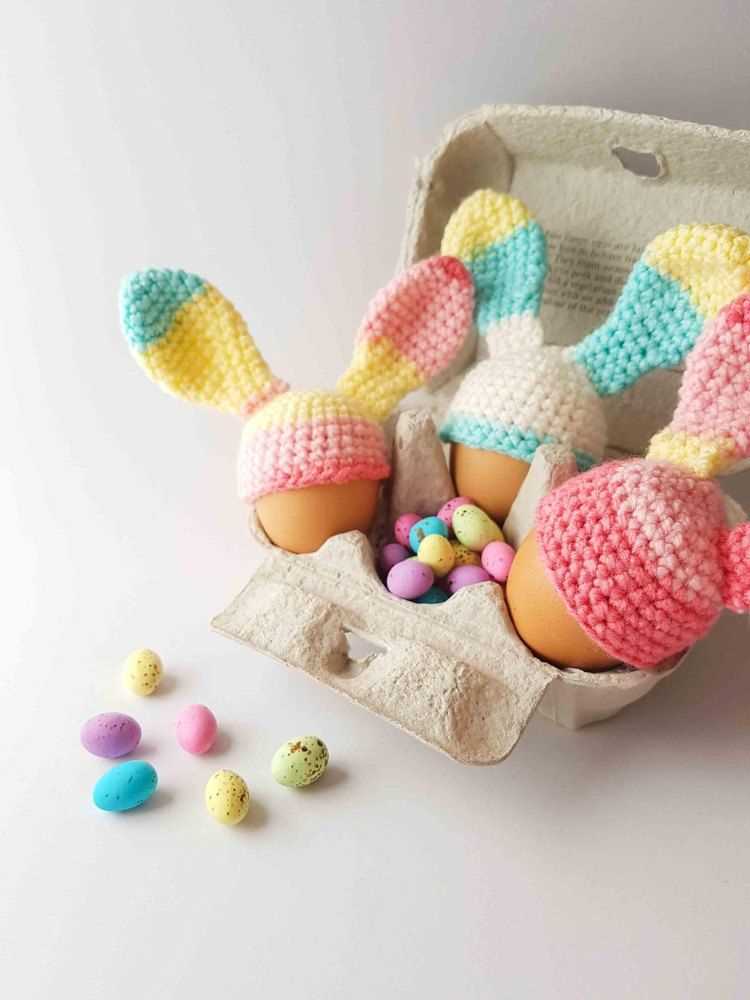
- Color variations: Use different colors of yarn to create a unique and personalized egg cosy. You can experiment with pastel shades for a traditional Easter look or go bold with vibrant colors.
- Embroidery: Add some extra flair to your bunny egg cosy by embroidering details such as the bunny’s eyes, nose, or whiskers. You can use embroidery floss in contrasting colors to make the details pop.
- Accessories: Give your bunny egg cosy some extra charm by adding small accessories like a tiny bow tie, a miniature bow, or a small flower. These little details can make your egg cosy truly one-of-a-kind.
- Size adjustments: If you want to make different-sized egg cosies, you can easily adjust the pattern by changing the number of stitches and rows. This way, you can create egg cosies for different sized eggs.
Remember, this knitting pattern is just a starting point, and you can truly make it your own by adding your own personal touch. Get creative and have fun experimenting with different variations and customizations. Happy knitting!