
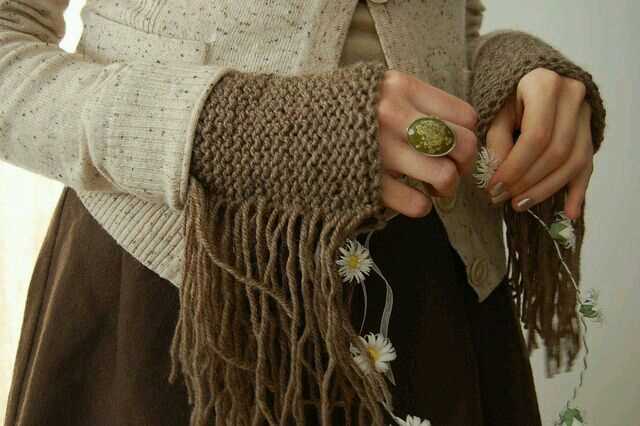
Arm warmers, also known as fingerless gloves or wrist warmers, are a stylish and practical accessory. They are designed to keep your hands and forearms warm in colder weather while leaving your fingers free for dexterity. Arm warmers are a popular knitting project for both beginners and experienced knitters, as they are quick to make and can be customized to suit your personal style.
This knitting pattern arm warmers is a versatile and adaptable design that can be easily adjusted to fit any size or style preference. The pattern uses a simple ribbed stitch pattern, which creates a stretchy and snug fit. The arm warmers can be made with any type of yarn, making them a great way to use up leftover yarn from other projects.
Whether you’re a beginner knitter looking for a simple project or an experienced knitter looking for a quick and satisfying knit, this pattern is perfect for you. Knit a pair of arm warmers for yourself, or make them as a thoughtful gift for a friend or loved one. With this knitting pattern arm warmers, you’ll be able to stay warm and stylish all winter long.
Knitting Pattern Arm Warmers

Arm warmers, also known as wrist warmers or fingerless gloves, are a practical and stylish accessory for colder weather. They can keep your hands and arms warm while leaving your fingers free for tasks that require dexterity. Knitting your own arm warmers allows you to customize the colors and patterns to your liking, and it’s a fun project for knitters of all skill levels.
When choosing a knitting pattern for arm warmers, consider the following factors: yarn weight, needle size, and desired length. Different yarn weights and needle sizes will create different textures and densities in the finished arm warmers. Additionally, the length of the arm warmers can vary from a few inches above the wrist to the elbow, depending on personal preference.
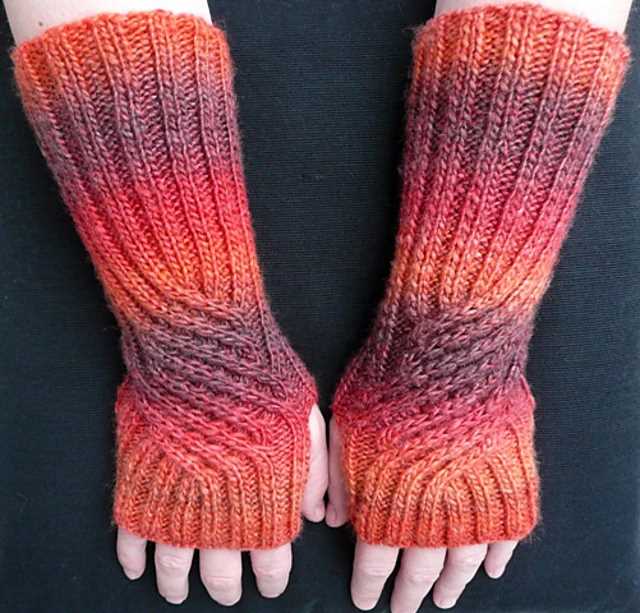
Simple Ribbed Arm Warmers
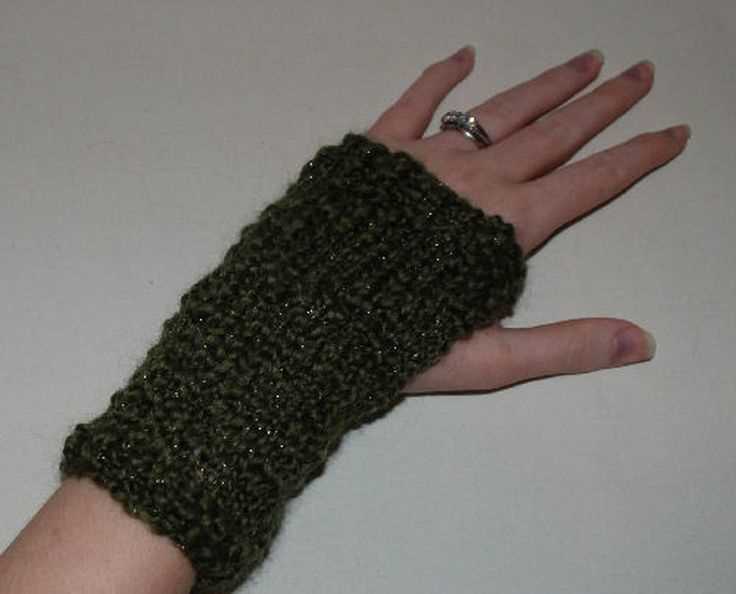
For beginners or those looking for a quick and easy project, a simple ribbed arm warmer pattern is a great choice. This pattern typically uses a medium-weight yarn and requires knowledge of basic knitting stitches, such as knit and purl. The ribbed design provides a stretchy and snug fit around the arms, ensuring warmth and comfort.
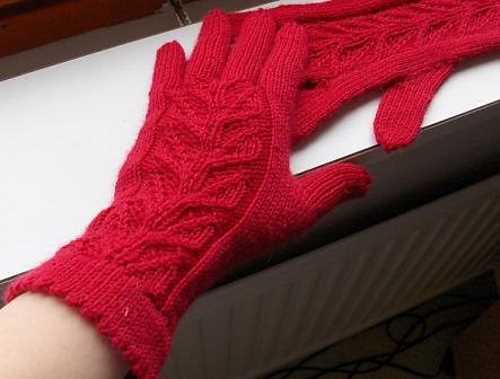
Lace Arm Warmers
If you’re looking for a more delicate and feminine design, lace arm warmers can be a beautiful option. Lace patterns are created by strategically adding yarn overs and decreases to create decorative holes and designs. This type of pattern often uses a lightweight yarn and smaller needle sizes for a more intricate and delicate look. Lace arm warmers can be a great accessory for special occasions or to add an elegant touch to your everyday outfits.
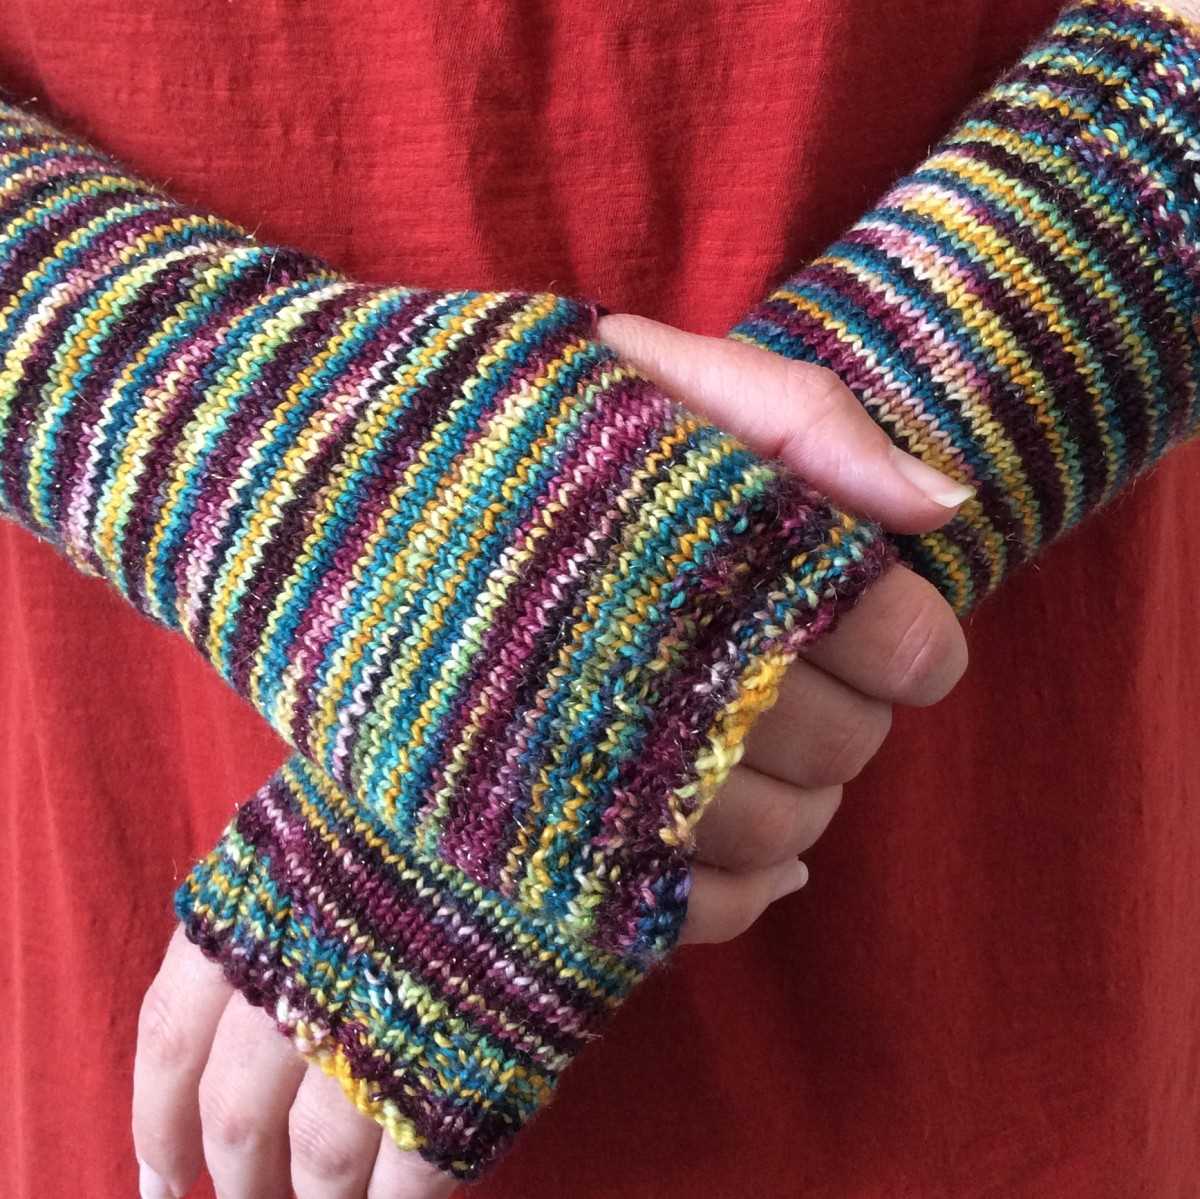
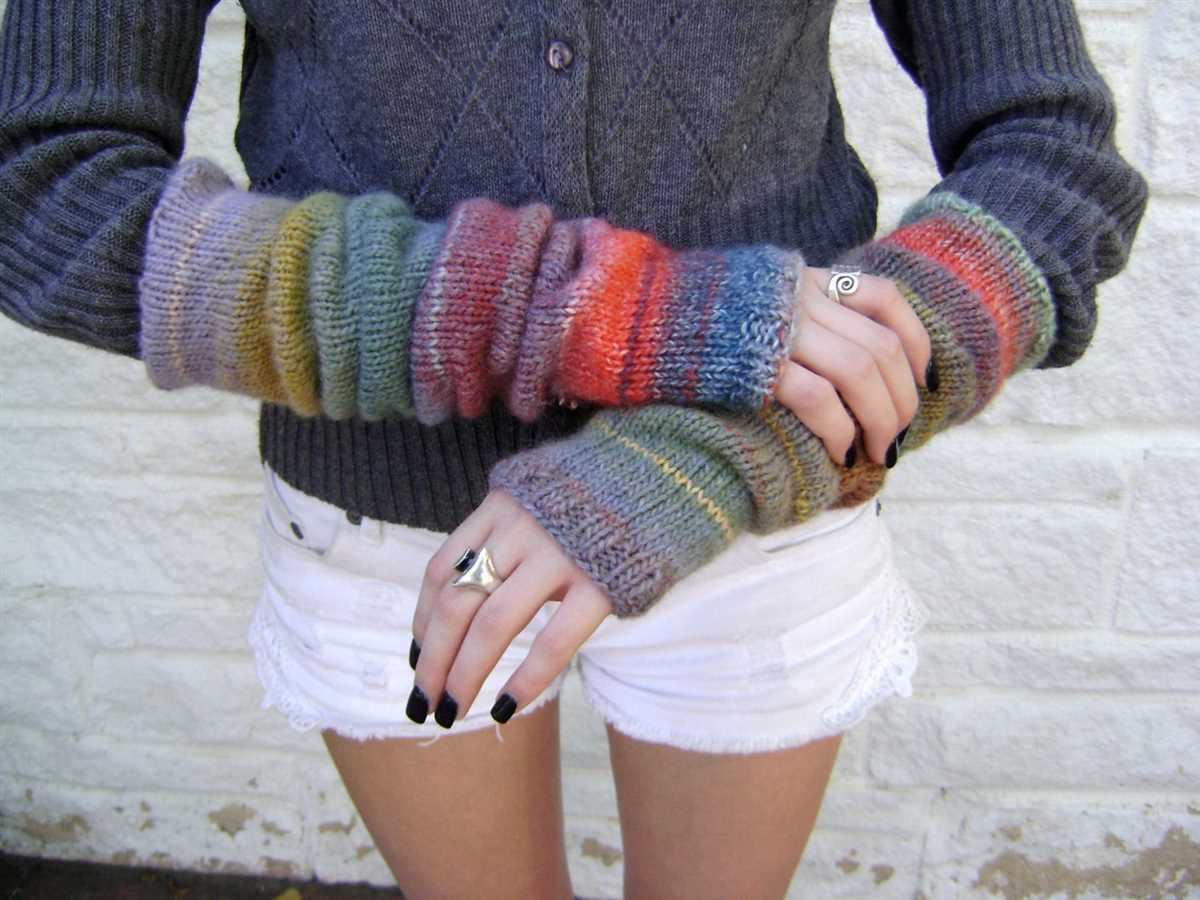
Colorful Striped Arm Warmers
If you want to add some vibrant colors to your arm warmers, consider knitting a pattern with colorful stripes. Striped arm warmers can be a fun and playful accessory, allowing you to experiment with different color combinations. This type of pattern typically uses multiple colors and requires knowledge of basic colorwork techniques, such as carrying yarn and weaving in ends. Whether you choose bold and contrasting colors or more subtle shades, striped arm warmers are sure to make a statement.
What are arm warmers?
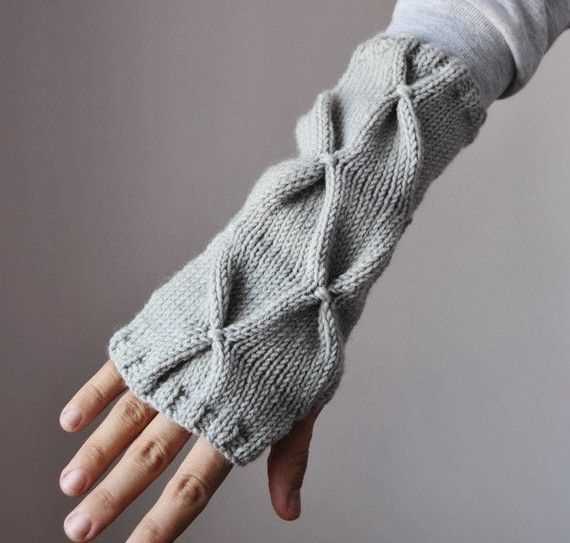
Arm warmers are knitted accessories that cover the arms from the wrist to the upper arm. They are designed to provide warmth and insulation while leaving the fingers free for movement. Arm warmers are commonly used in colder weather or during outdoor activities to keep the arms cozy without having to wear a bulky sweater or jacket.
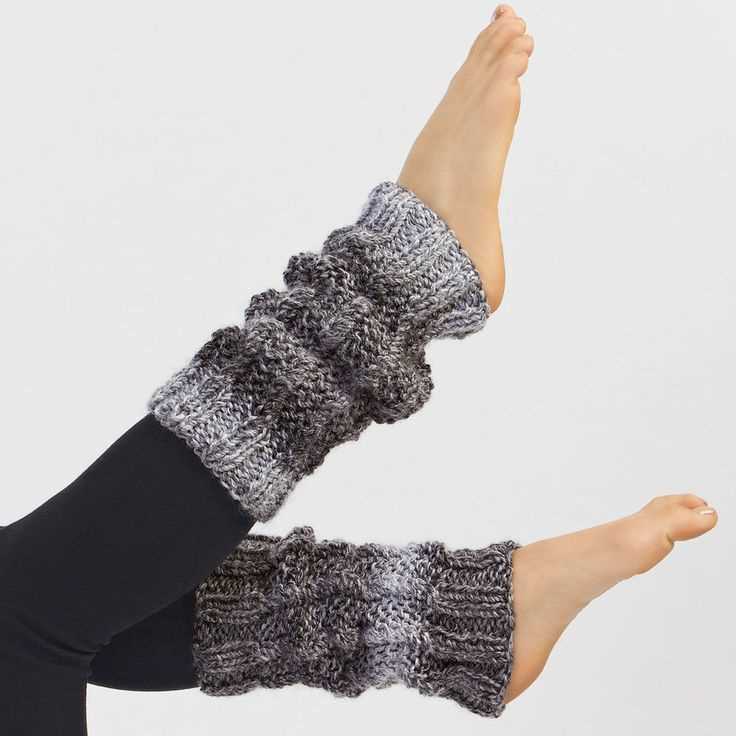
Arm warmers are typically made from soft and stretchy materials such as wool, acrylic, or a blend of different fibers. They come in various lengths, ranging from just covering the wrists to reaching up to the elbow or even the upper arm. Some arm warmers may have thumb holes to secure them in place and provide extra coverage for the hands.
The main purpose of arm warmers is to keep the arms warm and protected from cold temperatures, especially in chilly climates or during outdoor activities such as hiking, running, or cycling. They can be easily slipped on and off, allowing for easy temperature regulation. Arm warmers are also a fashionable accessory, adding a touch of style to any outfit while keeping the arms comfortable. They come in a wide range of colors, patterns, and designs, making them a versatile accessory that can be coordinated with different outfits.
Why knit arm warmers?
Knitting arm warmers is a great way to create a stylish and practical accessory for colder weather. With their unique design, arm warmers provide warmth and comfort while allowing your fingers to be free for daily tasks. These versatile accessories are perfect for anyone who wants to keep their arms cozy and add a touch of fashion to their outfit.
One of the main reasons to knit arm warmers is their functionality. In chilly weather, arm warmers can be a great alternative to wearing bulky sweaters or jackets. They provide an extra layer of insulation to keep your arms warm, which is especially useful when you need to use your hands frequently. Whether you’re typing on a keyboard, texting on your phone, or simply running errands, arm warmers allow for full dexterity while keeping you comfortably warm.
Knitting arm warmers also offers an opportunity to showcase your creativity. With a wide variety of knitting patterns available, you can choose from different colors, stitches, and decorative elements to customize your arm warmers to suit your personal style. From simple and classic designs to intricate lacework or cable patterns, there is a knitting pattern for arm warmers to match any aesthetic preference.
Additionally, knitting arm warmers can be a rewarding and relaxing project. The repetitive nature of knitting can be therapeutic, helping to reduce stress and promote mindfulness. Knitting arm warmers allows you to take a break from your daily routine and focus on creating something beautiful with your own hands. It’s a satisfying feeling to complete a knitting project and have a useful and fashionable accessory to show for it.
Overall, knitting arm warmers is a practical, creative, and enjoyable activity. By choosing a knitting pattern and selecting your favorite yarn, you can create a unique pair of arm warmers that will keep you warm and stylish all winter long.
Choosing the right yarn for arm warmers
When it comes to knitting arm warmers, choosing the right yarn is essential to ensure both comfort and durability. The yarn you select will greatly affect the overall feel and performance of the arm warmers, so it’s important to consider a few key factors before making your decision.
1. Fiber content: Different yarns are made from different fibers, and each fiber has its own unique characteristics. For arm warmers, you’ll want to look for a yarn that is soft and cozy against the skin, such as merino wool or alpaca. These fibers are known for their warmth and comfort, making them ideal for keeping your arms cozy during cooler weather.
2. Weight: The weight of the yarn will determine the thickness and drape of the arm warmers. If you’re looking for a lightweight and breathable option, consider choosing a fingering or sport weight yarn. On the other hand, if you want a more substantial and warm pair of arm warmers, you might opt for a bulky or chunky yarn.
3. Color and texture: The color and texture of the yarn can greatly impact the appearance of your arm warmers. Consider whether you want a solid color or a variegated yarn for a more interesting effect. Additionally, think about the texture of the yarn – a smooth yarn will give a more polished look, while a textured yarn can add a touch of visual interest to the arm warmers.
4. Durability: Arm warmers tend to be exposed to a lot of wear and tear, so it’s important to choose a yarn that can withstand regular use. Look for yarns that have good stitch definition and are known for their durability, such as superwash wool or acrylic blends.
In conclusion, choosing the right yarn for arm warmers involves considering factors such as fiber content, weight, color and texture, and durability. By carefully selecting a yarn that meets your preferences and needs, you can ensure that your arm warmers not only look great but also provide the warmth and comfort you desire.
Selecting the Appropriate Knitting Needles
When it comes to knitting, selecting the right needles is crucial for achieving the desired results. The type and size of needles you choose can greatly impact the texture, gauge, and overall appearance of your knitted project. Here are a few factors to consider when selecting knitting needles:
Material:
The material of the knitting needles can influence the tension and feel of your knitting. Common options include bamboo, wood, metal, and plastic. Bamboo and wood needles are often favored for their lightweight and smooth texture, making them ideal for beginners or those with sensitive hands. Metal needles, on the other hand, provide a slick surface, allowing stitches to glide easily, making them suitable for faster knitters. Plastic needles are often more budget-friendly and can be a good option for certain types of projects.
Size:
The size of your knitting needles will determine the gauge or tension of your stitches. Needles are typically labeled with their size, usually measured in millimeters or US needle sizes. The size of needles you use should correspond to the thickness of the yarn you are using and the desired tension of your project. Thicker yarns generally require larger needles, while thinner yarns require smaller needles to achieve the desired gauge.
Needle Type:
There are several types of knitting needles to choose from, including straight needles, circular needles, and double-pointed needles. Straight needles are the most traditional type and are used for flat knitting, such as scarves or blankets. Circular needles have two needle tips connected by a flexible cable and are often used for knitting in the round, such as hats or socks. Double-pointed needles come in sets of four or five and are used for small circumference knitting, such as gloves or sleeves. The type of needle you choose will depend on the type of project you are working on.
Other Considerations:
When selecting knitting needles, you may also want to consider factors such as durability, cost, and personal preference. Some needles may be more prone to breaking or warping over time, while others may be more expensive but offer enhanced features such as interchangeable tips or ergonomic designs. It’s also important to consider your own comfort and knitting style when choosing needles, as what works for one person may not work for another.
In conclusion, selecting the appropriate knitting needles involves considering factors such as material, size, needle type, and personal preferences. By choosing the right needles for your project, you can ensure a successful and enjoyable knitting experience.
Basic Knitting Techniques for Arm Warmers
Knitting arm warmers can be a fun and satisfying project for knitters of all skill levels. Whether you’re a beginner or an experienced knitter, there are a few basic techniques that you should be familiar with to create beautiful and functional arm warmers.
Casting On: Begin by casting on the desired number of stitches onto your knitting needles. This will determine the width of your arm warmers. If you want a snug fit, cast on fewer stitches, and if you want a looser fit, cast on more stitches.
Knit Stitch: The knit stitch is the most basic stitch in knitting. To knit, insert the right needle into the first stitch on the left needle, from left to right, and bring the yarn over the right needle to create a loop. Then, slip the right needle through the loop and slide the stitch off the left needle. Repeat this process for each stitch until you reach the end of the row.
Purl Stitch: The purl stitch is the reverse of the knit stitch. To purl, insert the right needle into the first stitch on the left needle, from right to left, and bring the yarn under the right needle to create a loop. Then, slip the right needle through the loop and slide the stitch off the left needle. Repeat this process for each stitch until you reach the end of the row.
Ribbing: Ribbing is a common technique used in arm warmers to create a stretchy, snug cuff. It is typically done by alternating knit and purl stitches in a specific pattern, such as K1, P1 or K2, P2. Ribbing can be done at the beginning and end of the arm warmer or throughout the entire length for added texture.
Decreasing: To shape the arm warmer, you will need to decrease stitches. There are various methods for decreasing, such as knit two stitches together (K2tog) or slip, knit, pass slipped stitch over (SKP). Decreasing can be done at the beginning or end of the row or in the middle to create a tapered effect.
Binding Off: Once you have completed the desired length of your arm warmers, it’s time to bind off. To bind off, knit the first two stitches, then insert the left needle into the first stitch knitwise, lift it over the second stitch, and drop it off the right needle. Continue this process until you have one stitch left, then cut the yarn and pull it through the remaining stitch to secure.
Mastering these basic knitting techniques will give you the foundation you need to create beautiful arm warmers and explore more complex patterns. Remember to practice and take your time, and soon you’ll be knitting arm warmers with confidence and style!
Knitting pattern: Ribbed arm warmers
Arm warmers are a stylish and practical accessory to keep your arms warm during colder months. With this knitting pattern, you can create a pair of ribbed arm warmers that will not only provide warmth but also add a touch of elegance to your outfit.
To make these ribbed arm warmers, you will need a set of double-pointed knitting needles, yarn, and a tapestry needle. Choose a yarn that is soft and warm, such as merino wool or alpaca blend.
Materials:
- Double-pointed knitting needles (size 8)
- Yarn (worsted weight, approximately 200 yards)
- Tapestry needle
Instructions:
- Cast on 56 stitches using the long-tail cast-on method.
- Divide the stitches evenly onto three double-pointed needles, with 18 stitches on each needle and 2 stitches on another needle.
- Join the round, being careful not to twist the stitches.
- Work *K2, P2* ribbing for 4 inches.
- Switch to stockinette stitch (knit every round) for 6 inches.
- Switch back to *K2, P2* ribbing for 4 inches.
- Bind off all stitches in pattern.
- Weave in any loose ends.
- Repeat the above steps to make the second arm warmer.
With this easy-to-follow knitting pattern, you can create a pair of stylish ribbed arm warmers to keep you cozy and chic. These arm warmers are the perfect accessory for those chilly days when you want to add an extra layer of warmth to your outfit. Whether you’re an experienced knitter or a beginner, this pattern is suitable for all skill levels.
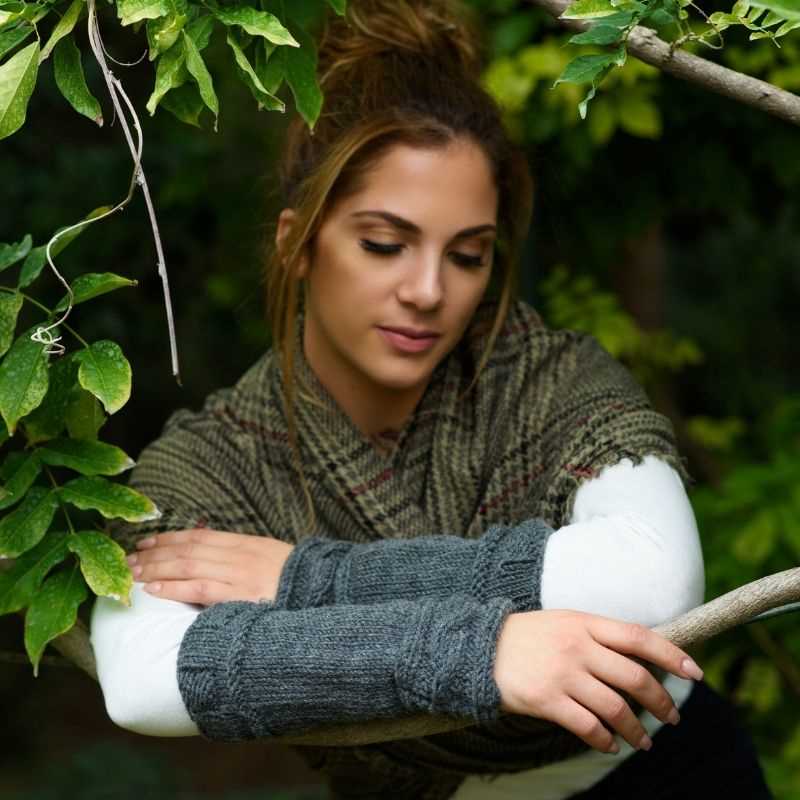
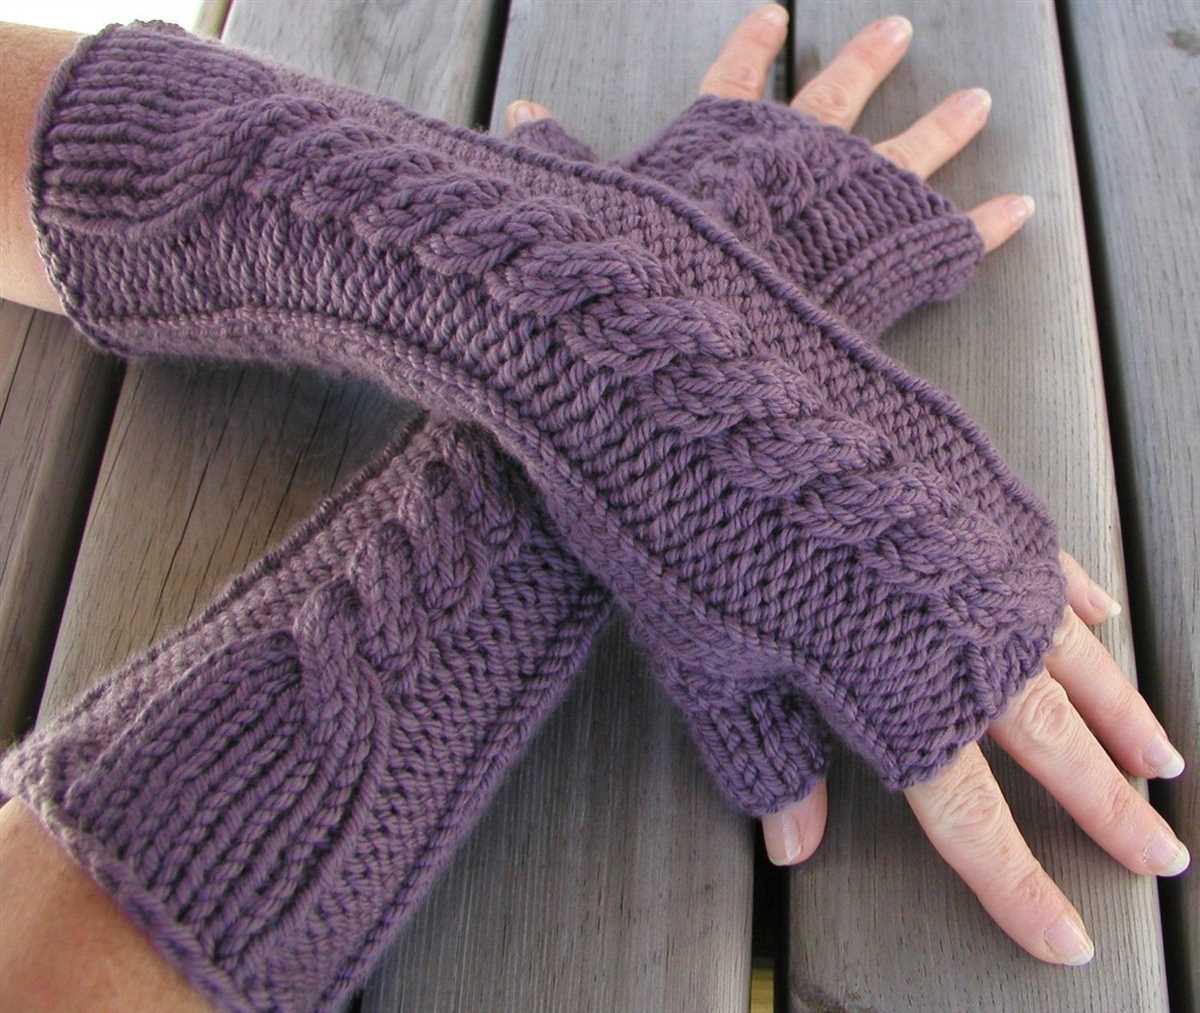
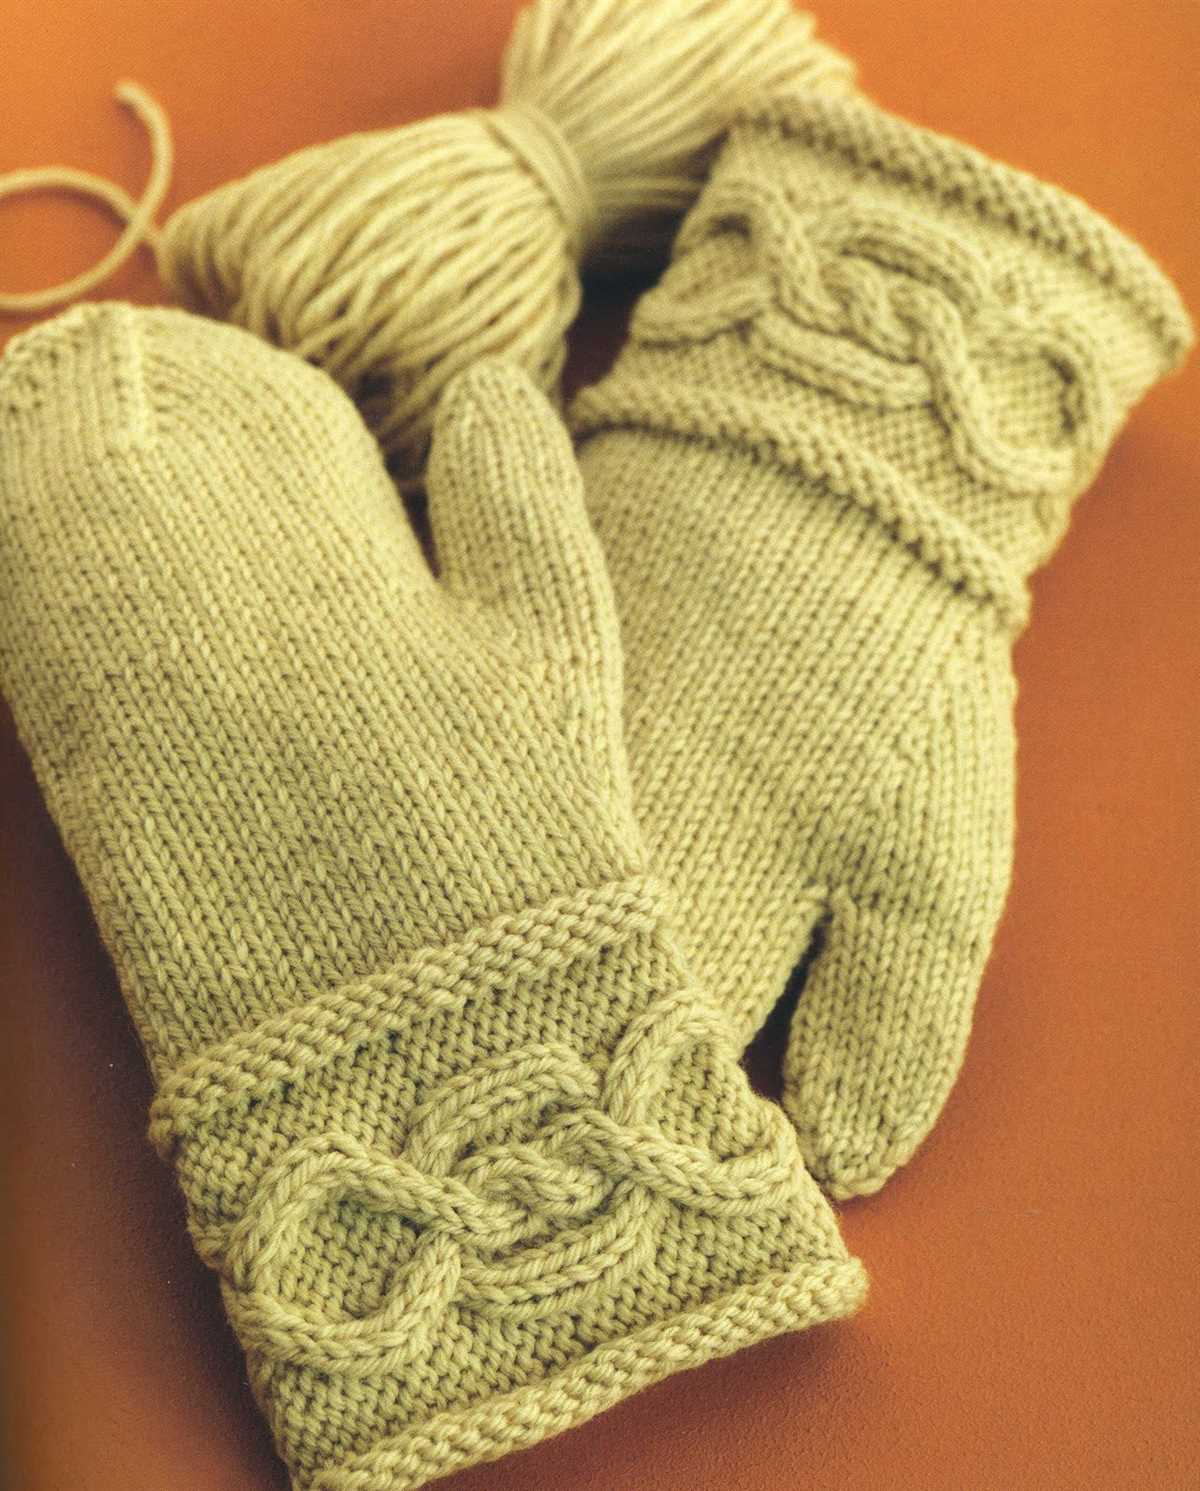
Knitting pattern: Cable knit arm warmers
If you’re looking for a fun knitting project that’s both stylish and practical, cable knit arm warmers are an excellent choice. These cozy accessories not only keep your arms warm, but they also add a touch of texture and elegance to any outfit. Plus, knitting cables can be a rewarding challenge for intermediate knitters looking to expand their skills.
To get started, you’ll need a few basic knitting supplies: yarn, knitting needles, and a cable needle. Choose a soft, warm yarn in your preferred color for the arm warmers. Worsted weight yarn works well for this project, as it provides the right balance of warmth and drape.
For the cable pattern, you’ll need to know how to knit cables. If you’re unfamiliar with this technique, don’t worry – it’s easier than it looks! Knitting cables involves crossing stitches over each other to create a twisted, interlocking pattern. You can find numerous online tutorials and videos to help you master this skill.
Start by casting on the desired number of stitches for your arm warmers. A good starting point is usually around 40 stitches, but adjust accordingly based on your gauge and the size of your arms. Then, work a few rows in a ribbing stitch pattern (such as k2, p2) to create a stretchy cuff.
Next, it’s time to start the cable pattern. This is where the magic happens! Follow a cable chart or written instructions to create the desired cable design. Cable patterns can range from simple twists to intricate braids, so choose a pattern that matches your skill level and personal style.
Continue knitting in the cable pattern until the arm warmer reaches your desired length. Try it on occasionally to ensure a proper fit. Once you’re happy with the length, finish off with a few rows of ribbing to match the cuff. Finally, bind off, weave in any loose ends, and repeat the process for the second arm warmer.
With your cable knit arm warmers complete, you’ll be ready to tackle chilly weather in style. These accessories are not only functional for keeping cozy during colder months, but they also add a touch of sophistication to any outfit. Whether you’re wearing them with a winter coat or pairing them with a dress, cable knit arm warmers are a versatile accessory that will elevate your winter wardrobe.
Knitting pattern: Lace arm warmers
Arm warmers are a stylish and practical accessory to keep your arms warm during cooler seasons. This knitting pattern for lace arm warmers adds a touch of elegance and femininity to any outfit. The delicate lace pattern creates a beautiful texture, making these arm warmers a versatile accessory for both casual and formal occasions.
To knit these lace arm warmers, you will need a set of double-pointed knitting needles and a lace weight yarn. The pattern utilizes basic knitting stitches such as knit, purl, yarn over, and knit two together, making it suitable for knitters of all skill levels.
Materials:
- Double-pointed knitting needles (size 4mm)
- Lace weight yarn (approximately 200 yards)
- Tapestry needle
Instructions:
- Cast on 48 stitches onto your double-pointed knitting needles.
- Divide the stitches evenly onto three needles (16 stitches per needle).
- Join the round, being careful not to twist the stitches.
- Begin the lace pattern:
- Round 1: *Knit 2, yarn over, knit 2 together, repeat from * to end of round.
- Round 2: Knit all stitches.
- Repeat Rounds 1 and 2 until the arm warmers reach your desired length.
- For the ribbed cuff, switch to a smaller size of double-pointed knitting needles (size 3.5mm) and work in a 2×2 ribbing pattern (knit 2, purl 2) for about 1 inch.
- Bind off all stitches.
- Weave in any loose ends with a tapestry needle.
- Repeat the above instructions to make the second arm warmer.
With this lace arm warmer knitting pattern, you can create a stylish and feminine accessory that will keep you warm and fashionable. Whether you’re wearing them with a casual outfit or dressing up for a special occasion, these lace arm warmers are sure to add a touch of elegance to your look.
Knitting pattern: Fair Isle arm warmers
Arm warmers are a stylish and practical accessory for colder weather, and with this knitting pattern, you can create your own Fair Isle arm warmers. The Fair Isle technique involves working with multiple colors in each row, creating intricate and colorful patterns.
To make these arm warmers, you will need a set of double-pointed knitting needles and two different colors of yarn. The pattern starts with a ribbed cuff, which provides a snug fit and helps to keep the arm warmers in place. Then, the Fair Isle pattern is worked over the main section of the arm warmers, adding a touch of color and design.
When knitting the Fair Isle pattern, it’s important to carry the unused yarn along the back of the work, so it doesn’t get caught or tangled. This technique creates floats on the back of the work, which can be secured later to ensure durability. The arm warmers can be customized to fit your desired length or width, depending on your preferences.
Once the main section is completed, the arm warmers are finished with another ribbed cuff. This creates a cohesive look and helps to keep the arm warmers in place. The ribbing also adds flexibility, allowing the arm warmers to stretch to fit comfortably on the arms.
With this Fair Isle arm warmers knitting pattern, you can create a stylish and cozy accessory to keep your arms warm in colder weather. The intricate Fair Isle pattern adds a touch of color and design, making these arm warmers a unique and eye-catching addition to any outfit.
Tips for customizing your arm warmers
Arm warmers are a versatile accessory that can be customized to suit your personal style and preferences. Whether you’re an experienced knitter or just starting out, here are a few tips to help you make your arm warmers uniquely your own.
Choose the right yarn
When customizing your arm warmers, selecting the right yarn is key. Consider the weight, fiber, and color of the yarn to create the desired look and feel. For a cozy and warm pair of arm warmers, opt for a bulky weight yarn in a wool blend. If you prefer a more lightweight and breathable option, a fingering weight yarn in cotton or acrylic may be a better choice. Experiment with different colors to match your wardrobe or add a pop of contrast.
Add interesting stitch patterns
Add visual interest to your arm warmers by incorporating unique stitch patterns. Simple ribbing or cables can give your arm warmers a classic and timeless look. If you’re feeling adventurous, try lace or colorwork patterns for a more intricate design. Remember to choose stitch patterns that complement the yarn you’re using and consider the stretchiness of the stitch pattern to ensure a comfortable fit.
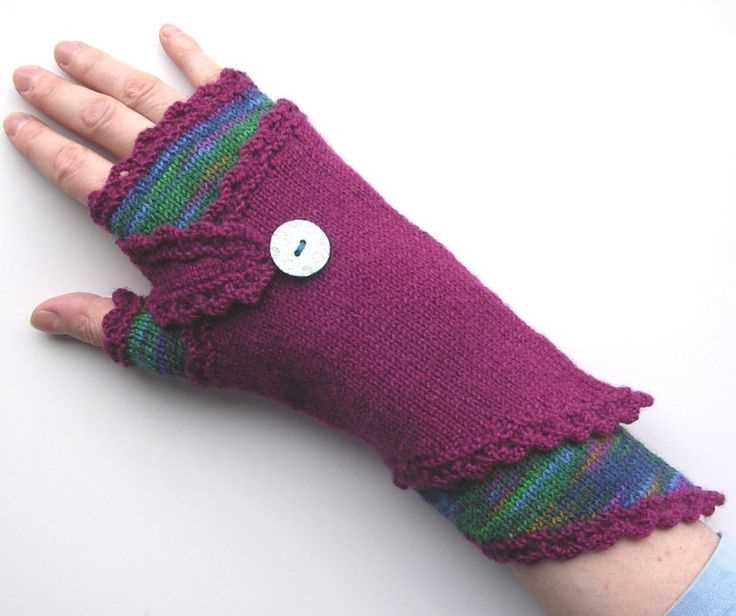
Personalize with embellishments
Add a personal touch to your arm warmers by embellishing them with buttons, beads, or embroidery. Sew on decorative buttons for a touch of vintage charm, or add beads for a touch of elegance. You can also embroider simple designs or initials to make your arm warmers truly one-of-a-kind. Just remember to take into account the practicality and comfort of these embellishments, especially if you plan on wearing the arm warmers for extended periods of time.
Adjust the length and fit
Customize the length and fit of your arm warmers to ensure the perfect fit. Measure your arm circumference and use this measurement as a guide when knitting the arm warmers. Consider whether you want them to be snug or loose-fitting, and adjust the number of stitches accordingly. Similarly, you can adjust the length of your arm warmers depending on how much coverage you prefer. Keep in mind that arm warmers that are too tight may restrict movement, while those that are too loose may slide down.
By keeping these tips in mind, you can create a pair of arm warmers that not only keep you warm but also reflect your personal style and creativity. Have fun experimenting with different yarns, stitch patterns, and embellishments, and enjoy the process of customizing your very own arm warmers!
Finishing touches for your arm warmers
When it comes to finishing touches for your arm warmers, there are several options to consider. One popular choice is to add decorative buttons to the cuffs. This can give your arm warmers a unique and stylish look, and it’s a great way to personalize them to your own taste. Choose buttons that complement the yarn color or add a pop of contrast. Sew the buttons securely onto the cuff using a needle and thread that matches the yarn color.
Another option for finishing your arm warmers is to add ribbing or a scalloped edge to the cuffs. This can be done by switching to a smaller needle size and working a few rounds of ribbing or a decorative stitch pattern before binding off. This not only adds visual interest, but it also helps to ensure a snug and comfortable fit around your wrist.
- Embroidery: Consider adding some embroidery to your arm warmers to create a unique and personalized design. Choose a contrasting color of embroidery thread and use a simple stitch, such as a backstitch or a chain stitch, to create your design.
- Colorwork: If you’re feeling adventurous, you could try adding some colorwork to your arm warmers. This could be as simple as adding a stripe or two in a contrasting color, or you could try your hand at a more complex Fair Isle or intarsia design.
- Lace edging: For a delicate and feminine touch, consider adding a lace edging to the cuffs of your arm warmers. You could either knit a lace pattern directly onto the cuff, or you could sew on a separate lace trim using a needle and thread.
Remember to block your arm warmers before wearing them to give them a polished and finished look. This involves wetting the finished arm warmer, gently shaping it to the desired dimensions, and allowing it to dry flat. Blocking helps to even out any irregularities in the stitches and gives the arm warmers a professional finish.
Styling and wearing your arm warmers
Once you have finished knitting your arm warmers, it’s time to style and wear them. Here are some tips on how to make the most of your arm warmers:
1. Pair them with different outfits
Arm warmers can be a versatile addition to your wardrobe. They can be worn with a variety of outfits, including dresses, skirts, and jeans. Experiment with different color combinations and patterns to create unique looks.
2. Layer them for extra warmth
If you live in a colder climate or simply want extra warmth, you can layer your arm warmers over a long-sleeve shirt or under a jacket. This will not only keep you cozy but also add a stylish touch to your outfit.
3. Show them off
Don’t be afraid to show off your arm warmers! You can roll up your sleeves or push them slightly down your arms to expose the warmers. This will not only showcase your knitting skills but also add a trendy and fashionable element to your look.
4. Customize with accessories
Another way to make your arm warmers stand out is by adding accessories. You can attach buttons, bows, or even embroidery to personalize your arm warmers and make them truly unique. Don’t be afraid to get creative and experiment with different embellishments.
5. Care for your arm warmers
To ensure that your arm warmers stay in good shape, it’s important to take care of them properly. Hand wash them with mild detergent and lay them flat to dry. Avoid wringing or twisting them, as this can stretch the fabric and alter the shape of the warmers.
In conclusion, arm warmers are not only practical but also a stylish accessory that you can easily incorporate into your outfits. By following these tips and tricks, you can confidently wear your arm warmers and make a fashion statement.