
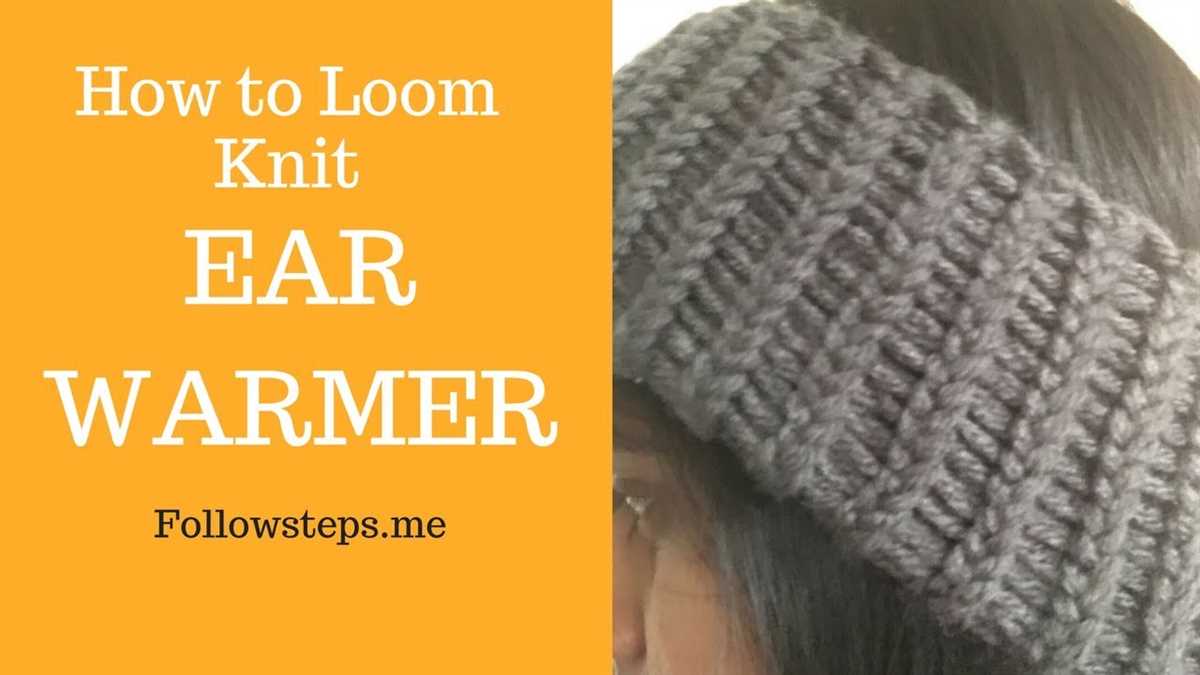
Winter is the perfect time to get crafty and cozy up with some knitting projects. One popular project for beginners and experienced knitters alike is a knitting loom ear warmer. This simple accessory not only keeps your ears warm during the colder months, but it also adds a stylish and trendy touch to any outfit.
Knitting loom ear warmers are a great option for those who may not have the time or patience for traditional needle knitting. With a knitting loom, you can easily create a beautifully textured ear warmer without the need for needles. Loom knitting is a technique that uses a circular loom with pegs around the circumference. You simply wrap the yarn around the pegs, creating stitches as you go.
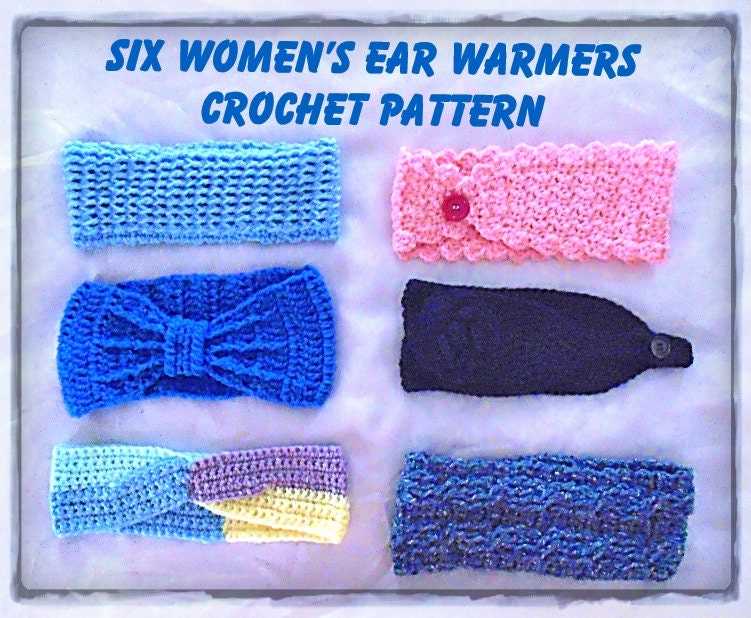
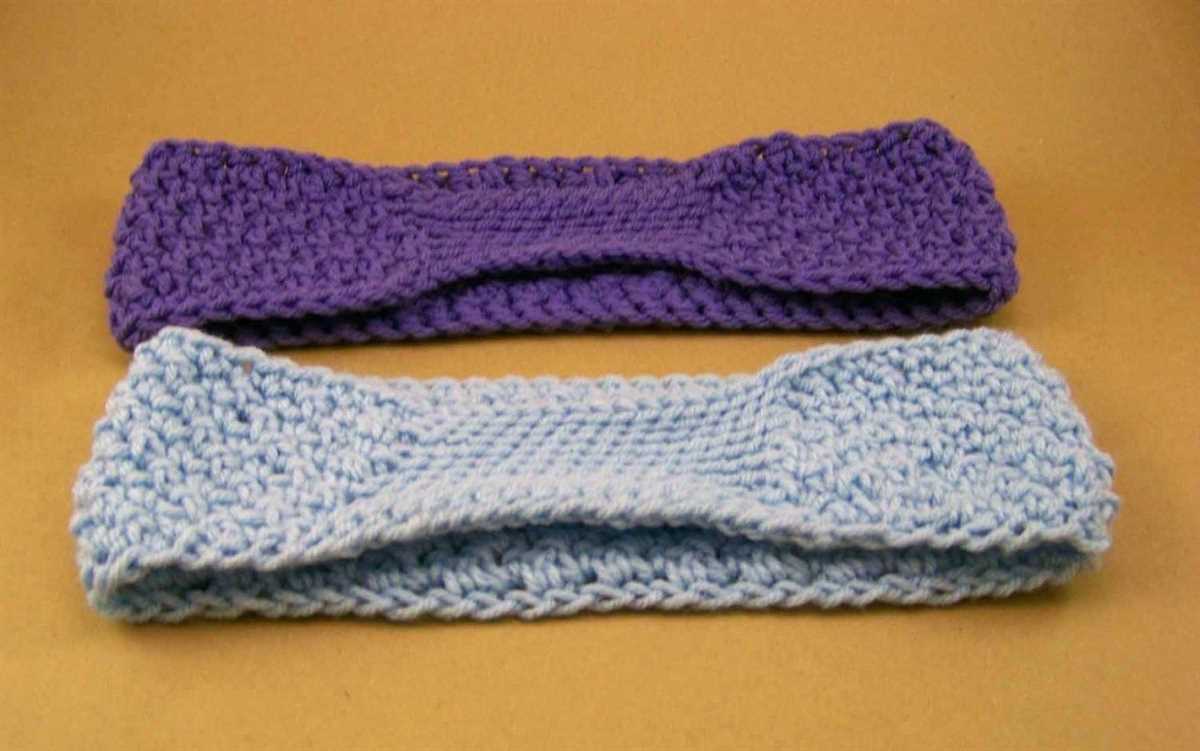
This knitting loom ear warmer pattern is perfect for beginners. With just a few simple steps, you can create a cozy accessory to keep you warm all winter long. The pattern uses a combination of knit and purl stitches, creating a ribbed texture that stretches to fit comfortably around the head. The wide design of the ear warmer provides extra coverage and warmth.
Not only is this knitting loom ear warmer pattern easy to follow, but it also allows for endless customization. You can choose any color or type of yarn to match your personal style. You can also add embellishments such as buttons or flowers to make your ear warmer truly unique.
Knitting Loom Ear Warmer Pattern: Stay Warm and Stylish!
If you’re looking for a cozy and fashionable accessory to keep your ears warm during the colder months, look no further than a knitting loom ear warmer. This simple and versatile pattern allows you to create a stylish headband that not only offers warmth but also adds a touch of elegance to any outfit.
The knitting loom ear warmer pattern is perfect for beginners, as it requires basic knitting skills and can be completed in just a few hours. With a few simple supplies, such as a knitting loom, yarn, and a crochet hook, you’ll be on your way to creating a beautiful ear warmer that you can wear with pride.
To begin, choose your preferred color and type of yarn. Whether you opt for a soft and cozy wool blend or a vibrant and lightweight acrylic yarn, the choice is yours. Next, determine the size of your knitting loom based on your head circumference. Measure around your head where you want the ear warmer to sit comfortably, and select a loom that matches that measurement.
Once you have your supplies ready, it’s time to start knitting! Simply follow the step-by-step instructions to create your ear warmer. Begin by casting on the desired number of stitches onto the knitting loom, then proceed with the knitting stitch of your choice. Whether you prefer a basic knit stitch or a more intricate cable stitch, the knitting loom allows you to easily create beautiful patterns.
Once you’ve completed the required number of rows, it’s time to bind off and finish your ear warmer. Use a crochet hook to carefully remove the loops from the knitting loom and secure them to create a seamless edge. Feel free to add any embellishments or personal touches, such as buttons or a decorative bow, for added style.
With your knitting loom ear warmer complete, you’ll not only stay warm during the chilly weather but also showcase your knitting skills and fashion sense. This versatile accessory can be worn with any outfit, whether you’re heading to an outdoor event or simply running errands. Stay warm and stylish with your very own knitting loom ear warmer!
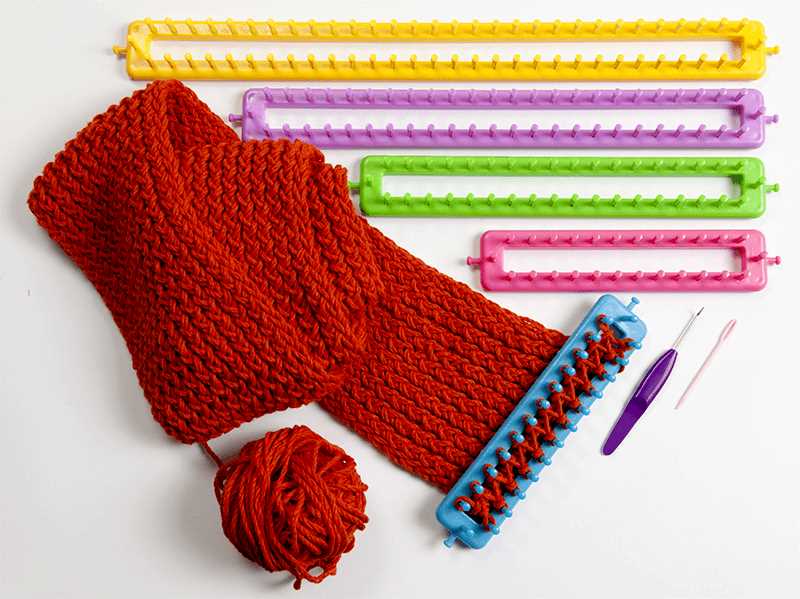
Choosing the Right Loom for Your Ear Warmer Project
When it comes to knitting an ear warmer using a loom, it’s important to choose the right loom to ensure the desired outcome. With a variety of looms available, each with its own features and sizes, here are some important factors to consider before starting your project.
Size of the Loom:
The size of the loom determines the width and thickness of the ear warmer. Depending on the style you prefer, you can choose a narrow or wide loom. A narrower loom will create a thinner ear warmer, while a wider loom will result in a thicker and more cozy ear warmer.
Number of Pegs:

The number of pegs on the loom determines the circumference of the ear warmer. A loom with fewer pegs will create a smaller ear warmer, while a loom with more pegs will produce a larger one. Consider the size of your head or the recipient’s head when selecting the number of pegs on the loom.
Material and Durability:
The material and durability of the loom are important factors to consider, especially if you plan to use it for multiple projects. Look for looms made from sturdy and long-lasting materials like plastic or wood. This will ensure that your loom can withstand the tension of the yarn and last for a long time.
Additional Accessories:
Some looms come with additional accessories such as stitch markers, hooks, and instructions. These accessories can be useful, especially if you’re a beginner or if you want to experiment with different stitches and patterns. Consider whether these extra accessories are important to you before making your selection.
In conclusion, choosing the right loom for your ear warmer project is essential for achieving the desired outcome. Consider factors such as the size of the loom, number of pegs, material and durability, and any additional accessories provided. With the right loom, you’ll be able to create a cozy and stylish ear warmer that fits perfectly.
Selecting the Perfect Yarn and Needles
When it comes to knitting loom ear warmers, selecting the right yarn and needles is crucial to achieving the desired result. The type and weight of the yarn will determine the warmth, elasticity, and overall appearance of the finished product.
Yarn: There are several factors to consider when choosing the yarn for your ear warmer. First, think about the level of warmth you want to achieve. If you live in a colder climate or are looking for extra warmth, opt for a heavier weight yarn such as bulky or super bulky. These yarns will provide better insulation and keep your ears cozy. On the other hand, if you live in a milder climate or prefer a lighter ear warmer, go for a lighter weight yarn such as DK or sport weight. You can also consider the fiber content of the yarn. Some fibers, like wool and alpaca, are naturally warm and great for winter wear, while others, like cotton and acrylic, are more lightweight and breathable.
Needles: The size of the knitting loom needles will also impact the final look of your ear warmer. Depending on the thickness of the yarn you choose, you may need to use different needle sizes to achieve the desired gauge. The gauge refers to the number of stitches and rows per inch, and it is important to match the gauge specified in the pattern to ensure an accurate fit. Most knitting loom sets come with a range of needle sizes, allowing you to experiment and find the perfect match for your yarn. Keep in mind that looms with smaller peg spacing will result in a tighter fabric, while larger peg spacing will create a looser and more open weave.
Overall, taking the time to carefully select the right yarn and needles for your knitting loom ear warmer project will greatly contribute to the final outcome. Whether you prefer a thick and cozy ear warmer or a lightweight and breathable one, there are various options available to suit your preferences and needs.
Getting Started: Casting On and Making the First Rows
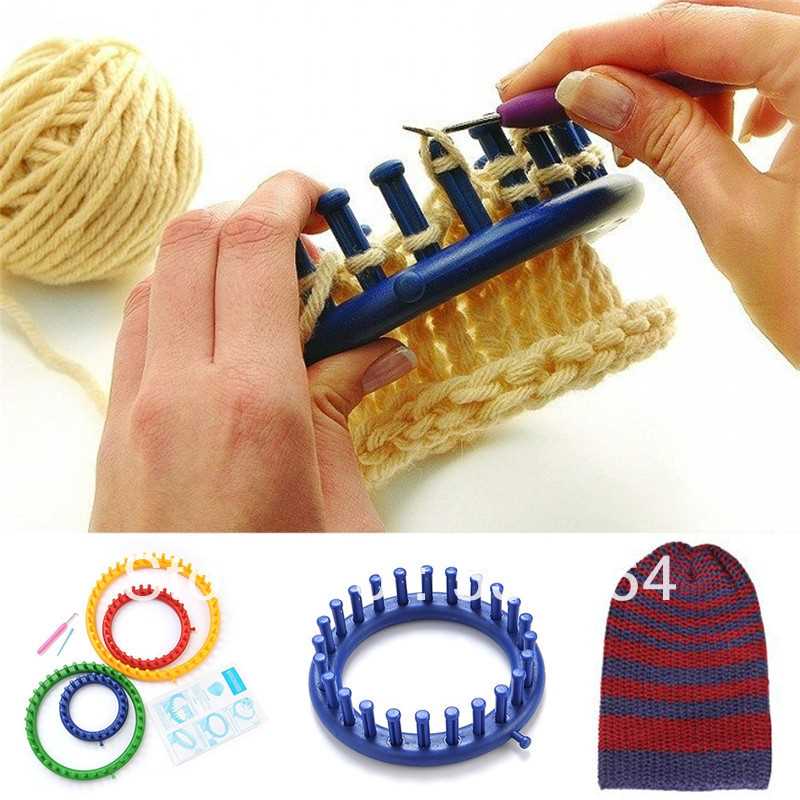
Before you can begin knitting your ear warmer using a knitting loom, you’ll need to cast on the stitches onto the loom. To do this, start by attaching the yarn to the anchor peg at one end of the loom. Secure the yarn with a knot or by wrapping it around the peg a few times. Make sure the yarn is taut, but not too tight.
Once you have the yarn attached, begin casting on the stitches by wrapping the yarn around each peg in a clockwise direction. Starting at the anchor peg, wrap the yarn around the first peg and move to the next peg, continuing until you reach the end of the loom. Repeat this process for each row until all the pegs are filled with loops of yarn.
To make the first rows of your ear warmer, you’ll need to use a knitting tool (a long, hooked tool that comes with most knitting loom sets). Starting at one end of the loom, insert the tool under the bottom loop of the first peg, hook the top loop, and pull it over the bottom loop, off the peg, and towards the center of the loom. Continue this process for each peg, working your way from one end of the loom to the other.
Once you’ve completed the first row, push the remaining loops down towards the base of the pegs. This will create space for the next row. Repeat the process of hooking the top loop and pulling it over the bottom loop for each peg to create subsequent rows. After a few rows, you’ll start to see the fabric of your ear warmer taking shape.
To create a ribbed pattern for your ear warmer, you can alternate between knitting and purling stitches. Knitting involves hooking the top loop and pulling it over the bottom loop, while purling involves hooking the bottom loop and pulling it over the top loop. Experiment with different combinations of knitting and purling to achieve your desired texture and pattern.
Remember to keep your tension consistent as you knit, and adjust the tightness of your stitches as needed. Practice and patience are key to mastering the art of loom knitting, so don’t get discouraged if your first few rows don’t turn out exactly as planned. With a bit of practice, you’ll be well on your way to creating beautiful ear warmers using a knitting loom.
Adding Patterns and Designs to Your Ear Warmer
When it comes to knitting loom ear warmers, adding patterns and designs can help make your creation unique and stylish. There are several ways to incorporate patterns and designs into your ear warmer, whether using different colored yarns, stitch variation, or embellishments.
Color: One simple way to add a pattern to your ear warmer is by using multiple colors of yarn. You can create stripes, chevron patterns, or even color blocking. Experiment with different color combinations to find a design that best suits your style.
Stitches: Another way to add patterns is by using different stitch variations. For example, using a rib stitch can create a textural pattern that adds interest to your ear warmer. You can also try different cable stitch patterns to create intricate designs.
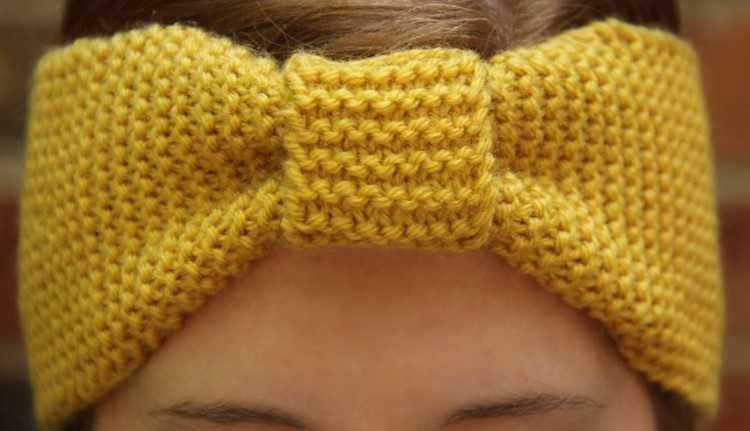
Embellishments: Adding embellishments such as buttons, bows, or flowers can instantly elevate the look of your ear warmer. Sew or glue them onto the finished piece to create a unique and personalized design.
Remember to experiment and have fun when adding patterns and designs to your ear warmer. The possibilities are endless, and you can truly make it your own. Whether you prefer a simple and minimalist design or something bold and eye-catching, there are endless ways to customize your knitting loom ear warmer.
Adjusting the Size for a Perfect Fit
When knitting a loom ear warmer, it is important to ensure that it fits perfectly. Everyone’s head size varies, so it may be necessary to adjust the pattern to achieve the desired fit. Here are a few tips for adjusting the size of a knitted loom ear warmer.
1. Choosing the Right Loom Size
The first step in adjusting the size of a knitted loom ear warmer is to choose the right loom size. Looms come in various sizes, so selecting a loom that matches the desired head circumference is crucial. Measure the head circumference using a tape measure and choose a loom that closely matches this measurement. This will help create a snug and comfortable fit.
2. Adding or Removing Stitches
If the loom size is close to the desired size, but not quite perfect, it may be necessary to add or remove stitches to achieve a better fit. Adding stitches will make the ear warmer larger, while removing stitches will make it smaller. To do this, simply adjust the number of stitches cast on or decrease the number of stitches during the knitting process. Be sure to adjust the stitch count evenly around the loom to maintain symmetry.
3. Adjusting the Length
In addition to adjusting the width of the ear warmer, you may also need to adjust the length for a perfect fit. Measure the distance from the base of the neck to the top of the head to determine the desired length. Knit the ear warmer to this length, making sure it provides enough coverage and sits comfortably on the head. Remember to consider the desired amount of stretch when determining the length.
By following these tips and making adjustments as needed, you can create a knitted loom ear warmer that fits perfectly and provides both warmth and style. Happy knitting!
Finishing Touches: Binding Off and Weaving in Ends
Once you have completed your knitting loom ear warmer pattern, it’s time to finish it off with some binding off and weaving in ends. These final steps will help give your ear warmer a polished look and ensure that it stays in place when worn.
Binding Off
To bind off, start by knitting two stitches onto the loom. Then, using a crochet hook, pull the first stitch over the second stitch and off the peg. Continue knitting one stitch and pulling the previous stitch over until you reach the last stitch. Cut the yarn, leaving a long tail, and thread it through the last stitch to secure it.
Weaving in Ends
After binding off, you will have two loose ends of yarn. Take a tapestry needle and thread one of the ends through the eye of the needle. Starting at one end of the ear warmer, weave the needle in and out of the stitches, making sure to go in different directions to secure the yarn. Repeat this process with the other loose end, weaving it in the opposite direction to further secure the yarn.
Once you have finished weaving in the ends, trim any excess yarn, being careful not to cut too close to the stitches. This will help prevent any unraveling or fraying of the yarn. Once all the loose ends are secured and trimmed, your knitting loom ear warmer is ready to be worn or gifted!
Embellishments and Customizations: Adding Buttons or Flowers
One of the great things about knitting loom ear warmers is that they can easily be customized to fit your style and personality. One way to do this is by adding embellishments such as buttons or flowers. These small details can make a big impact and add a touch of uniqueness to your ear warmer.
If you want to add buttons to your ear warmer, you can do so by sewing them on after you have finished knitting. Choose buttons that complement the color and style of your ear warmer. You can either sew them directly onto the fabric or sew them onto small pieces of fabric or felt and then attach them to the ear warmer. Be creative and try different placements and combinations of buttons to create a look that you love.
If you prefer a more feminine and decorative touch, you can add flowers to your ear warmer. You can knit or crochet flowers using yarn that matches or complements the color of your ear warmer. There are many patterns available online for knitted or crocheted flowers. Once you have your flowers, you can sew them onto the ear warmer, either individually or in clusters. You can also add beads or sequins to the centers of the flowers for an extra touch of sparkle.
Adding buttons or flowers to your knitting loom ear warmer is a fun and creative way to personalize your accessory. Whether you choose buttons for a classic or rustic look, or opt for flowers for a more whimsical and feminine touch, these embellishments will surely make your ear warmer stand out from the crowd.
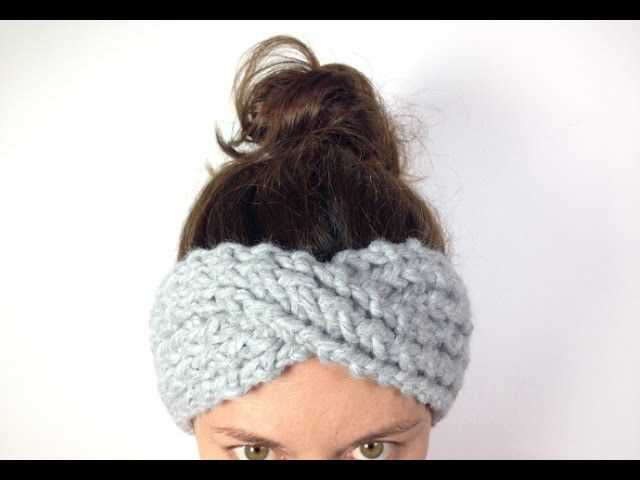
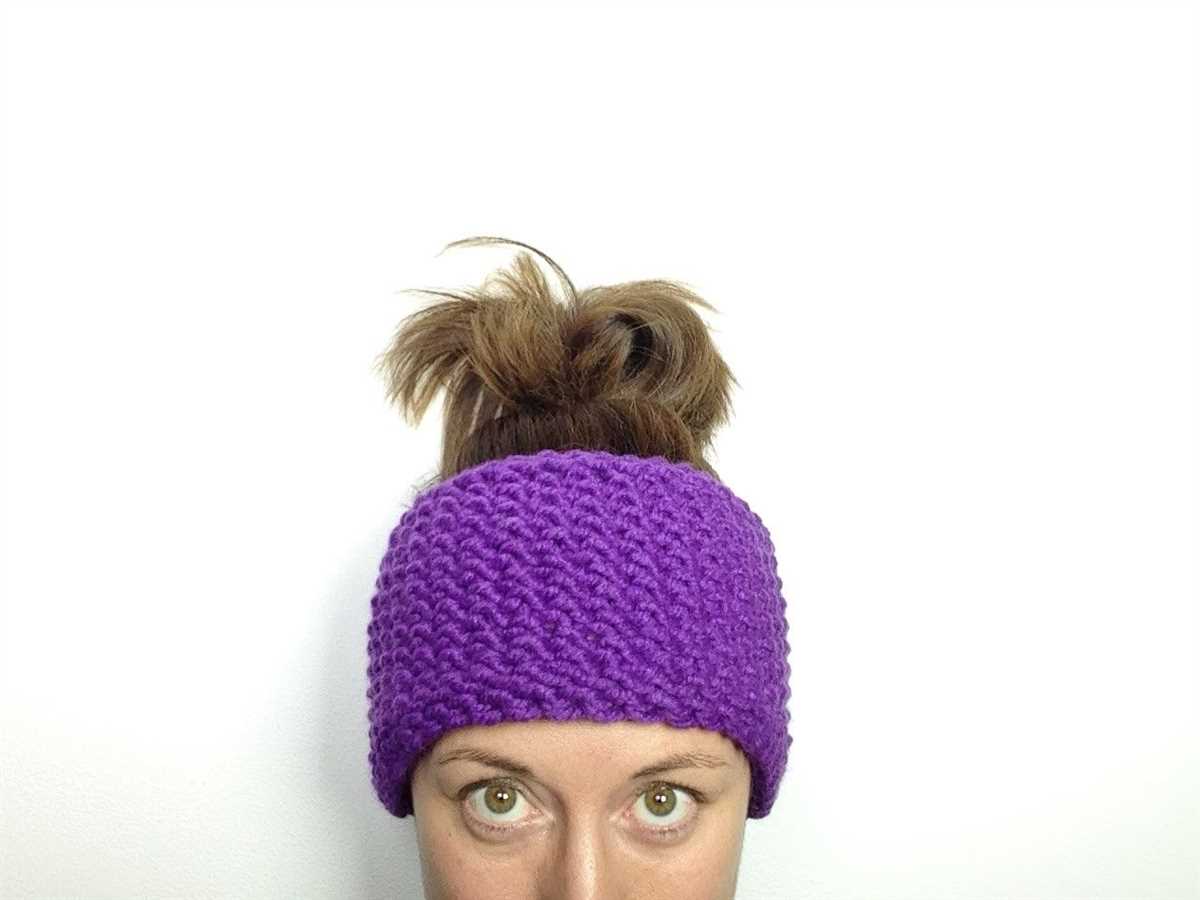
Styling Tips: Different Ways to Wear Your Knitted Ear Warmer

Once you have crafted your knitted ear warmer using a loom, it’s time to explore the various ways you can style and wear it. Whether you prefer a casual or formal look, there are plenty of options to suit your personal style and occasion.
Here are some suggestions to get you started:
1. Classic Headband Style
One of the most common ways to wear an ear warmer is in the classic headband style. Simply place the ear warmer around your head, covering your ears and securing it at the nape of your neck. This timeless look works well with both casual and dressy outfits.
2. Bohemian Twist
Add a bohemian touch to your outfit by incorporating a twist into your ear warmer. After placing it around your head, twist the sides before securing it at the back. This style adds an extra element of interest to your look and pairs well with flowy dresses and loose hairstyles.
3. Faux Headwrap
If you love the look of a headwrap but don’t want the hassle of tying a scarf, try styling your ear warmer as a faux headwrap. Place it around your head, leaving the front slightly loose, then tuck the ends under at the back. This creates a stylish and effortless look that works well with both casual and formal outfits.
4. Half-Up Hairstyle
Add a touch of femininity to your hairstyle by incorporating the ear warmer into a half-up hairdo. Style your hair into a half-up style, leaving some locks loose around your face, then place the ear warmer over your head and secure it at the back. This look works well with both straight and curly hair.
5. Layered Headband
For colder days or when you want extra warmth, try layering your ear warmer with a wide headband. Place the wide headband over your ears, then add the knitted ear warmer on top, covering any exposed areas. This not only provides extra insulation but also adds a trendy and stylish touch to your look.
With these styling tips, you can take your knitted ear warmer from functional to fashionable. Experiment with different styles and find the ones that best suit your personal style and outfit. Whether you’re going for a casual or dressy look, your ear warmer is sure to keep you warm and stylish throughout the winter season.