
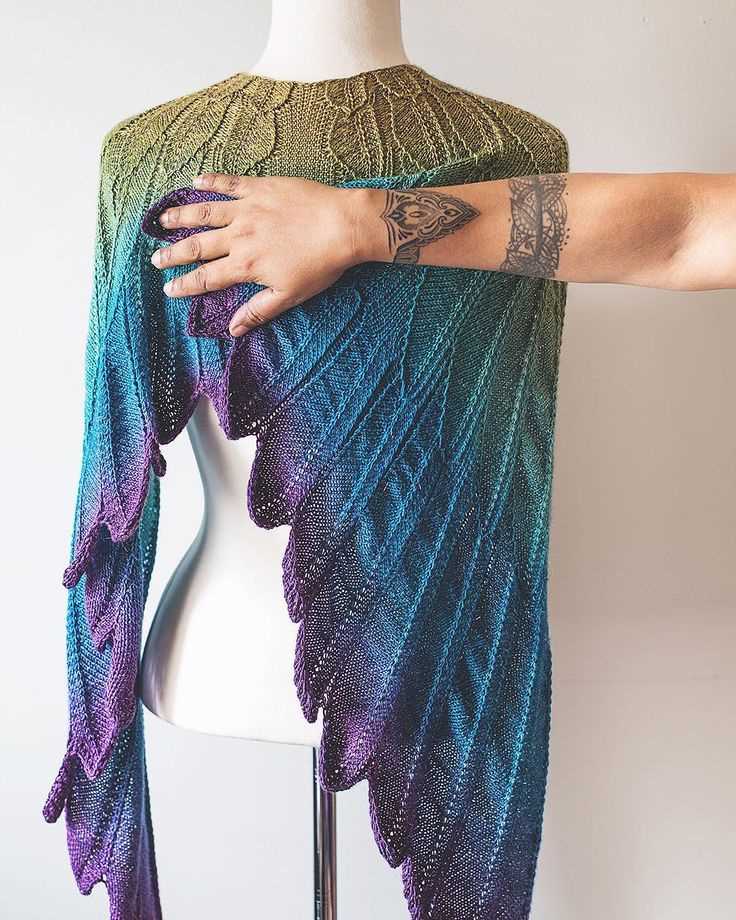
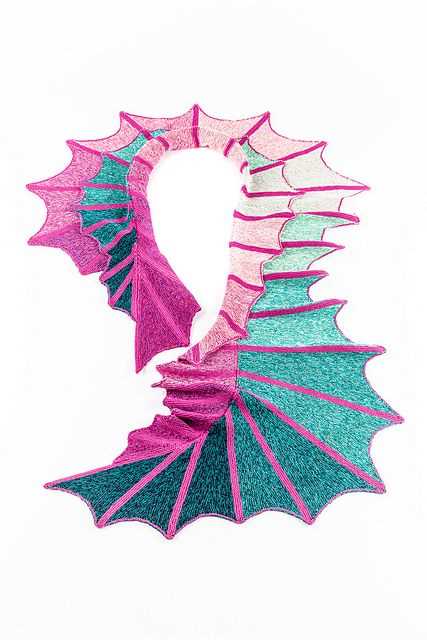
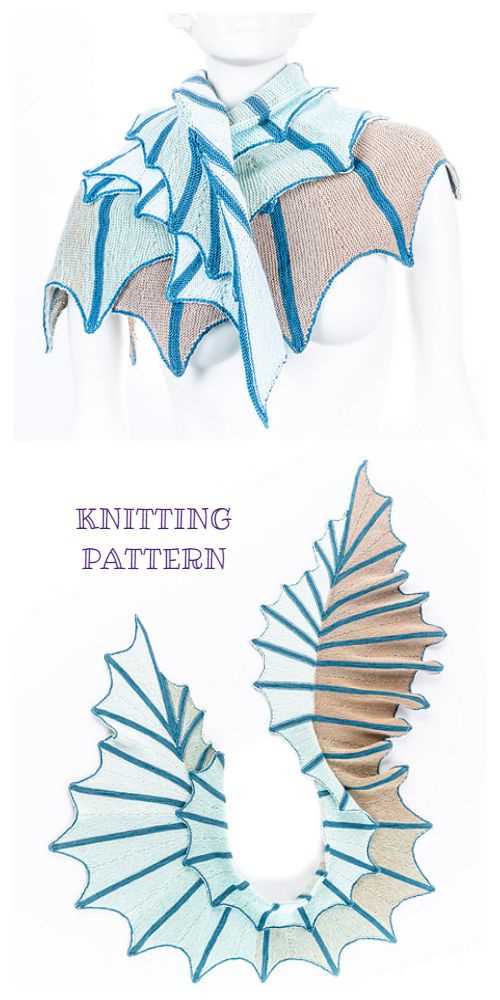
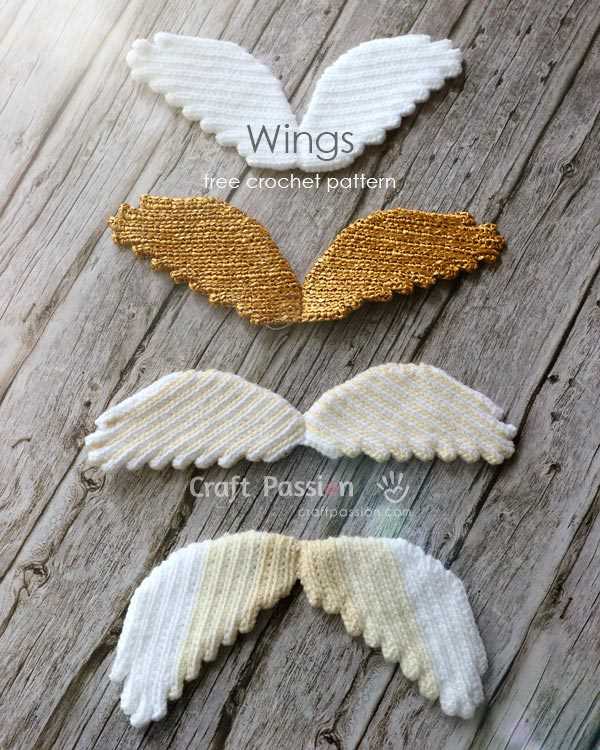
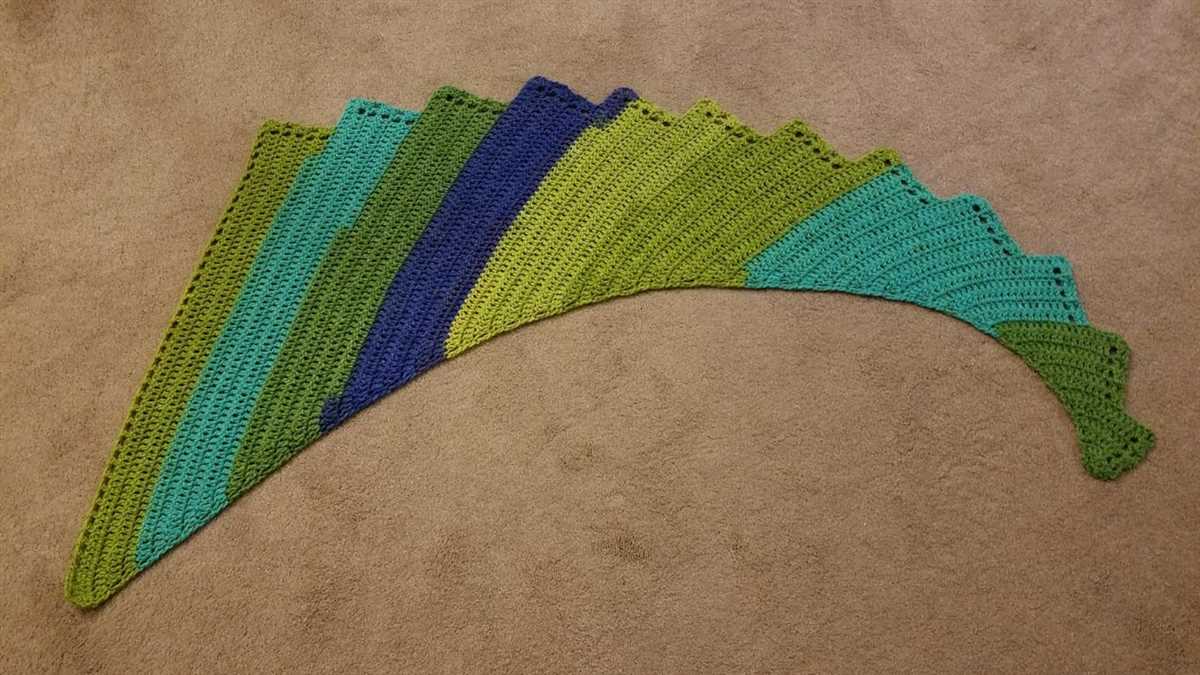
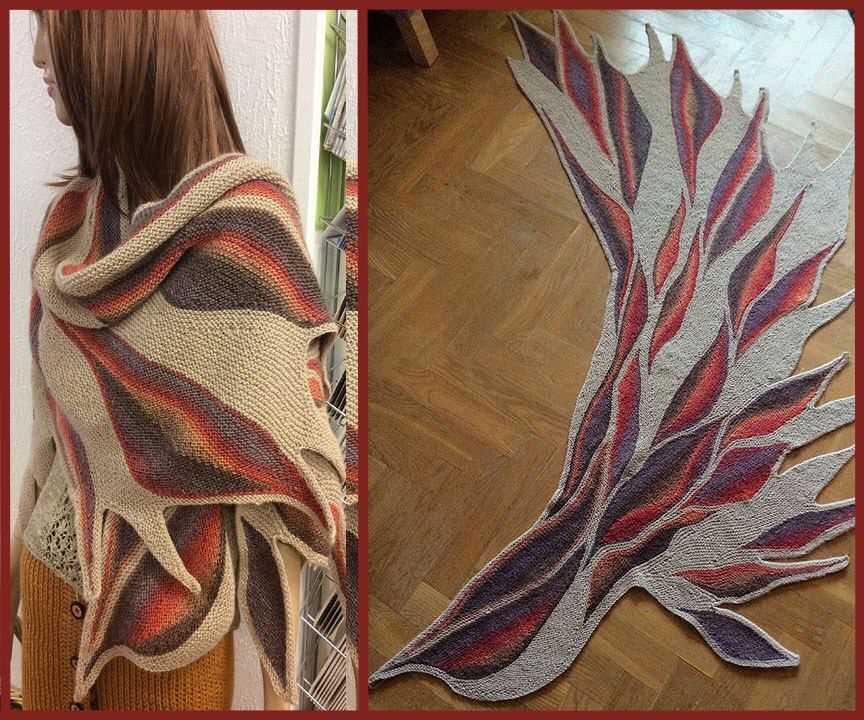
Knitting is an ancient craft that has been passed down through generations, allowing individuals to create beautiful and functional items with just a few simple tools and techniques. One popular item that can be knitted is wings. Knitted wings are a unique and eye-catching accessory that can be added to a variety of garments, including cardigans, shawls, and even hats.
The knitted wings pattern is a versatile design that can be easily adjusted to fit any size or style. Whether you want to create a delicate pair of fairy wings or a bold and dramatic set of angel wings, this pattern provides a solid foundation to build upon. The pattern consists of simple stitches and techniques such as knitting, purling, increasing, and decreasing, making it suitable for knitters of all skill levels.
One of the great things about knitted wings is the ability to customize them with a variety of colors and textures. From soft and fluffy feathers to shiny metallic yarns, the options are endless. Knitting your wings also allows you to incorporate special touches such as beads, sequins, or even embroidery, making each set of wings truly unique.
Not only are knitted wings a fun and creative project, but they can also serve as a reminder of the power and freedom that comes with crafting. Just as wings allow birds to soar through the sky, knitting allows individuals to express their creativity and create something beautiful. So grab your needles and yarn, and let your imagination take flight with a pair of knitted wings!
What are knitted wings?
Knitted wings are a unique and creative accessory that can be added to various garments such as cardigans, sweaters, shawls, and even hats. Made using knitting needles and yarn, these wings are designed to be attached to the back of the garment, giving it a whimsical and playful touch.
One popular pattern for knitted wings is the feathered wing design, which resembles the wings of a bird. The pattern typically involves using a combination of knit and purl stitches to create the feather-like texture, and increases and decreases to shape the wings. These wings can be knitted in various sizes, depending on the desired effect and the size of the garment they will be attached to.
Knitted wings can be an excellent way to add a touch of personalization and creativity to your knitting projects. They can be made in different colors to match or contrast with the garment, and can be embellished with beads, buttons, or other decorative elements. Whether you’re a beginner or an experienced knitter, knitting wings can be a fun and rewarding project to try.
Benefits of Using Knitted Wings
Knitted wings offer numerous benefits for both birds and humans. One of the key advantages is the ability to provide warmth and insulation, especially during colder seasons. The knitted fabric traps air and creates a layer of insulation, keeping birds warm and protected from the elements.
Additionally, knitted wings can also serve as a protective barrier against external factors such as strong winds, rain, and snow. The tight-knit pattern helps to shield the birds’ delicate feathers, preventing damage and ensuring their ability to fly remains unhindered.
Improved Flight Efficiency
- Reduced energy consumption: The use of knitted wings allows birds to conserve energy during flight. The insulation provided by the fabric reduces heat loss, enabling birds to fly more efficiently and cover longer distances without using excessive energy.
- Better aerodynamics: The knitted pattern on the wings can enhance the bird’s aerodynamic performance. The texture and structure of the fabric help in reducing drag and improving lift, resulting in smoother and more stable flight.
- Increase in maneuverability: Knitted wings can improve a bird’s maneuverability by providing better control and stability during flight. The elasticity of the fabric allows for greater wing flexibility, enabling birds to execute complex flight maneuvers with ease.
Protecting Endangered Species
The use of knitted wings can also play a crucial role in protecting and conserving endangered bird species. By providing an additional layer of insulation and protection, knitted wings can help endangered birds survive harsh environmental conditions, ensuring their survival and contributing to their overall population growth.
In conclusion, the benefits of using knitted wings are manifold. They provide warmth, insulation, protection, and improved flight efficiency for birds. They also have the potential to contribute to the conservation efforts of endangered bird species. The unique and versatile properties of knitted wings make them an invaluable tool in the world of avian conservation.
Why choose knitted wings over other types of wings?
Knitted wings offer a unique and customizable option for those looking to add a touch of whimsy to their wardrobe or costume. With their intricate patterns and soft texture, they can create a stunning visual effect that is sure to stand out.
One of the main advantages of knitted wings is their versatility. They can be made in any size, shape, or color, allowing for endless possibilities in design. Whether you want small and delicate fairy wings or large and bold dragon wings, knitting allows you to bring your imagination to life.
In addition to their visual appeal, knitted wings also offer practical benefits. Unlike other wing materials, such as feathers or wire, knitted wings are lightweight and comfortable to wear. They won’t weigh you down or restrict your movement, making them perfect for events and performances where you need to be agile.
The handmade nature of knitted wings also adds a special touch. Each pair is unique, created with care and attention to detail. This makes them a wonderful gift for anyone who appreciates the artistry and craftsmanship that goes into handmade items.
Furthermore, knitted wings can be easily cared for and stored. They can be hand-washed or machine-washed on delicate cycles, and they can be folded or rolled up for compact storage when not in use. This makes them a convenient and practical choice for those who want wings that are both beautiful and easy to maintain.
In conclusion, knitted wings offer a combination of artistic expression, comfort, and versatility that sets them apart from other types of wings. Whether for a costume party, a theatrical performance, or just for fun, knitted wings are a fantastic choice for those who want to make a unique and memorable statement.
Advantages of knitted wings
Knitted wings offer several advantages over traditional fabric or metal wings. One of the major advantages is their flexibility. The knitted material allows for a greater range of motion, which can be beneficial in situations where the wings need to adapt to changing air currents or maneuvering during flight. The flexibility also makes the wings more resilient to impacts, reducing the risk of damage.
Another advantage of knitted wings is their lightweight nature. The use of knitted materials allows for a significant reduction in weight compared to traditional wings, which can improve the overall performance of the aircraft. The lighter weight also means that less fuel is required to power the aircraft, resulting in increased fuel efficiency.
Improved aerodynamics: The knitted structure of the wings can be designed to optimize airflow and reduce drag. This can result in improved aerodynamic performance, allowing for faster speeds and better fuel efficiency. The flexible nature of the knitted wings also allows for precise control over the shape and angle of the wing, further enhancing their aerodynamic properties.
Enhanced safety: Knitted wings can offer improved safety features compared to traditional wings. The flexibility of the material can help absorb and dissipate energy during impact, reducing the risk of injuries in the event of a crash. Additionally, the knitted structure can provide a higher level of resistance to fatigue and stress, increasing the overall durability and reliability of the wings.
Innovative design possibilities: The knitted nature of the wings opens up a whole new world of design possibilities. The material can be easily manipulated to create complex shapes and patterns, allowing for unique and visually appealing wing designs. This can be particularly advantageous for aircraft manufacturers looking to differentiate their products in a competitive market.
In summary, knitted wings offer several advantages over traditional wings, including flexibility, lightweight, improved aerodynamics, enhanced safety, and innovative design possibilities. These advantages make knitted wings an attractive option for aircraft manufacturers and can potentially revolutionize the aviation industry.
Materials Needed for Knitted Wings Pattern
When attempting the knitted wings pattern, you will need a few essential materials to successfully complete the project. Gathering these items beforehand will ensure a smooth and enjoyable knitting experience.
Here is a list of the necessary materials:
- Knitting Needles: You will require a pair of knitting needles, preferably in size US 8 (5mm) or as recommended in the pattern. These needles will help you create the desired stitch tension and produce the correct size for the knitted wings.
- Yarn: Choose a suitable yarn for the project, keeping in mind the desired drape and weight of the wings. A lighter weight yarn in your preferred color will work well for this pattern.
- Tapestry Needle: A tapestry needle with a large eye is necessary for seaming and weaving in loose ends. This needle will come in handy when finishing the wings and ensuring they are secure and tidy.
- Scissors: Have a pair of sharp scissors nearby for cutting yarn and trimming any excess threads. This will help maintain neatness and precision throughout the knitting process.
- Stitch Marker: Using a stitch marker can be helpful for keeping track of specific sections or stitch counts in the pattern. Choose a marker that is easy to manipulate and does not slip out of place.
- Row Counter: A row counter is optional but can be beneficial for tracking the number of rows worked, especially if you find it challenging to remember or keep count manually. It will assist in maintaining consistency and accuracy in the wing’s dimensions.
List of materials required
In order to create the knitted wings, you will need the following materials:
- Yarn: Choose a soft and durable yarn that is suitable for knitting, such as acrylic or wool blend. The amount of yarn needed will depend on the size of the wings and the desired thickness. It is recommended to have at least two skeins of yarn.
- Knitting Needles: Use knitting needles that are appropriate for the chosen yarn. The size of the needles will depend on the gauge of your knitting. It is recommended to have a set of straight or circular knitting needles in sizes US 6 (4 mm) – US 8 (5 mm).
- Tapestry Needle: A tapestry needle with a large eye will be needed for weaving in loose ends and seaming the wings.
- Sewing Pins: Sewing pins will be useful for holding the knitted pieces in place during assembly.
- Stitch Markers: Stitch markers will help you keep track of your stitches and define specific sections of the wing pattern if needed.
- Scissors: A pair of sharp scissors will be necessary for cutting the yarn and trimming any excess.
With these materials at hand, you will be ready to start knitting your wings and bring your creative vision to life!
Recommended yarns and needles
When it comes to knitting wings, the choice of yarn and needles is important to achieve the desired results. The right combination can make a big difference in the final appearance and texture of the wings. Here are some recommended yarns and needles that can be used for knitting wings.
Firstly, it is important to choose a yarn that is lightweight and has good stitch definition. A yarn made of a blend of synthetic fibers such as acrylic or nylon can be a good option as it provides both strength and softness. Additionally, a yarn with a slight sheen or metallic thread can add a touch of sparkle to the wings.
Recommended Yarns:
- Superfine or fingering weight yarn: This weight of yarn is ideal for creating delicate and intricate wing patterns. It allows for a finer stitch detail and results in lightweight wings.
- Lace weight yarn: This weight of yarn will give the wings an airy and ethereal appearance. It is perfect for creating delicate lace patterns and intricate details.
- Mohair blend yarn: A mohair blend yarn can provide a fluffy and feathery texture to the wings. It adds an extra dimension and softness to the finished wings.
Next, it is essential to use the right size of needles for the chosen yarn. Generally, smaller needle sizes are preferred for creating finer details and achieving an overall dainty look. However, this can vary depending on the desired effect and the individual’s knitting tension. It is recommended to use circular needles for larger wing projects as they can accommodate a greater number of stitches and make knitting more comfortable.
Recommended Needles:
- US size 1-3 (2.25-3.25mm) double-pointed needles: These smaller needle sizes are suitable for finer yarn weights and detailed work.
- US size 4-6 (3.5-4mm) circular needles: These sizes are great for lace weight or mohair blend yarns and can accommodate a greater number of stitches for larger wing projects.
Remember that these recommendations are just guidelines, and experimentation with different yarns and needles can lead to unique and beautiful results. Depending on the desired size and style of the wings, adjustments can be made to the yarn weight and needle size. It is always recommended to make a gauge swatch before starting any project to ensure the desired outcome.
Knitting Techniques for Knitted Wings Pattern
When it comes to creating knitted wings, there are several knitting techniques that can be used to achieve the desired effect. One popular technique is the feather and fan stitch, which creates a beautiful ripple effect that resembles the texture of bird wings. To create this stitch, you will need to alternate between knitting and purling stitches in specific sequences, creating a wave-like pattern. This technique is perfect for adding depth and texture to your knitted wings.
Another knitting technique that can be used for knitted wings is the lace knitting technique. Lace knitting involves creating intricate patterns by using a combination of knitting and purling stitches, as well as yarn overs and decreases. This technique allows you to create delicate and intricate designs that mimic the look of feathers. By using lace knitting, you can achieve a lightweight and airy texture that is perfect for knitted wings.
For those who prefer a more three-dimensional approach, the cable knitting technique can be used to create knitted wings with a raised and textured appearance. This technique involves twisting and crossing stitches, creating cables that resemble the structure of feathers. By using cable knitting, you can add depth and dimension to your knitted wings, making them look more realistic and interesting.
Regardless of the knitting technique you choose, it is important to pay attention to stitch count and tension to ensure that your knitted wings turn out as desired. Additionally, using the right yarn and needle size can also play a significant role in achieving the desired texture and appearance. Experimenting with different techniques and materials can help you find the perfect combination to create stunning knitted wings.
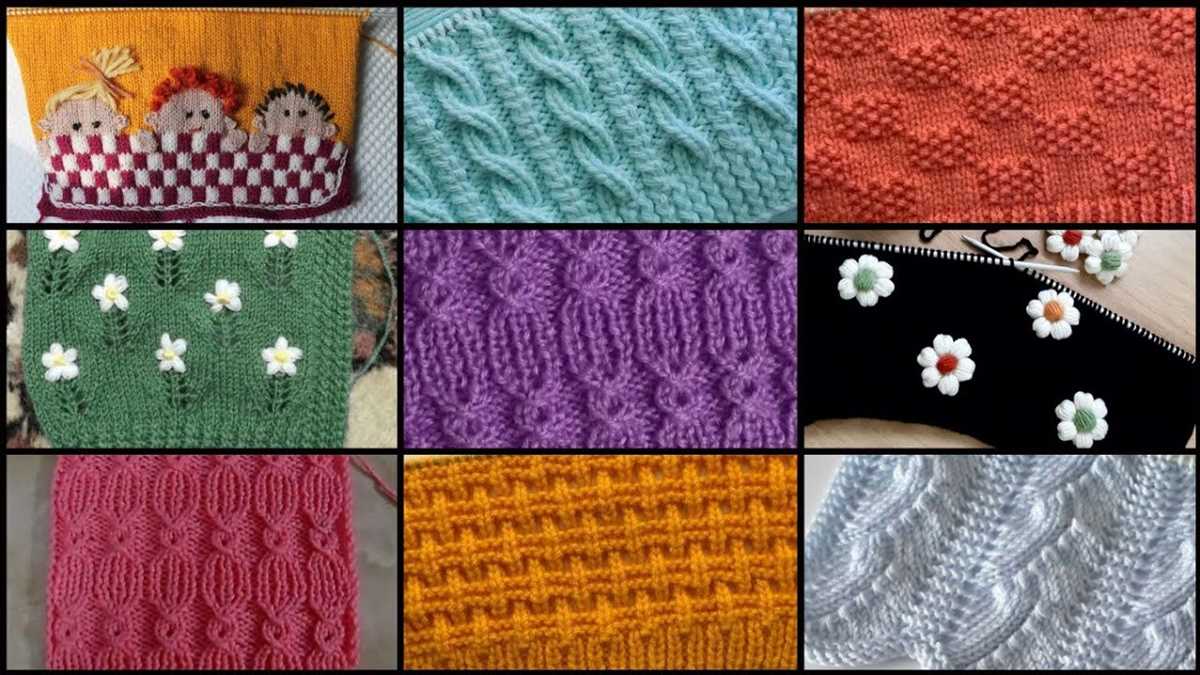
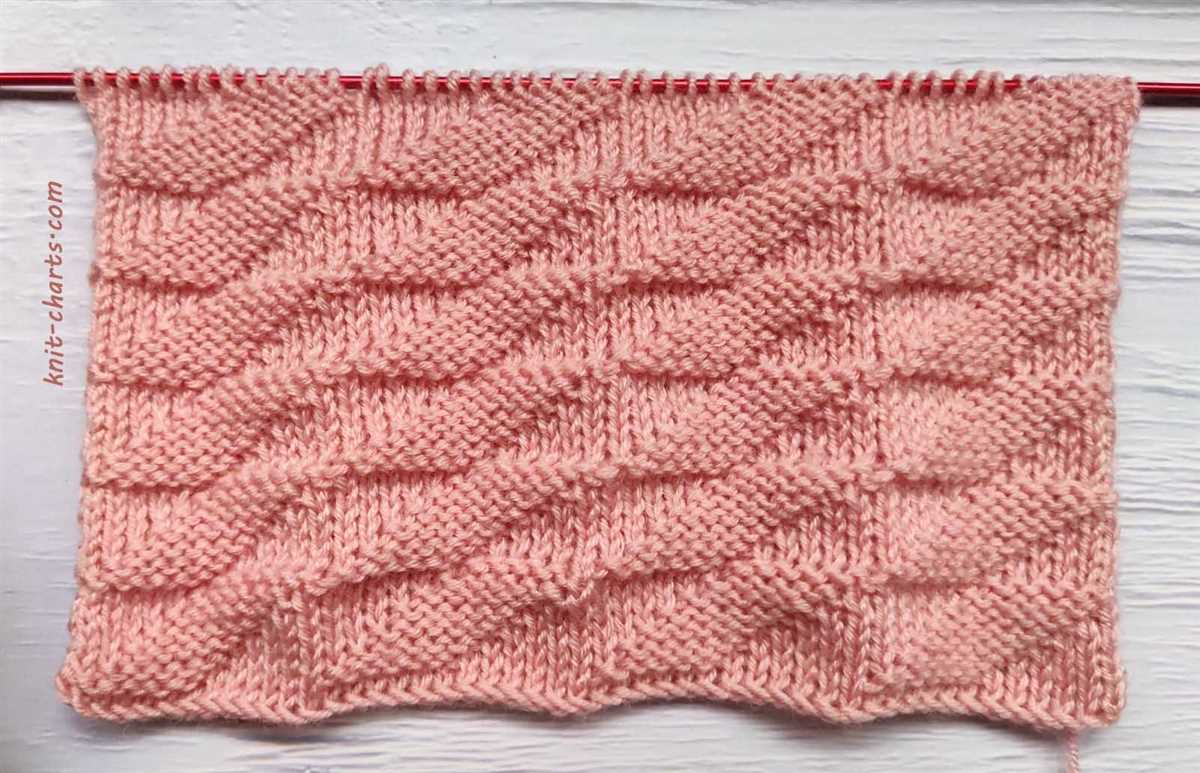
Basic knitting stitches used
The pattern for knitted wings requires a few basic knitting stitches to create the desired shape and texture. These stitches include:
- Knit stitch: The knit stitch is the most basic and commonly used stitch in knitting. It creates a smooth, V-shaped texture on the right side of the fabric.
- Purl stitch: The purl stitch is another fundamental stitch in knitting. It produces a raised, horizontal ridge on the right side of the fabric and a smooth surface on the wrong side.
- Stockinette stitch: The stockinette stitch is created by alternating rows of knit and purl stitches. This stitch pattern produces a smooth, flat fabric on the right side and a bumpy texture on the wrong side.
- Garter stitch: The garter stitch is made by knitting every row. It creates a ridged texture on both sides of the fabric and is commonly used as an edging or for reversible projects.
These basic stitches can be combined and manipulated to create various patterns and textures in knitting. In the context of the knitted wings pattern, these stitches are used to shape the wings and add visual interest to the finished project.
Advanced knitting techniques involved
Knitting wings requires advanced techniques to achieve the desired shape and texture. Here are some of the key techniques involved:
1. Lace knitting:
Lace knitting is an intricate technique used to create delicate and airy patterns. In the context of knitting wings, lace stitches are commonly used to emulate the delicate veining and feather-like texture of wings. This technique involves intricate stitch patterns, yarn overs, and decreases to create an open and lacy fabric.
2. Short rows:
Short rows are used to create shaping and curvature in the wings. By working partial rows instead of full rows, knitters can add depth and dimension to the wings, mimicking the natural curvature and shape of bird wings. Short rows can be used to create the distinctive shape of the wingtip or to add curvature throughout the wing structure.
3. Intarsia knitting:
Intarsia knitting is a technique used to create blocks of color within a larger fabric. In the context of knitting wings, intarsia can be used to add color and detail, such as creating contrasting feather patterns or adding small accents like eyes or scaled textures. This technique requires careful yarn management and attention to detail to achieve the desired color and pattern placement.
4. Cable knitting:
Cable knitting is a technique that creates textured patterns by crossing stitches over each other. While not as commonly used in knitting wings, cable knitting can be incorporated to add depth and visual interest. Cable stitches can be used to mimic the raised ridges found on some bird wings or to create a bolder and more structured texture within the wing design.
These advanced knitting techniques require patience, skill, and attention to detail to achieve the desired result. With practice and experimentation, knitters can create intricate and realistic wings that will be the highlight of any project.
Step-by-Step Instructions for Knitted Wings Pattern
If you’re looking to add a whimsical touch to your next knitting project, consider incorporating knitted wings into your design. Whether you’re making a stuffed animal, a baby blanket, or even a sweater, knitted wings can add an enchanting element. Here are step-by-step instructions for creating your own knitted wings pattern.
Materials:
Before you begin, gather the following materials:
- Knitting needles in the appropriate size for your chosen yarn
- A ball of yarn in your desired color
- A tapestry needle for weaving in ends
- Scissors to trim excess yarn
Instructions:
- Cast on the desired number of stitches for your wing. The number of stitches will depend on the size and shape of the wing you want to create. For a basic wing shape, you can start with 20 stitches.
- Knit every row in garter stitch until your wing reaches the desired length. Garter stitch is simply knitting every stitch on every row. This will create a textured fabric.
- Once your wing has reached the desired length, it’s time to shape the top. Begin by decreasing stitches on each side of the wing. You can do this by knitting two stitches together at the beginning and end of each row.
- Continue decreasing stitches until you have a few stitches left on your needle. Bind off the remaining stitches.
- Repeat these steps to create a second wing.
- Once both wings are complete, it’s time to attach them to your project. You can sew them onto a stuffed animal or sew them onto the back of a baby blanket or sweater. Use a tapestry needle and matching yarn to securely sew the wings in place.
- After attaching the wings, weave in any loose ends and trim excess yarn.
- Your knitted wings are now complete! Admire your finished project and enjoy the whimsical touch they add.
With these step-by-step instructions, you can easily create knitted wings to incorporate into your next knitting project. Whether you’re a beginner or an experienced knitter, this pattern is a fun way to add some magic to your creations.
How to Start Knitting the Wings
Knitting the wings for your project can be a fun and rewarding process. Whether you are making a pair of angel wings for a costume or a decorative piece, following these steps will help you get started.
Gather Your Materials
Before you begin knitting the wings, make sure you have all the necessary materials. This includes knitting needles of the appropriate size for your chosen yarn, as well as the yarn itself. You may also want to have stitch markers and a tapestry needle on hand for finishing touches.
Choose a Wing Pattern
There are many different wing patterns available, so consider the style and size of wings you want before making a selection. Look for patterns that provide clear instructions and have been well-tested by other knitters. You may also want to consider adjusting the pattern to fit your specific needs or personal preferences.
Cast On Stitches
To start knitting the wings, you will need to cast on the required number of stitches. Follow the pattern instructions for the recommended cast-on method. It is important to ensure that you cast on with a loose tension to make it easier to work with the stitches later on.
Begin Knitting
Once you have cast on your stitches, you can begin knitting the wing pattern. Follow the instructions row by row, making sure to pay attention to any stitch or pattern changes. It may be helpful to use stitch markers to keep track of certain sections or repeats.
Shape the Wings
As you progress through the pattern, you will likely encounter instructions on shaping the wings. This may involve increasing or decreasing stitches to create the desired shape. Pay close attention to these instructions and ensure that you are working in the correct order and direction.
By following these steps and taking your time, you will be able to successfully start knitting the wings for your project. Remember to enjoy the process and have fun with your knitting!
Detailed Instructions for Each Section of the Wings
In this section, we will provide detailed instructions for each section of the knitted wings. Following these instructions step by step will help you create a beautiful pair of wings.
Before starting, make sure you have the necessary materials and tools, including the specified yarn, knitting needles, stitch markers, and a tapestry needle.
Section 1: Casting On
Begin by casting on the required number of stitches, as stated in the pattern. Make sure your stitches are evenly distributed on the needles and that your tension is not too tight or too loose. Use stitch markers to mark the beginning and end of this section.
Section 2: The Body of the Wings
In this section, you will work the main body of the wings using a specific stitch pattern. Follow the pattern instructions carefully, ensuring you maintain the correct stitch count and repeat the necessary rows or rounds. Use stitch markers to mark any shaping points or pattern repeats. Pay attention to any increases or decreases that may be required.
Section 3: Shaping the Wings
Once you have completed the body of the wings, you will begin shaping them to create the desired shape. Follow the pattern instructions for any shaping techniques, such as increasing or decreasing stitches. Use stitch markers to mark the points where shaping should occur.
Section 4: Finishing the Wings
After you have shaped the wings, you will need to finish them off. This may involve binding off stitches, weaving in yarn ends, or blocking the wings to shape them properly. Follow the pattern instructions for these finishing techniques.
Summary
By following these detailed instructions for each section of the wings, you will be able to successfully knit a pair of wings. Remember to read the pattern carefully, use stitch markers to mark important points, and pay attention to any shaping instructions. With practice and patience, you will create beautiful knitted wings that can be used for various projects or costumes.
Q&A:
What is a knitted wings pattern?
A knitted wings pattern is a set of instructions for creating a pair of knitted wings. It typically includes the necessary materials, stitch patterns, and step-by-step instructions to knit the wings.
How can I find a knitted wings pattern?
You can find a knitted wings pattern by searching online on knitting websites, forums, or pattern-sharing platforms. There are also many books and magazines that feature knitting patterns, including patterns for knitted wings.
What materials do I need to knit wings?
The materials needed to knit wings typically include knitting needles, yarn in the desired color, and any additional embellishments such as feathers or beads. The specific materials required may vary depending on the pattern you choose.
Are there different styles of knitted wings patterns?
Yes, there are various styles of knitted wings patterns available. Some patterns may create wings that are more realistic and detailed, while others may be more whimsical or abstract. You can choose a pattern that matches your preferred style.
Can I modify a knitted wings pattern?
Yes, you can modify a knitted wings pattern to suit your preferences. You can change the size of the wings, alter the stitch patterns, or add your own unique design elements. Knitting patterns are often a starting point for creativity.
Where can I find a knitted wings pattern?
You can find a knitted wings pattern on various online platforms such as knitting blogs, knitting pattern websites, and social media platforms like Pinterest and Ravelry.
What materials do I need to knit wings?
To knit wings, you will need knitting needles, yarn in your desired color, a tapestry needle for weaving in ends, and any additional materials such as stitch markers or a row counter, depending on the pattern you choose.