
If you’re tired of looking at plain toilet rolls in your bathroom, why not try a knitted toilet roll cover? These cute and functional covers not only add a touch of charm to your bathroom decor, but also protect your toilet rolls from dust and dirt.
In this article, we’ll provide you with a free knitted toilet roll cover pattern that you can easily follow. Whether you’re a beginner or an experienced knitter, this pattern is suitable for all skill levels. Plus, it’s a great way to use up any leftover yarn you may have lying around.
To get started, you’ll need some basic knitting supplies such as knitting needles and yarn. The pattern uses a simple stitch pattern that creates a textured and stretchy fabric. You can choose any color yarn you like to match your bathroom decor or add a pop of color.
So grab your knitting needles and let’s get started on this fun and practical project. Follow our step-by-step instructions and you’ll have a beautiful knitted toilet roll cover in no time!
Knitted Toilet Roll Cover Pattern Free
Looking for a fun and unique way to add some personality to your bathroom? Why not try knitting your own toilet roll cover? With this free pattern, you can create a one-of-a-kind piece that will make your bathroom stand out.
This knitted toilet roll cover pattern is simple and easy to follow, making it perfect for knitters of all levels. Whether you’re a beginner or an experienced knitter, you’ll have no trouble creating this fun and functional accessory.
Materials needed for this project include:
- Worsted weight yarn
- Size 6 knitting needles
- Tapestry needle
- Scissors
To begin, cast on 40 stitches using the long-tail cast on method. This will create the base of your toilet roll cover. Once you have cast on, knit in a rib stitch pattern (knit one, purl one) for about 6 inches.
Next, switch to a stockinette stitch pattern (knit all rows) for another 6 inches. This will create the main body of the cover. Once you have reached your desired length, switch back to a rib stitch pattern and knit for about 2 inches.
Finally, bind off all stitches and use your tapestry needle to weave in any loose ends. Your knitted toilet roll cover is now complete and ready to be used! Feel free to experiment with different colors and yarns to create a unique look.
This knitted toilet roll cover pattern is a great way to add a touch of handmade charm to your bathroom. Plus, it makes for a fun and practical gift idea. So grab your knitting needles and get started on this project today!
Why You Should Knit a Toilet Roll Cover
Knitting a toilet roll cover may not be the first project that comes to mind when thinking about knitting, but it is actually a fun and practical item to make. The toilet roll cover serves as a protective and decorative sleeve for your toilet paper, adding a touch of charm and personality to your bathroom.
One of the main reasons to knit a toilet roll cover is to add a unique and handmade touch to your home decor. Instead of using generic and boring plastic holders, a knitted cover allows you to express your creativity and style. You can experiment with different colors, patterns, and textures to match your bathroom theme or personal taste. It’s a great way to showcase your knitting skills and bring a sense of warmth and comfort to your space.
Aside from the aesthetic aspect, a knitted toilet roll cover also serves practical purposes. It helps to keep the toilet paper clean and protected from dust and dirt. The cover adds an extra layer of insulation, keeping it from unraveling or tearing easily. Plus, it can also act as a buffer to reduce noise when you pull the toilet paper, creating a more peaceful bathroom experience. You can even personalize the cover by adding pockets or hooks to hold small items like a spare roll or a scented sachet.
Overall, knitting a toilet roll cover is a creative project that offers both aesthetic and practical benefits. It allows you to showcase your skills, add a personal touch to your home decor, and provide a functional and stylish solution for storing and protecting your toilet paper. So why not give it a try and enjoy the satisfaction of creating something useful and beautiful with your own hands?
Materials Needed for Knitting a Toilet Roll Cover
Knitting a toilet roll cover can be a fun and creative project. To get started, you will need a few materials to ensure you have everything you need to complete the project.
1. Yarn: The first and most important material you will need is yarn. Choose a yarn that is suitable for knitting and is soft and durable. The color of the yarn can be as per your preference, but it is recommended to choose a bright and vibrant color to add a pop of color to your bathroom.
2. Knitting needles: You will also need a pair of knitting needles. The size may vary depending on the pattern you are using, so make sure to check the pattern’s recommended needle size. It is advisable to use needles that are comfortable for you to hold and work with.
3. Scissors: Scissors are an essential tool for any knitting project. You will need them to cut the yarn and trim any excess at the end. Make sure to use a sharp pair of scissors for clean cuts.
4. Stitch markers: Stitch markers can be helpful to mark certain stitches or sections of your knitting. They come in various shapes and sizes, so choose ones that are suitable for the size of your needles and won’t slip off easily.
5. Tapestry needle: A tapestry needle is used for weaving in ends and sewing up any seams. It should have a large eye to easily thread the yarn through. Choose a blunt-tipped needle to avoid splitting the yarn.
6. Toilet roll: Lastly, don’t forget the toilet roll! The purpose of knitting a toilet roll cover is to dress up a plain roll, so make sure to have a fresh roll ready to go.
Gather these materials and you will be ready to start knitting your own unique and stylish toilet roll cover. Happy knitting!
Choosing the Right Yarn for Your Toilet Roll Cover
When it comes to knitting a toilet roll cover, choosing the right yarn is essential to ensure that your finished project is not only functional but also visually appealing. There are several factors to consider when selecting the yarn for your toilet roll cover, including its durability, softness, and color.
Durability: Since toilet roll covers are meant to be used frequently, it is important to choose a yarn that is durable and can withstand regular handling. Look for yarns that have a high twist or are made from natural fibers such as cotton or acrylic, as they tend to be more hard-wearing.
Softness: To add a touch of comfort to your toilet roll cover, opt for a soft and cozy yarn. Consider choosing yarns that have a brushed or fuzzy texture, as they will provide a luxurious feel. Yarns made from alpaca, merino wool, or mohair are known for their softness and can elevate the overall look and feel of your toilet roll cover.
Color: The color of the yarn will play a significant role in the overall aesthetic of your toilet roll cover. You can choose a yarn in a neutral shade, such as white, gray, or beige, for a classic and timeless look. Alternatively, you can opt for bold and vibrant colors to make a statement or match your bathroom decor. Consider the existing color scheme in your bathroom and choose a yarn color that complements it.
When selecting the yarn for your toilet roll cover, it is important to keep in mind the intended use, the desired level of comfort, and the overall design aesthetic. By considering these factors, you can ensure that your knitted toilet roll cover not only serves its purpose but also adds a touch of style to your bathroom.
Selecting the Perfect Knitting Needles for your Project
When it comes to knitting, selecting the right needles for your project is essential. The type and size of the needles can greatly impact the final outcome of your knitting, as well as your overall experience. Here are some factors to consider when choosing knitting needles:
Type of Needles: There are various types of knitting needles available, including straight needles, circular needles, and double-pointed needles. Each type is designed for specific purposes, so it’s important to choose the one that suits your project. Straight needles are ideal for flat knitting, circular needles are great for knitting in the round and larger projects, while double-pointed needles are used for small circumference knitting, such as socks or sleeves.
Material: Knitting needles can be made from different materials, such as wood, metal, or plastic. Each material has its own characteristics and can affect the way yarn slides on the needles. For example, wood needles provide better grip but may slow down your knitting speed, while metal needles are smooth and allow for faster knitting. Consider your personal preference and the type of yarn you’ll be using when choosing the material of your knitting needles.
Size: Knitting needles come in different sizes, usually indicated by numbers or millimeter measurements. The size of the needles determines the gauge, or the number of stitches and rows per inch. It’s important to match the needle size with the recommended gauge for your knitting project to ensure the correct size and fit. Keep in mind that different patterns may require different needle sizes, so always check the pattern instructions.
Additional Features: Some knitting needles may have additional features, such as interchangeable tips or ergonomic designs for enhanced comfort. Interchangeable needles allow you to customize the length and type of needle tips for different projects, while ergonomic designs provide a more comfortable grip for long knitting sessions. Consider these additional features based on your knitting style and preferences.
By considering these factors and selecting the perfect knitting needles for your project, you can ensure a more enjoyable and successful knitting experience. Get ready to cast on and create beautiful knitted pieces with the right needles in hand!
Knitting Techniques for Beginners
Knitting is a popular craft that allows you to create beautiful and functional items using just a pair of needles and some yarn. If you’re new to knitting, it can be overwhelming to learn all the different techniques and stitches. However, with a little practice and patience, you’ll soon be able to knit with confidence.
Casting on: The first step in knitting is casting on, which is creating the initial row of stitches on your needles. There are several methods for casting on, but one of the simplest is the long-tail cast on. This method involves creating a loop around your thumb and using the tail end of the yarn to create a new stitch. Once you’ve cast on the desired number of stitches, you’re ready to start knitting.
Knit stitch: The most basic stitch in knitting is the knit stitch. To knit, insert your right needle into the first stitch on the left needle from left to right, wrap the yarn around the right needle counterclockwise, and pull the yarn through the stitch. Slide the stitch off the left needle and onto the right needle. Repeat this process for each stitch on the left needle until you’ve completed a row.
Purl stitch: The purl stitch is another fundamental stitch in knitting. It creates a bumpy texture on the right side of the fabric. To purl, insert your right needle into the first stitch on the left needle from right to left, wrap the yarn around the right needle clockwise, and pull the yarn through the stitch. Slide the stitch off the left needle and onto the right needle. Repeat this process for each stitch on the left needle until you’ve completed a row.
Increasing and decreasing: Once you’ve mastered the knit and purl stitches, you can start to experiment with increasing and decreasing. Increasing involves adding stitches to your knitting, while decreasing involves removing stitches. Common methods for increasing include yarn over (bringing the yarn over the needle) and knitting or purling into the front and back of a stitch. Common methods for decreasing include knitting or purling two stitches together and slipping, knitting, and passing the slipped stitch over.
Finishing: To finish your knitting project, you’ll need to bind off or cast off your stitches. This creates a secure edge and prevents your work from unraveling. There are several methods for binding off, but a common one is the basic bind off. To bind off, knit the first two stitches, then use the left needle to lift the first stitch over the second stitch and off the right needle. Knit the next stitch, and repeat the process until you have one stitch left. Cut the yarn, leaving a tail, and pull it through the last stitch to secure it.
These are just a few basic knitting techniques to get you started. As you continue to practice and gain experience, you can explore more advanced stitches and techniques to create even more intricate and beautiful knit items.
Knitting Techniques for Advanced Knitters
As an advanced knitter, you have already mastered the basic knitting techniques and are ready to explore more complex patterns and designs. Here are some advanced knitting techniques that will challenge you and take your knitting skills to the next level.
Cable Knitting
Cable knitting is a technique that creates twisted stitches that resemble interlocking cables. This technique requires the use of a cable needle to hold stitches while creating the cable pattern. With cable knitting, you can create intricate and decorative designs on your knitwear, such as braids and twists. The key to successful cable knitting is understanding the pattern instructions and mastering the technique of crossing stitches.
Fair Isle Knitting
Fair Isle knitting, also known as stranded knitting, is a technique that involves knitting with multiple colors in a single row or round. This technique creates beautiful patterns and designs by carrying the unused colors across the back of the work. Fair Isle knitting requires good tension control to ensure that the fabric remains even and the carried yarns do not show through. It is also important to practice color dominance to create clear and defined patterns.
Lace Knitting
Lace knitting is a technique that produces delicate and intricate openwork designs. This technique incorporates increases and decreases to create holes and decorative motifs. Lace knitting requires attention to detail and a good understanding of lace charts and symbols. It is important to keep a loose tension while knitting lace to allow the fabric to open up and showcase the lace pattern.
Knitting in the Round
Knitting in the round is a technique that allows you to create seamless and circular projects, such as hats, socks, and sweaters. This technique can be done using circular needles or double-pointed needles. Knitting in the round requires knowledge of different cast-on methods, such as the magic loop or provisional cast-on, as well as techniques for joining and knitting in the round. It is also important to understand how to read and follow patterns written for knitting in the round.
By mastering these advanced knitting techniques, you can expand your knitting repertoire and create more intricate and challenging projects. Remember to practice and take your time with each technique to ensure beautiful and professional results. Happy knitting!
Different Types of Toilet Roll Cover Patterns
When it comes to knitting different types of toilet roll cover patterns, there are numerous options to choose from. These patterns not only provide a decorative touch to your bathroom, but also help in keeping the toilet rolls organized and protected.
1. Basic Knitted Toilet Roll Cover: The basic knitted toilet roll cover pattern is perfect for beginners. It involves simple knitting stitches and can be customized with different colors and patterns. This cover fits over a standard-sized toilet roll and adds a cozy and stylish look to your bathroom.
2. Lace Toilet Roll Cover: For those who prefer a more elegant and delicate look, the lace toilet roll cover pattern is a great choice. This pattern incorporates lace knitting techniques to create a beautiful and intricate design. The lace pattern allows for air circulation, preventing any moisture build-up on the toilet rolls.
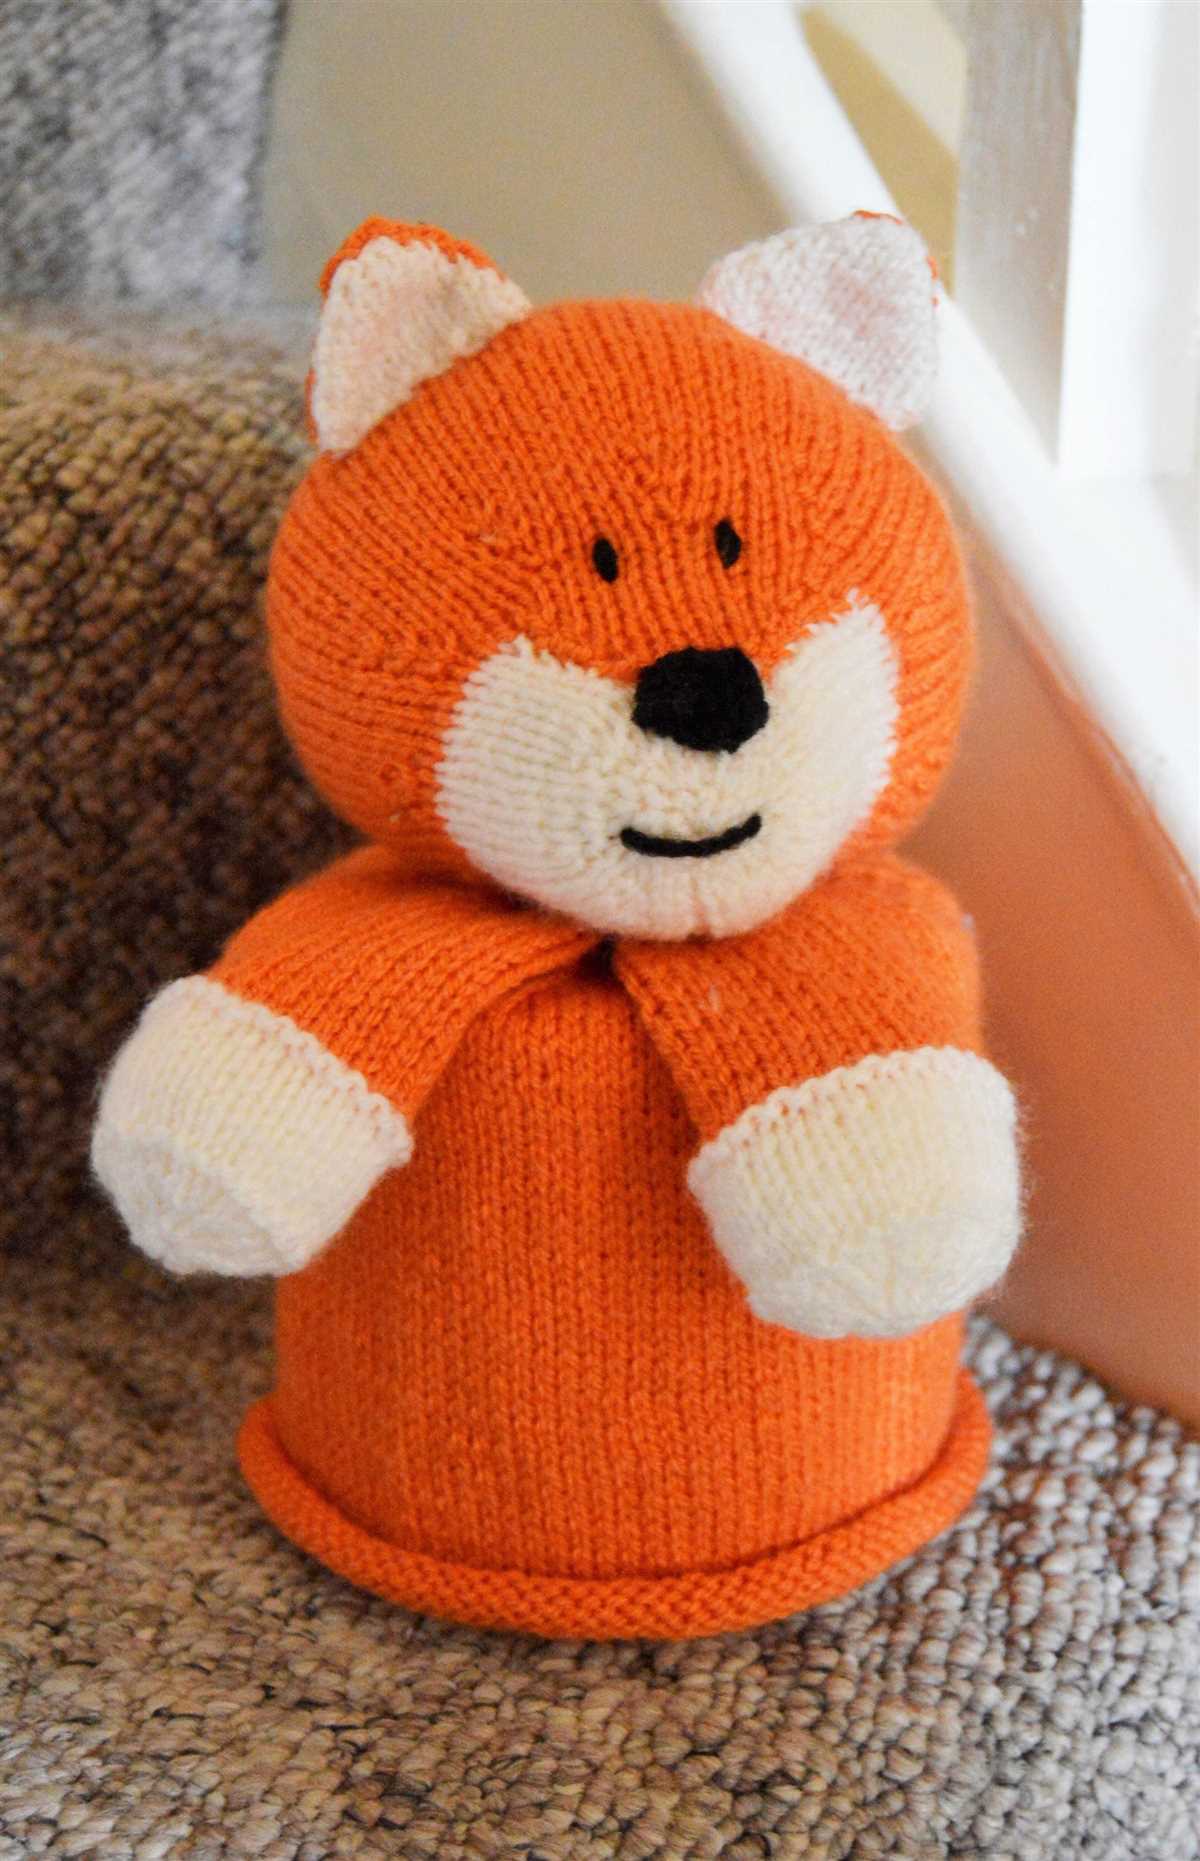
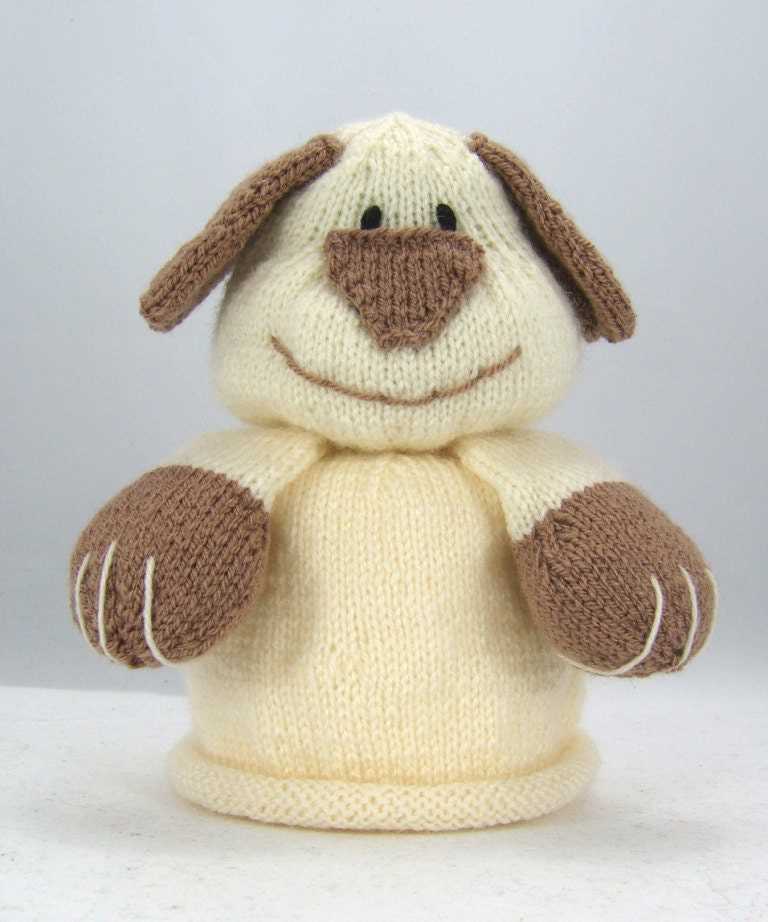
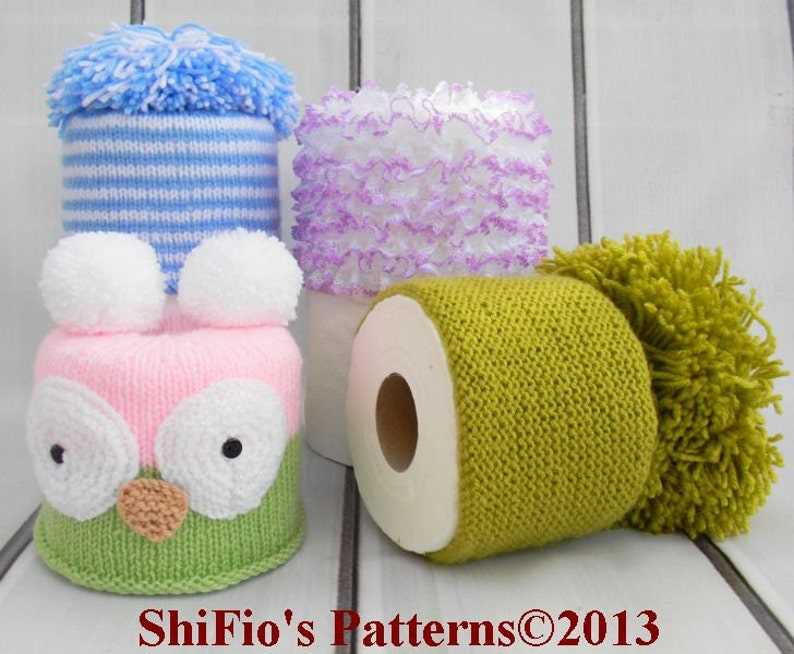
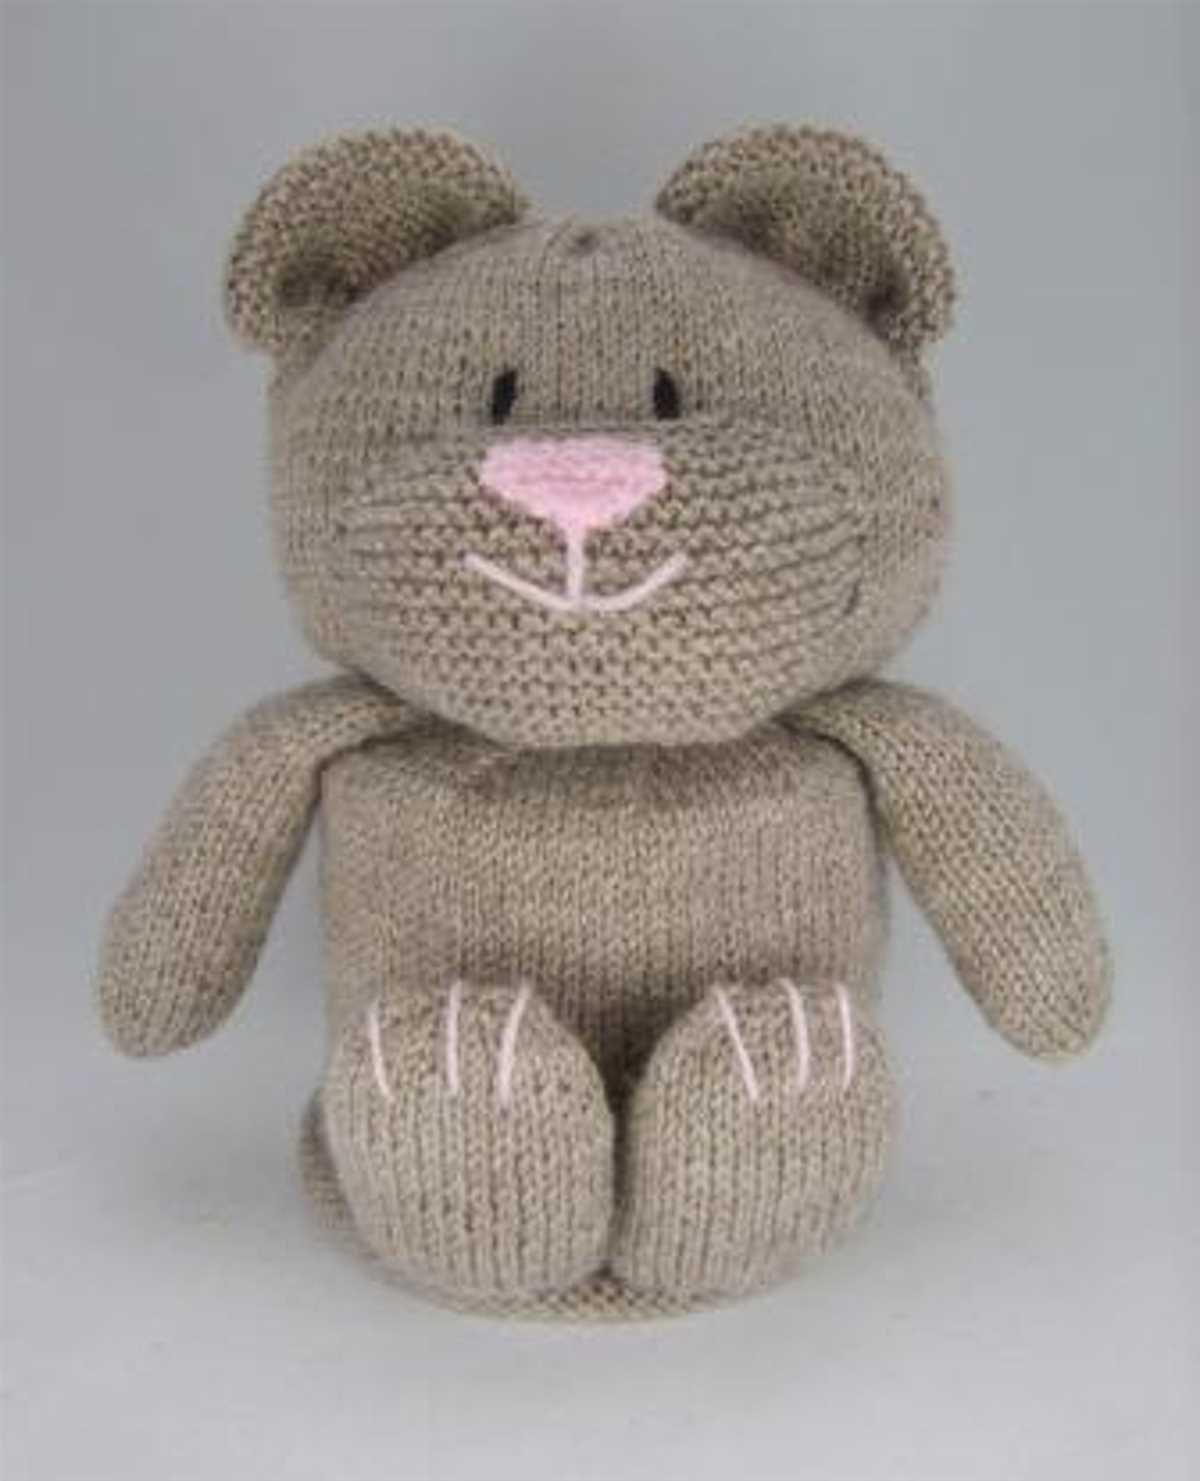
3. Animal-Shaped Toilet Roll Covers: If you want to add a fun and whimsical touch to your bathroom, consider knitting animal-shaped toilet roll covers. These patterns create adorable animal designs like cats, dogs, or even owls. They are a perfect way to bring some personality to your bathroom decor.
4. Cable-Knit Toilet Roll Cover: The cable-knit toilet roll cover pattern is a classic choice that adds a touch of elegance and sophistication to your bathroom. The cable knitting technique creates a textured pattern that looks intricate and visually appealing. This cover is perfect for those who prefer a more traditional and timeless design.
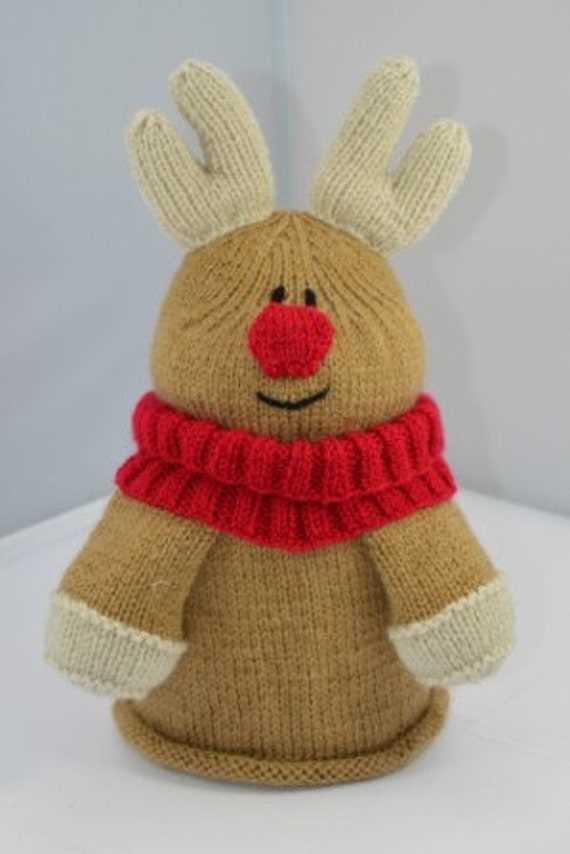
5. Holiday-Themed Toilet Roll Covers: For special occasions or holidays, you can knit toilet roll covers that match the festive spirit. Whether it’s Halloween, Christmas, or Easter, there are plenty of patterns available that incorporate holiday-themed designs. These covers add a festive touch to your bathroom decor and make it more festive and welcoming.
Popular Designs for Toilet Roll Covers
A knitted toilet roll cover is a charming and practical way to add a touch of personality and decoration to your bathroom. Whether you prefer a classic, whimsical, or modern design, there are plenty of popular options to choose from.
One popular design is the animal-themed toilet roll cover. These covers often feature adorable animals such as cats, dogs, or sheep. They can add a playful and cute element to your bathroom decor. Imagine a knitted cat peeking out from the top of the toilet roll – it’s sure to bring a smile to your face!
If you prefer a more traditional and elegant design, you may opt for a lace or floral pattern. These covers are often delicate and intricate, adding a touch of sophistication to your bathroom. Lace patterns can create a vintage and romantic atmosphere, while floral designs can bring a fresh and cheerful vibe.
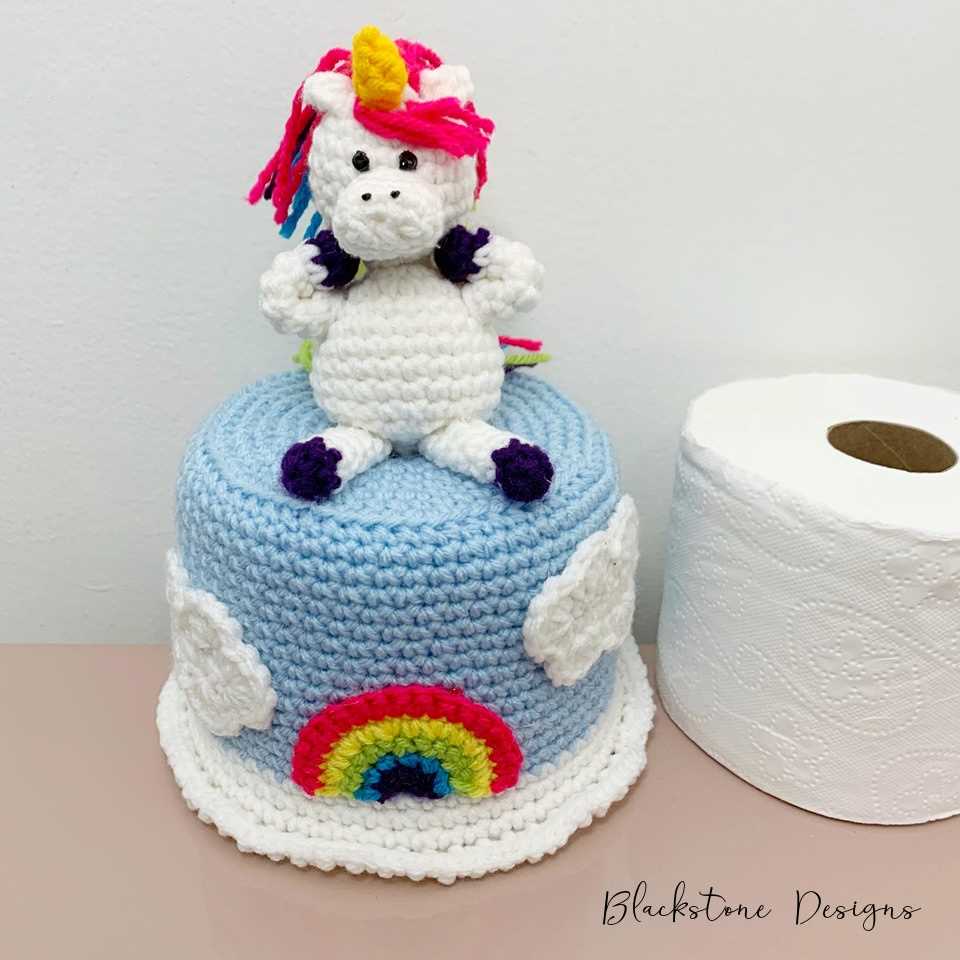
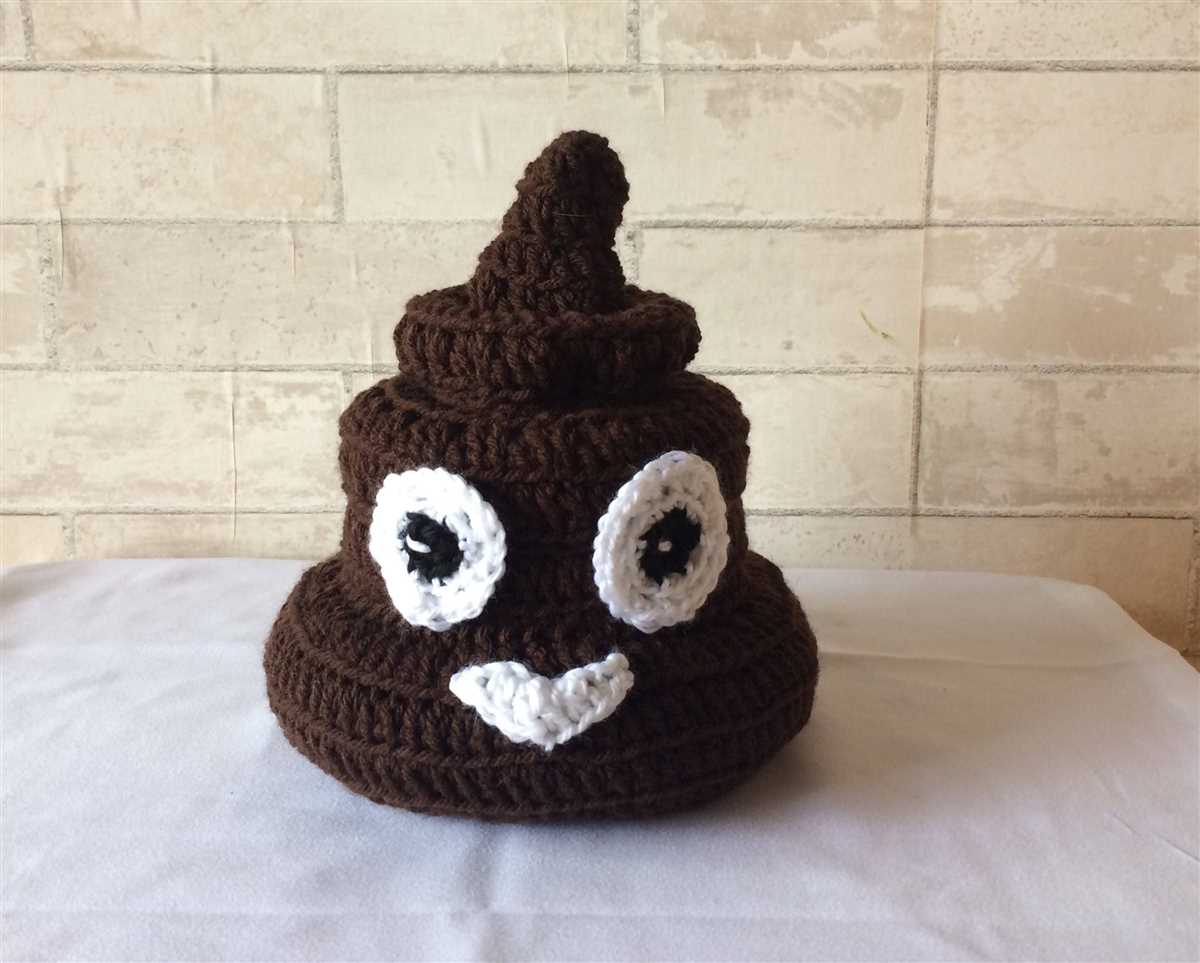
For those who enjoy a bit of humor and whimsy, there are also novelty toilet roll covers available. These covers come in various quirky shapes, such as cupcakes, strawberries, or even miniature toilets. They can be a great conversation starter and add a fun element to your bathroom.
Tips and Tricks for Knitting a Perfect Toilet Roll Cover
Knitting a toilet roll cover can be a fun and useful project, adding a touch of personality to your bathroom decor. Whether you are a seasoned knitter or a beginner, here are some tips and tricks to help you create a perfect toilet roll cover.
Choose the right yarn and needles
When selecting yarn for your toilet roll cover, it’s important to choose a material that is durable and easy to clean. Opt for cotton or acrylic yarns that are machine washable and can withstand the moist environment of a bathroom. Additionally, choose needles that are appropriate for the yarn weight you are using. Use a smaller needle size if you want a tighter and more secure stitch.
Consider the size and shape
Before you begin your project, consider the size and shape of your toilet roll. Measure the circumference and height of the roll to ensure an accurate fit. You can use these measurements as a guide when choosing your cast-on number and determining the overall size of your cover.
Add decorative touches
To add some flair to your toilet roll cover, consider incorporating decorative touches such as cables, lace patterns, or colorwork. These techniques can elevate your design and make your cover stand out. Experiment with different stitch patterns or add a contrasting color for a visually appealing result.
Use stitch markers
Stitch markers can be helpful when working on more complex patterns or when shaping your toilet roll cover. They can help you keep track of stitch counts or indicate the beginning of a pattern repeat. By using stitch markers, you can make your knitting process more organized and reduce the chances of making mistakes.
Finish with a secure bind-off
To ensure your toilet roll cover stays in place, finish your knitting with a secure bind-off. Use a stretchy bind-off method, such as a tubular bind-off or a picot bind-off, to allow for easy removal and replacement of the toilet roll. Make sure to weave in any loose ends neatly to give your cover a polished look.
By following these tips and tricks, you can create a perfect toilet roll cover that not only adds a touch of charm to your bathroom but also showcases your knitting skills. Have fun experimenting with different patterns and designs to make your cover truly unique!
Finishing and Assembling Your Toilet Roll Cover
Once you have finished knitting your toilet roll cover, it’s time to add the finishing touches and assemble it. Follow these steps to complete your project:
1. Weaving in the loose ends
Start by weaving in all the loose ends of yarn to ensure that your toilet roll cover looks neat and tidy. Use a tapestry needle to carefully thread the ends through the stitches on the back of your work. Trim any excess yarn once the ends are securely woven in.
2. Blocking the cover
If you want your toilet roll cover to have a more professional finish, you can choose to block it. Wet the cover with water and gently squeeze out the excess. Lay it flat on a clean towel and use pins to shape it into the desired size and shape. Leave it to dry completely before proceeding to the next step.
3. Sewing the sides together
With your knitting needles, stitch the two sides of the cover together using a whipstitch or mattress stitch. Make sure to align the pattern and edges as you sew to create a seamless finish. Don’t forget to leave an opening at the top to insert and change the toilet roll.
4. Adding embellishments (optional)
If you want to personalize your toilet roll cover, you can add embellishments such as buttons, bows, or pompoms. Use a needle and thread to securely attach these decorations to the cover, making sure they are well-secured and won’t easily come off during use.
5. Finishing touches
Inspect your completed toilet roll cover and make any necessary adjustments or repairs. Trim any loose threads and steam or lightly iron the cover to smooth out any wrinkles.
By following these steps, you can create a beautiful and functional toilet roll cover that adds a touch of style to your bathroom decor. Have fun experimenting with different yarns and patterns to create unique designs for yourself or as gifts for friends and family.
How to Care for Your Knitted Toilet Roll Cover
Knitted toilet roll covers are not only functional, but they can also add a touch of charm and whimsy to your bathroom decor. Whether you have made one yourself or received it as a gift, it’s important to properly care for your knitted toilet roll cover to ensure its longevity. Here are some tips on how to keep your knitted toilet roll cover looking its best:
1. Handwash Only: Knitted items are delicate and can easily become damaged or misshapen in a washing machine. To clean your toilet roll cover, fill a basin or sink with lukewarm water and a gentle detergent. Gently agitate the cover in the water, being careful not to stretch or twist it. Rinse thoroughly and squeeze out any excess water.
2. Dry Flat: After washing, do not wring out the knitted cover as this can cause it to lose its shape. Instead, lay it flat on a clean towel or drying rack to air dry. Avoid hanging the cover up to dry as this can cause it to stretch or sag.
3. Avoid Direct Sunlight: Prolonged exposure to direct sunlight can cause colors to fade and yarn to weaken. To preserve the vibrant colors and integrity of your knitted toilet roll cover, avoid placing it in direct sunlight when drying or storing.
4. Store Properly: When not in use, store your knitted toilet roll cover in a cool, dry place to prevent any damage from moisture or pests. You can also use a fabric or plastic bag to protect it from dust and dirt.
5. Handle with Care: While knitted items are generally quite sturdy, it’s still important to handle them with care to avoid any snagging or unraveling. Avoid pulling or tugging on the cover, and be mindful of sharp objects that could potentially catch on the yarn.
By following these care instructions, you can ensure that your knitted toilet roll cover stays in great condition for years to come. With a little bit of care, your knitted toilet roll cover can continue to bring style and personality to your bathroom.
Conclusion
Knitting a toilet roll cover can be a fun and creative project. Not only does it add a decorative touch to your bathroom, but it also provides a practical solution for keeping your toilet paper neat and organized.
In this article, we have explored various free patterns and resources for knitting a toilet roll cover. From basic designs to more intricate patterns, there is something for every skill level. Whether you prefer a simple solid color or a whimsical design, there are plenty of options available.
To get started, you can try out some of the free patterns mentioned in this article or explore other knitting resources such as knitting websites, knitting forums, and knitting tutorials. These resources can provide you with more inspiration and guidance to create your own unique toilet roll cover design.
Remember to choose the right yarn and knitting needles for your project and take your time to practice different stitches and techniques. With patience and dedication, you will be able to knit a beautiful and functional toilet roll cover that you can proudly display in your bathroom.
So grab your knitting needles, choose a pattern, and get started on your next knitting project – a cozy and stylish toilet roll cover!
Q&A:
Where can I find a knitted toilet roll cover pattern for free?
You can find free knitted toilet roll cover patterns on various knitting websites and blogs. Some popular sources include Ravelry, LoveCrafts, and AllFreeKnitting.
Are there different designs and styles available for knitted toilet roll covers?
Yes, there are many different designs and styles available for knitted toilet roll covers. Some common designs include animal shapes, flowers, and geometric patterns.
What materials do I need to knit a toilet roll cover?
To knit a toilet roll cover, you will need knitting needles, yarn in the color of your choice, a tapestry needle for sewing, and optional embellishments such as buttons or beads.
Are knitted toilet roll covers easy to make?
Knitted toilet roll covers can be relatively easy to make, especially if you have some experience with knitting. The difficulty level may vary depending on the pattern you choose and your skill level.
Can I customize the size of my knitted toilet roll cover?
Yes, you can customize the size of your knitted toilet roll cover by adjusting the number of stitches and rows in the pattern. This allows you to create a cover that fits your specific toilet roll size.
Where can I find a free knitted toilet roll cover pattern?
You can find free knitted toilet roll cover patterns on various knitting websites, such as Ravelry, Knitting Pattern Central, and LoveCrafts. These patterns are often created and shared by fellow knitters, so they’re usually free to download and use.