
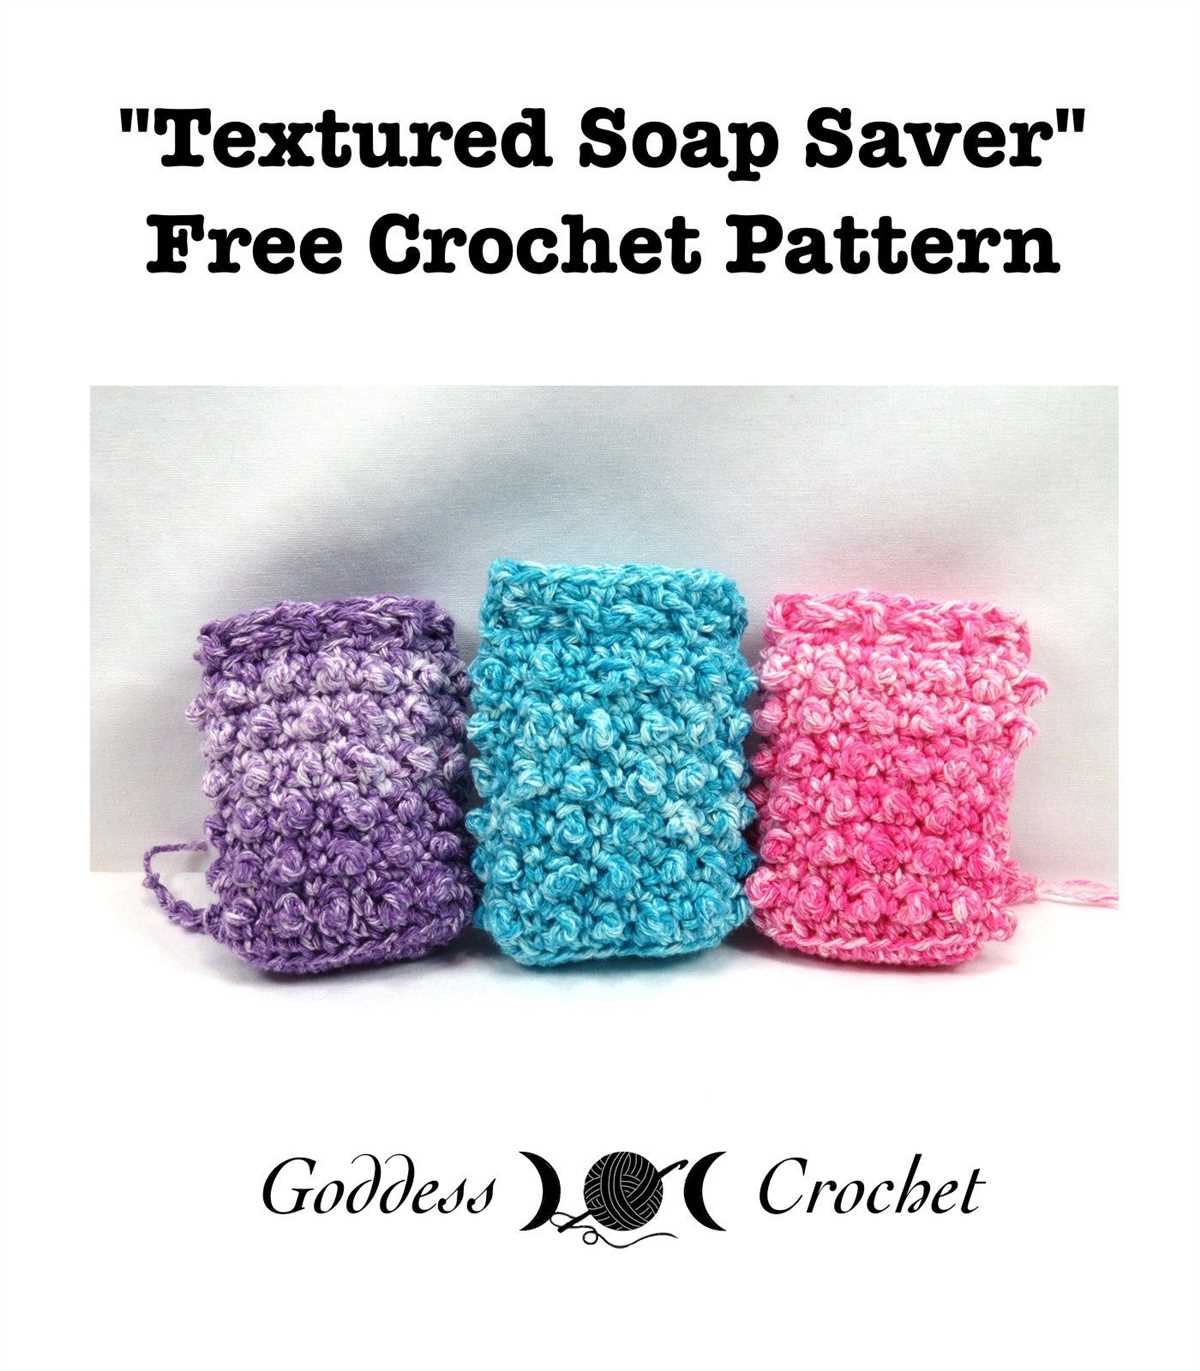
Are you tired of your soap slipping out of your hands in the shower? Or do you hate how quickly your soap dissolves in the water? Look no further than a knitted soap saver bag! This simple and practical knitting pattern will keep your soap secure and help it last longer.
Not only does a soap saver bag prevent a sudsy mess in your shower, but it also provides gentle exfoliation for your skin. The textured stitches of the bag create a natural scrubbing effect, leaving your skin feeling clean and smooth. Plus, the bag can be reused again and again, making it an eco-friendly alternative to plastic loofahs.
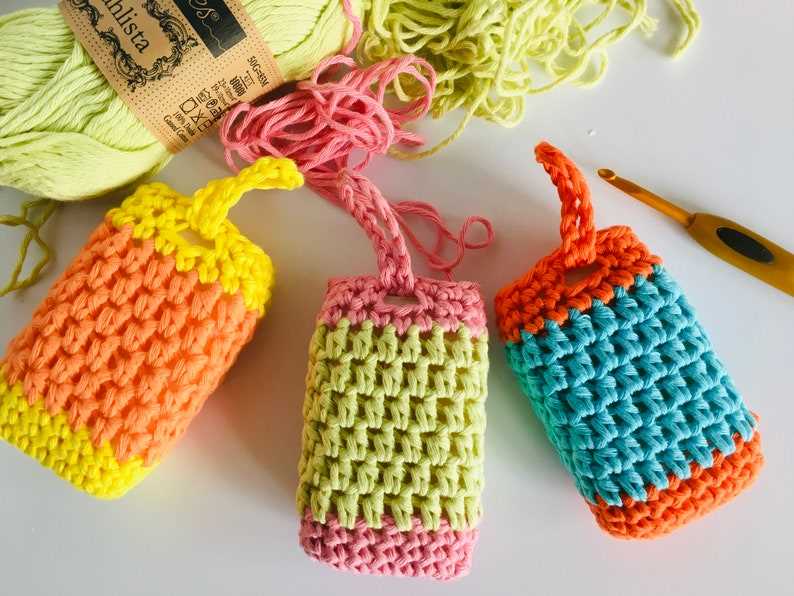
Knitting a soap saver bag is a great project for beginners and experienced knitters alike. You only need basic knitting skills and a few supplies to get started. Choose your favorite yarn in any color to personalize your bag, or use up leftover yarn from other projects. This makes the soap bag a perfect stash-busting project.
What is a Knitted Soap Saver Bag?
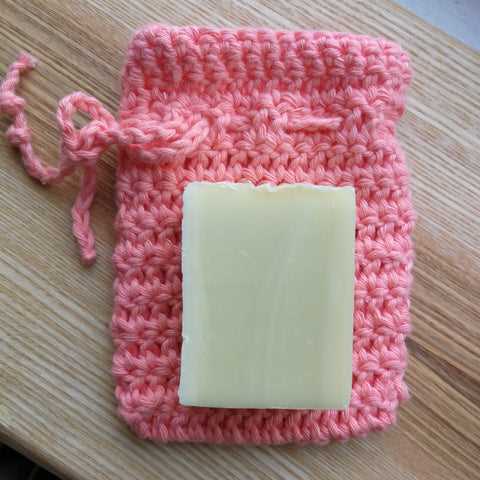
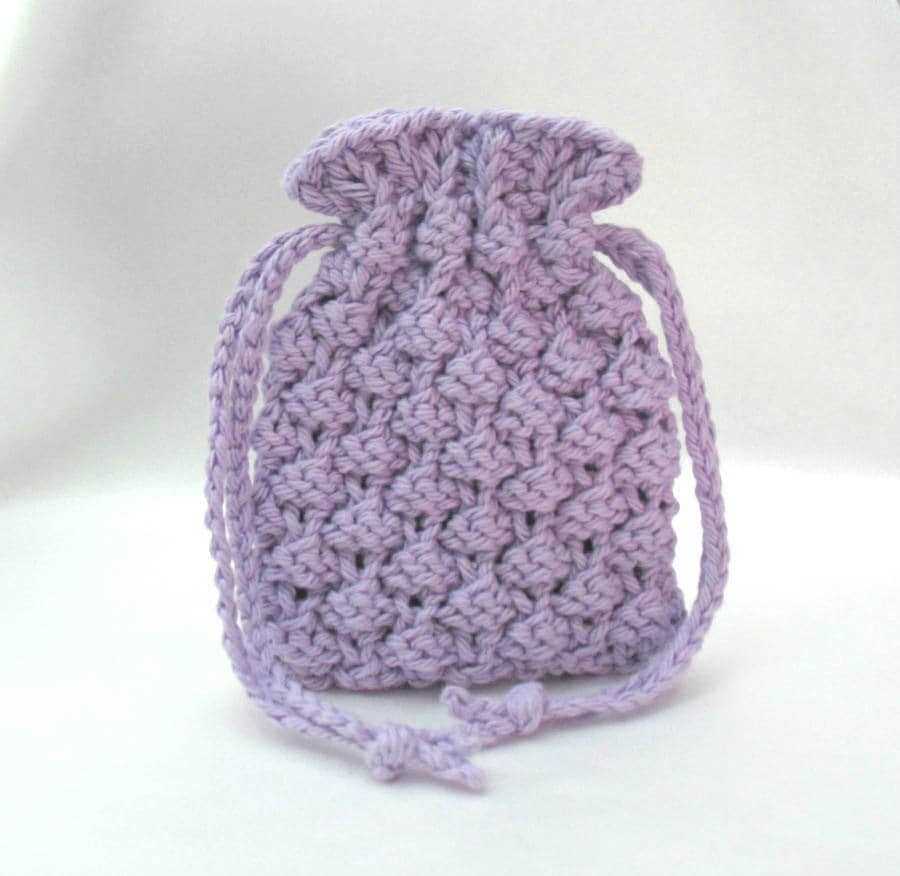
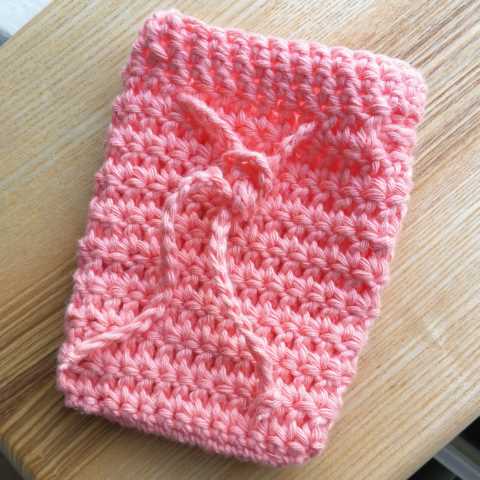
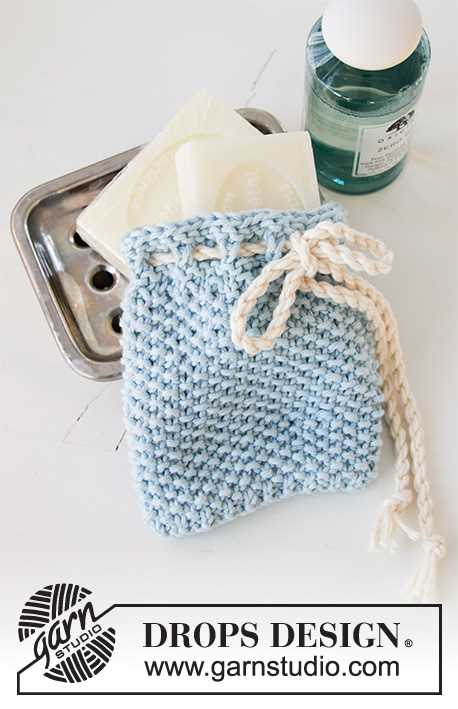
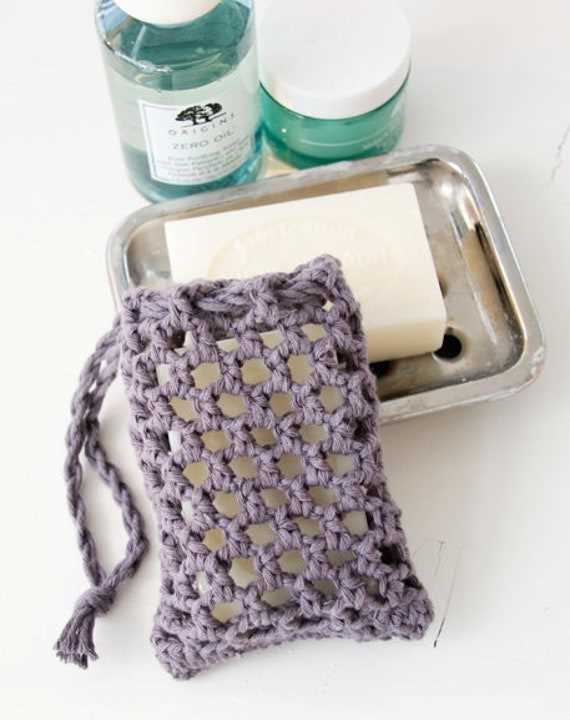
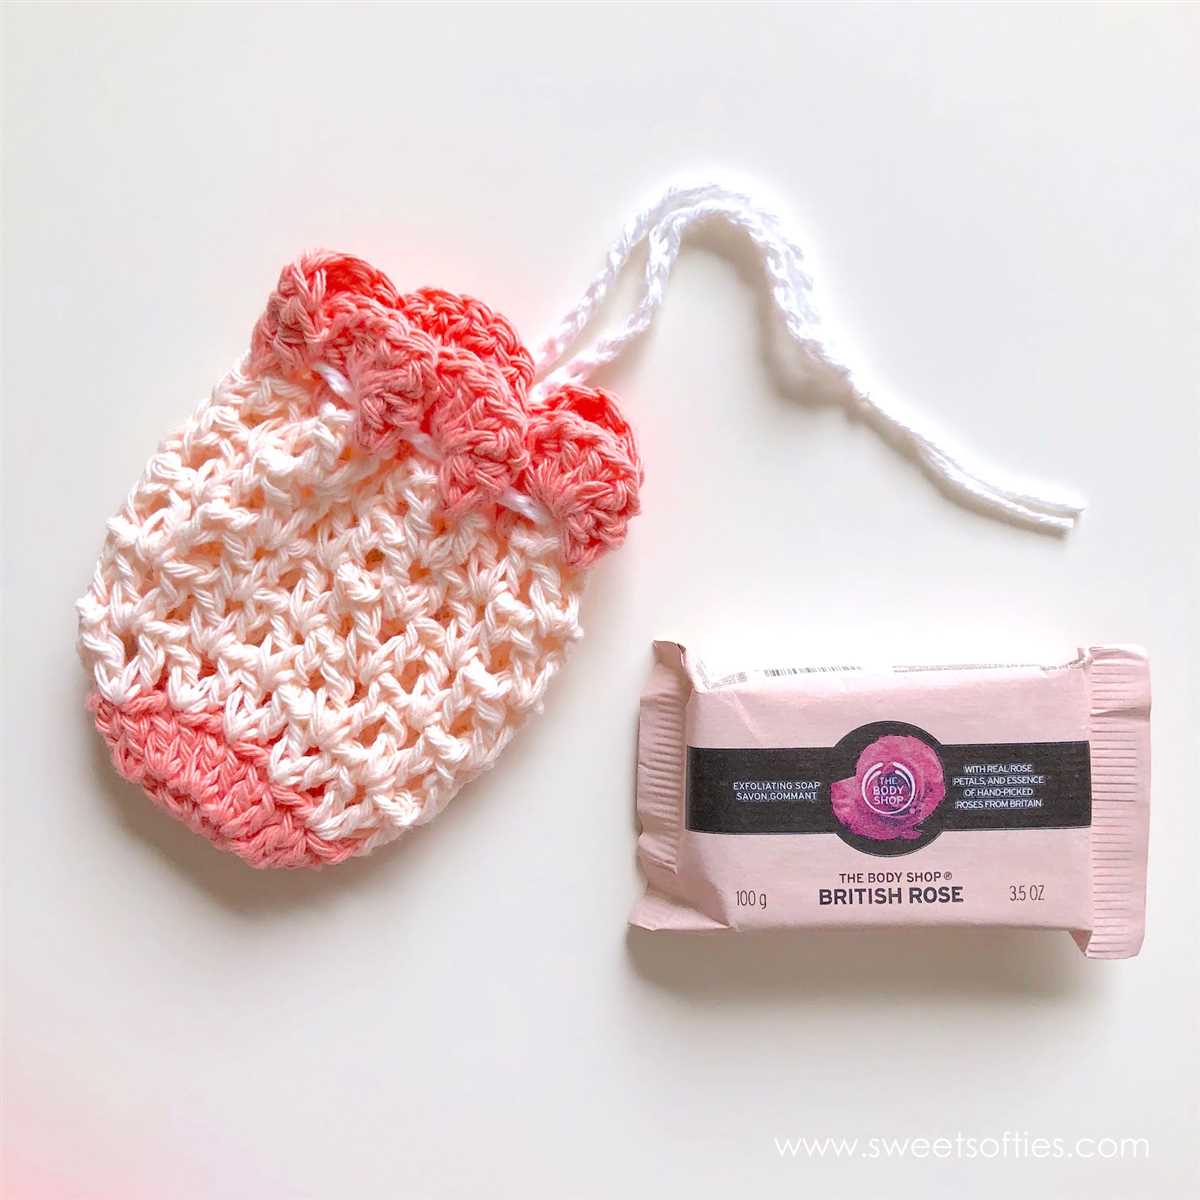
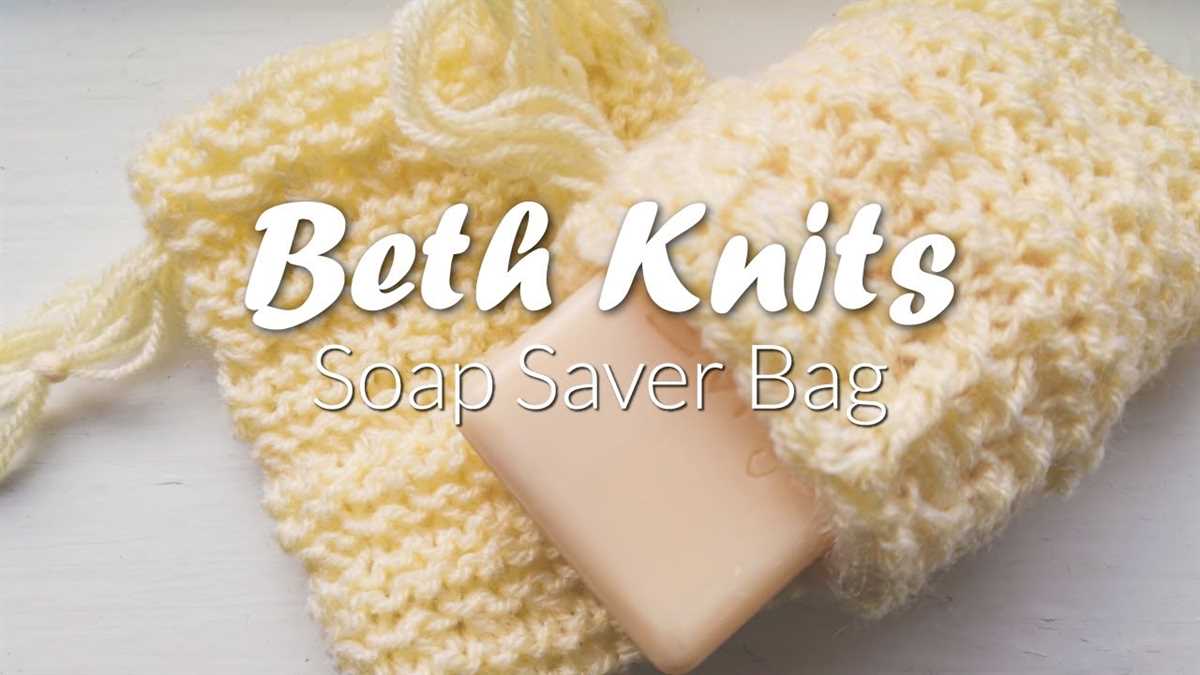
A knitted soap saver bag is a small bag made out of yarn that is used to hold and store bars of soap. It is designed to extend the life of the soap by allowing it to dry out between uses, preventing it from sitting in a puddle of water and becoming mushy. The bag has a textured pattern that helps to create a lather when used with the soap, making it perfect for exfoliating and gently cleansing the skin.
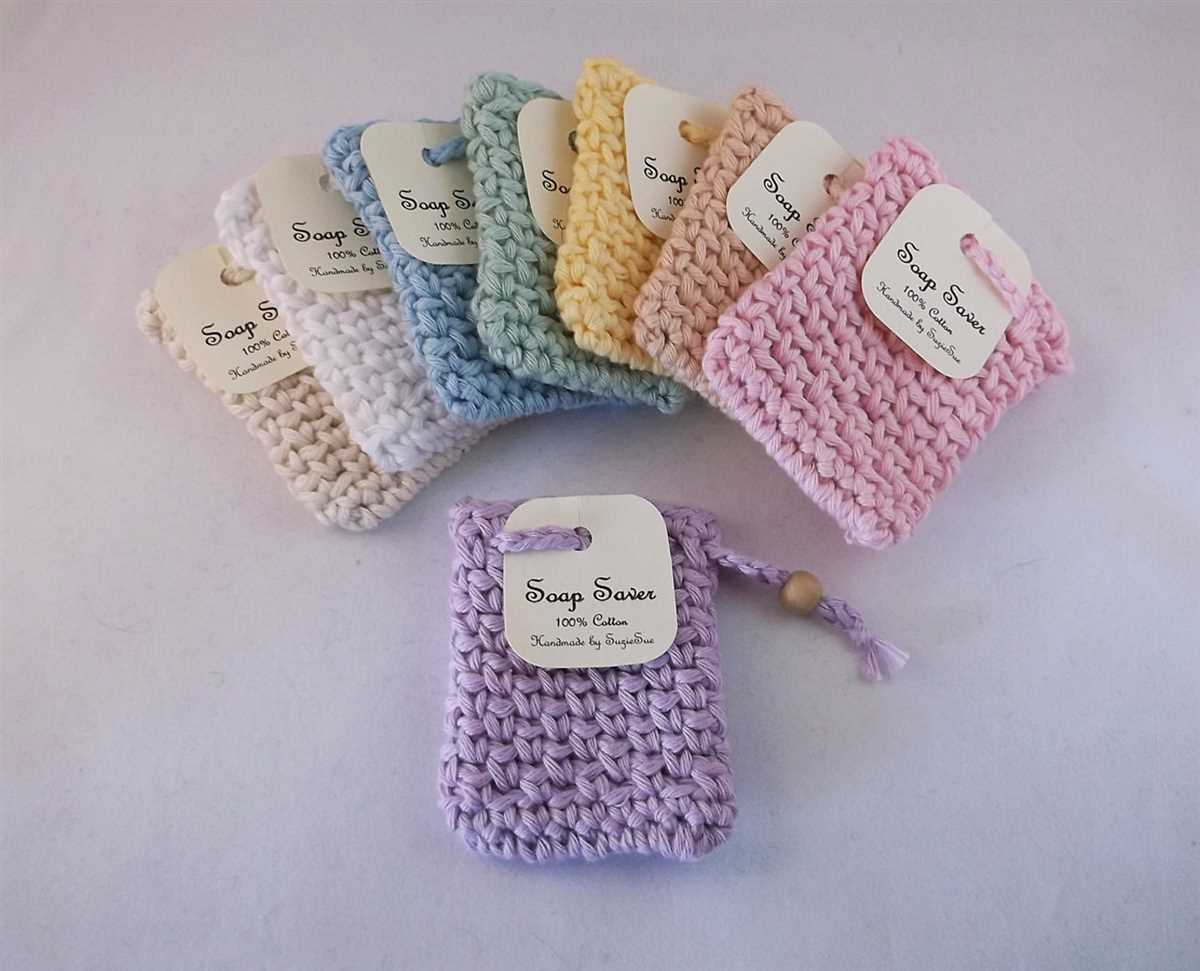
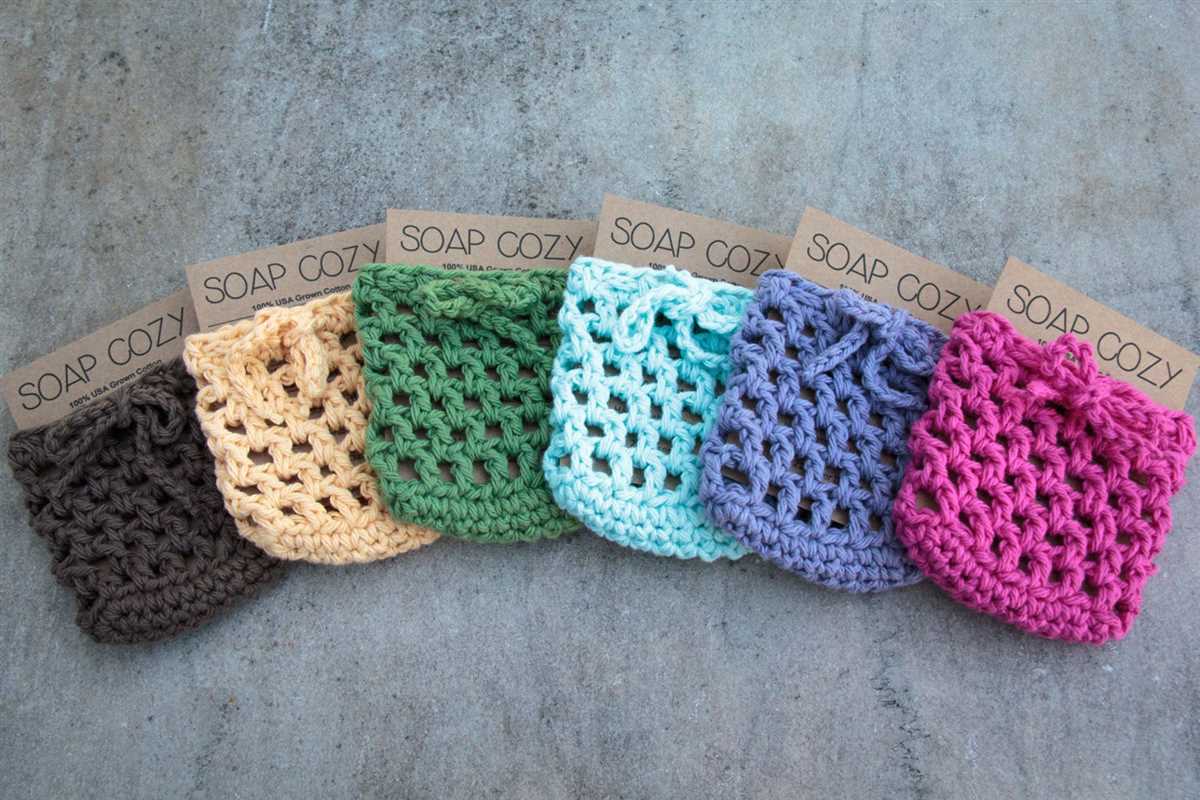
The knitted soap saver bag is a practical and eco-friendly alternative to using a washcloth or a loofah. It is reusable and can be easily washed along with your other laundry. The bag also helps to reduce waste by using up small amounts of leftover yarn that would otherwise go to waste. It can be made in various sizes and colors, allowing you to customize it to your liking or make it as a thoughtful handmade gift for someone special.
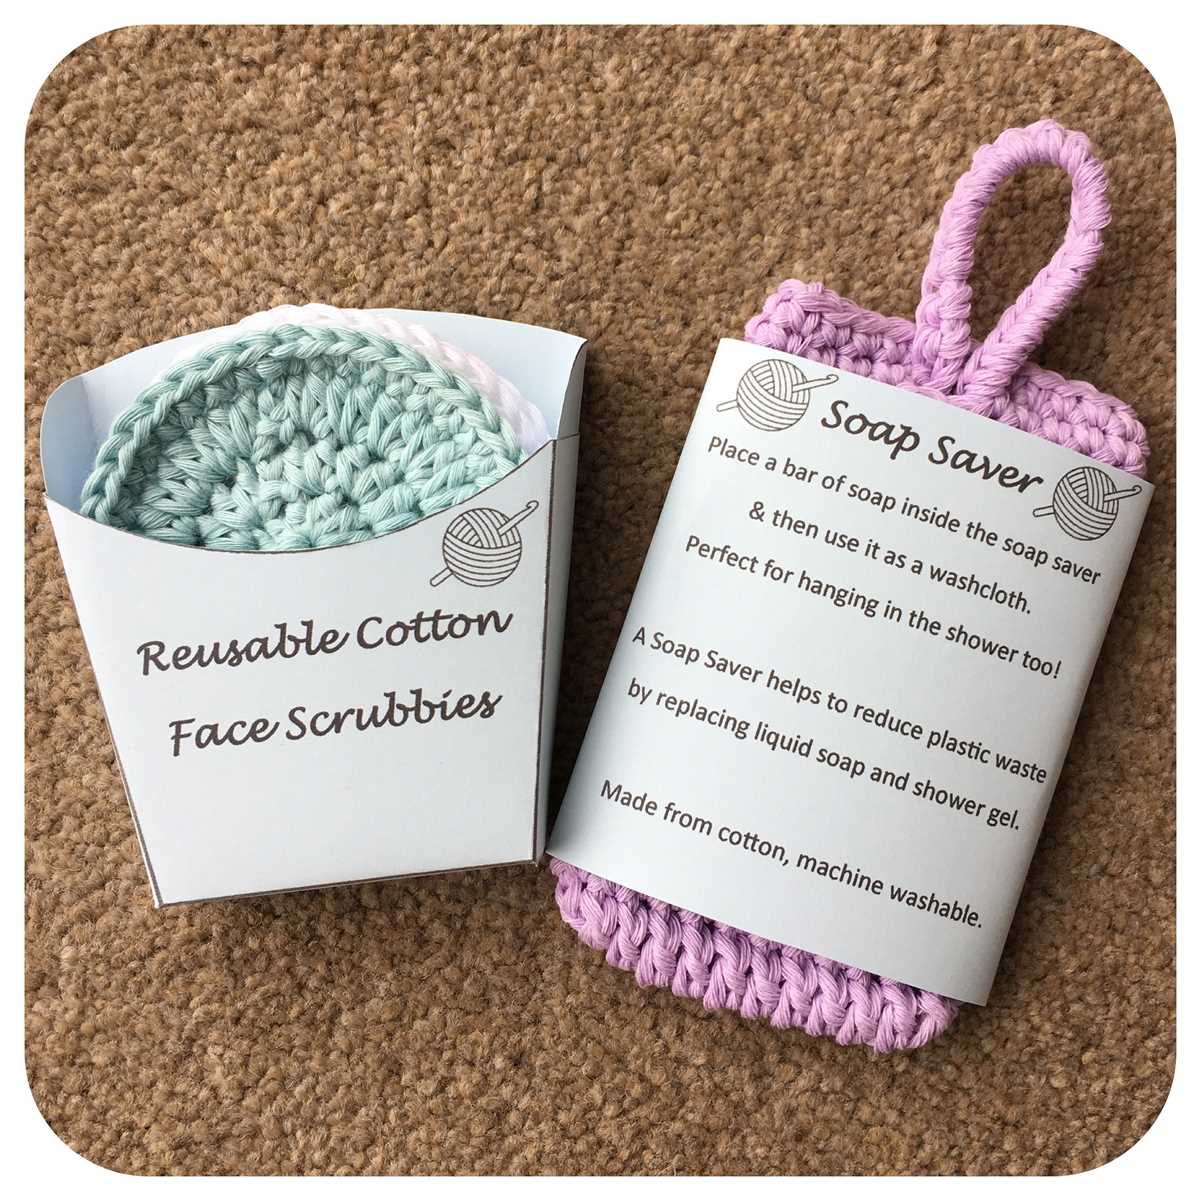
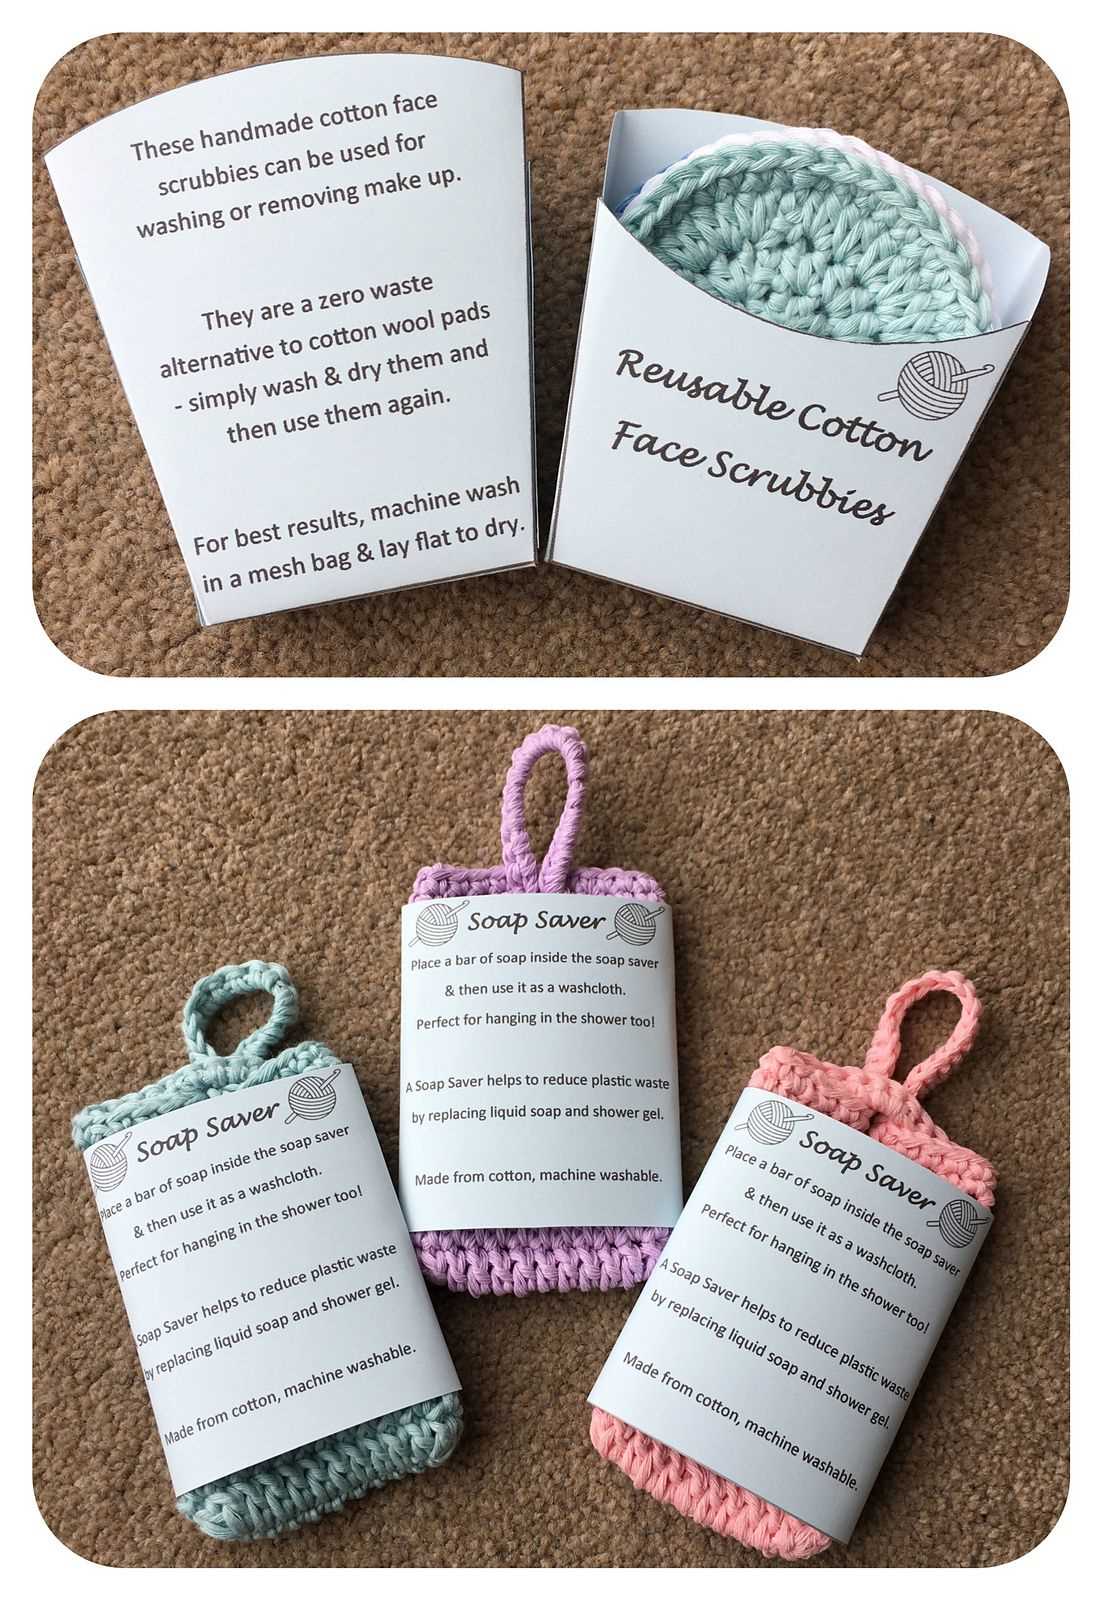
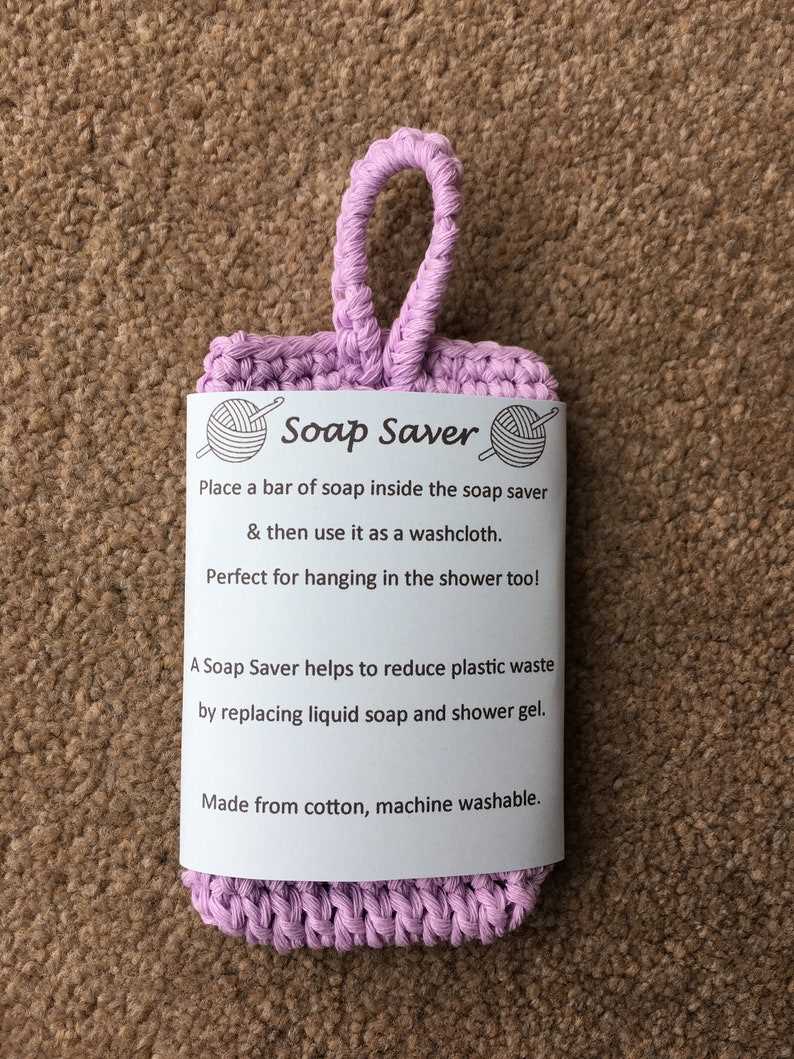
When using a knitted soap saver bag, simply place a bar of soap inside and pull the drawstring tight to secure it. Wet the bag and soap together, then lather and clean your body as usual. After use, hang the bag up to dry, and it will be ready for your next shower or bath. The bag not only keeps the soap intact and free from mushiness but also makes it easier to handle and hold onto, even when it becomes smaller as it gets used up.
- A knitted soap saver bag helps extend the life of your soap
- It is reusable and eco-friendly
- Can be customized to your liking
- Creates a lather and gently exfoliates the skin
- Easy to use and hang up to dry
Benefits of Using a Knitted Soap Saver Bag
Knitted soap saver bags are a practical and eco-friendly alternative to traditional soap dishes or loofahs. These small bags are designed to hold a bar of soap while allowing water to drain and air to circulate, ensuring that your soap lasts longer and stays dry between uses. There are several benefits to using a knitted soap saver bag.
1. Increases the lifespan of your soap
A soap saver bag prevents your soap from sitting in a pool of water, which can cause it to become soft and mushy. By allowing your soap to dry out between uses, a knitted soap saver bag helps to extend the lifespan of your soap.
2. Eco-friendly and sustainable

Using a soap saver bag eliminates the need for plastic soap dishes or loofahs, reducing plastic waste. The knitted texture of the bag also provides gentle exfoliation, eliminating the need for separate exfoliating tools or products.
3. Convenient for travel
Soap saver bags are compact and lightweight, making them ideal for travel. They can be easily packed in your toiletry bag without the risk of your soap getting wet or making a mess. Plus, the knitted texture provides a comfortable grip, making it easier to handle and use your soap on the go.
4. Versatility
A soap saver bag is not just limited to holding soap. It can also be used to hold small items like jewelry or even as a washcloth. The textured surface of the bag can provide gentle exfoliation for your skin, making it a multi-purpose accessory.
In conclusion, using a knitted soap saver bag offers various benefits such as increasing the lifespan of your soap, being eco-friendly and sustainable, convenient for travel, and versatile in its usage. Consider investing in a knitted soap saver bag to enhance your bath and shower experience.
Choosing the Right Yarn for Your Soap Saver Bag
When it comes to making a soap saver bag, choosing the right yarn is crucial. The yarn you choose will determine the durability, texture, and functionality of the bag. Here are a few factors to consider when selecting yarn for your soap saver bag:
1. Fiber Content:
The fiber content of the yarn will greatly affect the functionality of your soap saver bag. Natural fibers such as cotton and hemp are great choices as they are absorbent and can withstand regular use. Their strength and durability ensure that your soap saver bag will last, even with frequent washing.
2. Texture:
The texture of the yarn will determine how well it exfoliates your skin. If you want a more gentle exfoliation, choose a smooth and soft yarn. However, if you prefer a more abrasive texture, opt for a yarn with a bit of texture, such as one with a slubby or bouclé effect.
3. Thickness:
The thickness of the yarn will determine the size of the stitches and the overall structure of your soap saver bag. Thicker yarns will create a sturdier and more structured bag, while thinner yarns will result in a more delicate and flexible bag. Consider the intended use of your soap saver bag when deciding on the thickness of the yarn.
4. Color:
While the color of the yarn may seem like a purely aesthetic choice, it can also influence the functionality of your soap saver bag. Light-colored yarns may show dirt and stains more easily, while darker-colored yarns may be more forgiving in terms of appearance. Additionally, certain natural dyes may bleed when exposed to water, so be mindful of the color choices when selecting yarn for your soap saver bag.
By considering these factors and choosing the right yarn for your soap saver bag, you can ensure that you create a functional and long-lasting accessory that will enhance your bathing experience.
Knitting Tools and Techniques for Making a Soap Saver Bag
When knitting a soap saver bag, there are a few essential tools and techniques to have in your knitting arsenal. These will help you create a beautiful and functional bag that will keep your soap dry and last longer.
Knitting Needles: To start your soap saver bag project, you will need a pair of knitting needles. The size of the needles will depend on your preferred yarn weight and desired gauge. Generally, a size US 7 or 8 needle works well for most soap saver bags.
Yarn: Choose a yarn that is durable and absorbent, such as cotton or linen, for your soap saver bag. These fibers will help the bag dry quickly and effectively. Worsted weight or DK weight yarn is recommended for this project.
Cast-On Techniques: There are multiple cast-on techniques you can use to start your soap saver bag. The long-tail cast-on method is commonly used and creates a neat and elastic edge. You can also try other methods like the provisional cast-on or the cable cast-on, depending on your preference.
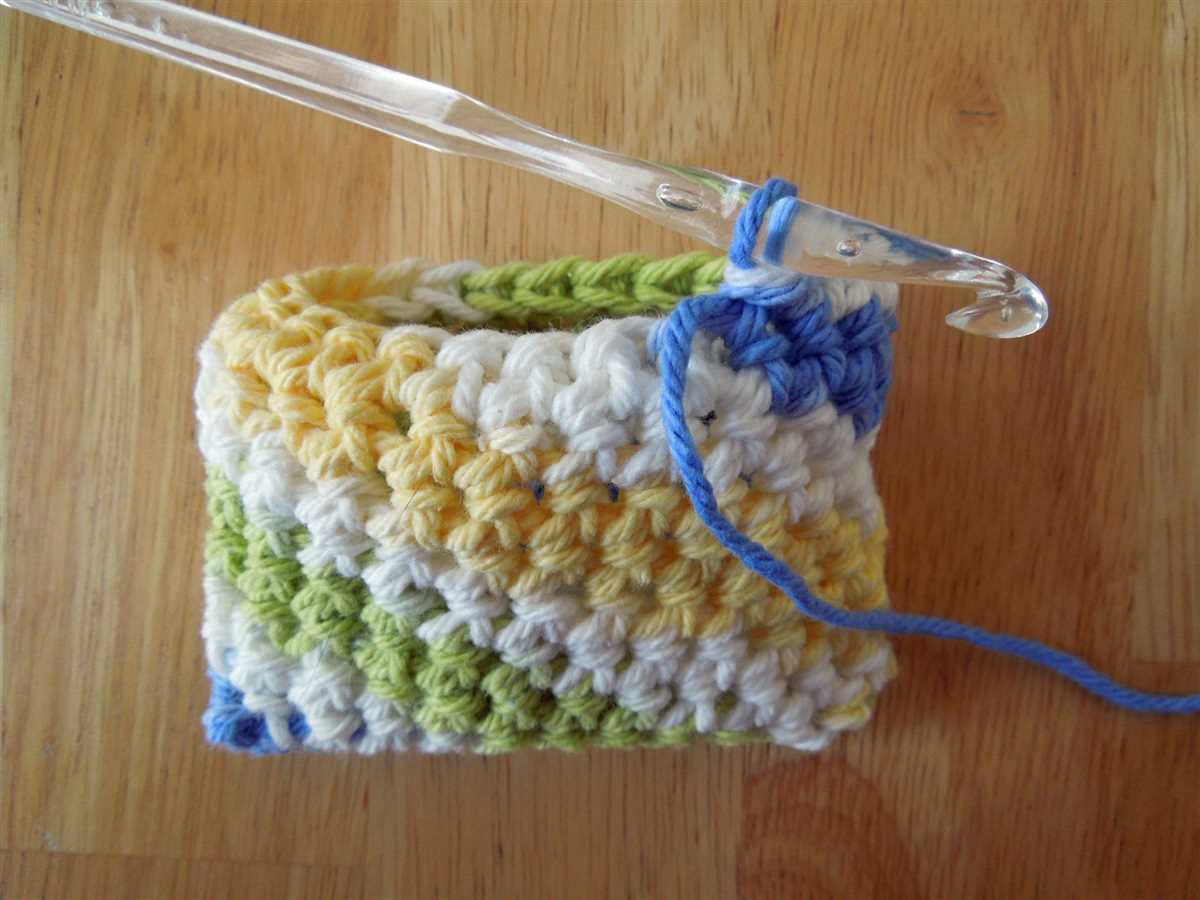
Knitting Stitches: For the body of the soap saver bag, you can choose from a variety of knitting stitches. The most common stitches used are the knit stitch and the purl stitch, as they create a simple and elegant texture. You can also experiment with other stitches, such as seed stitch or ribbing, to add more visual interest to your bag.
Shaping Techniques: To create a functional soap saver bag, you may want to incorporate shaping techniques, such as increasing and decreasing stitches. These techniques allow you to create a bag with a wider base and a narrower top, ensuring that the soap stays securely inside.
Finishing Techniques: Once you have completed the knitting portion of your soap saver bag, you will need to finish it off. This can be done using techniques like binding off, which create a neat and secure edge. You can also add decorative elements, such as a crochet border or buttons for extra flair.
- Needles (size US 7 or 8)
- Yarn (cotton or linen, worsted or DK weight)
- Cast-On Techniques (long-tail, provisional, cable)
- Knitting Stitches (knit, purl, seed stitch, ribbing)
- Shaping Techniques (increasing, decreasing)
- Finishing Techniques (binding off, crochet border, buttons)
Basic Knit Stitch Pattern for a Soap Saver Bag
If you enjoy knitting and are looking for a simple and practical project, a soap saver bag is a great choice. Not only does it add a touch of luxury to your bathing routine, but it also helps to extend the life of your soap bar by providing a gentle exfoliation and preventing it from becoming mushy.
To knit a soap saver bag, you will need to know a basic knit stitch pattern. This pattern creates a sturdy and textured fabric that is perfect for holding soap bars securely. The pattern is also easily customizable, allowing you to adjust the size of the bag to fit different soap bar sizes.
To start, cast on an even number of stitches using your desired yarn and needle size. For example, you could cast on 20 stitches for a small soap bar or 30 stitches for a larger one. Once your stitches are cast on, simply knit every stitch in every row until the desired length is reached. You can make the bag as long or short as you like, depending on your personal preference.
If you want to add a decorative touch to your soap saver bag, you can incorporate different stitch patterns. For instance, you could alternate between knitting and purling rows to create a ribbed effect or experiment with other stitch patterns like seed stitch or basketweave. These variations can add visual interest and texture to your soap saver bag.
Once you’ve finished knitting the main body of the soap saver bag, it’s time to bind off. Simply knit two stitches, then pass the first stitch over the second stitch and off the needle. Continue this process until all stitches are bound off. Finally, weave in any loose ends and sew up the sides of the bag using a yarn needle.
With your basic knit stitch pattern, you’ll be able to create beautiful and functional soap saver bags for yourself or as thoughtful handmade gifts. These bags are not only practical but also make for a unique addition to your bathroom decor. So grab your knitting needles and some soft yarn, and start creating your very own soap saver bag today!
Advanced Knit Stitch Patterns for a Soap Saver Bag
When it comes to knitting a soap saver bag, there are numerous advanced stitch patterns to choose from that can elevate the look of your project. These patterns not only add visual interest to the bag, but also provide texture and functionality.
Cable Stitch: One popular advanced stitch pattern for a soap saver bag is the cable stitch. This stitch creates a braided effect, giving the bag a classic and timeless look. The cable stitch pattern requires a bit of concentration and skill, as it involves crossing stitches over one another to create the cable effect. The result is a beautifully textured bag that is sure to impress.
Lace Stitch: For a more delicate and feminine soap saver bag, consider using a lace stitch pattern. Lace stitches are often created by a combination of yarn overs and decreases, resulting in an intricate and airy design. This pattern allows the soap to dry quickly and adds an elegant touch to the bag. You can choose from a wide range of lace stitch patterns, from simple to complex, depending on your skill level and desired outcome.
Seed Stitch: The seed stitch is another advanced stitch pattern that can be used to create a unique and textured soap saver bag. This stitch pattern alternates between knit and purl stitches, creating a bumpy and textured surface. The seed stitch is not only visually appealing, but it also provides a gentle exfoliating effect when used with a bar of soap. This makes it an ideal choice for a functional yet decorative soap saver bag.
Two-Color Brioche Stitch: If you’re up for a challenge and want to create a truly eye-catching soap saver bag, consider using the two-color brioche stitch. This stitch pattern creates a reversible fabric with a unique ribbed texture. By using contrasting colors, you can create a striking colorwork design on your soap saver bag. The two-color brioche stitch requires careful attention to tension and stitch counting, but the end result is well worth the effort.
Incorporating advanced stitch patterns into your soap saver bag adds a touch of sophistication and uniqueness to your project. Whether you choose a cable stitch, lace stitch, seed stitch, or two-color brioche stitch, these advanced patterns will take your knitting skills to the next level and create a stunning soap saver bag.
Adding Embellishments to Your Knitted Soap Saver Bag
Knitting a soap saver bag is a practical and fun project. But why not take it to the next level by adding some embellishments? With just a few extra materials and a little creativity, you can turn your knitted soap saver bag into a unique and beautiful work of art.
One simple way to jazz up your soap saver bag is by adding buttons. Choose some colorful or decorative buttons that complement the colors of your yarn. Sew them onto the bag in a pattern or randomly for an eye-catching effect. Not only will the buttons add visual interest, but they will also provide texture, making it easier to grip the bag while in use.
If you want to add some sparkle to your soap saver bag, consider using beads or sequins. Thread them onto a thin, durable yarn or thread, and then sew them onto your bag. You can create patterns, spell out words, or add a sprinkling of beads for a subtle shimmer. Just make sure to securely attach them so they won’t come off during use.
If you’re feeling adventurous, why not try embroidery? Use different colored yarns to create intricate designs or stitch on flowers, leaves, or any other motif that catches your fancy. Embroidery adds a personalized touch to your soap saver bag and allows you to showcase your knitting and stitching skills at the same time.
When adding embellishments to your knitted soap saver bag, remember to consider the practicality as well. Ensure that any additions are securely attached and won’t snag on anything. Also, keep in mind that the bag will be used in a wet environment, so choose materials that can withstand moisture and won’t easily degrade or fade.
In conclusion, adding embellishments to your knitted soap saver bag is a fantastic way to make it stand out and showcase your creativity. From buttons to beads to embroidery, the possibilities are endless. So go ahead and let your imagination run wild as you transform your simple soap saver bag into a beautiful and functional work of art.
Different Shapes and Sizes for Knitted Soap Saver Bags
If you’re looking to make a knitted soap saver bag, there are plenty of options when it comes to shapes and sizes. From simple rectangles to unique animal-inspired designs, you can find a pattern that suits your style and preferences.
Rectangular Bags: One of the most common shapes for knitted soap saver bags is the rectangular design. These bags are straightforward to make and provide ample space for holding a standard-sized bar of soap. The rectangular shape allows for easy insertion and removal of the soap and can be customized with different stitch patterns or color combinations.
Round Bags: For a more unique and whimsical look, consider knitting a round soap saver bag. These bags are often shaped like small pouches with a drawstring closure to keep the soap secure. Round bags can add a touch of fun to your bathroom decor and make great gifts.
Animal-Inspired Bags: If you’re feeling adventurous, you can try knitting a soap saver bag in the shape of an animal. Patterns for animal-inspired bags are available for a wide range of creatures, including ducks, fish, and even cats. These bags are not only practical but also add a playful element to your bathroom or kitchen.
Customizable Sizes: The great thing about knitting your own soap saver bags is that you can customize the size to fit your specific needs. If you prefer smaller bars of soap, you can knit a smaller bag, or if you have larger bars, you can make a bigger bag. You can also adjust the length of the bag to accommodate multiple soaps if desired.
Pattern Resources: There are plenty of resources available online for finding knitting patterns for soap saver bags of different shapes and sizes. Websites like Ravelry and Pinterest offer a wide selection of free and paid patterns that you can download and use. Additionally, knitting books and magazines often feature patterns for soap saver bags.
Tips for Washing and Caring for Your Knitted Soap Saver Bag
Knitted soap saver bags are a wonderful addition to any bathroom or kitchen. They are not only functional, but also add a touch of handmade charm to your space. To ensure that your soap saver bag lasts for a long time and remains in good condition, it’s important to properly wash and care for it.
Handwashing is Key
To keep your knitted soap saver bag looking its best, it’s recommended to handwash it. Fill a basin or sink with lukewarm water and add a small amount of mild detergent. Gently agitate the soap saver bag in the soapy water, being careful not to stretch or pull on the fibers. Rinse the bag thoroughly with cool water to remove any soap residue.
Allow to Air Dry
After washing, avoid wringing or twisting the soap saver bag, as this can cause damage to the knitted stitches. Instead, gently squeeze out any excess water and lay the bag flat on a clean towel to air dry. Avoid exposing it to direct sunlight, as this can fade the colors.
Store Properly
When not in use, it’s best to store your knitted soap saver bag in a dry area, away from moisture. This will help prevent the growth of mold or mildew. Consider placing it in a drawer or hanging it up using a hook or peg. This will also help maintain its shape and ensure it stays clean until your next use.
By following these simple tips, you can keep your knitted soap saver bag looking beautiful and extend its lifespan. Enjoy the benefits of using a handmade, eco-friendly product while keeping your soap residue-free and your bathroom or kitchen stylish.
Variations and Creative Ideas for Knitted Soap Saver Bags
Knitted soap saver bags are a versatile and customizable project that can be adapted in various ways to suit your personal preferences and creativity. Here are some ideas to inspire you:
- Color combinations: Experiment with different color combinations to create unique patterns and designs. You can use variegated or self-striping yarns to add visual interest to your soap saver bags.
- Texture: Explore different stitch patterns to add texture to your soap saver bags. You can try ribbing, cables, lace, or any other stitch pattern that catches your fancy.
- Embroidery and embellishments: Add a personal touch to your soap saver bags by embroidering designs or adding embellishments such as buttons, beads, or charms.
- Personalization: Customize your soap saver bags by knitting initials, names, or messages into the fabric. This can make them great personalized gifts or even promotional items.
- Size and shape: Experiment with different sizes and shapes of soap saver bags to accommodate different types and sizes of soap bars. You can also create soap saver bags in unique shapes, such as animals or fruits, for a fun and whimsical touch.
With these creative ideas and variations, you can take your knitted soap saver bags to the next level and create truly unique and beautiful pieces. Whether you’re making them for yourself or as gifts, these customized soap saver bags are sure to impress!