
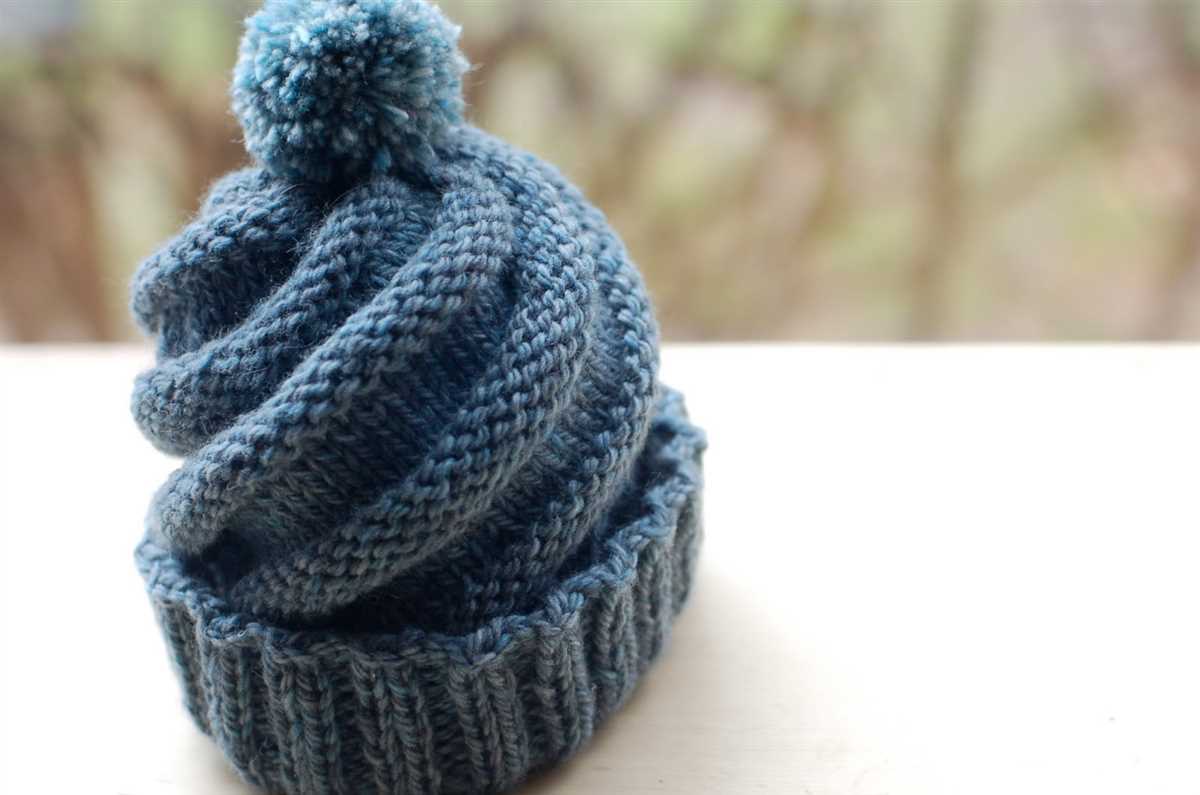
If you’re looking for a fun and stylish project to keep you warm during the colder months, look no further than a knitted ski hat. Not only do these hats provide excellent insulation for your head, but they also add a touch of personality to any winter outfit with their unique designs and colors.
Knitting your own ski hat allows you to customize it to your liking, choosing the type of yarn, the pattern, and the size that best fits your head. Whether you prefer a classic ribbed design or a more intricate cable pattern, there are endless possibilities to explore.
Creating a knitted ski hat is also a great way to practice your knitting skills and expand your knowledge of different stitches and techniques. With each hat project, you’ll become more comfortable with casting on, knitting in the round, and shaping the crown. Plus, the repetition and rhythm of knitting can be a relaxing and meditative activity, perfect for unwinding after a long day on the slopes or a busy day at work.
So grab your knitting needles and dive into the world of knitted ski hats. Whether you’re a beginner or an experienced knitter, this versatile and practical accessory is sure to become a favorite in your winter wardrobe.
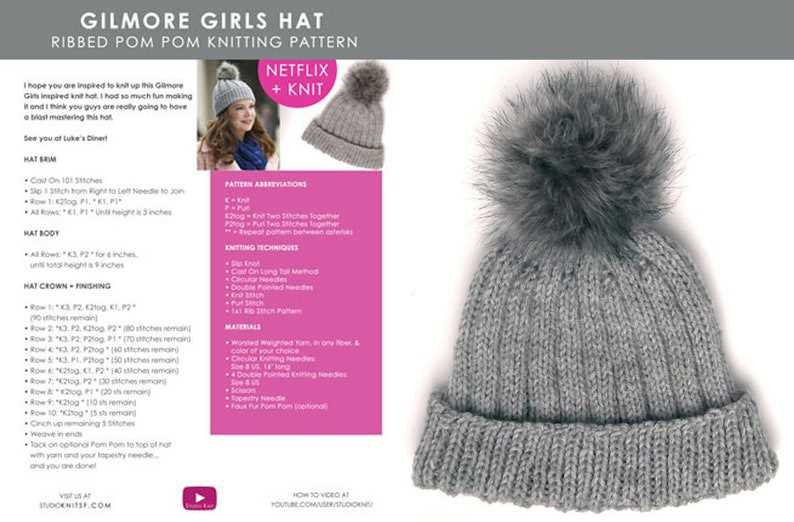
Knitted Ski Hat Pattern
Stay warm and stylish on the slopes with this knitted ski hat pattern. Whether you’re a beginner or an experienced knitter, this pattern is perfect for creating a cozy and comfortable hat to keep you warm during your winter adventures.
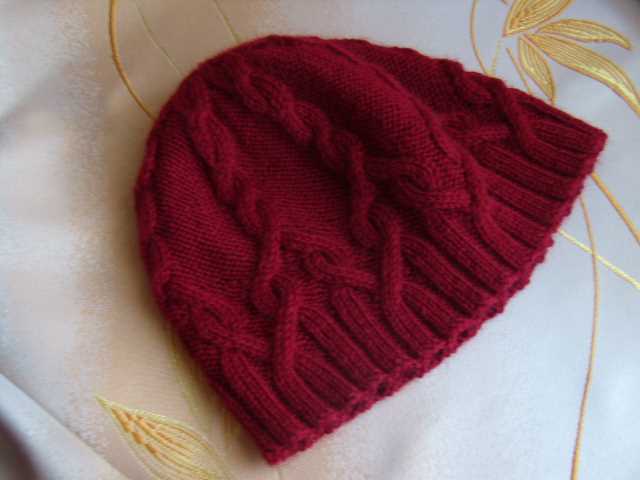
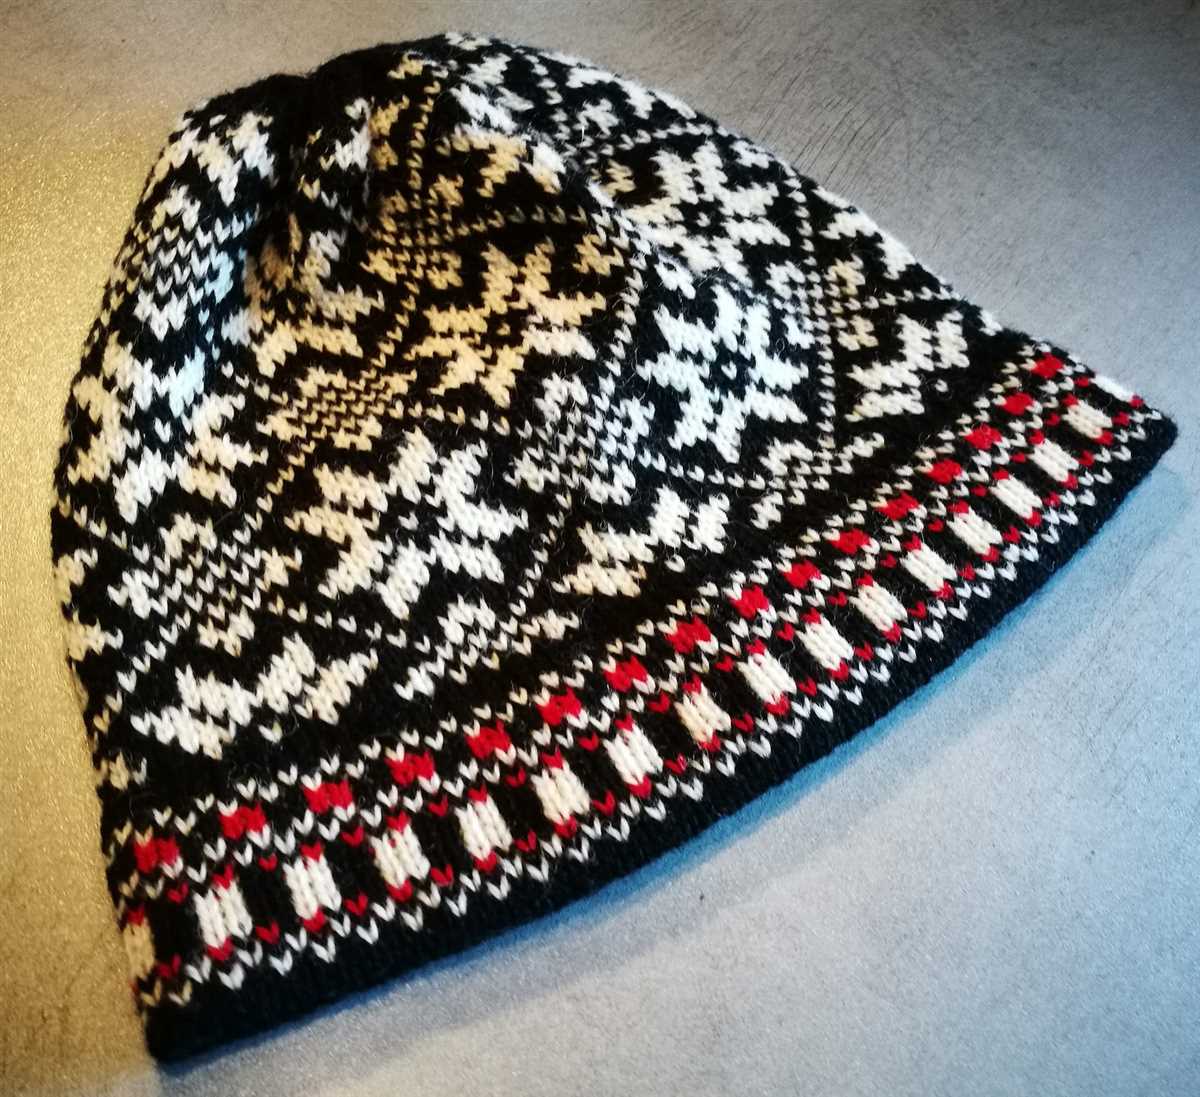
This pattern requires basic knitting skills and can be customized to fit your personal style. It uses a combination of knit and purl stitches to create a textured pattern that adds extra insulation and warmth. You can choose any color of yarn to match your ski gear or create a bold accent piece to stand out on the slopes.
To begin, you will need:
- Size 8 (5mm) circular knitting needles
- One ball of worsted weight yarn
- A set of double-pointed knitting needles
- A tapestry needle for weaving in ends
Start by casting on 88 stitches onto your circular knitting needles. Join the round and place a stitch marker to mark the beginning of the round. Begin knitting in a *k2, p2* ribbing pattern for 2 inches to create a snug fit around the brim of the hat.
Next, continue knitting in a stockinette stitch pattern, knitting every round, until the hat measures 7 inches from the cast on edge. Then, begin decreasing by knitting 6 stitches, then knitting 2 stitches together, repeating this pattern until the end of the round.
Continue decreasing in this way until you have 8 stitches remaining. Cut the yarn, leaving a long tail. Thread the tail through a tapestry needle and slip the remaining stitches onto the needle. Pull tight to close the top of the hat.
Weave in any loose ends and your knitted ski hat is complete! Now you’re ready to hit the slopes in style and stay warm all winter long.
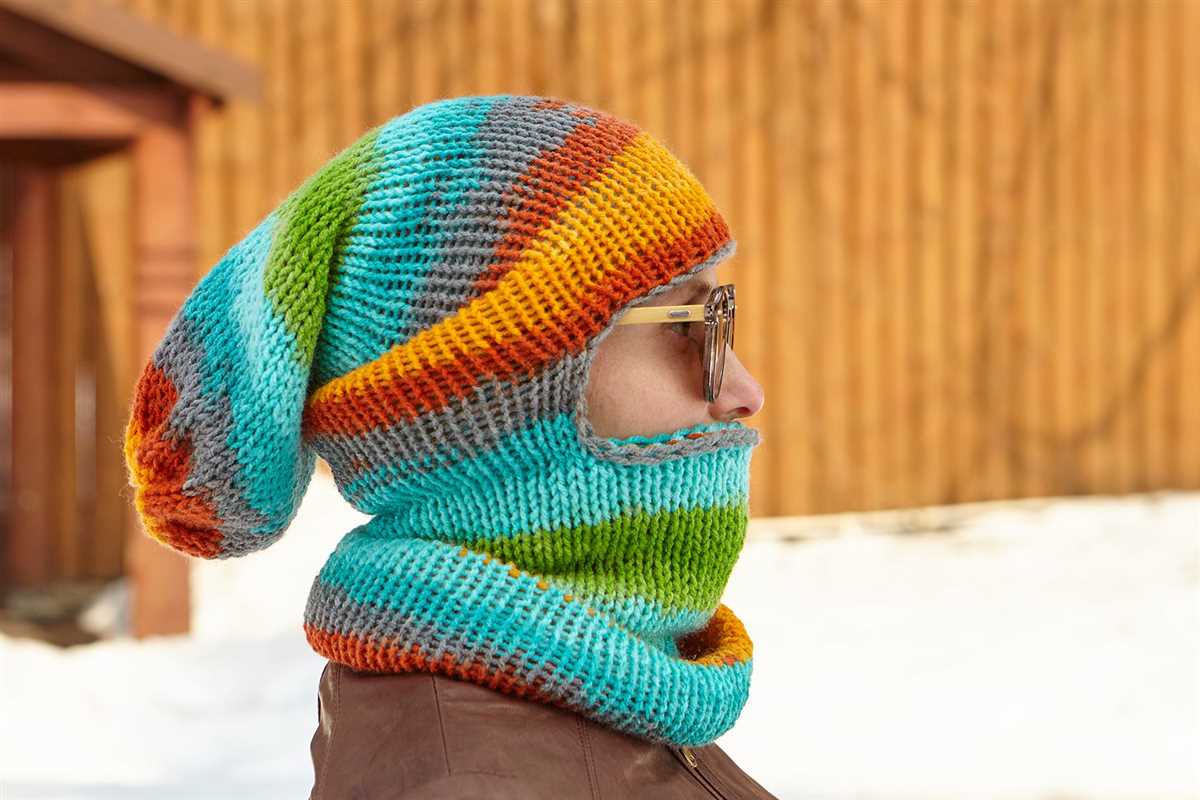
Ski Hat Basics
Ski hats are essential accessories for staying warm and stylish on the slopes. Whether you’re a beginner or an experienced skier, it’s important to have a hat that fits well and provides enough warmth to keep you comfortable in the cold weather. In this article, we’ll cover the basics of ski hats, from choosing the right materials to finding the perfect pattern.
Choosing the Right Materials
When it comes to ski hats, the material is key. Look for hats made from high-quality yarns that offer both warmth and breathability. Wool and acrylic blends are popular choices as they provide insulation and are resistant to moisture. Additionally, hats with a fleece lining can add an extra layer of warmth while wicking away sweat.
It’s also important to consider the thickness of the yarn. Thicker yarns are generally warmer, but they may not be as lightweight or flexible as thinner yarns. Consider the weather conditions and your personal preferences when selecting the yarn thickness for your ski hat.
Finding the Perfect Pattern
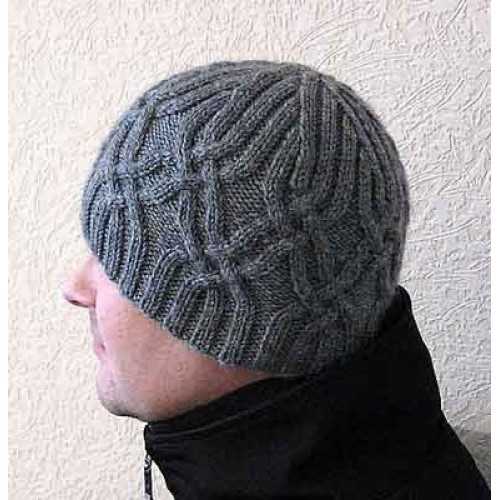
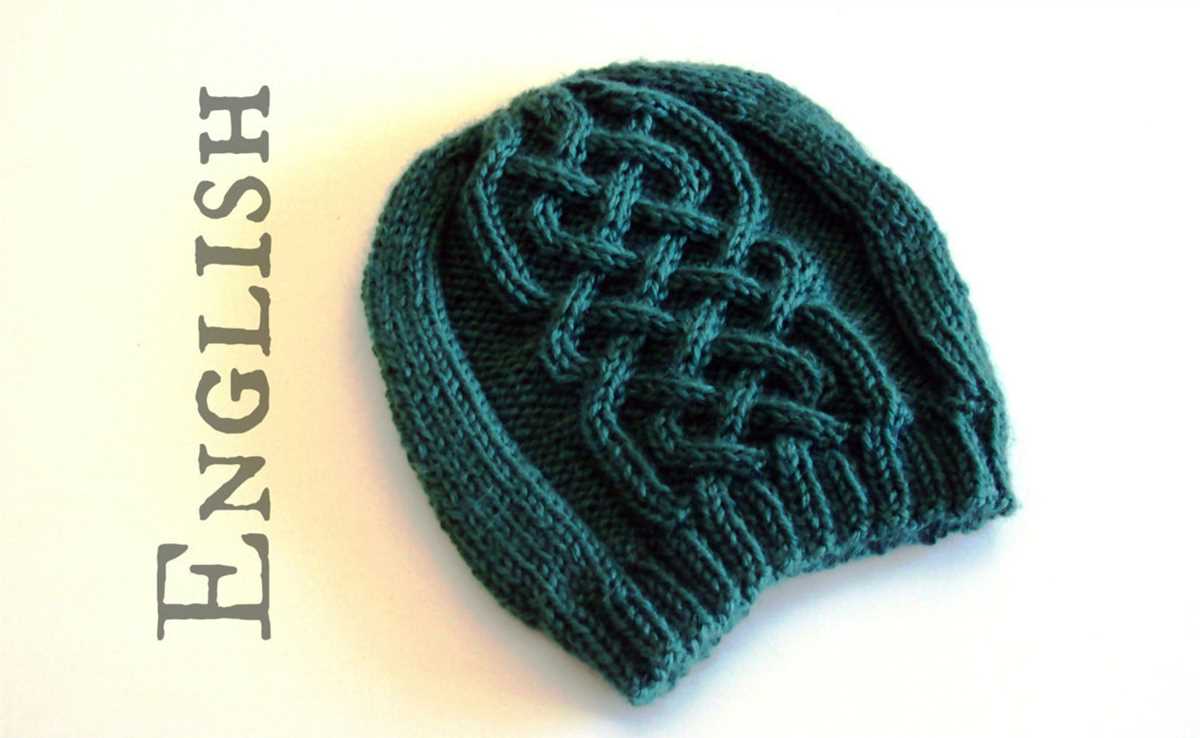
There are countless ski hat patterns available, so it’s important to find one that matches your skill level and desired style. If you’re a beginner, look for simple patterns with basic stitches like knit and purl. As you gain more experience, you can try more complex patterns with cables, colorwork, or textured stitches.
When choosing a pattern, make sure to check the gauge requirements. The gauge is the number of stitches and rows per inch, and it determines the size of the final hat. If your gauge doesn’t match the pattern’s gauge, your hat may turn out too small or too large. Take the time to swatch and adjust your needle size if necessary to ensure your hat fits perfectly.
- Overall, finding the right ski hat involves considering the materials, thickness, and pattern that best suit your needs.
- Don’t forget to have fun and experiment with different colors and embellishments to make your ski hat truly unique!
Choosing Yarn and Needles
When it comes to choosing yarn for your knitted ski hat, there are a few factors to consider. Firstly, you’ll want to think about the level of warmth and insulation you desire. For those colder climates, a thicker and bulkier yarn is recommended, while a lighter weight yarn can be suitable for milder weather conditions. It’s important to also consider the fiber content of the yarn, as different fibers can have varying levels of warmth and stretch.
The type of needles you choose can also impact the final result of your ski hat. The size of the needles will determine the gauge and overall fit of the hat. If you want a tighter, denser fabric, opt for smaller needles, while larger needles will create a looser, more open fabric. Additionally, the material of the needles, such as bamboo or metal, can affect the feel and tension of your knitting. Some knitters prefer the smoothness and speed of metal needles, while others enjoy the grip and warmth of bamboo needles.
Considerations for Yarn:
- Warmth and insulation
- Weight and thickness
- Fiber content
Considerations for Needles:
- Size of needles
- Type of material
Getting Started: Cast On
Before you can start knitting your ski hat, you will need to cast on. Casting on is the process of creating the first row of stitches on your knitting needle. There are several methods you can use to cast on, but for this pattern, we will be using the long-tail cast on method.
To begin, you will need to estimate how much yarn you will need for your cast on. The long-tail cast on requires you to have a long tail of yarn, approximately three times the length that you want your hat to be. Measure this length of yarn and cut it from the skein, leaving a long tail.
Hold the tail end of the yarn in your right hand, and the working yarn (attached to the skein) in your left hand. Place your left thumb and index finger between the two strands of yarn, creating a “V” shape. Insert your right-hand needle through the “V” from right to left, catching the yarn around the needle. With your left hand, pull the yarn snugly to create the first stitch on your right-hand needle. This is called the slip knot.
Continue working the long-tail cast on, making sure to keep your stitches loose but even. Insert the right-hand needle between the two strands of yarn, from left to right, and catch the yarn around the needle. Use your left hand to pull the yarn snugly, creating a new stitch on your right-hand needle.
Repeat this process until you have cast on the required number of stitches for your ski hat. Remember to count each stitch as you go to ensure accuracy. Once you have cast on all of your stitches, you are ready to begin knitting the body of your hat.
Ribbing: Knitting the Brim
In knitting a ski hat, one of the important components is the ribbing, which forms the brim of the hat. The ribbing is usually knitted using a smaller needle size than the main body of the hat to create a tighter and more elastic fabric. This helps to ensure a snug fit around the head and keeps the hat in place during active winter activities.
To knit the ribbing, a simple yet effective pattern called the 1×1 ribbing is commonly used. This pattern alternates between knitting one stitch and purling one stitch. The resulting fabric has a ribbed texture and good stretch. The 1×1 ribbing is also reversible, making it an ideal choice for the brim as it looks the same on both sides.
The process of knitting the brim begins by casting on an even number of stitches. The exact number of stitches depends on the desired width of the brim and the gauge of the knitter. Once the stitches are cast on, the first row is worked by knitting one stitch, then purling one stitch, and repeating this pattern until the end of the row. Subsequent rows are worked in the same manner, knitting the knits and purling the purls as they appear.
It is important to maintain an even tension while knitting the ribbing to ensure a consistent and neat appearance. This can be achieved by paying attention to the tension of the yarn and the tightness of the stitches. If the ribbing feels too loose, using a smaller needle size or knitting tighter may help. Conversely, if the ribbing feels too tight, switching to a larger needle size or knitting looser can be a solution.
Once the desired length of the ribbing is reached, the knitter can then transition to the main body of the hat, using a larger needle size and a different stitch pattern. The ribbing provides a sturdy and polished foundation for the hat, making it a crucial step in the knitting process.
Switching to Main Stitch
Once you have completed the ribbing section of the ski hat, it’s time to switch to the main stitch pattern. This is where you will create the body of the hat and give it its distinctive look.
To switch to the main stitch, you will need to change your knitting technique. Instead of continuing with the ribbing pattern, which typically involves alternating knits and purls, you will now be working with a specific stitch pattern that will create the desired texture for the hat.
One common main stitch pattern for a knitted ski hat is the stockinette stitch. This involves working all rows in knit stitches, creating a smooth and uniform fabric. To switch to the stockinette stitch, you simply need to start knitting every row instead of alternating knits and purls. This will create a clean and simple look for your ski hat.
Another option for the main stitch pattern is the seed stitch. This involves alternating knits and purls within each row, creating a textured and bumpy fabric. To switch to the seed stitch, you will need to remember to follow the specific pattern of knits and purls for each row. This will give your ski hat a more complex and interesting texture.
Overall, switching to the main stitch pattern is an important step in creating the body of your knitted ski hat. Whether you choose the stockinette stitch or the seed stitch, this transition will define the overall look and feel of the hat. Take your time and enjoy the process of creating a unique and cozy accessory for the winter season.
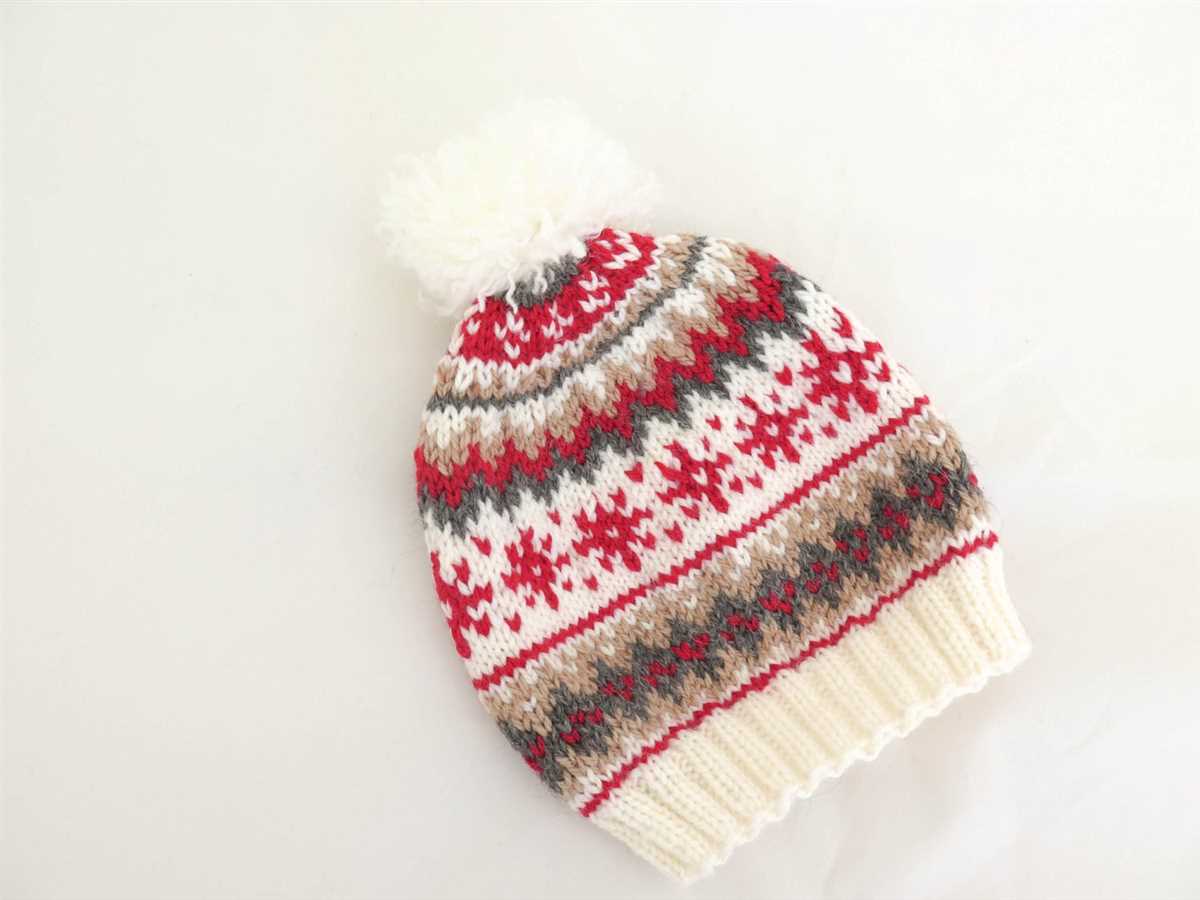
Creating a Pom Pom
To add a fun and playful touch to your knitted ski hat, you can create a pom pom to attach at the top of the hat. Pom poms are easy to make and can be customized to match the colors of your hat or add a pop of contrasting color. Here are the steps to create a pom pom for your knitted ski hat:
Materials:

- Yarn in desired color(s)
- Pom pom maker or cardboard
- Scissors
Step 1: Choose the yarn color for your pom pom. You can use the same yarn as your hat or experiment with different colors to create a unique look. Make sure to have enough yarn to create a full and fluffy pom pom.
Step 2: If you have a pom pom maker, follow the instructions provided with the tool to create your pom pom. If you don’t have a pom pom maker, you can easily make one using cardboard. Cut two identical cardboard circles with a small hole in the center. The size of the circles will determine the size of your pom pom.
Step 3: Take your chosen yarn and wrap it around the cardboard circles. Keep wrapping until the center hole is filled and the pom pom looks full and dense. The more yarn you use, the thicker your pom pom will be.
Step 4: Once you are satisfied with the amount of yarn, carefully cut along the outer edge of the cardboard circles. Use sharp scissors to make clean cuts. Be sure to hold the yarn securely in place while cutting to prevent it from unraveling.
Step 5: Cut a separate piece of yarn and slide it between the two cardboard circles. Tie it tightly in a double knot to secure the strands of yarn. This will hold the pom pom together.
Step 6: Gently remove the cardboard circles from the pom pom. Fluff and shape the strands of yarn to create a round and even pom pom. Trim any uneven or long strands to achieve a neat and uniform look.
Step 7: Finally, attach your pom pom to the top of your knitted ski hat. You can sew it on using a needle and thread, or use a small piece of yarn to tie it securely in place. Make sure it is centered and secure before wearing your hat.
Now you have a stylish and cozy knitted ski hat with a playful pom pom on top. Experiment with different yarn colors and sizes to create unique pom poms for your hats. Have fun and stay warm!
Shaping the Hat: Decreasing Stitches
In order to shape the knitted ski hat and create a snug fit, you will need to decrease the number of stitches as you progress towards the crown. Decreasing stitches is a simple technique that involves reducing the number of stitches on your needle.
To begin the decreasing process, you will need to count the number of stitches you have on your needle. This will help you determine how many stitches to decrease in each round. Common decrease stitches include knit two together (k2tog) and slip slip knit (ssk). These decrease stitches create a neat and uniform decrease.
To decrease stitches using the k2tog method, simply knit the next two stitches together as one. This will reduce two stitches to one and create a smooth diagonal line in your knitting. Repeat this decrease across the round until you have reached the desired number of stitches.
If you prefer a left-leaning decrease, you can use the ssk method. To ssk, slip the next two stitches knitwise, one at a time, onto the right-hand needle. Then, insert the left-hand needle into the front of both stitches and knit them together through the back loop. This will create a left-leaning decrease.
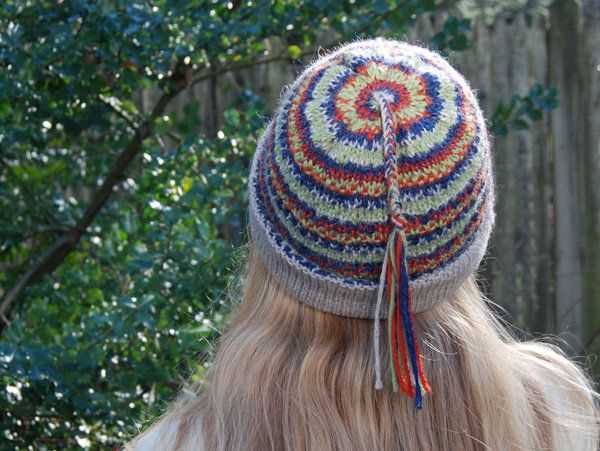
Continue to decrease stitches in each round until you have reached a small enough number of stitches to gather the remaining stitches together and close the crown of the hat. This will create a tapered shape that fits snugly on the head and keeps the wearer warm and cozy during outdoor winter activities.
Switching to Double-Pointed Needles
If you are working on a knitted ski hat pattern, at some point you may need to switch to double-pointed needles. Double-pointed needles are necessary for working in the round when you have decreased the number of stitches to a point where they no longer fit comfortably on a circular needle. Switching to double-pointed needles can seem intimidating at first, but with a few simple steps, you’ll be able to continue your project seamlessly.
Step 1: When the number of stitches becomes too few for your circular needle, divide the stitches evenly onto three or four double-pointed needles, depending on the pattern instructions. Make sure to slide the stitches to the middle of each needle so they don’t fall off.
Step 2: Hold one of the empty double-pointed needles in your right hand and the needle with the stitches in your left hand. Insert the empty needle into the first stitch on the left-hand needle as if to knit.
Step 3: Wrap the yarn around the right-hand needle and pull it through the stitch, transferring the stitch from the left-hand needle to the right-hand needle. Repeat this process for the remaining stitches on the left-hand needle.
Step 4: Once all the stitches have been transferred, hold the right-hand needle with the stitches in your right hand and pick up another empty needle with your left hand. Repeat Step 2 and Step 3 for the next set of stitches.
Step 5: Continue transferring the stitches onto the empty double-pointed needles until all the stitches have been moved. Make sure to keep the tension consistent and be careful not to drop any stitches.
By following these steps, you can easily switch to double-pointed needles and continue working on your knitted ski hat pattern. Remember to take your time and practice, and soon you’ll be comfortable with this technique.
Finishing Touches: Sewing the Hat Seam
Once you have completed knitting your ski hat, it is time to sew the hat seam to give it a polished and professional finish. The seam creates structure and shape to the hat, and also holds it together securely. Here are the steps to sew the hat seam:
Materials:
- A tapestry needle
- A pair of scissors
- Matching yarn in the same thickness as your hat
Step 1: Prepare the Hat
Before sewing the seam, make sure your hat is blocked or gently steamed to shape it. This will help ensure that the hat has a uniform and even stitch tension. Lay the hat flat on a clean surface with the right side facing up.
Step 2: Thread the Needle
Thread the tapestry needle with a piece of yarn that is at least three times the length of the hat seam. Make a knot at the end of the yarn to secure it.
Step 3: Position the Hat
Hold the hat in a way that brings the two edges of the seam together. The right sides of the fabric should be touching each other.
Step 4: Begin Sewing
Starting from the bottom edge of the hat, insert the needle through both layers of fabric, making sure to catch the corresponding loops or stitches on each side. Pull the yarn through, leaving a small tail hanging at the bottom.
Step 5: Continue Sewing
Working your way up, continue to sew the seam by inserting the needle through the loops or stitches on each side, keeping them aligned. Make sure to pull the yarn tight enough to create a snug and invisible seam, but be careful not to pull too tightly to avoid distorting the stitches.
Step 6: Finish Off
Once you reach the top of the hat, secure the yarn by making a few stitches through the loops or stitches on each side, and then weave in the yarn tail back into the hat. Trim any excess yarn.
With the hat seam sewn, your knitted ski hat is now complete and ready to be worn with warmth and style. The carefully sewn seam adds durability and a polished finish to your handmade creation. Enjoy the cozy comfort and trendy look of your knitted ski hat!
Blocking the Hat
Blocking is an essential step in finishing your knitted ski hat. It helps to shape and even out the stitches, giving your hat a polished and professional look.
Before you begin blocking, make sure to read through the pattern instructions to determine the recommended blocking method. There are several ways to block a hat, including wet blocking, steam blocking, and spray blocking.
Wet Blocking
To wet block your hat, start by filling a basin or sink with lukewarm water and a gentle wool wash. Submerge the hat in the water, gently pressing it down to ensure it is fully saturated. Let the hat soak for about 10-15 minutes.
After soaking, carefully remove the hat from the water and gently squeeze out the excess moisture. Lay the hat flat on a clean, dry towel and gently shape it to the desired size and form.
Steam Blocking
If the pattern recommends steam blocking, you will need a steam iron and a blocking mat or towel. Fill the iron with water and set it to a low steam setting. Place the hat on the blocking mat and hover the steam iron over the hat, making sure not to touch the iron to the hat.
Move the iron in a slow, sweeping motion over the hat, allowing the steam to penetrate the fibers. As you steam, gently shape the hat with your hands to achieve the desired size and form. Once the hat is dry and cool, it will hold its shape.
Spray Blocking
If you prefer a less aggressive blocking method, spray blocking may be the best option for your knitted ski hat. Fill a spray bottle with lukewarm water and lightly mist the hat, focusing on the areas that need shaping or stretching.
After spraying, gently shape the hat with your hands, pulling and stretching it as needed. Allow the hat to dry completely before removing it from the blocking surface. This method is ideal for hats made with delicate or sensitive fibers.
Regardless of the blocking method you choose, it’s important to take your time and handle the hat with care. Pay attention to the pattern instructions and any specific blocking recommendations to ensure the best results. With proper blocking, your knitted ski hat will be ready to keep you warm and stylish on the slopes!
Personalizing Your Hat: Embellishments
Knitting your own ski hat gives you the opportunity to create a one-of-a-kind accessory that reflects your personal style. While the basic hat pattern provides a great foundation, adding embellishments can take your hat to the next level. Whether you prefer simple and subtle details or bold and eye-catching designs, there are plenty of options to choose from. Here are a few ideas to inspire you:
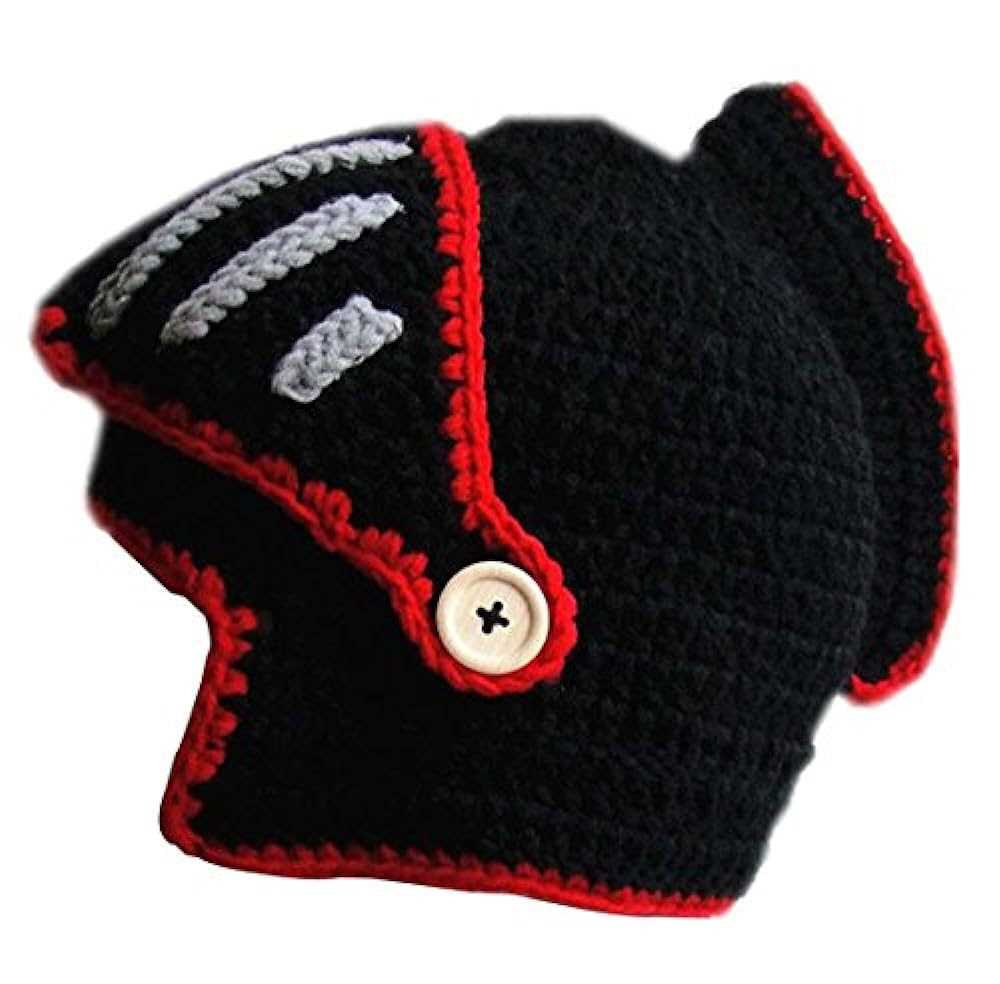
- Buttons: Sewing buttons onto your hat can add a touch of charm and personality. Choose buttons in different shapes, sizes, and colors to create an interesting visual effect.
- Pom-poms: Pom-poms are a classic choice for hat embellishment. You can purchase ready-made pom-poms or make your own using yarn. Attach one or multiple pom-poms to the top of your hat for a fun and playful look.
- Embroidery: Embroidery is a versatile technique that allows you to add intricate designs to your hat. You can embroider patterns, symbols, or even words or initials to make your hat truly unique.
- Sequins or beads: For a glamorous touch, consider sewing on sequins or beads. They can be arranged in patterns, scattered randomly, or used to create specific motifs.
- Ribbons or bows: Adding ribbons or bows can instantly make your hat look more feminine and elegant. You can attach them to the brim, side, or back of the hat for a stylish finish.
Remember, the key to successful embellishments is finding the right balance. Avoid going overboard with too many elements, as it can make your hat look cluttered and overwhelming. Instead, choose one or two embellishments that complement each other and enhance the overall design of your hat. Have fun experimenting with different options to create a hat that perfectly reflects your personal style.
Tips and Troubleshooting
Knitting a ski hat can be a fun and rewarding project, but it can also come with its fair share of challenges. Here are some tips and troubleshooting suggestions to help you along the way:
Tips
- Choose the right yarn: When selecting yarn for your ski hat, make sure to choose a yarn that is suitable for winter wear. Look for yarn that is warm, durable, and will hold its shape well.
- Check your gauge: Before starting your hat, it is important to check your gauge to ensure that you are using the correct needle size and yarn weight. This will help ensure that your hat is the right size and fit.
- Use stitch markers: To help keep track of your stitches and pattern repeats, consider using stitch markers. This can help prevent mistakes and make it easier to keep track of your progress.
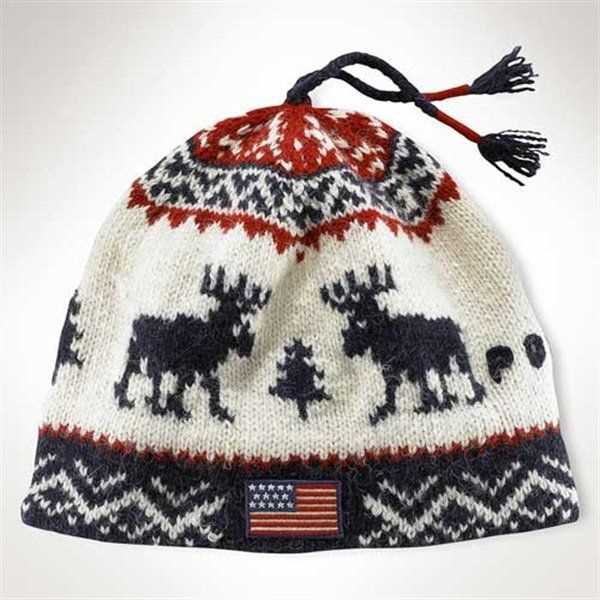
- Try different techniques: Don’t be afraid to try different techniques when knitting your ski hat. Adding texture, colorwork, or cables can take your hat to the next level and make it truly unique.
Troubleshooting
Here are some common issues you may encounter while knitting your ski hat, along with some troubleshooting suggestions:
- Uneven stitches: If you notice that your stitches are uneven, try adjusting your tension. Experiment with looser or tighter tension to achieve more consistent stitches.
- Too tight or too loose: If your hat is turning out too tight or too loose, make sure to check your gauge and adjust your needle size accordingly. Using larger or smaller needles can help you achieve the desired fit.
- Twisted stitches: Twisted stitches can happen when you accidentally twist the stitch in the wrong direction. Pay close attention to your knitting and make sure to insert your needle correctly to avoid twisted stitches.
- Holes or gaps: If you notice holes or gaps in your knitting, try tightening your tension or using a smaller needle size. You can also try picking up extra stitches in the area to help close up any gaps.
Remember, practice makes perfect! Don’t be discouraged if your first ski hat doesn’t turn out exactly as planned. Keep trying and experimenting with different techniques until you achieve the desired results. Happy knitting!