
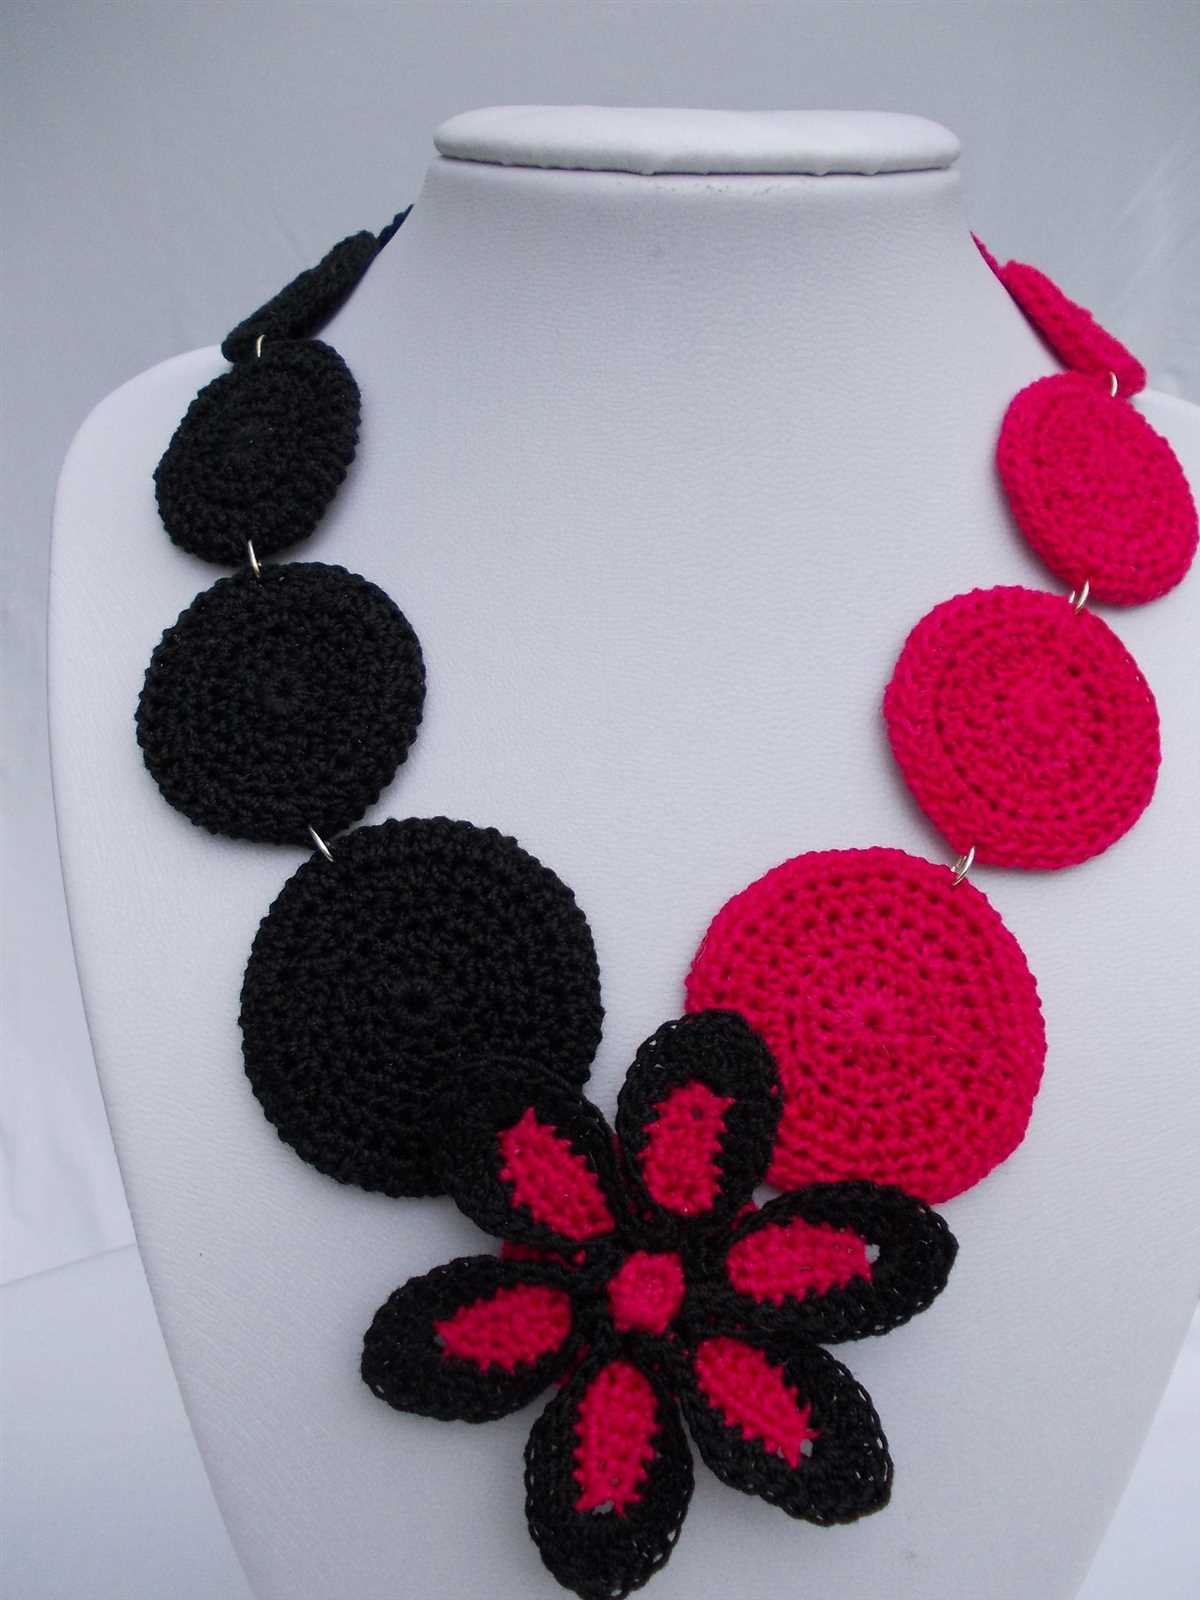
Knitting is a versatile and enjoyable craft that allows you to create a wide range of items, from cozy scarves to intricate sweaters. If you’re looking for a quick and stylish project, why not try making a knitted necklace? These delicate and elegant accessories can be the perfect addition to any outfit, and they’re also a great way to use up those leftover bits of yarn.
There are countless variations and patterns to choose from when it comes to knitted necklaces. You can opt for a simple design with just a few rows of stitches, or you can get creative and experiment with different textures and colors. The possibilities are endless, and the best part is that you don’t need much yarn or time to complete a necklace.
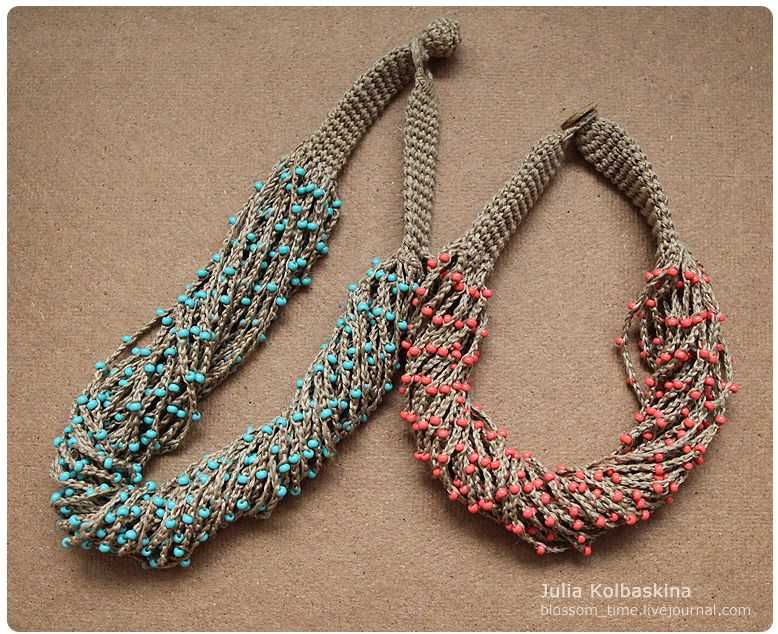
One popular knitted necklace pattern is the seed stitch necklace. This pattern is perfect for beginners and requires only basic knitting skills. To create this necklace, you’ll need a set of knitting needles and a small amount of yarn in your favorite color. The seed stitch is created by alternating knit and purl stitches, resulting in a textured and visually interesting pattern.
Materials needed for the knitted necklace
Yarn: The main material you will need for knitting the necklace is yarn. Choose a yarn that is suitable for making accessories like necklaces. You can opt for any color that matches your preference or the outfit you plan to wear the necklace with.
Knitting Needles: You will also need a pair of knitting needles. The size of the needles will depend on the type of yarn you choose to use. Make sure to select needles that are appropriate for your yarn to ensure the best knitting experience.
Tapestry Needle: A tapestry needle is required for weaving in the loose ends of your knitted necklace. This needle should have a large enough eye to easily thread your yarn through.
Closure: Depending on the design of the knitted necklace, you may need a closure to secure it around your neck. This could be a clasp, button, or any other type of fastening that suits your style and preferences.
Scissors: Scissors are necessary for cutting the yarn and trimming any excess. Choose a pair of sharp scissors that will cleanly cut through the yarn without fraying or damaging it.
Optional Embellishments: If you want to add some extra flair to your knitted necklace, you can consider adding embellishments such as beads, sequins, or charms. These can be sewn or attached to the necklace using a tapestry needle and thread.
Measuring Tape: A measuring tape or ruler may come in handy for ensuring that your necklace is the desired length. This will help you achieve a precise fit and make any necessary adjustments during the knitting process.
With these materials, you will be ready to start knitting your stylish and unique necklace. Gather all the necessary supplies, find a comfortable knitting spot, and get ready to create a fabulous accessory that will enhance any outfit.
Choosing the right yarn for your necklace
When it comes to making a knitted necklace, the type of yarn you choose is crucial to the overall look and feel of the finished piece. The yarn you select will determine not only the texture and weight of the necklace, but also its durability and how well it holds its shape.
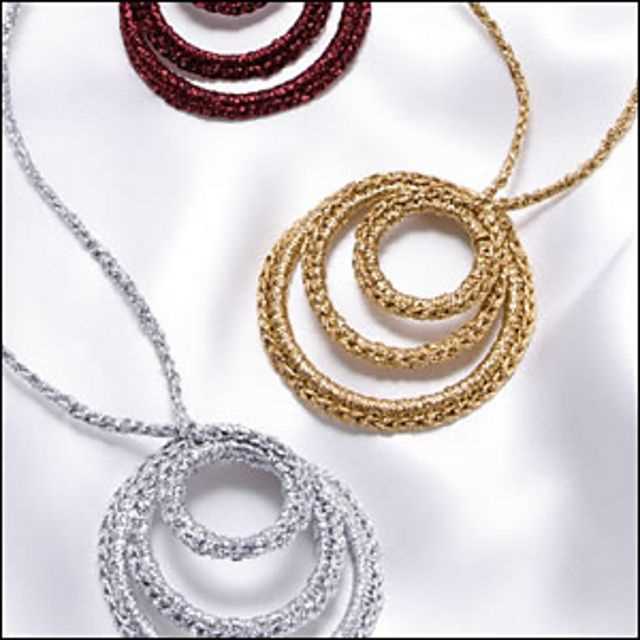
1. Consider the fiber content: Different types of yarn have different characteristics, so it’s important to think about what you want from your knitted necklace. If you’re looking for a soft and comfortable necklace, consider using a yarn made from natural fibers like cotton or bamboo. Alternatively, if you prefer a more textured or sparkly look, you could opt for a yarn that includes synthetic fibers like acrylic or metallic threads.
2. Think about the weight: The weight of the yarn will determine the drape and movement of your necklace. If you want a lightweight and delicate necklace, choose a fine or lace-weight yarn. On the other hand, if you prefer a chunkier and more substantial necklace, go for a bulky or super bulky yarn. Keep in mind that the weight of the yarn may also affect how the necklace hangs and sits around your neck.
3. Test the stretch and elasticity: Since a necklace needs to be able to stretch to fit around your neck comfortably, it’s important to choose a yarn with the right amount of stretch and elasticity. You can test this by gently pulling on the yarn and seeing how much it stretches and then recovers its shape. Be sure to choose a yarn that has enough elasticity to accommodate the size of your head and neck.
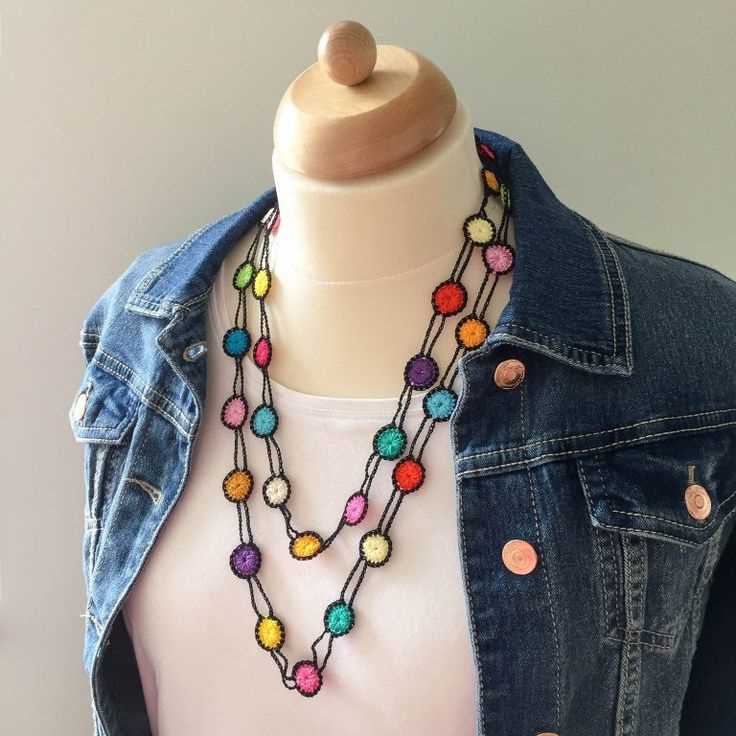
4. Consider the color and texture: The color and texture of the yarn can greatly impact the overall aesthetic of your knitted necklace. Consider whether you want a solid color or a variegated yarn, and whether or not you want the yarn to have a smooth or textured finish. Keep in mind that the color and texture of the yarn can complement or contrast with your outfit or other accessories.
By carefully considering these factors, you’ll be well on your way to choosing the perfect yarn for your knitted necklace. Once you’ve made your selection, you can start knitting and create a unique and beautiful accessory to complete your look.
Getting started: Knitting techniques
Before you begin knitting your necklace, it’s important to familiarize yourself with some basic knitting techniques. Whether you’re a beginner or have some experience, mastering these techniques will help you create a beautiful and professional-looking piece.
Casting on
The first step in knitting is casting on, which is how you create the foundation stitches for your project. There are several different methods you can use to cast on, such as the long-tail cast on or the knitted cast on. Choose the method that you find most comfortable and practice until you can easily create a neat and even row of stitches.
Knit stitch
The knit stitch is the fundamental stitch in knitting and will be used throughout your necklace pattern. To knit a stitch, simply insert the right needle into the front of the stitch on the left needle, wrap the yarn around the right needle, and pull it through the stitch, sliding the stitch off the left needle. Practice knitting until you can create consistent and uniform stitches.
Purl stitch
The purl stitch is the reverse of the knit stitch and creates a bumpy texture on the fabric. To purl a stitch, insert the right needle into the front of the stitch on the left needle from right to left, wrap the yarn around the right needle, and pull it through the stitch, sliding the stitch off the left needle. Practice purling until you can create smooth and even purl stitches.
- Once you have mastered these basic knitting techniques, you will be ready to start working on your knitted necklace pattern. Remember to read the pattern carefully and follow the instructions for each row.
- As you progress with your knitting, don’t be afraid to experiment with different stitch patterns, colors, and yarns to personalize your necklace and make it uniquely yours.
With patience and practice, you will be able to create a beautiful knitted necklace that showcases your knitting skills and adds a fashionable touch to any outfit.
Basic knitting stitches for the necklace pattern
When creating a knitted necklace pattern, it is important to have a good understanding of basic knitting stitches. These stitches will form the foundation of your necklace design and allow you to create beautiful and intricate patterns. Here are some of the essential stitches you need to know.
1. Cast on stitch:

The cast on stitch is used to create the initial row of stitches on your knitting needle. There are different methods of casting on, such as the long-tail cast on or the knit cast on. Choose the method that you are most comfortable with and that best suits your design.
2. Knit stitch:
The knit stitch is the most basic and commonly used stitch in knitting. It creates a smooth and flat fabric and is often used for the main body of the necklace pattern. To knit, insert the right-hand needle into the loop on the left-hand needle, wrap the yarn around the right-hand needle, and pull it through the loop.
3. Purl stitch:
The purl stitch is the reverse of the knit stitch and creates a textured fabric with a visible raised row. It is often used in combination with the knit stitch to create various patterns and designs. To purl, insert the right-hand needle into the loop on the left-hand needle from right to left, wrap the yarn around the right-hand needle counterclockwise, and pull it through the loop.
4. Yarn over stitch:
The yarn over stitch is used to create an increase in stitches and to create eyelets in the fabric. It involves bringing the working yarn from the back to the front of the work, creating an extra loop on the needle. This stitch adds a decorative element to the necklace pattern and can be used to create lace-like designs.
5. Slip stitch:
The slip stitch is used for various purposes, such as creating a smooth edge, joining stitches together, or decreasing stitches. To slip a stitch, insert the right-hand needle into the next stitch as if to purl, but instead of purling, simply transfer the stitch from the left-hand needle to the right-hand needle without working it.
With these basic knitting stitches in your repertoire, you will be able to create a wide variety of necklace patterns. Experiment with different combinations of stitches and techniques to create unique and personalized designs.
How to cast on and bind off for the necklace
When starting to knit a necklace, the first step is to cast on the desired number of stitches. This will create the foundation row for your necklace. The method of casting on will depend on your preference and the type of yarn you are using. One popular method is the long-tail cast on, where you create a slipknot and then use both strands of yarn to form the stitches. Another option is the provisional cast on, which allows you to easily remove the cast on edge later if you want to add additional length to your necklace.
After casting on, it’s important to work the first row carefully to ensure it is flat and even. You can use a knitting needle one size larger than your working needle to help with this. Once the foundation row is complete, you can begin working the main pattern of your necklace.
When you have finished knitting your necklace, it’s time to bind off and secure the stitches. There are several methods for binding off in knitting, but one popular option for necklaces is the standard bind off. To do this, knit the first two stitches, then use the left needle to lift the first stitch over the second stitch and off the right needle. Continue knitting one stitch and binding off until you reach the end of the row. Once you have bound off all the stitches, cut the yarn, leaving a tail of about 6 inches. Thread the tail through the last stitch and pull tight to secure the end.
After binding off, you may want to block your necklace to give it a finished look. This can be done by gently washing the necklace and laying it flat to dry, or by using a steam iron on a low setting to lightly press the stitches. Once your necklace is dry and blocked, it’s ready to be worn or given as a gift.
Knitting the Body of the Necklace
Once you have cast on your desired number of stitches, you can begin knitting the body of the necklace. This part of the pattern will determine the overall shape and length of the necklace, so make sure to follow the instructions carefully.
Start by knitting the first row in your chosen stitch pattern. Whether you prefer a simple garter stitch, a delicate lace pattern, or a textured cable design, this is where you can showcase your knitting skills and creativity.
If you’re using a stitch pattern that requires repeating rows, make sure to keep track of your progress by using stitch markers or a row counter. This will help you stay organized and ensure that your necklace turns out beautifully.
Continue knitting rows until the body of the necklace reaches your desired length. If you’re unsure about how long to make it, you can try draping the knitting around your neck to get a better idea of how it will look when finished.
Remember to periodically try on the necklace as you go to ensure that it fits comfortably and has the desired drape. Depending on the type of fiber you’re using and your knitting tension, you may need to adjust the number of stitches or needle size to achieve the desired result.
Once the body of the necklace is complete, you can move on to the next step in the pattern, such as adding a closure or embellishments. Stay tuned for the next installment of this knitting tutorial to learn how to finish your knitted necklace with style!
Following the knitted necklace pattern
When it comes to creating a stylish and unique accessory, a knitted necklace can be a perfect choice. By following a knitted necklace pattern, you can create a beautiful piece of jewelry that adds a touch of glamour to any outfit. Knitting a necklace allows you to experiment with different colors and textures, making it a fun and creative project.
Before you begin, it’s important to choose the right yarn and needles for your knitted necklace. Thinner yarn and smaller needles will create a delicate and intricate design, while thicker yarn and larger needles will result in a chunkier and more statement piece. Once you have selected your materials, it’s time to start following the pattern.
Materials:
- Yarn of your choice
- Knitting needles (size depending on desired necklace thickness)
- Scissors
- Yarn needle
- Closure (e.g., lobster clasp)
Instructions:
- Cast on the desired number of stitches, typically ranging from 60 to 100, depending on the desired length of the necklace.
- Follow the pattern stitch by stitch, knitting or purling as indicated. Pay attention to any special instructions or stitch patterns.
- Continue knitting until the necklace reaches the desired length.
- Bind off your stitches to secure the end of the necklace.
- Attach the closure, such as a lobster clasp, to one end of the necklace using a yarn needle.
- Weave in any loose ends using the yarn needle.
- Your knitted necklace is now ready to be worn or gifted.
Remember to have fun and experiment with different patterns, colors, and textures when knitting your necklace. You can also add beads or other embellishments to make it even more unique and personalized. With a knitted necklace pattern, you can create a beautiful and fashionable accessory that showcases your knitting skills and style.
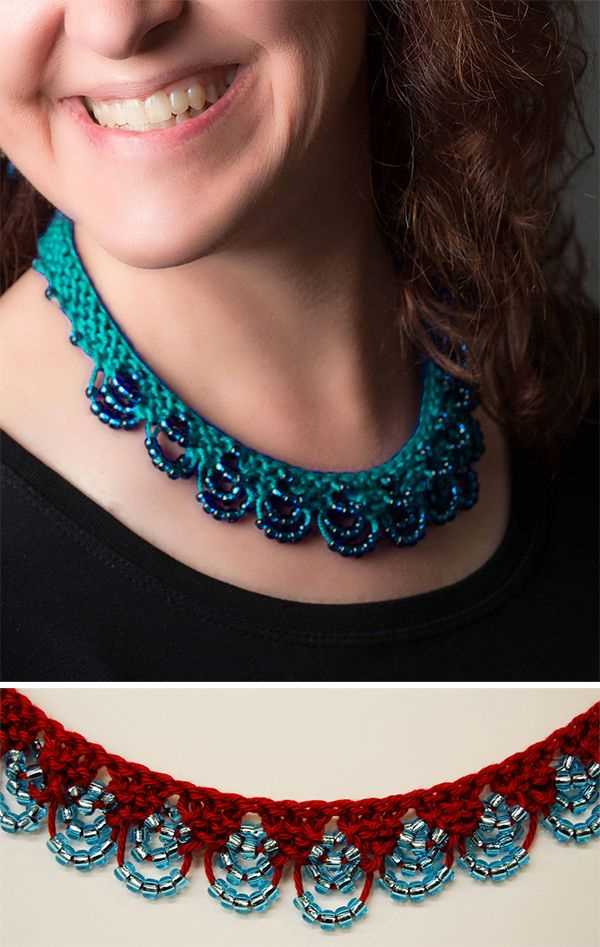
Adding beads or buttons to your necklace
Adding beads or buttons to your knitted necklace can add an extra touch of style and detail. It’s a great way to personalize your piece and make it unique. Whether you want to create a simple and understated look or go for something more elaborate, beads and buttons are a versatile accessory that can enhance the overall design.
Using beads: There are several ways to incorporate beads into your knitted necklace. One option is to thread the beads onto your yarn before you start knitting. This allows you to position the beads wherever you want in your design. Another option is to add the beads as you go, by slipping them onto a stitch. You can choose to space the beads evenly or create a pattern with different bead sizes and colors.
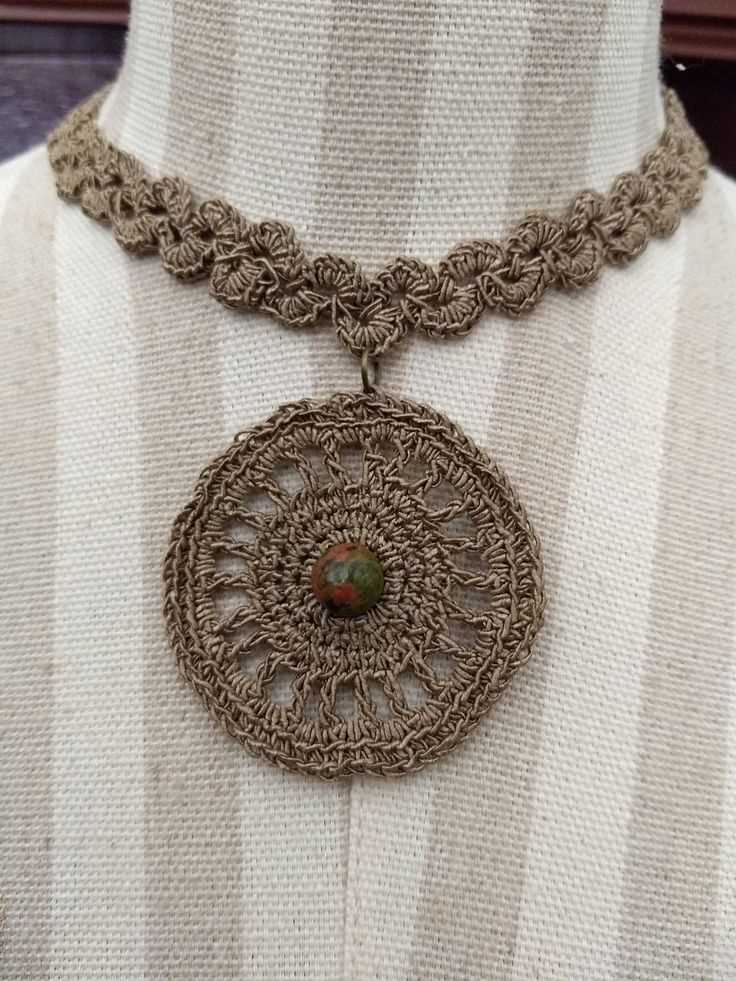
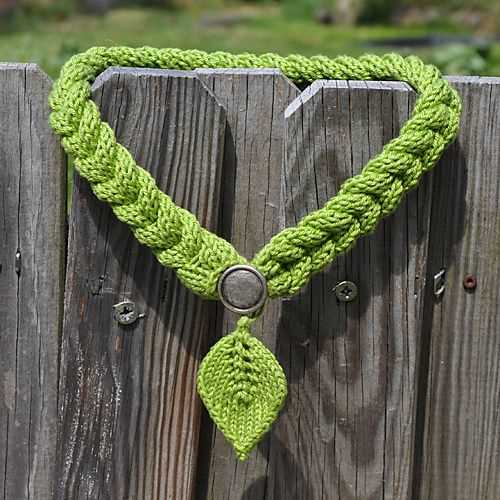
Using buttons: Buttons can also be a fantastic addition to your knitted necklace. They come in various shapes, sizes, and colors, allowing you to create different effects. You can sew the buttons onto the knitted fabric, either as a decorative element or as a functional closure. Alternatively, you can create buttonholes in your knitting pattern and use the buttons to fasten the necklace securely around your neck.
Both beads and buttons provide endless opportunities for creativity. They can be used to accentuate specific parts of the necklace, create focal points, or add texture to your design. Consider the color palette and style of your necklace and choose beads or buttons that complement the overall look. Whether you prefer a minimalist approach or enjoy experimenting with vibrant and bold accessories, adding beads or buttons to your knitted necklace will undoubtedly elevate its visual appeal.
Finishing touches: Blocking and weaving in ends
Once you have completed knitting your necklace, it’s time to add the finishing touches to make it look polished and professional. Two essential steps in this process are blocking and weaving in ends.
Blocking is a method of shaping and stretching a knitted item to ensure the stitches are even and the garment or accessory retains its intended shape. To block your knitted necklace, start by filling a basin with lukewarm water and adding a gentle wool wash or shampoo. Immerse the necklace in the water and let it soak for about 15 minutes. Carefully remove the necklace from the water, without wringing or twisting it, and gently squeeze out excess water. Lay a clean towel on a flat surface and place the necklace on top of it. Shape the necklace into its desired form and gently pat it into place. Allow the necklace to dry completely before wearing or storing it.
Weaving in ends is the process of securing and hiding the loose yarn tails or ends from the knitting project. To weave in ends on a knitted necklace, thread a yarn needle with one of the loose ends, and carefully insert the needle into the back of the knitted fabric, under a few stitches. Continue to weave the needle in and out of the stitches for a short distance. Pull the needle through the fabric, being careful not to pull the stitches too tightly. Trim any excess yarn, leaving a small tail. Repeat this process with the remaining loose ends of yarn, making sure to secure them neatly and discreetly.
These finishing touches of blocking and weaving in ends will give your knitted necklace a professional and polished look. Take the time to complete these steps, and you’ll be able to proudly wear your hand-knitted accessory with confidence.
Blocking your knitted necklace
A knitted necklace can be a beautiful accessory that adds a unique touch to your outfit. To ensure that it looks its best, it is important to block your knitted necklace. Blocking is a process of shaping and setting your knitting to achieve the desired dimensions and appearance. It helps to even out stitches, enhance drape, and give your necklace a professional finish.
Before blocking, you will need to gather a few essential tools. These include a blocking mat or towel, rustproof T-pins, a tape measure, and a spray bottle filled with water. Start by gently soaking your knitted necklace in lukewarm water with a mild detergent for about 15-20 minutes. Be careful not to agitate or twist the necklace to avoid stretching or distorting the stitches.
Once your necklace is thoroughly soaked, gently squeeze out excess water and transfer it onto a clean towel. Remove any excess water by rolling the towel and pressing down. Lay the necklace flat on a blocking mat or towel, taking care to arrange it into the desired shape. Use rustproof T-pins to secure the edges and corners, ensuring that it stays in place.
Next, use a tape measure to check the dimensions of your necklace. Adjust the placement of the T-pins if necessary to achieve the desired length and width. If you want to add gentle curves or waves to your necklace, you can gently stretch or shape the knitting while it is pinned down. Mist the necklace with water using a spray bottle to help set the shape.
Leave your knitted necklace to dry completely in a well-ventilated area. This process can take anywhere from a few hours to overnight, depending on the yarn and humidity levels. Once it is completely dry, carefully remove the T-pins and admire your beautifully blocked knitted necklace. It is now ready to be worn or gifted to someone special.
Weaving in Loose Ends for a Polished Look
After completing your knitted necklace, you’ll end up with a few loose ends of yarn, which can make the piece look messy and unfinished. Fortunately, weaving in these loose ends is a simple process that will give your necklace a polished look.
To weave in loose ends, you’ll need a yarn needle with a large eye, which will make threading the yarn easier. Start by threading the needle with one of the loose ends.
Steps to weave in loose ends:
- Insert the needle under the stitches along the back of your knitted necklace, following the natural path of the yarn.
- Gently pull the yarn through, making sure not to pull too tightly to avoid distorting the shape of the necklace.
- Continue weaving the yarn under the stitches for about an inch or two, or until you are confident that the loose end is secure.
- Trim off any excess yarn, leaving a small tail.
- Repeat the process for any remaining loose ends, making sure to weave them in different directions to ensure the durability of the weave.
Once all the loose ends are woven in and trimmed, inspect your necklace to make sure everything looks tidy and secure. If you notice any areas that need extra attention, go back and reinforce the weave.
By weaving in the loose ends, you not only achieve a polished look for your knitted necklace, but you also ensure that it stays intact and doesn’t unravel over time. So take the time to weave in those loose ends, and enjoy your beautifully finished accessory!
Q&A:
What materials do I need to make a knitted necklace?
To make a knitted necklace, you will need yarn, knitting needles, a tapestry needle, and a clasp or closure for the necklace.
What kind of yarn should I use for a knitted necklace?
You can use any type of yarn for a knitted necklace, but it is best to choose a lightweight yarn such as cotton or silk to ensure that the necklace is comfortable to wear.
How do I knit a knitted necklace?
To knit a knitted necklace, you will need to first cast on the desired number of stitches. Then, you can use various knitting stitches and techniques to create the desired pattern. Finally, you will need to bind off and attach a clasp or closure to complete the necklace.
Are there any specific patterns available for knitted necklaces?
Yes, there are many patterns available for knitted necklaces. You can find patterns online or in knitting books and magazines. Some popular patterns include lace necklaces, beaded necklaces, and chunky knit necklaces.
Can I customize the size of the knitted necklace?
Yes, you can customize the size of the knitted necklace by adjusting the number of stitches and rows you knit. You can also choose to make the necklace longer or shorter by adding or subtracting stitches or rows.