
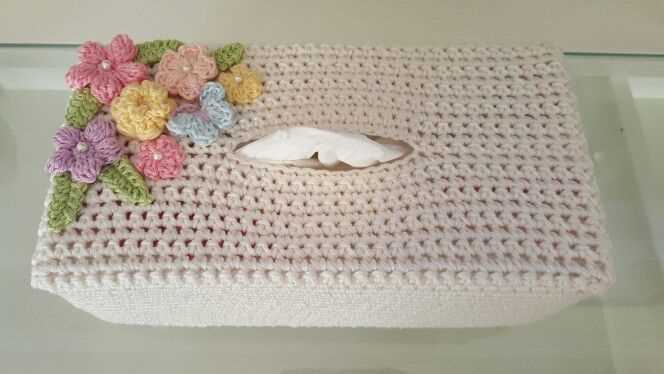
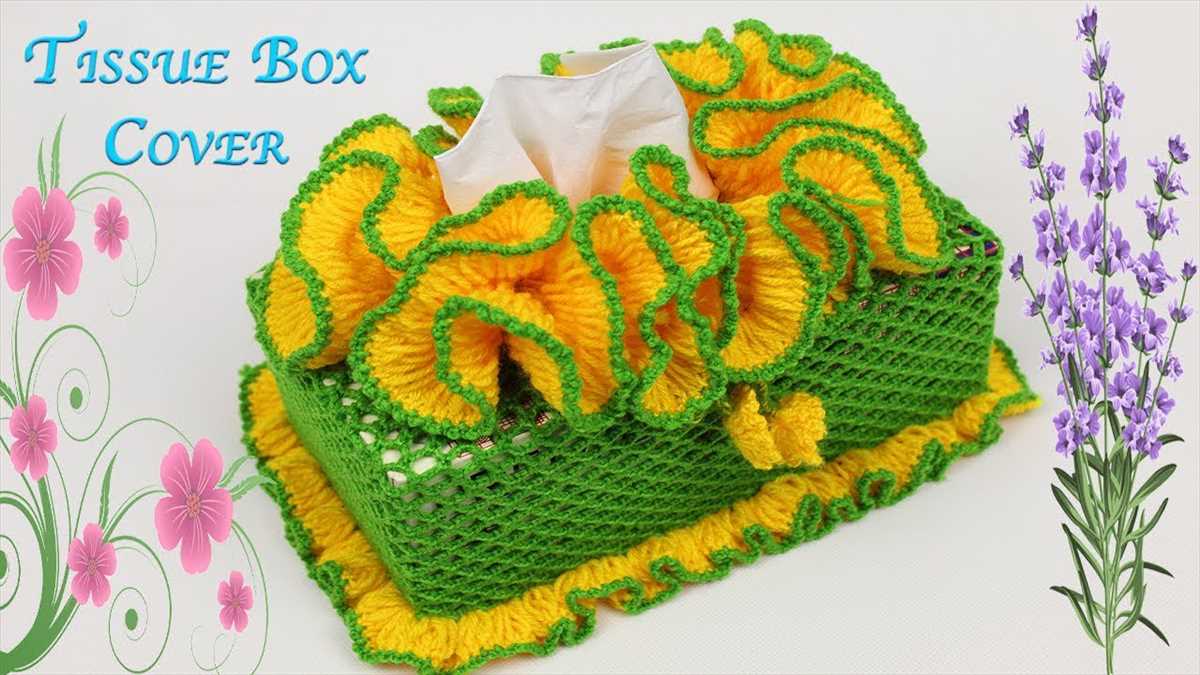
If you’re tired of the plain and boring tissue box covers you find in stores, why not create your own beautiful knitted lace cover? With this easy-to-follow pattern, you can add a touch of elegance and charm to any room in your home.
The knitted lace pattern featured in this tutorial is not only visually stunning, but also a fun and satisfying project to work on. Whether you’re an experienced knitter or just starting out, you’ll find that this pattern is a great way to add a personal touch to your home decor.
Not only is this knitted lace tissue box cover pattern customizable in terms of size, but you can also choose from a variety of different yarns and colors to match your personal taste and style. The pattern utilizes basic knitting stitches such as knit and purl, as well as yarn over and slip stitches to create the intricate lace design.
So why settle for a plain tissue box cover when you can create a one-of-a-kind knitted lace masterpiece? Follow this pattern and let your creativity shine! Whether you’re a beginner or an experienced knitter, you’ll love the end result and enjoy the process of creating something beautiful for your home.
Knitted Lace Tissue Box Cover Pattern
Looking for a pattern to add a touch of elegance to your tissue box? Look no further than this knitted lace tissue box cover pattern. With its delicate lace design, this cover will instantly elevate the look of any tissue box and add a touch of sophistication to your home decor.
To create this beautiful cover, you will need a set of knitting needles and yarn in your chosen color. The pattern is suitable for intermediate knitters and includes both written instructions and a chart for the lace pattern. The cover is worked in the round using a combination of knit, purl, yarn over, and decrease stitches to create the intricate lace design.
The pattern begins with a ribbed edging to ensure a snug fit around the tissue box. From there, you’ll move on to the lace pattern, which features a combination of openwork and texture stitches to create a visually stunning design. The pattern includes instructions for adjusting the size of the cover to fit different tissue box sizes.
This knitted lace tissue box cover makes for a thoughtful gift or a lovely addition to your own home. The lace pattern adds a touch of elegance to any room and is sure to impress guests. So why settle for a plain tissue box when you can dress it up with this stunning knitted lace cover?
Overview
In this project, we will provide an overview of a knitted lace tissue box cover pattern. Knitting is a popular craft that involves creating fabric by interlocking loops of yarn using knitting needles. Lace patterns are a delicate and intricate type of knitting that create openwork designs. A tissue box cover is a decorative and functional item that can be placed over a standard-size tissue box to add a touch of elegance to any room.
The knitted lace tissue box cover pattern we will be discussing is a beginner-friendly design that is suitable for knitters of all skill levels. The pattern includes clear, step-by-step instructions and is accompanied by helpful diagrams and charts. It uses basic knitting techniques such as knitting, purling, yarn overs, and decreases. The finished tissue box cover measures approximately 5 inches by 5 inches and can fit a standard-size square tissue box.
To complete this project, you will need a few supplies, including knitting needles in the appropriate size for the yarn you choose, a yarn needle for seaming, and a stitch marker to keep track of your progress. The pattern recommends using a lightweight or medium-weight yarn in a color of your choice to achieve the desired lace effect. You may also choose to incorporate additional embellishments, such as beads or ribbons, for added decoration.
The knitted lace tissue box cover pattern can be a great project for knitters looking to practice their lace knitting skills and create a beautiful and functional item. It also makes for a thoughtful handmade gift for friends and family. So grab your knitting needles and yarn, and let’s get started on this enjoyable and rewarding project!
Materials Needed
Before you begin knitting your lace tissue box cover, make sure you have all the necessary materials. The following items will be needed:
- Knitting Needles: You will need a pair of knitting needles in the appropriate size for the yarn you are using. Check the yarn label for the recommended needle size.
- Yarn: Choose a yarn that is suitable for lace knitting. It should be lightweight and have good stitch definition. You will need approximately 200-300 yards, depending on the size of your tissue box cover.
- Tissue Box: Measure your tissue box to ensure that the cover will fit properly. Note the dimensions so that you can adjust the pattern if needed.
- Tapestry Needle: This needle will be used for weaving in ends and sewing any seams if necessary.
- Stitch Markers: These can be helpful for keeping track of stitch patterns or marking important sections of your work.
- Scissors: A pair of sharp scissors will be needed for cutting yarn.
With these materials on hand, you will be ready to start knitting your lace tissue box cover. Make sure to follow the pattern instructions carefully, and don’t hesitate to reach out for help if you encounter any difficulties.
Gauge and Sizing
When knitting the lace tissue box cover, it is important to achieve the correct gauge in order to ensure the proper sizing of the finished product. To determine your gauge, it is recommended to knit a swatch using the same yarn and needles that you plan to use for the project. The gauge is typically measured over a 4-inch square, using the specified stitch pattern.
The pattern for the lace tissue box cover usually provides a suggested gauge, which is the number of stitches and rows per inch. It is important to note that if your gauge differs from the suggested gauge, it may result in a different size of the finished cover.
It is also important to consider the sizing of the tissue box cover. The pattern may provide instructions for different sizes, such as small, medium, and large. Before starting the project, measure the dimensions of your tissue box and choose the appropriate size for the cover accordingly.
In some cases, the pattern may include instructions for adjusting the sizing, such as adding or decreasing stitches. It is important to carefully follow these instructions to achieve the desired fit for your tissue box cover.
Pattern Instructions

The knitted lace tissue box cover pattern is a beautiful and intricate design that adds a touch of elegance to any room. To create this pattern, you will need intermediate knitting skills and basic knowledge of lace knitting techniques.
The pattern begins with a cast on of 61 stitches. You will then work the pattern in a repeating sequence of rows, following a chart that shows the stitches and their placement. It is important to read the chart carefully and keep track of your progress to maintain the correct pattern alignment.
- Row 1: Knit 3, purl 1, *knit 2 together, yarn over twice, slip 1, yarn over twice, knit 2 together through back loops, purl 1; repeat from * to last 3 stitches, knit 3.
- Row 2 and all even rows: Knit all stitches.
- Row 3: Knit 2, purl 2, *knit 2 together, yarn over twice, slip 1, yarn over twice, knit 2 together through back loops, purl 3; repeat from * to last 6 stitches, knit 2, purl 4.
- Continue repeating rows 1-4, following the chart, until the piece measures your desired length.
Once you have completed the desired length, you will finish the pattern by working a few rows of ribbing. This will create a snug fit around the tissue box and add a polished edge to the cover. Finally, bind off the stitches and weave in any loose ends. Your knitted lace tissue box cover is now complete and ready to be displayed in your home.
Step 1: Cast On
Before you can begin knitting your lace tissue box cover, you need to cast on. Casting on is the process of creating the first row of stitches on your knitting needle. For this pattern, you will be using a long-tail cast on method.
Gather Your Materials
To cast on for your knitted lace tissue box cover, you will need the following materials:
- Size 8 knitting needles
- DK weight yarn in the color of your choice
- Tape measure
- Tissue box for sizing
- Scissors
Make sure you have all of these materials on hand before you begin casting on.
How to Cast On
To cast on using the long-tail method, follow these steps:
- Hold the knitting needle in your right hand and make a slipknot with your yarn. Place the slipknot onto the knitting needle, leaving a long tail.
- Hold the knitting needle in your left hand. With your right hand, bring the yarn over the needle from back to front.
- With your right hand, insert the needle into the slipknot from left to right. Hold the needle parallel to the knitting needle.
- With your right hand, bring the long tail of yarn over the needle from right to left.
- With your right hand, pull the new loop through the slipknot, creating a new stitch on the needle.
- Repeat steps 2-5 until you have cast on the required number of stitches for your pattern.
Once you have cast on all of the stitches for your knitted lace tissue box cover, you are ready to move on to the next step of the pattern.
Step 2: Knit the Body
Once you have finished knitting the lace edging for your tissue box cover, it’s time to move on to knitting the body. The body of the cover will be worked in a basic stockinette stitch to create a smooth and even surface.
To begin, cast on the required number of stitches onto your knitting needles. The number of stitches will depend on the size of your tissue box. Make sure to leave a long tail of yarn at the beginning for seaming the edges later.
Next, knit every stitch in the first row to create a row of knit stitches. Then, continue knitting every row in the stockinette stitch pattern until the body of the cover reaches your desired height. Remember to keep a consistent tension while knitting to ensure an even and professional-looking finish.
If you want to add some variation to the body of the tissue box cover, you can experiment with different stitch patterns or add decorative elements such as cables or lace panels. Just make sure to adjust your stitch count accordingly to maintain the proper size and fit for your tissue box.
Once you have reached the desired height for the body of the cover, you can proceed to the next step in the pattern, which is shaping and finishing the top of the cover. This will involve reducing the number of stitches gradually to create a tapered shape that will neatly fit over the top of the tissue box.
Step 3: Add Lace Panel
In this step, we will be adding a beautiful lace panel to the tissue box cover. This lace panel will add a touch of elegance and sophistication to the design.
To begin, you will need to select a lace pattern of your choice. There are many different lace patterns available, ranging from simple to intricate designs. Once you have chosen your pattern, you can begin knitting it into the panel of the tissue box cover.
Materials:
- Knitting needles
- Lace-weight yarn in your desired color
First, cast on the required number of stitches for the width of the lace panel. The number of stitches will depend on the lace pattern you have chosen and the size of your tissue box cover. Make sure to leave a few stitches on each side for the border.
Once you have cast on the stitches, you can begin knitting the lace pattern row by row. Follow the instructions for the lace pattern carefully, making sure to include any yarn overs, decreases, or other stitch variations that may be required.
Continue knitting the lace pattern until the panel reaches your desired length. Make sure to periodically check the panel against your tissue box cover to ensure a proper fit.
Once the lace panel is the correct length, you can finish off the edges by working a few rows of garter stitch or another border pattern of your choice. This will help to give the panel a neat and finished look.
Finally, sew the lace panel onto the front of the tissue box cover using a yarn needle. Make sure to position the panel evenly and securely, ensuring that it covers the front of the tissue box cover completely.
With the lace panel in place, your knitted lace tissue box cover will be complete. The addition of the lace panel will give your cover a delicate and elegant look that is sure to impress.
Step 4: Knit the Top
Once you have completed knitting the sides of the tissue box cover, it’s time to move on to knitting the top. This is the part of the pattern where you will start to shape the cover to match the dimensions of your tissue box.
1. Begin by picking up stitches along the edge of the front panel. Using your knitting needle, insert it into the first stitch along the edge and wrap the yarn around the needle. Pull the loop through to create a new stitch. Continue picking up stitches along the edge, making sure to keep an even spacing between each stitch.
2. Work in the pattern stitch. Once you have picked up stitches all the way around the front panel, begin working in the pattern stitch. This may be a lace pattern or another decorative stitch, depending on the design of the cover. Follow the pattern instructions for the number of rows and stitches to work.
3. Shape the top. As you work the pattern stitch, you will also need to shape the top of the cover to fit the dimensions of your tissue box. This may involve decreasing or increasing stitches to create a tapered or rounded shape, depending on your preference.
4. Bind off. Once you have completed the desired number of rows and shaped the top to fit your tissue box, it’s time to bind off. Follow the pattern instructions for the appropriate bind off method. This will ensure that the top of the cover stays secure and in place.
By following these steps, you will be able to successfully knit the top of your lace tissue box cover. Remember to pay attention to the pattern instructions and make any necessary adjustments to fit your specific tissue box dimensions.
Step 5: Finishing Touches
After completing the lace pattern for your tissue box cover, it’s time to add those finishing touches that will make it look even more beautiful. Here are a few steps you can follow:
1. Blocking the Cover
Before you move on to the final steps, it’s important to block your knitted lace tissue box cover. This process helps to reshape the fabric and create a more polished look. To block the cover, start by soaking it in lukewarm water for about 20 minutes. Gently squeeze out the excess water and lay it flat on a clean towel. Use T-pins to stretch and shape the cover according to the desired dimensions. Allow it to air dry completely.
2. Sewing the Side Seam

Next, sew the side seam of the cover to create a cylindrical shape. Use a tapestry needle and matching yarn to carefully stitch the side edges together. Make sure to align the lace pattern and maintain an even tension as you sew. Once the seam is complete, weave in any loose ends for a neater finish.
3. Adding a Decorative Button or Ribbon
To enhance the aesthetic appeal of your tissue box cover, consider adding a decorative button or ribbon. This can be done by sewing the button or attaching the ribbon to the front of the cover. Choose a button or ribbon that complements the color and style of your cover to create a cohesive look.
4. Inserting the Tissue Box
Finally, it’s time to insert the tissue box into the cover. Gently slide the box into the cylindrical opening, ensuring that it fits snugly. Adjust the cover as needed to make sure the tissue box is properly enclosed.
With these finishing touches, your knitted lace tissue box cover is complete and ready to add a touch of elegance to any room!
Variations and Customizations
You can personalize your knitted lace tissue box cover pattern by making various variations and customizations. Here are some ideas:
- Color variations: Experiment with different colors of yarn to create unique and stunning designs. You can choose vibrant, contrasting colors for a bold look or subtle, pastel shades for an elegant touch.
- Stitch pattern variations: Instead of using the traditional lace stitch pattern, you can try different stitch patterns like cables, bobbles, or textured stitches to add more interest to your tissue box cover.
- Size customization: Adjust the size of the pattern according to the dimensions of your tissue box. You can make it larger or smaller to fit different box sizes.
- Add embellishments: Personalize your tissue box cover by adding embellishments like buttons, beads, or ribbons. These small details can make your cover look more decorative and unique.
- Mix and match: Combine different stitch patterns or colors to create a patchwork effect. This can give your tissue box cover a playful and eclectic look.
Remember, knitting is all about creativity and personal expression. Feel free to experiment with different variations and customizations to make your knitted lace tissue box cover pattern truly your own!