
Are you tired of the same old hair accessories and looking for a way to spice up your hair game? Why not try knitting your own hair accessories? Knitting is not only a fun and relaxing hobby, but it also allows you to create unique and personalized pieces.
With the wide variety of yarns available today, you can choose the perfect yarn to match your style and preferences. Whether you prefer a chunky and cozy headband for those cold winter days or a delicate and lacy hair scrunchie for a more feminine touch, there is a pattern out there for you.
Knitting your own hair accessories also allows you to customize the size, color, and design to perfectly suit your needs. You can create a set of matching accessories to go with different outfits or make personalized gifts for friends and family.
In this article, we will explore some of the best free patterns for knitted hair accessories. From headbands and hair bows to scrunchies and hair ties, there is something for everyone. So grab your knitting needles and get ready to elevate your hair style to the next level!
Knitted Hair Accessories Free Patterns
Knitted hair accessories are a stylish and practical way to add some flair to your hair. Whether you’re looking for a headband, a scrunchie, or a hair tie, there are plenty of free knitting patterns available to help you create the perfect accessory. These patterns are a great way to use up leftover yarn and show off your knitting skills.
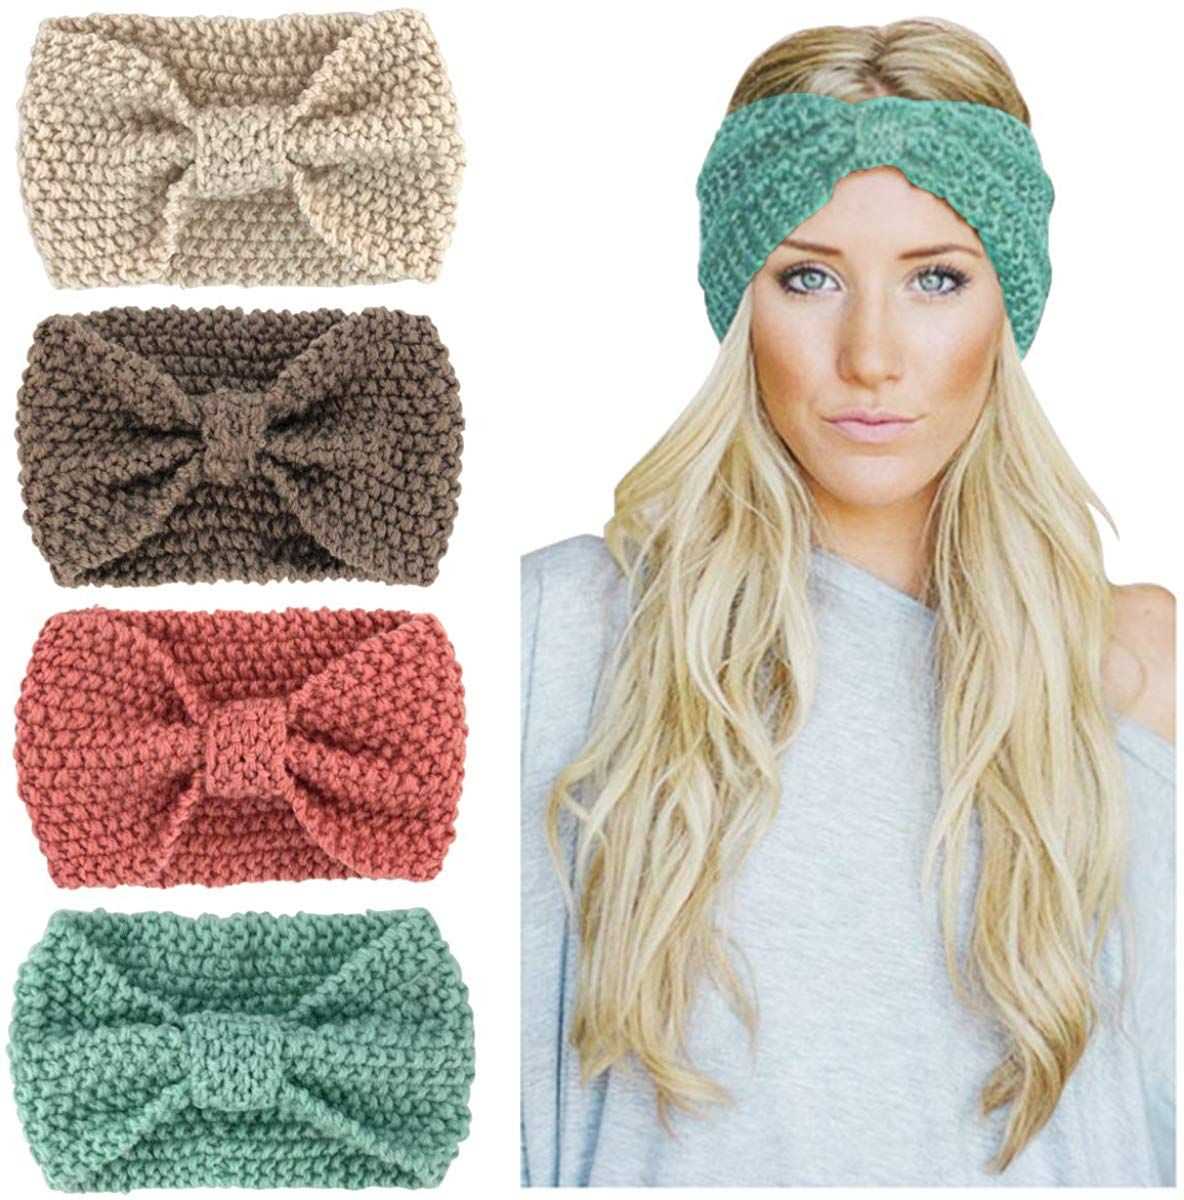
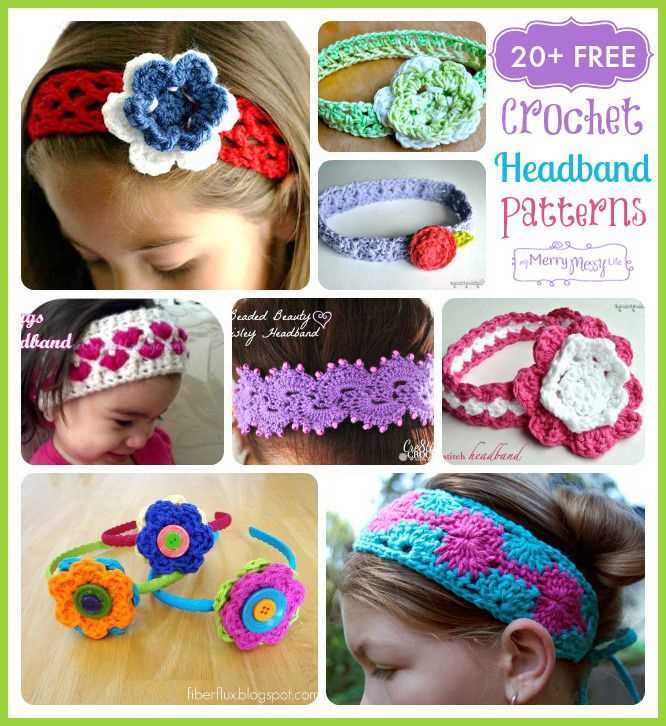
One popular hair accessory pattern is the knitted headband. This versatile accessory can be worn year-round and is perfect for keeping your hair out of your face. With a wide range of design options, you can customize your headband to match any outfit or occasion. From simple garter stitch bands to intricate lace patterns, there’s a headband pattern out there for every knitter.
1. Knitted Scrunchie
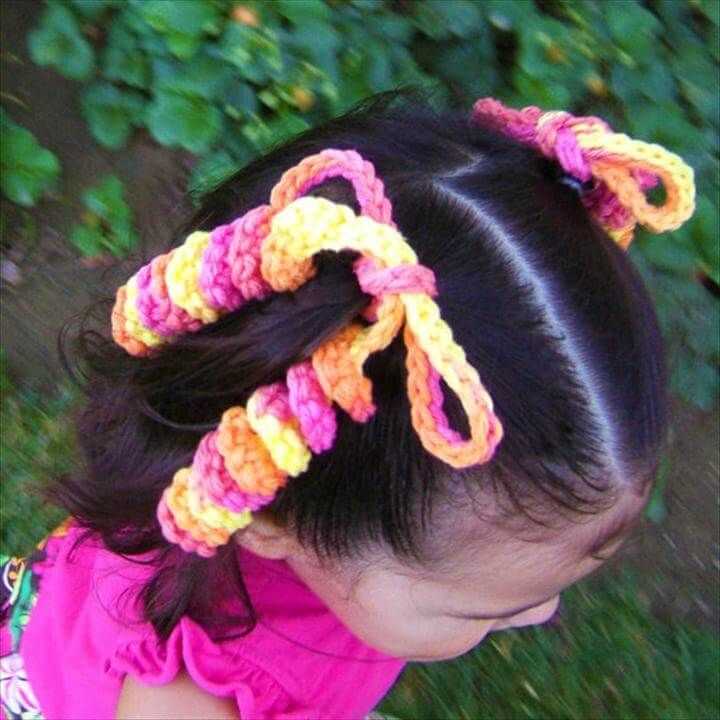
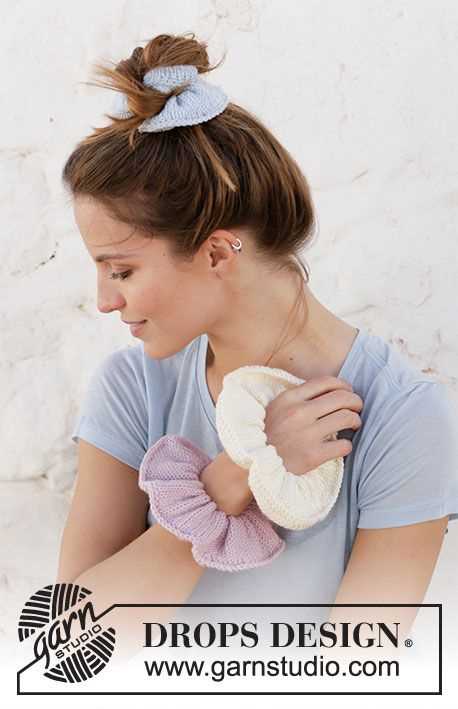
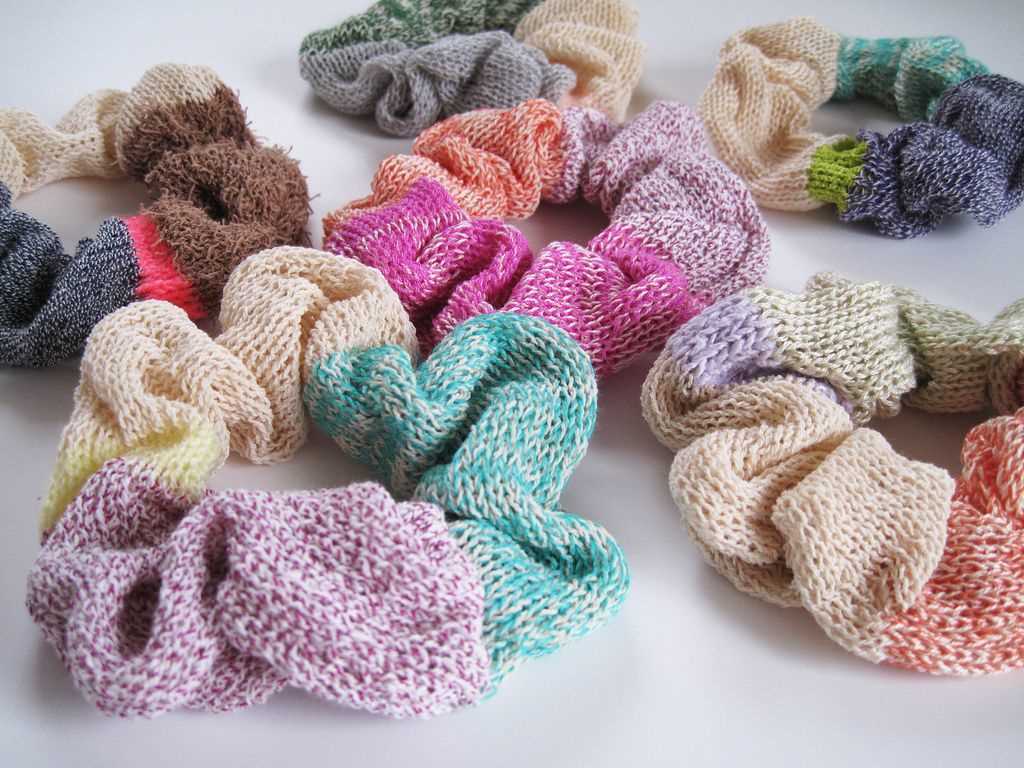
Scrunchies are making a comeback, and knitting your own scrunchies allows you to create unique and personalized accessories. There are many free patterns available that guide you through the process of knitting a scrunchie, often using a simple rib stitch or seed stitch for a textured look. Knitting a scrunchie is a quick and satisfying project that will add a touch of retro style to your hairstyles.
2. Cable Knit Hair Tie
Cable knitting adds a beautiful and intricate detail to any accessory, including hair ties. With a cable needle and some basic knitting skills, you can create a stunning hair tie that will hold your hair in place with style. Cable knit hair ties are perfect for adding a touch of elegance to your updos or for keeping your ponytail looking chic.
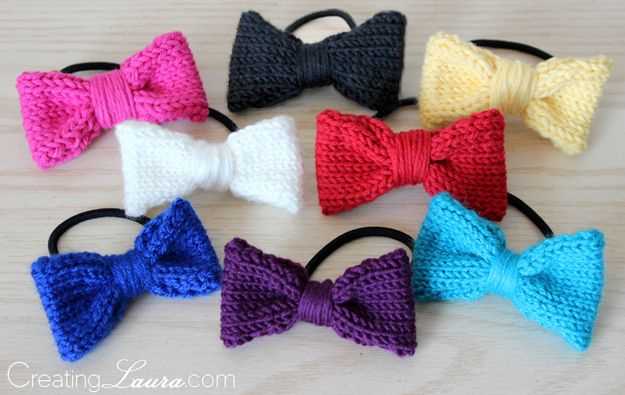
3. Bow Headband
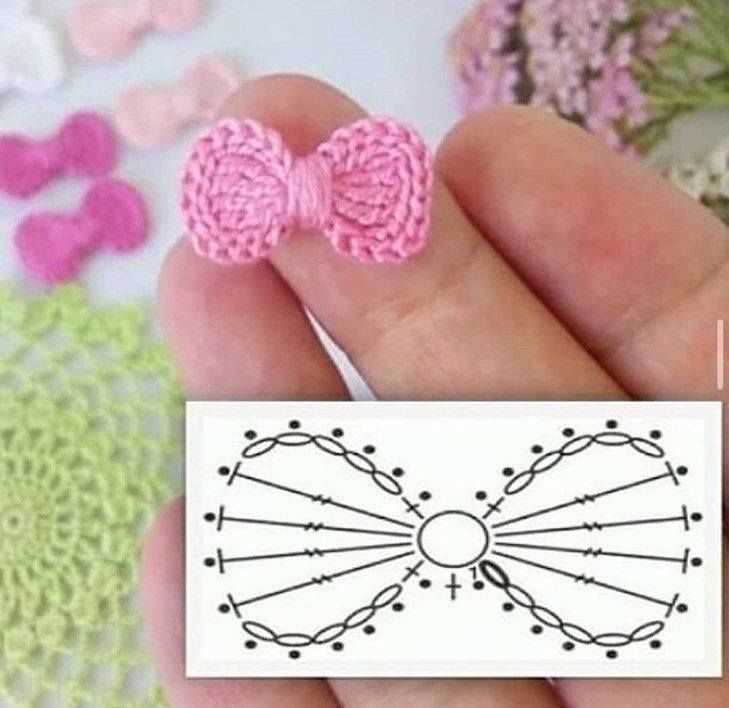
Add a playful twist to your headbands with a knitted bow. This pattern is a great way to use up any leftover yarn, as it requires only a small amount. The bow can be attached to a simple headband or incorporated into the design itself. Knitting a bow headband allows you to create a unique accessory that will make a statement.
These are just a few examples of the many knitted hair accessories free patterns available. Whether you’re a beginner or an experienced knitter, there’s a pattern out there that will suit your skill level and style. So grab your knitting needles and start creating beautiful and functional hair accessories today!
Beginner-Friendly Knitted Headband Pattern
Knitting can be a fun and relaxing hobby, and creating your own accessories is a great way to personalize your style. If you’re new to knitting or looking for a quick and easy project, this beginner-friendly knitted headband pattern is perfect for you.
To get started, you’ll need some basic knitting supplies, including a pair of knitting needles and some yarn. Look for a soft and chunky yarn that will provide warmth and comfort. You can choose any color or pattern that matches your personal style.
Here’s a simple pattern to follow:
- Start by casting on the desired number of stitches. For this headband, you’ll need about 12-15 stitches, depending on the thickness of your yarn and the width you want for your headband.
- Next, knit every row until the headband reaches your desired length. You can measure it against your head as you go to ensure a perfect fit.
- Once you’re happy with the length, bind off your stitches and weave in any loose ends.
- To finish off the headband, you can add a decorative touch like a bow or a flower. You can knit one separately and sew it onto the headband, or use a pre-made accessory and attach it with a few stitches.
This simple pattern is great for beginners because it only requires basic knit stitches and doesn’t involve any complicated techniques. It’s a quick project that you can easily complete in a weekend or even in an evening.
Once you’ve mastered this pattern, you can experiment with different yarns, stitch patterns, and embellishments to create unique and stylish headbands. Knitted headbands make great gifts for friends and family, or you can keep them for yourself to add a cozy and fashionable touch to your winter outfits.
Stylish Knitted Turban Pattern
Adding a stylish touch to your winter outfits is easy with this knitted turban pattern. Whether you’re heading out for a night on the town or just running errands, a turban adds a chic and cozy element to any look. With this easy-to-follow pattern, you’ll be able to create your own fashionable accessory in no time.
Materials Needed
- Medium weight yarn
- Circular knitting needles in a size that corresponds to the recommended gauge
- Stitch marker
- Tapestry needle
Instructions
- Start by casting on the required number of stitches, as indicated in the pattern.
- Join in the round, being careful not to twist the stitches.
- Follow the pattern instructions for the body of the turban, which may involve various stitch patterns and shaping.
- Once you’ve completed the body, it’s time to shape the top. Follow the pattern for any necessary decreases and shaping.
- Finish off the turban by binding off and weaving in any loose ends.
With this stylish knitted turban pattern, you’ll have a trendy accessory to keep you warm and fashionable all winter long. Whether you choose a bold color or a classic neutral, this turban is sure to become a staple in your cold-weather wardrobe. It’s an accessory that will make you stand out from the crowd and add a touch of elegance to any outfit.
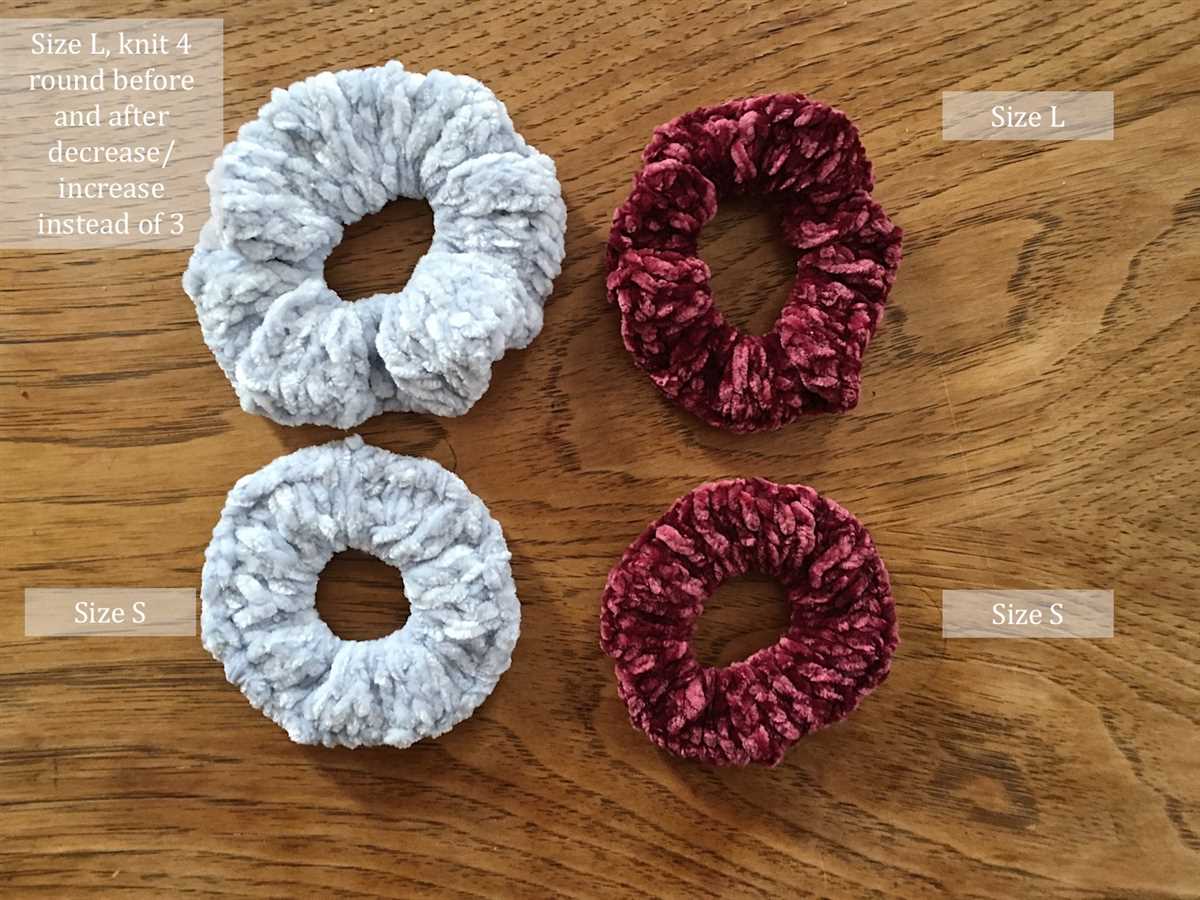
Easy Knitted Scrunchie Pattern
In the world of hair accessories, scrunchies have made a comeback and become a popular accessory for both adults and children. With their soft and stretchy fabric, they are gentle on the hair and come in a variety of colors and patterns. Why not add some handmade charm to your hair with an easy knitted scrunchie?
To make an easy knitted scrunchie, you will need a few basic supplies: yarn, knitting needles, and a hair elastic. Choose a yarn that is soft and stretchy, such as cotton or acrylic. You can use any size knitting needles, but a smaller size, such as US 6 or 7, will result in a tighter stitch and a more secure scrunchie. The hair elastic will be used to give the scrunchie its stretchiness.
Step 1: Cast on about 70 stitches onto your knitting needles. This number may vary depending on the thickness of your yarn and the desired width of your scrunchie. Make sure to leave a long tail of yarn for later.
Step 2: Start knitting in the round, joining the ends of your cast on stitches together. Use a stitch marker to mark the beginning of each round.
Step 3: Knit every round in a simple knit stitch until your scrunchie is the desired length. This can vary depending on the thickness of your hair and how many times you want to wrap the scrunchie around your hair.
Step 4: Bind off your stitches, making sure to leave a long tail of yarn for sewing. Cut the hair elastic so that it is about half the length of your knitted piece.
Step 5: Thread the hair elastic through the center of your knitted piece, using the long tail of yarn to sew it in place. Make sure to secure the ends of the hair elastic with a few stitches to prevent it from slipping out.
Step 6: Once the hair elastic is sewn in place, use the long tail of yarn to sew the ends of your knitted piece together, creating a loop. Make sure to secure the ends tightly.
Congratulations, you’ve made your own knitted scrunchie! Experiment with different yarns and stitch patterns to create a variety of scrunchies to match your outfits or give as gifts. These easy knitted scrunchies are not only fun to make, but they are also a practical and stylish accessory for any hair type.
Cute Knitted Bow Hair Clip Pattern
Accessorize your hair with this adorable knitted bow hair clip! This pattern is perfect for adding a touch of cuteness to any hairstyle. Whether you’re going for a casual, everyday look or dressing up for a special occasion, this knitted bow hair clip is sure to be a stylish addition to your ensemble.
To make this hair clip, you will need:
- DK weight yarn in the color of your choice
- Knitting needles in a suitable size for your yarn
- A hair clip or bobby pin
- Yarn needle
Begin by casting on the desired number of stitches, depending on how wide you want your bow to be. Knit in garter stitch until your piece measures the desired length for your bow. Then, bind off all stitches.
Next, fold your knitted piece in half to form the loop of the bow. Use your yarn needle to stitch the two ends together securely. Trim any excess yarn.
To create the center of the bow, cut a small piece of yarn and wrap it tightly around the middle of the bow loop. Tie a knot to secure the yarn in place, then trim the ends.
Finally, attach the hair clip or bobby pin to the back of the knitted bow. Use your yarn needle to sew the clip onto the back of the bow securely, making sure it is centered and positioned correctly.
Once your hair clip is complete, you can wear it in a variety of ways. Slide it into a half-up, half-down hairstyle, secure it to a ponytail, or use it to hold back bangs or flyaway hairs. The options are endless!
With this cute knitted bow hair clip pattern, you’ll have a fun and stylish accessory to wear all year round. Whether you’re dressing up for a special occasion or adding a touch of cuteness to your everyday look, this hair clip is sure to become a favorite in your accessory collection.
Chunky Knitted Head Wrap Pattern
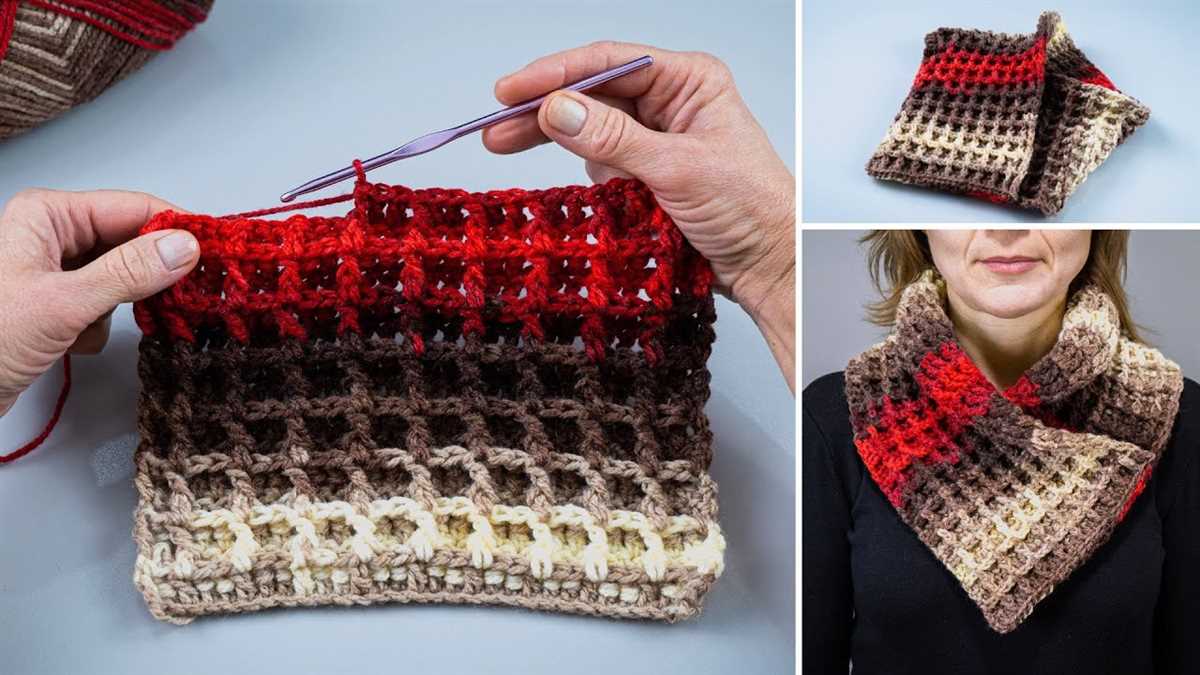
This chunky knitted head wrap pattern is the perfect accessory to keep your hair in place and add a touch of style to your winter outfits. With its thick and cozy design, it will also keep your ears warm during those cold and windy days.
To create this head wrap, you’ll need chunky yarn and a pair of size 10 knitting needles. The pattern calls for a simple garter stitch, making it perfect for beginners or those looking for a quick and easy project.
Start by casting on 15 stitches. Using the garter stitch, knit every row until your head wrap measures approximately 20 inches in length. This length can be adjusted to fit your head size by adding or subtracting stitches.
Once you’ve reached your desired length, bind off all the stitches. To finish the head wrap, simply sew the two ends together to create a loop. You can also add a decorative button or bow for a personalized touch.
This chunky knitted head wrap is not only functional but also stylish. It can be worn with your hair up or down and paired with any winter outfit. Whether you’re heading out for a walk in the park or running errands, this head wrap is sure to keep you warm and fashionable.
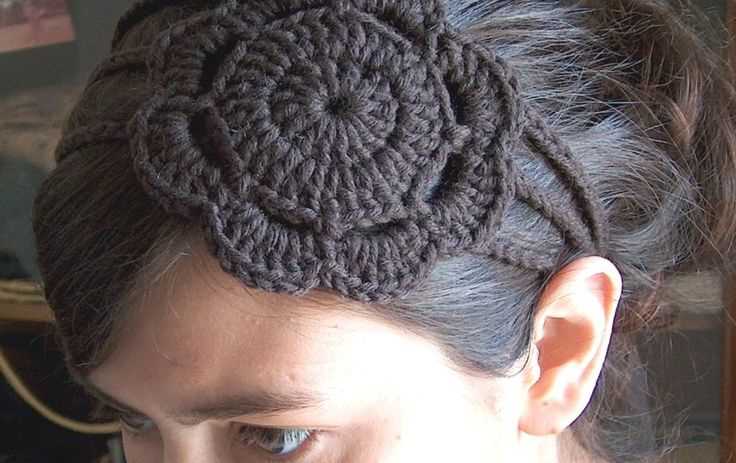
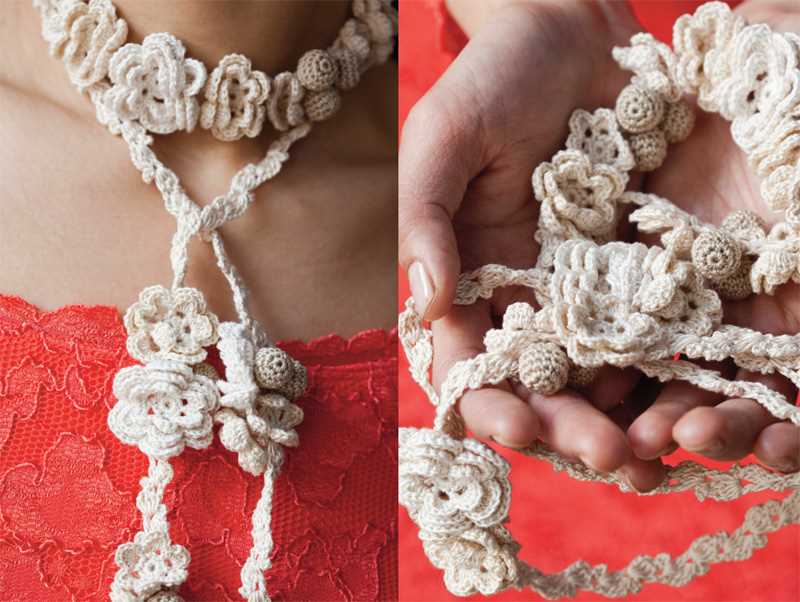
Knitted Flower Hair Pin Pattern
If you’re looking to add a touch of charm and elegance to your hairstyles, a knitted flower hair pin is the perfect accessory. Whether you want to dress up your everyday look or add a special touch to a formal updo, this knitted flower hair pin pattern is a beautiful and versatile option.
To create your own knitted flower hair pin, you’ll need some basic knitting skills and a few supplies. Start by gathering your materials, including a small amount of yarn in the color of your choice, knitting needles in the appropriate size for your yarn, and a hairpin or bobby pin for attaching the flower to your hair.
Once you have your supplies, you’ll start by casting on a small number of stitches to create the center of the flower. From there, you’ll work in rounds, increasing the number of stitches to create the petals. You can customize the size and shape of your flower by adjusting the number of stitches and the number of rounds you work.
Once you’ve finished knitting your flower, you’ll need to attach it to the hairpin or bobby pin. This can be done by sewing the flower directly onto the pin or by attaching it with glue or a small piece of fabric. Make sure the flower is securely fastened to the pin so it doesn’t come loose during wear.
Once your knitted flower hair pin is complete, you can wear it in a variety of ways. It can be worn as a standalone accent piece or paired with other hair accessories for a more elaborate look. You can also experiment with different hairstyles and placements to find the look that suits you best.
Overall, a knitted flower hair pin is a fun and creative project that allows you to showcase your knitting skills while also adding a unique and stylish accessory to your hair. Whether you’re a beginner or an experienced knitter, this pattern is a great way to try something new and elevate your hairstyle game.
Cozy Knitted Ear Warmer Pattern
Stay warm and stylish this winter with a knitted ear warmer! Whether you’re going for a walk in the snow or just need something to keep your ears cozy indoors, this knitted accessory is perfect for any occasion. With its simple yet elegant design, it will add a touch of charm to any outfit.
This ear warmer pattern features a wide band that covers the ears and keeps them protected from the cold. It is knit using a soft and warm yarn, making it comfortable to wear for extended periods of time. The pattern is suitable for both beginner and experienced knitters, so everyone can enjoy creating their own ear warmer.
To knit this cozy ear warmer, you will need the following materials:
- Worsted weight yarn in your choice of color
- Size 8 (5mm) knitting needles
- A tapestry needle for sewing up seams
The pattern starts with a simple rib stitch for the band, which provides a snug fit around the head. Then, it transitions into a stockinette stitch to create a smooth and stylish look. The ear warmer is finished off with a neat bind off and the seams are sewn up using the tapestry needle.
Once you have finished knitting the ear warmer, you can customize it with your favorite embellishments, such as buttons or bows. This will add a personal touch and make your ear warmer truly unique. With the cozy knitted ear warmer pattern, you’ll be ready to face the winter chill in style!
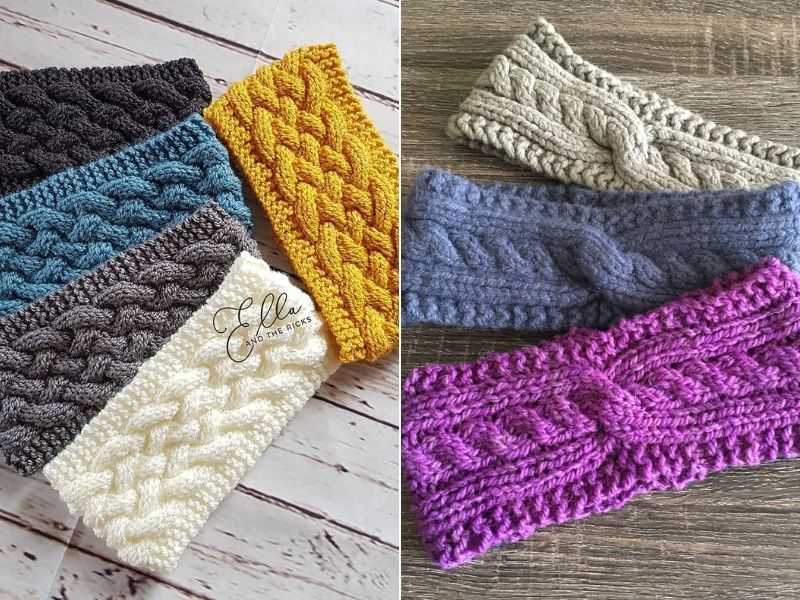
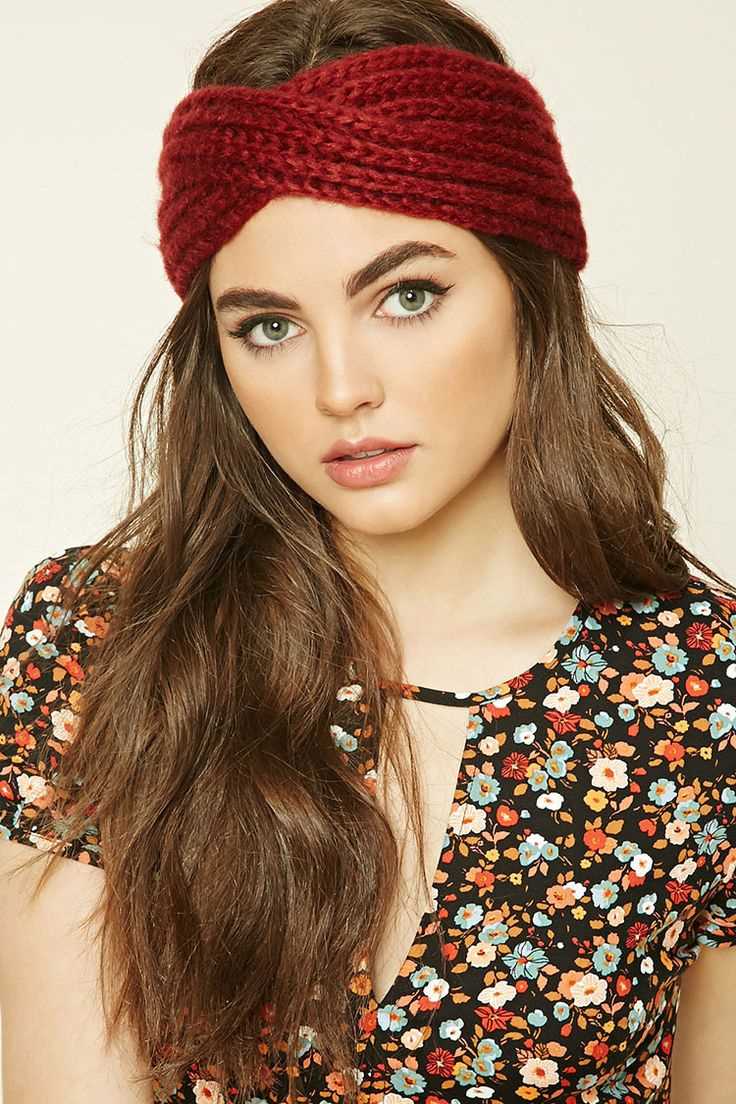
Knitted Headband with Twist Pattern
A knitted headband is a stylish accessory that can keep you warm and add a touch of flair to your outfit. The twist pattern adds a unique and eye-catching detail that will make your headband stand out from the crowd.
To create a knitted headband with a twist pattern, you will need a soft and comfortable yarn in a color of your choice. It is recommended to use a medium weight yarn and appropriate knitting needles to achieve the desired gauge for your headband.
To start, cast on a multiple of stitches to fit your head circumference. The twist pattern is created by working a simple cable stitch over a certain number of stitches. You can customize the width of the twist by increasing or decreasing the number of stitches involved in the cable.
Continue to knit the rows following the twist pattern until the headband reaches your desired length. Make sure to keep track of your rows to ensure an even and consistent twist pattern throughout the headband.
Once the headband is the desired length, bind off the stitches and sew the ends together to create a loop. You can add a button or a decorative embellishment to the headband for additional style.
The knitted headband with a twist pattern is a versatile accessory that can be worn with various hairstyles and outfits. It is perfect for keeping your ears warm during chilly weather or for adding a fashionable touch to your everyday look.
Elegant Knitted Hair Band Pattern
If you’re looking to add a touch of elegance to your hair accessories collection, this knitted hair band pattern is perfect for you. Made with soft and luxurious yarn, this hair band will not only keep your hair in place but also add a stylish flair to any outfit.
Materials:
- Knitting needles (size 6)
- DK weight yarn (color of your choice)
- Scissors
- Tapestry needle
Instructions:
- Cast on 20 stitches.
- Work in a rib stitch pattern (knit 2, purl 2) for 4 inches.
- Switch to stockinette stitch (knit one row, purl one row) for the next 6 inches.
- Switch back to rib stitch pattern for the last 4 inches.
- Bind off the stitches.
- Using a tapestry needle, sew the two ends of the hair band together to create a loop.
- Weave in any loose ends.
You can customize this hair band pattern by adding embellishments such as buttons, beads, or flowers. Experiment with different yarn colors to match your outfits or make a statement. This elegant knitted hair band is a versatile accessory that can be worn for any occasion.
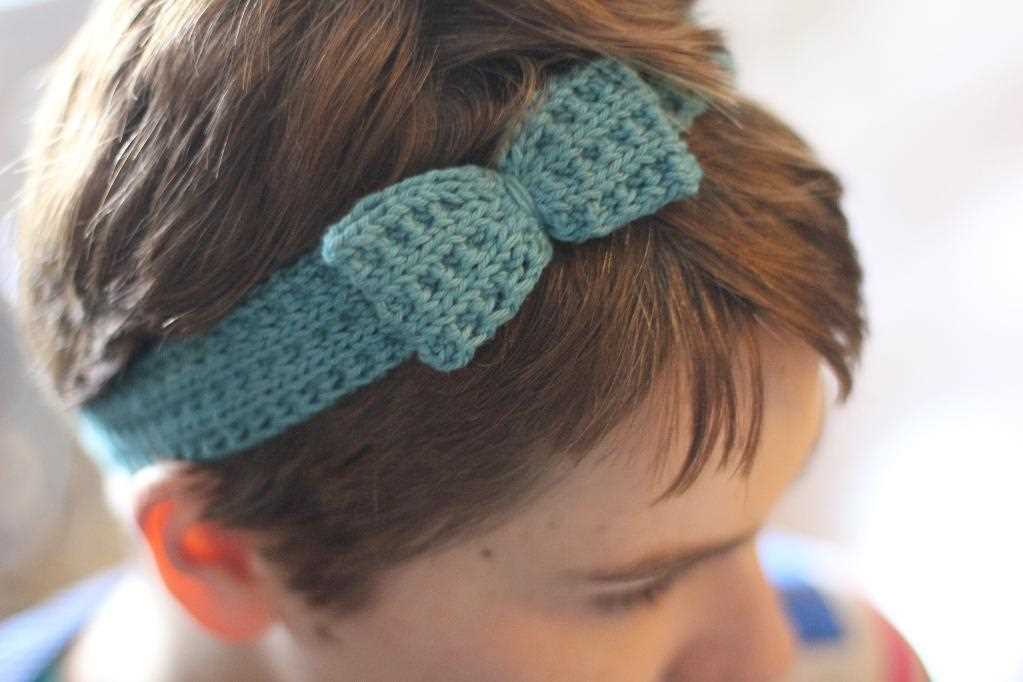
Knitted Bow Tie Hair Band Pattern
If you’re looking for a fun and fashionable way to accessorize your hair, why not try knitting your own bow tie hair band? This free pattern will guide you through the process of creating a stylish and unique hair accessory that is sure to turn heads.
To get started, you will need the following materials:
- Worsted weight yarn in your choice of color
- Size 8 knitting needles
- Yarn needle
- Scissors
Once you have gathered your materials, it’s time to begin knitting your bow tie hair band. Start by casting on 10 stitches. This will be the width of your hair band. Knit every row in garter stitch until your work measures approximately 12 inches.
Next, it’s time to shape the bow tie. To do this, you will need to increase and decrease stitches. Begin by knitting 4 stitches, then increasing 1 stitch in the next stitch. Knit 1, increase 1, and knit the remaining 4 stitches. Repeat this pattern for the next row.
Continue knitting in this pattern until you have a total of 16 stitches on your needles. Then, begin decreasing stitches in the same pattern. Knit 4 stitches, decrease 1, knit 1, decrease 1, and knit the remaining 4 stitches. Repeat this pattern for the next row.
Once you have decreased back down to 10 stitches, it’s time to finish off your bow tie hair band. Knit every row in garter stitch for another inch, then bind off all stitches. Use the yarn needle to weave in any loose ends.
Now you have a beautiful bow tie hair band that you can wear with pride. Whether you’re heading to a special occasion or just want to add a touch of elegance to your everyday look, this knitted accessory is the perfect choice.
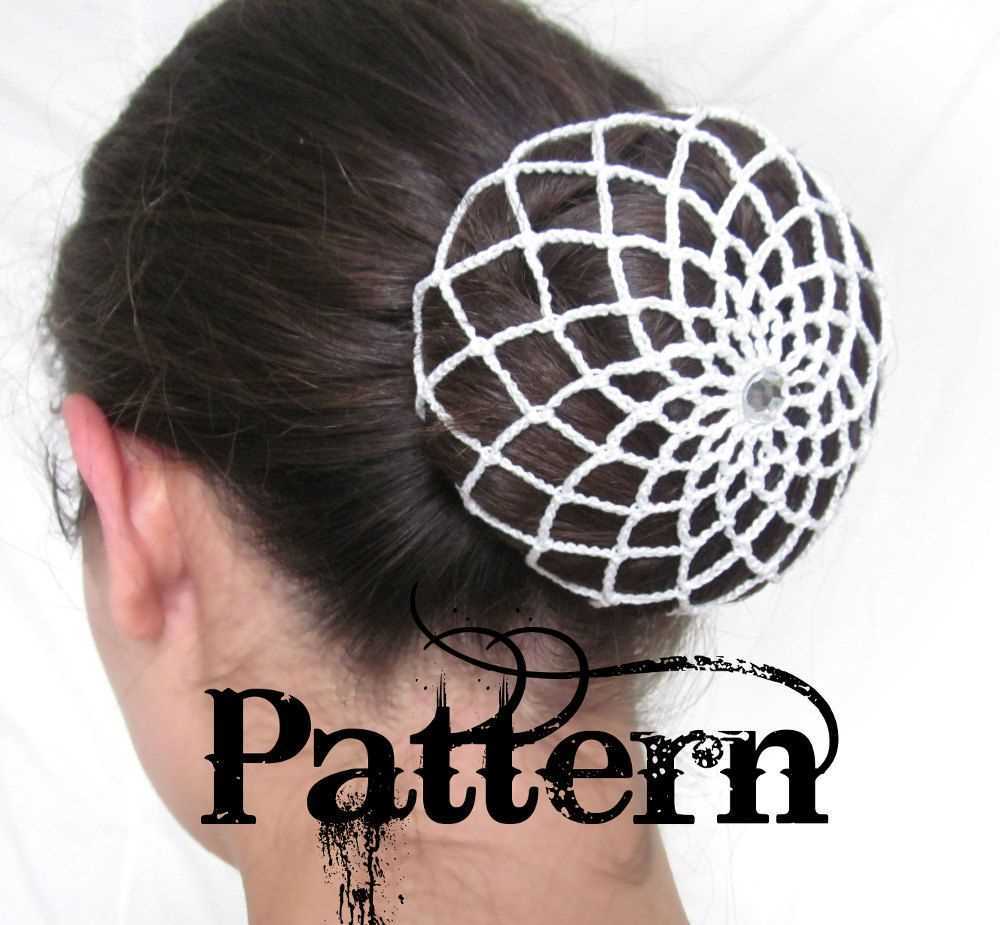
Delicate Knitted Lace Hair Accessory Pattern
Knitted lace hair accessories are a beautiful and elegant addition to any hairstyle. They add a touch of delicacy and sophistication, making them perfect for special occasions or everyday wear. With this free pattern, you can create your own delicate knitted lace hair accessory in no time.
To begin, you will need:
- 1 skein of lace weight yarn
- US size 2 (2.75 mm) knitting needles
- Tapestry needle
- Scissors
Instructions:
- Cast on 50 stitches using the long tail cast on method.
- Row 1: Knit all stitches.
- Row 2: Purl all stitches.
- Repeat rows 1 and 2 until the piece measures 12 inches in length.
- Bind off all stitches.
- Using the tapestry needle, weave in any loose ends.
- Bring the ends of the knitted piece together to form a circle.
- Secure the ends by stitching them together using the tapestry needle.
- Optional: Attach a small decorative button or bead to the center of the knitted circle.
Note: Feel free to customize this pattern by adding additional lace patterns, increasing the length, or using different colors of yarn. The possibilities are endless!
With this easy and versatile pattern, you can create a variety of delicate knitted lace hair accessories to match any outfit or style. Whether you’re attending a wedding, a fancy dinner, or just want to add a touch of elegance to your everyday look, these knitted lace hair accessories are sure to impress.