
Winter is the perfect time to pick up your knitting needles and create cozy accessories to keep you warm. One of the most popular projects among knitters is a stocking cap. Not only is it practical and functional, but it also allows for endless creativity and personalization. Whether you’re a beginner or an experienced knitter, this knit stocking cap pattern is suitable for everyone.
The pattern is designed to be versatile and adjustable, so you can make a cap to fit any head size. It features a ribbed brim for a snug and comfortable fit, and a simple knit stitch throughout the body of the cap. You can choose to make the cap in a solid color or experiment with different stripes or patterns to add your own personal touch.
This knit stocking cap pattern is a great way to improve your knitting skills and create a unique accessory for yourself or as a gift for a loved one. So grab your needles and some soft yarn, and let’s get started on this cozy winter project!
What is a stocking cap?
A stocking cap, also commonly known as a beanie or knit cap, is a type of hat that is made of knitted fabric and typically fits closely to the head. It is usually worn in colder temperatures to provide warmth and cover the head. Stocking caps are popular among both men and women and come in various styles, colors, and designs.
Key features of a stocking cap:
- Knitted fabric: Stocking caps are made of knitted fabric, often using soft wool or acrylic yarns. The knitting creates a stretchy and flexible material that can fit snugly on the head.
- Tight fit: A stocking cap is designed to fit closely to the head, covering the entire scalp and sometimes even the ears. The snug fit helps to retain body heat and provide insulation in cold weather.
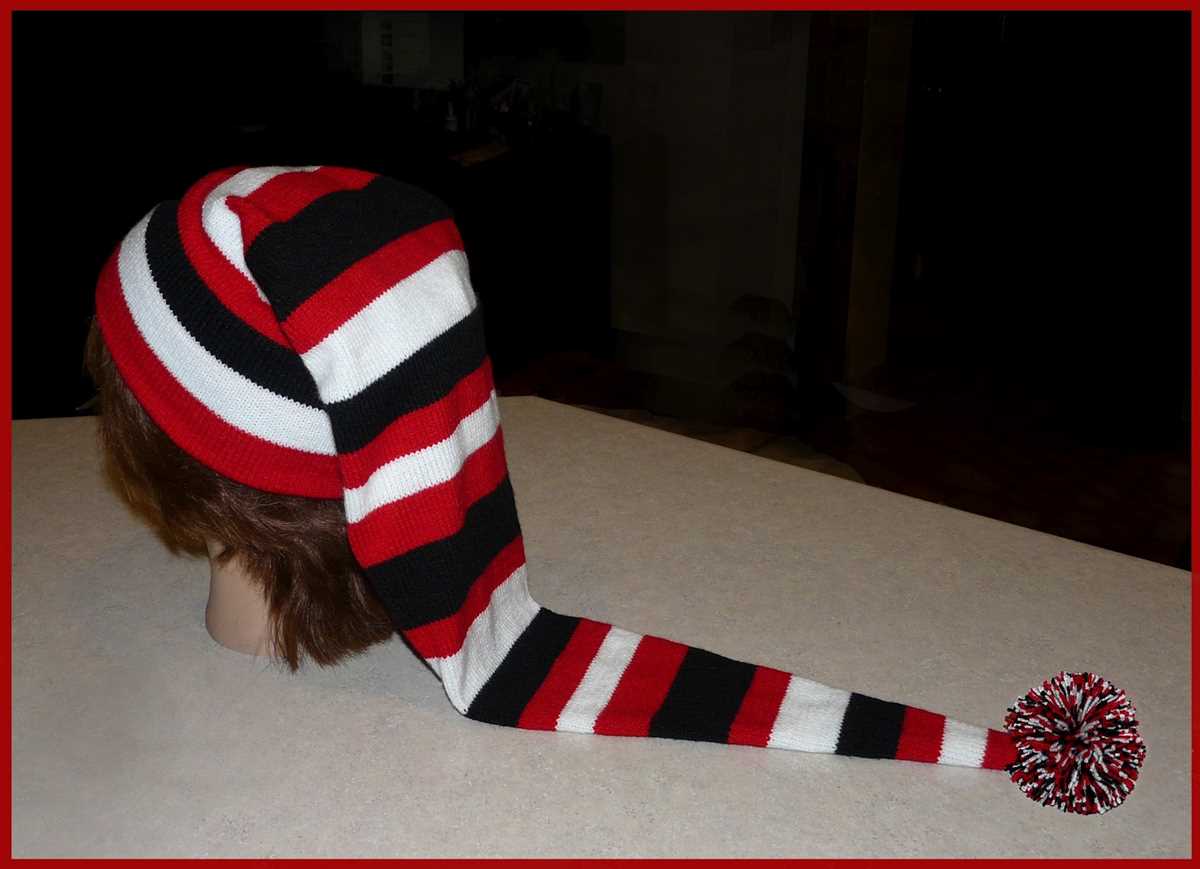
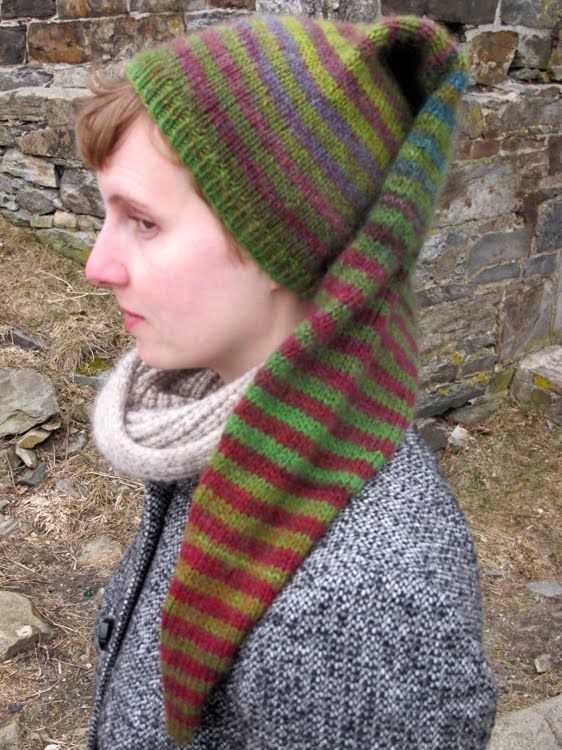
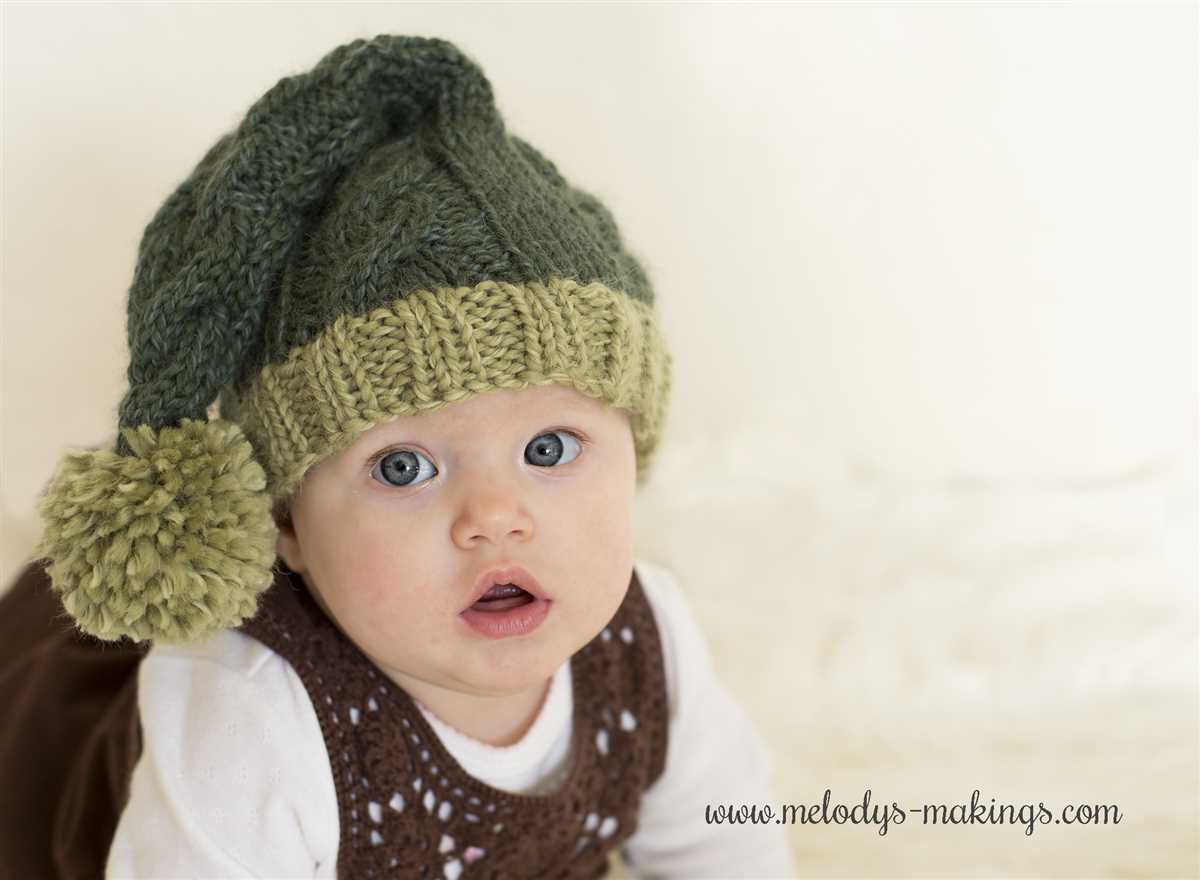
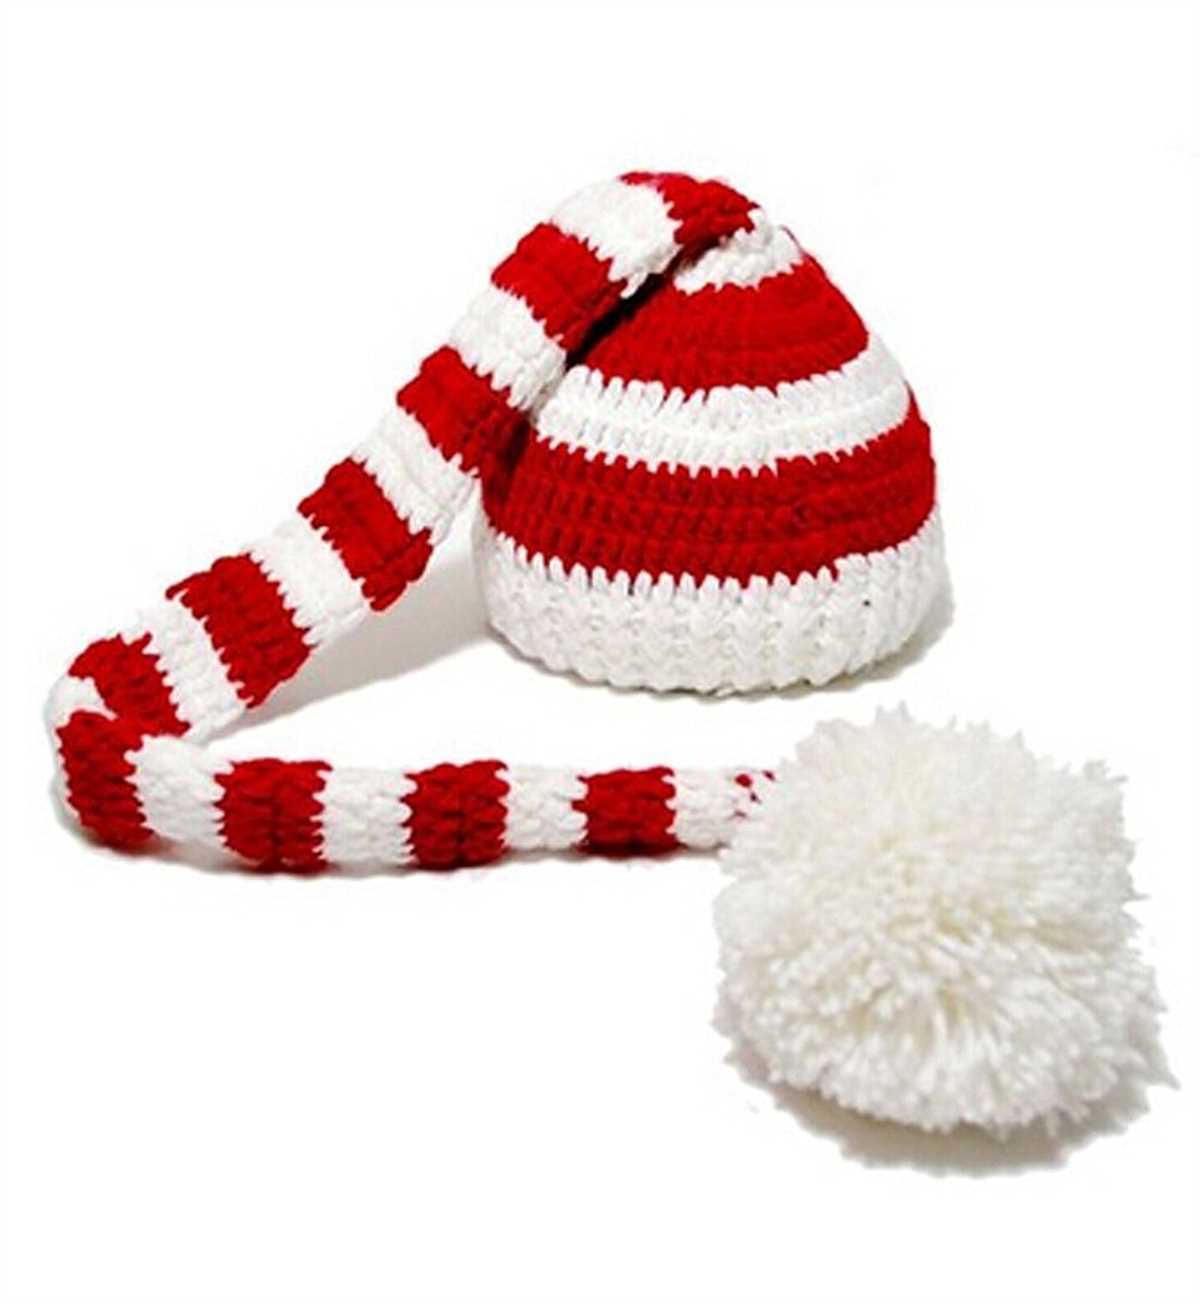
- Ear flaps or pom pom: Some stocking caps feature additional elements like ear flaps or a pom pom on top. Ear flaps provide extra warmth for the ears, while a pom pom adds a decorative touch.
Stocking caps are versatile accessories that can be worn for both functional and fashion purposes. They are commonly worn during winter activities such as skiing, snowboarding, and ice skating, as well as for everyday casual wear. Whether you want to keep warm in cold weather or add a stylish touch to your outfit, a stocking cap is an essential accessory to have in your wardrobe.
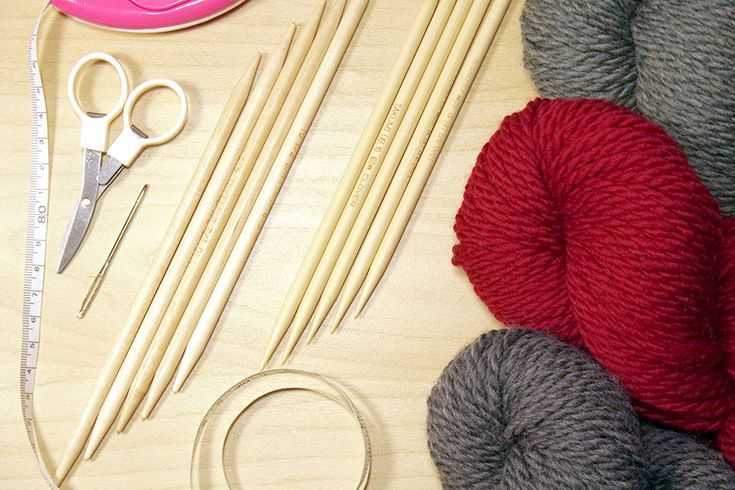
Choosing the right yarn and needles
When it comes to knitting a stocking cap, choosing the right yarn and needles is essential to ensure that your project turns out just as you envision. The type of yarn and needles you select will determine the overall look, feel, and fit of your cap.
Yarn: The yarn you choose should be suitable for hats and should offer warmth, comfort, and durability. It is important to consider the fiber content of the yarn, as well as its weight. Natural fibers like wool and alpaca are great choices for stocking caps as they provide excellent insulation. Acrylic yarn is another popular option, as it is lightweight, affordable, and machine washable. It is important to consider the recipient’s preferences and any potential allergies when selecting yarn.
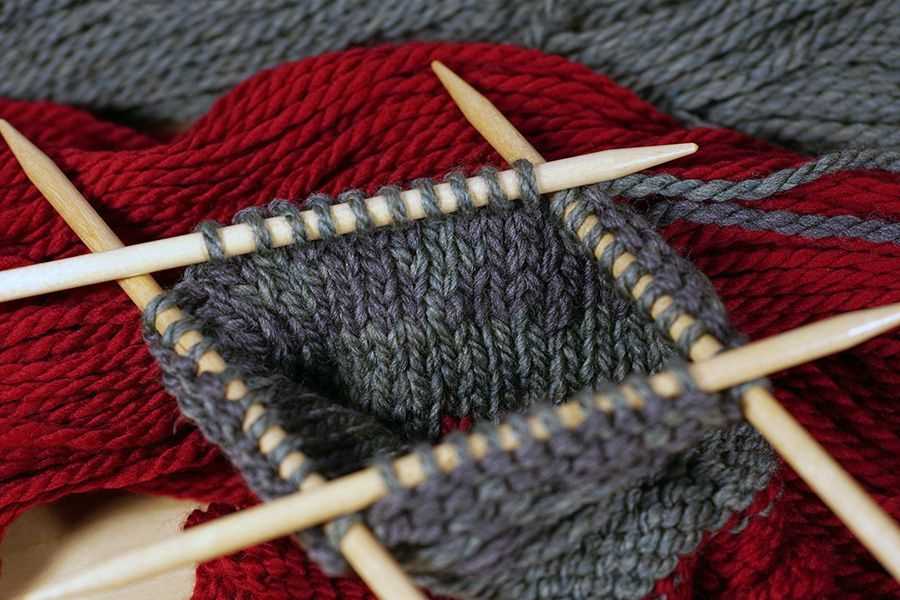
Needles: The size of the needles you choose will determine the gauge and the overall size of your cap. Generally, stocking caps are knit using circular needles or double-pointed needles (DPNs) to accommodate the small circumference. Circular needles are a popular choice as they allow for seamless knitting in the round. The length of the circular needles should be shorter than the circumference of the cap. DPNs are also a good option for smaller projects like stocking caps, especially if you are comfortable with them. The size of the needles should be based on the recommended gauge of the yarn. It is important to check your gauge before starting your project to ensure a proper fit.
Summary:
- Choose yarn that is suitable for hats, considering factors such as fiber content, weight, and warmth.
- Consider natural fibers like wool and alpaca for excellent insulation or acrylic yarn for affordability and easy care.
- Select circular needles or DPNs depending on your preference and comfort level.
- Ensure the length of the circular needles is shorter than the circumference of the cap.
- Choose needle size based on the recommended gauge of the yarn and check gauge before starting your project.
Getting started: casting on
Before you can begin knitting your stocking cap, you will need to cast on. Casting on is the process of creating the first row of stitches on your knitting needles. There are several different methods of casting on, but one common and easy method is the long-tail cast on.
To start the long-tail cast on, you will need a long tail of yarn, measuring approximately three times the width of the desired brim of your stocking cap. This extra length of yarn is used to create the foundation row of stitches. Hold the tail end of the yarn in your right hand, and the working yarn (connected to the ball of yarn) in your left hand. Grip the needle with your left hand, and hold it parallel to your thumb and index finger.
Step 1: Create a slip knot by making a loop with the tail end of the yarn, bringing the working yarn through the loop, and pulling it tight onto the needle.
Step 2: Hold the needle firmly in your right hand. Use your left hand’s thumb and index finger to create a “V” shape with the working yarn, laying it over the top of the needle.
Step 3: Insert the point of the needle from the right side into the “V” shape, under the first strand of yarn, and over the second strand.
Step 4: Loop the right-hand needle down and under the second strand of yarn, creating a loop around the first strand.
Step 5: Slide the loop off the left-hand needle, and tighten the stitch slightly by pulling on the working yarn with your left hand. This completes one cast-on stitch.
Repeat steps 3-5 until you have cast on the desired number of stitches for your stocking cap project. Once you have cast on all the stitches, you can continue with the next steps in your knitting pattern.
Knitting the body of the cap
After casting on the desired number of stitches, it’s time to start knitting the body of the cap. This is where the main part of the cap begins to take shape. To create the body, you will continue working in the round, using the chosen stitch pattern or plain knitting.
If you are using a stitch pattern, it’s important to keep track of the pattern repeats and follow the instructions carefully. This will ensure that the design is consistent throughout the cap. However, if you prefer a simpler look, plain knitting can also create a classic and versatile cap.
As you work the body of the cap, it’s a good idea to periodically try it on to check the fit. This will help you determine if you need to make any adjustments in terms of length or width. Remember that the cap will stretch slightly when worn, so it’s better to err on the side of a slightly snug fit.
Depending on the desired length of the cap, you can continue knitting until you reach the desired measurement or follow a specific set of instructions. Once you have reached the desired length, you can move on to the next step, which is usually shaping the crown of the cap.
Working the decreases
In knitting a stocking cap, working the decreases is an important step to shape the crown of the hat. Decreases are typically done at the top of the hat to create a more fitted and rounded shape. There are various ways to work the decreases, depending on the pattern and desired outcome.
One common method is to work the decreases in a symmetrical manner. This means that you decrease stitches evenly around the crown of the hat to create a uniform shape. For example, you may start by knitting two stitches together, then knit a certain number of stitches before repeating the decrease. This method ensures a balanced and neat appearance.
A different approach is to work the decreases in a spiral pattern. This creates a more slouchy and casual look. Instead of decreasing at regular intervals, you may choose to work the decreases in a random or organic pattern. This can be achieved by decreasing stitches in a staggered or offset manner. This technique adds a unique and artistic touch to the finished hat.
Regardless of the method used, it is important to carefully follow the pattern instructions for the decreases. This will ensure that the decreases are worked correctly and result in the desired shape. It is also important to count your stitches and regularly check your work to ensure accuracy. With practice and attention to detail, you can successfully work the decreases and complete your knit stocking cap.
Creating the brim
When knitting a stocking cap, the brim is an important element that adds both style and functionality. The brim helps to keep the cap in place and provides a comfortable fit around the forehead. There are several different techniques for creating the brim, depending on the desired design and level of difficulty.
1. Ribbing: One common method for creating the brim is by using ribbing. Ribbing involves alternating knit and purl stitches in a specific pattern, such as 2×2 ribbing (knit 2 stitches, purl 2 stitches, repeat). This creates a stretchy and flexible brim that can easily accommodate different head sizes. Ribbing is a great option for beginners as it is relatively easy to master.
2. Double brim: Another option for creating the brim is to knit a double layer. This involves knitting two layers of fabric and folding the brim up, creating a thicker and warmer edge. To achieve this, you will need to cast on additional stitches for the double layer and knit both layers simultaneously. This technique creates a sturdy and durable brim that is perfect for cold winter days.
3. Garter stitch: The garter stitch is another simple yet attractive method for creating the brim. This stitch pattern consists of knitting every row, creating a textured fabric that lies flat. It is an excellent choice for beginners as it only requires knowledge of the basic knit stitch. The garter stitch brim provides a clean and classic look.
When choosing a brim style for your stocking cap, consider the overall design and your knitting skill level. Experiment with different techniques to find the one that suits your preferences and delivers the desired results.
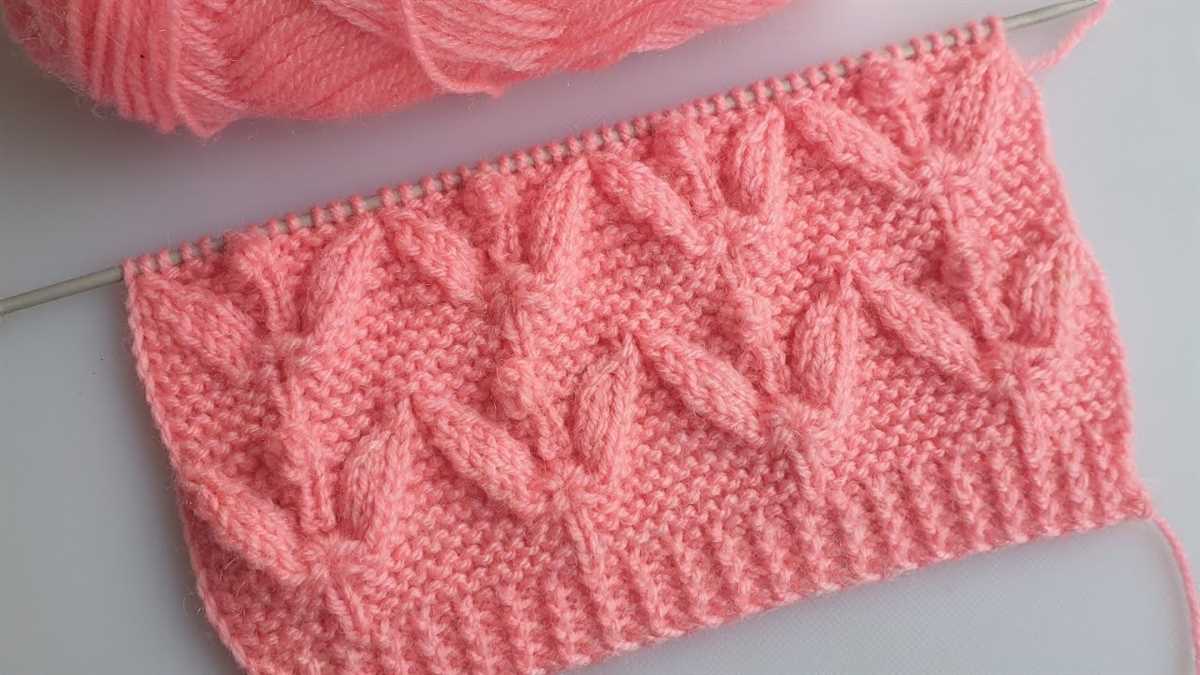
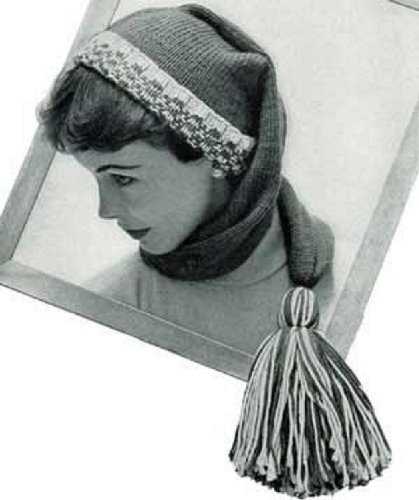
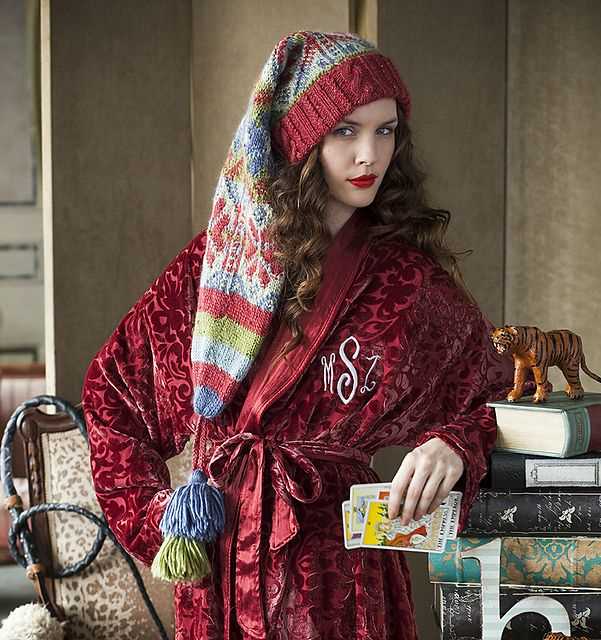
Adding stripes or other designs

Adding stripes or other designs to a knit stocking cap can add visual interest and make your cap truly unique. There are several ways you can incorporate stripes into your cap.
One option is to use different colors of yarn to create stripes. For example, you could alternate between two colors for each row to create a classic striped effect. You could also use multiple colors and create wider stripes by knitting several rows in one color before switching to the next. Experiment with different color combinations to find the look you like best.
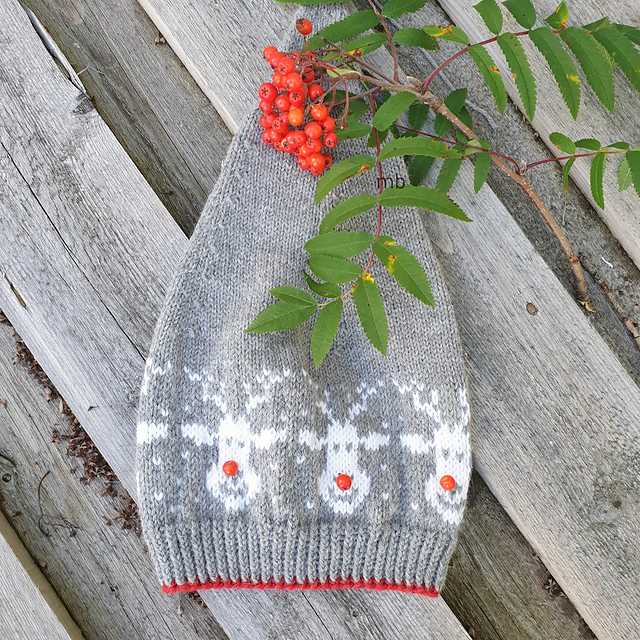
If you’re feeling more adventurous, you can try adding other designs to your cap. One popular option is to include a Fair Isle pattern. Fair Isle is a technique in which two or more colors are used in a row, creating intricate patterns. You could incorporate a small Fair Isle design on the brim of your cap or create an all-over Fair Isle pattern for a more striking effect.
Another option is to use intarsia, a technique that allows you to create large, bold designs on your cap. With intarsia, you work with different colors of yarn and create separate sections of color, knitting them together as you go. This technique is great for creating large shapes or images on your cap.
Whatever design you choose, adding stripes or other designs to your knit stocking cap can take it to the next level and make it truly your own. Have fun experimenting with different techniques and patterns to create a cap that reflects your personal style.
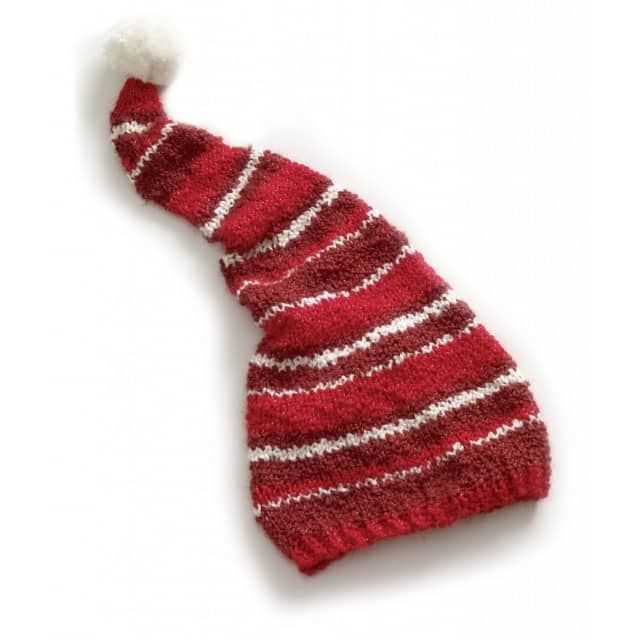
Optional Pompom or Tassel
If you want to add a little extra flair to your knit stocking cap, consider adding an optional pompom or tassel. This simple addition can elevate the look of your cap and give it a fun and playful touch.
Adding a pompom or tassel is easy and can be done using the same yarn you used to knit the cap. All you need to do is create a pompom or tassel using a pompom maker or by wrapping the yarn around your fingers or a piece of cardboard. Once you have your pompom or tassel, simply attach it to the top of your cap by sewing it securely in place.
The size and style of your pompom or tassel is entirely up to you. You can create a small and neat pompom for a more subtle look, or make a large and fluffy one for a statement piece. Similarly, you can make a simple tassel with just a few strands of yarn, or create a fuller and more intricate tassel with multiple layers and embellishments.
An optional pompom or tassel can be a great way to personalize your knit stocking cap and make it unique to your style. Whether you prefer a whimsical and playful look or a more sophisticated and elegant one, adding a pompom or tassel is a fun and creative way to customize your cap.
Blocking and Finishing
Once you have finished knitting your stocking cap, it is important to block and finish it to ensure that it maintains its shape and fits properly. Blocking is the process of shaping the knitted fabric by wetting it and allowing it to dry in the desired shape. This helps to even out any inconsistencies in tension and give the cap a professional finish.
Blocking: To block your stocking cap, start by filling a sink or basin with lukewarm water and adding a small amount of mild detergent. Submerge the cap in the water, gently squeezing it to ensure that it is fully saturated. Allow the cap to soak for about 15 minutes, then carefully remove it from the water without wringing or twisting it.
Finishing: Once you have blocked your stocking cap, it is time to finish any remaining details. This may include weaving in loose ends, sewing on any embellishments or attachments, or adding a decorative border. Take the time to carefully sew any seams or join any pieces together to ensure that the finished cap is sturdy and durable. If desired, you can also add a pompom or tassel to the top of the cap for an extra touch of style.
Tips for Blocking and Finishing:
- Use blocking mats or a clean towel to reshape and pin your cap into the desired shape.
- Allow the cap to dry completely before removing the pins or shaping aids.
- Always follow the care instructions for your yarn when washing and blocking.
- Take your time and pay attention to detail when finishing your cap to ensure a professional-looking result.
- Experiment with different techniques and materials to add unique finishing touches to your stocking cap.
In conclusion, blocking and finishing are essential steps in the knitting process that help to give your stocking cap a polished and professional appearance. By taking the time to block your cap and carefully finish any remaining details, you can ensure that your finished project will be a success.
Tips and tricks for a perfect cap
Making a knit stocking cap can be a fun and rewarding project, but it can also be a bit challenging. To help you create the perfect cap, here are some tips and tricks to keep in mind:
1. Choose the right yarn
When selecting yarn for your cap, it’s important to choose a suitable weight and fiber type. A medium-weight yarn like worsted or bulky will work well for a warm and cozy cap. Additionally, consider the fiber content of the yarn. Natural fibers like wool or alpaca will provide excellent warmth, while synthetic fibers like acrylic can offer durability and easy care.
2. Gauge swatch
Before you dive into the main cap pattern, it’s crucial to create a gauge swatch. This small sample will help you determine if you’re matching the recommended stitches and rows per inch. Making a swatch will ensure that your cap turns out the correct size and fit.
3. Circular needles

Using circular needles for your cap project can make your knitting experience much more comfortable. Circular needles allow the weight of your project to rest on your lap, reducing strain on your hands and wrists. Additionally, knitting in the round on circular needles eliminates the need for seaming the cap later.
4. Count your stitches
It’s important to count your stitches regularly to ensure you’re staying on track with the pattern. Mistakes in stitch count can result in an ill-fitting or misshapen cap. Make use of stitch markers to indicate important sections or pattern repeats, which can also help you keep track of your stitches.
5. Finishing touches
Once you’ve completed the main body of the cap, don’t forget the finishing touches. Blocking your cap can help even out the stitches and give it a smoother appearance. Additionally, you can add a pom-pom or other decorative elements to personalize your cap and give it that extra special touch.
By keeping these tips and tricks in mind, you’ll be well on your way to creating a perfect knit stocking cap. Happy knitting!
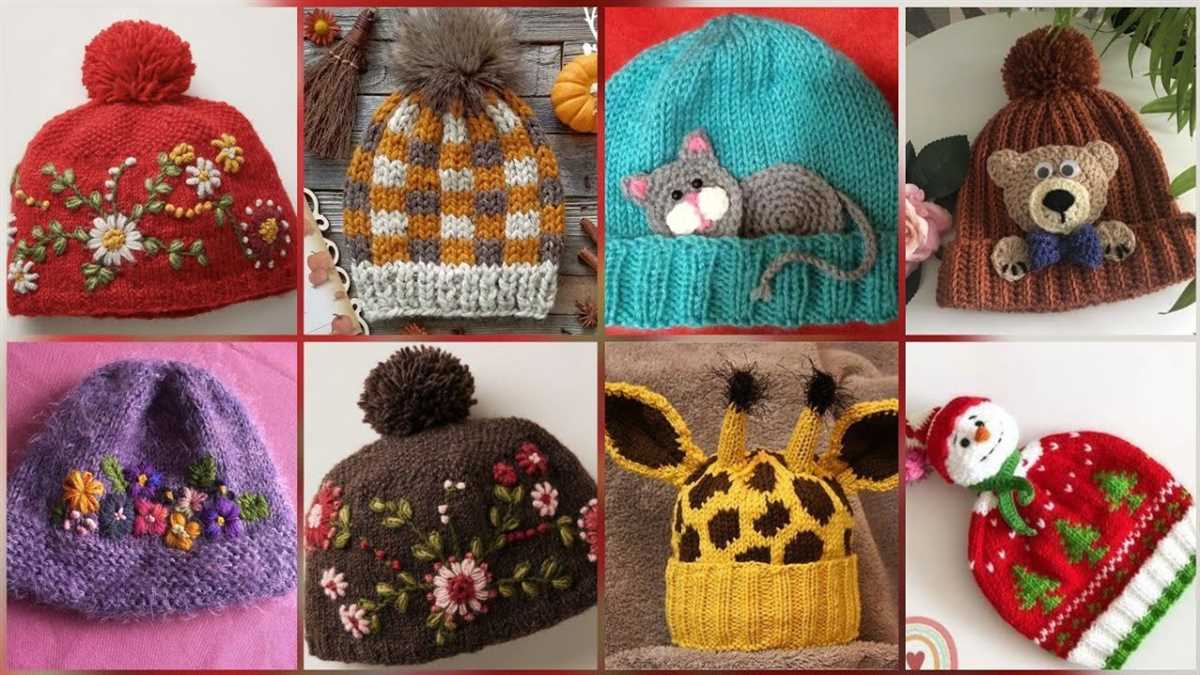
Additional Knit Stocking Cap Patterns
Whether you’re a beginner or an experienced knitter, there are plenty of resources available to find additional knit stocking cap patterns. Here are a few suggestions:
- Online knitting communities: Websites like Ravelry and Knitting Paradise have extensive pattern databases where you can search for stocking cap patterns using various criteria such as yarn weight, skill level, and designer.
- Knitting magazines and books: There are numerous publications focused on knitting that regularly feature new patterns. Check out popular magazines like Vogue Knitting or Interweave Knits, or visit your local library or bookstore for knitting books.
- Knitting blogs and websites: Many talented knitters and designers share their patterns for free or for purchase on their personal blogs or websites. Explore the world of knitting blogs or search for specific keywords like “free stocking cap knitting pattern”.
- Video tutorials: If you prefer visual instructions, there are many knitting tutorial videos available on platforms like YouTube. Search for specific keywords such as “stocking cap knitting tutorial” to find step-by-step instructions.
With these resources at your disposal, you’ll never run out of knitting inspiration for your next stocking cap project. Happy knitting!
Q&A:
How do I knit a stocking cap?
To knit a stocking cap, you will need to gather the necessary materials such as yarn, knitting needles, and a yarn needle. Then, you can follow a pattern of your choice or create your own design. Start by casting on the required number of stitches and then continue knitting in the round until the cap reaches the desired length. Finish off by binding off the stitches and weaving in any loose ends.
What size needles should I use for knitting a stocking cap?
The size of needles you should use for knitting a stocking cap will depend on the thickness of the yarn you are using and the desired tension or gauge. Generally, a medium to chunky weight yarn will work well with size 10.5 – 11 (6.5 – 8 mm) knitting needles. However, it is always recommended to check the label of your chosen yarn for recommended needle size and to make a gauge swatch to ensure the correct fit.
Can I knit a stocking cap with any type of yarn?
Yes, you can knit a stocking cap with any type of yarn. However, the thickness and texture of the yarn will affect the finished look and feel of the cap. Thicker yarns will create a chunkier and warmer cap, while thinner yarns will result in a more lightweight and delicate cap. It’s important to choose a yarn that suits your preferences and the intended use of the cap.
Are there any special knitting techniques required for making a stocking cap?
While there aren’t any specific special techniques required for making a stocking cap, it can be helpful to know how to knit in the round using circular or double-pointed needles, as most stocking caps are worked in this manner. Additionally, knowledge of basic knitting stitches such as knit and purl, as well as increases and decreases, will be useful in creating shaping and decorative elements in your cap.
Where can I find free stocking cap knitting patterns?
You can find free stocking cap knitting patterns on various websites, such as knitting blogs, knitting pattern databases, and yarn manufacturer websites. Some popular websites for finding free knitting patterns include Ravelry, LoveKnitting, and AllFreeKnitting. These patterns are often available in a wide range of styles, sizes, and difficulty levels, so you can easily find one that suits your preferences and skill level.
Can you recommend a knit stocking cap pattern?
Yes, I can suggest a simple and popular pattern for a knit stocking cap. It involves casting on stitches using circular knitting needles, knitting in a rib stitch pattern for a stretchy brim, and then continuing in stockinette stitch for the body of the cap. You can customize it by adding stripes, a pom-pom, or other embellishments as desired. There are many variations of stocking cap patterns available online or in knitting books, so you can choose one that suits your skill level and style preferences.