
If you enjoy knitting and want to add a touch of handmade charm to your kitchen, a knit potholder is the perfect project for you. Whether you’re a beginner or an experienced knitter, this easy and quick pattern is sure to result in a beautiful and functional potholder.
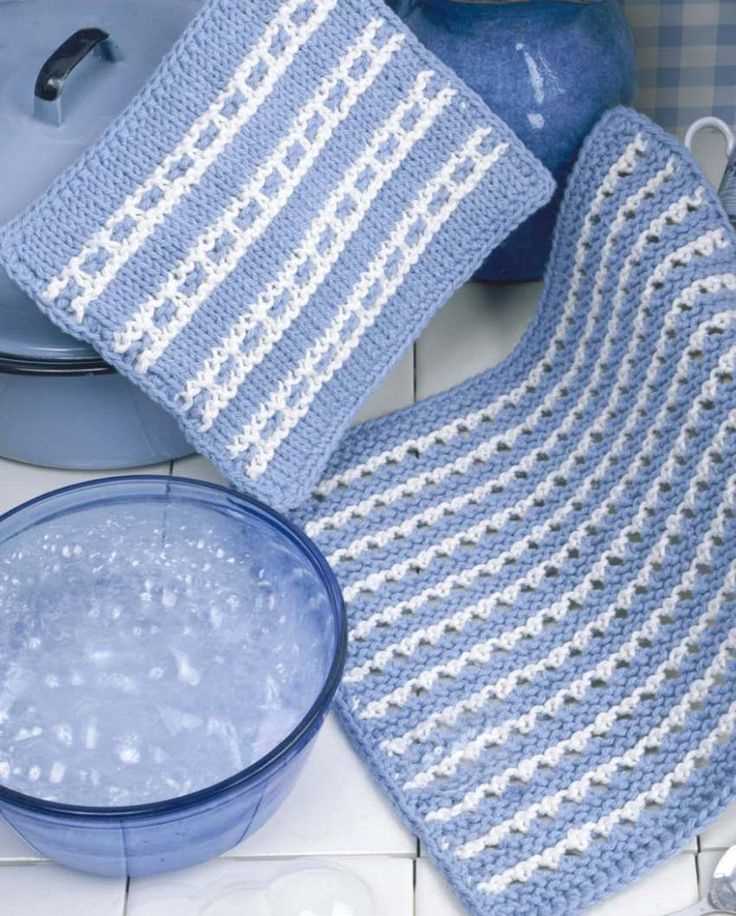
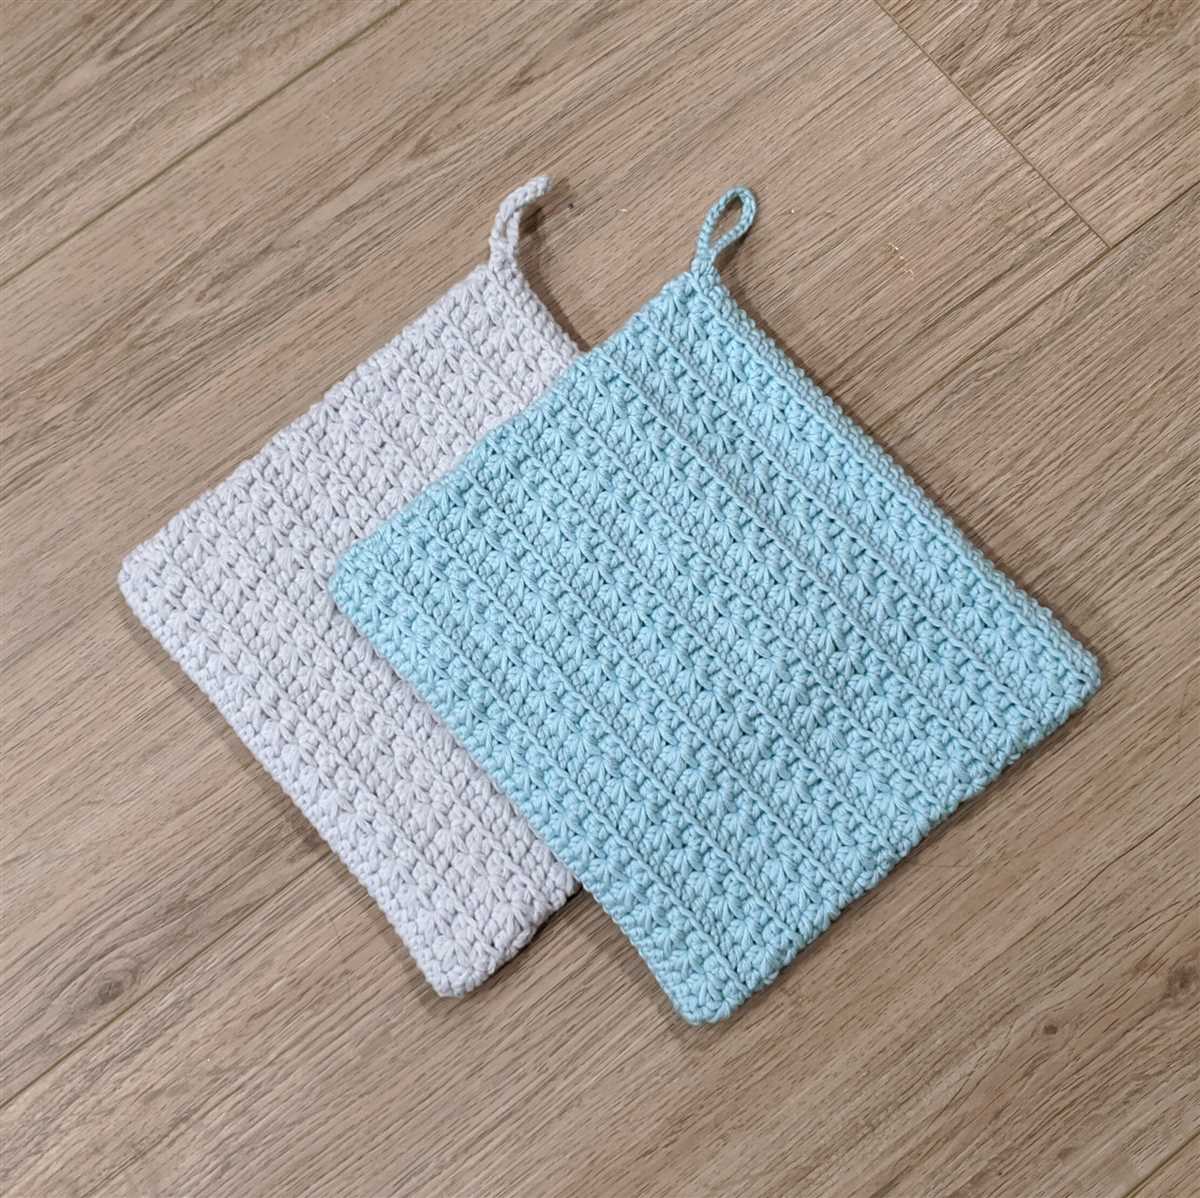
This pattern uses basic knit and purl stitches, making it accessible for knitters of all levels. The finished potholder has a simple yet elegant design, making it a great addition to any kitchen decor. Plus, it’s thick enough to protect your hands from hot pots and pans, making it both stylish and practical.
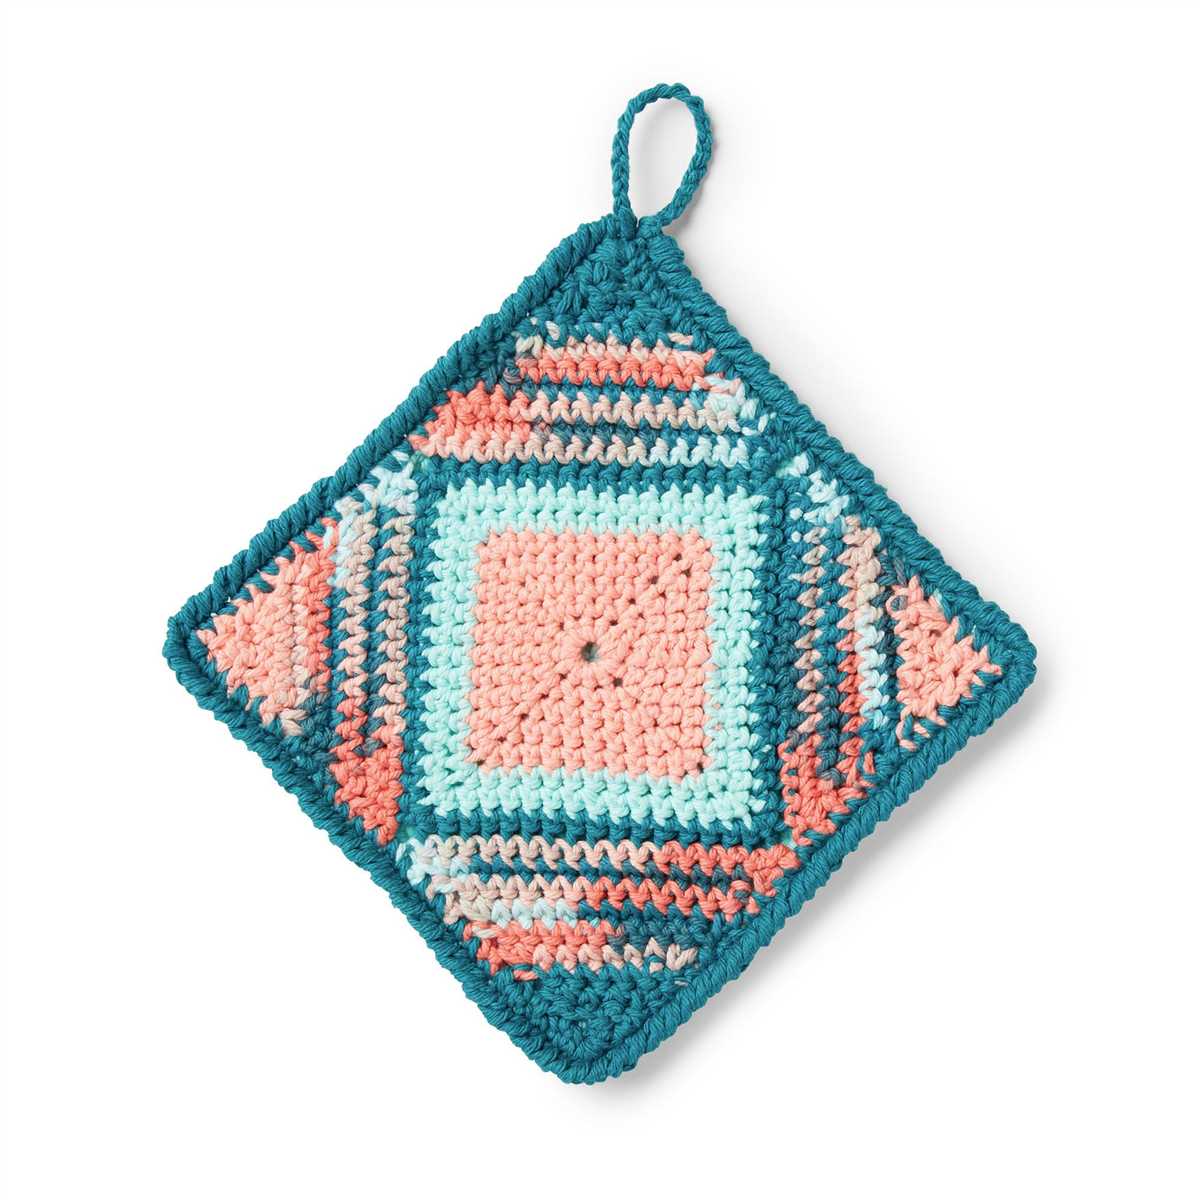
The pattern provides instructions for knitting a square potholder, but you can easily customize it to make rectangular or round potholders. You can also experiment with different colors and yarn weights to create unique patterns and textures. With this knit potholder pattern, the possibilities are endless!
Knit Potholder Pattern Easy
If you’re looking for a quick and easy knitting project, a knit potholder is the perfect choice. Potholders are not only practical, but they also make great gifts. With just a few simple steps, you can create a beautiful and functional potholder that will brighten up your kitchen or make a thoughtful present for someone special.
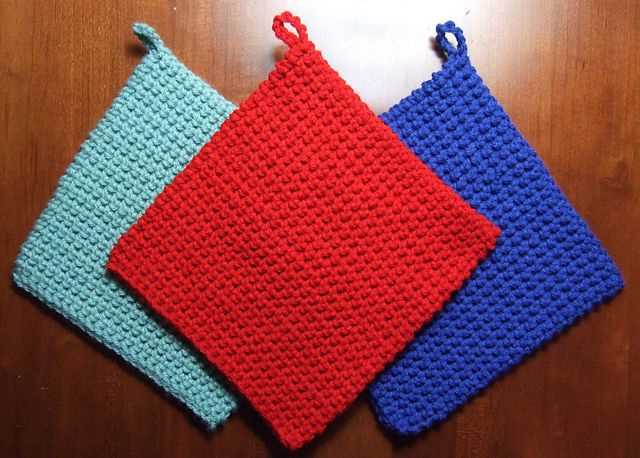
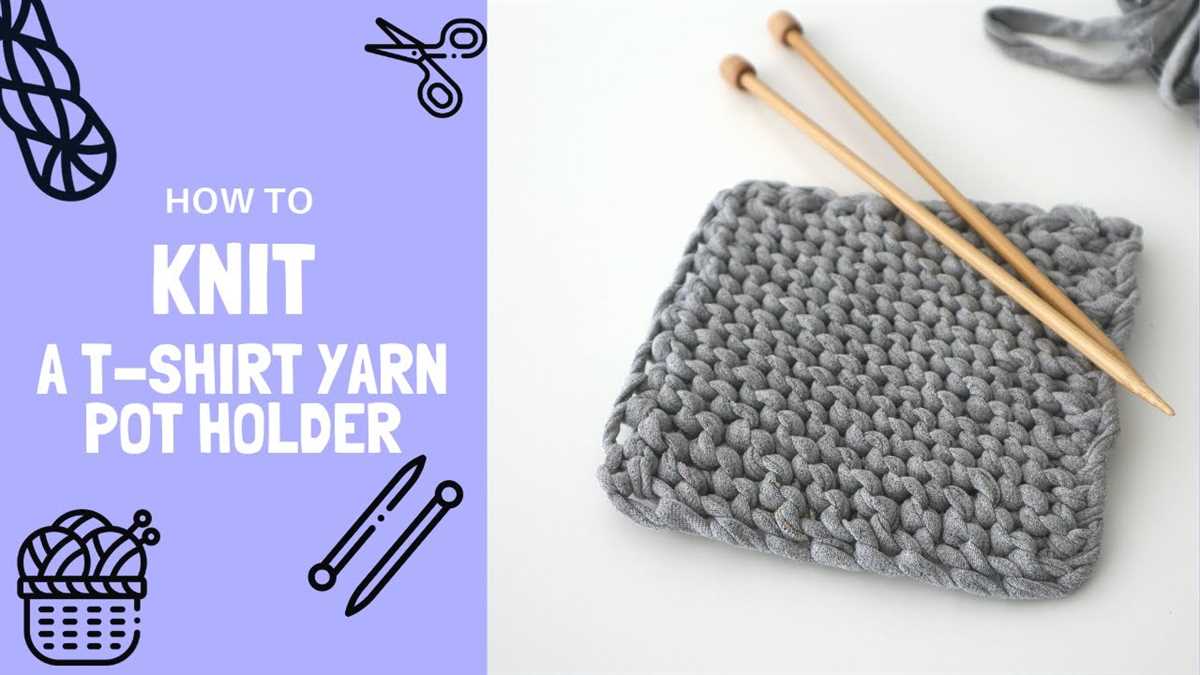
To start, gather your materials, including a pair of knitting needles and a ball of durable cotton yarn. Opt for a bright color or a combination of colors that matches your kitchen decor. The choice is yours! Begin by casting on an appropriate number of stitches, usually around 30-40, depending on the size you prefer.
Once you have cast on your stitches, you can start knitting the potholder pattern. There are many different stitch patterns you can use, but for a simple potholder, the garter stitch is a great option. Simply knit every row until your potholder reaches the desired size. Remember to leave a few rows at the beginning and end for a neat border.
If you want to add some extra flair to your potholder, try incorporating different colors or stripes. You can also experiment with different stitch patterns, such as ribbing or seed stitch, to create interesting texture. Play around with different combinations until you find the design that you love.
Once you have finished knitting your potholder, it’s time to bind off your stitches. Cut the yarn, leaving a long tail, and thread it through the last stitch to secure it. Weave in any remaining ends to give your potholder a polished look. For added durability, consider sewing a fabric backing onto your potholder.
With this easy knit potholder pattern, you’ll have a practical and stylish addition to your kitchen in no time. Whether you’re a beginner or an experienced knitter, this project is sure to be a hit.
What Is a Potholder?
A potholder is a small, padded square or rectangular piece of fabric used to protect your hands from heat while handling hot pots and pans in the kitchen. It is typically made of materials that offer thermal insulation, such as cotton or silicone, and is designed to provide a barrier between your hands and the hot surface.
Potholders are an essential kitchen tool that helps prevent burns and injuries while cooking or baking. They are usually used to grip handles or lift hot dishes, preventing direct contact with the high temperatures. The padding and insulation in potholders allow you to safely grip and handle hot items without burning your hands.
Types of Potholders
There are various types of potholders available, each with its own design and functionality. Some common types include:
- Traditional Fabric Potholders: These potholders are made of cotton or other fabrics and usually feature multiple layers of padding for heat resistance. They often come in square or rectangular shapes and may have a hanging loop for easy storage.
- Silicone Potholders: These potholders are made of silicone, which is a heat-resistant material. They are flexible and provide a good grip on hot items. Silicone potholders can withstand high temperatures and are easy to clean.
- Magnetic Potholders: These potholders have magnets attached to them, allowing them to be conveniently attached to metal surfaces, such as the refrigerator or oven door. It makes them easily accessible and keeps them within reach while cooking.
- Finger Potholders: These potholders are designed to fit over your fingers, providing a protective shield while handling hot pots or pans. They offer dexterity and allow you to maintain a firm grip on the cookware.
When choosing a potholder, consider the material, size, and design that best suits your needs and preferences. It is important to have reliable potholders in your kitchen to ensure your safety and prevent accidents while cooking.
Why Should You Knit Your Own Potholders?
Knitting your own potholders can be a rewarding and practical way to add a personal touch to your kitchen. Not only do homemade potholders provide insulation and protection from hot surfaces, but they also allow you to showcase your creativity and style. Whether you’re an experienced knitter or just starting out, knitting potholders can be a fun and satisfying project.
1. Customization: When you knit your own potholders, you have the freedom to choose the colors, patterns, and designs that suit your personal taste and kitchen décor. You can create unique and one-of-a-kind potholders that reflect your individuality and add a pop of color to your cooking space.
2. Quality: Homemade potholders can be made with high-quality materials and stitching techniques, ensuring that they will stand up to the demands of everyday use. By knitting your own potholders, you can select durable yarns and reinforce the seams to create sturdy and long-lasting kitchen accessories.
3. Eco-friendly: By choosing to make your own potholders, you can reduce your reliance on mass-produced, disposable options. Knitting potholders allows you to use up leftover yarn or repurpose old garments, minimizing waste and contributing to a more sustainable lifestyle.
4. Personalized gifts: Knitting potholders can also be a thoughtful and personalized gift idea for friends and loved ones. You can tailor the colors and designs to match their preferences, creating a unique and practical present that shows you’ve put time and effort into making something special.
In conclusion, knitting your own potholders offers a range of benefits, from customization and quality to eco-friendliness and personalized gifting. Whether you’re looking to add a touch of style to your kitchen or create heartfelt gifts, knitting potholders can be a rewarding and enjoyable activity. So grab your knitting needles and get started on your next project!
Choosing the Right Yarn and Needles
When it comes to knitting potholders, it is important to choose the right yarn and needles for your project. The type of yarn you select will greatly affect the final appearance and functionality of your potholders. Additionally, the size and material of your needles will determine the tension and overall texture of your knitting.
Yarn: For potholders, it is best to opt for a cotton or linen yarn. These natural fibers are heat-resistant, absorbent, and durable, making them perfect for withstanding the high temperatures and frequent use in the kitchen. Avoid using synthetic yarns, such as acrylic or polyester, as they may melt or become damaged when exposed to heat.
Weight:
When choosing the weight of your yarn, consider the desired thickness and density of your potholders. Lighter weight yarns, such as sport or DK, will result in thinner and more flexible potholders. On the other hand, worsted or bulky weight yarns will create thicker and more substantial potholders. Ultimately, the decision of yarn weight depends on personal preference and the intended use of the potholders.
Needles:
The size and material of your knitting needles will influence the overall texture and tightness of your stitches. For potholders, it is recommended to use a size 6 or 7 knitting needle, which provides a balance between tightness and flexibility. However, if you prefer a looser or tighter stitch, you can adjust the needle size accordingly.
Material: Most commonly, knitting needles are made of metal, wood, or plastic. Metal needles, such as those made of aluminum or stainless steel, are sturdy and provide a smooth knitting experience. Wooden needles offer a warm and natural feel, making them comfortable to work with. Plastic needles are lightweight and affordable, making them a popular choice for beginners. Ultimately, the choice of needle material depends on personal preference and comfort.
In conclusion, choosing the right yarn and needles is crucial for knitting potholders that are both functional and visually appealing. Opt for heat-resistant natural fibers like cotton or linen, and consider the weight and material of the yarn to achieve the desired thickness and texture. Similarly, select knitting needles that provide the right tension and comfort for your knitting style. With the appropriate materials, you’ll be well on your way to creating beautiful and practical potholders.
Basic Knitting Techniques for Potholders
When it comes to knitting potholders, there are a few basic techniques that every beginner should know. These techniques will help you create sturdy and functional potholders that will protect your hands from hot surfaces in the kitchen. Let’s take a look at some of these techniques:
Garter Stitch
The garter stitch is the most basic and easiest knitting stitch. It is created by knitting every stitch in every row. This stitch creates a fabric that is thick and durable, making it perfect for potholders. To create a garter stitch potholder, simply knit every stitch in every row until you reach the desired size.
Seed Stitch
The seed stitch is another simple knitting stitch that adds texture to your potholders. It is created by alternating between knitting and purling stitches in every row. The seed stitch creates a fabric that is both soft and dense, making it great for potholders. To create a seed stitch potholder, alternate between knitting and purling stitches in each row.
Slip Stitch
The slip stitch is a technique used to create color and texture variations in your potholders. It involves slipping certain stitches without knitting or purling them. This technique can be used to create stripes or other patterns in your potholders. To create a slip stitch potholder, follow a slip stitch pattern using different colors or stitches.
Decreasing and Increasing
To shape your potholders and create rounded corners, you will need to know how to decrease and increase stitches. Decreasing involves knitting or purling two stitches together to reduce the number of stitches in a row, while increasing involves adding stitches by knitting or purling into the front and back of a stitch. These techniques will help you create the desired shape for your potholders.
By mastering these basic knitting techniques, you will be able to create beautiful and functional potholders for your kitchen. Get started with a simple garter stitch or seed stitch pattern, and then experiment with different colors and textures using the slip stitch technique. Happy knitting!
Easy Knit Potholder Pattern for Beginners
If you’re new to knitting and looking for a simple project to start with, this easy knit potholder pattern is perfect for you. With basic knitting stitches and a few rows of simple colorwork, you’ll have a functional and stylish potholder in no time.
This pattern requires only basic knitting skills, making it ideal for beginners. You’ll need to know how to cast on, knit, purl, and bind off. If you’re not familiar with these techniques, there are many online tutorials and videos available to help you learn.
To begin, you’ll need a pair of knitting needles and two colors of yarn. Choose a sturdy cotton yarn for durability and heat resistance. You can experiment with different color combinations to create unique and personalized potholders.
Start by casting on a multiple of 4 stitches. This will ensure that your pattern is even and symmetrical. Next, work a few rows of garter stitch, knitting every stitch on every row. This will create a nice textured surface for the potholder.
Once you’ve completed the garter stitch section, it’s time to add some color. Switch to the contrasting color and begin working in a simple colorwork pattern, such as stripes or checks. You can follow a chart or create your own design. Remember to carry the unused yarn along the back of your work to avoid loose strands.
Continue knitting in colorwork until your potholder reaches the desired size. To finish, bind off all stitches and weave in the loose ends. You may also choose to add a loop for hanging the potholder.
This easy knit potholder pattern is a great way to practice your knitting skills while creating a practical and useful item for your kitchen. With its simple design and versatile color options, it’s sure to be a favorite project for beginners and experienced knitters alike.
More Advanced Knit Potholder Patterns
If you’re looking to challenge yourself and take your knitting skills to the next level, there are plenty of more advanced potholder patterns available. These patterns typically involve more complex stitch patterns and techniques, and they can create beautiful and intricate designs.
Lace Potholder: One option for a more advanced potholder pattern is a lace design. Lace patterns often incorporate delicate and intricate stitches, creating an elegant and visually appealing finished product. To create a lace potholder, you’ll need to be comfortable with advanced knitting techniques, such as yarn overs and decreases.
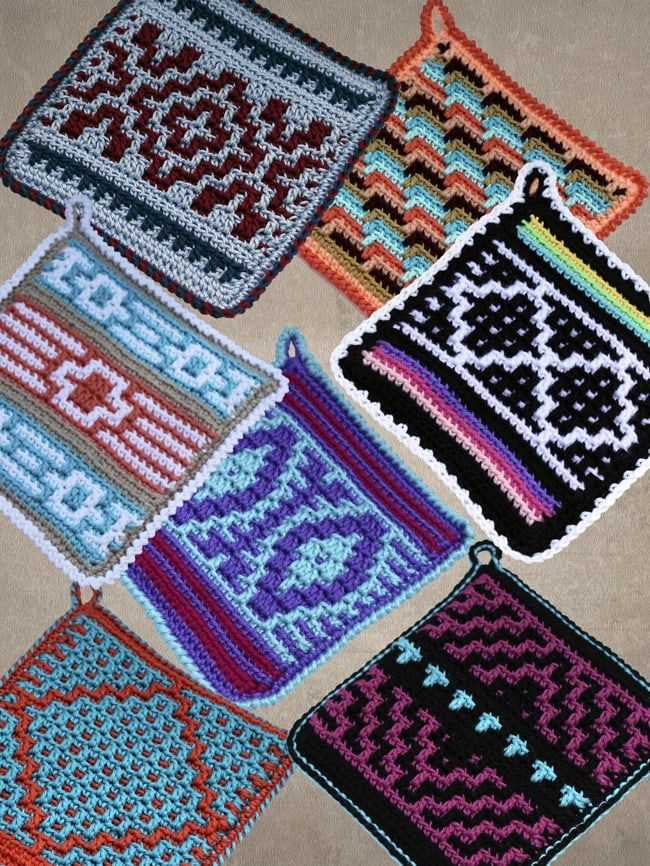
Colorwork Potholder: Another option for a more advanced pattern is a colorwork design. Colorwork involves knitting with multiple colors to create patterns and designs. Fair Isle and intarsia are two popular methods of colorwork that can be used to create stunning potholder patterns. Colorwork can be challenging, as it requires a good understanding of tension and carries, but the end result is well worth the effort.
Other advanced potholder patterns: In addition to lace and colorwork, there are many other advanced potholder patterns to choose from. Cable designs, textured patterns, and even intricate motifs can all be used to create unique and challenging potholders. These patterns may require a bit more experience and skill, but they offer a great opportunity to expand your knitting abilities.
Conclusion: If you’re ready to take your knitting skills to the next level, consider trying out more advanced potholder patterns. Lace, colorwork, cables, and textured designs can all be used to create beautiful and challenging potholders. These patterns will not only enhance your knitting abilities but also result in functional and decorative kitchen accessories.
Tips for Adding Color and Design to Your Potholders
When it comes to knitting potholders, adding color and design can make them more visually appealing and fun to use in the kitchen. Whether you’re a beginner knitter or an experienced one, here are some tips to help you add color and design to your potholders:
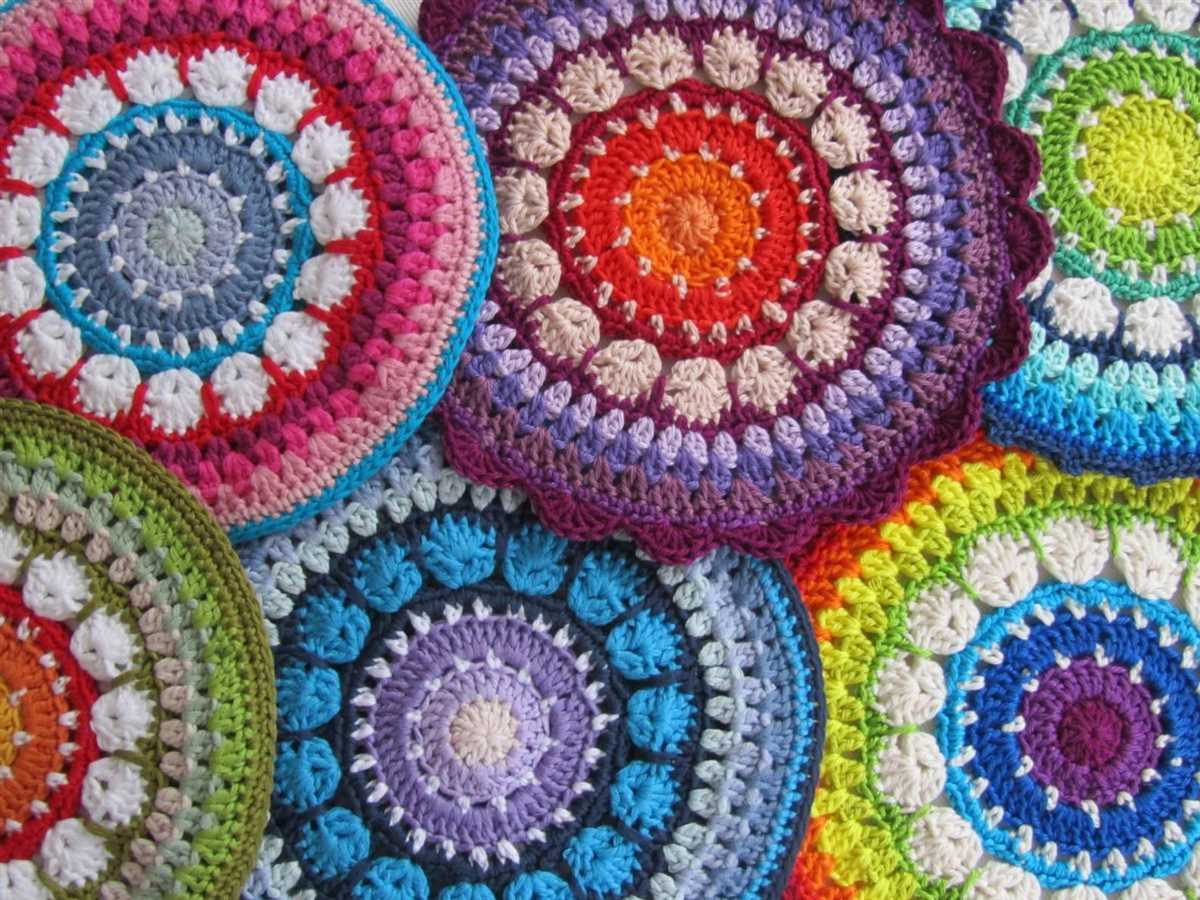
Choose Yarn with Variegated Colors
A great way to add color to your potholders is by choosing yarn with variegated colors. This type of yarn has multiple colors that blend together, creating beautiful patterns as you knit. You can find variegated yarn in a wide range of color combinations, from subtle shades to bold and vibrant ones. By using variegated yarn, you don’t have to worry about changing colors or weaving in ends, making it easier to create colorful potholders.
Experiment with Color Blocking
If you prefer a more organized and symmetrical look, you can try color blocking in your potholders. Color blocking involves using different colors in distinct blocks or sections of your knitting. You can choose two or more contrasting colors and alternate them in your pattern. Color blocking can create a bold and modern look for your potholders, and it’s a great way to play with color combinations.
Add Embellishments
To add some extra visual interest to your potholders, you can incorporate embellishments into your design. You can use simple embroidery techniques, such as cross-stitch or duplicate stitch, to add small motifs or patterns to your potholders. This allows you to personalize your potholders and make them unique. Additionally, you can also attach buttons, beads, or ribbons to your potholders using a needle and thread to create a more decorative look.
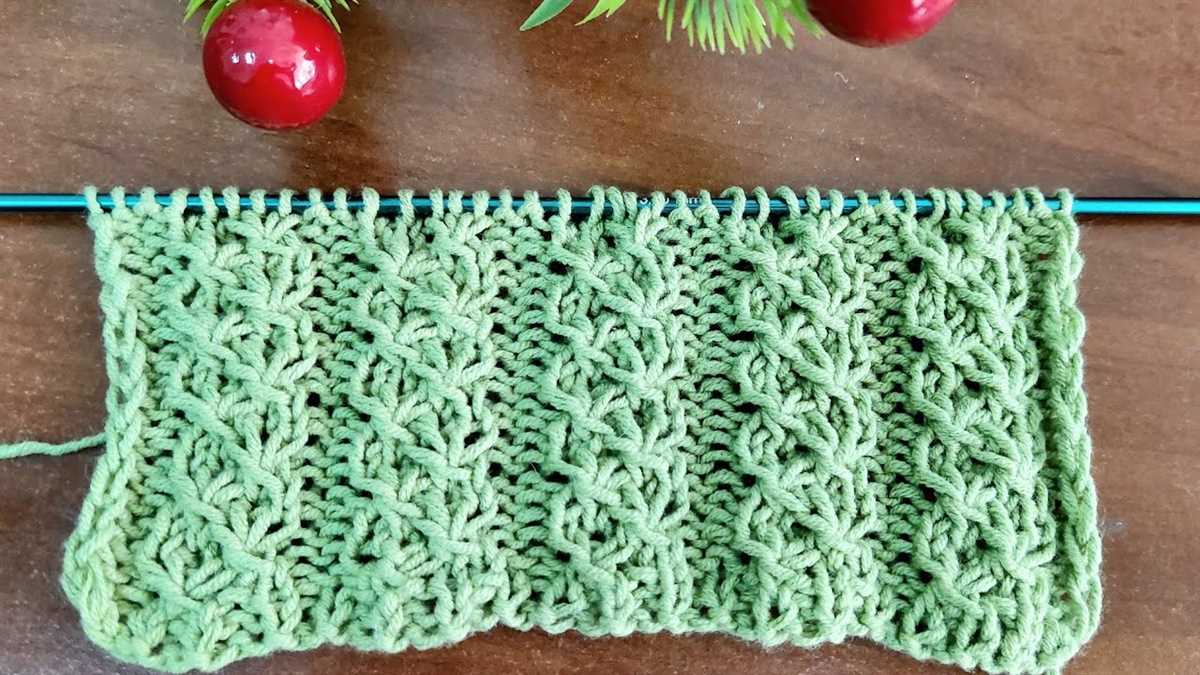
Try Textured Stitches
If you want to add depth and dimension to your potholders, consider using textured stitches. Knitting stitches like seed stitch, moss stitch, or basketweave stitch can create interesting patterns and textures that can enhance the overall design of your potholders. You can use these stitches for the entire potholder or just in certain sections to add visual interest.
By using these tips, you can easily add color and design elements to your knitted potholders, making them not only practical but also beautiful additions to your kitchen. Have fun experimenting with different techniques and unleash your creativity to create unique and eye-catching potholders.
Using Different Stitch Patterns for Unique Potholders
Knitting potholders is a great way to practice different stitch patterns and create unique and functional items for your kitchen. By using different stitch patterns, you can add texture and visual interest to your potholders, making them stand out and adding a personal touch to your kitchen decor.
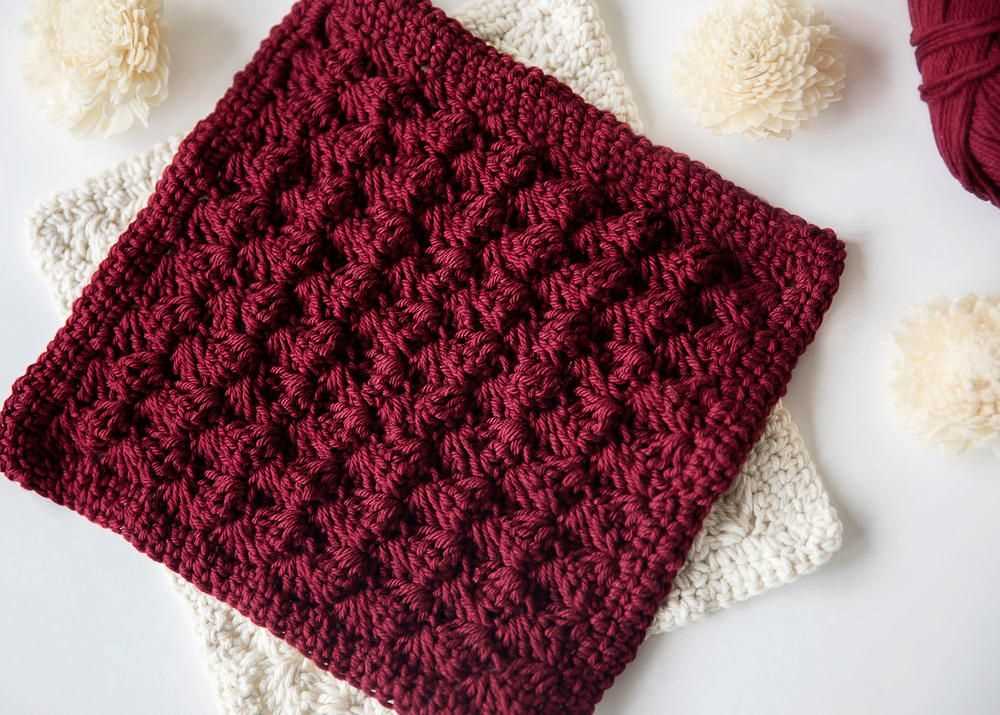
One popular stitch pattern for potholders is the seed stitch. This stitch pattern creates a textured fabric that is both durable and heat resistant. By alternating knit and purl stitches across each row, you can create a beautiful seed stitch pattern that adds a touch of elegance to your potholders.
If you’re looking for a more intricate stitch pattern, you can try the basketweave stitch. This stitch pattern creates a woven-like effect that is perfect for adding extra thickness and insulation to your potholders. By alternating blocks of knit and purl stitches, you can create a unique basketweave pattern that not only looks beautiful but also provides excellent heat protection.
Another interesting stitch pattern to try is the cable stitch. This stitch pattern creates a twisted rope-like design that adds a touch of sophistication to your potholders. By crossing stitches over each other, you can create intricate cable patterns that will impress anyone who sees your potholders.
By experimenting with different stitch patterns, you can create potholders that are not only functional but also artistic and eye-catching. Whether you prefer a simple seed stitch, a complex basketweave, or an elegant cable pattern, there are endless possibilities to explore and incorporate into your knitting projects. So grab your knitting needles and try out different stitch patterns to create unique and beautiful potholders for your kitchen!
Knitting Potholders with Different Shapes and Sizes
When it comes to knitting potholders, there are endless possibilities for creating unique and practical kitchen accessories. Whether you’re a beginner or an experienced knitter, experimenting with different shapes and sizes can add a fun twist to your projects.
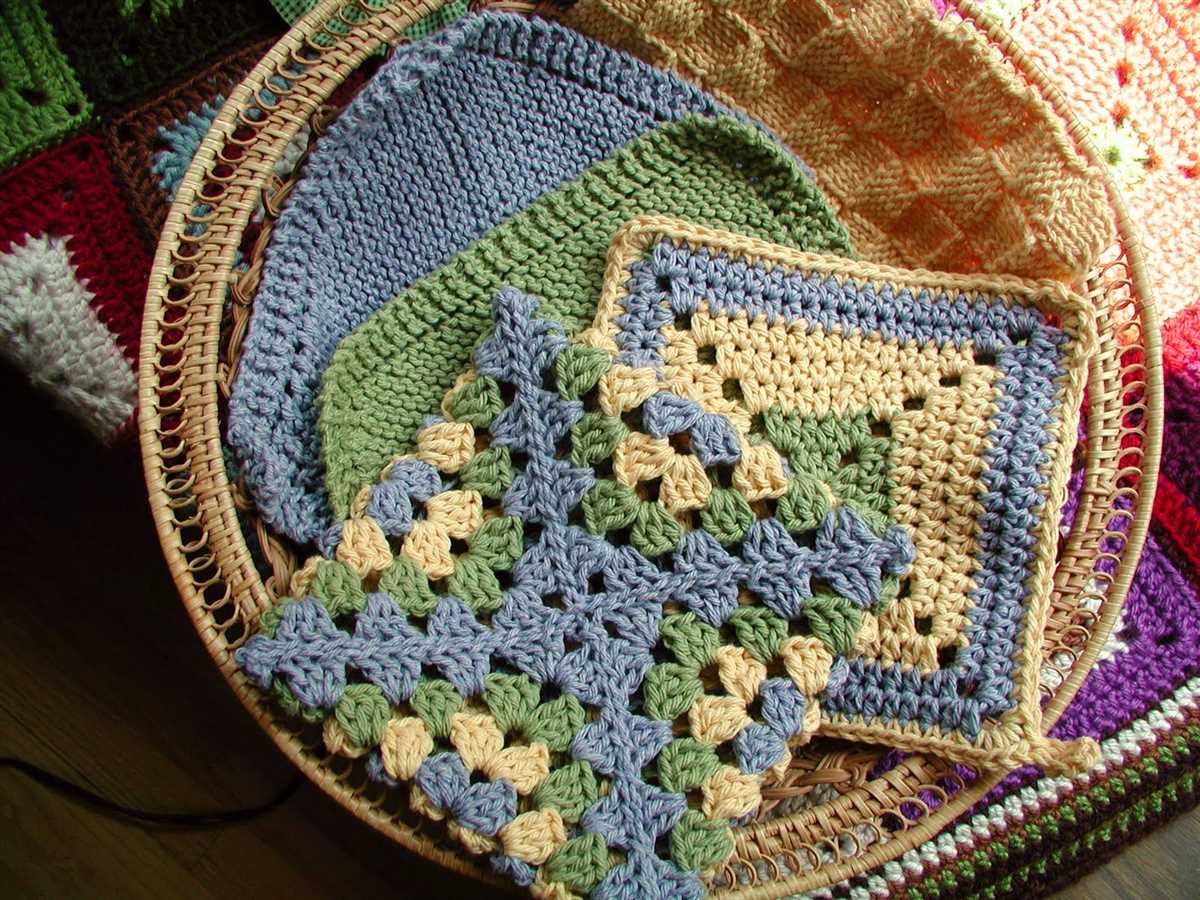
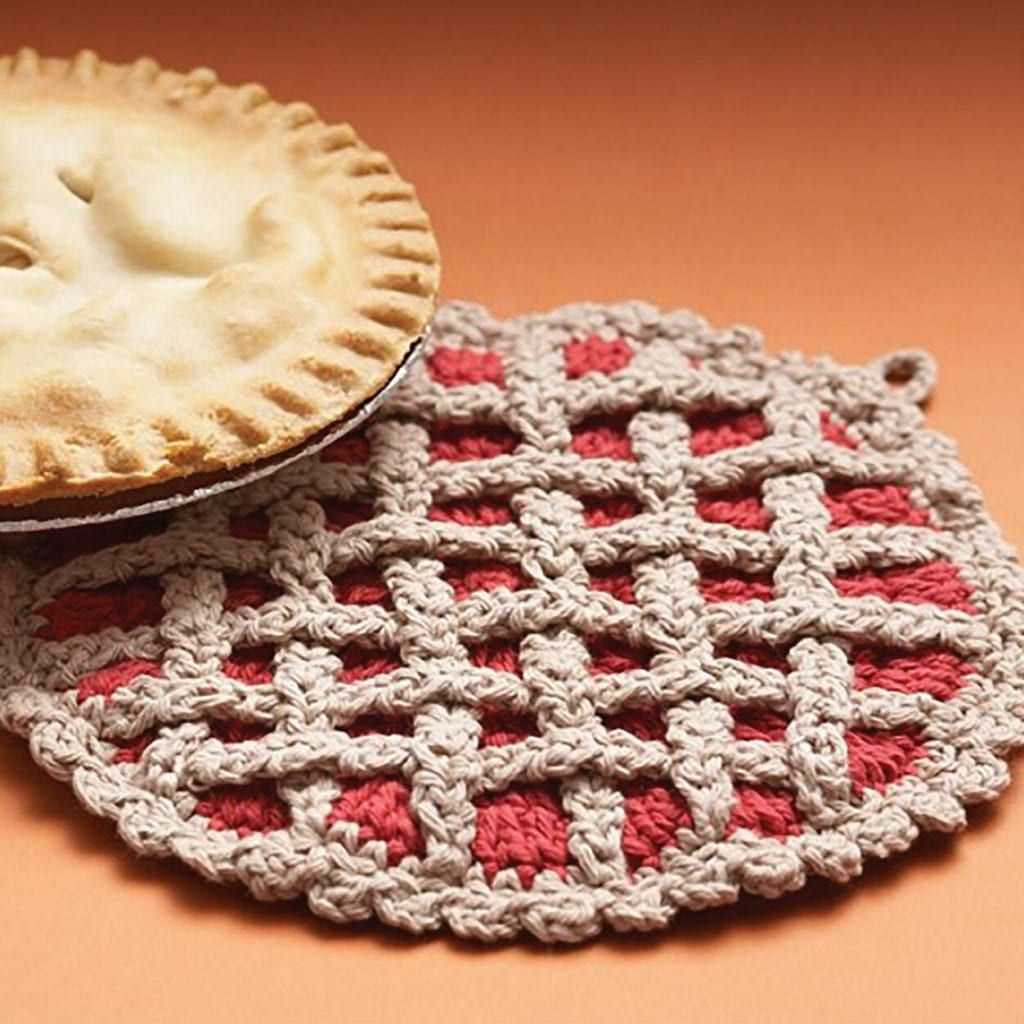
One popular option is to knit round potholders. These can be made using circular knitting needles and a simple pattern, such as alternating between knit and purl stitches. The circular shape provides a nice surface area for gripping hot pots and pans, and it also adds an aesthetic touch to your kitchen decor.
Another variation is the square potholder.
This shape is ideal for showcasing different stitch patterns, such as seed stitch or basketweave. Square potholders can be knitted using straight needles and a basic garter stitch pattern, or you can challenge yourself with more intricate designs. The square shape allows for easy folding and storage, making it a practical choice for everyday use.
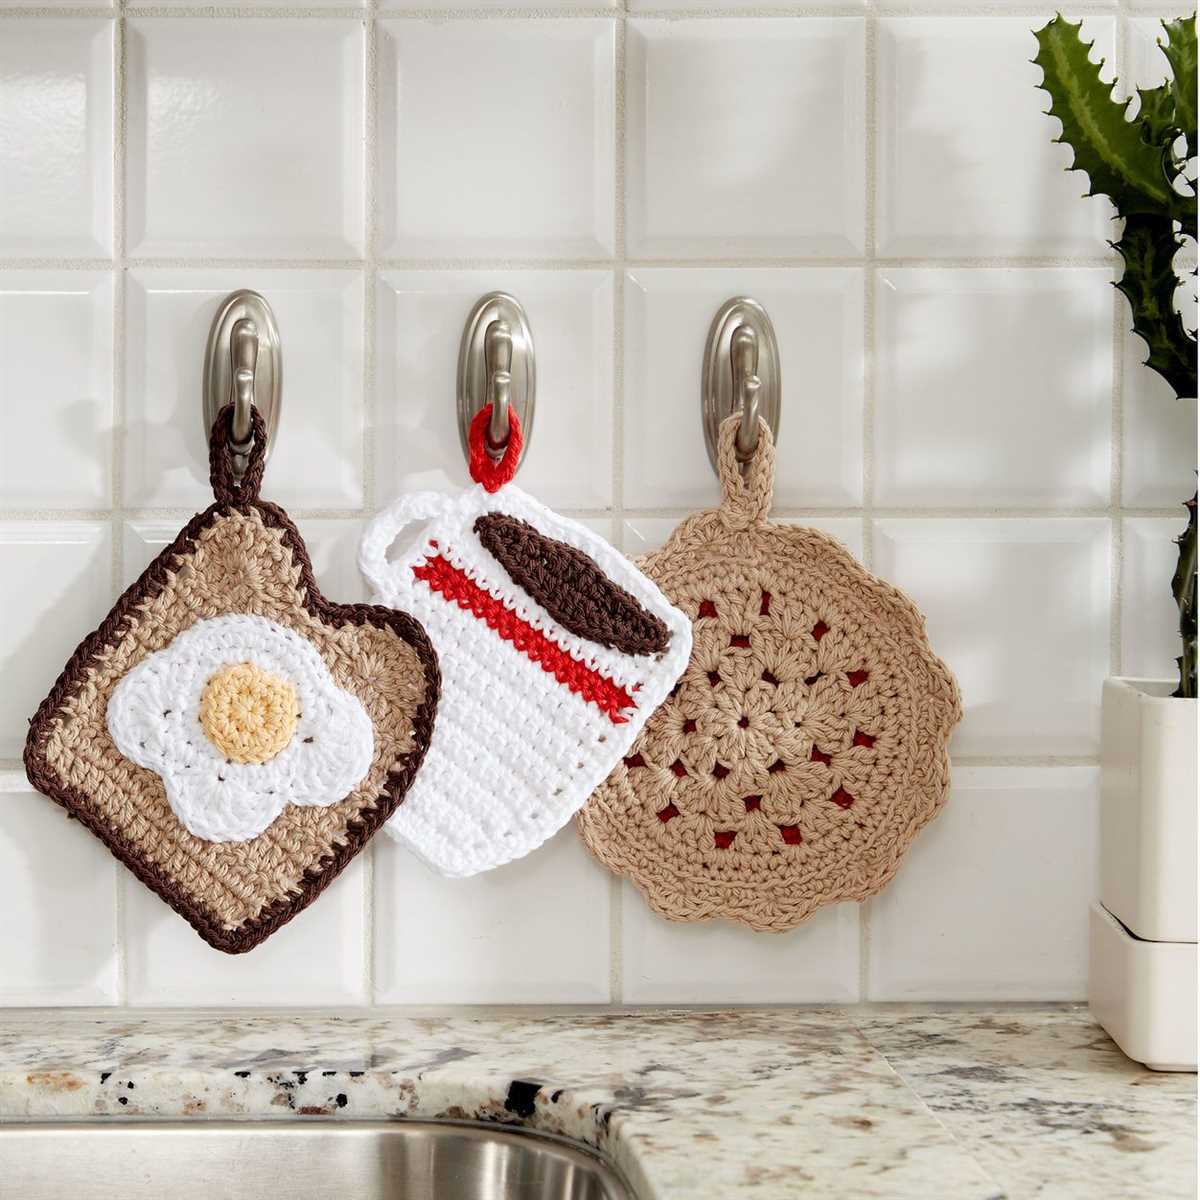
If you’re feeling adventurous, you can even try knitting potholders in other shapes, such as hearts or stars. These can be achieved by following a chart or using shaping techniques, such as increasing and decreasing stitches. These unique shapes make for eye-catching potholders that can double as decorative items in your kitchen.
To add some variety, consider knitting potholders in different sizes.
While a standard potholder is typically around 7 to 8 inches in diameter or square, you can experiment with smaller or larger sizes to fit your needs. Smaller potholders are perfect for grabbing smaller pots and pans, while larger ones can provide more coverage and protection when dealing with larger cookware.
- Regardless of the shape or size you choose, always opt for heat-resistant yarns that can withstand high temperatures.
- Additionally, using cotton or other natural fibers can provide better insulation and absorbency.
- Don’t forget to finish your potholders with a sturdy edging, such as a crochet border, to prevent fraying and add durability.
By exploring different shapes and sizes, you can create a collection of potholders that not only serve their practical purpose but also reflect your creativity and personal style.
How to Finish and Block Your Knit Potholders
Once you have completed knitting your potholders, it’s time to finish and block them to ensure they look their best and retain their shape. Here are some simple steps to follow:
1. Weave in the Ends:
Start by using a tapestry needle to weave in any loose ends of yarn from your knitting. This will give your potholders a neat and professional finish.
2. Wash Your Potholders:
Before blocking, it’s important to wash your potholders to remove any dirt or oils that may have accumulated during the knitting process. Follow the care instructions for your yarn and gently wash your potholders in warm soapy water. Rinse thoroughly and squeeze out excess water.
3. Block Your Potholders:
To block your potholders, you will need a blocking board or a towel and some rust-proof pins. Lay your potholders flat on the blocking surface and carefully stretch them to their desired shape. Pin them in place, making sure the edges are straight and the corners are sharp. Leave them to dry completely.
Note: If you want your potholders to have a more sturdy and heat-resistant finish, you can also consider lining them with a layer of insulating fabric before blocking.
By following these simple steps, you can ensure that your knit potholders not only look great but also perform well in the kitchen. So go ahead and finish and block your potholders to enjoy the satisfaction of a completed project!
Caring for Your Knitted Potholders
Proper care and maintenance of your knitted potholders can ensure their longevity and effectiveness. Here are some tips to help you care for your knitted potholders:
1. Hand washing: It is best to hand wash your knitted potholders to prevent any damage. Fill a basin with lukewarm water and a mild detergent. Gently scrub the potholders, paying attention to any stained areas. Rinse well with cool water and gently squeeze out the excess water. Avoid wringing or twisting the potholders as this can distort their shape.
2. Drying: After washing, lay the potholders flat on a clean towel and reshape them if necessary. Allow them to air dry completely before using or storing them. Avoid hanging the potholders to dry as this can lead to stretching and misshaping.
3. Storing: Store your knitted potholders in a clean and dry place. Avoid placing heavy objects on top of them as this can cause indentations or damage. Consider folding or rolling the potholders instead of stacking them to prevent any creases.
4. Avoid heat sources: Knitted potholders are not meant to withstand high heat. Avoid placing them directly on hot surfaces or using them as trivets for hot pots and pans. Excessive heat can cause the yarn to melt or become damaged.
Summary:
Caring for your knitted potholders involves hand washing with mild detergent, air drying them flat, and storing them in a clean and dry place. Avoid exposing them to high heat sources and handle them with care to ensure their longevity. By following these simple steps, you can keep your knitted potholders in excellent condition and continue to enjoy their functionality and aesthetic appeal.